Workflow and Operations
Overview of Operations
| Session > Open Video… | Add/replace a video to/on the timeline |
|---|---|
| Window > Video Monitor | Open/close external video monitor window |
| View > Video Monitor > … | Various settings of the video monitor |
| Session > Export > Export to Video File… | Export session and multiplex with video-file |
| Left-drag the video in the timeline | Re-align video and move 'locked' audio-regions along |
| Context-menu on the video-timeline: Lock | Prevent accidental drags |
| Audio region context menu: Name_Of_The_Region > Position > Lock to video | Mark audio region(s) to be moved along with the video. |
Adding a video
Adding a video is a two-step process: selecting a video file, and choosing import mode and optionally selecting an audio track to extract. Only one video can be present in the session, so opening a video when one is already opened results in replacing the video.
Launching the video server (optional)
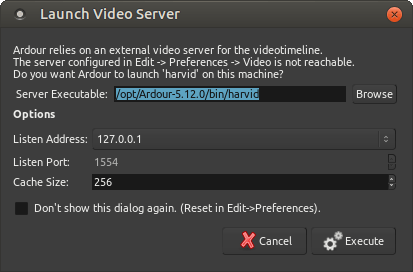
Importing a video makes Ardour start the video server automatically. If the Show video Server Startup Dialog option in the Video section of the preferences is checked, the Launch Video Server window is shown, allowing more complex operations, e.g. connecting to a remote video server instead of a local one.
Selecting a file
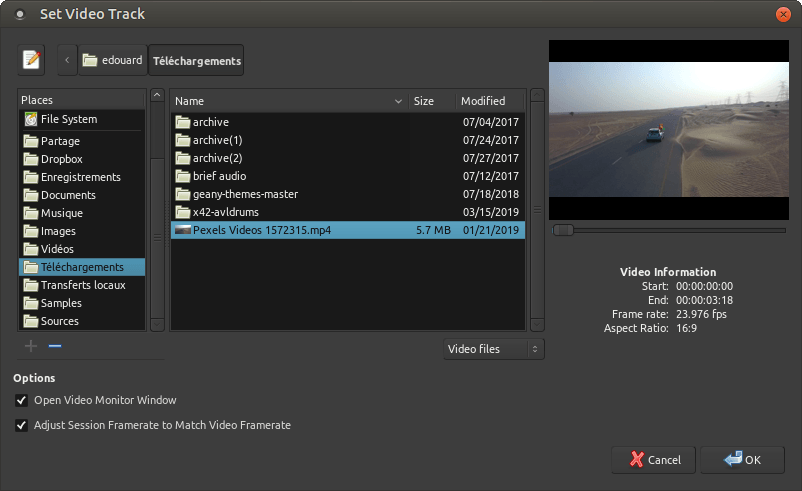
This step is rather straight-forward. The panel on the right side allows to seek through the video and displays basic file information. It is also useful to check if the video format/codec is supported.
The lower part of the window shows some options:
- Open Video Monitor Window to automatically show the video monitor (Harvid). This can also be done later by using the Window > Video Monitor menu which is binded to V by default.
- Adjust Session Framerate to Match Video Framerate which can also be set later with the Session Properties. Having the session and video framerate at the same value allows their sync not to drift off.
Import options
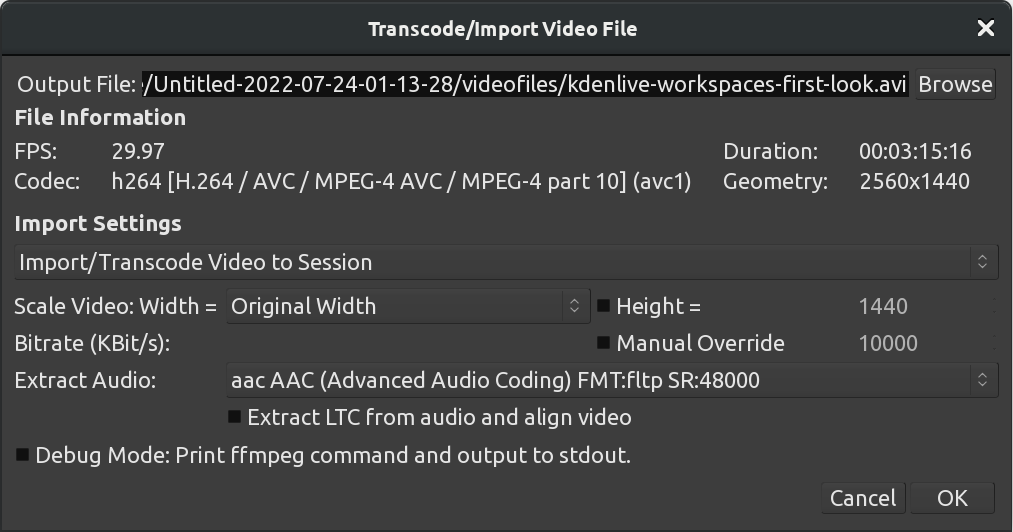
This step analyzes the video file in more detail and offers import options:
| Import/Transcode Video to Session | This is the default. The video will be imported in a suitable video format/codec for the timeline and video monitor and saved inside the session folder. A location other than the session folder can also be chosen (external disk, or network storage of the video server on a different machine) by using the Output File: field. |
|---|---|
| Reference from Current Location (Previously Transcoded Files Only) | Only useful for opening files that were previously encoded (are already in a good format/codec for Ardour). Should be used with care. |
| Do not Import Video (Audio Import Only) | Useful for extracting audio only. |
By default the video is imported using the original width/height. If it is a large video (e.g. Full HD), it makes sense to scale it down to decrease the CPU load and disk I/O required to decode and play the file.
A small, low-quality representation of the image is usually sufficient for editing soundtracks. The default bitrate in kbit/sec is set to use 0.7 bits per pixel (in comparison, the average DVD medium uses 5000 kbit/s; at PAL resolution this is about 0.5 bits per pixel, but the DVD is using the mpeg2—a denser compression algorithm than the mjpeg codec used by Ardour).
The Extract Audio: offers options regarding the Audio part of the stream, allowing to either not extract audio, or to choose which audio stream to add to the session.
When extracting any audio, if it includes LTC timecodes, those can be extracted and used to sync the video by checking the option below.
Working with A/V
Working with A/V in Ardour is similar to working in a pure audio setup, except for the presence of a video timeline in the ruler zone, and a Xjadeo video window, showing a preview of the result.
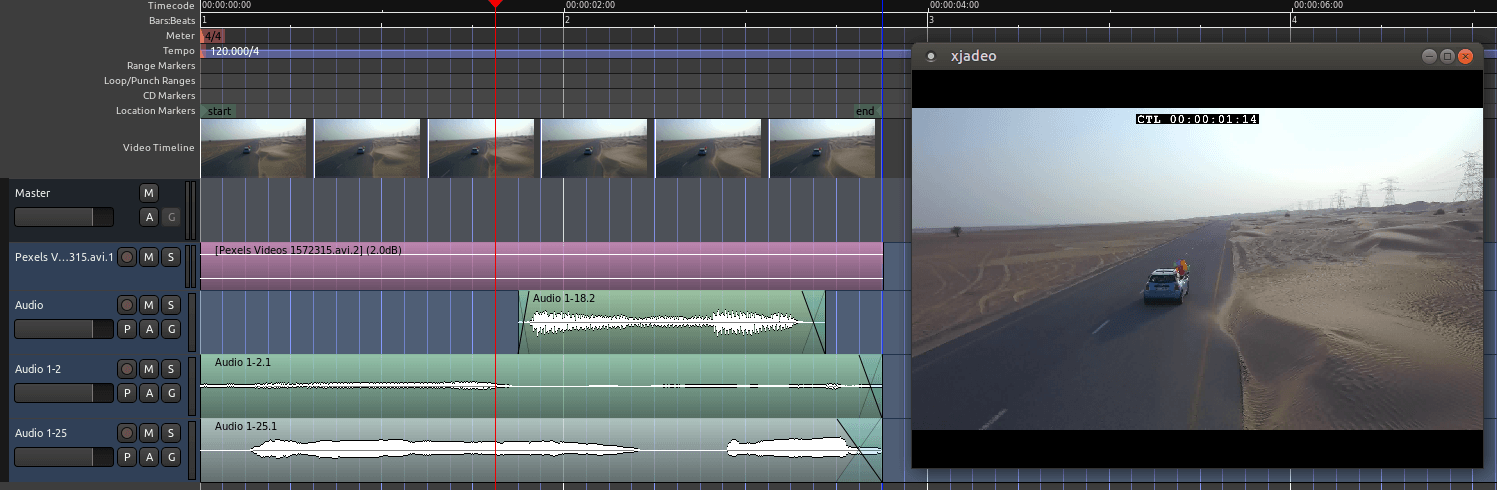
The Xjadeo window supports some user interactions, such as showing some OSD information or changing the zoom level. Xjadeo's documentation is available on its website.
Exporting Video
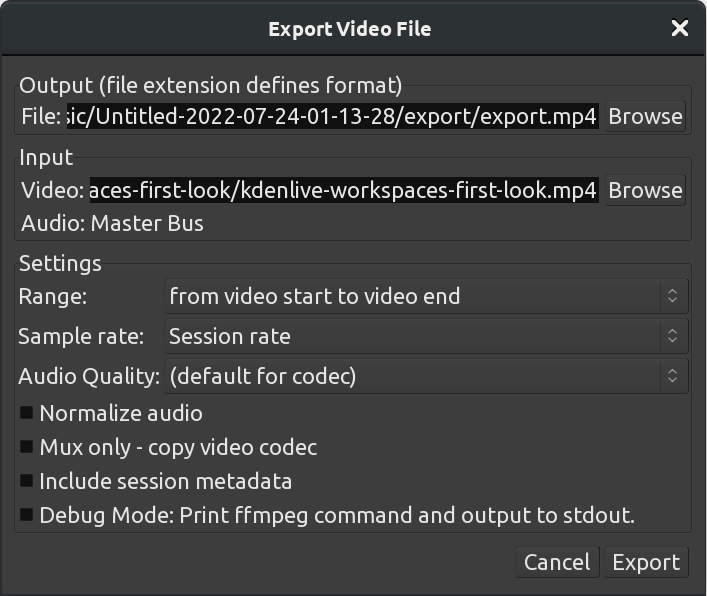
The video export will take audio from the current Ardour session and multiplex it with a video file. The soundtrack of the video is taken from an audio export of Ardour's master bus.
An arbitrary video file can be chosen. For high quality exports, the original file (before it was imported into the timeline) should be used. This is the default behaviour if that file can be found. If not, Ardour will fall back to the imported proxy-video which is currently in use on the timeline. Any existing audio tracks on this video file are stripped.
The range selection allows to cut or extend the video. If the session is longer than the video duration, black frames are prefixed or appended to the video. (Note: this process may fail with non-standard pixel aspect ratios). If Ardour's session range is shorter, the video will be cut accordingly.
Audio sample rate and normalization are options for Ardour's audio exporter. The remaining settings are options that are directly passed on to ffmpeg.
The file format is determined by the extension chosen for it (.avi, .mov, .flv, .ogv, .webm,…). Note: not all combinations of format, codec, and settings produce files which are according to specifications. For example, flv files require sample rates of 22.1 kHz or 44.1 kHz, mpeg containers can not be used with AC-3 audio codec, etc. If in doubt, one of the built-in presets should be used.
Ardour's video exporter is not recommended for mastering! While ffmpeg (which is used by Ardour) can produce high-quality files, this export lacks the possibility to tweak many settings. We recommend using winff, devede or dvdauthor to mux and master. Nevertheless this video exporter comes in handy to do quick snapshots, intermediates, dailies or online videos.