Techniques for Working with Tempo and Time Signature
Matching a recorded tempo with a tempo ramp
As a general approach, the best way to control tempo ramps is to use them in pairs.
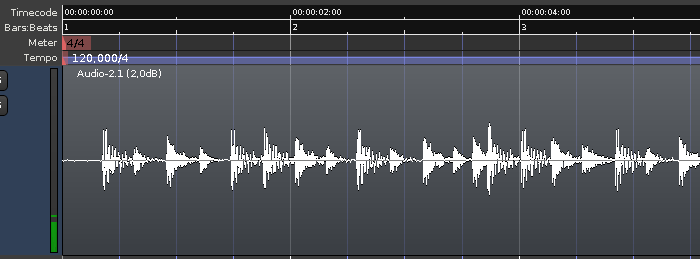
One typical use of tempo ramps is to match the click to a drum performance recorded in 'free time', like in the (admittedly bad) 4/4 example on the left.
Step 1: First time signature

The first thing needed is determining where the first beat is in the recording and left dragging the first time signature to that position.
Step 2: Locating the nth bar
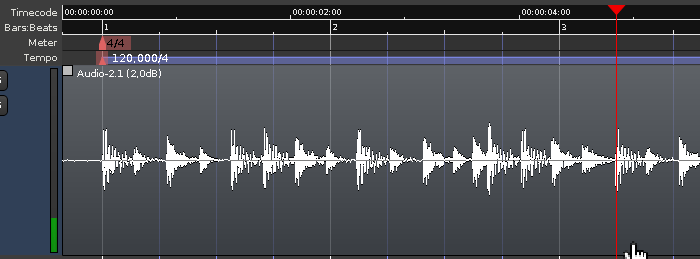
Now the first click will be in time with the first beat. By listening to the recorded drums, the position of bar n (here, 9th beat, 3rd bar) is visually located (the playhead may be moved to this location to "pin" it).
Step 3: Aligning the ruler with the tempo
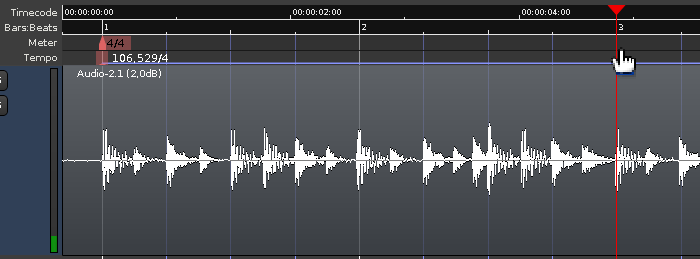
Holding the constraint modifier ( by default, may be changed in Preferences > Editor > Modifiers), the third bar marker in the BBT ruler is dragged at the position of the third bar in the recording (where the playhead is located). This drag can be done either in the Time Signature or in the Tempo rulers. The tempo (on the first and only tempo marker) reflects the new value based on this change.
The click now matches the first 8 beats, but after that it can wander off, which will be reflected in the tempo lines thet won't quite match the drum hits.
Step 4: Placing a new tempo marker

A new tempo marker is placed on the last position where the click matches the recorded audio, by -clicking the Tempo ruler. This will "anchor" the value of the tempo at that position.
Step 5: Placing another tempo marker at the nth beat
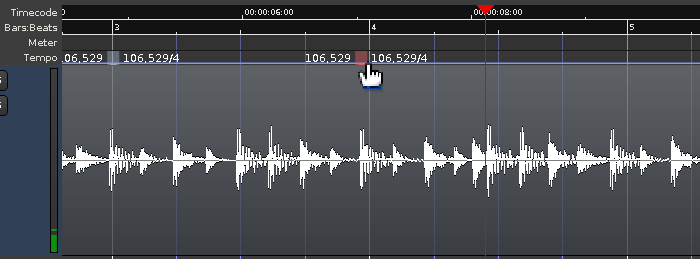
Another tempo marker is placed n beats after the previous marker (here, 4 beats, 1 bar).
Step 6: Changing the tempo to a new value
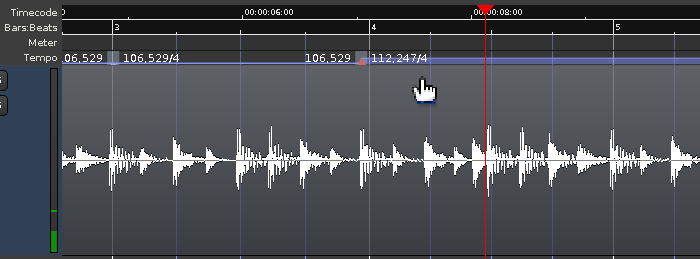
Now, -dragging any beat after the second new tempo marker will allow to align the drum audio and tempo after the second marker.
Step 7: Ramping the tempo change
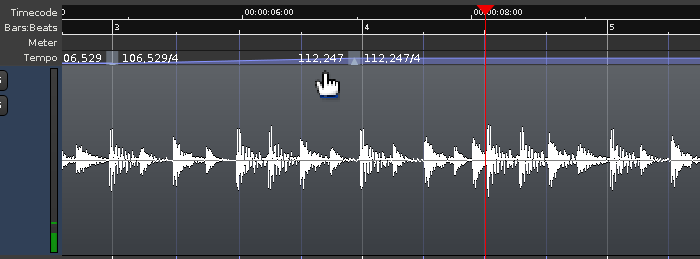
Although it may be unnecessary in some cases where the tempo changes abruptly, most of the time, the tempo change is progressive in time, like an instrumentist drifting in tempo. In those cases, the tempo change should be progressive too, and Ardour allows that by ramping the tempo change.
Right-clicking the first tempo marker, a menu appears, allowing to Ramp to Next. This will make the tempo between the two markers linearly change from the first marker's value to the second's.
Again, some time later the click will probably drift again, so the same technique has to be repeated: adding two new tempos and dragging the BBT ruler after the newest tempo so that the beats align with the audio again.
In a general sense, adding tempo markers in pairs allows to 'pin' the tempo at the marker's location while moving further to the right.
Other use cases
Audio-locked time signatures can be useful when composing, as they allow a continuous piece of music to be worked on in isolated segments, preventing the listening fatigue of a fixed form. Reassembly is left as an exercise for the reader.
Tempo ramps can also be used in a video context, e.g. for an accelerando, by snapping to TC frames and dragging the ruler so that a bar ends up on a significant video frame.