Editing Cues
You can edit pre-loaded or recorded clips in trigger slots directly on the Cue page. Simply click on a clip to open clip properties and the editor in the bottom pane.
The editor interface is largely the same as in the region editor on the Editor page and the separate pianoroll window.
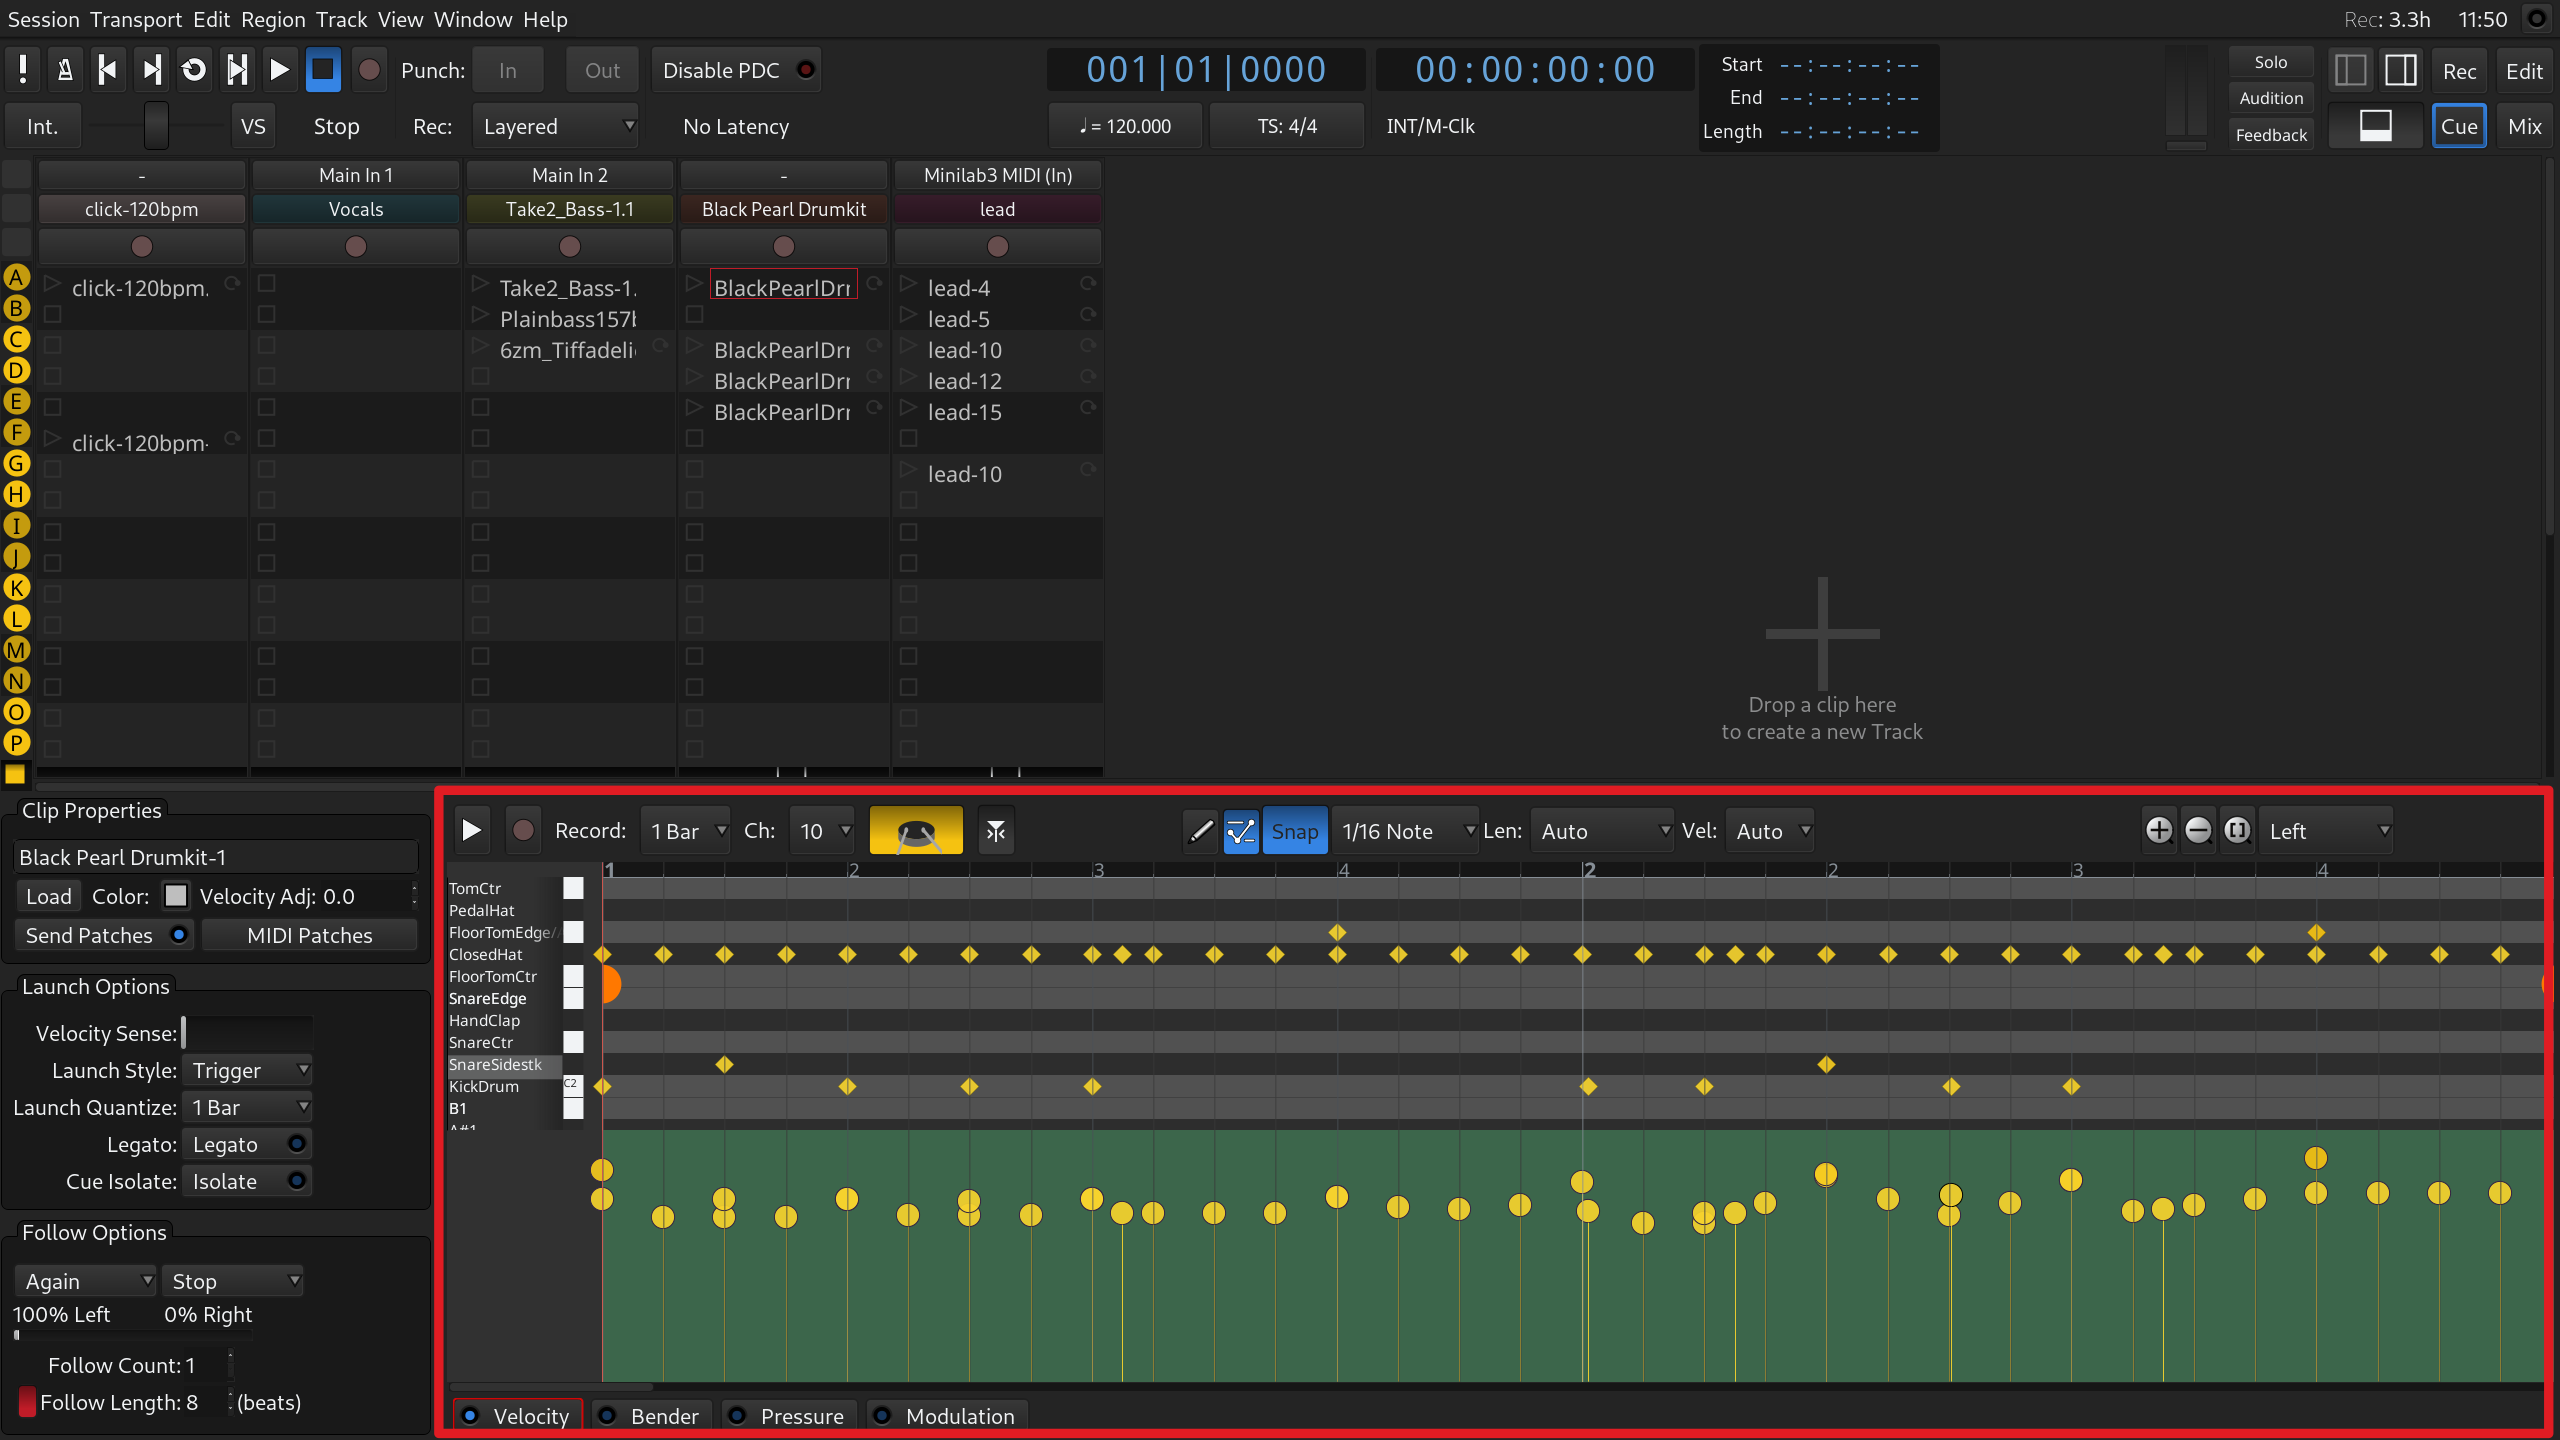
The main areas are:
- Editor toolbar, with view options, editing mode selection, and other controls.
- Zoom control on the left that sets how many octaves you see at once and which ones.
- The main pianoroll area that displays notes.
- The automation editing area below.
Editing notes
There are two available editing modes: Draw and Edit.
With the Draw mode, you can:
- Add new notes with predefined length by setting the length in the editor toolbar and single-clicking on the timeline.
- Draw notes with custom length by clicking on the timeline and dragging to the right.
- Brush notes by pressing Shift, clicking, and dragging to the right. New notes will be painted at an interval defined by global quantization, with the length defined in the editor toolbar.
See this chapter for details on adding MIDI notes.
With the Edit mode, you can:
-
Select multiple notes:
- with Ctrl for any separate notes you click;
- with Shift for all notes between the currently selected note and the clicked-on note;
- with rubberband selection cue by clicking on an empty area and dragging towards notes.
- Move notes by selecting them, then clicking on their middle parts and dragging up/down or left/right.
- Trim and extend notes by pointing at their left/right sides, clicking, and dragging the edges.
- Split and join notes using S and J shortcuts. See this chapter for more information.
Editing automation
You can create new automation in the Draw mode and edit existing automation in the Edit mode. Please refer to this chapter for details on editing workflows and methods.
The automation editing area displays note velocity and controllers and is disabled by default. Clicking on any of the available controller options (Velocity, Bender, Pressure, Modulation) enables it.
To enable or disable an automation lane, click on the small LED indicator to the left of its name on the bottom toolbar.
The area can display data from multiple controllers, overlaid on top of each other, but only one automation lane is editable at the time.