Pianoroll Window
Pianoroll windows are a conventional user interface for editing MIDI data. It's possible to open several regions for editing in dedicated pianoroll windows at a time:
- Select one or multiple MIDI regions on the timeline.
- Right-click, then select {region name} > Edit in a separate window…
The user interface largely resembles that of in-place editing in the main window on the timeline.
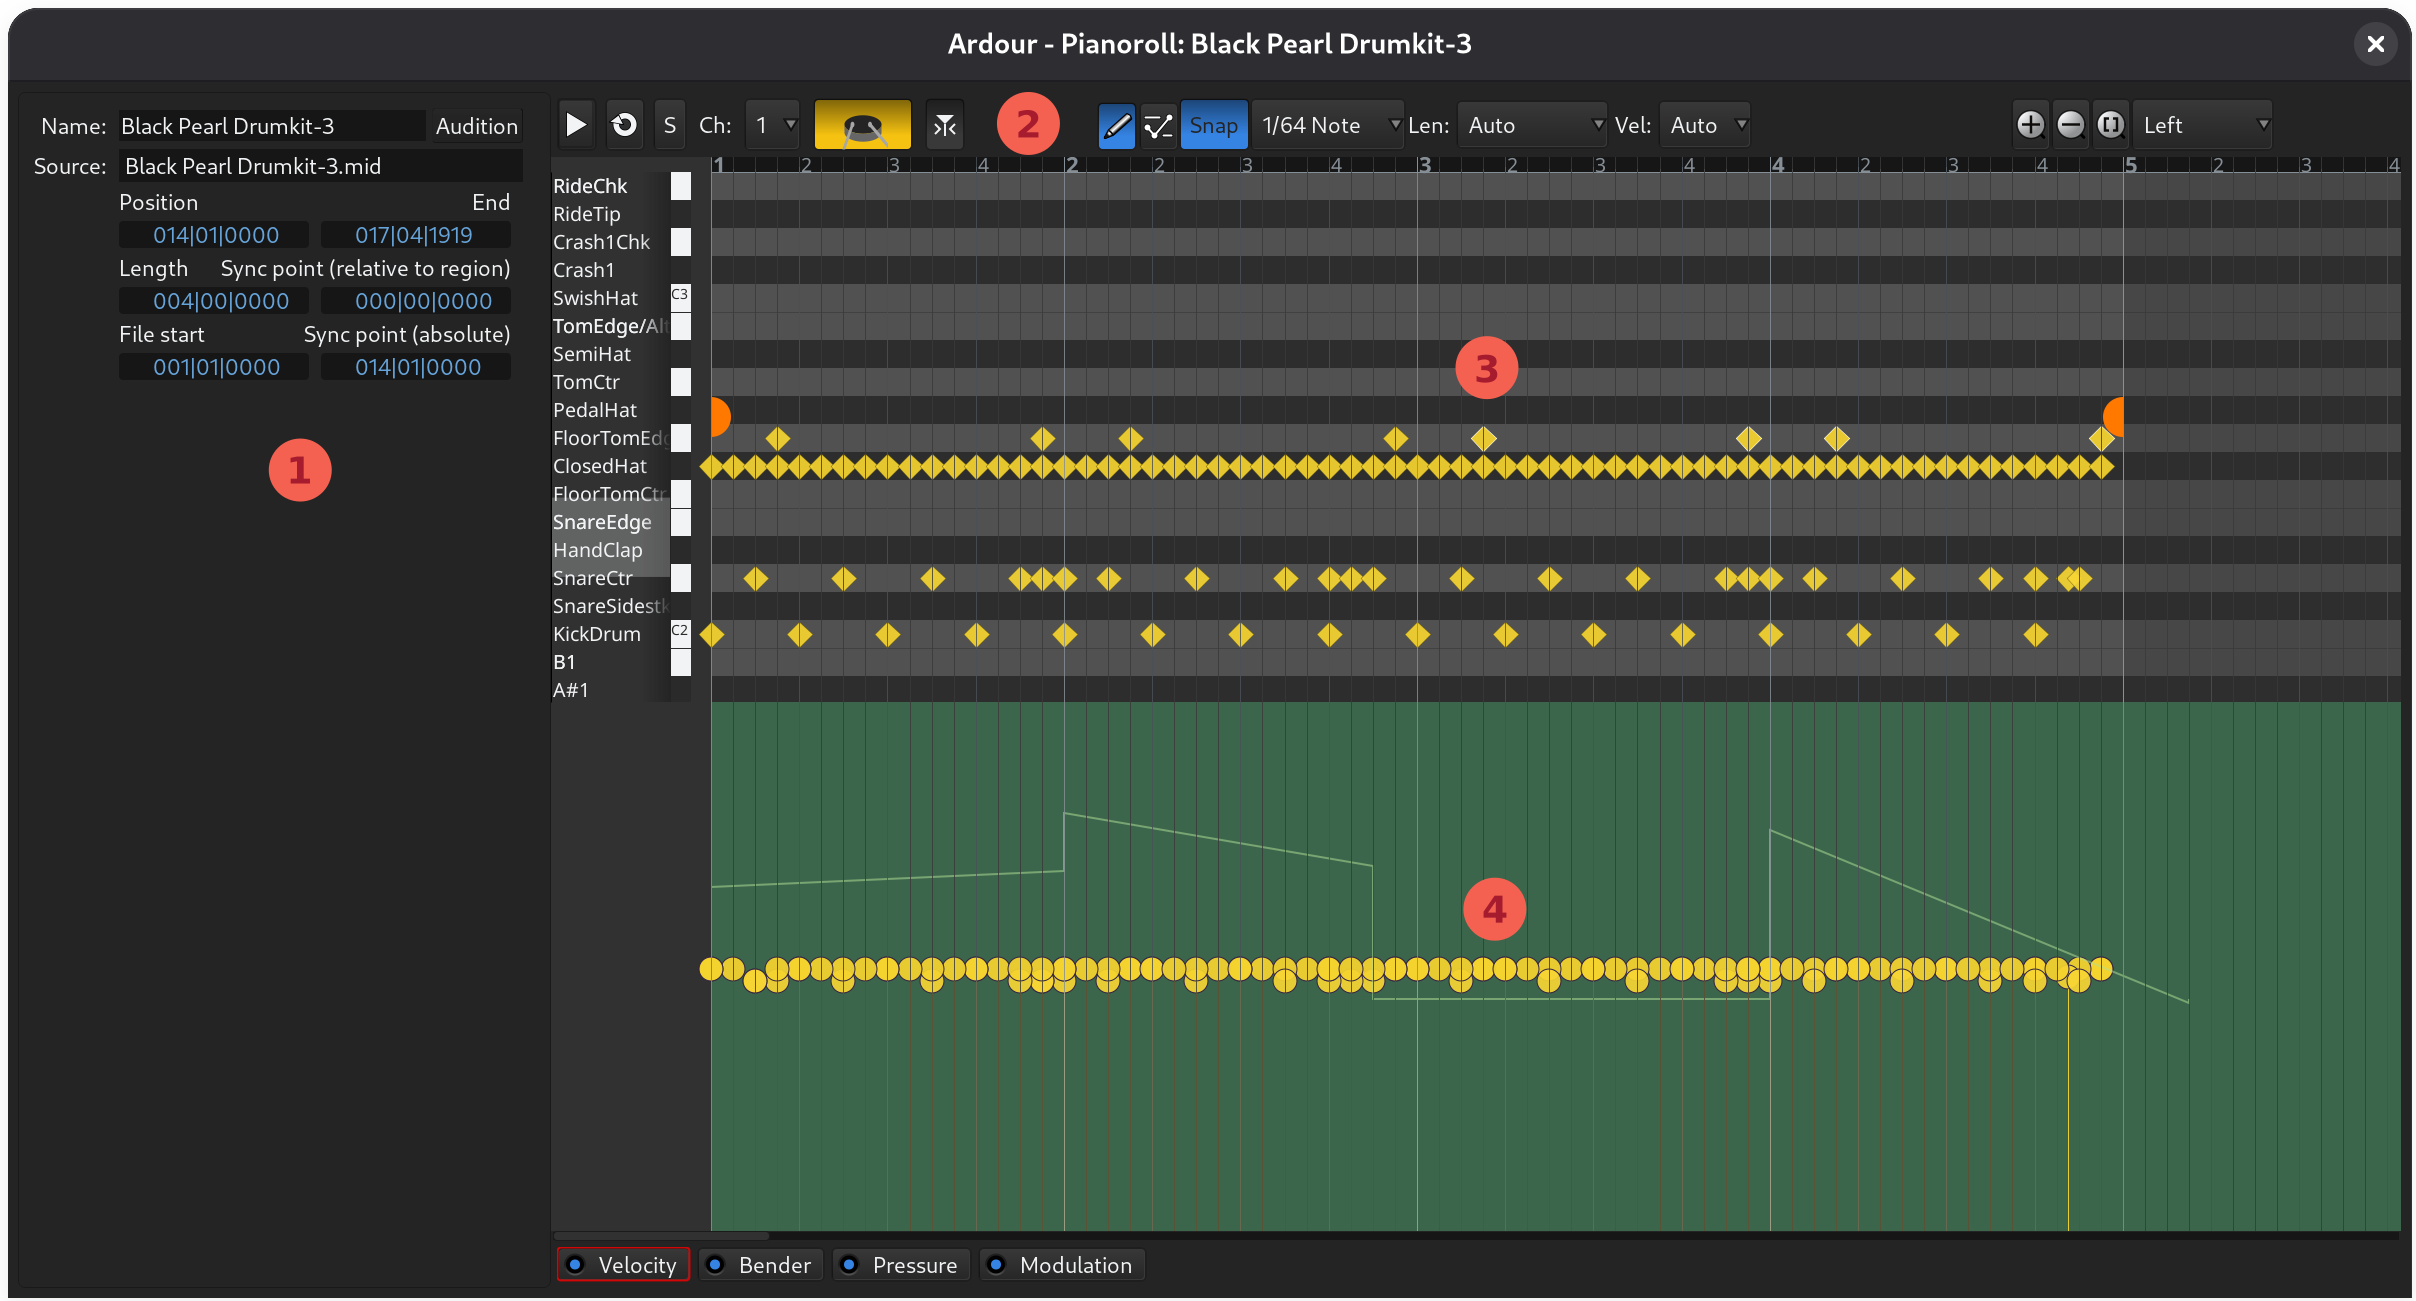
- MIDI Inspector pane
- Editor toolbar
- Note editing area
- Automation editing area
MIDI Inspector pane
The MIDI Inspector pane contains three section:
- Chord Editing
- Quantize
- Region Properties
The pane is hidden by default. To enable it, click on this button in the toolbar:
Chord Editing
The Chord Editing part of the pianoroll sidebar helps insert new chords to MIDI regions and edit existing chords.
For a guide on adding and editing chords, see Adding and Editing Chords.
Quantize
The Quantize section of the pane help quickly quantize notes to a specific grid unit for captured live MIDI performance.

The user interface is the same as in the separate Quantize dialog used in the inline MIDI editor of the main Editor window. To apply quantization in the pianoroll window, select notes, set quantization parameters, then hover over the notes, and press Q.
Region properties
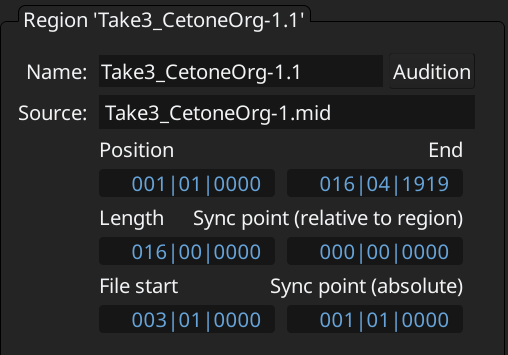
Displays essential information about the MIDI region:
- Name: the name of the region
- Source: the MIDI file where the notes are stored
- Position: where on the timeline the region starts
- End: where on the timeline the region ends
- Length: the duration of the region
- File start: where the visible part of the region begins, counting from the region's start
- Sync point (relative to the region)
- Sync point (absolute)
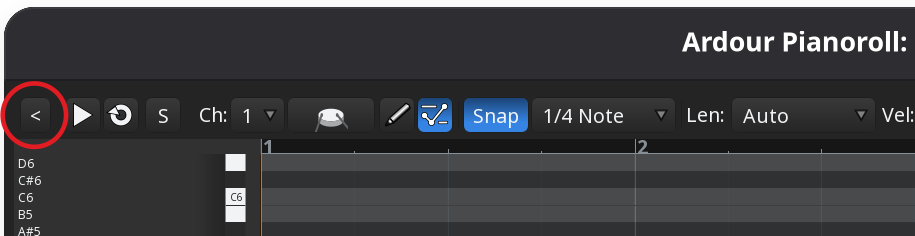
Editor toolbar
The editor toolbar provides playback, editing, and zoom controls.

Playback controls:
- Play once starting at the beginning of the region
- Loop-playback the region until stopped
- Solo toggle for the track where the region is located
Note display controls:
- Select visible MIDI channel: notes on this channel will be editable, notes on other channels will be displayed as ghost notes that cannot be edited
- Note mode selector: whether to display notes in regular or drum (diamond-shaped) mode
- Follow playhead: whether the pianoroll window should automatically scroll horizontally to follow the playhead
Note editing controls:
- Draw vs Edit mode selection
- Snapping toggle: enables or disables snapping to selected grid units
- Grid mode: allows selecting a specific grid unit or no grid at all
- Length: default note length for notes created by single-clicking on the timeline
- Velocity: default note velocity. The 'Auto' option inherits the velocity from the nearest note
Zoom controls:
- Zoom in
- Zoom out
- Zoom to show the entire region
- Zoom focus mode
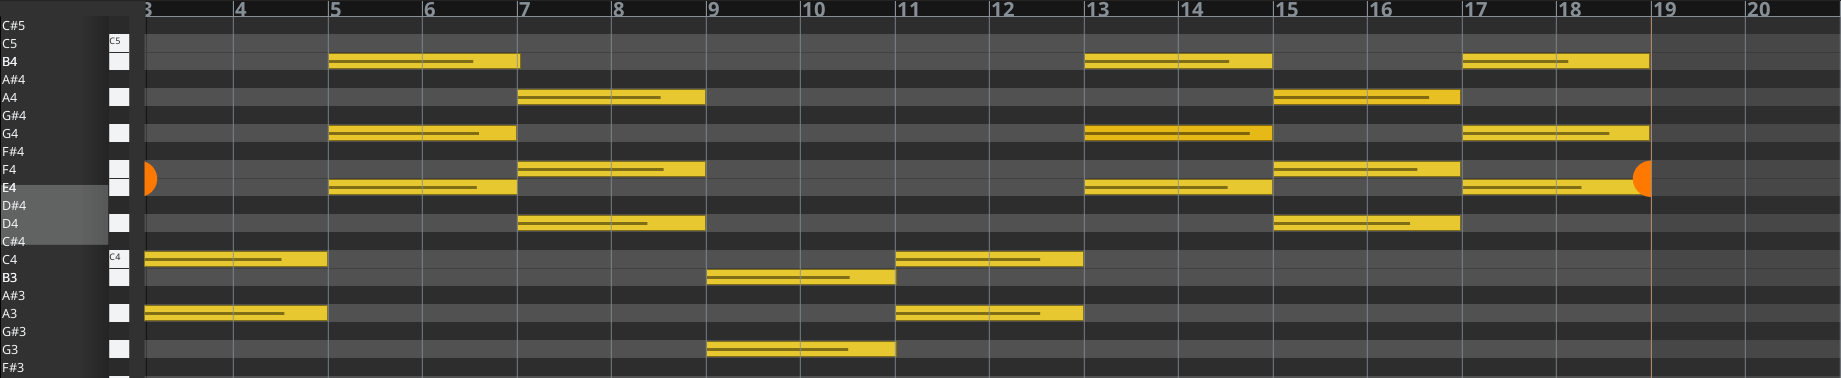
Note area
This areas displays all editable notes and provides control for panning between staves and tweaking the beginning and the end of the region.
The area on the left controls the visible note range. See here for the detailed explanation how to use the widget.
The orange handles on the left and on the right control the start and the end of the region's visible part. For example, dragging the orange start marker (on the left) to the right is equivalent to using the Grab tool to pick the left side of the region and trim the beginning of the region.
Drawing and editing MIDI notes works the same way as in the main window:
- Select the Draw mode and then click and drag to add a note. Alternatively, press and hold Shift and click and drag to brush notes at the interval defined by global quantization.
- Select the Edit mode, click on a note or rubberband-select multiple note, then click and drag notes by their middle to move them, or click and drag on the left or the right side of one note to trim or extend.
Automation area
This area displays note velocity and controllers and is disabled by default. The area can display data from multiple controllers, stacked above each other.

To enable or disable an automation lane, click the A button at the right end of the pianoroll toolbar and select a controller.
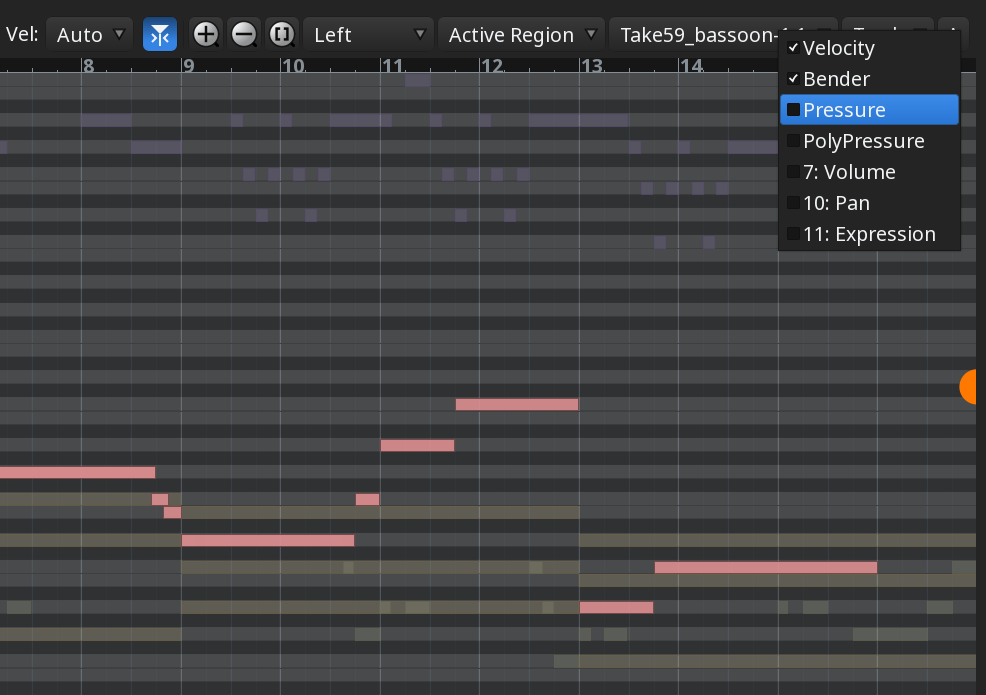
You can toggle multiple lanes by hovering over them one by one and pressing spacebar on your keyboard.
To draw new automation or edit existing one, use the Draw and Internal Edit modes just like when you do edit automation in the main Editor window.
To clear all automation in a lane, click on the respective