Using the PreSonus FaderPort 2/8/16
Ardour supports a variety of controllers in the Presonus FaderPort product line. The documentation below is written with FaderPort™ 8 in mind. However, it equally applies to FaderPort 2 and FaderPort 16 as the main difference between these units is the amount of motorized faders. For the documentation on using 1st generation FaderPort devices please refer to this chapter instead.
Connecting the FaderPort 8
The FaderPort 8 (FP8) comes with a USB socket on the back. Connect a suitable USB cable from there to a USB port on your computer. The FP8 will be automatically recognized by your operating system, and will appear in any of the lists of possible MIDI ports in both Ardour and other similar software.
Ardour uses the FaderPort 8 in what PreSonus calls "Studio One" or "native"
mode. To use the FaderPort8 with Ardour's FP8 Control Surface, make sure that
the device is in "Studio One" mode. (If you would like to change the mode at
any point, power on the unit while holding down the two leftmost Select
buttons, see the FaderPort 8 manual for further details. Also note that at
least firmware version 1.01 is required. NB. "factory default" resets the
firmware, see the PreSonus FaderPort8 Owner's manual chapter 9.4.)
While the FaderPort provides a Mackie Control Universal (MCU) mode, which
works with Ardour's Mackie Control Surface, MCU does not support various
elements available on the FP8 (e.g. colored buttons, and the custom mode
scribble strips).
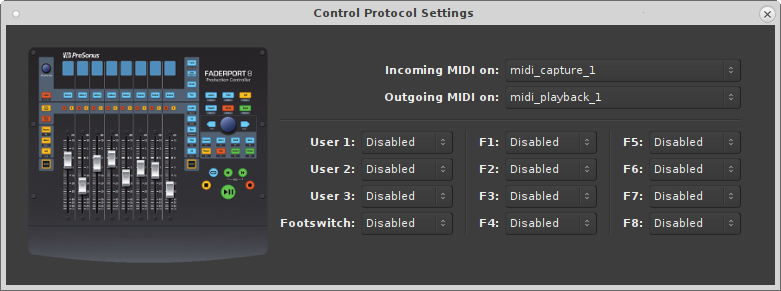
Normally, Ardour should be able to automatically detect a connected Faderport 8 device and enable it. If it fails, open the Preferences dialog, select "Control Surfaces" and enable "PreSonus FaderPort 8". Then open the "Protocol Settings" dialog for the FP8. Which (among other things) allows to select the the MIDI ports corresponding to the FP8.
Once you select the input and output port, Ardour will initialize the FP8 and it will be ready to use. You only need do this once: Once these ports are connected and your session has been saved, the connections will be made automatically in this and other future sessions.
Using the FaderPort 8
The FaderPort's controls can be divided into five groups:
- Transport buttons
- Session Navigation controls
- Fader modes
- Mix management
- Channel strip
In general the control mapping described in the FaderPort 8 Owner's Manual for Studio One (chapter 2) applies to Ardour as well. There are however subtle differences where the DAWs differ.
Buttons generally act on release (not press), with exception of transport-control (since 6.0pre) and individual exceptions mentioned below.
Transport Buttons

- Stop: Stops the transport. Press twice to return to session start.
- Loop: Toggles loop playback. A loop-range needs to be defined in the session for looping to be engaged.
- Play/Pause: Roll/Stop the transport (note that Ardour has no "pause" mode: Pause is equivalent to stop). During vari-speed playback, pressing "play" resets to 100% forward speed.
- Rewind: Rewind, roll backwards. Successive presses or holding the button incrementally changes the speed.
- Fast Forward: Roll forward. Successive presses or holding the button accumulate speed. Pressing (Rewind and Fast Forward) simultaneously stops playback and returns the playhead to zero.
- Record: Toggles the global record enable setting.
Session Navigation
Session Navigation allows quick navigation and provides access to session-wide controls. Each of the eight buttons alters the function of the push-button encoder and the Prev, Next buttons. With exception of Click the seven modes are exclusive (radio buttons).

- Channel: The Prev / Next buttons select the previous/next mixer-strip. If no strip is selected, Next selects the first, Prev the last mixer-strip in the session. Pressing the encoder knob moves the most recently selected mixer-strip into view on the FP8. The encoder scrolls the editor-canvas up/down.
- Master: The encoder controls the master-bus level. If a session includes a monitor-section, the encoder controls monitor-out by default. Hold the button to control the master-bus level. Press the encoder knob to reset the gain to 0dB. The Prev / Next navigation buttons bank the visible strips on the FP8 by one track left/right.
- Zoom: The encoder controls horizontal zoom of the editor. Press the encoder to zoom to fit the session. Prev / Next navigation buttons zoom selected track(s) vertically (or all tracks if none are selected).
- Click: Toggle the metronome on/off. While holding the Click button, the encoder modifies the volume of the metronome click (press the encoder while holding Click to reset the metronome level to 0dBFS).
- Scroll: The encoder scrolls the timeline (hold Shift for finer steps). Pressing the encoder zooms to fit the session. The Prev / Next navigation buttons bank the visible strips on the FP8 by one track left/right.
- Section: The Prev / Next navigation buttons nudge the selected region by the time configured in the nudge-clock. If no region is selected the playhead position is nudged. The encoder always nudges the playhead position.
- Bank: Encoder and navigation buttons scroll through mixer-strips in banks of eight. Pressing the encoder moves the most recently selected mixer-strip into view on the FP8.
- Marker: The encoder scrolls the timeline (hold Shift for finer steps). The Prev / Next navigation buttons jump to prev/next markers. Press the encoder to drop a new marker.
When combined with Shift, the eight buttons will access custom functions, which can be configured in the Preference Dialog. The buttons will light up if an action has been assigned to a button.
The following tables shows a condensed overview of the session-navigation modes:
| Prev / Next | Encoder knob | Encoder Press | |
|---|---|---|---|
| Channel | Select prev/next mixer-strip | Scroll Editor up/down | Bank to show selected strip on FP8 |
| Master | Bank visible strips on FP8 by 1 | Adjust master/monitor level | Reset master/monitor to 0dB |
| Zoom | Vertical zoom (editor track-height) | Horizontal timeline zoom (time) | Horizontal zoom to session |
| Scroll | Bank visible strips on FP8 by 1 | Scroll the timeline (move playhead) | Horizontal zoom to session |
| Section | Nudge the selected region | Nudge the playhead | - |
| Bank | Bank visible strips on FP8 by 8 | Bank visible strips on FP8 by 1 | Bank to show selected strip on FP8 |
| Marker | Move to prev/next marker | Scroll the timeline (move playhead) | Drop a new marker |
| Press and hold Click | (mode dependent) | Adjust metronome Level | Reset metronome level to 0dBFS |
Shift Button

The two Shift buttons are identical, they're copied to provide
convenient access to the modifiers. Pressing and holding the Shift
button updates the lights (and colors on RGB buttons) to indicate the modified
control.
Pressing and holding the Shift button for one second without
pressing any other button enters shift-lock mode. Press Shift again
to reset.
The Shift button engages directly on press. Activating an action
while the button is held will void the shift-lock mode.
Fader Modes
The eight faders on the FP8 can be assigned to various automatable controls present in the current session. The four fader-mode buttons change the behavior of the mixer-strip and scribble strip displays. (Note: with the 1.01 firmware these buttons always act on press.)

- Track: In Track-mode, the motorized faders display and control a mixer-strip's signal level. The Pan/Param encoder modifies the azimuth of the panner (hold Shift to control the width, if the track's panner supports it). Mute and Solo affect the respective mixer-strip.
- Edit Plugins: When Edit Plug-ins mode is active, the
motorized faders will control the parameter settings of a given
plugin-insert.
Press the Edit Plugins button to view all available plugin-inserts on a strip. If no plugins are available, Edit Plugins will not engage and the FP8 automatically switches back to Track-mode.
Select Plugin Mode: Use the Select buttons under the scribble strip to pick a plugin to edit.
The Select button color indicates the bypass/enable state of the plugin (red: bypassed, green: enabled). Use Shift + Select to toggle the bypass state.
Selecting a plugin enters Parameter Edit Mode: The faders and the Select buttons will respectively control the parameters and toggle controls of the selected plugin (once a plugin has been selected, it stays in edit mode regardless of track selection). If there are more than eight parameters, the Pan/Param encoder allows to scroll through available control-parameters (hold Shift to bank by 8).
If the plugin has any presets, pressing the Pan/Param encoder switches to the plugin-preset display: Plugin preset names are displayed on the scribble-displays, the Select button below each loads the preset. The "Pan/Param" encoder can be used to scroll through presets if there are more than seven (right-most, 8th, slot is reserved to unload/clear a loaded preset, hold Shift to bank by 7). The Select button color is used to indicate the currently loaded preset (if any) and blinks if a parameter has been modified since loading the preset. Loading a preset or pressing the Pan/Param encoder again switches back to the Plugin Parameter Edit Mode.
In Parameter Edit Mode, the "Open" (Shift + Macro) allows to toggle the Plugin GUI visibility.
Press the Edit Plugins button again to return to the Select Plugin Mode. - Sends: In Sends mode, each of the faders is mapped to the send-level of aux-sends of the selected track. If there are more than eight sends on a given track, the Pan/Param encoder can scroll through them. Send-mode follow the selection. If there are no sends on a given track, the FP8 automatically switches back to Track-mode.
- Pan: When Pan mode is active, the motorized faders will display and control the panner's azimuth. The Pan/Param controls the pan-width of the selected mixer-strip.
Shift + Track toggles timecode display on/off (middle row of the scribble-strip). The timecode format can be configured in the Control Surface Preference Dialog (Timecode, musical-time: bar/beat/tick).
Channel Strip

- Touch-Sensitive Fader: The fader can be used to control volume levels, aux send levels, panning, or plugin parameters, depending on the fader-mode (see above).
- Pan/Param: The encoder controls panning in Track and Pan mode. In Plugin and Send fader-modes, the encoder banks parameters. See Fader modes above for details. When "Link" is engaged, the encoder can control any automatable parameter (see Miscellaneous below).
- Mute: Toggle the mute-control of the corresponding mixer-strip. Mute engages on press, and disengages on release. Press and hold the button for at least 0.5sec for momentary.
- Solo: Toggle the solo or listen (AFL,PFL) control of the corresponding mixer-strip. Solo engages on press, and disengages on release. Press and hold the button for at least 500ms for momentary.
- Select: In Track and Sends and Pan mode the Select
button select/de-select a given mixer-strip.
Since selection is not limited to a single mixer-strip, the button acts in tri-state. A mixer-strip light indicates selection:- Any Selected Track: The select button is lit with the track's color.
- Any Not Selected Track: The select button is off (dimly showing the track's color).
- Most Recently Selected Track: Only one track at a time. The select button blinks with the track's color.
- Select: The track is exclusively selected and also becomes the most-recently selected.
- Shift + Select any selected track: Deselect the track.
- Shift + Select any unselected track: Adds the given track to the selection and make it most-recently selected).
While holding the ARM button the Select button lights change to red and the Select buttons controls the record-arm of the given track. Mixer-strips that cannot be record-armed have a dim white light.
Shift + ARM record-arms all tracks in the session.
Mix Management
These buttons allows to select which mixer-strips are spilled on the FP8 channel-strips.

- Audio: View Audio Tracks only.
- VI: Show tracks with virtual instrument plugins.
- Bus: Display only Busses.
- VCA: Show VCAs.
- All: Display all Tracks, Busses (incl master-bus) and VCAs.
In combination with the Shift modifier ten total filters are available:
- Shift + Audio Inputs: shows all record-armed tracks (Audio and MIDI).
- Shift + VI MIDI: View all MIDI tracks.
- Shift + Bus Outputs: Show the Master and Monitor Bus.
- Shift + VCA FX: Shows Aux-Busess.
- Shift + All User: Display all currently selected mixer-strips only.
Automation Controls
The Automation Controls provide access to the currently selected mixer-strips. The automation enable lights indicates the mode of the most recently selected mixer-strip (blinking selection button). The action affects all selected mixer-strips. The automation controls are currently only available in Track and Pan fader modes where they affect the fader and pan automation modes respectively.

- Latch: Currently not available in Ardour.
- Trim: Currently not available in Ardour.
- Off: Select "Manual" automation mode.
- Read: Select "Play" automation mode.
- Write: Select "Write" automation mode (note at the end of a write pass, Ardour automatically puts the track into "Touch" mode.
- Touch Select "Touch" automation mode.
The Automation Controls also double as session state controls when combined with Shift.
- Shift + Latch Save: Save the session. The button lights up red if the session is modified.
- Shift + Trim Redo: Redo a previously undone operation. The button lights up green if redo is possible.
- Shift + Off Undo: Undo the most recent operation. The button lights up green if undo is possible.
With Shift, the bottom row allows to bind three custom user actions.
Miscellaneous

- Solo Clear: Reset all solo controls in the session. If the FP8 was used to clear solo-state, pressing the button again will restore the previous state (unless solo state was modified manually since).
- Mute Clear: Unmute all mixer-strips in the session. If the FP8 was used to clear mute-state, pressing the button again will restore the previous mute state (unless mute-state was changed manually since).
- Bypass: The behavior depends on the edit-mode:
- Track + Pan Mode: A/B bypass toggle any plugins on all selected mixer-strips.
- Edit Plugin Parameter: Toggle bypass of of the plugin that is currently being edited. Bypass state is indicated by color: red for bypassed, green for enabled (not bypassed).
- Shift + Bypass Bypass All: A/B bypass toggle any plugins on all selected mixer-strips.
- Macro: Toggle Editor and Mixer Windows/Tabs.
- Shift + Macro Open: The
behavior depends on the edit-mode:
- Edit Plugin Parameter: Toggle Plugin GUI visibility (if it has a GUI) of the plugin that is currently being edited.
- all other modes: Show the Import Audio Dialog.
- Link: Activate Control-Link Mode (only available in
Track and Pan modes).
The Pan/Param encoder controls the element over which the mouse-cursor hovers in the GUI. One can access any parameter which can be automated.
Pressing the Pan/Param encoder resets the control-parameter to the default value.
The buttons color is used to indicate the link-state:- orange: Link is enabled, but the mouse-cursor is not over an element which can be controlled.
- yellow: Link is enabled, and the cursor is hovering over a controllable element.
- green: Link is locked to a given element (see below).
- turquoise: Link lock is possible (when pressing Shift while link-mode is enabled).
- red: Link-lock is not possible (only when pressing Shift while link-mode is enabled without a valid element to control.
- Shift + Link Lock:
When in Link-mode (see above), this allows to lock the current control to
the Pan/Param encoder. Link will no longer follow the GUI mouse-cursor.
If Link-mode is not enabled, Lock, locks the GUI (alike Session > Lock) to prevent accidental changes.
Link and Link-Lock mode will automatically disengage when entering Sends or Edit Plugins mode.
Harrison Mixbus
The above also applies to Ardour-derivatives Harrison-Mixbus and Mixbus 32C with a few subtle differences:
- Mix Management Bus shows Mixbusses only, while FX spills Aux-busses.
- The Mixbus built-in EQ and Compressor are present on every track and bus and always available. They are displayed as special plugins on right-side in Select Plugin Mode. When editing those processors, the parameters follows track selection (for other plugins this is not possible since they may not be present).
- Fader mode Sends shows mixbus-assigns first (before any optional aux-sends). The master-bus-assign is available on the "S"olo button of the right-most strip.