About Ardour
About Ardour's documentation
Conventions Used In This Manual
This section covers some of the typographical and language conventions used in this manual.
Keyboards and Modifiers
Keyboard bindings are shown like this: s or x.
x means "press the key, keep it pressed and then also press the x key".
Combinations such as e may be seen, which means "hold down the key and the key, and then, while keeping them both down, press the e key".
Different platforms have different conventions for which modifier key (Control or Command) to use as the primary or most common modifier. When viewing this manual from a machine identifying itself as running OS X, Cmd will be seen where appropriate (for instance in the first example above). On other machines Ctrl will be seen instead.
Mouse Buttons
Mouse buttons are referred to as Left, Middle and Right. Ardour can use additional buttons, but they have no default behaviour in the program.
Mouse Click Modifiers
Many editing functions are performed by clicking the mouse while holding a modifier key, for example Left.
Mouse Wheel
Some GUI elements can optionally be controlled with the mouse wheel when the pointer is hovering over them. The notation for mouse wheel action is ⇑ ⇐ ⇓ ⇒.
Context-click
The term context-click is used to indicate a Right-click on a particular element of the graphical user interface. Although right-click is the common, default way to do this, there are other ways to accomplish the same thing—this term refers to any of them, and the result is always that a menu specific to the item clicked on will be displayed.
"The Pointer"
When the manual refers to the "pointer", it means the on-screen representation of the mouse position or the location of a touch action if touch interface is being used.
Other User Input
Ardour supports hardware controllers, such as banks of faders, knobs, or buttons.
Menu Items
Menu items are indicated like this: Top > Next > Deeper. Each ">"-separated item indicates one level of a nested menu or sub-menu.
OSC Messages
OSC messages, whether sent or received, are displayed like this: /transport_stop.
Preference/Dialog Options
Choices in various dialogs, notably the Preferences and Properties dialog, are indicated thus:
Edit > Preferences > Audio > Some Option.
Each successive item indicates either a menu, sub-menu, or a tabbed dialog navigation. The final item is the one to choose or select.
If an option is deselected, it will look like this:
Edit > Preferences > Audio > Some other Option.
User Input
Some dialogs or features may require the user to input data such as this. In rare cases, certain operations will be required to be performed at the command line of the operating system:
cat /proc/cpuinfo sleep 3600 ping www.google.comProgram Output
Important messages from Ardour or other programs will be displayed like this.
Notes
Important notes about things that might not otherwise be obvious are shown in this format.
Warnings
Hairy issues that might cause things to go wrong, lose data, impair sound quality, or eat your proverbial goldfish, are displayed in this way.
Ardour Overview
Ardour is a professional digital workstation for working with audio and MIDI.
Ardour is meant for…
Audio Engineers
Ardour's core user group: people who want to record, edit, mix and master audio and MIDI projects. When you need complete control over your tools, when the limitations of other designs get in the way, when you plan to spend hours or days working on a session, Ardour is there to make things work the way you want them to.
Musicians
Being the best tool to record talented performers on actual instruments has always been a top priority for Ardour. Rather than being focused on electronic and pop music idioms, Ardour steps out of the way to encourage the creative process to remain where it always has been: a musician playing a carefully designed and well built instrument.
Soundtrack Editors
Sample accurate sync and shared transport control with video playback tools allows Ardour to provide a fast and natural environment for creating and editing soundtracks for film and video projects.
Composers
Arrange audio and MIDI using the same tools and same workflow. Use external hardware synthesizers or software instruments as sound sources. From sound design to electro-acoustic composition to dense multitrack MIDI editing, Ardour can help.
Ardour features…
Audio and MIDI Multi-Track Recording and Editing
Any number of tracks and busses. Non-linear editing. Non-destructive (and destructive!) recording. Any bit depth, any sample rate. Dozens of file formats.
Plugins with Full Sample Accurate Automation
AudioUnit, LV2, LinuxVST and LADSPA formats. FX plugins. Software instruments. MIDI processors. Automate any parameters. Physically manipulate them via control surfaces. Distribute processing across as many (or as few) cores as you want.
Transport Sync and External Control Surfaces
Best-in-industry sync to MIDI timecode and LTC. Send and receive MIDI Machine Control. Sync with JACK transport and MIDI clock. Dedicated Mackie Control protocol support, pre-defined mappings for many MIDI controllers plus dynamic MIDI learn. Use OSC to drive almost any operation in Ardour.
Powerful Anywhere-to-Anywhere Signal Routing
Complex signal flows are simple and elegant. Inputs and outputs connect to your hardware and/or other applications. Use sends, inserts and returns freely. Connections can be one-to-many, many-to-one or many-to-many. Tap signal flows at any point. If you can't connect in the way you want with Ardour, it probably can't be done.
Video Timeline
Import a single video and optionally extract the soundtrack from it. Display a frame-by-frame (thumbnail) timeline of the video. Use a Video-monitor window, or full-screen display, of the imported video in sync with any of the available ardour timecode sources. Lock audio-regions to the video: Move audio-regions with the video at video-frame granularity. Export the video, cut start/end, add blank frames and/or mux it with the soundtrack of the current-session.
Why is it called Ardour?
The name "Ardour" came from considerations of how to pronounce the acronym HDR. The most obvious attempt sounds like a vowel-less "harder" and it was then a short step to an unrelated but slightly homophonic word:
ardour n 1: a feeling of strong eagerness (usually in favor of a person or cause); "they were imbued with a revolutionary ardor"; "he felt a kind of religious zeal" [syn: ardor, elan, zeal]
2: intense feeling of love [syn: ardor]
3: feelings of great warmth and intensity; "he spoke with great ardor" [syn: ardor, fervor, fervour, fervency, fire, fervidness]
Given the work required to develop Ardour, and the personality of its primary author, the name seemed appropriate even without the vague relationship to HDR.
Years later, another interpretation of "Ardour" appeared, this time based on listening to non-native English speakers attempt to pronounce the word. Rather than "Ardour", it became "Our DAW", which seemed poetically fitting for a Digital Audio Workstation whose source code and design belongs to a group of collaborators.
Why Write a DAW for Linux?
There are already a number of excellent digital audio workstations. To mention just a few: ProTools, Nuendo, Samplitude, Digital Performer, Logic, Cubase (SX), Sonar, along with several less well known systems such as SADIE, SAWStudio and others. Each of these programs has its strengths and weaknesses, although over the last few years most of them have converged on a very similar set of core features. However, each of them suffers from two problems when seen from the perspective of Ardour's development group:
- they do not run natively on Linux
- they are not available in source code form, making modifications, improvements, or bugfixes by technically inclined users or their friends or consultants impossible.
It is fairly understandable that most existing proprietary DAWs do not run on Linux, given the rather small (but growing) share of the desktop market that Linux has. However, when surveying the landscape of "popular operating systems", we find:
- older versions of Windows: plagued by abysmal stability and appalling security
- newer versions of Windows seem stable but still suffer from security problems
- macOS: a nice piece of engineering that is excellent for audio work but only runs on proprietary hardware and still lacks the flexibility and adaptability of Linux.
Security matters today, and will matter more in the future as more and more live or semi-live network based collaborations take place.
Let's contrast this with Linux, an operating system which:
- can stay up for months (or even years) without issues
- is endlessly configurable down to the tiniest detail
- is not owned by any single corporate entity, ensuring its life and direction are not intertwined with that of a company (for a contrary example, consider BeOS)
- is fast and efficient
- runs on almost any computing platform ever created, including old "slow" systems and new "tiny" systems (e.g. Raspberry Pi)
- is one of the most secure operating systems "out of the box"
More than anything, however, Ardour's primary author uses Linux and wanted a DAW that ran there.
Having written a DAW for Linux, it turned out to be relatively easy to port Ardour to macOS, mostly because of the excellent work done by the JACK development group that ported JACK to macOS.
Isn't This a Really Complicated Program?
There is no point in pretending that Ardour is a simple, easy to use program. The development group has worked hard to try to make simple things reasonably easy, common tasks quick, and hard and/or uncommon things possible. There is no doubt that there is more to do in this area, as well as polishing the user interface to improve its intuitiveness and work flow characteristics.
At the same time, multi-track, multi-channel, non-linear, non-destructive audio editing is a far from simple process. Doing it right requires not only a good ear, but a solid appreciation of basic audio concepts and a robust mental model/metaphor of what one is doing. Ardour is not a simple "audio recorder"—it can certainly be used to record stereo (or even mono) material in a single track, but the program has been designed around much richer capabilities than this.
Some people complain that Ardour is not "intuitive" to use—its lead developer has some thoughts on that.
Creating Music with Ardour
Ardour can be used in many different ways, from extremely simple to extremely complex. Many projects can be handled using the following kind of workflow:
Stage 1: Creating The Project
The first step is to create a new session, or open an existing one. A session consists of a folder containing a session file that defines all the information about the session. All media files used by the session are usually stored within the session folder.
More details on sessions can be found in Sessions chapter.
Stage 2: Creating and Importing Audio and MIDI Data
Once a session has been created, it will be necessary to add some audio and/or MIDI material to it—which can be done in one of 3 ways:
- Record incoming audio or MIDI data, either via audio or MIDI hardware connected to the computer, or from other applications
- Create new MIDI data using the mouse and/or various dialogs
- Import existing media files into the session
MIDI recordings consist of performance data ("play note X at time T") rather than actual sound. As a result, they are more flexible than actual audio, since the precise sound that they will generate when played depends on where the MIDI data is sent to. Two different synthesizers may produce very different sounds in response to the same incoming MIDI data.
Audio recordings can be made from external instruments with electrical outputs (keyboards, guitars, etc.), or via microphones or other sound capturing equipment.
Ardour can use the JACK Audio Connection Kit for all audio and MIDI I/O, making recording audio/MIDI from other applications fundamentally identical to recording audio/MIDI from audio/MIDI hardware.
Stage 3: Editing and Arranging
Once there is material within the session, it can be arranged in time. This is done in one of the two main windows of Ardour: the Editor window.
Audio/MIDI data appears in chunks called regions, which are arranged into horizontal lanes called tracks. Tracks are stacked vertically in the Editor window. Regions can be copied, shortened, moved, and deleted without changing the actual data stored in the session at all—Ardour is a non-destructive editor. (Almost) nothing done while editing will ever modify the files stored on disk (with the exception of the session file itself).
Many transformations can be done to the contents of regions, again without altering anything on disk. It is possible to alter, move, delete and remove silence from audio regions, for example.
MIDI regions can also be copied, moved, shortened, or deleted without altering the MIDI files, though any edit like adding, suppressing or moving notes inside a region results in a modification of the underlying MIDI file.
Stage 4: Mixing and Adding Effects
Once the arrangement of the session is mostly complete, the next step is the mixing phase. Mixing is a broad term to cover the way the audio signals that the session generates during playback are processed and added together into a final result that is actually heard. It can involve altering the relative levels of various parts of the session, adding effects that improve or transform certain elements, and others that bring the sound of the whole session to a new level.
Ardour allows automation of changes to any mixing parameters (such as volume, panning, and effects controls)—it will record the changes made over time, using a mouse or keyboard or some external control device, and can play back those changes later. This is very useful because often the settings needed will vary in one part of a session compared to another—rather than using a single setting for the volume of a track, it may need increases followed by decreases (for example, to track the changing volume of a singer). Using automation can make all of this relatively easy.
Stage 5: Exporting
Once the arrangement and mix of the session is finalized, a single audio file that contains a ready-to-listen to version of the work is usually desired. Ardour allows the exporting of audio files in a variety of formats (simultaneously in some cases). This exported file would typically be used in creating a CD, or be the basis for digital distribution of the work.
Of course it is sometimes desirable to export material that isn't finished yet—for example, to give a copy to another party to mix on their own system. Ardour allows exporting as much of a session as desired, at any time, in any supported format.
Additional Resources
In addition to this documentation, there are a variety of other resources:
- the Ardour release notes
- the Ardour Forums
- information about Ardour Support via mailing lists and IRC (chat)
The IRC channels in particular are where most of the day-to-day development and debugging is done, and there are plenty of experienced users to help if problems are encountered when using Ardour.
Please be prepared to hang around for a few hours, the chat is usually busiest from 19:00 UTC to 04:00 UTC. It is best to keep one's IRC client window open if possible, so that a belated answer can be seen.
Getting Started
Starting Ardour
How to Launch Ardour
There are several ways of starting Ardour, which may vary depending on which platform it is being used on:
- by double-clicking the Ardour icon in the platform's file manager (e.g. Nautilus on Linux, Finder on OS X)
- by double-clicking on an Ardour session file in the platform's file manager
- on Linux, Ardour can also be started via the command line (see below)
When Ardour is run for the very first time, a special dialog is displayed that will ask several questions about the system's setup. The questions will not be asked again, but the choices thus made can always be modified via the Edit > Preferences dialog.
If JACK is needed, in general, it is sensible to start it before Ardour is run. Though this is not strictly necessary, it will provide more control and options over JACK's operation. JACK can be started through the CLI of a terminal, or by using a GUI program, like QjackCtl or Cadence.
If Ardour is opened without specifying an existing session, it will display the Session > New… dialog and the Audio/MIDI Setup dialog. See New/Open Session Dialog for a description of those dialogs.
Starting Ardour From the Command Line (Linux)
Like (almost) any other program on Linux, Ardour can be started on the command line. Type the following command in a terminal window, adjust the path for your version of the program:
/opt/Ardour-8.6.0/bin/ardour8To start Ardour with an existing session, use:
/opt/Ardour-8.6.0/bin/ardour8 /path/to/sessionReplace /path/to/session with the actual path of the session. Either the session folder or any session file inside the folder can be specified, including snapshots.
To start Ardour with a new, named session, use:
/opt/Ardour-8.6.0/bin/ardour8 -N /path/to/sessionUnderstanding Basic Concepts and Terminology
In order to fully grasp the terms used in Ardour (and this manual), it is necessary to understand what things like sessions, tracks, busses, regions and so on—as used in Ardour—are.
Sessions
An Ardour session is a container for an entire project. A session may contain an arbitrary number of tracks and busses consisting of audio and MIDI data, along with information on processing those tracks, a mix of levels, and everything else related to the project. A session might typically contain a song, an entire album, or a complete live recording.
Ardour sessions are kept in directories; these directories contain one or more session files, some or all of the audio and MIDI data, and a number of other state files that Ardour requires. The session file describes the structure of the session, and holds automation data and other details.
Ardour's session file is written in XML format, which is advantageous as it is somewhat human-readable and human-editable in a crisis. Sound files are stored in one of a number of optional formats, and MIDI files as SMF.
It is also possible for Ardour sessions to reference sound and MIDI files outside the session directory, to conserve disk space and avoid unnecessary copying if the data is available elsewhere on the disk.
Ardour has a single current session at all times; if Ardour is started without specifying one, it will offer to load or create one.
More details can be found in the Sessions chapter.
Tracks
A track is a concept common to most DAWs, and also used in Ardour. Tracks can record audio or MIDI data to disk, and then replay it with processing. They also allow the audio or MIDI data to be edited in a variety of different ways.
In a typical pop production, one track might be used for the kick drum, another for the snare, more perhaps for the drum overheads and others for bass, guitars and vocals.
Ardour can record to any number of tracks at one time, and then play those tracks back. On playback, a track's recordings may be processed by any number of plugins, panned, and/or its level altered to achieve a suitable mix.
A track's type is really only related to the type of data that it stores on disk. It is possible, for example, to have a MIDI track with a synthesizer plugin which converts MIDI to audio. Even though the track remains MIDI (in the sense that its on-disk recordings are MIDI), its output may be audio-only.
More details can be found in the Tracks chapter.
Busses
Busses are another common concept in both DAWs and hardware mixers. They are similar in many ways to tracks; they process audio or MIDI, and can run processing plugins. The only difference is that their input is obtained from other tracks or busses, rather than from disk.
A bus might typically be used to collect together the outputs of related tracks. Consider, for example, a three track recording of a drum kit; given kick, snare and overhead tracks, it may be helpful to connect the output of each to a bus called "drums", so that the drum kit's level can be set as a unit, and processing (such as equalization or compression) can be applied to the mix of all the tracks. Such busses are also called groups.
Regions
A track may contain many segments of audio or MIDI. Ardour contains these segments in things called regions, which are self-contained snippets of audio or MIDI data. Any recording pass, for example, generates a region on each track that is enabled for recording. Regions can be subjected to many editing operations; they may be moved around, split, trimmed, copied, and so on.
More details can be found at Working With Regions.
Playlists
The details of what exactly each track should play back is described by a playlist. A playlist is simply a list of regions; each track always has an active playlist, and can have other playlists which can be switched in and out as required.
More details can be found in the Playlists chapter.
Plugins
Ardour allows processing audio and MIDI using any number of plugins. These are external pieces of code, commonly seen as VST plugins on Windows or AU plugins on Mac OS X. Ardour supports the following plugin standards:
| LADSPA | the first major plugin standard for Linux. Many LADSPA plugins are available, mostly free and open-source. |
|---|---|
| LV2 | the successor to LADSPA. Lots of plugins have been ported from LADSPA to LV2, and also many new plugins written. |
| VST | Ardour supports VST plugins that have been compiled for Linux. |
| AU | Mac OS X versions of Ardour support AudioUnit plugins. |
Ardour has some support for running Windows VST plugins on Linux, but this is rather complicated, extremely difficult for the Ardour developers to debug, and generally unreliable, as it requires running a large amount of Windows code in an emulated environment. If it is at all possible, it is strongly advisable to use native LADSPA, LV2 or Linux VST plugins on Linux, or AU on Mac OS X.
More details can be found at Working With Plugins.
Using the Mouse
Clicking
Throughout this manual, the term click refers to the act of pressing and releasing the Left mouse button. This action is used to select objects, activate buttons, turn choices on and off, pop up menus and so forth. On touch surfaces, it also corresponds to a single, one-finger tap on the GUI.
Right-Clicking
The term right-click refers to the act of pressing and releasing the Right mouse button. This action is used to pop up context menus (hence the term "context click", which will also be seen). It is also used by default in combination with the shift key to delete objects within the editor window.
Some mice designed for use with Mac OS X may have only one button. By convention, pressing and holding the Control key while clicking is interpreted as a right-click by many applications.
Middle-Clicking
A middle-click refers to the act of pressing and releasing the Middle mouse button. Not all mice have a middle click button (see the Mouse chapter for details). Sometimes the scroll wheel acts as a clickable middle button. This action is used for time-constrained region copying and mapping MIDI bindings.
Internally, your operating system may identify the mouse buttons as Button1, Button2, and Button3, respectively. It may be possible to invert the order of buttons to accommodate left-handed users, or to re-assign them arbitrarily. This manual assumes the canonical order.
Double-Clicking
A double click refers to two rapid press/release cycles on the leftmost mouse button. The time interval between the two actions that determines whether this is seen as two clicks or one double click is controlled by your system preferences, not by Ardour.
Dragging
A drag primarily refers to the act of pressing the leftmost mouse button, moving the mouse with the button held down, and then releasing the button. On touch surfaces, this term also corresponds to a single one-finger touch-move-release action.
Ardour also uses the middle mouse button for certain kinds of drags, which will be referred to as a middle-drag.
Modifiers
There are many actions in Ardour that can be carried out using a mouse button in combination with a modifier key. When the manual refers to Left, it means that you should first press the key, carry out a left click while is held down, and then finally release the key.
Available modifiers depend on your platform:
Linux Modifiers
- Ctrl (Control)
- Shift
- Alt
- Win (Super/Windows)
macOS Modifiers
- Cmd (Command, "windmill")
- Ctrl (Control)
- Alt (Option)
- Shift
Scroll Wheel
Ardour can make good use of a scroll wheel on the mouse (assuming it has one), which can be utilized for a variety of purposes. Scroll wheels generate vertical scroll events, ⇑ (ScrollUp) and ⇓ (ScrollDown). Some also emit horizontal events, ⇐ (ScrollLeft) and ⇒ (ScrollRight).
When appropriate, Ardour will differentiate between these two different scroll axes. Otherwise it will interpret ScrollDown and ScrollLeft as equivalent and similarly interpret ScrollUp and ScrollRight as equivalent.
Typically, scroll wheel input is used to adjust continuous controls such as faders and knobs, or to scroll vertically or horizontally inside a window. In most continuous control cases, holding down the Ctrl key while scrolling will use "fine" mode and the scroll wheel increments will then be 10% of normal.
Default Keyboard Bindings
Almost every available function in Ardour can be bound to a keyboard shortcut (and those few that cannot will usually respond to an OSC command). Ardour comes with a rich set of default key bindings for the most commonly used functions.
These bindings strive to be mnemonic, that is, easy and intuitive to remember, and follow widely accepted conventions. As a general rule, the first letter of an operation will be used for as a shortcut, if available. This does not necessarily lead to the best ergonomics for rapid editing—there are alternative binding sets for that—but it does make it simpler for newcomers to remember some of the most useful ones, for example:
S for Region > Edit > Split or P for Transport > Playhead > Playhead to Mouse.
Existing key bindings in menus are listed on the right side of the menu items.
Almost every key binding in Ardour can be looked for and/or changed in Window > Keyboard Shortcuts.
Ardour will warn you with a "Colliding Keybindings" message, if you try to reassign the binding of a key combination that is already in use. Nevertheless if you do so, consider, that this might lead to confusion when asking for help—when the explanation is given in terms of a standard key binding—which will have a completely different effect on the system with the modified key bindings.
The conventions for using modifier keys (, , , etc.) differ among platforms, so different default bindings for each are provided.
Basic GUI Operations
By default, Ardour will show helpful tooltips about the purpose and use of each GUI element if the pointer is positioned over it and hovered there for a short while. These little pop-up messages can be a good way to discover the purpose of many aspects of the GUI.
Pop-ups can also be distracting for experienced users, who may wish to disable them via Edit > Preferences > GUI > Show tooltip if mouse hovers over a control.
Selection Techniques
Ardour follows the conventions used by most other computer software (including other DAWs) for selecting objects in the GUI.
Selecting individual objects
Clicking on an object (sometimes on a particular part of its on-screen representation) will select the object, and deselect other similar objects.
Selecting multiple (similar) objects
A left-click on an object toggles its selected status, so using left on a series of objects will select (or deselect) each one of them. A completely arbitrary set of selections can be constructed with this technique.
Selecting a range of objects
In cases where the idea of "select all objects between this one and that one" makes sense, select one object and then left-click on another to select both of them as well as all objects in between.
Time range selection
To select a time range in the Editor, Left-click and drag the mouse. A Left drag then lets you create other ranges and a left-click extends a range to cover a wider area.
Selection Undo
The set of objects (including time range) that are selected at any one time is known as the selection. Each time an object is selected or deselected, the new selection is stored in an undo/redo stack. This stack is cleared each time the content of the timeline changes.
If a complex selection has been built up and then accidentally cleared it, choosing Edit > Undo Selection Change will restore the previous selection. If a selection is undone and a return to the state before the undo is desired, choosing Edit > Redo Selection Change will take the selection back to where it was before Edit > Undo Selection Change was chosen.
Cut and Paste Operations
The clipboard is a holder for various kinds of objects (regions, control events, plugins) that is used during cut-and-paste operations.
Cut
A cut operation removes selected objects and places them in the clipboard. The existing contents of the clipboard are overwritten. The default key binding is x.
Copy
A copy of the selected objects are placed in clipboard. There is no effect on the selected objects themselves. The existing contents of the clipboard are overwritten. The default key binding is c.
Paste
The current contents of the clipboard are pasted (inserted) into the session, using the current edit point as the destination. The contents of the clipboard remain unchanged—the same item can be pasted multiple times. The default key binding is v.
Deleting Objects
Within the Editor window (and to some extent within the Mixer window too), there are several techniques for deleting objects (regions, control points, and more).
Using the mouse and keyboard
Select the object(s) to be deleted and then press the Del key. This does not put the deleted object(s) in the clipboard, so they cannot be pasted elsewhere.
Using normal cut and paste shortcuts
Select the object(s) and then press x. This puts the deleted object(s) in the clipboard so that they can be pasted elsewhere.
Using just the mouse
By default, Shift Right will delete the clicked-upon object. Like the Del key, this does not put the deleted object(s) in the clipboard.
The modifier and mouse button used for this can be controlled via Edit > Preferences > User Interaction > Delete using …. Any modifier and mouse button combination can be used.
Undo/Redo for Editing
While editing, it sometimes happens that an unintended change is made, or a choice is made that is later decided to be wrong. All changes to the arrangement of session components (regions, control points) along the timeline can be undone (and redone if necessary).
The default keybindings are Z for Undo and R for Redo. These match the conventions of most other applications that provide undo/redo.
Changes are also saved to the session history file, so that undo/redo is possible even if the session is closed and reopened later, even if Ardour is exited in between.
The maximum number of changes that can be undone can be configured under Edit > Preferences > Misc > Undo. The maximum number of changes stored in the history file is a separate parameter, and can also be set in the same place.
In addition to the normal undo (which works only on actions that change the timeline), there is a visual undo which will revert any command that affects the display of the editor window. Its shortcut is Z. There is also an undo for selection; see "Selection Techniques" above.
Ardour Configuration
Ardour Systems
Using a general purpose computer for the recording and playback of digital audio is not trivial. This chapter covers some of the most common pitfalls encountered on the way to creating a reliable and powerful audio workstation.
The Right Computer System for Digital Audio
It is nice to think that one could just go and buy any computer, install a bit of software on it and start using it to record and create music. This idea isn't necessarily wrong, but there are some important details that it misses. Any computer that can be bought today (since somewhere around the end of 2012) is capable of recording and processing a lot of audio data. It will come with a builtin audio interface that can accept inputs from microphones and/or electrical instruments; it will have a disk with a huge amount of space for storing audio files.
However, when recording, editing and mixing music, it is generally desirable to have very little latency between the time a sound is generated and when it can be heard. When the audio signal flows through a computer, that means that the computer has to be able to receive the signal, process it and send it back out again as quickly as possible. And this is where it becomes very important what computer system is being used for this task, because it is absolutely not the case that any computer can do it well.
Routing audio through a computer will always cause some delay, but if it is small, it will generally never be noticed. There are also ways to work in which the delay does not matter at all (for example, not sending the output from the computer to speakers).
The latency that is typically needed for working with digital audio is in the 1–5 ms range. For comparison, if one is sitting 1 m (3 ft) from a set of speakers, the time the sound takes to reach the ears is about 3 ms. Any modern computer can limit the delay to 100 ms; most can keep it under 50 ms. Many will be able to get down to 10 ms without too much effort. Attempting to reduce the latency on a computer that cannot physically do it will cause clicks and glitches in the audio, which is clearly undesirable.
Hardware-related Considerations
| Video interface | Poorly engineered video interfaces (and/or their device drivers) can "steal" computer resources for a long time, preventing the audio interface from keeping up with the flow of data. |
|---|---|
| Wireless interface | Poorly engineered wireless networking interfaces (and/or their device drivers) can also block the audio interface from keeping up with the flow of data. |
| USB ports | When using an audio interface connected via USB, and sometimes even if not, the precise configuration of the system's USB ports can make a big difference. There are many cases where plugging the interface into one port will work, but using different USB port results in much worse performance. This has been seen even on Apple systems. |
| Internal USB Hubs | Ideally, all USB ports should connect directly to the main bus inside the computer. Some laptops (and possibly some desktop systems) come wired with an internal USB hub between the ports and the system bus, which can then cause problems for various kinds of external USB devices, including some models of audio interfaces. It is very difficult to discover whether this is true or not, without simply trying it out. |
| CPU speed control | Handling audio with low latency requires that the processor keeps running at its highest speed at all times. Many portable systems try to regulate processor speed in order to save power—for low latency audio, this should be totally disabled, either in the BIOS or at the OS level. |
| Excessive Interrupt Sharing | If the audio interface is forced by the computer to share an interrupt line (basically a way to tell the CPU that something needs its attention) with too many other (or wrong) devices, this can also prevent the audio interface from keeping up with the flow of data. In laptops it is generally impossible to do anything about this. In many desktop systems, it is possible at the BIOS level to reassign interrupts to work around the problem. |
| SMIs | SMIs are interrupts sent by the motherboard to tell the computer about the state of various hardware. They cannot safely be disabled, and they can take a relatively long time to process. It is better to have a motherboard which never sends SMIs at all—this is also a requirement for realtime stock trading systems, which have similar issues with latency. |
| Hyperthreading | This technology is becoming less common as actual multi-core CPUs become the norm, but it still exists and is generally not good for realtime performance. Sometimes this can be disabled in the BIOS, sometimes it cannot. A processor that uses hyperthreading will be less stable in very low latency situations than one without. |
| Excessive vibration | This doesn't affect the flow of data to or from the audio interface, but it can cause the flow of data to and from (spinning) disk storage to become much slower. If a computer going to be used in an environment with loud live sound (specifically, high bass volume), make sure it is placed so that the disk is not subjected to noticeable vibration. The vibrations will physically displace the read-write heads of disk, and the resulting errors will force a retry of the reading from the disk. Retrying over and over massively reduces the rate at which data can be read from the disk. Avoid this.If you find this hard to believe, check out this video which shows the effects of merely shouting at your drives. This is likely not an issue with contemporary SSD drives, which have no spinning/head mechanisms. |
Richard Ames presents a long (28 minutes) video that is very helpful if you want to understand these issues in more depth. It is a little bit Windows-centric, but the explanations apply to all types of computers and operating systems.
The Right Mouse
Ardour is designed to work best with a three button mouse equipped with a scroll wheel. While it can be used with a two button mouse or touchpad, at least two key operations will not be (easily) available:
- time-constrained region copying
- MIDI bindings created by "learning" them from incoming MIDI data
It is strongly encouraged to invest in a three-button mouse. A good quality mouse (especially one with a weighted, latchable scroll wheel) will make the use of Ardour vastly more efficient. They are cheap, and time is not.
For information on how to use the mouse in Ardour, see Using the mouse.
System Specific Setup
It is unfortunate, but some OSes and/or Desktop Environments will cause problems that are beyond the capability of Ardour to address. The following covers some of the known problems and how to work around them.
Ubuntu Linux
Ubuntu Linux is the most popular variety of Linux in use on desktop and laptop systems. It has the backing of a for-profit corporation (Canonical Inc.), a defined philosophy and a huge and worldwide user base. As a result, it is a common platform for people who want to use Ardour and other tools for music creation and pro-audio work.
High Level Recommendations for Ubuntu Users
Currently, installing pro audio applications on vanilla Ubuntu requires some configuration, in order for the user to gain realtime privilege (read below). Ubuntu Studio, which is an official flavor of Ubuntu, and thus shares the repositories with Ubuntu, has this already configured. Other distributions, such as KXStudio, and Dreamstudio are largely based on Ubuntu, and like Ubuntu Studio, has these settings pre-configured, while also containing customized versions of Ubuntu packages, which often are more up to date.
Installing Ardour
There may be unintended differences, and even bugs in Ubuntu native packages, as a result of a different building method. For this reason, Ardour developers highly recommend installing the official ready-to-run version of the program that can be downloaded from ardour.org, as Ubuntu native packages are not supported in the official Ardour forums or other support channels.
Follow these steps to install the latest version of Ardour:
- Download the latest release from ardour.org.
- Right-click the downloaded file and choose properties.
- Click the Permissions tab and check the option "Allow this file to run as a program".
- Close the dialog and double-click the file.
- Follow the prompts.
Problems with JACK configuration
What is the problem?
To function as intended, JACK needs to run with access to two operating system facilities called realtime scheduling and memory locking. This means that the user who starts JACK must be allowed access to these facilities. By default, Ubuntu does create a user group that has this permission but—it does not put new users into this group by default. Read more about why here. Consequently, the user will not have permission to run JACK in the way they should.
Symptoms
A message like Cannot lock down memory in the output from JACK as it starts up. This output may be hidden in the Messages window of QJackCtl (aka JACK Control), so one should check there.
How to fix
Make sure the file /etc/security/limits.d/audio.conf exists. If it is named /etc/security/limits.d/audio.conf.disabled, rename it to the former. Run the command:
sudo usermod -a -G audio YOUR-LOGIN-NAMEThen log out and log in again. On Ubuntu Studio the user is a member of audio group by default, but not on other official flavors.
Reporting Issues
Given the difficulties in supporting Ubuntu and the limited time and resources of the Ardour team, the Ubuntu Studio Project has requested that issues and bug reports related to Ubuntu, Ubuntu Studio and other derivatives be directed to them.
Contact Information for Ubuntu Studio
Information on the Ubuntu Studio Mailing Lists.
Information on the Ubuntu Studio IRC channel. #ubuntustudio on irc.freenode.net
Microsoft Windows
Microsoft Windows is officially supported since version 5.0 (2016).
Installing Ardour
- Download the latest windows build from the download page.
- Run the installer and follow the prompts.
How to help
- Hang out in #ardour on Libera. One may ask questions there and if possible, answer questions that others have.
- Keep an eye on the Windows forum and contribute to the discussions there.
- Update this manual via pull requests on GitHub.
KDE Plasma 5
Under KDE Plasma 5, plugin and various other windows will not stay on top of any main window; therefore a workaround is required.
Workaround for ancillary windows not staying on top in KDE Plasma 5
In order to force ancillary windows in Ardour to stay on top, the following steps are necessary:
- Launch the System Settings application.
- Open Workspace > Window Management.
- Select Window Rules in the left-hand sidebar. It should default to the Window matching tab.
- Click on the New… button.
- On the line that says Window class (application), set the combo box to Substring Match and type ardour in the text entry field.
- In the list box that is labeled Window types:, click on the option Dialog Window, then press and hold Ctrl while clicking on the second option Utility Window.
- Select the Arrangement & Access tab.
- Check the box next to the Keep above option. On the same line, select Force from the combo box, then click on the Yes radio button for that line.
- Click on the OK button to dismiss the dialog.
At this point the System Settings application can be closed.
Background Info
According to one of the lead KDE developers, they are not willing to follow the ICCCM standard for utility windows. Apparently they are alone in this understanding, as plugin windows on Ardour under Linux work out of the box on every other WM out there.
Under KDE 4, there was a workaround in Ardour (Preferences > Theme > All floating windows are dialogs) that would "trick" KDE into forcing certain window types to be on top of their parent windows, but this no longer works under KDE Plasma 5.
I/O Setup
Connecting Audio and MIDI Devices
Normally Ardour does not care about how audio and MIDI gets into the computer—it pretty much deals only with its own inputs and outputs; it is up to the user to ensure that all external routing is sound. After all, Ardour has no way to know how signals from the outside world get to it. However, there are some things that Ardour can do to help troubleshoot problems with audio and MIDI connections—at least on the computer side.
For example, a typical setup might include a microphone that feeds a mixer that then feeds the computer. A failure can occur anywhere in that signal chain, including the cables that connect everything together. As far as Ardour is concerned, the most important connection is the one coming from the sound source to the physical audio input of the computer—in this example, the cable connecting between the mixer and the computer.
Common sense and basic troubleshooting skills are needed when problems arise, and in the above example, one would have to go through the entire signal chain to ensure that each component was working as it should.
For some cases, Ardour eliminates possible I/O issues. One such case is automatically saving I/O per device to sessions and restoring connections when switching the backend, e.g. from ALSA to PulseAudio and vice versa.
Common Problems
Ardour tries to set things up in a sane manner by automatically connecting the hardware inputs of the computer to its master input and the hardware outputs to the master output. If the signal coming into the hardware inputs is active, the meters on Ardour's master channel should move. If they don't, some things to check include:
- Making sure there is actually an input signal
- Making sure the input signal is getting into the computer
- Making sure that Ardour is talking to the correct sound card
- Making sure that the sound card in use by Ardour is working properly
Monitor Setup in Ardour
Ardour has two main settings which affect how monitoring is performed. The first is Edit > Preferences > Monitoring > Record monitoring handled by. There are two or three options here, depending on the capabilities of the hardware.
The other setting is the Session > Properties > Track Input Monitoring automatically follows transport state (auto-input).
Monitoring also depends on the state of the track's record-enable button and the session record-enable button, as well as on whether or not the transport is rolling.
If Ardour is set to external monitoring, Ardour does not do any monitoring.
Synchronization
On Clock and Time
Synchronization in multimedia involves two concepts which are often confused: clock (or speed) and time (location in time).
A clock determines the speed at which one or more systems operate. In the audio world this is generally referred to as Word Clock. It does not carry any absolute reference to a point in time: A clock is used to keep a system's sample rate regular and accurate. Word clock is usually at the frequency of the sample rate—at 48 kHz, its period is about 20 μs. Word Clock is the most common sample rate based clock but other clocks do exist such as Black and Burst, Tri-Level and DARS. Sample rates can be derived from these clocks as well.
Time or timecode specifies an absolute position on a timeline,
such as 01:02:03:04 (expressed as Hours:Mins:Secs:Frames). It is
actual data and not a clock signal per se.
The granularity of timecode is Video Frames and is an order of
magnitude lower than, say, Word Clock which is counted in
samples. A typical frame rate is 25 fps with a period of
40 ms.
In the case of 48 kHz and 25 fps, there are 1920 audio samples
per video frame.
The concepts of clock and timecode are reflected in JACK and Ardour:
JACK (Ardour does this internally if using the ALSA backend) provides clock synchronization and is not concerned with time code (this is not entirely true, more on jack-transport later). On the software side, jackd provides sample-accurate synchronization between all JACK applications. On the hardware side, JACK and Ardour use the clock of the audio-interface. Synchronization of multiple interfaces requires hardware support to sync the clocks. If two interfaces run at different clocks the only way to align the signals is via re-sampling (SRC—Sample Rate Conversion), which is expensive in terms of CPU usage and may decrease fidelity if done incorrectly.
Timecode is used to align systems already synchronized by a clock to a common point in time, this is application specific and various standards and methods exist to do this.
To make things confusing, there are possibilities to synchronize clocks using timecode. e.g. using mechanism called jam-sync and a phase-locked loop.
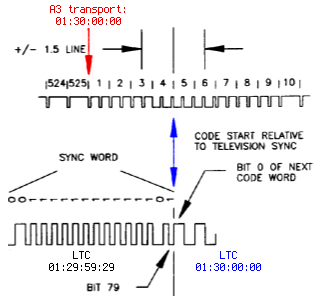
An interesting point to note is that LTC (Linear Time Code) is a Manchester encoded, frequency modulated signal that carries both clock and time. It is possible to extract absolute position data and speed from it.
Latency and Latency-Compensation
Latency is a system's reaction time to a given stimulus. There are many factors that contribute to the total latency of a system. In order to achieve exact time synchronization all sources of latency need to be taken into account and compensated for.
Sources of Latency
Sound propagation through the air
Since sound is a mechanical perturbation in a fluid, it travels at comparatively slow speed of about 340 m/s. As a consequence, an acoustic guitar or piano has a latency of about 1–2 ms, due to the propagation time of the sound between the instrument and the player's ear.
Digital-to-Analog and Analog-to-Digital conversion
Electric signals travel quite fast (on the order of the speed of light), so their propagation time is negligible in this context. But the conversions between the analog and digital domain take a comparatively long time to perform, so their contribution to the total latency may be considerable on otherwise very low-latency systems. Conversion delay is usually below 1 ms.
Digital Signal Processing
Digital processors tend to process audio in chunks, and the size of that chunk depends on the needs of the algorithm and performance/cost considerations. This is usually the main cause of latency when using a computer and the one that can be predicted and optimized.
Computer I/O Architecture
A computer is a general purpose processor, not a digital audio processor. This means the audio data has to jump a lot of fences in its path from the outside to the CPU and back, contending in the process with some other parts of the system vying for the same resources (CPU time, bus bandwidth, etc.)
The Latency Chain
Note! the rest of this document assumes the use of jackd for the audio backend. While many of the concepts are true, the specifics may be different.
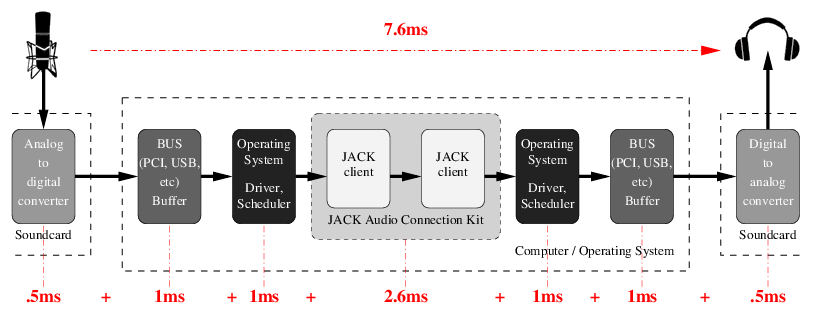
The numbers are an example for a typical PC. With professional gear and an optimized system the total round-trip latency is usually lower. The important point is that latency is always additive and a sum of many independent factors.
Processing latency is usually divided into capture latency (the time it takes for the digitized audio to be available for digital processing, usually one audio period), and playback latency (the time it takes for the audio that has been processed to be available in digital form). In practice, the combination of both matters. It is called round-trip latency: the time necessary for a certain audio event to be captured, processed and played back.
It is important to note that processing latency in Ardour is a matter of choice. It can be lowered within the limits imposed by the hardware (audio device, CPU and bus speed) and audio driver. Lower latencies increase the load on the system because it needs to process the audio in smaller chunks which arrive much more frequently. The lower the latency, the more likely the system will fail to meet its processing deadline and the dreaded xrun (short for buffer over- or under-run) will make its appearance more often, leaving its merry trail of clicks, pops and crackles.
The digital I/O latency is usually negligible for integrated or PCI audio devices, but for USB or FireWire interfaces the bus clocking and buffering can add some milliseconds.
Low Latency Use Cases
Low latency is not always a feature one wants to have. It comes with a couple of drawbacks: the most prominent is increased power consumption because the CPU needs to process many small chunks of audio data, it is constantly active and can not enter power-saving mode (think fan noise). Since each application that is part of the signal chain must run in every audio cycle, low-latency systems will undergo context switches between applications more often, which incur a significant overhead. This results in a much higher system load and an increased chance of xruns.
For a few applications, low latency is critical:
Playing virtual instruments
A large delay between the pressing of the keys and the sound the instrument produces will throw off the timing of most instrumentalists (save church organists, whom we believe to be awesome latency-compensation organic systems.)
Software audio monitoring
If a singer is hearing her own voice through two different paths, her head bones and headphones, even small latencies can be very disturbing and manifest as a tinny, irritating sound.
Live effects
Low latency is important when using the computer as an effect rack for inline effects such as compression or EQ. For reverbs, slightly higher latency might be tolerable, if the direct sound is not routed through the computer.
Live mixing
Some sound engineers use a computer for mixing live performances. Basically that is a combination of the above: monitoring on stage, effects processing and EQ.
In many other cases, such as playback, recording, overdubbing, mixing, mastering, etc. latency is not important, since it can easily be compensated for.
To explain that statement: During mixing or mastering, one doesn't care if it takes 10ms or 100ms between the instant the play button is pressed and the sound coming from the speaker. The same is true when recording with a count in.
Latency compensation
During tracking it is important that the sound that is currently being played back is internally aligned with the sound that is being recorded.
This is where latency compensation comes into play. There are two ways to compensate for latency in a DAW, read-ahead and write-behind. The DAW starts playing a bit early (relative to the playhead), so that when the sound arrives at the speakers a short time later, it is exactly aligned with the material that is being recorded. Since we know that playback has latency, the incoming audio can be delayed by the same amount to line things up again.
The second approach is prone to various implementation issues regarding timecode and transport synchronization. Ardour uses read-ahead to compensate for latency. The time displayed in the Ardour clock corresponds to the audio signal that is heard on the speakers (and is not where Ardour reads files from disk).
As a side note, this is also one of the reasons why many projects start at timecode 01:00:00:00. When compensating for output latency the DAW will need to read data from before the start of the session, so that the audio arrives in time at the output when the timecode hits 01:00:00:00. Ardour does handle the case of 00:00:00:00 properly but not all systems/software/hardware that you may inter-operate with may behave the same.
Latency Compensation And Clock Sync
To achieve sample accurate timecode synchronization, the latency introduced by the audio setup needs to be known and compensated for.
In order to compensate for latency, JACK or JACK applications need to know exactly how long a certain signal needs to be read-ahead or delayed:

In the figure above, clients A and B need to be able to answer the following two questions:
- How long has it been since the data read from port Ai or Bi arrived at the edge of the JACK graph (capture)?
- How long will it be until the data written to port Ao or Bo arrives at the edge of the JACK graph (playback)?
JACK features an API that allows applications to determine the answers to above questions. However JACK can not know about the additional latency that is introduced by the computer architecture, operating system and soundcard. These values can be specified by the JACK command line parameters -I and -O and vary from system to system but are constant on each. On a general purpose computer system the only way to accurately learn about the total (additional) latency is to measure it.
Calibrating JACK Latency
Linux DSP guru Fons Adriaensen wrote a tool called jack_delay to accurately measure the round-trip latency of a closed loop audio chain, with sub-sample accuracy. JACK itself includes a variant of this tool called jack_iodelay.
Jack_iodelay allows to measure the total latency of the system, subtracts the known latency of JACK itself and suggests values for jackd's audio-backend parameters.
jack_[io]delay works by emitting some rather annoying tones, capturing them again after a round trip through the whole chain, and measuring the difference in phase so it can estimate with great accuracy the time taken.
The loop can be closed in a number of ways:
- Putting a speaker close to a microphone. This is rarely done, as air propagation latency is well known so there is no need to measure it.
- Connecting the output of the audio interface to its input using a patch cable. This can be an analog or a digital loop, depending on the nature of the input/output used. A digital loop will not factor in the AD/DA converter latency.
Once the loop has been closed, one must:
- Launch jackd with the configuration to test.
- Launch jack_delay on the command line.
- Make the appropriate connections between the jack ports so the loop is closed.
- Adjust the playback and capture levels in the mixer.
On Linux, the latency of USB audio interfaces is not constant. It may change when the interface is reconnected, on reboot and even when xruns occur. This is due the buffer handling in the Linux USB stack. As a workaround, it is possible to recalibrate the latency at the start of each session and each time an xrun occurs.
Timecode Generators and Slaves
Ardour supports three common timecode formats: LTC, MTC, and MIDI Clock, as well as JACK-transport, a JACK-specific timecode implementation.
Ardour can generate timecode and thus act as timecode master,
providing timecode information to other applications. Ardour can also be
slaved to some external source in which case the playhead
follows the incoming timecode.
Combining the timecode slave and generator modes, Ardour can also
translate timecode. e.g create LTC timecode from incoming MTC.
Ardour Timecode Configuration
Each Ardour session has a specific timecode frames-per-second setting which is configured in session > properties > timecode. The selected timecode affects the timecode ruler in the main window as well as the clock itself.
Note that some timecode formats do not support all of Ardour's available fps settings. MTC is limited to 24, 25, 29.97 and 30 fps.
The video pull-up modes change the effective samplerate of Ardour to allow for changing a film soundtrack from one frame rate to another. The concept is beyond the scope of this manual, but Wikipedia's entry on Telecine may be a good start.
Ardour Timecode Generator Configuration
This is pretty straightforward: simply turn it on. The MTC and MIDI-Clock generator do not have any options. The LTC generator has a configurable output level. JACK-transport cannot be generated. Jack itself is always synced to its own cycle and cannot do varispeed—it will always be synced to a hardware clock or another JACK master.
The relevant settings for timecode generator can be found in Edit > Preferences > MIDI Preferences (for MTC, MC) and Edit > Preferences > Transport Preferences (for LTC).
The timecode is sent to jack-ports ardour:MTC out,
ardour:MIDI clock out and ardour:LTC-out. Multiple
generators can be active simultaneously.
Note that, as of Jan 2014, only the LTC generator supports latency compensation. This is due to the fact the Ardour MIDI ports are not yet latency compensated.
In Session > Properties, it is possible to define an offset between Ardour's internal time and the timecode sent. Currently only the LTC generator honors this offset.
Both LTC and MTC are limited to 30 fps. Using frame rates larger than that will disable the generator. In both cases also only 24, 25, 29.97df (drop-frame) and 30 fps are well defined by specifications (such as SMPTE-12M, EU and the MIDI standard).
MTC Generator
The MTC generator has no options. Ardour sends full MTC frames whenever the transport is relocated or changes state (start/stop). MTC quarter frames are sent when the transport is rolling and the transport speed is within 93% and 107%.
LTC Generator
The level of the LTC generator output signal can be configured in the Preferences > Transport dialog. By default it is set to -18 dBFS, which corresponds to 0dBu in an EBU calibrated system.
The LTC generator has an additional option to keep sending timecode even when the transport is stopped. This mode is intended to drive analog tape machines which unspool the tape if no LTC timecode is received.
LTC is sent regardless of Ardour's transport speed. It is accurately generated even for very slow speeds (<5%) and only limited by the soundcard's sampling-rate and filter (see Gibbs phenomenon) for high speeds.
Ardour Slave Configuration
The timecode source can be switched with the button just right of Ardour's main clock. By default it is set to Internal in which case Ardour will ignore any external timecode. The button allows to toggle between Internal and the configured timecode source which is chosen in Edit > Preferences > Transport.
When Ardour is chasing (synchronizing to) an external timecode source, the following cases need to be distinguished:
- the timecode source shares the clock
- the timecode source is independent (no wordclock sync)
and
- the timecode source uses the same FPS setting as Ardour
- the timecode source runs at different frames-per-second
In both cases the first option is preferred: clock sync + same FPS setting.
If the frames-per-second do not match, Ardour can either re-calculate and map the frames, or the configured FPS (Session > Properties) can be changed automatically while the slave is active. The behavior is configured with the checkbox Edit > Preferences > Transport > Match session video frame rate to external timecode.
When enabled, the session video frame rate will be changed to match that of the selected external timecode source. When disabled, the session video frame rate will not be changed to match that of the selected external timecode source. Instead the frame rate indication in the main clock will flash red, and Ardour will convert between the external timecode standard and the session standard.
29.97 drop-frame timecode is another corner case. While the SMPTE 12M-1999
specifies 29.97df as 30000/1001 frames per second, not all hardware devices
follow that standard. The checkbox
Lock to 29.9700 fps instead of 30000/1001 allows
to use a compatibility mode for those devices.
When enabled, the external timecode source is assumed to use 29.970000 fps
instead of 30000/1001. SMPTE 12M-1999 specifies 29.97df as 30000/1001. The
spec further mentions that drop-frame
timecode has an accumulated error of -86 ms over a 24-hour period.
Drop-frame timecode would compensate exactly for a NTSC color frame rate
of 30 * 0.9990 (ie 29.970000). That is not the actual rate. However,
some vendors use that rate—despite it being against the
specs—because the variant of using exactly 29.97 fps yields zero
timecode drift.
Clock Sync Lock
As described in the On Clock and Time chapter, timecode and clock are independent. If the external timecode source is not in sample-sync with the audio hardware (and JACK), Ardour needs to run at varispeed to adjust for the discrepancy.
The checkbox External timecode is sync locked allows to select the behavior according to the setup. When enabled, it indicates that the selected external timecode source shares sync (Black & Burst, Wordclock, etc) with the audio interface.
In other words: if enabled, Ardour will only perform initial synchronization and keep playing at speed 1.0 instead of vari-speed adjusting to compensate for drift.
MIDI Clock
MIDI Clock is not a timecode format but tempo-based time. The absolute reference point is expressed as beats-per-minute and Bar, Beat and Tick. There is no concept of sample-locking for MIDI clock signals. Ardour will vari-speed if necessary to chase the incoming signal.
Note that the MIDI Clock source must be connected to the
ardour:MIDI clock in port.
LTC—Linear Timecode
The LTC slave decodes an incoming LTC signal on a JACK audio port. It will auto-detect the frame rate and start locking to the signal once two consecutive LTC frames have been received.
The incoming timecode signal needs to arrive at the
ardour:LTC-in port. Port-connections are restored for each
session and the preference dialog offers an option to select it for all
sessions.
Ardour's transport is aligned to LTC-frame start/end positions according to the SMPTE 12M-1999 specification, which means that the first bit of an LTC-Frame is aligned to different Lines of a Video-Frame, depending on the TV standard used. Only for Film (24fps) does the LTC-Frame directly match the video Frame boundaries.
Ardour supports vari-speed and backwards playback but will only follow speed changes if the sync locked option is disabled.
While Ardour is chasing LTC, the main transport clock will display the received Timecode as well as the delta between the incoming signal and Ardour's transport position.
A global offset between incoming timecode and Ardour's transport can be configured in Session > Properties.
The user-bits in the received LTC frame are ignored.
MTC—MIDI Timecode
Ardour's MTC slave parses full timecode messages as well as
MTC quarter-frame messages arriving on the
ardour:MTC in port. The transport will only start rolling
once a complete sequence of 8 quarter frames has been received.
Ardour supports vari-speed and backwards playback but will only follow MTC speed changes if the sync locked option is disabled.
When Ardour is chasing MTC, the main transport clock will display the received timecode as well as the delta between the incoming signal and Ardour's transport position.
JACK Transport
When slaved to jack, Ardour's transport will be identical to JACK Transport. As opposed to other slaves, Ardour can be used to control the JACK transport states (stopped/rolling). No port connections need to be made for JACK Transport to work.
JACK Transport does not support vari-speed, nor offsets. Ardour does not chase the timecode but is always in perfect sample-sync with it.
JACK Transport also includes temp-based time information in Bar:Beats:Ticks and beats-per-minute. However, only one JACK application can provide this information at a given time. The checkbox Session > Properties > JACK Time Master configures Ardour to act as translator from timecode to BBT information.
Overview of all Timecode related settings
Timecode settings are accessed from the menu in three places:
- Session > Properties > Timecode
- Edit > Preferences > Transport
- Edit > Preferences > MIDI
Timecode Settings
| Timecode frames-per-second | Configure timecode frames-per-second (23.976, 24, 24.975, 25, 29.97, 29.97 drop, 30, 30 drop, 59.94, 60). Note that all fractional framerates are actually fps*(1000.0/1001.0). |
|---|---|
| Pull up/down | Video pull-up modes change the effective samplerate of Ardour to allow for changing a film soundtrack from one frame rate to another. See Telecine |
| Slave Timecode offset | The specified offset is added to the received timecode (MTC or LTC). |
| Timecode Generator offset | Specify an offset which is added to the generated timecode (so far only LTC). |
| JACK Time Master | Provide Bar|Beat|Tick and other information to JACK. |
These settings are session specific.
Transport Preferences
| External timecode source | Select timecode source: JACK, LTC, MTC, MIDI Clock |
|---|---|
| Match session video frame rate to external timecode | This option controls the value of the video frame rate while chasing an external timecode source. When enabled, the session video frame rate will be changed to match that of the selected external timecode source. When disabled, the session video frame rate will not be changed to match that of the selected external timecode source. Instead the frame rate indication in the main clock will flash red and Ardour will convert between the external timecode standard and the session standard. |
| External timecode is sync locked | Indicates that the selected external timecode source shares sync (Black & Burst, Wordclock, etc) with the audio interface. |
| Lock to 29.9700 fps instead of 30000/1001 | The external timecode source is assumed to use 29.97 fps instead of 30000/1001. SMPTE 12M-1999 specifies 29.97df as 30000/1001. The spec further mentions that drop-frame timecode has an accumulated error of -86ms over a 24-hour period. Drop-frame timecode would compensate exactly for a NTSC color frame rate of 30 * 0.9990 (ie 29.970000). That is not the actual rate. However, some vendors use that rate—despite it being against the specs—because the variant of using exactly 29.97 fps has zero timecode drift. |
| LTC incoming port | Offers a session agnostic way to retain the LTC port connection. |
| Enable LTC generator | Does just what it says. |
| Send LTC while stopped | Enable to continue to send LTC information even when the transport (playhead) is not moving. This mode is intended to drive analog tape machines which unspool the tape if no LTC timecode is received. |
| LTC generator level | Specify the Peak Volume of the generated LTC signal in dbFS. A good value is 0 dBu (which is -18 dbFS in an EBU calibrated system). |
These settings are common to all sessions.
MIDI Preferences
| Send MIDI Timecode | Enable MTC generator |
|---|---|
| Send MIDI Clock | Enable MIDI Clock generator |
These settings are also common to all sessions.
Transport Masters
The Transport Masters dialog allows selecting a transport master (a timecode source) for Ardour to sync to, as well as tweaking additional settings.

Supported protocols are:
- JACK Transport
- MIDI Time Code (MTC)
- Linear (or Longitudinal) Timecode (LTC)
- MIDI Beat Clock, or MIDI Clock
For each type of supported protocol it's possible to select the port to read timecode signal from, view sync position and drift (delta), see when any message was received the last time, and toggle additional options.`
Selecting a Transport Master
The dialog collects all transport masters information and settings in one place, however Ardour can sync only to one timecode source at a time. Clicking the radio button to the left of the master's name selects that transport master.
It is necessary to also select an audio or MIDI port (depending on the protocol) to read timecode data from. Relevant ports are listed for each transport master in the dropdown list in the Source section.
Keeping Track of Sync
Format displays the timecode format for each transport master depending on the specifics of that master's protocol. E.g. while MTC and LTC will display a frame rate such as 25 fps, MIDI Clock will be transmitting tempo such as 120 beats per minute.
Sync Position + Delta displays current location as per timecode as well as the difference between current location in Ardour and the location per timecode source. This difference (delta) accumulates as long as Ardour's transport isn't rolling.
Last Message + Age displays the latest location transmitted by the timecode source, as well as the time since the last transmission was received.
Additional Options
It's possible to set several additional options.
Active Commands makes it possible to perform certain types of actions in Ardour at the cost of decoupling from the transport master. Supported options are:
- Accept start/stop commands (displays 'Start/Stop' on the button)
- Accept speed-changing commands (displays 'Speed' on the button)
- Accept locate commands (displays 'Locate' on the button)
When only one command is enabled, its short name will displayed at the button's caption (see above). When two out of three are enabled, the button's caption will be 'Complex'. When all three options are enabled, the caption will be 'All'.
The easiest way to select two or three options at a time is to open the drop-down menu, use arrow up/down keys to navigate to the option of interest, the press Spacebar to toggle that option without subsequently closing the drop-down menu.
Clock Synced — when this option is enabled, the external timecode source is assumed to be sample-clock synced to the audio interface that is being used by Ardour
29.97/30 — when this option is enabled, the external timecode source is assumed to use 29.97 fps exactly rather than 30000/1001 (which is 29.97002997).
Both Clock Synced and 29.97/30 options are not applicable to MIDI Beat Clock that operates in the musical time domain and transmits beats per minute rather that seconds and frames.
Adding and Removing Custom Transport Masters
It is possible to add additional masters of the same type, e.g. two difference sources of LTC.
Clicking Add a New Transport Master opens a new dialog.
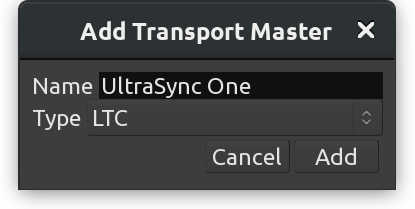
It's usually a good idea to give the custom transport master a descriptive name, especially if there are multiple ones available using the same protocol.
The next step is selecting the audio or MIDI port where the timecode signal will be coming from.
Additional transport masters can be removed with a single click. Every custom transport master has a button with a crosshair icon X to the right of the window. No confirmation will be asked upon clicking this button.
Preferences
Global preferences control general workflow and system configuration, and should apply to all sessions. They are located in Edit > Preferences and stored in Ardour's user configuration file in the user's home directory.

Settings can be searched for using the input box in the lower left corner of the Preferences window. Typing in a keyword and pressing Enter will open the Preferences pages where the first occurrence of the keyword is available, the setting will be highlighted. Pressing Enter again will highlight the next occurrence (where available).
Preferences are conveniently grouped by category:
- General
- Appearance
- Editor
- MIDI
- Transport
- Plugins
- Monitoring
- Signal Flow
- Metronome
- Control Surfaces
- Metering
- Performance
- Video
- Triggering
General
-
Audio/MIDI Setup
- Show Audio/MIDI Setup window Shows the Audio/MIDI Setup dialog.
- Try to auto-launch audio/midi engine allows Ardour to try to automatically launch the audio and MIDI system, driver and device, thus not showing the Audio/MIDI Setup dialog. This can save a little time if the system is always used the same way.
-
Editor Undo defines the behaviour of the Undo operations:
- Limit undo history sets how many commands can be undone using Z or Edit > Undo. Unchecking will keep an endless memory of operations to undo, at the expense of memory.
- Save undo history sets how many commands are saved so they are available to be undone after reopening the session. This can also be unchecked to keep all actions undoable, at the cost of bigger session files.
- Verify removal of last capture when enabled prompts to verify removal the last recording capture when Edit > Remove Last Capture is executed.
-
Session Management:
- Make periodic backups of the session file will create a backup session file after changes to the timeline. The backup file is the session name followed by .ardour.bak. The backup can be used to recover from crashes when the session had not been explicitly saved.
- Default folder for new sessions: defaults the folder where Ardour will create new session folders. This is used in the Session Setup dialog displayed by Session > New.
- Maximum number of recent sessions: determines how many of the last opened sessions shows in the Recent Sessions dialog displayed by Session > Recent.
-
Selection:
- Group operations on selected tracks: this controls the behavior where selecting multiple tracks in the mixer and e.g. dragging the gain fader in one track drags faders in other selected tracks by the same amount.
-
Import:
- Drag and drop import always copies files to session selects, and then disables changes to, the Copy files to session option in the Add Existing Media dialog.
- Cache Folder for downloaded Freesound clips: when you try sounds form FreeSound.org before inserting them into the project, they need to be saved locally on your computer; this is where you define the folder for those temporary files.
-
Export
-
Save loudness analysis as image file after export allows, when the
Analyze Exported Audio is checked in the
Export dialog, to save the analysis graph
as a file named
session.pngalongside the exported audio file(s) (in the same folder). -
Save Mixer screenshot after export creates and exports
a graphical image of the Mixer window as a file named
session-mixer.pngalongside the exported audio file(s) (in the same folder).
-
Save loudness analysis as image file after export allows, when the
Analyze Exported Audio is checked in the
Export dialog, to save the analysis graph
as a file named
-
New Version Check
- Check for announcements at application start sends an anonymous request to Ardour's server to check for a new version.
Appearance
-
GUI Lock
- Lock timeout (seconds): locks the GUI after this many idle seconds (zero being 'never lock'). The GUI can also be locked with Session > Lock. When locked, a dialog will display a "Click to unlock" button.
- System Screensaver Mode: can be used to prevent the screensaver to be launched by the system, either while recording (e.g. for long and unattended recording session), when Ardour is simply started, or never (the screensaver is then able to start).
-
Theme
- Color faders with track/bus colors: when enabled, fills faders for tracks and busses with respective track or bus colors.
- Draw "flat" buttons: when enabled, button controls in the user interface will be drawn with a flat look. When disabled button controls will have a slight 3D appearance.
- Draw "boxy" buttons: when enabled, button controls in the user interface will have square corners instead of being slightly rounded.
- LED meter style if checked, the bar meters in the editor and mixer will be styled to look like if they were made of LEDs, with a dotted bar. Unchecking this option makes the bars flat and continuous.
-
Graphical User Interface
- Highlight widgets on mouseover, when checked, makes Ardour's widgets (buttons, sliders, …) slightly change color when the mouse hovers them, visually indicating what a mouse action would interact with.
- Show tooltips if mouse hovers over a control when checked, displays a little help bubble about the control the mouse hovers. The mouse pointer needs to stay idle for about 1 sec for the tooltip to appear.
- Update clocks at TC Frame rate: Ardour updates its clocks every 100 ms. Checking this will make the clock refresh at every TimeCode frame which is more responsive, at the cost of a bit more system stress.
- Blink Rec-Arm buttons: when enabled, the record-armed buttons on tracks will blink when they are armed but not currently recording. When disabled, the record-armed buttons on tracks will be outlined in red instead of blinking. The global record-arm button in the Transport bar is unaffected.
- Blink Alert indicators: when enabled, the Alert indicators (like the Error Log or the Feedback button) will blink when they are active (when an error or feedback has been detected, respectively). When disabled, the indicators will turn red instead of blinking.
-
Graphics Acceleration
- Use intermediate image-surface to render canvas (requires restart): Ardour uses hardware accelerated UI rendering by default for speed. Sometimes though, a buggy driver can cause this to make the system slow or unstable. Checking this will make Ardour draw its UI without hardware acceleration, in software, improving stability and responsiveness on those buggy systems at the expense of speed.
Recorder
-
Input Meter Layout
- Input Meter Layout: in Recorder mode, determines if audio inputs are displayed horizontally or vertically.
Editor
-
General
- Use name highlight bars in region displays (requires a restart): when enabled, the region name is displayed, in the editor, in its own opaque bar at the bottom of the region. When disabled, the region name is overlaid at the top of the region, possibly over audio waveforms or MIDI notes.
- Region color follows track color: when enabled, the background color of regions in the editor will be displayed using the color assigned to the track. When disabled the default region background color will be used.
- Show Region Names: when enabled, overlays the name of the region over its waveform representation, in the top-left.
- Waveforms color gradient depth: determines how much gradient effect is applied to the inner of audio waveforms displayed in the editor. Values range from 0.0, no gradient effect, to 1.0, maximum effect.
- Timeline item gradient depth: Determines how much gradient effect is applied to the backgrounds of regions displayed in the editor. Values range from 0.0, no gradient effect, to 1.0, maximum effect.
-
Track name ellipsize mode: when the track header is not
wide enough to display the track's name in full, selects how the
name will be shorten between:
- Ellipsize start of name will show only the end of the name
- Ellipsize middle of name will show only the start and end of the name
- Ellipsize end of name will show only the start of the name
- Add a visual gap below Audio Regions: selects whether or not the audio regions fit the height of the track or leave a gap at the bottom, either small or large.
-
Editor Meters
- Show meters in track headers: when enabled, shows a small meter in the Editor's track headers. The meter is shown on the right side area of the header and provides an instant, if imprecise, view of the levels on this track/bus.
- Limit track header meters to stereo: if a track has more than two outputs (e.g. with a drum plugin), limits the number of meters in the track header to the first two ones. Only affects audio meters, not MIDI.
-
MIDI Regions
- Display first MIDI bank/program as 0: when patches and bank changes are displayed in the editor, if this option is checked, the numbering will be zero-based instead of one-based, i.e. banks/programs will be numbered O, 1 ,2… instead of 1, 2, 3…
- Don't display periodic (MTC, MMC) SysEx messages in MIDI Regions: if checked, will hide these control messages from the MIDI regions for better legibility.
- Show velocity horizontally inside notes: when on, each note of a MIDI region (in Sustained mode) displays its velocity (0-127) with a darker fill proportional to its value.
- Use colors to show note velocity: if checked, makes the saturation of the notes color proportional to its velocity, hence making a more veloce note more intense in color.
-
Display note names in track headers: allows selecting in
which scenario Ardour will display note names:
- Always — Ardour will always try to display note names regardless of whether they are available through a MIDNAM file.
- When Available — Ardour will only show note names when they are provided in a MIDNAM file.
- Never — Ardour will never display note names.
Waveform
-
Editor Waveforms
- Show waveforms in regions: when enabled, shows a visual representation of the region's audio waveform.
- Show waveforms while recording: when enabled, will draw the audio waveform in regions being recorded, in near real time. When disabled, only a region block will be drawn while recording, reducing CPU requirements.
- Show waveform clipping: when enabled, the waveform displayed will show peaks marked in red if they exceed the clip level.
- Waveform Clip Level (dBFS): sets the level at which the waveform shown in an audio region will be drawn in red to indicate clipping. Setting lower than 0.0 dBFS can be useful if any tool in the audio chain has problems near 0.0 dBFS.
- Waveform scale: when waveforms are shown in audio regions, they can be displayed using a linear or a logarithmic scale. See Waveform display.
- Waveform shape: when waveforms are shown in audio regions, they can be displayed using a traditional or a rectified shape. See Waveform display.
Mixer
-
Mixer Strip
- This table enables (checked) or disables (unchecked) the display of controls in the mixer strip. Controls whose display can be toggled are: Input, Phase Invert, Record & Monitor, Solo Iso/Lock, Output, Comments and VCA Assigns.
- Use narrow strips in the mixer for new strips by default When enabled, new mixer strips are created in narrow format. When disabled, they are created in wide format. Existing mixer strips width can be toggled with the width control at the top left of the mixer strip.
- Limit inline-mixer-strip controls per plugin : Whether or not, and how many, controls each plugin can show in the mixer strip. These mixer-strip controls are added by checking plugin context-menu > Controls > □ control parameter.
Application Bar
-
Main Transport Toolbar Items: this section allows to toggle the
visibility of some elements of the application bar:
- Display Record/Punch Options toggles the visibility of the punch and record slice of the application bar.
- Display Plugin Delay Compensation Info toggles the visibility of the Latency Compensation slice of the application bar.
- Display Secondary Clock toggles the visibility of the secondary clocks slice of the application bar.
- Display Cue Rec/Play Controls toggles the visibility of the buttons that enable creating and playing back cue markers.
- Display Selection Clock toggles the visibility of the selection clocks slice of the application bar.
- Display Navigation Timeline toggles the visibility of the navigation/mini timeline slice of the application bar.
- Display Master Level Meter toggles the visibility of the selection clocks slice of the application bar.
- Display Monitor Section Info toggles the visibility of the Monitor Info slice of the application bar.
-
Display Action-Buttons
- Column n enables or disables the visibility of the six possible columns of Lua script buttons. Each columns contains two user-assignable buttons.
Size and Scale
-
User Interface Size and Scale
- GUI and Font scaling: allows the display size of most of the text and buttons in the user interface to be scaled up or down. May require a restart to take effect.
- Drag deadzone: provides broad control over how many pixels the pointer must move before a drag (or copy-drag) begins.
Colors
-
Colors
- Color Theme allows to switch between some presets bundled with Ardour, changing both the palette and items colors, hence styling Ardour all at once.
-
The table allows to change the color settings in Ardour by acting on three
parameters:
- Items that allow to choose any color from the palette (see below) to color a UI element. Clicking on a color sample in the Color column bring up the Palette, to choose from.
- Palette that allows to create a set of colors that will be used in the UI. Using a palette allows for better consistency, instead of picking "free" colors for each UI element. Clicking on a color patch brings up a full color selector, to assign this color to this patch of the palette.
- Transparency where possible, allows to select, with a slider, the transparency of the UI element, with 0 (slider to the left) being fully opaque.
- Restore Defaults turns all the palette, item colors and transparency back to Ardour's default base setting, in case Ardour's appearance has turned into a toddler's toy.
- Use color-palette to assign color for new tracks enables color-coding of tracks by picking colors from a fixed palette and assigning them to regions' backgrounds and, optionally, to respective faders of tracks and busses (there is a dedicated setting for that). When disabled, all regions (and faders) have a neutral gray background.
- Use color-palette to assign color for new busses does the same as the setting above, but with regards to busses.
- Use color-palette to assign color for new VCA does the same as the setting above, but with regards to VCAs.
Quirks
-
Various Workarounds for Windowing Systems: As Ardour is available
on a number of platforms and windowing systems, some specific workarounds are
sometimes required to provide a smooth experience to the user.
- Use visibility information provided by your Window Manager/Desktop allows the system window manager's rules for the windows visibility to supersede Ardour's.
- Show/Hide splash screen instead of setting z-axis stack order: Hides the splash instead of re-layering it. This setting requires a restart of Ardour to take effect.
- All floating windows are dialogs: when enabled, Ardour will use type "Dialog" for all floating windows instead of using type "Utility" for some of them. This may help usability with some window managers. This setting requires a restart of Ardour to take effect.
- Transient windows follow front window.: when enabled, transient windows will follow the front window when toggling between the editor and mixer. This setting requires a restart of Ardour to take effect.
- Float detached monitor-section window: as the monitor section can be detached from the mixer, this option makes it a floating window, which may be handled differently by the windowing system and easier to access.
- Allow to resize Engine Dialog: allow to resize the engine dialog window to work around a bug on some XWayland systems that render this dialog as blank.
Translation
-
Internationalization
- Use translations sets if Ardour should use a translated version of all the messages. The default (unchecked) is English (US). When checked, and if a language file exists for the system language, this file will be used to translate Ardour.
Regions
-
Region Information
- Show xrun markers in regions puts a marker on the region(s) while recording, when a buffer over/underflow happens.
- Show cue markers in regions determines if cue markers, that are bounded to regions, are displayed or not.
- Show gain envelopes in audio regions: sets in which modes the gain envelope is displayed in audio regions. The gain envelope is superimposed over the region in the selected modes, and hidden otherwise for a better legibility.
Editor
-
Scroll and Zoom Behaviors
- Zoom to mouse position when zooming with scroll wheel: by default, Ardour zooms to the edit point. When this option is checked, and the zoom is done with + mousewheel, the zoom will happen at the mouse cursor position regardless of the edit point chosen.
- Zoom with vertical drag in rulers allows, when checked, to click anywhere in an empty zone of the ruler zone and drag up to zoom in or down to zoom out.
- Double click zooms to selection allows by double clicking, to zoom on the selection, both on the time and tracks axes. If the selection has been done with or , then this key should still be pressed when double clicking for this to work, otherwise the first click breaks the group selection.
- Update editor window during drags of the summary: when enabled the contents of the editor window will redraw the tracks area as the selection rectangle in the summary area is moved or resized.
- Auto-scroll editor window when dragging near its edges when enabled will scroll the editor window automatically when dragging a region. This can make it easier to see where to position the region.
- Auto-scroll speed when dragging playhead: chooses how fast the canvas scrolls when dragging the playhead outside of the visible canvas.
- Limit zoom & summary view beyond session extents to: prevents the zoom out both in the editor and the summary, to show anything past the chosen time after the end marker, restraining the vision to only useful content.
-
Editor Behaviour
- Move relevant automation when audio regions are moved, when enabled, causes automation data to stay with a region when the region is moved inside the playlist. When disabled, the automation is not affected by movement of regions.
- Ignore Y-axis click position when adding new automation-points allows to create new automation points at the x-position of the mouse, without using the Y-position as the value, hence creating a new automation point at its present value.
- Automation edit cancels auto hide determines whether automation lanes that have been automatically shown because of the Edit > Show Automation Lane on Touch option should be kept visible if the automation has been touched.
- Default fade shape: sets which fade shape is the default.
- Regions in edit groups are edited together: sets the criteria to see if editing actions apply to tracks grouped together in an group.
- Layering model: Ardour allows layering multiple regions in the same track. This selector defines how these layers are managed, either manually or by placing the latest on top.
-
Split/Separate
-
After a Separate operation, in Range mode: determines what
should become of the Range selection after a Separate operation:
- Clear the Range Selection: nothing is selected anymore
- Preserve the Range Selection: the range selection is kept
- Force-Select the regions under the range: the regions that were in the range selection are selected in Grab/Object mode
-
After a Split operation, in Object mode: determines which,
if any, regions are selected after a split operation. The options are:
- Clear the Region Selection: nothing is selected anymore
- Select only the newly-created regions BEFORE the split point: if regions have been affected by the split, then the regions created by the split before the split point is selected
- Select only the newly-created regions BEFORE the split point: same as above, for the regions created after the split point
- Select the newly-created regions: sum of the two above, i.e. all the regions that are created as a result of the split are selected.
- Preserve the existing selection, AND select all newly-created regions: same as above (all the parts that have been created by the split) plus the unaffected regions that were selected before the split.
-
After a Separate operation, in Range mode: determines what
should become of the Range selection after a Separate operation:
-
Region Editing
- Region Editing Preference: this controls whether double-clicking to edit a region opens a new window or uses the bottom panel of the editor.
Snap
-
General Snap options :
- Snap Threshold (pixels): is the maximum distance between a snap anchor and an object for Ardour to force the object to be placed precisely at that anchor.
- Approximate Grid/Ruler granularity (pixels): Ardour tries to show a reasonable number of grid lines at the current zoom level and in the available screen estate. This value tells Ardour what the approximate absolute distance between two closest grid lines should be, so that it displays the most relevant grid scale to approximately fit this distance.
- Show "snapped cursor" If the Edit point is not the playhead, shows the currently selected Edit point as a blue line, to indicate where the next editing operation will occur.
- Snap rubberband selection to grid makes the highlighted zone created by an area selection also snap to grid, i.e. the beginning and end of the resulting selecting box will both be grid anchors.
- Grid switches to alternate selection for Internal Edit Tools. Two levels of grid mode can coexist in Ardour, one for global regions manipulations, and one for finer, in-region editing (e.g. for placing MIDI events in a MIDI region). When this option is checked, entering Internal Edit mode makes the grid mode switch from one mode to the other.
- Rulers automatically change to follow the Grid mode selection If enabled, changing the Grid mode also makes the relevant ruler visible, while hiding the other ones.
-
Snap Target Mode:
-
When "Snap" is enabled, snap to:
Lists the different possible anchors to which an object should snap to, among:
- Markers
- Playhead
- Region Sync points
- Region Starts
- Region Ends
- Grid
-
When "Snap" is enabled, snap to:
Lists the different possible anchors to which an object should snap to, among:
-
Snap Targets
- Markers: whether markers are snap targets
- Playhead: whether the playhead is a snap targets
- Region Sync Points: whether region sync points are snap targets
- Regions Starts: whether regions starts are snap targets
- Regions Ends: whether regions ends are snap targets
Modifiers
This page allows to choose how things are done in the editor. This is a very flexible way for Ardour to match an existing workflow, or speed up the editing process based on the user's most used actions.
The Reset to recommended defaults button at the bottom provides a way to revert any user made change to its default value.
MIDI
-
Session
- Allow non quarter-note pulse: by default, Ardour understands the tempo as the number of quarter notes in a minute. Checking this option allows to set the tempo based on any division of the note, from whole to 1/128th. This is reflected in the Edit Tempo window (accessed by double clicking a tempo marker) that shows a "Pulse" menu when this option is checked.
-
Initial program change: Ardour will send a MIDI program
change message on the
ardour:MMC outMIDI port when a session is loaded and whenever this field is changed. A value of -1 means don't send any program change message.
-
Audition
- Sound MIDI notes as they are selected in the editor will play any selected or added MIDI note when in Draw or Internal Edit modes. The note is sent as MIDI as if Ardour was playing it with the session, so the processors and signal routing will be applied.
-
Virtual Keyboard
- Virtual Keyboard Layout: selects which (if any) computer keyboard layout is used to be mapped on the keys of the musical keyboard of the Virtual Keyboard (Window > Virtual Keyboard).
-
Default Visible Note Range
- Default lower visible MIDI note: this note will be the lowest visible one on the timeline unless you tweak that by adjusting the vertical range. E.g. C4 is C on the fourth octave.
- Default upper visible MIDI note: this note will be the highest visible one on the timeline unless you tweak that by adjusting the vertical range. E.g. B4 is B on the fourth octave.
- Maximum note height sets the height of MIDI notes in pixels at maximum vertical zoom. Attempting to zoom in closer will result in scrolling the pianoroll up or down.
-
MIDI Port Options
- MIDI input follows MIDI track selection allows Ardour to automatically connect the MIDI input to the selected track. Selecting a different MIDI track results in Ardour disconnecting the MIDI device from the former track and connecting it to the newly selected one, so that the MIDI device is always connected to the selected track. Which MIDI device will follow selection can be chosen below.
MIDI Port Config
This page allows to set options for input and output MIDI devices, such as:
- Music Data: whether Ardour should accept/send note events from/to selected MIDI device
- Control Data: whether Ardour should accept/send control events (Control Change, or CC) from/to selected MIDI device
- Follow Selection: whether Ardour should connect this device only to a selected track (only applicable to input devices)
You can also give a more meaningful name to any input and output MIDI device here. Double-click the name of the device, enter a new name, then press Enter to confirm.
Transport
-
General
- Prompt for new marker names when enabled, popup a dialog when a new marker is created. This allows markers to be named as they are created.
- Stop at the end of the session causes the transport to stop during playback when it reaches the end marker. Behavior during recording is not changed.
- Keep record-enable engaged on stop leaves the global record-enable engaged after transport is stopped. Does not affect track level record-enable which is never changed on stop.
- Reset default speed on stop when the Shuttle speed control is in wheel mode, i.e. the transport speed can be constantly changed, enabling this option makes these changes temporary, and the transport speed reset each time the transport is stopped.
- Disable per-track record disarm while rolling, when enabled, will not allow the any track's record-enable to be disarmed during record, preventing accidentally stopping the recording of a take.
- 12dB gain reduction during fast-forward and fast-rewind when enabled will reduce the unpleasant increase in perceived volume that occurs when fast-forwarding or rewinding through some kinds of audio.
- Rewind/Fast-forward buttons change direction immediately sets whether Rewind and Fast-forward transport operations (Transport > Forward/Rewind) changes the playback direction and speed abruptly, or gradually.
- Allow auto-return after rewind/ffwd operations if Auto returnis engaged, sets whether it applies to rewind and fast-forward operations.
- Preroll: sets the duration of the preroll for playing and recording when using a preroll. Can be a musical duration (in bars) or a duration in seconds.
- Create a marker when a MIDI program change is received (and RECORDING) allows capturing a MIDI program change when recording from an external MIDI device.
- Locate to the next matching scene marker when a MIDI program change is received (and NOT recording): allows moving the playhead to a previously captured MIDI scene event when received a MIDI program change.
- Stop transport using the current grid (if any): if enabled, stopping the transport (playback or recording) will happen at the next grid point instead of immediately.
-
Looping
- Play loop is a transport mode changes the behavior of the loop button, turning it into a toggle. When enabled, the loop button does not start playback but forces playback to always play the loop. Looping stays engaged when the transport is stopped. Playback continues where the transport stopped and continues to loop. When disabled, the loop button starts playing the loop but stop then cancels loop playback.
- Loop Fades: when the transport moves from the end of the loop range back to the beginning, clicks might be audible. This parameter allows for adding fades (in, out or cross-) to prevent those clicks.
-
Dropout (xrun) Handling
- Stop recording when an xrun occurs will stop the transport when an xrun occurs during recording, ensuring no audible glitches are recorded.
- Create markers where xruns occur will create a new marker when an xrun occurs during recording at the location of the xrun. This marks where possible xruns might produce audible glitches.
- Reset x-runs counter when starting to record, when enabled, sets the x-run counter in the Status bar to 0 each time a recording is started, hence showing only the relevant number of x-run while recording.
-
Plugins
- Silence plugins when the transport is stopped when stopping playback or recording, if this option is checked, the plugins that still emit sound (reverbs, etc…) will be stopped. If unchecked, the plugins will continue playing after the transport stop.
Chase
-
MIDI Machine Control (MMC)
-
Respond to MMC commands when enabled Ardour will respond
to MIDI Machine Control commands received on the
ardour:MMC inMIDI port. -
Inbound MMC device ID: is the only device ID Ardour will
respond to when an MMC command is received on the
ardour:MMC inMIDI port. - MMC Fast-wind behavior: how to respond to the "fast-wind" command that allows quickly navigating through the timeline.
-
Respond to MMC commands when enabled Ardour will respond
to MIDI Machine Control commands received on the
-
Transport Masters
- Show Transport Master Window Opens the Transport masters window, where all the timecode sources are shown to be selected and/or synchronized; same as clicking Window > Transport Masters
- Match session video frame rate to external timecode controls the value of the video frame rate while chasing an external timecode source. When enabled, the session video frame rate will be changed to match that of the selected external timecode source. When disabled, the session video frame rate will not be changed to match that of the selected external timecode source. Instead, the frame rate indication in the main clock will flash red and Ardour will convert between the external timecode standard and the session standard.
Generate
-
Linear Timecode (LTC) Generator
- Enable LTC generator when enabled Ardour will output an LTC timecode signal on its LTC-out port. If this option is checked, the two options below are active:
- Send LTC while stopped, (only available when the previous Enable LTC generator is on) when enabled Ardour will continue to send LTC information even while the transport (playhead) is not moving.
- LTC generator level [dBFS]: specifies the peak volume of the generated LTC signal in dbFS. A good value is 0dBu=−18dbFS in an EBU calibrated system.
- LTC Output Port: selects to which port (if any) the LTC generator will be connected by default.
-
MIDI Time Code (MTC) Generator
-
Enable MTC Generator when enabled Ardour will generate MIDI
time code on the
ardour:MTC outMIDI port. - Max MTC varispeed (%): MIDI time code generation will be disabled when the transport speed is greater than normal speed plus this percentage or less than normal minus this percentage.
-
Enable MTC Generator when enabled Ardour will generate MIDI
time code on the
-
MIDI Machine Control (MMC)
-
Send MMC commands when enabled Ardour will send MIDI Machine
Control commands on the
ardour:MMC outMIDI port. - Outbound MMC device ID: is the MIDI device ID Ardour will use when it sends MMC commands.
-
Send MMC commands when enabled Ardour will send MIDI Machine
Control commands on the
-
MIDI Beat Clock (Mclk) Generator
-
Enable Mclk generator when enabled Ardour will generate a
(tempo dependent) beat clock at a rate of 24 pulses per quarter note on
the
ardour:MIDI clock outport.
-
Enable Mclk generator when enabled Ardour will generate a
(tempo dependent) beat clock at a rate of 24 pulses per quarter note on
the
Plugins
The content of this preference page varies heavily between versions or Ardour: both the platform and the build-time options can make Ardour support some types of plugins and not others. While this documentation tries to show all possible options, most systems will only show a subset of the options hereunder, e.g. AudioUnits are macOS only…
-
Scan/Discover
- Scan for Plugins will initiate an immediate scan of the system for available plugins. Useful to get a newly installed plugin recognised by Ardour.
- Scan Time Out sets the time that Ardour will try to find any plugins in known paths until it gives up.
-
General
- Scan for [new] Plugins on Application Start When enabled new plugins are searched, tested and added to the cache index on application start. When disabled new plugins will only be available after triggering a 'Scan' manually.
- Always Display Plugin Scan Progress When enabled a popup window showing plugin scan progress is displayed for indexing (cache load) and discovery (detect new plugins).
- Verbose Plugin Scan: adds information about the plugin in the Log window.
- Open Plugin manager window when missing plugins are found: when enabled, the Plugin Manager is displayed at session load if the session contains any plugins that are missing, or plugins have been updated and require a rescan.
- Make new plugins active: when enabled, any plugin added to a track will be in active mode. If unchecked, the plugins will be added in inactive mode by default, hence have no processing effect on the track/bus.
- Setup Sidechain ports when loading plugin with aux inputs: when enabled, Ardour will automatically create sidechain ports for plugins that have sidechain inputs and leave them for the user to connect in the Pin Configuration dialog (see the Sidechaining chapter).
-
LV1/LV2
- Conceal LADSPA (LV1) Plugins if matching LV2 exists When enabled, gives precedence to the LV2 (more up-to-date) version of a plugin over its LV1 version, if both exists.
-
Instrument
- Ask to replace existing instrument plugin: if a MIDI track already has an instrument (i.e. MIDI to audio converter of some sort) and this option is checked, Ardour will detect it and offer to replace the existing instrument with the newly added one, avoiding a possible conflict.
- Interactively configure instrument plugins on insert: when inserting a multichannel instrument plugin, if this option is checked, prompts the user for the channel configuration for this plugin.
-
Statistics
- Reset Statistics: clears the statistics used to determine the most used and most recently used plugins.
- Plugin chart (use-count) length: In the Mixer view's favorite plugins section, determines how many plugins are displayed when in Top-10 Plugins mode.
- Plugin recent list length: Same as above, when in Recent Plugins mode.
GUI
-
Plugin GUI
- Automatically open the plugin GUI when adding a new plugin shows the plugins GUI as soon as it is added to the processing box. If unchecked, the plugin will be added in the processor box but the GUI will only be shown when double clicking it.
- Automatically open instrument plugin GUI when adding a new MIDI Track/Bus: Ardour defaults to automatically showing instrument plugin GUIs when new tracks/busses with instruments are added. If multiple tracks are added, Ardour will only show the GUI for the first one. This setting allows you to opt out of that behavior.
- Show only one plugin window at a time: when enabled, only one plugin window will be displayed on the screen; when disabled, you can open as many plugin windows as you like.
- Closing a Plugin GUI Window: this allows users deciding how Ardour should treat plugin windows aftre closing them. Hiding means a complex plugin window can be re-opened fast because it's saved in memory, but it uses system resources. Destroying means the window isn't saved, which frees up system resources, however some plugins will take longer to showup on the screen.
-
Mixer Strip Inline Display
- Show Plugin Inline Display on Mixer strip by default allows Ardour to show, in the mixer strips, a visual rendering of the effect. These Inline Display are a special feature of Ardour, so not all plugins are able to show this display. Most of Ardour's own plugins have an Inline Display. At any time, the plugin's inline display can be toggled on or off by double-clicking it.
-
Don't automatically open the plugin GUI when the plugin has an inline
display mode: this option, available only if
Automatically open the plugin GUI when adding a new plugin
is checked, supercedes it and hides the plugin GUI at creation if it has an
Inline Display, like Ardour's own
ACE *plugins.
-
VST3 UI:
- Automatically show 'Micro Edit' tagged controls on the mixer-strip: displays the plugin's UI directly inside each mixer strip (inline), if the plugin has a 'Micro Edit' tag.
- VST3 Knob Mode: Enforce a knob mode for VST3 plugins: use plugin default or switch between linear (depends on vertical movement) and two variation of circular, with and without a jump to a clicked position.
VST
-
VST
- Enable Mac VST2 support (requires restart or re-scan) makes a MacOs system able to run VST-Mac plugins. As stated, a new scan for plugins is required, be it manually or by restarting Ardour.
- Enable Linux VST2 support (requires restart or re-scan) makes a Linux system able to run VST2 plugins.
- Enable VST3 support (requires restart or re-scan) makes any system able to run VST3 plugins.
-
VST 2.x
- VST 2 Cache: Clicking the Clear button removes all VST plugins from the list of plugins available to be inserted into the processor box. A new VST plugin scan is then required.
- VST 2 Ignorelist: Clicking the Clear button makes ignored VST plugins available to be added to the processor box.
- Linux VST2 Path: Clicking the Edit button pops up a dialog to manage the directories that will be searched for Linux VST plugins. When modified, Ardour will offer to scan those paths for plugins.
- Path: are the paths chosen above.
- Windows VST Path: Clicking the Edit button pops up a dialog to manage the directories that will be searched for Windows VST plugins. When modified, Ardour will offer to scan those paths for plugins.
- Path: are the paths chosen above.
-
VST 3
- VST 3 Cache: Same as above, for VST 3
- VST 3 Ignorelist: Same as above, for VST 3
- Additional VST3 Path: The VST 3 specs clearly define where the host application should look for plugins. Although Ardour provides a way to search other directories for plugin, it is out of spec and not recommended.
-
VST2/VST3
- Conceal VST2 Plugin if matching LV3 exists: When enabled, gives precedence to the VST3 (more up-to-date) version of a plugin over its VST2 version, if both exists.
Audio Unit
-
Audio Unit
- Enable Audio Unit support (requires restart or re-scan) When enabled, new AU plugins are searched, tested and added to the cache index on application start. When disabled, new plugins will only be available after triggering a 'Scan' manually.
- AU Cache: Clicking the Clear button removes all AU plugins from the list of plugins available to be inserted into the processor box. A new AU plugins scan is then required.
- AU Ignorelist: Clicking the Clear button makes ignored AU plugins available to be added to the processor box.
Monitoring
-
Monitoring
- Record monitoring handled by: determines whether Ardour provides monitoring of incoming audio or whether monitoring is provided by hardware. See Monitoring for more information.
- Auto Input does 'talkback' when enabled, the Transport > Auto Input option also sets the tracks to monitor its audio input when transport is not rolling.
-
Solo contains settings that affect the use of
solo, muting, and
panning.
- Solo controls are Listen controls: when enabled, the soloed track is soloed only on the monitor bus, the master fader mix is not affected by the solo. This option can also be set by enabling pre-fader listen or after-fader listen in the Mixer monitor section.
- Exclusive solo when enabled will only solo the last track selected for solo. Previously soloed tracks will be un-soloed. This setting is also available from the Mixer monitor section.
- Show solo muting when enabled outlines the mute button on tracks and busses when another track is soloed.
- Soloing overrides muting when enabled allows a track to be heard when it is soloed while muted. This setting is also available from the Mixer monitor section.
- Solo-in-place mute cut (dB): sets the attenuation of the other tracks when another track is soloed in place. This setting is also available from the Mixer monitor section. The default is "−inf" for −∞, meaning the other tracks are totally muted.
- Listen Position: determines what is listened to when the solo controls are used as listen controls. The options are after-fader or pre-fader.
- PFL signals come from: determines whether the pre-fader listen position is before or after the pre-fader processors.
- AFL signals come from: determines whether the after-fader listen position is before or after the after-fader processors.
Signal Flow
-
Master
- Enable master-bus output gain control adds a gain-stage to the master-bus and a Loudness Analyzer & Normalizer button that calculates the Loudness (LUFS) of the session (or a range selection), and normalizes the loudness according to various standards.
- I/O Resampler (vari-speed) quality: resampling on the fly during playback or recording takes time and thus introduces latency. This setting accommodates for that and introduces latency predictably and consistently. Each preset matches a particular level of resampling quality. Restarting audio engine is required after changing this setting.
-
Default Track / Bus Muting Options sets the muting options
for a newly created tracks or bus. The mute options for an existing track
or bus are changed by the right-click context menu on a mute button.
- Mute affects pre-fader sends when enabled pre-fader sends will be muted by default.
- Mute affects post-fader sends when enabled post-fader sends will be muted by default.
- Mute affects control outputs when enabled control outputs are muted by default.
- Mute affects main outputs when enabled main outputs are muted by default.
-
Send Routing affects aux and external sends.
- Link panners of Aux and External Sends with main panner by default when enabled, sends follow the channel panner. When disabled, sends can panned independently of the channel panner and fader. Double clicking the send in the processor box toggles the main panner and fader between the aux send and the channel.
-
Audio Regions
- Replicate missing region channels: if a track is N-channel, and the region has fewer channels, this option copies the existing channel's data for this non-existent one. If left unchecked, the missing channels will stay silent.
-
Track and Bus Connections
- Auto-connect main output (master or monitor) bus to physical ports auto-connects the outputs to the first N physical ports. In a session without a monitor section, the master-bus is connected to the system's playback ports, and if a monitor section exists, the monitor-bus' output are connected.
- Connect track inputs: allows to choose when a new track is created whether its inputs will be automatically connected to the physical inputs of the system or not (hence the user has to manually connect it).
- Connect track and bus outputs: allows to choose, for any new track or bus created, whether its output will automatically be connected to the master bus, directly to the physical outputs or to nothing (the user has to manually connect it).
- Use 'Strict-I/O' for new tracks or busses determines the default choice for the signal flow of a newly created track or bus. This can be overridden in the Add Track/Bus/VCA dialog
Metronome
-
Metronome handles the way Ardour's metronome is played when
enabled in the Transport Bar.
- Emphasis on first beat plays a different sound when the first beat is played (e.g. 1/4 in 4/4, 1/3 in 3/4,…). When unchecked, all the beats are indistinguishable.
- Use built-in default sounds when checked, uses Ardour's own sounds for the metronome click. Unchecking this allows to set some custom sounds below.
- Audio file: selects an audio file for the beats, in any format Ardour supports.
- Emphasis audio file: in conjunction with Emphasis on first beat, selects an audio file for the first beats of each bar.
- Gain level: allows the metronome's click sounds to be boosted or attenuated.
-
Options
- Enable Metronome only while recording: when enabled, the metronome will remain silent unless Ardour is recording.
Control Surfaces
This tab contains settings for control surfaces.
It lists all the Control Surface protocols Ardour knows. To enable a Control Surface Protocol, the Enable checkbox next to its name should be ticked. Editing the settings related to this protocol can be done by double-clicking its name or clicking the Show protocol settings (only for Generic MIDI and Open Sound Control).
Metering
-
Metering
- Peak hold time: allows the meter to keep displaying the highest signal level for a period of time before reverting to showing the actual instantaneous value (unless an even higher peak occurs). The longer this time is, the easier it is to spot peaks, at the expense of instantaneous accuracy.
- DPM fall-off: describes how fast the Digital Peak Meters can go from a high value to a lower one. Faster values are more accurate but less readable.
- Meter line-up level; 0 dBu: chooses a standard for the conversion between dBFS (Full Scale) which represent the numeric signal level, and dBu which represents the analog signal level. This value is used to configure meter-marks and color knee-points, or set the reference levels for various meter-types.
- IEC1/DIN Meter line-up level; 0 dBu: sets the reference level for the IEC1/DIN Meter
- VU Meter standard: selects which standard to use for the zero value of the vu-meters, i.e. the analog dBu value that will show as 0 on the VU-meter.
- Peak indicator threshold [dBFS]: at that value and over, the signal will make the peak meter to turn red, indicating a level too high.
-
Default Meter Types sets the default meters when creating a session
or track. These meters can be changed afterwards by
right-clicking a meter.
- Default Meter Type for Master Bus: defines which kind of meter will be used when creating a new session (does not apply to the current session).
- Default Meter Type for busses: defines which kind of meter will be used when creating a new bus (applies to the bus created after changing the value).
- Default Meter Type for tracks: same as above, for tracks.
-
Region Analysis
- Enable automatic analysis of audio generates the transient values (used in e.g. the Rhythm Ferret) automatically. When unchecked, the transient values will be generated on demand.
Performance
-
DSP CPU Utilization
- Signal processing uses: sets an upper limit on how many CPU cores or processors can be used to signal processing. By default Ardour uses all but one (leaving one core for the GUI, and other tasks).
- Power Management, CPU DMA latency: modern processors try to aggressively transition to power saving when idle, even for a few microseconds, hurting realtime performance by needing to wake to a more active state. This setting counters this behaviour by setting a maximum response time while low latency operation is desired. 0 is the fastest response time.
-
CPU/FPU Denormals are a specific type of very small numbers that
can cause issues with CPU consumption when using some plugins in some
circumstances. Ardour provides two methods of handling the issue.
Trying different combinations of these settings may minimize CPU consumption.
- Use DC bias to protect against denormals adds a small constant value to numbers to move the numbers away from zero.
- Processor handling:, if the computer's hardware supports it, offers two methods that can be used individually or combined. Flush to zero and denormals are zero.
-
Disk I/O Buffering settings determine how many seconds of
audio off of disk will be buffered in memory. Longer settings reduce
the risk of buffer under-runs but consume more memory.
- Preset: will automatically choose the values for the playback and recording buffer based on the chosen size of the session. The Custom option allows to manually select the buffers with the two sliders below.
- Playback (seconds of buffering): sets how many seconds of audio Ardour will buffer during playback.
- Recording (seconds of buffering): sets how many seconds of audio Ardour will buffer during recording.
-
Memory Usage
- Waveform image cache (megabytes): sets the maximum amount of ram that can be used to store the images representing the waveforms in the editor. Past this amount, the images will be regenerated when needed, which can significantly decrease the system's performance.
-
Automation
- Thinning factor ranges from 0 to 1000 with larger values sending fewer automation changes. Thinning is like lossy audio compression, removing data that is less likely to be noticed, although the more is removed, the more likely the loss will be noticed. The advantage to thinning is reduced CPU usage.
- Automation sampling interval ranges from 1 to 1000 ms. Determines how frequently the automation input is sampled. The shorter the interval the higher the accuracy but also the higher the CPU requirements.
-
Automatables
- Limit automatable parameters per plugin: as some plugins (synthesizers, …) have a lot of parameters, and those parameters can be automated by Ardour, checking this will limit the number of parameters that are listed as automatable, hence making the lists shorter and the GUI more responsive.
Video
-
Video Server
- Show Video Server Startup Dialog: when using video inside Ardour, this video is accessed via Xjadeo from a source file through a Video Server. This options shows the server's startup dialog (useful for debugging a malfunctioning video).
- Advanced Setup (remote video server) can be used when the setup is more complex than opening a local file with Ardour. The tools used behind the scene by Ardour allow a lot of flexibility, so for a competent user, the options below are provided to access a distant file (i.e. on another machine). The default options for the two following fields ("http://localhost:1554" and "/") are suitable for local files.
-
Video Server URL: Base URL of the video server delivering the video
through the network (
http://IP-or-address:port). - Video folder is the server's local path to the document-root, i.e. the files that can be delivered by the server.
-
Video Monitor
- Custom Path to Video Monitor (xjadeo) - leave empty for default: Ardour bundles offer xjadeo bundled, so it should run flawlessly. Though, for custom builds or if a newer version of xjadeo is available, one can specify a path to the wanted version of xjadeo.
Triggering
-
Triggering
- Default trigger input: this is where you choose a MIDI device that will send notes to trigger boxes in the Cue window. This is typically a grid controller like monome, Novation Launchpad, Ableton Push etc.
-
Clip Library
- User writable Clip Library: this is a folder where your custom reusable clips will be saved to.
- Reset Clip Library Dir: this will reset the location of your custom reusable clips to a default location.
Session Properties
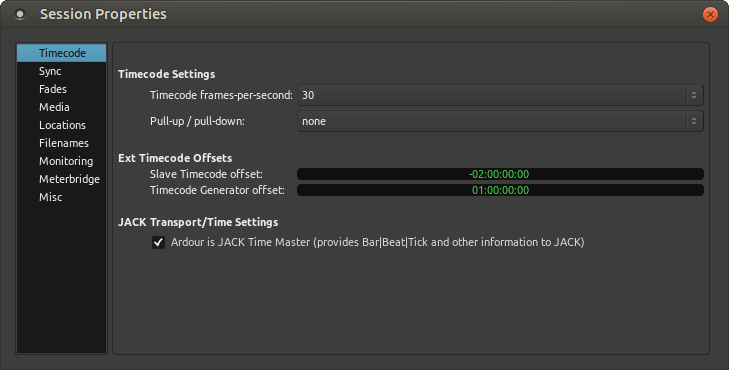
Session properties control aspects of the workflow or configuration that pertain to the current session only; these settings are initially set from the template used to create the session. They can be found in Session > Properties, and are stored in the session file.
Settings can be searched for using the input box in the lower left corner of the Preferences window. Typing in a keyword and pressing Enter will open the Preferences pages where the first occurrence of the keyword is available, the setting will be highlighted. Pressing Enter again will highlight the next occurrence (where available).
Preferences are grouped by category:
Timecode
-
Timecode Settings
- Timecode frames-per-second: defines how many frames of timecode are in one second. This can differ from the actual frame rate depending on the standard used.
- Pull-up / pull-down: sets the speed correction to match one actual second, e.g. a 4.1667 pull-up matches a 24fps cinema movie to a 25 fps PAL TV broadcast format.
-
Ext Timecode Offsets
- Slave Timecode offset: when an external timecode source is used, adds or substracts the specified offset to the received timecode (MTC or LTC).
- Timecode Generator offset: adds the specified offset to the timecode generated by Ardour (so far only LTC) before sending it to the external synchronized system.
-
JACK Transport/Time Settings
- Ardour is JACK Time Master (provides Bar|Beat|Tick and other information to JACK): aside from synchronizing any JACK slave, Ardour can also provide musical time information (Bar/Beat/Tick) for the current absolute position for all the JACK-aware clients (N.B. the first jack client that asks for this wins).
Sync
-
A/V Synchronization
- Use Video File's FPS Instead of Timecode Value for Timeline and Video Monitor: when checked, uses the timecode FPS value of the standard used by the video file instead of forcing the FPS set in the Timecode tab.
- Apply Pull-Up/Down to Video Timeline and Video Monitor (Unless using JACK-sync): allows to apply the pull-up/down as set in the Timecode tab to the video timeline as displayed in the editor and to the Video Monitor, resulting in a shorter/longer video in the editor and a speed-up/down in the Video Monitor.
Fades
-
Audio Fades
- Declick when transport starts and stops: creates an artificial fade in/out when starting or stopping playback, to avoid the 'click' sound resulting in starting it at a non zero value.
- Declick when monitor state changes: also creates an artificial fade in/out to avoid clicks when a parameter in the monitor changes.
- Region fades active: when checked, Ardour applies the region crossfades to each region's start and end. When unchecked, no fades are applied, and clicks may be heard at regions boundaries.
- Region fades visible: when checked, the region fades are visible in the the Editor. Unchecking may increase readability for sessions made of a lot of tiny regions.
Media
Change how sound is stored on disk. These options do not change how sound is handled internally.
-
Audio File Format
- Sample format: defaults to 32-bit floating point, the same as the internal representation. 24 and 16-bit integer representation are also available, for more lightweight sessions at the cost of a reduced audio definition.
- File type: defines what format is used to store the audio files. The default is WAVE, and can be changed to Broadcast Wave to store metadata and timecodes, CAF to overcome WAVE's limitation to 4Gb in size, RF64 to add more channels, etc. The chosen format is usually very workflow-specific.
Locations
These options add file locations that will be searched to find the audio and midi files used by the session. This is useful when the files have been imported into the session but not copied into the session.
-
File Locations
- Search for audio files in: allows to add a location to look for audio files. Adding a location is done by navigating to the directory where the files are stored, selecting it and clicking Open. The directory will show up in the dialog. The Remove button next to the added directory can be used to remove it from the search path. Multiple paths can be added this way.
- Search for MIDI files in: is exactly the same, but for MIDI files.
Filenames
This tab is used to change how Ardour names recorded regions.
-
File Naming
- Prefix Track number: when checked, a unique number will appear on each track in the Editor window and will prefix the region name. If the track number is 2 and the region would have been named Gtr-1.1, with track number prefix turned on the region will be named 2_Gtr-1.1 instead. See Region Naming.
- Prefix Take Name: when enabled, the first time a track is recorded it will have the specified take name. When recording is stopped, any trailing number on the end of the take name will be incremented by 1. If the specified track name doesn't have a number on the end, the number 1 will be suffixed.
- Take name specifies what name is prefixed if Prefix Take Name is checked.
Monitoring
Provides options affecting monitoring.
-
Monitoring
- Track Input Monitoring automatically follows transport state ("auto-input"): affects how input monitoring is handling. See Monitor Setup in Ardour
- Cue containing clips disables implicit (auto) disk monitoring for the track: affects monitor playback.
- Use monitor section in this session: when enabled, displays an extra section in the Mixer window that is modelled on the similarly named section on large analog consoles. More information can be found on the Monitor Section page.
Meterbridge
This tab changes what controls are displayed in the Meterbridge that is available in the Window > Meterbridge menu.
-
Display Options
- Show Midi Tracks: displays/hides MIDI tracks (even when no synth, hence no audio output exists)
- Show Busses: displays/hides Busses tracks
- Include Master Bus: displays/hides the Master Bus
-
Button Area
- Rec-enable Button: displays/hides the record arm button (for audio and MIDI tracks only)
- Mute Button: displays/hides the mute button (for all tracks/busses types)
- Solo Button: same for solo
- Monitor Buttons: displays/hides the two (input and playback)monitoring buttons, selecting what is played at record and playback time.
- Fader as Gain Knob: displays/hides a rotary button to control the gain of the channel.
-
Name Labels
- Track Name: adds the tracks' names below the buttons.
MIDI
- Draw tool creates opaque MIDI regions: if selected, creates MIDI regions that, when placed on top of other regions, don't mix with content below during playback.
- MIDI region copies are independent: if selected, when a MIDI region is copied or duplicated, the new region is not linked to the region it was copied from. If it is not selected, the copied regions are linked and any editing done on one of the linked regions changes all of the linked regions.
-
Policy for handling overlapping notes on the same MIDI channel:
selects how Ardour reacts to possibly conflicting MIDI notes:
- never allow them
- don't do anything in particular
- replace any overlapped existing notes
- shorten the overlapped existing note
- shorten the overlapping new note
- replace both overlapping notes with a single note
Misc
This tab has several things that don't fit on the other tabs.
-
Miscellaneous Options
- Default time domain: allows selecting either audio (wallclock) time, or musical (beats) time. In an already opened session, this changes what units various markers operate in.
-
Metronome
- Always count-in when recording: when checked, waits for two bars before the actual recording begins. The Metronome will tick (even if disabled) during the count-in. Same as recording with Transport > Record w/Count-In.
-
Defaults
- Use these settings as defaults: clicking this button makes all the present Session Properties default, by recording them in the default session template.
Configuring MIDI
MIDI is a way to describe musical performances and to control music hardware and software.
Ardour can import and record MIDI data, and perform a variety of editing operations on it. Furthermore, MIDI can be used to control various functions of Ardour.
MIDI-handling Frameworks
MIDI input and output for Ardour are handled internally by the same "engine" that handles audio input and output. However, Ardour can use as many MIDI devices as the system can see as there are no syncing difficulties as there would be with audio.
| OS X | CoreMIDI is the standard MIDI framework on OSX systems. |
|---|---|
| Linux | ALSA MIDI is the standard MIDI framework on Linux systems. |
| Windows | MME is the standard MIDI framework on Windows systems. |
JACK is an alternate audio system which Ardour can utilize for both audio and MIDI. JACK is used to route audio between independent applications, and is now considered an advanced use case which is not recommended for most users. Users with a need to use JACK for audio routing should consult the latest documentation at the JACK website.
MIDI on Linux
It is no longer necessary to use jackd as a backend for Ardour in Linux. In fact with the spread of LV2 plugins, almost all workflows in Ardour work well with the ALSA backend. When using the ALSA backend for Ardour, Ardour will see all MIDI ports that ALSA sees without any user setup. However, should jackd need to be used, the rest of this page is valid.
The right approach for using MIDI on Linux depends on which version of JACK is in use. The world divides into:
| Systems using JACK 1, versions 0.124 or later | On these systems, JACK must be started with the -X alsa_midi
server argument. To support legacy control applications, the -X
seq argument to the ALSA backend of JACK can also be used to get the
exact same results. |
|---|---|
| All others | Using a2jmidid acts as a bridge between ALSA MIDI and JACK. The -X seq
or -X raw arguments should not be used—the timing and
performance of these options is unacceptable. |
Using a2jmidid
a2jmidid is an application that bridges between the system MIDI ports and JACK.
First it must be ensured that there is no ALSA sequencer support enabled in JACK. To check that, one must open QJackCtl's Setup window and set Settings > MIDI Driver to none, then uncheck the Misc > Enable ALSA Sequencer support option. The jack server must then be restarted before going on.
Checking for a2jmidid availability
Next, it must be checked whether a2jmidid is already installed. This is done by starting the JACK server, then going to the command line and typing:
a2jmidid -eIf a2jmidid does not exist, it must be installed with the software manager of the Linux distribution in use until this command responds.
Checking available MIDI ports
If JACK is correctly configured for MIDI, then the MIDI ports should appear in qjackctl under Connections > MIDI.
Making it automatic
Once it has been verified that the ports appear in JACK as expected, this can be made to happen whenever JACK is started:
- If a newer version of JACK 1 is in use, by just making sure the
-X alsa_midior-X seqoptions are enabled for whatever technique is being used to start JACK. - For other versions of JACK, by adding
a2jmidid -e &as an "after start-up" script in the Setup > Options tab of QJackCtl, so that it is started automatically whenever JACK is started.
MIDI on OS X
In order for CoreMIDI to work with Jack MIDI, a CoreMIDI-to-JACK-MIDI bridge is required. This feature is available on versions equal to or greater than version 0.89 of JackOSX.
Routing MIDI
Inside Ardour
MIDI ports show up in Ardour's MIDI connection matrix in multiple locations. Bridged CoreMIDI ports as well as JACK MIDI ports that have been created by other software clients will show up under the "Other" tab. Bridged CoreMIDI hardware ports show up under the "Hardware" tab.
External Applications
There are multiple options for connecting MIDI ports outside of Ardour.
- MIDI Monitor is a handy tool for doing various MIDI-related tasks.
- MIDI Patchbay allows connection of ports and filters MIDI data.
Keyboard Shortcuts
The Keyboard Shortcuts dialog allows easily redefining existing keyboard shortcuts to operations and creating new ones.
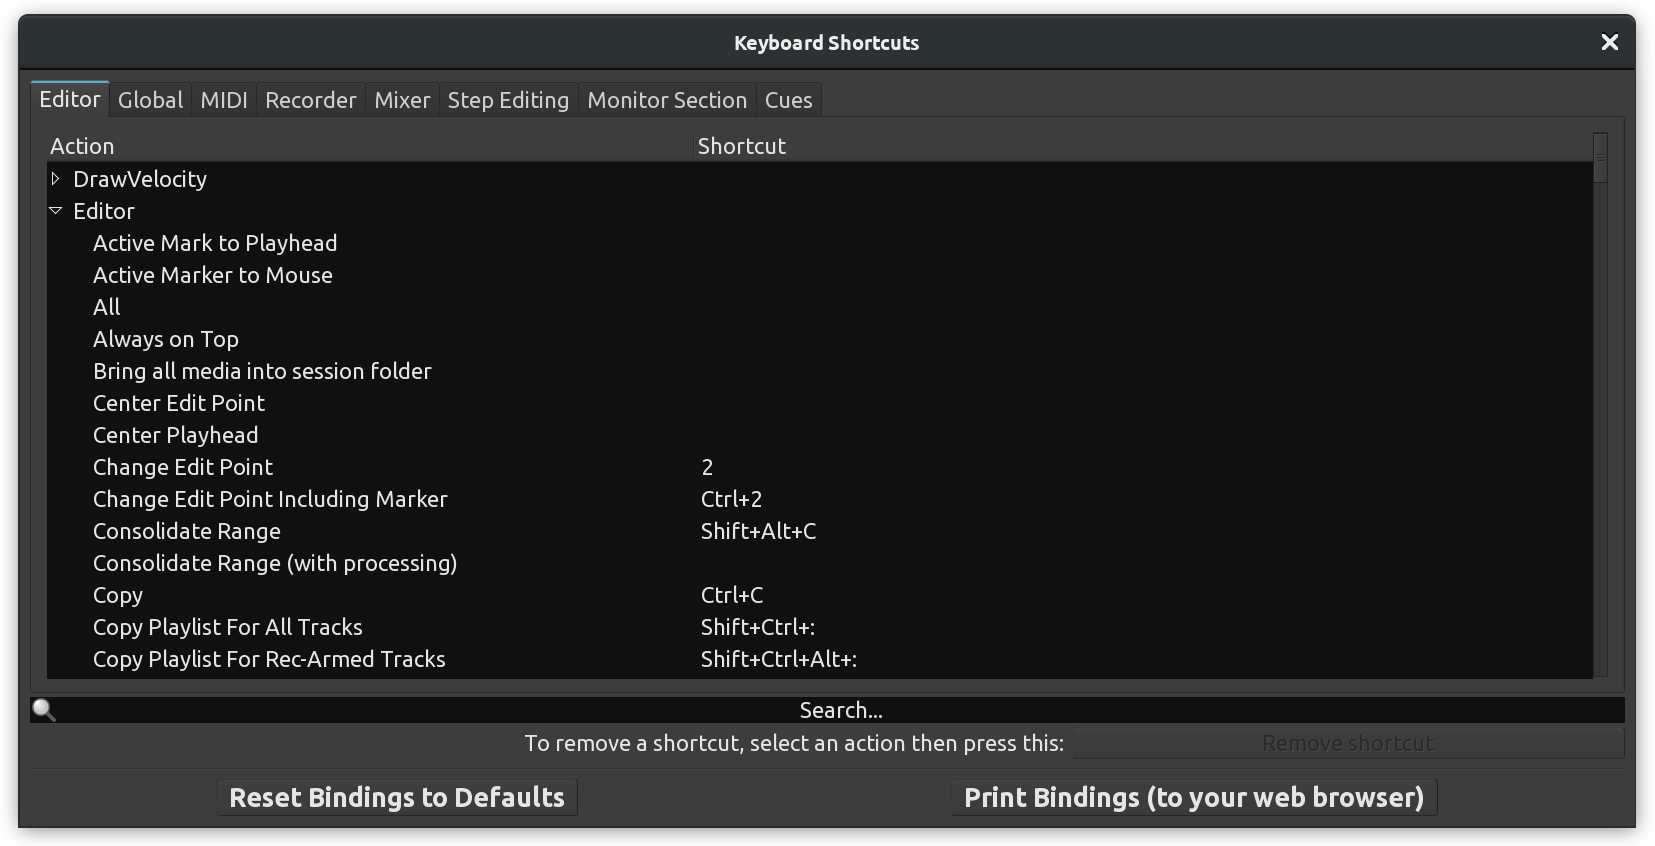
A thematic list of the default keyboard shortcuts in Ardour can be found in the Appendix, but the Print Bindings (to your web browser) button show an up-to-date list of the current keyboard bindings, with customization, nicely laid out by theme and alphabetical.
Contexts and Subcontexts
The important concept to understand here is that the same shortcut can be used for different operations in different contexts. E.g. in the Editor context, the T key switches on the Stretch mode to time-stretch clips on the canvas. However, in the MIDI Step Entry context, T inserts an F-sharp note. The contexts are represented by tabs in this dialog, e.g. Editor, MIDI, Recorder, etc.
Inside every tab, features are grouped into subcontexts that can be expanded or collapsed by clicking the triangular-shaped button to the left of the name of each subcontext. E.g. the 'Snap' subcontext lists all snapping units, while the 'Region' subcontext lists all actions accessible via the right-click menu.
The Search function at the bottom of the dialog works within the currently selected context/tab only. If a search returned zero results, switching to a different context is a viable solution to locating the action of interest.
Setting New Shortcuts
Once an action of interest is located in the list, all it takes to set a keybinding to it is selecting the action in the list, then pressing the sequence of keys. The newly defined keybinding will immediately show up in the Shortcut column.
Redefining Existing Shortcuts
An existing shortcut to an action can easily be replaced with a different one by selecting the action and pressing a new sequence of keys. The newly defined keybinding will immediately show up in the Shortcut column.
Handling Collisions
Once a keybinding is assigned to an action, that keybinding is considered taken. Attempting to assign that same keybinding to a different action will result in a collision. Ardour will notify the user that the keybinding is already taken (and by what action) and will ask to either reconsider or force-set the keybinding to a new action.
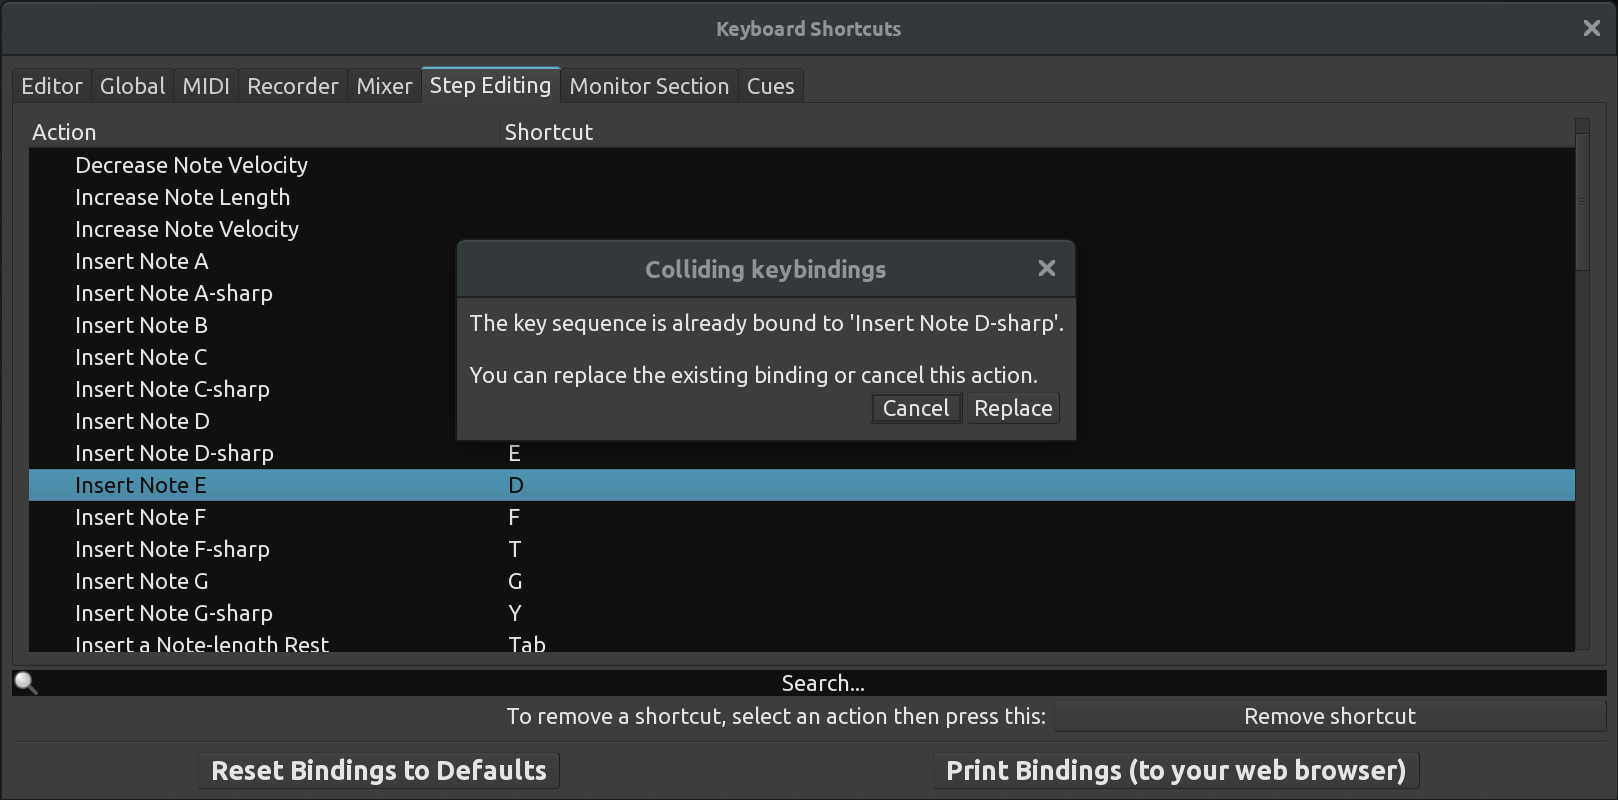
Force-setting the keybinding of choice to a new action will remove the keybinding from the action it was previously assigned to. A new keybinding then can be assigned to that action.
Removing Existing Shortcuts
In some cases it is desirable to remove a shortcuts entirely. Selecting an action of interest, then pressing the Remove shortcut button at the bottom of the dialog will do just that. The keybinding will immediately disappear from the Shortcut column.
Reverting to Factory Settings
If applied customizations to default keyboard shortcuts didn't work out, it's possible to revert to "factory settings". Clicking Reset Bindings to Defaults will remove all customizations and bring back default keybindings. Important: Ardour will not ask for a confirmation!
Using Search Prefixes
The Search function supports the following prefixes:
- "k:" search by shortcut name
- "p:" search by action path (as displayed when hovering a shortcut in the list)
Ardour's Interface
Ardour's Interface Overview
In Ardour, work is done in one of four windows: the Editor, the Mixer, the Recorder, or the Cue Grid.

The Editor, Mixer, Recorder and Clip Launcher share the same toolbar (the top of the window). The sections displayed in this toolbar can be customized to the user's workflow, by checking options in Preferences > Appearance > Toolbar.
Switching between these 4 different modes is done:
- with the Mode Selector buttons in the upper right
- with the menu Window > Editor (or Mixer / Recorder / Cue Grid) > Show.
Additionally, the M shortcut allows switching between the Editor and Mixer.
Multiple windows can be visible at the same time (e.g. for a multi-monitor setup) using Window > Editor (or Mixer / Recorder / Cue Grid) > Detach option in the same submenu.
The Editor
The Editor window includes the editor track canvas where audio and MIDI data can be arranged along a timeline. This is the window where editing and arranging a project is done. The window has a general "horizontal" sense to it: the timeline flows from left to right, the playhead showing the current position in the session moves from left to right—the window really represents time in a fairly literal way.
It is possible to show a single channel strip in the editor window, and some people find this enough to work on mixing without actually opening the mixer window. Most of the time though, both of these windows will be needed at various stages of a session's lifetime.
The Mixer
The Mixer window represents signal flow and is the window that will probably be used most when mixing a session. It includes channel strips for each track and bus in the session. It has a general "vertical" sense to it: signals flow from the top of each channel strip through the processing elements in the strip to reach the output listed at the bottom.
To learn more about the process of mixing, see Mixing.
The Recorder
The Recorder window is a very specialized view that provides a compact view of all track's record and monitor status, and a simplified timeline that keeps everything in view at once. Most of the information that is shown in this mode is already available in Mixer or Editor mode, but the Recorder aims at having everything in sight and under control while tracking a performance.
The Recorder is covered in great detail in its own page.
The Cue Grid
The Cue Grid window, unlike the rest of Ardour, allows for a non-linear workflow. It is a clip launcher, that allows to chain and combine various loops and samples, and program events.
Instead of anchoring these samples or loops on a timeline, the Cue Grid gives them instruction on when they are triggered, how they are played, what happens at the end of the clip, etc…
The Cue section of this manual describes this worfkow.
Main Menu
The Main Menu allows the user to interact with Ardour and may appear daunting at first. Below is a reference of all the menus and submenus.
Most of these menus, and probably all of the most used ones, have keyboard shortcuts to make using them easier and faster. A summary of these shortcuts can be found on the Defaults Keyboard Bindings page, and every menu in Ardour can be reassigned to an user defined key binding, or used via OSC with a control surface.
Some menu items placement may depend on the OS, e.g. the "About" window may not be in the Help menu on Mac systems.
The Session Menu
The Session menu groups together everything related to the session and the file operations.
| New… | Creates a new session |
|---|---|
| Open… | Opens an existing session |
| Recent… | Opens a list of recent sessions that can be opened |
| Close | Closes the current session (but not Ardour) |
| Save | Saves the current session |
| Save As… | Saves to a new session (with options) |
| Rename… | Changes the name of the session |
| Snapshot (& keep working on current version)… | Create a Snapshot but any subsequent change will be saved to this session |
| Snapshot (& switch to new version)… | Same thing, and any subsequent change will be saved to this new snapshot session |
| Save Template… | Saves the session as a template, without the audio |
| Archive… | Exports the session as a compressed file for archiving or sharing purposes, optionally compressing the audio to FLAC |
| Add Track, Bus or VCA… | Adds a new track/bus/VCA to the session, same as the Track > Add Track, Bus or VCA… |
| Import | Opens the Import windows, to add media to the session |
| Import PT session | Import a ProTools© session file. Not everything in the original session can be imported. |
| Open Video… | Imports a video file in the session |
| Remove Video | Removes the video part of the session (the video timeline disappears) |
| Loudness Assistant… | Shows the Loudness Analyzer and Normalizer, allowing an in-depth analysis of the master bus' volume for the final export |
| Export | |
| Quick Audio Export… | Export a selection or the entire session to audio with just a few settings |
| Export to Audio File(s)… | Export all or part of the session in audio form |
| Stem export… | Exports each track as its own audio file (for e.g. DAW interchange) |
| Export to Video File | Exports the session to a video file |
| □ Properties | Shows the Session Properties dialog, allowing to fine-tune the parameters of the current session |
| Monitor Section | |
| □ Use Monitor Section | Shortcut for the homonymous session property, adds a Monitor Section to the Mixer |
| □ Mute | Shortcut for the global monitor "Mute" control also available in the mixer's Monitor Section |
| □ Dim | Shortcut for the global monitor "Dim" control also available in the mixer's Monitor Section |
| □ Mono | Shortcut for the global monitor "Mono" control also available in the mixer's Monitor Section |
| Metadata | |
| Edit Metadata… | Opens the Metadata window, where information about the session can be saved |
| Import Metadata… | Creates the metadata by extracting them from another session |
| Clean-Up | |
| Bring all media into session folder | Copies all the media files imported from outside the session folder in that folder, see Cleaning up Sessions |
| Rebuild Peak Files | Reinitializes the buffered images representing the audio files |
| Clean-up Unused Sources… | Quarantines all the media files not used in the session to a specific sub-folder of the session |
| Clean-up Unused Regions… | Deletes the regions that are not used in the session |
| Flush Wastebasket | Deletes those quarantined files |
| Lock | Locks the session by showing an Unlock window that (until clicked) blocks every action on Ardour's window |
| Quit | Exits Ardour. Prompts for saving the session if it has been modified. |
The Transport Menu
The Transport menu handles how Ardour handles the playback and playhead.
| Start/Stop | Starts or stops the playhead, and recording if it is armed |
|---|---|
| Play | |
| Play Selection | Only plays the selected duration of the session, based on the current range or selected region(s) |
| Solo Selection | Only plays the selected regions of the session. Regions that are not selected, even on a track with selected regions, wont be played |
| Play w/Preroll | As the previous menu, except it starts the playback a few bars or seconds before the beginning of the selection (the amount of time can be set in the Preferences) |
| Start/Continue/Stop | Leaves loop play or range play mode but without stopping the transport |
| Play from Edit Point and Return | Starts the playback at the Edit point, and when stopped, goes back to the original location |
| Play Loop Range | If a Loop range is defined, play it and loop until stopped |
| Start Recording | This is a shortcut to trigger the global recording, and start playback at once |
| Stop and Forget Capture | Stops the recording, removes the newly created material, and goes back to the original position |
| Enable Record | Triggers the global recording. Next time "Play" is pressed, it will record on the track(s) that are armed for recording |
| Record w/Preroll | As the Start Recording menu, except it starts the recording a few bars or seconds before the playhead's position (the amount of time can be set in the Preferences) |
| Record w/Count-In | As the Start Recording menu, except it waits for 2 bars before the playhead's position. The Metronome will tick (even if disabled) during the count-in |
| Forward | Plays the audio forwards from the playhead on. If the audio is already playing forwards, increment its speed by 50%. |
| Rewind | Plays the audio backwards from the playhead on. If the audio is already playing backwards, increment its speed by 50%. |
| Transition to Roll | Plays the audio forwards, with a speed of 1 (real time) |
| Transition to Reverse | Plays the audio backwards, with a speed of 1 (real time) |
| Set Loop from Selection | Converts the selection into a Loop range by placing loop markers at the start and end of the selected range |
| Set Punch from Selection | Same thing, for Punch |
| Set Session Start/End from Selection | Same thing, for the start and end markers of the session, defining the session's length |
| Playhead | |
| Playhead to Mouse | Set the position of the playhead at the current position of the mouse cursor |
| Playhead to Active Mark | If a marker is selected, set the position of the playhead at the position of the marker |
| Center Playhead | Centers the view on the playhead without changing the zoom level (putting the playhead in the middle of the screen) |
| Nudge Playhead Forward | Shifts the position of the playhead to the right by the amount shown in the nudge timer |
| Nudge Playhead Backward | Same thing, to the left |
| Move to Next Transient | When transient have been set, moves the playhead to the next one to the right |
| Move to Previous Transient | Same, to the left |
| Playhead to Next Grid | Regardless of the state of the Grid Mode, goes to the next grid to the right, as set by the Snap/Grid unit |
| Playhead to Previous Grid | Same, to the left |
| Playhead to Next Region Boundary | Moves the playhead to the right to the next beginning or end of region on the selected track or, if no track is selected, on all tracks |
| Playhead to Previous Region Boundary | Same, to the left |
| Playhead to Next Region Boundary (No Track Selection) | Moves the playhead to next beginning or end of region, be it on the selected track or any other |
| Playhead to Previous Region Boundary (No Track Selection) | Same, to the left |
| Playhead to Next Region Sync | Moves the playhead to next Region Sync Point, that is by default the beginning of a region but can be moved |
| Playhead to Previous Region Sync | Same, to the left |
| Jump to Next Mark | moves the playhead to the next marker on the Ruler |
| Jump to Previous Mark | Same, to the left |
| Jump to Loop Start | moves the playhead to the loop start marker if a loop exists |
| Jump to Loop End | Same, for the loop end marker |
| Go to Zero | Sends the playhead to the 00:00:00:00 time, regardless of the sessions Start marker |
| Go to Start | Sends the playhead to the Start marker of the session |
| Go to End | Sends the playhead to the End marker of the session |
| Go to Wall Clock | Sends the playhead to the current value of system time, as shown on the top right of the Status bar |
| Active Mark | |
| To Next Region Boundary | Moves the currently selected marker to the next region beginning or end |
| To Previous Region Boundary | Same, to the left |
| To Next Region Sync | Moves the currently selected to the next region sync point (by default: beginning or end of the region) |
| To Previous Region Sync | Same, to the left |
| Markers | |
| Add Mark from Playhead | Creates a Marker at the position of the playhead |
| Remove Mark at Playhead | Removes any marker at the position of the playhead |
| Toggle Mark at Playhead | Combine the 2 previous: if a marker exists, deletes it, otherwise create it |
| Locate to Mark n | If it exists, goes to the n-th marker |
| Set Session Start from Playhead | Puts the Start of the session marker at the playhead's position |
| Set Session End from Playhead | Puts the End of the session marker at the playhead's position |
| Cues | |
| Trigger Cue A → H | Starts the playback and triggers the A → H line of the Cue grid |
| □ Time Master | Sets Ardour as the Time master, i.e. Ardour sends the time information to the audio system |
| □ Punch In/Out | Based on the Punch in and Punch out markers if they exist, tells Ardour to record only between those two points |
| □ Punch In | Based on the Punch in marker, only allow to record from this point on |
| □ Punch Out | Based on the Punch out marker, forbids recording before this point |
| □ Auto Input | If checked, automatically switch the monitor from input to playbackmode when playing |
| □ Follow Range | If checked, selecting a range moves the playhead to its beginning |
| □ Auto Play | If checked, moving the playhead in the ruler starts the playback |
| □ Auto Return | If checked, when the playback is stopped, go back to the previous position of the playhead. If not, the playhead stays where it is when the playback is stopped |
| □ Click | Activates/deactivates the click track (metronome) |
| □ Follow Playhead | If checked, while playing, when the playhead reaches the right of the screen, Ardour scrolls one screen to the right to keep the playhead visible at all times |
| □ Stationary Playhead | If checked and if Follow playhead is checked, on playback, the playhead stays at the center of the screen, and the session scrolls |
| □ Use External Positional Sync Source | If checked, allows Ardour to be controlled by external program |
| Panic (Send MIDI all-notes-off) | Immediately stops all MIDI playback (useful e.g. when a MIDI bug in encountered) |
The Edit Menu
The Edit menu groups together the actions related to the edition, and so will be mostly used while in Editor mode.
| Undo (action) | Reverts the last editing operation, namely action |
|---|---|
| Redo | Does the last editing operation again, after an Undo |
| Undo Selection Change | Reverts the last selection operation |
| Redo Selection Change | Does the last selection operation again after an Undo Selection Change |
| Cut | Deletes the current selection, but puts it in memory ready to be pasted |
| Copy | Copies the current selection to memory |
| Paste | Pastes the memory at the edit point, after a Cut or Copy operation |
| Select | |
| Select All Objects | Selects all the regions and automation points in the session |
| Select All Tracks | Selects all the tracks, busses and control masters in the session |
| Select All Visible Lanes | Selects all the visible tracks, busses and control masters, i.e. those marked v in the Editor List |
| Deselect All | Deselects all objects or tracks, nothing is selected |
| Invert Note Selection | Select the previously unselected regions, and deselect the previously selected ones |
| Set Range to Loop Range | Creates a range selection on the selected tracks, based on the selected loop markers, and switches to Range Mode tool |
| Set Range to Punch Range | Same as above, based on the selected punch markers |
| Set Range to Selected Regions | Same as above, based on the selected regions (i.e. from the start of the earliest region to the end of the latest one) |
| Select All After Edit Point | Select all the regions and automation points that exist after the Edit Point, even if the region starts before it. If some tracks are selected, only selects on these tracks. |
| Select All Before Edit Point | Same as above, but before the Edit point (i.e. to the left of it) |
| Select All Overlapping Edit Range | Select all the regions and automation points of which at least a part is in the current selection range |
| Select All Inside Edit Range | Selects all the regions that are completely inside the selection range, i.e. their start and end are inside the range. If some tracks are selected, only selects on these tracks. |
| Select All in Punch Range | Selects all the regions of which a part in in the punch range. If some tracks are selected, only selects on these tracks. |
| Select All in Loop Range | Same as above, based on the loop range |
| Move Range Start to Previous Region Boundary | Extends the left boundary of the range to the left to the next region start or end. The region must be in the range. |
| Move Range Start to Next Region Boundary | Same as above, to the right (reduces the selection) |
| Move Range End to Previous Region Boundary | Same as above, with the right edge of the range, to the left (reduces the selection) |
| Move Range End to Next Region Boundary | Same as above, with the right edge, to the right (extends the selection) |
| Start Range | Sets the left edge of the range to the Edit point |
| Finish Range | Sets the right edge of the range to the Edit point |
| Select Next Track or Bus | Select the track or bus under the currently selected one. If multiple tracks are selected, only the first one is considered |
| Select Previous Track or Bus | Same as above, with the track/bus above the first one selected. |
| Delete | Deletes all that is currently selected |
| Crop | Cuts the parts of the regions that are outside the range boundaries. Only applies on the regions that belong at least in part to the range. |
| Split/Separate | Cuts the selected regions at the Edit point, separating them in two regions |
| Separate | |
| Separate Under | Removes all the parts of the regions that are under the selected one. Once done, the selected region is alone on its part of the track. |
| Separate Using Loop Range | Cuts the selected regions or the regions on the selected tracks along the Loop range's start and end markers. If nothing is selected, acts on all tracks at once. |
| Separate Using Punch Range | Same as above, with the Punch range markers |
| Consolidate | |
| Consolidate Range | Group all parts of regions in the range and on the same track as one (Audio or MIDI but not both). Optionally, add it to the Cue Grid and/or to the Clip library. |
| Consolidate Range (with processing) | Same as above, with processing (effects, plugins, gain&hellip) applied before grouping. |
| Combine | Group all the selected regions belonging to the same track as one (Audio or MIDI but not both). |
| Uncombine | (Audio only) splits back a compound into its original regions. |
| Align | |
| Align Start | Moves the selected regions to align the beginning of the regions to the Edit point |
| Align Start Relative | When multiple regions are selected, moves all the regions together as a block to align the beginning of the earliest one to the Edit point. |
| Align End | Moves the selected regions to align the end of the regions to the Edit point |
| Align End Relative | When multiple regions are selected, moves all the regions together as a block to align the end of the latest one to the Edit point. |
| Align Sync | Moves the selected regions to align the Sync point of the regions to the Edit point |
| Align Sync Relative | When multiple regions are selected, moves all the regions together as a block to align the earliest Sync point to the Edit point. |
| Fade | |
| Fade Range Selection | For all the regions that either begin or end in the range, create a fade in or out on the regions length. |
| Set Fade In Length | If the edit point is within the region boundaries, adjusts selected audio regions' fade in to end at the edit point. |
| □ Fade In | Toggles the fade in on the selected region on or off |
| Set Fade Out Length | Same as above, for the fade out |
| □ Fade Out | Toggles the fade out on the selected region on or off |
| Analyze | |
| Spectral Analysis | For the selected range and tracks, shows the Spectral analysis, showing a frequency vs dBFS graph. |
| Loudness Analysis | For the selected range, one tab per track, shows the Audio Report/Analysis, showing in particular a time vs dBFS graph. |
| Loudness Assistant | For the selected range and tracks, shows the Loudness Analyzer and Normalizer. |
| Tag Last Capture | Prompts for a text to tag the last record, this tag is visible in the Region list |
| Remove Last Capture | Destroy the last recording. A prompt reminds the user this cannot be undone. |
| Edit point | |
| Change Edit Point | Toggles between the mouse and the playhead as the Edit point |
| Change Edit Point Including Marker | Toggles between the mouse, the playhead and marker as the Edit point |
| Toggle Snap | Activates/deactivates snapping, which aligns region boundaries to the closest selected time marker when moved |
| Snap & Grid | |
| Previous Quantize Grid Choice | Changes the snap quantization to the previous one in the list below |
| Next Quantize Grid Choice | Changes the snap quantization to the next one in the list below |
| ○ No Grid | Disables snapping, i.e. allows free movement of regions and boundaries |
| ○ Bar | Snaps to the closest musical bar, bars can be set and seen in the Ruler |
| ○ 1/4 Note → 1/28 (32nd septuplet) | Selects the division of musical time to snap to |
| ○ Timecode | Snaps to the closest frame, a timecode being Hrs:Min:Sec:Frame. The number of frames per second is defined in the Session Properties. |
| ○ MinSec | Snaps to the closest second in the timeline. |
| ○ CD Frames | Snaps to the closest CD Frame, one CD frame being 1/75th of a second. |
| Tempo | |
| Set Tempo from Region = Bar | Computes the tempo so that the duration of the first selected region is 1 bar. Ardour prompts if the user wants it to be the global tempo, or a tempo marker at the beginning of the region used |
| Set Tempo from Edit Range = Bar | Same thing, with the current Range instead of a region |
| □ Smart Mode | Toggles the Smart Mode, allowing the mouse to be in Range Mode in the upper half of a region, and in Grab Mode in the lower half |
| □ Show Automation Lane on Touch | When toggled on, clicking on a plugin parameter, hardware controller, etc… makes Ardour show the relevant automation lane |
| Lua Scripts | |
| □ Script Manager | Shows the Script manager, allowing to use and manage the Lua scripts in the session |
| Action script #n | Executes the nth script. The script list is defined in the Script Manager. |
| Preferences | Displays the Preferences panels, allowing to change Ardour's behaviour |
The Region Menu
The Region Menu is where the user can tweak its regions, the parts of audio or MIDI that sit on the timeline.
| Insert Region from Source List | If a region is selected in the Editor List, add it at the Edit point |
|---|---|
| Play Selected Regions | Starts playback at the beginning of the selected region(s), and stops at its(their) end |
| Tag Selected Regions | Prompts for a text to tag all the selected regions, this tag is visible in the Region list |
| Loop | Creates a loop range on the selected region's boundaries, and starts the looped playback |
| Rename… | Changes the name of the region, that appears in its top left area |
| Properties… | Shows the Region properties window, that displays detailed information about the region and allow for some modifications |
| Loudness Analysis… | Shows the Audio Report/Analysis window, that displays detailed dBFS information as well as a spectrogram (dBFS of frequency against time) |
| Spectral Analysis… | Shows the Audio Report/Analysis window, that displays a integrated spectral view of the region (dBFS against frequency) |
| Edit | |
| Combine | Creates a new region by joining the selected audio regions in the same track, and replaces those region with the newly created compound. The same rules are applied to create the compound as for playback regarding e.g. layering |
| Uncombine | Splits back the compound created by combining into its original audio regions |
| Pitch Shift… | Changes the tune of the audio region, by octave, semitones or percentage, based on spectral analysis. Optionally, and if they have been set for the region, preserves the formants |
| Split at Percussion Onset | Allows splitting the selected regions on its Percussion Onsets marker as set by the Rhythm Ferret (Not usable as of 5.5) |
| Make Mono Regions | Creates mono regions out of a stereo or multichannel region by splitting it into its discrete channels. The created regions are added to the Editor List |
| Close Gaps | Extends (or reduces) the selected regions to be perfectly aligned. Optionally, sets up a crossfade duration, or a pull-back (spacing between regions) |
| Place Transient | Places a transient at the Edit Point. Used e.g. for the Pitch Shift… action |
| Rhythm Ferret… | Opens the Rhythm Ferret which is a powerful tool to sequence audio files |
| Strip Silence… | Opens the Strip Silence window which is a very handy tool to remove all audio under a user-chosen threshold (with a preview) |
| Reverse | Mirrors the audio horizontally |
| Layering | |
| Raise to Top | On overlapping regions, puts the selected one(s) on top |
| Raise | On overlapping region, makes the selected one(s) one layer higher |
| Lower | Makes the selected region(s) one layer lower |
| Lower to Bottom | Sends the selected region to the background |
| MIDI | |
| Transpose… | On a MIDI region, shows the Transpose MIDI window, allowing to shift the pitch of the whole MIDI region by ± n semitones or octaves |
| Insert Patch Change… | Inserts a patch change at the Edit Point, allowing a change of patch, channel, program and/or bank |
| Quantize… | Shows the Quantize window, allowing to perfectly align the MIDI notes to the musical grid |
| Legatize | Shortens or elongates the MIDI notes to make them perfectly sequential, i.e. the end of a note is the start of the following one |
| Remove Overlap | Shortens or elongates the MIDI notes to make them perfectly sequential, i.e. the end of a note is the start of the following one |
| Transform… | Transform window, that allows for mathematical operations on the midi notes |
| Unlink all selected regions | Makes the selected MIDI regions independent, e.g. editing this region won't affect any other one. |
| Unlink from unselected | Makes the selected MIDI regions independent from regions outside the selection, but keep the link between the selected ones. |
| Deinterlace Into Layers | Splits the selected region(s) to create in-place copies each containing only one channel. A region containing e.g. 3 channels will generate 3 stacked regions containing 1 channel each. |
| List Editor… | Shows the List Editor which sequentially lists all the MIDI events in the region, and allows for precise modifications |
| Gain | |
| □ Opaque | When checked, makes the region opaque audio-wise, i.e., the underlying regions won't be audible |
| □ Mute | When checked, mutes only the selected region on the track, without muting the track. The muted regions will have !! prepended to their name and will be semi-transparent |
| Normalize… | Shows the Normalize region dialog, which allows to scale the region level by setting its maximum level, optionally constraining the RMS |
| Boost Gain | Increases the gain on the selected region by boosting the audio, without touching the envelope or automation |
| Cut Gain | Reduces the gain without touching the envelope or automation |
| Reset Gain | If the gain has been edited, revert to its initial value |
| Reset Envelope | If the gain envelope has been edited, resets it to its initial value (constant at 0 dB) |
| □ Invert Polarity | When checked, inverts the signal's phase in the selected regions and renders the symbol (a diagonal line across zero) next to the names of affected regions |
| □ Envelope Active | When unchecked, disables any envelope editing that has been made. The envelope will be displayed in yellow instead of green. |
| Position | |
| Move to Original Position | Moves the region where it was initially recorded or inserted in the session |
| Snap Position to Grid | If the Grid Mode is set to Grid, snaps the region to the nearest grid line |
| □ Lock | Locks the selected regions at their current positions in time and tracks, avoiding any movement on the timeline. The region name will be surrounded by > and < brackets |
| □ Lock to Video | Same as above, relative to the position in the video |
| Set Sync Position | Creates or move the Sync position, i.e. the point of the region that will be aligned or snapped to the grid, and that is (by default) the beginning of the region. |
| Remove Sync | Removes any user defined Sync point, and resets the sync position to the beginning of the region |
| Nudge Later | Moves the region to the right by the amount shown in the nudge timer |
| Nudge Earlier | Same as above, to the left |
| Nudge Later by Capture Offset | Moves the region to the right by the capture latency computed by Ardour based on the user's settings regarding latency |
| Nudge Earlier by Capture Offset | Same as above, to the left |
| Sequence Regions | Puts the selected regions one after the other, so that the end of one region is the beginning of the next one, removing any overlap or silence. The reference point is the earliest region. |
| Markers | |
| Add Region Cue Marker | Opens a dialog to enter a region-level marker at the mouse pointer position |
| Clear Region Cue Markers | Removes all markers from the selected regions |
| Convert Region Cue Markers to CD Markers | Converts all markers from selected regions to CD markers, bit doesn't delete original region-level markers |
| Convert Region Cue Markers to Location Markers | Converts all markers from selected regions to location markers, bit doesn't delete original region-level markers |
| Trim | |
| Trim Start at Edit Point | If the Edit Point is within the region boundaries, shortens the region to align its start with the Edit Point |
| Trim End at Edit Point | Same as above, for the end of the region |
| Trim to Loop | Uses both the start and end Loop markers to shorten the region |
| Trim to Punch | Same as above with the Punch markers |
| Trim to Previous | On overlapping regions, shortens the selected one so that the previous region is complete, i.e. the new start point for the selected region is the end point of the previous region on the timeline |
| Trim to Next | Same as above, with the end of the selected region aligned to the start of the following one. |
| Ranges | |
| Set Loop Range | Creates a Loop range based on the selected regions, i.e. the start of the loop range is the start of the earliest region, and the end of the loop is the end of the latest region. |
| Set Punch | Same as above, for the Punch range |
| Add Single Range Marker | Same as above, for the Edit range |
| Add Range Marker Per Region | For each selected region, creates its own Edit range based on the boundaries of each region |
| Set Range Selection | Creates a range selection based on the boundaries of the selected regions |
| Fades | |
| □ Fade In | Activates/deactivates the Fade In at the start of the region |
| □ Fade Out | Same as above, for the Fade out at the end of the region |
| □ Fades | Shortcut to activate/deactivate both the fade in and fade out |
| Duplicate | |
| Duplicate | Creates a copy of the selected region(s) and appends it to the original |
| Multi-Duplicate… | Shows the Duplicate dialog, allowing to create multiple copies, or a not-integer number of copies (the last one will then be truncated) |
| Fill Track | Creates duplicates until it fills the session, i.e. reaches the End marker of the session. The last duplicate may be truncated to fit in |
| Export… | Shows the Export dialog, with all parameters set to export only the selected region(s) |
| Bounce (without processing) | Creates a bounce, i.e. a version of the region with all the edits (boundaries, envelope), as a new region in the Editor List, without any of the effects of the mixer strip |
| Bounce (with processing) | Same as above, with the effects of the mixer strip |
| Remove | Deletes the region from the edit (no file is harmed in the process, and the region stays in the Editor for later use) |
The Track Menu
The Track menu is where one can deal with the tracks, busses and control masters.
| Add Track, Bus or VCA… | Shows the Add Track, Bus or VCA… window, where one can add one or more tracks, busses or control masters to the session and define its parameters |
|---|---|
| Duplicate Tracks/Busses… | Shows the Duplicate Tracks and Busses window, allowing to duplicate the selected track(s) and optionally, its playlist |
| Toggle Record Enable | Sets the Record Enable mode On on the selected track(s). These tracks will record audio/midi next time the global record is active and playback is started. |
| Toggle Solo | Sets the solo On on the selected tracks, so only these tracks will play |
| Toggle Mute | Mutes the selected tracks, they won't play until unmuted |
| Playlists | |
| Show Playlist Selector | Opens the dialog where you can create new playlists or copy existing ones, as well as switch between playlists immediately |
| New Playlist For All Tracks | Creates a new playlist that includes all tracks |
| New Playlist For Rec-Armed Tracks | Creates a new playlist that includes only the tracks armed for recording |
| New Playlist For Selected Tracks | Creates a new playlist that includes only the selected tracks |
| Copy Playlist For All Tracks | Creates a copy of the current playlist that includes all tracks |
| Copy Playlist For Rec-Armed Tracks | Creates a copy of the current playlist that includes only the tracks armed for recording |
| Copy Playlist For Selected Tracks | Creates a copy of the current playlist that includes only the selected tracks |
| Insert Time | Shows the Insert Time window, allowing to insert a blank time in the selected tracks' playlist |
| Remove Time | Same as above, but to remove time |
| Remove Gaps | Locates gaps between regions and minimizes them, both original and final gap lengths are user-defined |
| Move Selected Tracks Up | Changes the position of the selected tracks one track up towards the top. In the mixer, the tracks will be moved to the left. |
| Move Selected Tracks Down | Same as above, towards the bottom |
| Height | |
| Fit Selection (Vertical) | Will fit the selected track(s) in the window. If too many tracks are selected, they'll be reduced to their minimum height. |
| Largest | Sets the selected tracks height to a very high value, hence making the tracks wide on screen |
| Larger | Same as above, but a little less high |
| Large | Same as above, but again less high |
| Normal | Sets the height of the track to its default value which is a trade-off between readability and number of tracks displayed |
| Small | Reduces the size of the tracks to a low value, increasing the number of on screen tracks |
| Toggle Active | Toggles the active state of a track. An inactive track will be grayed and won't play any sound. That can be seen in the A column of the Tracks and Busses List |
| Remove | Deletes this track and its playlist (no file is harmed in the process, and the regions from the playlist stay in the Editor for later use) |
The View Menu
The View menu sets how the session is seen, and what's visible or not.
| □ Maximise Editor Space | Puts the Editor window in full screen mode |
|---|---|
| □ Maximize Mixer Space | Puts the Mixer window in full screen mode |
| Region Layers | |
| Stacked Layer Display | When multiple takes are available, this will display them on top of one another |
| Overlaid Layer Display | When multiple takes are available, the most recent one will be displayed on top of older ones |
| Automation | |
| Toggle All Existing Automation | Show or hides all the automation lanes that have been edited by the user |
| Primary Clock | |
| Focus On Clock | Sets the focus on the main clock, allowing to type in numbers directly to change the playhead position |
| Timecode | Sets the main clock in timecode mode, so it displays time in the Hours:Minutes:Seconds:Frames format |
| Bars & Beats | Sets the main clock in musical time mode, so it displays time in the Bars:Beats:Ticks format |
| Minutes & Seconds | Sets the main clock in absolute time mode, so it displays time in the Hours:Minutes:Seconds.Milliseconds format |
| Samples | Sets the main clock in samples time mode, so the time is displayed in samples from the absolute start |
| Secondary Clock | |
| Timecode | Same as for the main clock (see above) |
| Bars & Beats | Same as for the main clock |
| Minutes & Seconds | Same as for the main clock |
| Samples | Same as for the main clock |
| Rulers | |
| □ Min:Sec | Shows (when checked) or hides a line in the Ruler with the time formatted as Hours:Minutes:Seconds.Milliseconds |
| □ Timecode | Same as above, with the time formatted as Hours:Minutes:Seconds:Frames |
| □ Samples | Same as the above, with the time displayed in samples from the absolute start |
| □ Bars & Beats | Same as the above, with the time formatted as Bars:Beats:Ticks |
| □ Time Signature | Shows / hides the time signature line in the ruler, where the signature can be adjusted along the playline |
| □ Tempo | Shows / hides the Tempo line, where the BPM can be changed with markers |
| □ Range Markers | Shows / hides the Range line, where ranges can be defined |
| □ Loop/Punch Ranges | Shows / hides the Loop/Punch line, where loops and Punches can be defined |
| □ CD Markers | Shows / hides the Range line, where CD Markers can be defined |
| □ Location Markers | Shows / hides the Markers line, where custom markers can be defined |
| □ Cue markers | Shows / hides the Cue line, where Cue markers can be set to trigger entire cues |
| □ Video Timeline | Shows / hides the Video timeline, where frames of the video are shown for syncing purposes |
| Zoom | |
| Zoom In | Zooms in, focusing the Zoom Focus (see below) |
| Zoom Out | Zooms out |
| Zoom to Session | Adjust the zoom value so that all the session (as defined by its start and end markers) fit in the window |
| Zoom to Extents | Adjust the zoom value so that all objects (markers, regions, etc…) fit in the window |
| Zoom to Selection | Adjust the zoom value so that all the selected regions fit in the window |
| Zoom to Selection (Horizontal) | Adjust the horizontal zoom value so that all the selected regions fit in the window, without changing the vertical zoom |
| Fit Selection (Vertical) | Fits the selected track(s) in the window. If too many tracks are selected, they'll be reduced to their minimum height. |
| Toggle Zoom State | Reverts to last zoom state (kind of "undo" for zoom, even if edits have been made in-between) |
| Expand Track Height | Increases the height of the selected tracks. If no track is selected, then all the tracks are expanded |
| Shrink Track Height | Same as above, but reduces the height of the tracks |
| Zoom Focus | |
| ○ Zoom Focus Left | Sets the screen's left side as the zoom target, i.e. when zooming in, the left side of the screen will stay at the same place in the timeline |
| ○ Zoom Focus Right | Same, with the right of the screen |
| ○ Zoom Focus Center | Same, with the center of the screen |
| ○ Zoom Focus Playhead | Sets the playhead as the focus point of the zoom, i.e. the point in time that will stay fixed |
| ○ Zoom Focus Mouse | Same as above, with the mouse pointer |
| ○ Zoom Focus Edit Point | Same as above, with the Edit Point |
| Next Zoom Focus | Circles between the previous modes |
| Scroll | |
| Scroll Tracks Down | Scrolls the view toward the bottom of the session from one screen (vertically, so along tracks) |
| Scroll Tracks Up | Same as above, towards the top |
| Scroll Forward | Scrolls the view toward the right of the session from one screen (horizontally, so along time) |
| Scroll Backward | Same as above, to the left |
| Video Monitor | |
| Original Size | When the Video Monitor is active, resets its size to the original size, i.e. 1 pixel in the video is 1 pixel on screen |
| □ Letterbox | When checked, forces the ratio (width/height) to be the one of the original video. If unchecked, the video will be stretched to fit the window |
| □ Always on Top | Stays above all other windows, enabling to work in Ardour without the video windows to be hidden in the background |
| □ Fullscreen | Sets the Xjadeo window to be fullscreen. Can be useful in a dual monitor setup |
| □ Timecode | When checked, displays a Timecode over the video, in the Hours:Minutes:Seconds:Frames format |
| □ Frame number | When checked, shows the absolute frame number inside the video, i.e. this image is the nth of the video |
| □ Timecode Background | Adds a black background to the timecode for readability |
| Editor Views | |
| Save View n | Saves the position on the timeline in the memory, horizontally and vertically (along time and tracks) |
| Go to View n | Loads and displays a saved position (see above) |
| □ Show Editor Mixer | When checked, the selected tracks' mixer strip is displayed on the left of the editor window, allowing for a quick access to e.g. effects and routing |
| □ Show Editor List | In the Editor window, shows the Editor List, giving access to a number of handy lists (regions, tracks, …) |
| □ Show Summary | If checked, in the Editor, shows the Summary, allowing a faster navigation in the session |
| □ Show Group Tabs | If checked, makes the groups visible as tabs on the left in the Editor, and on the top in the mixer |
| □ Show Marker Lines | If checked, each marker is extended across all the tracks in the editor with a line of the same color |
| □ Mixer: Show Mixer List | In the Mixer view, shows the Mixer list, giving access to some handy lists (Favorite plugins, The Strip list,…) |
| □ Mixer: Show VCAs | In the Mixer view, shows the VCA Strips if there are any |
| □ Mixer: Show Monitor Section | If the Use monitoring section on this session has been checked in the Session Properties window, shows or hides the Monitor Section in the Mixer |
| □ Mixer: Show Foldback Strip | In the Mixer view, shows the Foldback Strip if there are any |
The Window Menu
The Window menu deals with the layout of the different windows, and their visibility.
| □ Audio/MIDI Setup | Shows the Audio/MIDI Setup window, where the sound system configuration can be modified |
|---|---|
| Editor | |
| Show Editor | Switches to the Editor view |
| Hide | Hides the Editor, hence showing the Mixer when the windows are attached |
| Attach | If the Editor window is detached, separated from the main window, attach it back |
| Detach | If the Editor is attached to the main window, detach it (makes the Editor a separated window, useful for multi-monitor setup) |
| Mixer | |
| Show Mixer/Hide/Attach/Detach | Same as for the Editor, for the Mixer window |
| Recorder | |
| Show Recorder/Hide/Attach/Detach | Same as for the Editor, for the Recorder window |
| Cue Grid | |
| Show Cues/Hide/Attach/Detach | Same as for the Editor, for the Cue Grid window |
| Preferences | |
| Show/Hide/Attach/Detach | Same as for the Editor, for the Preferences window |
| Meterbridge | Shows the Meterbridge window, that displays all the tracks' meter at once and their recording status, and is very handy for multitrack recording |
| □ Locations | Opens the Ranges and Marks window, a single point of control for all range and location markers |
| □ Big Clock | Opens the Big Clock as its own separate (and huge) window, which is helpful when recording |
| □ Transport Controls | Opens a floating Transport Bar as its own separate window |
| □ Virtual Keyboard | Opens up the virtual MIDI keyboard. If a MIDI track is selected (or many), this keyboard can be used as an hardware device would. |
| □ Library Downloader | Opens up the Library Downloader which allows to download royalty free loopable material from kind people at Looperman. |
| □ Video Monitor | If a video has been imported in the session, opens a video window (namely, Xjadeo), synced to the timeline |
| □ Audio Connections | Opens the Audio Connection Manager window, a way to make connections to, from and within Ardour's mixer |
| □ MIDI Connections | Same as above, for the MIDI connections |
| □ Tracks and Busses | Opens the Tracks and Busses window, which is a shortcut to many tracks/busses operations (routing, effects, …) |
| □ Bundle Manager | Opens the Bundle Manager window, allowing to create and manage Bundles, which are a way to simplify connection management, by defining groups of ports |
| □ Plugin Manager | Opens the Plugin Manager, a dedicated tool to deal with plugins, add new ones, and troubleshoot all plugin-related issues |
| □ I/O Plugins | Opens the I/O Plugins window, to add I/O plugins, i.e. plugins that are applied before or after all processing, "outside" the session. |
| Scripting | Opens the Script console window where LUA scripts can be edited and run |
| Templates | Opens the Template Manager window, for both sessions and tracks templates management |
| □ Transport Masters | Opens the Transport Masters window, where all the timecode sources are shown to be selected and/or synchronized |
| □ Keyboard Shortcuts | Opens up a Keyboard Shortcuts window, which allows for easy creation or modification of any keyboard binding |
| □ Plugin DSP Load | Opens the Plugin DSP Load window showing all the active effects, plugins, etc… with bar-graphs showing the induced DSP load latency |
| □ Performance Meters | Opens the Performance Meters window showing the current system's load. Considering the buffer size, how much of it is spent idle or processing, and what takes processing time (engine or session) |
| Midi Tracer | Opens the MIDI Tracer window, allowing to follow each and every MIDI message entering or leaving Ardour |
| □ Log | Shows the Log window, where Ardour lists useful information, warnings and errors |
The Help Menu
The Help Menu gives access to useful information about Ardour.
| □ About | Shows the About Ardour window, which contains information about the version, config, authors, and license of Ardour |
|---|---|
| Chat | This is a shortcut to the webchat version of the Freenode IRC channel of Ardour, where the developers meet, and questions can be asked if the Manual is not enough |
| Tutorial | Link to a FLOSSManual guide to Ardour |
| Reference | Link to this manual, hosted on ardour.org |
| User Forums | Link to ardour.org's user forum |
| How to Report a Bug | Link to an helping page about reporting bugs |
| Report a Bug | Link to Ardour's Mantis bugtracker |
| Website | Link to Ardour's main and official website |
| Development | Link to the developers' part of the official website |
Status Bar

The status bar is an informative bar at the top of the window. Right clicking anywhere on the Status Bar allows to choose which of this information is displayed, through a checkbox menu, among:
| Path to Session: | the folder where the session files are |
|---|---|
| Snapshot Name and Modified Indicator: | the name of the snapshot being worked on. If the session has been modified since last save, the name is prefixed with an asterisk (*). |
| Active Peak-file work: | (only shows up while creating peaks) displays the number of peak files left to create |
| File Format: | the file format used in the session, including when recording |
| Timecode Format: | is the timecode, i.e. the number of frames per second used by the session (for videos) |
| Audio: | gives the sample rate used in the session, and the latency computed from the buffer size |
| Disk Space: | reports the remaining hard disk space as the time that can be recorded with the current session setting |
| DSP: | for Digital Sound Processing, shows worst case system load used by Ardour and plugins for realtime processing. The value is the percentage of time required to process vs. time available to process. |
| Wall Clock | showing the system time (especially useful in full screen mode) |
| Log button | that indicates if Ardour has encountered any warning or error. |
Some of these indicators also double as a shortcut to a relevant action, triggered by double clicking the info field:
| Path to Session / Snapshot Name and Modified Indicator | opens the session path in the file explorer |
|---|---|
| File Format: | opens the Media section of the Session Properties |
| Timecode Format: | opens the Timecode section of the Session Properties |
| Audio: | opens the Audio MIDI Setup window. |
| Log button | The log button turns yellow when a warning is shown, and red when an error occurs. Clicking the log button gives access to the log. |
Transport Bar
The transport controls
The Transport Bar groups all the actions regarding the control of playback and recording.
Transport action buttons
The upper row contains transport actions, that are all bound to keyboard shortcuts, which allows for speedier use and more focused work:
| Midi Panic | Immediately stops all midi output. |
|---|---|
| Enable/disable Audio Click | Toggles (on/off) a click track (metronome) along the tempo. Right clicking brings up the Click submenu from the Preferences. Scrolling with the mouse wheel adjusts the gain of the click. |
| Go to Start of the Session | Jumps back at the beginning of the session, as defined by the start marker. |
| Go to End of the Session | Jumps forward to the end of the session, as defined by the end marker. |
| Play Loop Range | Repeats the defined loop as defined by the Loop range, until the "Stop playback" button is pressed. Clicking the "Play loop Range" button while already active switches to normal Play mode, which exits the loop without stopping and restarting playback. |
| Play Range/Selection | If a range has been defined using the Range Mode button, plays the range, of if an audio or MIDI region is selected, plays this region. In both cases, the playback stops at the end of the range or selected region. |
| Play from playhead | Starts the playback and optionally record (more below). |
| Stop | Whatever the playing mode (loop, range, …) stops all playback. Depending on other settings, some effects (like chorus or reverb) might still be audible for a while. |
| Toggle Record | Global switch button to activate/deactivate recording. While active, the button blinks red. The button doesn't start recording by itself: if one or more tracks are marked as record-enabled, pressing the "Play from Playhead" starts recording on those tracks. |
If Ardour is synchronized with other devices then some or all of these control methods may be unavailable—depending on the synchronization protocol, Ardour may respond only to commands sent from its master device(s).
The Transport modifiers
The Shuttle Speed Control
Under these buttons is the Shuttle Speed Control that allows to temporarily scrub through the audio quickly. The slider decides the playback speed: the further from the center it is set, the faster the playback will scrub in both directions. The range of this acceleration can be set by right-clicking the control and setting the multiplier, either 1.5 (± 150%) or 2 (± 200%).
VariSpeed
The VS (for VariSpeed) button sets a constant playback/record speed. It can be set in semitones (1 semitone = × 2 1⁄12 ≈ 105,9%), cents of semitones, or percentages, and is armed/disarmed by clicking the button. The VS button will blink when VariSpeed is enabled. Whether or not this VariSpeed is persistent when stopping/restarting transport depends on the Reset default speed on stop parameter in the Preferences dialog.
Transport Sync
On the left of the slider is the positional sync button (which might show Internal, or MTC or several other values), than can be used to control whether or not the transport position and start is controlled by Ardour, or by an external positional synchronization source, such as MIDI Time Code (MTC), Linear Time Code (LTC) or JACK (see Timecode Generators and Slaves).
Transport Status
The current playback status (Stop, Play, or speed %) is shown on the right of the speed slider.
Using Key Bindings
Ardour has many available commands for playback control that can be bound to keys. Many of them have default bindings, some do not, so the list below shows both the default bindings and internal command names for some of them.
| Space | Switch between playback and stop. |
|---|---|
| Home | Move playhead to session start marker |
| End | Move playhead to session end marker |
| → | Playhead to next region boundary |
| ← | Playhead to previous region boundary |
| 0 | Move playhead to start of the timeline |
The Transport and Transport > Playhead menus contain a lot more transport actions and their key bindings.
Record/Punch Options
Punch controls
The punch controls available in the main toolbar, work in conjunction with the punch clocks, only visible while in Editor Mode.
The In and Out buttons relate to the Punch range, and allow to use only one of the two punch boundaries, or both:
| In only | Records from the In marker on, without an end boundary |
|---|---|
| Out only | Records until the Out marker, without a beginning boundary |
| In and Out | Records only between the In and Out markers |
Recording mode
The recording mode affects how the tracks behave when overdubbing:
| Layered | New regions will be layered on top of existing ones. Only the top layer will be played. This is the recommended mode for most workflows. |
|---|---|
| Non-Layered | The existing regions are trimmed so that there are no overlaps. This does not affect the previously recorded audio data, and trimmed regions can be expanded again at will. Non-layered mode can be very useful for spoken word material, especially in combination with push/pull trimming. |
| Snd on Snd | New regions will be layered on top of existing ones and made transparent. This means all overlapping layers will be played at the same time. This mode is typically recommended for progressively building up MIDI tracks, e.g. a drum track, in each individual take. |
See Track Modes for more information.
Transport Clocks

Clocks in Ardour are used to display time values precisely. In many cases, they are also one way to edit (change) time values.
In the transport bar of the editor window there are two clocks by default, that display the current position of the playhead and additional information related to transport control and the timeline. These are called the transport clocks; the left one is the primary transport clock (always showing the playhead position) and the right one is the secondary transport clock.
Having two transport clocks allows seeing the playhead position in two different time units without having to change any settings. For example, one can see the playhead position in both timecode units and BBT time. The secondary transport clock can nevertheless be hidden in the Preferences, at Appearance > Toolbar > Display Secondary Clock.
All the clocks in Ardour share the same powerful way of editing time. Refer to Editing Clocks to learn how. Editing the time in the transport clocks will reposition the playhead in the same way that various other editing operations will.
The transport clocks have special attributes due to their function:
Information panel
Under each clock is an information panel, that offers information about the current clock mode:
| Mode | Information |
|---|---|
| Timecode / Minutes:Second / Seconds | Source of Timecode (INT means that Ardour is its own timecode source) |
| Bars:Beats | Current tempo and current time signature. Clicking one of this button allows changing the value. |
| Samples | Sample rate (SR) and pull-up/down, as defined in the session properties. |
Time origin
In the Right-click menu, it is possible to change the time origin, i.e. the zero-point in time, amongst :
| Display absolute time | The zero point is the absolute start of the timeline (ignoring the session start and any timecode offsets). |
|---|---|
| Display delta to edit cursor | The zero point is the Edit Point as chosen from the Edit Point selector, e.g. a selected marker. |
| Display delta to origin marker | The zero point is the start marker of the session. |
- The transport clock may display a positive or negative value depending on the temporal order of the chosen zero value and the playhead.
- The clocks will use a different color when in delta to edit or delta to origin mode to avoid confusion.
- Also, when in the two later modes, the value of the clock can not be edited.
- left clicking moves the playhead to the time under the mouse cursor
- using the scroll wheel scrolls the playhead back and forth inside the session
- using scroll wheel scrolls more finely inside the session
- using scroll wheel scrolls even more finely inside the session
- the maxium reported latency by a plugin chain (worst route latency)
- the I/O latency, i.e. how long does it take for a signal arriving at any physical input to be played back again.
- Rec Cues: when enabled, every time you click on a cue in the Cue window during playback, Ardour will insert the correspinding cue marker at the current playhead position. Only use it when programming cue sequences to align with timeline content.
- Play Cues: when enabled, Ardour will play the corresponding cue every time the playhead passes its cue marker. This option is useful to be on by default.
- Mono: sums all of the paths to a single mono signal and applies it to all Monitor Section outputs.
- Dim All: Reduces overall monitor level by the amount set with the Dim level control.
- Mute All: Mutes all monitoring.
- The right sidebar (Editor list) and the bottom pane in the Editor window
- The bottom pane and the right sidebar (Cue list) in the Cue window
- The left sidebar in the Mixer window
- Deleting a range will move later regions to compensate for the deleted time
- Deleting a region will move later regions to compensate for the deleted region's length
- Moving a region will move later regions to compensate for the length of the move
- Inserting a new region (via dragging or via Paste) will move later regions to the right to compensate
- Selected. Only applies the ripple logic to currently selected tracks. After making a selection, you can use the Alt modifier and click on tracks to add or remove them to/from the selection. Markers will stay intact.
- All. Applies the ripple logic to all tracks on the timeline and shifts location, CD, and cue markers accordingly. Selecting a range with this mode will automatically make a time-constrained selection in all tracks of the project.
- Interview. This mode works just like the Selected mode with one exception: when you select a range and press Del, this will remove the selected portion of either audio or MIDI without shifting other clips to the left to match the freed space on the timeline. The main use case for this mode is editing interviews where you want the ripple behavior to edit out e.g. periods of silence, while being able to just delete e.g. an out-of-place noise or an exclamation by the interviewer.
- left-clicking in a part of the track that has no region, creates a one-bar long region, while left-dragging will create a region of arbitrary length.
- left-clicking on a region in Percussive mode creates a diamond indicating a hit.
- left-clicking on a region in Sustained mode creates a note whose duration is one Grid unit, while left-dragging creates a note of arbitrary Grid units length.
- On an automation lane, it allows to edit the automation like the Draw tool.
- On a MIDI region, it allows to lasso-select multiple notes at a time.
- On an audio region, it displays the current level of the signal and allows to edit the region gain like the Draw tool.
- Follow Playhead enables the mode where Ardour automatically scrolls the timeline to follow the playhead and always display it on the screen.
- Follow Range enables the mode where making a range selection moves the playhead to the start of the range.
- Left of the screen
- Right of the screen
- Center of the screen
- Playhead
- Mouse
- Edit Point as set in the Edit point control.
- Selection that focus on the selected tracks. If the selected tracks are not contiguous, the unselected tracks inbetween will be hidden, see the Track and Bus list.
- All that fits all the tracks of the sessions vertically (provided there's enough screen estate).
- Markers
- Region Sync points
- Region Starts
- Region Ends
- Grid.
- No Grid: hides the Grid
- Bar: shows one grid line per bar (e.g, in 4/4 at 120bpm, one line every 2 seconds)
- 1/4: shows one grid line per quarter bar, or 4 grid lines per bar (e.g, in 4/4 at 120bpm, one line every .5 seconds)
- ...
- 1/128: shows one grid line per 128th bar, or 128 grid lines per bar
- Triplets: groups the ternary divisions of time:
- 1/3 (8th triplet): shows one grid line per third bar
- ...
- 1/24 (64th triplet): shows one grid line per 24th bar
- Quintuplets: groups the 1/5th divisions of time:
- 1/5 (8th quintuplet): shows one grid line per fifth bar
- ...
- 1/20 (32th quintuplet): shows one grid line per 20th bar
- Septuplets: groups the 1/7th divisions of time:
- 1/7 (8th septuplet): shows one grid line per seventh bar
- ...
- 1/28 (32th septuplet): shows one grid line per 28th bar
- Timecode: shows one grid every frame
- MinSec: shows one grid line every thousandth of a second
- CD Frames: shows one grid line per CD Frame (1/75th second)
- the Playhead position
- the selected (or "active") Marker
- the position of the Mouse (or touch) pointer
- Set from Playhead : the clock is the current position of the playhead
- Locate to this time : moves the playhead to the the clock time
- Copy to clipboard : copies the clock (with formatting) to the clipboard.
- BPM at the start, sets a new tempo value.
- BPM at the end (only available for gradual transitions), defines the tempo value at the end of a tempo ramp.
- Tempo (transition) type, defines whether the tempo is the same (constant) until the next tempo marker or whether it gradually changes (ramps up or down) towards the next tempo.
- Location of the tempo marker, defined in musical time.
- Lock style, defines whether tempo is locked to musical time (bars and beats) or real time (minutes and seconds).
- Click and drag a marker left or right. Ardour will increment the change by one beat.
- Double-click the marker or right-click it and choose Edit to open the marker properties dialog, then change the bar and the beat where tempo change should occur.
- By repeatedly clicking the Tap tempo button in the dialog.
- By selecting a connected MIDI keyboard and repeatedly pressing either a piano key or a silicon pad.
- -clicking on the ruler
- Right-clicking on the ruler, then selecting the New Time Signature menu item
- Edit… to open the Edit Time Signature dialog;
- Remove to delete the selected time signature marker.
- Right-clicking on the Range Markers ruler at the top of the timeline, then selecting Add > Range. For loop ranges and punch ranges, please select Add > Loop Range and Add > Punch Range respectively.
- Selecting a range in the Editor window, then right-clicking and selecting Add Range Markers, Set Loop from Selection or Set Punch from Selection.
- Clicking New Range button at the bottom of the Ranges & Marks sidebar. The markers will be created around the playhead position, unless the playhead in at the time origin (in which case the markers will be placed at the time origin position).
- Right-clicking a location or a CD marker and selecting Create Range to Next Marker. This will create a pair of range markers that start at the selected marked and end at the position of the next location or CD marker (both rulers are taken into account).
- Double-clicking either of the two range markers will show a dialog for setting a new caption for the markers.
- The same can be achieved by right-clicking on either of the markers and selecting the Rename Range… menu item.
- Additionally, the name can be edited in the Ranges & Marks sidebar.
- By clicking on one of the markers and pressing the Del key.
- By right-clicking on one of the markers and selecting Remove Range.
- By clicking the markers' x button in the Ranges & Marks sidebar.
- By right-clicking on the Range Markers ruler at the top of the timeline, then selecting Add > Loop Range.
- By selecting a region on the timeline, right-clicking, then selecting [Region_Name] > Loop. This will create a loop range's start and end markers matching the beginning and the end of the region, then start playback of the loop range immediately.
- By selecting a range on the timeline, right-clicking, then selecting Set Loop from Selection. This will create a loop range's start and end markers matching the beginning and the end of the range selection respectively.
- By selecting a range on the timeline, right-clicking, then selecting Loop Range. This will create the same loop region and start loop playback immediately.
- By clicking the Play loop range button in the Transport toolbar
- By pressing the L key.
- By right-clicking on either of the two loop markers and selecting the Loop Range menu item.
- Individual markers can be dragged on the ruler by left-clicking and dragging. It is also possible to drag both the start and the end markers togother. Left-click and select both markers, then drag them.
- Positions of the start and the end markers can be edited numerically in the Ranges & Marks sidebar.
- Positions of the start and the end markers can also be reset from another range selection by making that selection, then right-clicking and selecting the Set Range from Selection menu item.
- Right-clicking and selecting the Remove Range menu item.
- Click the X button in the list of ranges in the Ranges & Marks sidebar.
- By right-clicking on the Range Markers ruler at the top of the timeline, then selecting Add > Punch Range.
- By selecting a range on the timeline, right-clicking, then selecting Set Punch from Selection. This will create punch range's start and end markers that match the beginning and the end of the range selection respectively.
- Individual markers can be dragged on the ruler by left-clicking and dragging. It is also possible to drag both the start and the end markers togother. Left-click and select both markers, then drag them.
- Positions of the start and the end markers can be edited numerically in the Ranges & Marks sidebar.
- Positions of the start and the end markers can also be reset from another range selection by making that selection, then right-clicking and selecting the Set Range from Selection menu item.
- Right-click on one of the punch range markers and select the Remove Range menu item.
- Click the X button in the list of ranges in the Ranges & Marks sidebar.
- using the keyboard shortcut (default is Tab)
- using the Transport > Markers > Add Mark from Playhead menu.
- right clicking in the Location Marker ruler, and selecting Add > Location Marker
- using the Ranges & Marks List, clicking New Marker and using the clock widget to set its position.
- Double-click on a marker opens a dialog where a new name can be submitted.
- Right-clicking on a marker and selecting Rename…. opens a dialog where a new name can be submitted.
- Editing and confirming the name by pressing Enter in an entry box in the Ranges & Marks sidebar.
- Hovering the marker and pressing Enter.
- Right-clicking on a marker and selecting Remove.
- Clicking the x for a marker of choice in the Ranges & Marks sidebar.
- Right-clicking on the Location Markers ruler and selecting Add > CD Track Marker.
- Any pre-existing location marker can be converted to a CD marker. Thus clicking the New Marker button at the bottom of the Ranges & Marks sidebar, then enabling the CD checkbox for the newly created marker will effectively create a new CD marker.
- Left-clicking and dragging on the CD Markers ruler will render a red-filled preview area that encompasses the future CD marker range. Releasing the mouse button will create a pair of CD markers named 'CDN' where N is a number that starts at 1 and is incremented by 1 (e.g. CD2, CD3 etc.) for every next pair of CD marker ranges.
- Creating a new pair of range markers in any supported way, then enabling the CD checkbox for the newly created range markers.
- Double-clicking on a marker or right-clicking on it and selecting the Rename… (single markers) or the Rename Range (paired markers) menu item brings up the dialog where the name can be changed.
- The name can also be changed in the Ranges & Marks sidebar by replacing the existing one and pressing the Enter key.
- By clicking a marker and pressing the Del key.
- By right-clicking on a markers and selecting Remove (single marker) or Remove Range (paired marker).
- By clicking the markers' x button in the Ranges & Marks sidebar.
- The white rectangle can be dragged anywhere on the session, moving the view accordingly.
- The right and left borders of the white square can be resized, zooming in and out accordingly.
- The toolbar on the right of the Summary pane has several controls: scrolling left and right, zooming out, zooming in, and zooming to fit the entire session (Start to End markers) on the screen.
- Pianoroll editor for a selected MIDI region
- Generic plugin UI for all plugins in the selected track
- Canceling the requested action and doing nothing.
- Removing just the regions that use the selected source, but not the sources themselves.
- Removing both the regions that use selected sources and deleting the selected sources. The latter action cannot be undone and requires using the Session > Cleanup > Flush Wastebasket command to physically delete the sources.
- Selection… to create a group of all selected tracks
- Record Enabled… to create a group of all the tracks that are record enabled
- Soloed… to create a group of all the soloed tracks
- Favorite Plugins which have been selected by the user as such,
- Recent Plugins which are the n last used plugins, n being a chosen value in the Statistics section of the Preferences,
- Top-10 Plugins which are the n most used plugins, n being also chosen value in the Preferences (so it is more of a "Top-n").
- Plugin names that have a right facing triangle (▷) next to them have presets associated with them; clicking on the triangle will cause all presets associated with the plugin to show in the list.
- Plugins can be dragged from the window to any track or bus processor box, which will add the plugin to that track or bus at the given position.
- The list includes user-presets for the plugins. Dragging a preset to a given track or bus will load that preset after adding the plugin.
- Double-clicking on a plugin or preset adds the given plugin to all selected tracks/busses pre-fader. Other insert positions are available from the context menu (right click).
- Dragging a plugin from a track into the window will add it to the list and optionally create a new preset from the current settings. The horizontal line in the list shows the spot where the plugin will land.
- The context-menu allows the deletion of presets or removal of the plugin from the list.
- Plugins in the list can be re-ordered using drag & drop. The custom order is saved.
- Show All
- Hide All
- Show All Audio Tracks
- Hide All Audio Tracks
- Show All Audio Busses
- Hide All Audio Busses
- Show All MIDI Tracks
- Hide All MIDI Tracks
- Header
- Track name
- Input(s)
- Polarity only for audio tracks
- Processor box
- Panner
- Recording options
- Mute/Solo
- Gain & Meter
- Control master
- Fader automation/mix group/metering point
- Output(s)
- Comments
- The double arrow button allows to shrink/expand the width of the strip. Click the button will shrink/expand all the tracks at once
- The color bar shows the color of the track in the editor
- The X button toggles the visibility of the track OFF. To turn it back ON, one can either go to the Tracks and Busses list in the Editor view and check the "V" column on the track's line or stay in the Mixer view and check the Show column of this strip in the Strips list.
- Solo Isolate, as the name suggests, isolates tracks or busses from the solo system. When tracks or busses are soloed the isolated ones will not mute.
- Solo Lock locks the solo into its current state (i.e. solo on or solo off). It will not allow the solo state to be changed until the lock is released.
- its input (which is midi, as shown by the red signal lines in the processor box) instead of n audio
- the fact that an instrument can be placed on it at creation time, whereas it can't easily be done for an audio bus
- as for tracks, the MIDI bus doesn't have a trim knob or invert phase button(s).
- as the busses don't have a playlist (and cannot host any media), they can't be recorded on. The recording controls are not present
- an Aux button replaces these controls.
- Nest VCAs (VCA 2 controls VCA 1 etc.)
- Chain VCAs (VCA 1 and VCA 2 both control track or bus N)
- Number of the VCA
- X button: Allows to hide the VCA strip. Left clicking this button toggles the exclusive visibility of the tracks connected to this VCA
- Name button
- M: mutes the VCA, S: solos the VCA
- Level meter: allows to adjust the level of the VCA
- ~vca~: a VCA button to optionally connect to another VCA
- Previous and Next buttons
- Hide button
- Foldback bus name button
- Invert button
- Show sends button
- Send controls
- Bus pan control
- Processor box
- Listen button
- Foldback bus level control
- Foldback bus output routing
- Comments button
- Comments is the same as the Comments button at the bottom of the strip
- Outputs shows the output routing grid
- Save as a template opens the template save dialog. The template saved has the same number of channels and the same processors but does not have any sends selected.
- Rename shows a rename dialog that allows the Foldback bus name to be renamed
- Active toggles The active status of the current Foldback bus
- Protect Against Denormals turns on denormal protection for the current Foldback bus
- Remove will remove the current Foldback bus
- Assign Selected Tracks creates Foldback sends on each selected track that feed the current Foldback bus
- Assign Selected Tracks and Buses creates Foldback sends on each selected track and bus that feed the current Foldback bus
- Copy track/bus gains to sends Sets the gain on the send to be the same as the gain of the track or bus the send comes from for the current Foldback bus
- Set sends gain to -inf sets the gain on all sends for the current Foldback bus to −∞ (the lowest gain possible)
- Set sends gain to 0dB sets the gain on all sends for the current Foldback bus to 0dB
- The button which shows the Foldback bus' name, has an active "LED"
indicator that can be clicked to enable or disable that send and has
a menu (mouse button 1) with items for that send:
- Copy track/bus gain to send Sets the gain on the send to be the same as the gain of the track or bus the send comes from for the current Foldback bus
- Set send gain to -inf sets the send gain for the current Foldback bus to −∞ (the lowest gain possible)
- Set send gain to 0dB sets the send gain for the current Foldback bus to 0dB
- Remove This Send removes the send from the sending track or bus.
- The knob, only present on a stereo Foldback bus, which controls the pan azimuth
- The horizontal slider which control the level input from that channel
- There is no color affected to the master strip
- There is exactly one and only one Master Bus Strip for a session, so it cannot be saved as a template, duplicated or removed in the context menu, although it can be renamed.
- The master strip cannot be hidden or disabled, so there is not X in the top right, nor an Active checkbox in the context menu.
- It is by definition always solo, so there is no Solo button, and Iso and Lock are disabled.
-
If the Master bus output gain control
is enabled, two controls are visible:
- a LAN button, to start the Loudness Analyzer & Normalizer,
- a volume slider to that can be controlled manually or set by the Normalizer.
-
If the session has a Monitoring section,
two buttons are visible:
- Mute to mute the Master bus while the monitoring is still active,
- Mon to show/hide the monitoring section in the Mixer view.
- It cannot belong to a mix group, so the Grp button is missing.
- By using the Track > Height menu. The Fit selection (Vertical) (default: F) is particularly useful.
- By double-clicking an empty space in the track header, to toggle the track's height between the Normal and Largest track heights from this menu.
- Or by grabbing the bottom of the track header with a left click and drag.
- dragging will change the fader's value as per the mouse's position
- clicking will set the fader to −∞
- clicking will reset the fader to its original 0dB position.
- The level meters for the track's outputs show MIDI output in red, on the left; Audio output in green, on the right
- The Scroomer, a combined scroll and zoom widget for controlling MIDI notes display range, is unique to MIDI tracks
- An External MIDI Device combobox can appear, for selecting MIDNAMs
- An External Device Mode combobox can appear, for selecting an external device's mode, in case no relevant External MIDI Device has been selected
- The scrollbar controls the range of pitches that are visible on the track, as visualized by the piano keyboard. Dragging the body of the scrollbar up and down displays higher or lower pitches.
- Dragging the scrollbar handles zooms in and out and increases or decreases the range of visible pitches.
- Double clicking the scrollbar auto-adjusts the zooms to make the range of visible pitches fit the actual content of the track.
- Clicking on the piano plays the corresponding MIDI note for reference.
- left clicking on a note adds the note to the selection (for all regions on the track). See Note Selection.
- middle clicking a note clears the selection, selects only the note.
- Record only selected channels
- Force all channels to 1 channel
- Play only selected channels
- Use a single fixed channel for all playback
- the playlist button, as a bus doesn't have any playlists or regions by itself, it is only a pipe to route audio or midi through
- the record button, for the same reason.
- Right-clicking on the group tab and using one of the Create… options there. A group can be created with no members, or one that starts with the currently selected tracks, or record-enabled tracks, or soloed tracks.
- Alternatively, clicking the g button on a track header to open the Group menu. The menu lists the available groups. Selecting one of these groups will add the track or bus to that group. The menu also allows creating a new group.
- Finally, the Track and Bus Groups list has a plus (+) button at the bottom of the list that can be clicked on to create a new group.
- Adjusting fader position in one track/bus will change faders' positions of other selected tracks/busses by the same amount. The same applies to input trim changes.
- Toggling Solo, Mute, Rec-enable, Solo Safe, Solo Isolate, Monitoring controls in one track/bus will toggle the same type of control in other selected tracks/busses.
- When a change to a control in a selected track/bus comes from a hardware control surface.
- When you use the mouse scroll wheel to adjust faders (this is a temporary limitation).
- Detach/attach control. This separates the Monitor section into its own floating window
- Status indicators for important functions
- Solo behaviour selection
- Show, hide and status of the Monitor Sections inline processors
- Level controls for solo functionality
- Level control for Monitor Dim
- Individual monitor path controls
- Mute, Dim and Mono functions for the monitor outputs
- Monitor level control
- Monitor output routing
- Soloing: This indicates when one or more tracks or busses are currently being soloed. See Muting and Soloing. Clicking on this indicator cancels all currently soloed channels or busses
- Auditioning: This indicates when an audio file is being listened to directly, e.g. when using the import dialogue, or using the Audition context menu in the Regions List. Clicking this indicator cancels the current audition
- Isolated: This indicates when one or more tracks or busses are solo isolated. See Muting and Soloing. Clicking on this indicator cancels any current isolation.
- Mono: sums all of the paths to a single mono signal and applies it to all Monitor Section outputs.
- Dim: Reduces overall monitor level by the amount set with the Dim level control.
- Mute: Mutes all monitoring.
session_name.ardourthe main session snapshot*.ardour, any additional snapshotssession_name.ardour.bak, the auto-backup snapshotsession_name.history, the undo history for the sessioninstant.xml, which records the last-used zoom scale and other metadatainterchange/, a folder which holds the raw audio and MIDI files (whether imported or recorded)export/, a folder which contains any files created by the Session > Export functionpeaks/, a folder which contains waveform renderings of all audio files in the sessionanalysis/, a folder which contains transient and pitch information of each audio file that has been analyseddead sounds/, a folder which contains sound files which Ardour has detected are no longer used in the session (during a Session > Clean-up > Clean-up Unused Sources operation, will be purged by Flush Waste Basket, see Cleaning Up Sessions)- Regular Ardour sessions
- Ardour session archives
- Sessions in the Advanced Authoring Format (AAF)
- The number of tracks and busses, along with their names
- The plugins present on each track or bus (if any)
- All I/O connections
- Renaming a template
- Removing one
- Adding/modifying its description
- Exporting the templates (e.g. to be used in another Ardour instance)
- Importing templates (from e.g. another Ardour instance).
- the session-archive only contains the current session-snapshot and only files which are used
- externally referenced files are included in the archive.
- None
- FLAC 16bit
- FLAC 24bit
- Choosing Track > Add Track, Bus or VCA…
- Right-clicking in an empty part of the track controls area
- Clicking the Plus (+) button underneath the list of tracks in the mixer
- I/O configuration including sends and inserts
- State of mixer controls (mute, solo, solo iso/lock etc.)
- All the processors and their settings
- In the Editor window, the Master bus will always be on top unless hidden. Tracks and busses will appear in their initial order, from top to bottom. The monitor section (if used) is never visible in the editor window.
- In the Mixer window, the tracks and busses will be displayed in their initial order, from left to right. The Master bus is always on the far right and occupies its own pane, so that it is always visible no matter how many other mixer strips are present. If a Monitor section is used, it shows up at the right edge of the mixer window; it can also be torn off into a separate window.
- Selecting the tracks to be moved, then dragging them up or down with the mouse (available since Ardour 8.7).
- Selecting the tracks to be moved, then using Track > Move Selected Tracks Up (shortcut: ↑) or Track > Move Selected Tracks Down (shortcut: ↓).
- Selecting the tracks to be moved in the Tracks & Busses panel of the Editor Lists dock, then dragging them up or down.
- A duration display, that shows the duration of the last (or current) recording. It is always displayed as hours:minutes:seconds:tenths, regardless of the Transport clocks display settings.
- An x-run counter, an x-run being a buffer under(or over)flow. Each time such an x-run occurs, an artifact is recording, that can be audible or not, but is a red flag for the recording quality.
- A Discard Last Take button, that deletes the last finished recording(s), effectively removing the audio file(s) from the hard drive, hence destructive.
- All In: all the tracks play what is on their Inputs,
- All Disk: all the tracks play the actual content of the playlist on Disk,
- or both: also called "cue monitoring" if both buttons are engaged, a combination of the two modes above, where all the tracks play existing data from disk while also listening to the input signal. This is particularly useful for MIDI tracks, where one can hear a performance/new material while listening to the playback of existing material in the track.
- When not playing: all tracks are on In (to listen to any connected source)
- When playing, all tracks are on Disk (to play whatever was recorded on those tracks)
- When recording, on rec-enabled tracks: In and on non rec-enabled ones: Disk
- New Playlist for All Tracks creates a new playlist for each visible track, while
- New Playlist for Rec-Armed uses the ● recording status of each track to generate new playlists.
- Disk space shows how many time or recoding is available on the current hard drive (i.e. the hard drive where the session is located), by accounting the bit depth, sampling rate, and number of armed tracks. The result is either a duration, or >24h if it exceeds 24 hours.
- Reset Peak Hold clears the memory of the highest recording level in the meters located in the bottom input panel, and displayed with a green line.
- it always encompasses the whole session in the time axis,
- the regions are displayed as blocks, not waveforms,
- no editing, like moving or resizing regions, is possible
- each track (or lane) has a fixed and narrow height
- A zone showing grouping, as in the Editor, with the same functions and menus.
- A ● rec-arm button. When armed, the entire button will turn pink, and change to bright red as soon as the transport is rolling and the track is recording. Right-clicking will allow to en/disable Rec-safe, protecting the track against accidental recording.
- An Input button displaying the connected input(s) of the track. It is the same button as the Input button shown in the Mixer strip, and behaves exactly the same way (Left-clicking to show the input menu, Right-clicking shows the input connection matrix).
- A P playlist button displaying the connected input(s) of the track. Again, it is the same button as the one shown in the Editor's track header, and behaves exactly the same way (Left-clicking to show the playlist menu).
- A Track Name label, displaying the track's name.Double-clicking allows to edit (rename) the track.
- Two In and Disk buttons allowing to set this particular track's monitoring option, as described above.
- N level meters showing the input level of the track, as in the Editor's track header, N being the number of input channels of the track.
- A n numbered button, using the track's color as background color. Numbering can be useful when using OSC, a MIDI controller, or when recording multiple performances at once.
- An overview of the track's content, with solid blocks representing regions. The region's color is the track color, except while recording where the recorded regions are displayed in red.
- a (1) button indicating how many tracks are fed by this input. Clicking this button will show only those tracks.
- a + button, allowing to create a track that will be automatically connected to this input. The type of track (MIDI or aurio) depends on the input type.
- a PFL button, or Pre-Fader Listen, active only if Use monitor section in this session is checked in the Session Properties. When active, sends the soloed signal to the Monitor.
- a Input's Name button. Inputs can be named or renamed at will, to ease the recognition of e.g. one microphone in a multi-track recording, like a multi-instrumentalist performance, by clicking the button. Ardour stores this name for the device, so any later session using this input will show this label.
- a live level-meter for this input that shows the current level of the audio signal. A green line marks the Peak Hold, i.e. the maximum level reached on this input.
- a continuous waveform, showing the input state during the last 5 seconds.
- a channel indicator, the channel numbers lighting up as events come in to show channel activity.
- a MIDI monitor, showing the last four MIDI events.
- Clicking the button to the left of the transport panel.
- Pressing the ` keyboard shortcut.
- Pressing either the designated button or any other button on a MIDI keyboard that is mapped to the metronome in a MIDI map.
- Emphasis on the first beat: when enabled, the metronome will make a louder click on the first beat to help musicians with the time signature.
- Use built-in default sounds: when this option is disabled, you can load your preferred audio files for the metronome. Otherwise, Ardour will use built-in audio files.
- Gain level: you can set here how loud you want metronome clicks to be. You can also adjust this setting by hovering the metronome toggle button in the main window and scrolling the mouse wheel up or down. As you change the value, the tooltip will update to show the new gain level.
- Enable metronome only while recording: when enabled, you will only hear metronome clicks while recording; there will be no metronome clicks while playing back the takes.
- Main menu: Session > Import
- Region List context menu: Import To Region List
- Track context menu: Import Existing Media
- number of channels,
- sample rate,
- file format,
- length,
- embedded timestamp (applies to some professional formats such as Broadcast WAVE), and
- tags (attached metadata to help categorize files in a library).
- the file timestamp (if available, zero by default)
- at the edit point
- at the playhead
- at the session start.
- Sort: allows sorting all sound clips that match your request in a particular order. Changing the type of sorting requires running the search again.
- License: allows limiting your search by choosing a particular license depending on how you license your own work.
- Amazon Music
- Apple Music
- BWAV 24bit
- BWAV 32float
- CD (Red Book)
- FLAC 24 bit
- MP3 (extreme)
- MP3 (medium)
- MP3 (standard)
- Ogg/Vorbis
- Ring Tone
- Soundcloud and Spotify
- Wav (Tagged)
- YouTube and Deezer
- CD + Ogg/Vorbis + FLAC
- CD only
- DVD-A only
- FLAC
- Ogg/Vorbis
- Ogg/Vorbis + FLAC
- Streaming
- The session or snapshot's name
- A custom label (i.e., any text)
- A revision number
- The name of the timespan (see below)
- A date (in multiple formats)
- A time (also in multiple format).
- the file name and location
- its format
- its channel count
- its sample rate
- its duration and timecode.
- the Peak value
- the True Peak value (to take inter sample peaks into account)
- the Normalization Gain (if it has been applied)
- the Integrated Loudness
- the loudness range
- a graph of the multiplicity of the peaks at the different loudness levels.
- Peak, which adjusts the gain to bring the highest signal peak to the chosen level (in dBFS),
- Loudness, which adjusts the gain to bring the average amplitude to the chosen level (in LUFS), without exceeding the chosen true-peak value (in dBTP). EBU R128 is only available for mono or stereo sounds while true-peak works for any channel layout.
- %a: Artist name
- %b: File's base-name
- %c: Copyright
- %d: File's directory
- %f: File's full absolute path
- %l: Lyricist
- %n: Session name
- %o: Conductor
- %t: Title
- %z: Organization
- %A: Album
- %C: Comment
- %E: Engineer
- %G: Genre
- %L: Total track count
- %M: Mixer
- %N: Timespan name
- %O: Composer
- %P: Producer
- %S: Disc subtitle
- %T: Track number
- %Y: Year
- %Z: Country
- Automatically loading the exported file into a respective slot of a cue of user's choice.
- Bouncing the region to a user-defined Clips folder so that it could be reused across sessions.
- OMF (Open Media Framework), also known as OMFI. Developed and controlled by Avid, never standardized
- AAF (Advanced Authoring Format). Developed by a consortium of media-related corporations.
- By clicking the Other Sessions button on the Session Setup Dialog,
- Or by going to Session > Open... menu.
- Audio regions data & position
- MIDI notes (fused to a unique region).
- The first selector directly selects how many tracks are currently on screen.
- The second one reduces the height of the selected track(s). If none are selected, all the tracks are affected, while maintaining (as long as it is possible) their relative heights.
- The third one enlarges the tracks, and is the counterpart of the previous one.
- the audio or MIDI source file(s) they represent,
- an offset (the "start point") in the audio or MIDI file(s), and
- a length.
- a position along the timeline, and
- a layer.
- Ctrl-left-click adds individual regions to the selection.
- Shift-left-click adds consecutive regions to the selection, Ardour considers all regions of the same track to the right from the currently selected track as consecutive regions.
- Press Ctrl+G
- Use Region > Group Selected Regions in the main menu
- Use Selected Regions > Group Selected Regions in the right-click menu.
- Press Shift+Ctrl+G
- Use Region > Ungroup Selected Regions in the main menu
- Use Selected Regions > Ungroup Selected Regions in the right-click menu.
- Region properties pane
- Editor toolbar
- Note editing area
- Automation editing area
- Name: the name of the region
- Source: the MIDI file where the notes are stored
- Position: where on the timeline the region starts
- End: where on the timeline the region ends
- Length: the duration of the region
- File start: where the visible part of the region begins, counting from the region's start
- Sync point (relative to the region)
- Sync point (absolute)
- Play once starting at the beginning of the region
- Loop-playback the region until stopped
- Solo toggle for the track where the region is located
- Select visible MIDI channel: notes on this channel will be editable, notes on other channels will be displayed as ghost notes that cannot be edited
- Note mode selector: whether to display notes in regular or drum (diamond-shaped) mode
- Follow playhead: whether the pianoroll window should automatically scroll horizontally to follow the playhead
- Draw vs Edit mode selection
- Snapping toggle: enables or disables snapping to selected grid units
- Grid mode: allows selecting a specific grid unit or no grid at all
- Length: default note length for notes created by single-clicking on the timeline
- Velocity: default note velocity. The 'Auto' option inherits the velocity from the nearest note
- Zoom in
- Zoom out
- Zoom to show the entire region
- Zoom focus mode
- Select the Draw mode and then click and drag to add a note. Alternatively, press and hold Shift and click and drag to brush notes at the interval defined by global quantization.
- Select the Edit mode, click on a note or rubberband-select multiple note, then click and drag notes by their middle to move them, or click and drag on the left or the right side of one note to trim or extend.
- the name of the track for which they were recorded, or
- the name of the embedded/imported file they represent.
- each region starts at the same offset within its source file,
- each region is located at the same position on the timeline, and
- each region has the same length.
- If the Edit Point is mouse, then
- if the mouse is over a selected region, or no region, use all selected regions, or
- if the mouse is over an unselected region, use just that region.
- For all other Edit Points
- use the selected regions and those that are both under the edit position and on a selected track, or on a track which is in the same active edit-enabled route group as a selected region.
- Left-clicking each region.
- Dragging a rubberband box from an empty point in a track before the first region to select to a point within or after the last region to select. Using left-drag allows doing it multiple times.
- If the regions are all adjacent to one another, clicking the first region to select, then Left-clicking the last one.
- If the material doesn't need its pitch to be preserved, the best choice is Resample without preserving pitch
- For drum-type material, the best choice is (depending on the transients crispness, stretching factor...) one of the two percussion types
- For melodic mono-tonal material (bass, winds,…), the best (and default) choice is Crisp monophonic instrumental
- For multi-tonal material (chords,…), either one of the three first choice, or the default Crisp.
- Cut/Paste Range Section to Edit Point
- Copy/Paste Range Section to Edit Point
- Delete Range Section
- to switch from one playlist to another (with the added benefit, compared to switching directly from the Local Playlists list, to see the creation date and time),
- to create a new, empty playlist, with the New Playlist(s) button,
- or to create an independent copy of the current one, with the Copy Playlist(s) button.
- by creating a new track to assemble the final version, and "cherry picking" from the playlists in the original track by copying regions over as required
- by recording each successive take on top of the others in "layers" and then editing them using the layer tools.
- a "mode" selection
- some parameters for this mode
- an operation selection, that for now only allows to Split regions.
- Percussive Onset will detect the start of each hit based on the sudden change in energy (= volume) of the waveform
- Note Onset will detect the start of each note based on the changes in the frequency domain.
- MIDI, just like audio, exists in regions. MIDI regions behave like audio regions: they can be moved, trimmed, copied (cloned), or deleted. Ardour allows either editing MIDI (or audio) regions, or MIDI region content (the notes), but never both at the same time. The e key (by default) sets Internal Edit Mode, which allows the editing of MIDI data in a given region.
- All MIDI I/O is handled by the audio/MIDI backend was chosen when starting Ardour. In general, all backends provide sample accurate timing and maximal efficiency when communicating with external software synthesizers.
- Every MIDI track has its own input port; it may have an arbitrary combination of audio and MIDI outputs, depending on the signal processing in the track; the full flexibility of Ardour patching & connectivity is present for MIDI just as it is for audio.
- Full automation for MIDI tracks, integrated with the handling of all MIDI CC data for each track.
- Controllers (CC data) can be set to discrete or continuous modes; the latter will linearly interpolate between control points and send additional data.
- Fader (volume) control currently operates on transmitted MIDI data, not by sending CC #7.
- All note/data editing is per-region. There are no cross-region operations at this time.
- By default, copying a MIDI region creates a deep link—both regions share the same data source, and edits to the contents of one will affect the other. Breaking this link is done by selecting MIDI > Unlink from other copies from the region context menu, after which the selected region(s) will have their own copies of only the data that they visually display on screen. The region will no longer be trimmable back to its original length after an Unlink operation, and the operation cannot be undone.
- Editing is done either in-place and in-window, in a separate pianoroll window, or a bottom panel editor. Notes are edited right where they appear.
- Editing note information in Ardour occurs in only a single region. There is no way currently to edit note data for multiple regions at the same time; so, for example, notes cannot be selected in several regions at once and then all deleted. However they can be copied and pasted from one region to another.
- Every MIDI track has its own MIDI port for input; it may have an arbitrary combination of audio and MIDI outputs, depending on the signal processing in the track.
- Full automation for MIDI tracks, integrated with the handling of all MIDI CC data for each track.
- Controllers (CC data) can be set to discrete or continuous modes (the latter will interpolate between control points and send additional data).
- There is a Normal and a Percussive mode for note data editing.
- The visible note range is controlled by a scroomer widget, which is a combination scroll/zoom tool for altering the zoom level and range of visible MIDI data. When in internal edit mode, you can also use scroll operations to adjust the visible range in various ways.
- Select one or multiple MIDI regions on the timeline.
- Right-click, then select {region name} > Edit in a separate window…
- MIDI Inspector pane
- Editor toolbar
- Note editing area
- Automation editing area
- Chord Editing
- Quantize
- Region Properties
- Name: the name of the region
- Source: the MIDI file where the notes are stored
- Position: where on the timeline the region starts
- End: where on the timeline the region ends
- Length: the duration of the region
- File start: where the visible part of the region begins, counting from the region's start
- Sync point (relative to the region)
- Sync point (absolute)
- Play once starting at the beginning of the region
- Loop-playback the region until stopped
- Solo toggle for the track where the region is located
- Select visible MIDI channel: notes on this channel will be editable, notes on other channels will be displayed as ghost notes that cannot be edited
- Note mode selector: whether to display notes in regular or drum (diamond-shaped) mode
- Follow playhead: whether the pianoroll window should automatically scroll horizontally to follow the playhead
- Draw vs Edit mode selection
- Snapping toggle: enables or disables snapping to selected grid units
- Grid mode: allows selecting a specific grid unit or no grid at all
- Length: default note length for notes created by single-clicking on the timeline
- Velocity: default note velocity. The 'Auto' option inherits the velocity from the nearest note
- Zoom in
- Zoom out
- Zoom to show the entire region
- Zoom focus mode
- Select the Draw mode and then click and drag to add a note. Alternatively, press and hold Shift and click and drag to brush notes at the interval defined by global quantization.
- Select the Edit mode, click on a note or rubberband-select multiple note, then click and drag notes by their middle to move them, or click and drag on the left or the right side of one note to trim or extend.
- Select multiple MIDI regions that start at the same time on the timeline.
- Right-click, then select Selected Regions > Edit in a separate window…
- With no notes selected, unmodified scrolling will move the visible range up and down.
- scroll will increase and decrease the visible range (zoom out and in).
- scroll will expand either the top or bottom of the visible note range (depending on scroll direction). Think of this as "show me higher pitches" or "show me lower pitches".
- For an already opened MIDI region, switch to the Draw mode.
- Click on the pencil button next to the chord you want to add.
- Draw the root note in the region.
- Select all the chord notes. Ardour will attempt to identify the chord and display it at the top of the Chord Editing section.
- Find the chord you want to change it to and click on the respective button.
- Select all the chord notes.
- Click on one of the two buttons:
Move Up orMove Down . - Drop 2: moves the second lowest pitch by 1 octave
- Drop 3: moves the thiord lowest pitch by 1 octave
- Drop 2+4: moves the second and the fourth pitches by 1 octave
- Select all the chord notes.
- Click on one of the two buttons:
Drop 2 ,Drop 3 , orDrop 2+4 . - The vertical position: the lower the lollipop head is, the lower is the velocity value, and vice versa.
- The color: just like with notes on the timeline, it goes from pale yellow (low velocity) to bright red (high velocity).
- Set velocity to this note's velocity
- + a random number from 1 to 20
- - a random number from 1 to 20
- MIDI note number (e.g. C2 is note number 24, C#2 is 25, etc.)
- MIDI velocity (the volume of the note, between 0 and 127)
- start time (in beats)
- length (in beats)
- MIDI channel
- this note's
- the previous note's
- this note's index (number of the note, i.e. the first one is 0, the second is 1, etc.)
- exactly (for a constant value, between 1 and 127)
- a random number from lower to higher (lower and higher being constant values between 1 and 127)
- equal steps from lower to higher (lower and higher being constant values between 1 and 127)
- + (addition)
- - (subtraction)
- * (multiplication)
- / (euclidean division)
- mod (remainder of the euclidean division)
- Chord entry switch (successive notes are stacked in a chord until it is released)
- Note length selectors
- Triplet toggle
- Normal, single, double and triple dotted note selectors
- Sustain button
- Buttons to:
- Insert a rest of the current selected note duration
- Insert a rest of the current grid step size
- Move back to the last inserted note
- Move forward to the next beat, or bar
- Move to the edit point
- Dynamics controls from pianississimo to fortississimo
- Channel selector
- Explicit numerical velocity selector, for more precise control than the dynamics selectors offer
- Octave selector
- A full 10-octave virtual keyboard
- A channel selector to choose on which MIDI channel the events are generated
-
A pitch bend that can bend as much as the virtual instrument allows.
The MIDI specification defines the pitch-bend range as [0..16383].
So Ardour maps that range to whatever the synth has and sets the
neutral/middle position in the virtual keyboard to 8192. If the synth
operates in the +/- 2 semitones range, that makes 1 semitone 4096
units large. The controls are:
- Mousewheel up/down : persistent bend up/down
- Mouse-drag up/down (by left-clicking anywhere in the slider) : sprung-mode bend up/down (returns to +0 semitone when the mouse button is released)
- F1: abruptly all the way down
- F2: abruptly half the way down
- F3: abruptly half the way up
- F4: abruptly all the way up
- ↓: ramps all the way down
- ↑: ramps all the way up.
- A modulator, with a modulation depth between 0 and 127, 127 being a modulation of ± 1 semitone, so 2 semtones peak-to-peak.
-
Four assignable knobs. By default, they are:
- CC-7 (Channel Volume)
- CC-8 (Balance)
- CC-91 (Reverb)
- CC-7 (Chorus)
-
Octave: a selector to choose where on the keyboard (on which
octave) the keyboard view is. The chosen octave will be the second one
displayed, i.e. if "Octave" is set to 3, the leftmost displayed octave
will be 2.
The selected octave is also where the keyboard mapping is set, so if the octave is set to 3, in a QWERTY setup, the leftmost (lowest) note, Z, is mapped to C3.
The controls are:- ←: decrease Octave by one (i.e., scroll the view to the left)
- →: increase Octave by one (i.e., scroll the view to the right)
- Range determines how many octaves are displayed.
-
Velocity sets the intensity of the note, which contributes
to its audio volume, and can, depending on the virtual instrument,
play a role in the sample selection.
Although the drop down menu only lists a few values, scrolling the mouse over the control, as with the other selectors, allows to change its value with a finer in/decrement.
Available shortcuts are:- F5: sets velocity to 32
- F6: sets velocity to 64
- F7: sets velocity to 96
- F8: sets velocity to 127
- A Transpose selector, that shifts the notes played by its value in semitones, either up or down, effectively tuning the whole keyboard.
- A Panic button, to immediately stop all MIDI sound.
- Selector of clip library locations
- List of clips, with a treeview where necessary
- Preview options
- Ardour Bundled Content: these are all the audio and MIDI files shipped along with an official Ardour build.
- FreeSound: all clips previously downloaded from FreeSound.org.
- Custom folder: it's a single user-defined location on a local or remote disk that you can write to. The folder is defined on the Triggering page of the Preferences dialog and is preserved across sessions.
- Additional locations: typically those are locations where you store existing clips/loops libraries acquired elsewhere. You can have as many as you like, please see Adding 3rd Party Clip Libraries chapter for more info. These locations are also preserved across sessions.
- Other locations: this is a one-off access to a location where clips and loops are stored. This location is not preserved across sessions.
- Reusing existing clips
- Creating new clips from content in the timeline
- Add to an existing track. Dragging and dropping a clip from the browser on an existing track will add this clip to a location on the timeline where you released the mouse button, snapping options apply. Audio clips can only be placed on audio tracks, MIDI clips can only be placed on MIDI tracks. Additionally, placing a single-channel (mono) clip on a multi-channel track will create a clip where only one channel is filled with the content of the original clip, the rest of the channels will be silent.
- Create a new track. Dragging and dropping a clip below the bottom track will create a new track from the clip and name it after the clip's file name. Ardour will make a few judgements based on clip properties: the track will contain as many channels as the audio file has. And for a MIDI clip, Ardour will automatically add the "preview" virtual instrument of choice to the processor box.
-
In the Clips tab of the sidebar, click the top drop-down list and choose Edit.
Clips' locations in the drop-down list - In the newly opened dialog called Edit Sample Library Path click Add and locate the folder that contains samples. If there are subfolders, choose the parent folder that contains all of them.
- Repeat for all other sample libraries.
- Click OK to apply changes.
- In the Editor window, drag a region from the list of regions to the Clips tab. Ardour will automatically switch to the Clips tab, display the main custom clips library, and let you drop the region there.
- In the Editor window, use the right-click menu to bounce a region or a range to the Clips library. You can bounce either processed (with all effects) or unprocessed (sans all effects) version of the audio data. The option to bounce to the clips library will be available in the bounce dialog. Additionally, if the track in question is visible in the Cue window, you can automatically insert a bounced clip into the slot of a particular scene for that track.
- You can use the file manager to navigate to the location of the custom clips library and place audio and/or MIDI files there.
- Use a file manager to navigate to your main custom clips folder.
- Locate the file you do not need any more, remove it to the trash bin.
- Grid of tracks and cues, playback indicators
- Mixer channel section
- Clip and trigger slot options
- Clip editor
- Sidebar: Clips, Tracks, Sources, and Regions
- Follow action
- Launch style
- Quantization
- Color
- Clip playback progress
- Which cue the playing clip belongs to
- MIDI clip indication
- Follow count
- Clip Properties: full name of a clip in the selected trigger slot, loading a different clip, gain control
- Launch Options: how the clips' playback is triggered and within what musical time unit it is quantized
- Follow Actions: how many times one clip is played and what other clip's playback is triggered next
- Stretch Options (audio-only): stretching the original audio data to match current session tempo, adjusting assumed original tempo for creative purposes
- Placing audio and MIDI data to trigger slots
- Creating new tracks
- Creating new reusable clips available from the Clips browser
- From right click menu: right-click over a trigger slot, choose Load, select an audio or a MIDI file.
- From Clip Properties box: click the Load button, select an audio or a MIDI file.
- From the Clips library: choose an audio or a MIDI file, listen to it before adding, then pick, drag towards the grid and drop into a trigger slot.
- From the Regions list: choose a region, drag it towards the grid and drop it into a trigger slot.
- From the timeline: select a region, right-click, choose {Region Name} > Bounce (with processing) or {Region Name} > Bounce (without processing), then enable the Bounce to Trigger Slot checkbox and choose the cue.
- Using bounce to create and name new clips will keep the Cue Track title and Cue Clip names easily recognizable.
- Pressing Delete or Backspace
- Right-clicking on the trigger slot and selecting Clear in the menu.
- Pressing a mouse button over the button to the left of the clip's name (Ardour defaults to Trigger launch style which has a classical triangle playback icon)
- Sending a note-on event from an external or a virtual MIDI controller
- Clip progress, in the form of a sliding pie chart
- Which cue is playing (it's C on the screenshot)
- MIDI clip indication, an icon representing two beamed 1/16 notes
- Follow count, e.g. '1/2' on the screenshot means the clip is currently being played the first time out of two times total
- Right-clicking on the trigger slot of interest
- Choosing MIDI Learn in the newly opened window
- Pressing a key on the MIDI controller
- Name: the full name of the clip's file, usually visible in its shortened form.
- Load: this button allows loading a clip's file into the selected trigger slot.
- Color: opens up a color chooser dialog to set the color of the clip's title inside the trigger slot.
- Velocity Adj: this effectively adjusts the output volume by increasing the velocity of MIDI notes.
- Send Patches: this enables sending a control message to load a particular patch. This is typically used for external MIDI gear such a hardware synthesizers.
- MIDI Patches: clicking this button will open a dialog where a patch can be selected to send when a MIDI clip is triggered.
- 0% means the left follow action is always chosen
- 100% means the right follow action is always chosen
- Anything between 0% and 50% will skew the probability towards the left follow action
- Anything between 50% and 100% will do the same for the right follow action
- Crisp works best for sounds with fast onset like drums and percussion
- Smooth is best used for sustained notes like pads
- Mixed is for anything in between
- On the Cue page, Click on the record button at the top of the track you want to record to. The play buttons for every slot turns into a record enable button.
- Select a trigger slot
- Click the recording button to the left of the selected trigger slot to enable recording
- Start the transport (typically by clicking the Play button in the transport toolbar or pressing Space)
- Editor toolbar, with view options, editing mode selection, and other controls.
- Zoom control on the left that sets how many octaves you see at once and which ones.
- The main pianoroll area that displays notes.
- The automation editing area below.
- Add new notes with predefined length by setting the length in the editor toolbar and single-clicking on the timeline.
- Draw notes with custom length by clicking on the timeline and dragging to the right.
- Brush notes by pressing Shift, clicking, and dragging to the right. New notes will be painted at an interval defined by global quantization, with the length defined in the editor toolbar.
-
Select multiple notes:
- with Ctrl for any separate notes you click;
- with Shift for all notes between the currently selected note and the clicked-on note;
- with rubberband selection cue by clicking on an empty area and dragging towards notes.
- Move notes by selecting them, then clicking on their middle parts and dragging up/down or left/right.
- Trim and extend notes by pointing at their left/right sides, clicking, and dragging the edges.
- Split and join notes using S and J shortcuts. See this chapter for more information.
- Setting up the trigger slots grid: loading clips into slots and grouping them into cues.
- Setting up follow actions to make transitions from one cue to another, although in some cases this would be fairly optional as it is possible to trigger specific cues from the timeline.
-
Adding cue markers on the ruler where repeatable clips should start
playing. This will launch an entire cue sans the isolated slots.
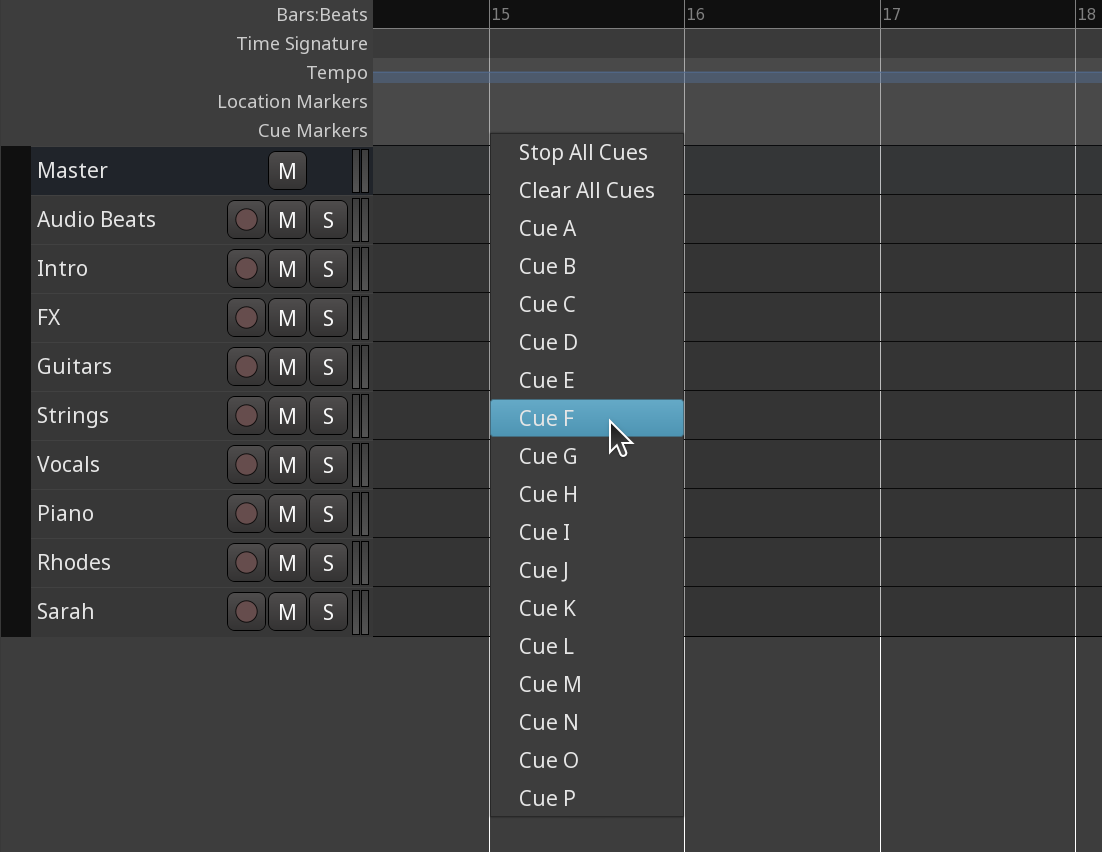
Adding a cue marker - Adding the "Stop all cues" marker where all cues should stop playing.
- By double clicking on a tempo marker. This opens the tempo dialog which allows entering the tempo directly into an entry box.
- By using the constraint modifier ( by default, may be changed in Preferences > Editor > Modifiers) to drag the beat/bars in the BBT ruler or the tempo/time signature lines. This is the preferred way to match the tempo to previously recorded material.
- by holding down the constraint modifier while dragging a tempo vertically. This is used for more complex tempo solving, as it allows changing of the position and tempo of a tempo marker in the same drag; it is, however, a useful way to adjust the first tempo for a quick result.
- A constant tempo will keep the session tempo constant until the next tempo section, at which time it will jump instantly to the next tempo. These are mostly useful abrupt changes, and is the way in which traditional DAWs deal with tempo changes (abrupt jumps in tempo).
- A ramped tempo increases its tempo over time so that when the next tempo section has arrived, the session tempo is the same as the second one. This is useful for matching the session tempo to music which has been recorded without a metronome. Ramps may also be used as a compositional tool, but more on this later. Note that a ramp requires two points—a start and an end tempo. The first tempo in a new session is ramped, but appears to be constant as it has no tempo to ramp to. It is only when a new tempo is added and one of them is adjusted that a ramp will be heard. The same applies to the last tempo in the session—it will always appear to be constant until a new last tempo is added and changed.
- To change a time signature, double-click it. A dialog will appear.
- To copy a time signature, hold down and drag it.
- When tracking, meters are used to ensure that the input signal does not overload and maintains reasonable headroom.
- Meters offer a quick visual indication of an activity when working with a large number of tracks.
- During mixing, meters provide an rough estimate of the loudness of each track.
- At the mastering stage, meters are used to check compliance with upstream level and loudness standards and to optimize the loudness range for a given medium.
- How To Make Better Recordings in the 21st Century—An Integrated Approach to Metering, Monitoring, and Leveling Practices by Bob Katz. Has a good historic overview of meters and motivates the K-meter
- Wikipedia: Peak programme meter—overview of meter types.
- "Audio Metering: Measurements, Standards and Practice", by Eddy Brixen. ISBN: 0240814673
- "Art of Digital Audio", by John Watkinson. ISBN: 0240515870
- K20: A meter according to the K-system introduced by Bob Katz, scale aligned to -20 dBFS, rise/fall times and color schema according to spec.
- K14: Same as K20 with scale aligned to -14 dBFS.
- K12: Same as K20 with scale aligned to -12 dBFS (since 3.5.143).
- Peak + RMS: standard RMS, customizable via Edit > Preferences > Metering
- The mixer window features fixed height meters for each channel strip.
- There are small (narrow) meters on each track-header in the editor window.
- There are variable height meters in the meterbridge window.
- Optionally, a fixed-size master meter can be displayed in the main toolbar.
- Various other locations (file import, sends) have level-meters.
- Mute button
- Solo button
- Monitor buttons
- Fader as a gain knob
- There can be a DI box sitting between the guitar and the front input, if the guitar has a passive pickup.
- The signal from a guitar can pass a DI box and feed into one track, but another path can go through preamp/amp/cabinet/mic and feed into another track, so that the musician has both processed sound and dry sound that can be re-amped later on.
- The same can be achieved by creating an input I/O plugin (a guitar amp/cab simulator), passing a copy of guitar's DI'ed signal through it and feeding the I/O plugin's output to another track.
- Monitoring could be done with hardware, so that there would be no monitor section, and thus the master bus would be connected to physical output ports directly.
-
Track inputs are optionally auto-connected to hardware inputs,
in the round-robin order. In the example below where an audio interface
only has two inputs and 8 new tracks have been created, Ardour connects
the first input to the first track, then the second input to the second
track, then the first input to the third track, and repeats it until all
tracks have an input assigned for them. The exact configuration will
depend on how many channels have been chosen for each new track in the
Session > New Session dialog.
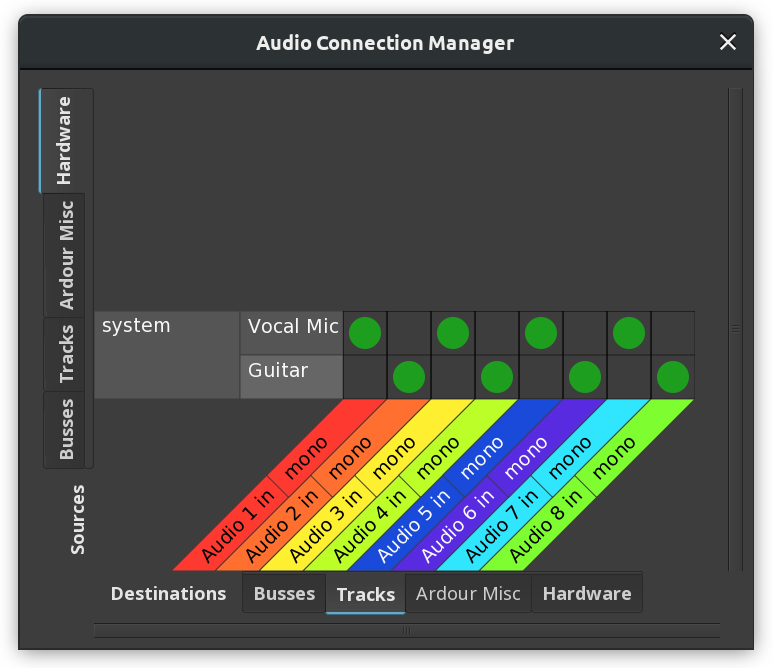
Round-robin assignment of connections - Bus inputs are left disconnected.
- The number of track and bus outputs are equal to the number of inputs of the master bus.
- Track and bus outputs are always auto-connected to the master bus inputs.
- Master bus outputs are connected to hardware outputs if new session don't have a monitor section by default (this is set when the user runs Ardour for the first time and can be changed on the Monitoring Page of the Preferences dialog).
- The first plugin in the track can be a MIDI plugin that somehow transforms incoming events, e.g. transposes them by two octaves or builds arpeggios and then send the resulting notes to a software synthesizer or a sampler.
- The MIDI output from the audio interface can be connected to a MIDI bus with an arpeggiator that sends resulted MIDI events to a MIDI track for capturing and to a hardware synthesizer for playback.
- The MIDI keyboard can be also connected directly to a laptop or a desktop via a USB port.
- Post-fader aux sends are typically used when using an aux for shared signal processing (FX), so that the amount of effect is always proportional to the main mix fader.
- Pre-fader sends ensure that the level sent to the bus is controlled only by the send, not the main fader—this is typical when constructing headphone and monitor wedge mixes.
- Right-clicking the send in the processor box and choosing either Cut or Delete.
- Selecting the send (with a single left click) and pressing the Del key.
- Midi Synths. When adding a synth at a point where there is a Midi port only, the synthesizer plugin will add audio output ports, which trickle down the processor chain to all follow up plugins as inputs and in turn force their outputs to match
- Side chain inputs are not affected by Strict I/O
- an I/O config column
- an interactive diagram
- a sidechain column
- Ardour creates two instances of the plugin
- the plugin gets a (2x1) label in the processor box
- its two input ports are each connected to one pin of an instance
- each mono output pin of the plugin is connected to one output port
- Mute on a track or bus will mute that track on the master bus, so that it will not be heard.
- Solo on a track or bus will solo that track or bus and mute all others. Soloing a bus will also solo any tracks or busses which feed that bus.
- Mute will mute the track or bus, so that it will not be heard anywhere (neither on the master nor monitor busses), much as before.
- Listen will disconnect the monitor bus from the master bus, so that the monitor bus now only receives things that are "listened to". Listen will not perform any muting, and hence the master bus will not be affected by a listened track or bus.
- 1 signal distributed to 2 outputs (the mono panner)
- 2 signals distributed to 2 outputs (the stereo panner)
- N signals distributed to M outputs (the VBAP panner)
- one speaker, if the desired direction coincides with a speaker location,
- two speakers, if the desired direction is on the line between two speakers,
- and three speakers in the general 3D case.
- Fader position in tracks, all types of busses, and VCA masters
- Panner position in tracks and all types of busses
- Foldback bus output levels
- State of record arm
- State of monitor input and monitor playback
- State of solo and mute
- Settings of plugins
- The general signal chain in the processor box, i.e. which plugins are loaded in whatever order
- Plugin bypass states
- Comments for mixer channels
- Any monitor section controls † (since 8.6-318-gb50477e608)
- Keyboard shortcuts: Ardour already defaults to Ctrl+F1..F12 for storing mixer scenes and to F1..F12 for recalling them, which gives you 4 more scenes that are, however, not visible in the list. You can also manually assign any keyboard shortcuts (Window > Keyboard Shortcuts) to mixer scene actions.
- Scripting: you can use Lua scripts to access the full range of available mixer scenes, which is 264.
- trim gain;
- all plugin parameters;
- pin connections;
- fader position and value.
- Local strip templates: these templates are saved into the current session's folder.
- Global strip templates: these templates are saved into the user's local folder with Ardour settings.
- Ardour sessions: processing is extracted from arbitrary Ardour sessions on the disk and applied to existing tracks/busses or imported as new tracks/busses.
- Select whether you want to export mixer strips from the entire session or just the selected tracks/busses.
- Select whether you want to export a local or a global strip template.
- Provide the name for the template.
- Click OK.
- Clear Mapping removes all mappings between internal tracks/busses and external states.
- Import all as new tracks removes all mappings and creates new ones where all external tracks and busses are imported as new tracks.
- Import visible as new tracks removes all mappings and creates new ones where only visible external tracks and busses are imported as new tracks.
- Reset restores default mappings (tracks and busses with matching names).
- Integrated loudness averaging the loudness on the whole session
- Short loudness using a sliding time window of 3 seconds
- Momentary loudness using a sliding time window of 400 ms.
- Peak : is the highest signal level value
- True Peak : is the highest signal level value where the signal has been oversampled to figure out more in-between values between the samples (interpolation)
- Integrated Loudness : is the loudness computed from the whole session or range
- Max Short Loudness : is the maximum loudness computed on short time ranges (3 seconds)
- Max Momentary Loudness : is the maximum momentary loudness
- Gain to normalize: is the max Delta value
- Previous output gain: is the current Master track gain
- Total Gain: is the difference between these two values, hence the correction to apply
- ✖: the signal is too loud
- ✔: the signal is too quiet, but satisfies the max. loudness spec
- ✔: signal loudness is within the spec.
- Left-click and hold freezes pauses the update until you release the mouse button. This is useful when you only need a quick inspection.
- Clicking on the Freeze button pauses the update until you click the button again. This is useful when you need to go into details and hover spectrograph to see the frequency/
- Speed: Sets the analysis return time, or how many dBs fall in a given period, from 1dB in 2 seconds for the Noise Measurement mode to 96dB/s for the Fast mode.
- Warp: Warps spectrum frequencies to focus on given range. A high warp factor increases resolution in the low frequency range, while the Bark scale is a frequency scale on which equal distances correspond with perceptually equal distances.
- Create various audio or MIDI effects
- Generate audio by functioning as "software instruments"
- A gap is opened up to indicate the location of the click. The gap shows where any new processors will be inserted.
- The processor under the click is selected.
- An options menu is presented.
- The generic plugin editor window when no custom UI is available (typically with LADSPA plugins or some VSTs), or the generic plugin UI was specifically selected.
- The bottom pane in the Editor window when a track rather than a region is selected on the timeline.
- Parameters
- Description
- CPU Profile
- Analysis graph
- the transfer function in white,
- the phase response in red (optional),
- the post effect spectrum in green.
- The name of the plugin
- A host-side bypass button
- A button that toggles collapse/expansion of the plugin's user interface
- Switches, such as plugin-side bypass
- Controls, or parameters, with a rotary knob for control and a drop-down list to choose automation style for each parameter
- Fader (Volume)
- Trim
- Muting
- Panning
- Any attached processor's parameters
- A hide button (square button with an "X" inside)
- A horizontal fader
- An automation mode selector
- Recording it using Write mode
- Recording it using Touch mode
- Drawing it using the mouse
- By left-clicking in the lane at a point where there is no existing control point. Once added, a control point can be left-clicked and dragged to any desired location. Hovering over a control point will show its current value. Warning: creating a verbose automation with many control points can cause some plugins to overuse available system resources.
- By left-clicking in the lane and drawing a free line from left to right.
- By pressing Ctrl, then pressing left in the lane and moving the mouse pointer from left to right or from right to left to preview a line segment, then releasing the mouse button to complete the action.
- Threshold. This setting defines the loudness at which the compressor will start working.
- Knee. Whether the transition from uncompressed to compressed is soft or hard. The effect is more noticeable with larger ratios.
- Ratio. How much the gain is reduced above a certain threshold. If the ratio is e.g. 5:1, 5dB will become 1dB.
- Attack. How long (in ms) it takes to apply maximum compression.
- Release. How long it takes to return to zero compression.
- Makeup Gain. How much the overall level should be increased after reducing loud sections.
- Sidechain. Whether the effect should be activate by the loadness of audio signal in another track passing a certain threshold.
- Attack. How long (in ms) it takes to apply maximum reduction of the quiet sections.
- Release. How long it takes to stop reducing the quiet signal at all.
- Knee. Whether the transition from non-reduced to reduced signal level is soft or hard. The effect is more noticeable with larger ratios.
- Ratio. How much the gain is reduced below a certain threshold. If the ratio is e.g. 3:1, -10dB will become -30dB.
- Threshold. The loudness at which the expander will start working.
- Makeup Gain. How much the overall level should be increased after reducing quiet sections.
- Sidechain. Whether the effect should be activated by the loudness of audio signal in another track passing a certain threshold.
- Tempo. Amount of beats per minute.
- Sync. This toggles the syncing to project's tempo.
- Divisor. The interval between the original sound and its delayed copy, expressed in whole or fractional notes (1/4th, 1/8th etc.)
- Dotted. When enabled, adds half the divisor unit to the delay interval, e.g. a 1/8th note becomes a dotted 1/8th note.
- Time. The final delay time expressed in milliseconds.
- Feedback. How much of the processed signal goes back into the delay effect's input.
- Low-Pass Filter (LPF). This helps simulating analog delay effects where the repeated signal gets dull.
- Invert. This option inverts the polarity of the output signal.
- Output Gain. Reduces or increases the level of the output signal.
- Blend. This control changes the mix in favour of either "dry" unprocessed signal that is being fed into the effect or the "wet" processed by the effect. 0 means you only hear the unprocessed signal, 1 mean you only hear the processed signal.
- Room Size. This control changes the size of the virtual room and therefore the amount of decay.
- Steepness. How much the filter reduces the signal per each step (12dB/oct to 48dB/oct). Setting steepness to Off disables the filter entirely.
- Cutoff frequency. The base frequency where the filter begins cutting off the data.
- Resonance. How much the signal around the cutoff frequency is suppressed (lower values) or emphasized (higher values). The plugins defaults to 0.707 which roughly translates to "do nothing".
Directly on the diagram. Dragging the band mark (1 through 4) left and right changes the frequency, dragging it up and down changes the gain. Scrolling the mouse wheel over the band mark changes the bandwidth.
In the bottom parameters boxes. Scrolling the mouse wheel over a setting changes its value. This is also where and how the master output can be adjusted.
Numerically via the generic plugin UI. This user interface can be displayed by right-clicking on the plugin in the mixer channel and choosing the Edit with generic controls… option.
- Reverb enable. Toggles the reverb effect.
- Chorus enable. Toggles the chorus effect.
- Output level. Adjusts the output gain.
- Reverb Room Size. Controls the room size of the reverb effect.
- Reverb Damping. Controls the absorption of high frequencies in the reverb.
- Reverb Width. Adjusts the stereo spread of the reverb signal.
- Reverb Dry/Wet. Changes the mix in favor of either "dry" unprocessed signal that is being fed into the effect or the "wet" signal processed by the effect.
- Chorus Voice Count. The voice count of the chorus.
- Chorus Speed. The modulation speed in Hz.
- Chorus Depth. The modulation depth of the chorus.
- Chorus Level. The output level of the chorus signal.
- Chorus Type. The type of the modulation wave, sine or triangle.
- Mono out: In 1/2 -> Out 1
- Stereo out: In 1/3 -> Out 1, In 2/4 -> Out 2
- Quad out: In 1/5 -> Out 1, In 2/6 -> Out 2, In 3/7 -> Out 3, In 4/8 -> Out 4
- Timescale. How many seconds of audio fit into the display at any time.
- Height (Aspect). The aspect ratio of the inline display.
- Logscale. Whether the plugin should use a logarithmic rather than a linear scale.
- 1/f scale. Whether the spectrum analyzer should adjust for 1/f aka "pink noise" to provide a more useful representation of the signal.
- FFT size. This is the frequency resolution. The more bins in analysis window, the better resolution.
- Height (Aspect). The aspect ratio of the inline display.
- Range. The dynamic range of the spectrum analyzer in dB.
- Offset. Optional gain correction of the original signal if it's too quiet or too loud.
- Hexadecimal. Whether values should be displayed in hexadecimal notation, e.g. 1E00 instead of 7680.
- System messages. Whether the Monitor should display system control and real-time messages
- Numeric notes. Whether the Monitor should display notes in the numeric notation, e.g. 48 instead of C3.
- Font size. The font size used to display events.
- Line count. How many lines the MIDI MOnitor should display in the mixer strip.
- Import a single video and optionally extract the soundtrack from it.
- Provide a video monitor window, or full-screen display, of the imported video in sync with any of the available Ardour timecode sources.
- Display a frame-by-frame (thumbnail) timeline of the video.
- Allow for a configurable timecode offset.
- Lock audio regions to the video.
- Move audio regions with the video at video-frame granularity.
- Export the video, trim start and end, add blank frames and/or multiplex it with the soundtrack of the current session.
- One machine for all video decoding, video monitoring and audio editing tasks
- Two machines, one for video monitoring, one for Ardour
- Three machines, separate video server (for timeline decoding and file archive), dedicated video monitor, and Ardour
- allow for more than one video to be loaded at a time.
- provide video editing capabilities
- xjadeo (the video monitor application): http://xjadeo.sf.net
- harvid (a video decoder used for the thumbnail timeline): http://x42.github.com/harvid/
- ffmpeg, ffprobe (used to import/export video, extract soundtracks and query video information and encode mp3 for export): http://ffmpeg.org
- TODO:
- Synchronization ardour → video-display-box should be accomplished by external means. Jack-transport(netjack), MTC, LTC (OSC and/or ssh-pipe work but introduce additional latency + jitter)
- Ardour launches
XJREMOTE(environment variable, default 'xjremote' which comes with xjadeo). - Either use a custom shell script that ssh'es into the remote box and launches/controls xjadeo there, selects the sync-source and passes though communication between ardour ⇔ xjadeo via ssh (xjadeo is launched stopped with the session).
- …or override xjremote's behavior—instead of IPC with a local running xjadeo-process, using OSC for example. Xjadeo would run permanently and Ardour will just tell it to load files and set offsets via OSC. See xjremote-osc example script.
- If the video server runs remotely, Ardour needs to be configured in Ardour > Preference > Video (hostname of the video-server).
- Ideally the machines have a common shared folder (NFS or similar). Ardour's import (audio-extract) and export (mux) functionality depends on having access to the video file. Also Ardour's video-import transcodes the file into a suitable proxy-format that allows reliable seeking to any frame…
- Open Video Monitor Window to automatically show the video monitor (Harvid). This can also be done later by using the Window > Video Monitor menu which is binded to V by default.
- Adjust Session Framerate to Match Video Framerate which can also be set later with the Session Properties. Having the session and video framerate at the same value allows their sync not to drift off.
- The solo button will blink red
- Track names will be prefixed by "*" if they are soloed, and "-" if they are muted due to soloing.
- Select the soloed track(s) and press the solo button again
- Press and hold the solo button for more than 1 second
- Transport speeds for shuttle positions
- Jump distance for jog wheel (in seconds, beats, or bars)
- Actions in Ardour for available on-device buttons
- AKAI MPD32
- AKAI APC mini
- AKAI APC mini mk2
- AKAI MidiMix EQ Mode
- AKAI MidiMix Normal Mode
- AKAI MPK61
- AKAI MPK 225 (Normal): preset 6
- AKAI MPK 225 (Eq mode): preset 6
- AKAI MPK249
- AKAI MPK mini mk1
- AKAI MPK mini mk3
- AKAI MPK miniplus
- Alesis Q49 MKII
- Alesis QX25
- Alesis VI25
- Arturia KeyLab 49
- Arturia Keylab 49/61/88 mk2 (MCU/Analog Lab mode)
- Arturia MiniLab 3
- Arturia MiniLab mk2
- Behringer BCF2000 Factory Preset 2
- Behringer BCF2000 Mackie Control
- Behringer DDX3216
- Devine VersaKey
- Donner StarryPad
- Donner DMK25 SpacLine
- E-MU Xboard 61
- Korg nanoKONTROL
- Korg nanoKONTROL w/Master
- Korg nanoKONTROL Studio
- Korg nanoKONTROL2
- Korg nanoKONTROL2 With Master
- Korg Taktile (mode 9)
- LAudio EASYCONTROL.9
- M-Audio Axiom 25 - Transport Controls
- M-Audio Axiom 49 MkII
- M-Audio Axiom 61
- M-Audio Axiom AIR Mini 32
- M-Audio Axiom Air 25 (2015 Model) - Transport Controls
- M-Audio Oxygen 49
- M-Audio Oxygen 61 v3
- M-Audio Oxygen25 (3rd Gen)
- M-Audio Oxygen25 (factory default)
- M-Audio Oxygen61 V3 by samtuke
- M-Audio Oxygen8 V2
- Nektar Impact GX
- Nektar Impact LX
- Nektar Panorama
- Novation Impulse 49
- Novation Impulse 61
- Novation Launch Control XL
- Novation LaunchKey 49
- Novation Launchkey 25
- Roland A-30
- Roland SI-24
- Roland V-Studio 20
- WiiMote via midikb
- Yamaha KX25 Transport Controls
Selection Clocks
The Selection Clocks
The current selection range, as set with the Range Mode tool, is displayed in these three clocks: start of the range, end of the range, and length.
Clicking on the range clocks will locate to either the beginning or end of the punch range.
Right clicking on any of the clocks brings up a context menu allowing to change the type of time display between the 4 clock modes, and to copy the selected clock's time to the clipboard.
Mini-Timeline

The mini-timeline allows, as the Summary does, navigating a session. Its main advantage, though, is that it stays visible even when in Mixer mode.
The range of time covered by the mini-timeline is set by right clicking the timeline, and choosing a time span from 30 seconds up to 20 minutes.
The mini-timeline shows all markers (start, end and any user defined ones). Clicking a marker jumps to that point on the timeline, allowing for quick access to key timings in the session. The next and previous markers out of the mini-timeline range are indicated by arrows, as the end marker in the screenshot above.
Cue markers are also displayed, with their play time duration shown by a line.
While hovering with the mouse over the mini-timeline:
Other Toolbar Items
Plugin Delay Compensation
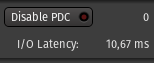
This section shows information about the latency compensation Ardour sets to align all signals in time whatever their route (and processing applied).
The only button Disable PDC allows to enable/disable the Plugin Delay Compensation. Enabling it will make all signal perfectly aligned, while disabling it will reduce the delay, at the expense of slightly misaligned signals for tracks that have plugins introducing latency.
The two infos are:
The Cue Options
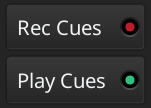
Those two buttons control how Ardour deals with cue markers:
The Master Level Meter

The global meter shows the levels of the master's output. Its the same meter that sits in the Master's Mixer strip, and also shows a peak indicator, that turns red when any level exceeds 0dB. It can be reset by a Left click.
The Monitor Section Info

This section is only useful and active if the session has a Monitor section. The three buttons are exactly linked to their counterparts in the Monitor slice of the mixer, but as they sit in the toolbar, remain visible even in Editor mode.
The three buttons are:
The Status Indicators

The Status buttons show the current session state:
| Solo | Blinks when one or more tracks are being soloed, see Muting and Soloing. Clicking this button disables any active explicit and implicit solo on all tracks and busses. |
|---|---|
| Audition | Blinks when some audio is auditioned, e.g. by using the import dialog, or using the Audition context menu in the Regions List. Clicking this button stops the auditioning. |
| Feedback | Blinks when Ardour detects a feedback loop, which happens when the output of an audio signal chain is plugged back to its input. This is probably not wanted and can be dangerous for the hardware and the listener. |
Script/Shortcut buttons

The buttons in between the Mode Selector and the Master Level Meter are script or shortcuts buttons, which are user-definable buttons to attach any session lua-script to, or any action shortcut (e.g. for tasks that are used often and buried deep inside nested menus).
The number of buttons (precisely, the number of columns of two buttons) can be set in the Preferences.
Left-clicking an affected button launches the script or shortcut, while right-clicking or clicking an unaffected button allows change the script/shortcut the button should execute.
Pane controls
These buttons control the visibility of panes in Ardour windows:
The Recorder window currrently has no panes to control.
The Mode Selector

The Mode Selector allows switching between the Editor, Mixer, Cue, and Recording windows. If a window is detached, the corresponding button is lit. Clicking the button switches the detached window visibility.
Toolbox

Global Edit mode
Ardour has a global Edit Mode selector at the left side of the Editing toolbar, which affects how regions are moved or copied:
| Slide | Regions move freely. Ardour creates overlaps when necessary. |
|---|---|
| Ripple | Editing affects the regions to the "right" of the edit (see below). |
| Lock | No region motion is permitted (except for "nudge"). |
The general idea behind the Ripple edit mode is this:
Within this general behavior several variations are available as Ripple edit modes:
If Snap To Grid is enabled, then regions can only move so that they align with locations determined by the current snap settings (beats, or seconds, or other region boundaries, etc). See Snap To the Grid for details.
The Edit Point selector
Numerous editing operations require the definition of an Edit Point, that is chosen in this selector. More information about the Edit Point can be found here.
The Smart mode toggle switch
The Smart Mode toggle button (shortcut: y) to the left of the mouse mode buttons modifies the behavior of Grab Mode: when enabled, the mouse behaves as if it is in Range Mode in the upper half of a region, while behaving as if it is in Grab Mode in the lower half. This makes it possible to avoid constant switching between these two modes.
Mouse Modes
Editing regions and their contents is very complex and, by virtue of this, requires different Mouse Modes in order to be able to perform typical editing chores in a way that is powerful and makes sense.
| Mode | Keyboard Shortcut |
|---|---|
| Grab | G |
| Range | R |
| Cut | C |
| Audition | None |
| Stretch | T |
| Grid | Y |
| Draw | D |
| Internal Edit | E |
Changes to the mouse pointer only occur when hovering over the track canvas; the mouse pointer always changes to a hand in the ruler area regardless of what mode is selected, and always moves the playhead to the position left-clicked on—as long as there is no marker or other tag under the mouse position clicked on.
Grab Mode
Grab Mode is used for selecting, moving, deleting and copying objects. In this mode, the mouse pointer appears as a hand and can be used to select and perform various operations on objects such as regions, markers etc…. This is the most common mode to work in, as it allows the for selection and moving of regions, as well as the modification of control points in automation lanes.
Range Mode
In Range Mode, the mouse pointer appears as a vertical line; left-clicking on the track canvas will display the time at the position clicked on. left-clicking and dragging on the track canvas will create a time range for the track clicked and dragged on; adjacent tracks can be selected as well by dragging the mouse into them. Once a time range has been defined, it can be resized by left-clicking on either the left-hand or right-hand side of the range and dragging the mouse to the desired position.
Cut Tool Mode
In Cut Tool Mode, the mouse pointer appears as a pair of scissors and allows for the separation of any region into two distinct regions by left-clicking at the desired point of separation. If more than one track is selected, then all the regions on the selected tracks will be split at the point clicked on. If no track is selected, then only the region hovered by the mouse cursor will be split.
Stretch Mode
In Stretch Mode, the mouse pointer appears as an expanding square symbol and is used to resize regions using a timestretch algorithm. Resizing a region is done by left-clicking on the right-hand side of the region and dragging the edge to the desired position; once the button is released a Time Stretch Audio dialog will appear, as detailed in the dedicated Stretching page.
Audition Mode
left-clicking on a given region using Audition Mode will play the the session for the time span of that region. The regions can also be scrubbed by left-clicking and dragging in the direction desired; the amount dragged in one direction or the other will determine the playback speed.
Grid Mode
The Grid mode has been designed to easily create and edit tempo maps.
Left-clicking on the timeline above a bar line creates a new tempo marker.
Left-clicking and dragging on the timeline above a bar line when a tempo marker already exists in that position changes the value of the current and the previous markers to accomodate for.
Left-clicking and dragging on the timeline anywhere between two bar lines creates a tempo ramp.
Draw Mode
In Draw Mode, the mouse pointer will change to a pencil; the effect it will have depends on the type of track or region it is utilized in.
In an audio track, a green line will appear in the region which is that region's gain envelope. left-clicking anywhere in a given region between two existing control points will add one to the region at the X-coordinate clicked on with the Y-coordinate being on the line connecting the control points on either side of the new one. left-clicking on a control point will allow it to be moved to any point in the region in between the control points that bound it on either side of itself. And finally, left-clicking on a control point and pressing the delete key or holding down the key while right-clicking on it will delete the control point.
In an automation lane, if any automation is defined in it, a green line connecting its control points will appear in the lane. Control points in the lane are manipulated in exactly the same way as they are in a region's gain envelope (see previous paragraph for details).
In a MIDI track,
Internal Edit Mode
In Internal Edit Mode, the mouse pointer will change to cross-hairs.
Controls
Playhead Options
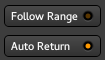
Those two buttons control the behaviour of the playhead:
Zoom Controls

The zoom controls allow to navigate the session along both the time and track axes. The controls are described from right to left :
Along the time axis
The drop down Zoom Focus (Playhead by default) menu allows to select a focus point for the zoom, i.e. the center of the zoom, to choose amongst:
The two zoom buttons (− and +) use this zoom focus to zoom out and in respectively.
The [ ] Zoom to session button is a handy shortcut to zoom out or in until all the session (as defined by its start/end markers) fits horizontally.
Along the tracks axis
Two buttons Shrink tracks and Expand tracks reduce or expand the vertical size of the selected tracks. If no track is selected, all the tracks will be shrunk or expanded each time the button is pushed.
Last, the dropdown menu (* by default) allows changing the number of visible tracks to fit vertically on screen.
There is a minimal track height to keep it visible, so according to the vertical screen size, some high number can have no effect.
Besides numbers that correspond to the number of tracks to show, there are two special choices:
Grid Controls

Snap
Snap will cause region drags and other mouse-driven operations to jump to positions determined by the nearest snap setting when the mouse is close enough to this snap point. Snapping is sometimes (improperly) referred to as magnetism.
The Snap options are set in the Preferences. Those include the Snap Threshold which determines how close the mouse has to be to a snap anchor to induce a snap, and the snap anchors themselves, among:
Grid
The Grid helps visually placing items in time. It will draw lines at selected intervals as chosen in the drop-down selector. Musical grid settings (Bar to Sextuplets) obviously depend on the tempo and time signature, so changing the tempo or time signature will rescale the grid, while absolute grid settings (Timecode, etc…) won't be affected.
A word about time signature in this context: a time signature consists of 2 numbers. The upper one determines how many beats are in a bar, the lower one, what division of a note a beat represents (e.g. : 4 stands for a quarter note). At e.g. 80 bpm, one beat lasts 1/80th min, so 0.75 sec. If the time signature is 3/4, there are 3 beats in a bar so a bar lasts for 3 × 0.75 = 2.25 sec. Choosing 1/8 Note as the grid setting will draw grid lines every 0.75 ÷ 1/4 × 1/8 = 0.375 sec.
The grid density can be either based on musical time:
Or absolute time:
Alternatively, Ardour can disable the usual musical/non-musical time grid and make the current playhead position the only snappable target. To do that, select the "Playhead" item in the drop-down list.
The grid consist of lines running vertically in the edit canvas. When zooming too far out, the grid can become too coarse. Ardour tries not to show “too many” or “too few” grid lines depending on the zoom level, based on the Approximate Grid/Ruler granularity (pixels) Preferences parameter. As a consequence, when the Grid is in the Snap anchors, it is possible that items snap in-between the grid lines sometimes. That’s expected behavior.
Syncing Regions to the Grid
By default, a region's beginning will be used as the reference for both types of snapping, this behaviour can be changed by setting a sync point in the region, by selecting the region(s) and pressing V. This will set the sync point to the current edit point.
Keyboard modifiers
Snapping can be temporarily disabled by using a keyboard modifier while editing, by default.
Snapping can also be temporarily set to relative, i.e. snapping will occur relative to the current position of the dragged item. E.g. if the Grid is in the Snap options, and the grid is set to Bars, using this keyboard modifier while dragging will snap at every bar relative to the region's beginning (or sync point) instead of the absolute musical bars.
The keyboard modifiers are defined in the Preferences.
Edit Point Control

Editing operations in a Digital Audio Workstation like Ardour can be broken down according to how many points on the timeline are required to carry the operation out. Splitting a region for example, requires just one position on the timeline—the one where the split will happen. Cutting out a time range requires two positions, one for the start of the cut and one for the end.
In Ardour the Edit Point is the location where most single-point editing operations take place. It can be set to any of the following:
The default edit point is the location of the mouse pointer.
There are two keybindings available to cycle through the edit point options. The most common workflow tends to involve switching back and forth between the playhead and mouse as the edit point. Pressing the grave accent key ` switches between these two. Using ` cycles through all three choices (including the selected marker). The edit point can also be switched using the combo-selector just right of the snap/grid unit selector.
Nudge Controls

The nudge controls will move the selected region(s) or notes in MIDI regions by a fixed amount of time. The left and right buttons move either backward or forward in time, and the small clock to the right of these buttons sets the amount of time to nudge by.
The clock, as with all other clocks, can be right-clicked on to choose the desired time representation. The menu also allows :
Combining these three options allow to e.g. memorize the current playhead position (Set from playhead) and reposition the playhead (Locate to this time) at that position after another edit.
If there are no selected objects, the nudge controls can be used to move the playhead backward or forward by the amount shown on the clock.
Rulers and Markers
Rulers

The ruler scales the session along time, allows navigating, and can be marked for different uses.
One of its main uses is to move the playhead: clicking anywhere on the timeline will bring the playhead at this location in time. Also, using the mouse's scrollwheel while hovering the ruler will zoom in or out (⇑/⇓ ).
The ruler is made of a succession of rows, each having a special role related to time. Adding or removing rows can be done by right clicking anywhere in the ruler's header on the left, and ticking any of:
| Mins:Secs | scaling the session with the Mins:Secs:mSec notation |
|---|---|
| Timecode | scaling the session with the Hours:Mins:Secs:Frames notation |
| Samples | scaling the session with the sample number notation |
| Bars:Beats | slicing the time according to the time signature |
| Time Signature | shows the time signature. It can be changed along the timeline, by Right-click > New Time Signature. The Bars:Beats ruler will reflect the change. |
| Tempo | shows the BPM. It can be changed along the timeline, by Right-click > New Tempo. The Bars:Beats ruler will reflect the change. |
| Range Markers | allow to create and modify ranges directly on the Ruler. |
| Location Markers | is meant to receive any kind of marker, user generated or from Ardour itself. |
| Arrangement | allows creating range sections like a verse, a chorus, a bridge etc. |
| Video Timeline | shows thumbnails of the video in the timeline |
Most rulers allow placing markers to serve a specific purpose: mark a point in time, define a loop range, or something else entirely.
Most of the operations on the markers are described in Working with Markers, additional information on Time Signature, Tempo, Bars:Beats, and Timecode is available in the Tempo and Time Signature chapter.
Markers Basics
Ardour supports multiple types of markers, all designed for particular tasks: single markers that define a location, single markers that change a value, paired markers that define a range on a timeline etc.
Creating New Markers
There are several ways to create markers in Ardour.
The most common way is to right-click over a ruler and select a menu item called like Add > Loop Range (for the Range Markers ruler) or Add New Tempo (for the Tempo ruler).
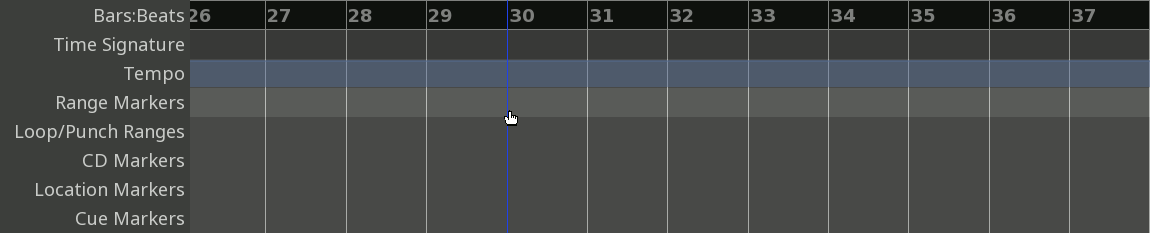
Some of the markers can be created from context menus on the canvas. E.g. range markers can be created by creating a range, opening the context (right-click) menu and choosing Add Range Markers.
Additionally, location markers and range markers can be created from the Ranges & Marks sidebar by clicking Ranges & Marks or Ranges & Marks respectively.
Moving Markers
Once a single or a paired marker has been added, it can be moved around.
Single marker
Left-clicking and dragging moves a single marker to a new location on the timeline.
Additionally, markers can be moved to playhead position by right-clicking and choosing the Move Mark to Playhead menu item.
Multiple markers
It is possible to move multiple markers by the same distance. Left-clicking each discrete marker, or Left-clicking the first and last markers of a range of markers selects them, then dragging one to a new location will move all selected markers together.
The markers are bounded by the zero point on the timeline. In other words, the first marker in the selection cannot move to the left of zero on the timeline.
Both ends of a range marker
By left-dragging either end of the range marker, the other end will move by the same distance.
Renaming Markers
Some markers on the ruler can have unique names: location markers, CD markers, range markers. Double-clicking on them opens a dialog where a different name can be submitted.
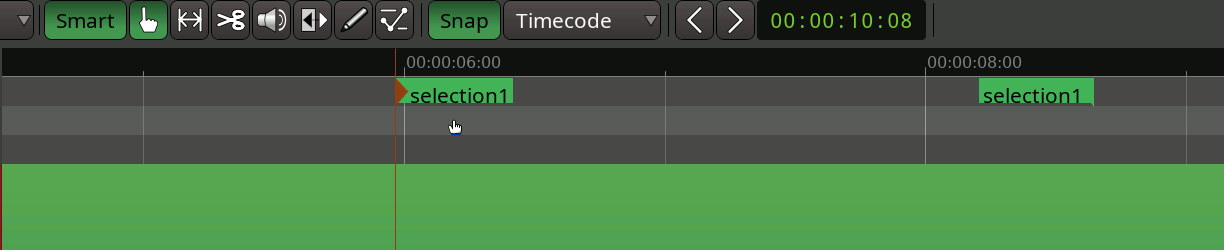
Alternatively, right-clicking on a marker will open a context menu with a menu item called Rename... or Rename Range..., depending on the type of the marker. The same dialog for submitting a new name will appear.
Editing Marker's Properties
Markers on rulers such as Time Signature or Tempo don't have unique names, however they do have other properties that can be edited. The principle is the same as with renaming: double-clicking on a marker or right-clicking and choosing the Edit... menu item.
Hiding Markers
Most marker types can be temporarily hidden from the ruler if the user chooses to do so. The user interface for that is available in the Ranges & Marks sidebar: it is a simple Hide checkbox for each marker.
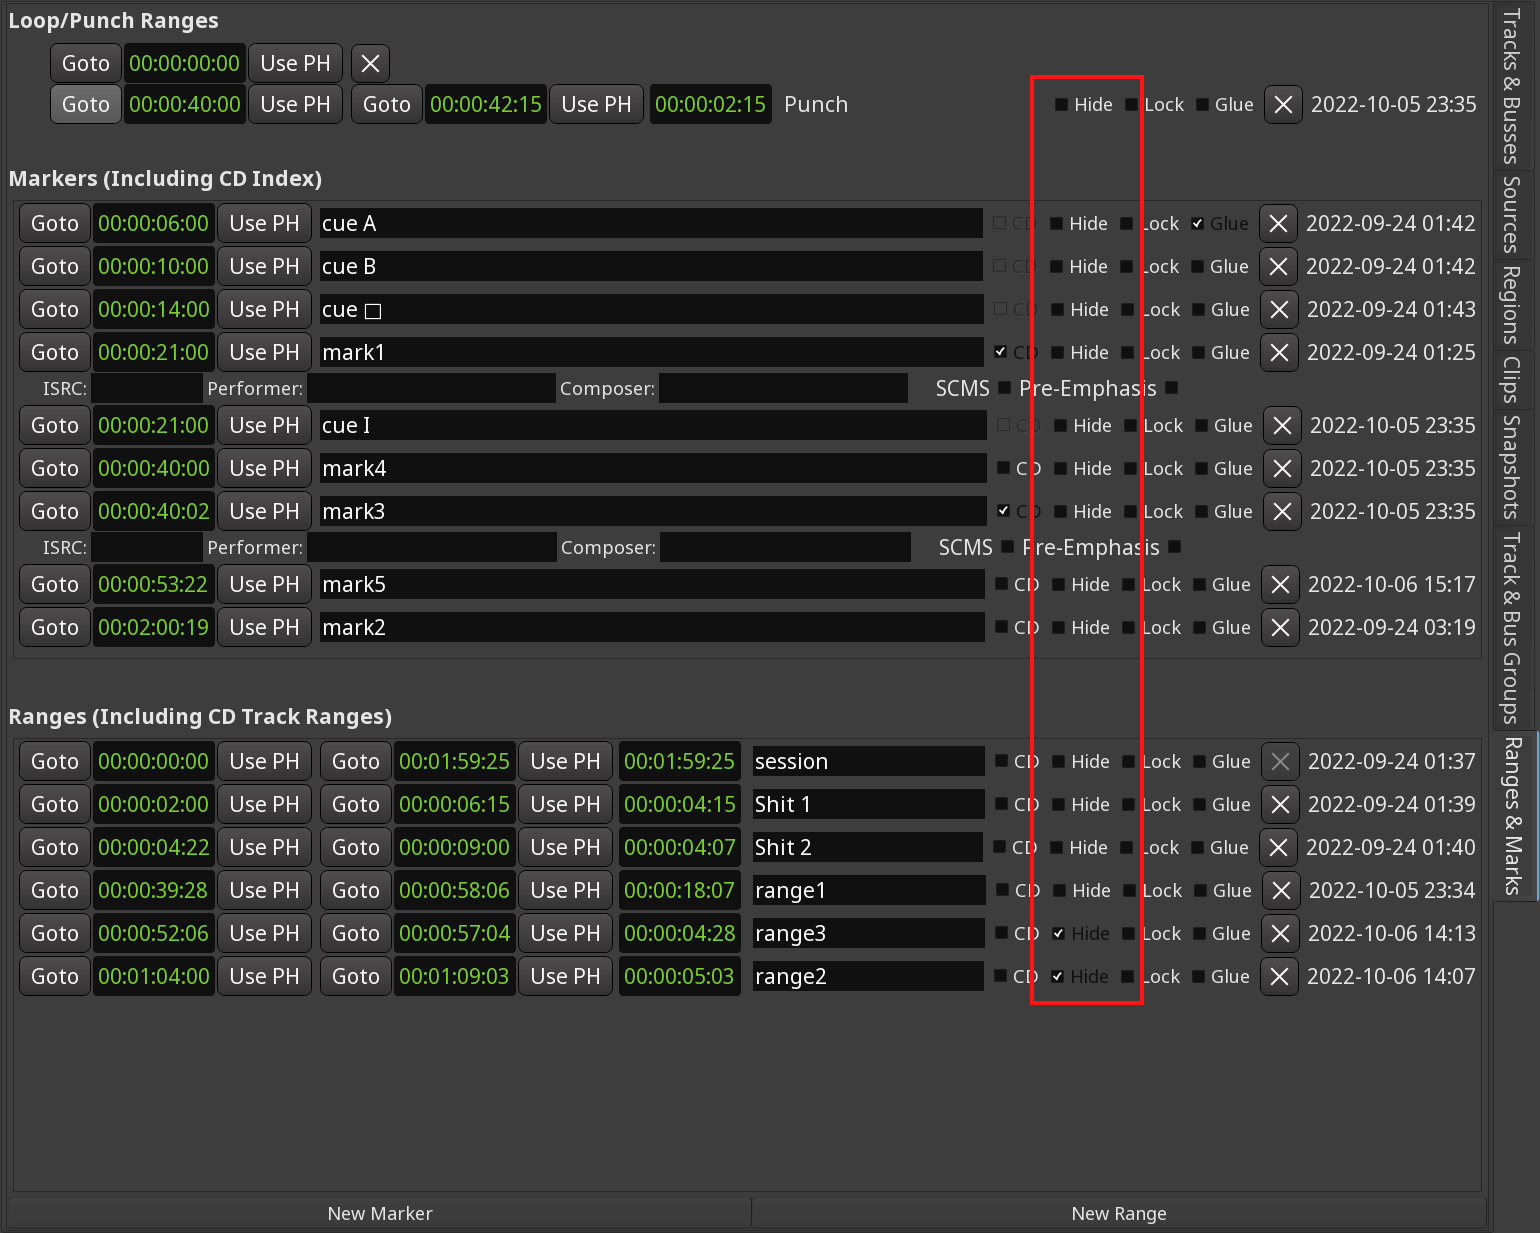
Clicking the respective Hide checkbox again will reveal the marker on the ruler again.
Removing Markers
There are three ways to permanently delete a marker. The first one is to right-click the marker of choice, then select Remove in the menu.
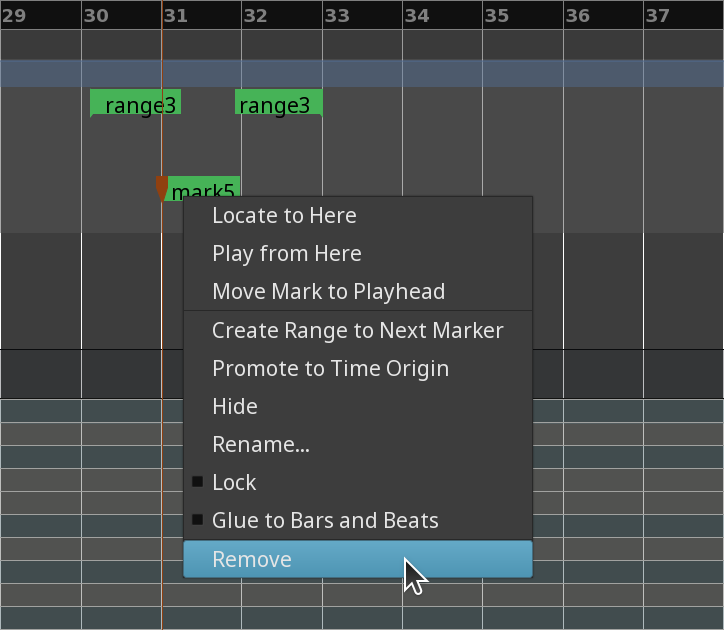
The second one is to click a marker to select it, keep hovering the mouse pointer, then press Del.
The third way is to click the markers' x button in the Ranges & Marks sidebar.
Controlling markers visibility
Right-clicking on the ruler displays two submenus: Show Locations and Show Ranges. You can select to display all types of location or range markers, or just one particular type.
Additional Actions
Depending on the type of a marker additional actions are possible, such as moving the playhead to a location marker's position or zooming to a range saved with range markers. This is covered in dedicated subchapters for respective ruler/marker types.
Bars:Beats
BBT markers allow resetting the timeline to a particular bar and beat. Most of the time a BBT marker will reset it to 1|1|0 (the very first beat of the very first bar) so that for each song in a multi-song session there would be a musical time origin. However it's entirely possible to reset to an arbitrary value such as 7|3|0.
To create a new BBT marker, -click on the Bars:Beats ruler. This will open a dialog titled New Music Time where you can name the marker and define what bar (left field) and beat (right field) this marker should reset the time to.

The timeline grid and the ruler will be updated accordingly:

Dragging a BBT marker right or left will reset the musical time at a different position on the timeline.
Right-clicking on a BBT marker opens a menu with two options: Edit… and Remove.
Choosing Edit… opens the Edit Musical Time dialog where it's possible to rename the marker and set a different bar and/or beat to reset the musical time to:
Choosing Remove deletes the marker.
Tempo
The Tempo ruler allows changing tempo within one session, either abruptly or gradually over time. This is done by placing tempo markers on the ruler and setting up how exactly the transition happens. Alternatively, in the Grid mode, markers can be added and edited directly on the timeline.
On the screenshot below, there are 4 bars of music at 120bpm starting at bar 27, then the tempo changes abruptly to 140bpm and goes on for another 4 bars at that tempo, then abruptly changes back to 120bpm and within the next 4 bars gradually goes back to 140bpm, then continues at 140bpm until the end of the session.

Anatomy of tempo markers
Each tempo marker exposes several editable properties:
Working with tempo markers on the ruler
Adding Tempo Markers
To add a tempo marker, hover a bar or a beat line, press Ctrl and single-click. Newly created tempo marker will have the same tempo value as the previous one.
Shifting tempo markers
To change the position of a tempo change, do one of the two things:
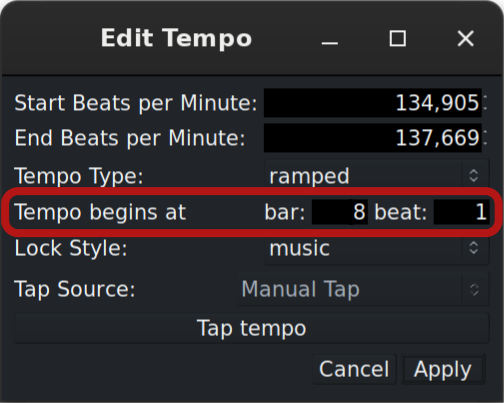
Editing tempo value
The tempo start value can be changed directly on the timeline or using the tempo marker properties dialog.
To change the tempo value directly on the timeline, hover the marker, press Ctrl, and drag the marker left or right. The bpm start value will change, and the grid will be adjusted accordingly.
Alternatively, double-click the marker or right-click it and choose Edit to open the marker properties dialog, then change the "Start beats per minute" value.
Additionally, you can set the new tempo by tapping it in one of the two ways:
In some cases, an existing tempo marker needs to get the same value as the tempo marker before it, typically to start a ramp. To do that, right-click the tempo marker that needs to change and select the Continue menu item.
Constant vs ramped tempo
The tempo between two tempo markers with different bpm start values can stay the same (constant) or change gradually (ramped).
When the tempo type is constant, the line between two markers stays horizontal:

When the tempo is ramped, the line between two markers is diagonal:

The toggle between constant and ramped types is available in the tempo marker properties menu and applies forward in the timeline. Alternatively, you can right-click a tempo marker and select the Ramp to Next menu item. Tempo will gradually accelerate or decelerate until the target tempo is reached, resulting in a musical accel. or ritard.
To switch from the ramped type to the constant type, either open the tempo marker properties dialog and switch it, or right-click a tempo marker and select the Set Constant menu item. The tempo will change abruptly at the next tempo marker.
Removing Markers
To remove a tempo marker, either single-click it and press Del or right-click it and select the Remove menu item.
Locking to music vs audio time
Audio-locked tempo markers stay in their frame position as their neighbor's positions are altered. Their pulse (musical) position will change as their neighbors move. Music-locked tempo markers move their frame position as their neighbors are moved, but keep their pulse position (they will move as the music is moved).
Working with tempo markers in the Grid mode
For documentation on editing the tempo map in the Grid mode, please see the relevant part of the Toolbox chapter.
Further Information
For more details on the workflow, please refer to the Tempo and Time Signature chapter.
Time Signature
The Time Signature ruler allows changing the time signature within one session. In the example below, the session starts with a time signature of 4/4, then switches to 3/4 at bar 5, then to 6/8 at bar 13. The division of the ruler and the bars/beats vertical lines on the canvas updates accordingly.

Ardour also supports using complex time signatures such as 11/8 or 27/32.
New time signature markers can be created in two ways:
In both cases a new window will open to specify time signature settings:
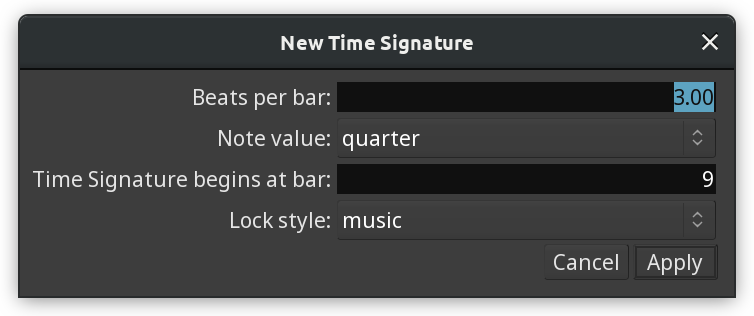
The right-click menu for existing time signature markers provides two options:
The Time, Tempo and Time Signature section provides more hands-on information on using this ruler in production.
Range Markers
Range markers are essentially two location markers that appear in the Range Markers ruler, and are grouped together to mark the beginning and end of a section on the timeline.
Ardour combines regular range markers, loop ranges, and punch ranges in the same Range Markers ruler.
Creating a Range on the Timeline
There are multiple ways to create range markers:
Editing a Range
Both markers of a range can be independently moved along the timeline by clicking and dragging them to the desired location. They can also be moved together by -dragging one of the markers.
Any pair or range markers, including session start/end markers, can be repositioned to the extents of an existing range selection on the timeline by right-clicking on either of the markers and selecting Set Range from Selection in the menu.
Renaming Range Markers
Ardour provides several ways to rename an existing pair of range markers:
Removing Range Markers
Range markers can be deleted in several ways:
Additionally, all ranges can be removed at once by right-clicking on an empty part of the Range Markers ruler and selecting the Clear All Ranges menu item.
More Options
The context (right-click) menu for range markers has more options than the ones mentioned above:
| Play Range | Starts playback at the left marker in the pair and stops at the right marker. |
|---|---|
| Locate to Marker | Moves the playhead to the selected marker. |
| Play from Marker | Moves the playhead to the selected marker and starts playback. |
| Loop Range | Creates a loop range off the selected range markers pair and starts playback. |
| Set Marker from Playhead | Changes the position of the selected marker to that of the playhead. |
| Zoom to Range | Changes the zoom so that the area defined by the range markers would be maximized yet visible entirely within Ardour's window. |
| Loudness Assistant… | Launches the Loudness Assistant to analyze the selection defined by the selected pair of range markers. |
| Export Range… | Exports the selection defined by the selected pair of range markers. |
| Promote to Time Origin | This makes the position of the chosen range marker the origin time. This is mostly useful when the Display delta to origin marker clock mode is enabled to display the difference between current playhead position and the origin time. Absolute time stays unaffected. |
| Hide Range | This hides the range from the Range Markers ruler. Marker's visibility can be restored in the Ranges & Marks sidebar. |
| Separate Regions in Range | Cuts all regions crossing the positions of the range markers. |
| Select All in Range | Select entire regions that cross the borders of the range markers. |
| Select Range | Create a selection from the range markers in all selected tracks and busses. |
Loop Range
The loop range is a special range that defines the start and end points for loop play, which can be enabled in the transport bar. Loop range markers show up on the Region Markers ruler.
Creating a Loop Range
A loop range can be created in multiple ways.
Playing a Loop Range
Playback of the loop range can be triggered the following ways:
Editing a Loop Range
The loop range can be edited in multiple ways as well.
Removing a Loop Range
There are two ways to delete a loop range:
More Options
The right-click menu mostly copies that of a regular pair of range markers. The following options are available in addition to the ones mentioned above.
| Play Range | Starts playback at the left marker in the pair and stops at the right marker. |
|---|---|
| Locate to Marker | Moves the playhead to the selected marker. |
| Play from Marker | Moves the playhead to the selected marker and starts playback. |
| Loop Range | Creates a loop range off the selected range markers pair and starts playback. |
| Set Marker from Playhead | Changes the position of the selected marker to that of the playhead. |
| Zoom to Range | Changes the zoom so that the area defined by the range markers would be maximized yet visible entirely within Ardour's window. |
| Loudness Assistant… | Launches the Loudness Assistant to analyze the selection defined by the selected pair of range markers. |
| Export Range… | Exports the selection defined by the selected pair of range markers. |
| Promote to Time Origin | This makes the position of the chosen range marker the origin time. This is mostly useful when the Display delta to origin marker clock mode is enabled to display the difference between current playhead position and the origin time. Absolute time stays unaffected. |
| Separate Regions in Range | Cuts all regions crossing the positions of the range markers. |
| Select All in Range | Select entire regions that cross the borders of the range markers. |
| Select Range | Create a selection from the range markers in all selected tracks and busses. |
Punch Range
The punch range is a special range used to define where recording will start and/or stop during a punch. Punch range markers show up on the Region Markers ruler.
Creating a Punch Range
A punch range can be created in multiple ways.
Editing a Punch Range
The punch range can be edited in multiple ways as well.
Removing a Punch Range
There are two ways to delete a punch range:
More Options
The right-click menu mostly copies that of a regular pair of range markers. The following options are available in addition to the ones mentioned above.
| Play Range | Starts playback at the left marker in the pair and stops at the right marker. |
|---|---|
| Locate to Marker | Moves the playhead to the selected marker. |
| Play from Marker | Moves the playhead to the selected marker and starts playback. |
| Loop Range | Creates a loop range off the selected range markers pair and starts playback. |
| Set Marker from Playhead | Changes the position of the selected marker to that of the playhead. |
| Zoom to Range | Changes the zoom so that the area defined by the range markers would be maximized yet visible entirely within Ardour's window. |
| Loudness Assistant… | Launches the Loudness Assistant to analyze the selection defined by the selected pair of range markers. |
| Export Range… | Exports the selection defined by the selected pair of range markers. |
| Promote to Time Origin | This makes the position of the chosen range marker the origin time. This is mostly useful when the Display delta to origin marker clock mode is enabled to display the difference between current playhead position and the origin time. Absolute time stays unaffected. |
| Separate Regions in Range | Cuts all regions crossing the positions of the range markers. |
| Select All in Range | Select entire regions that cross the borders of the range markers. |
| Select Range | Create a selection from the range markers in all selected tracks and busses. |
Location Markers
Location Markers appear in the Locations Markers ruler at the top of the timeline. They have multiple uses, most commonly — for navigation in a session, e.g. where this or that instrument should start/stop playing. Custom markers can be created at any position in a session.
The start and end markers, that define the length of the session, appear automatically once any content has been added to the session (either recorded or imported). The end marker automatically shifts to the right once more material gets added.
Creating Location Markers
There are multiple ways to create custom markers at the current playhead position:
Adding a marker at an arbitrary location on the timeline (i.e. not at the playhead position) can also be done either by:
Moving Location Markers
Left-clicking and dragging moves a single marker to a new location on the timeline.
It is possible to move multiple markers by the same distance. Left-clicking each marker creates a selection of markers that can be dragged left or right together.
Renaming Location Markers
There are three ways to rename a location marker:
Removing Location Markers
There are three ways to remove a location marker:
More Options
The context (right-click) menu for location markers has more options than the ones mentioned above:
| Locate to Here | Moves the playhead to the selected marker. |
|---|---|
| Play from Here | Moves the playhead to the selected marker and starts playback. |
| Move Mark to Playhead | This changes the position of the selected marker to that of the playhead. |
| Create Range to next Marker | This creates a pair of range markers between the selected marker and the next one to the right on the timeline. |
| Promote to Time Origin | This makes the position of the chosen range marker the origin time. This is mostly useful when the Display delta to origin marker clock mode is enabled to display the difference between current playhead position and the origin time. Absolute time stays unaffected. |
| Hide | This hides the selected marker from the ruler until the user chooses to unhide it. |
| Rename… | This opens a dialog to rename the marker. |
| Lock | This prevents a marker from being accidentally moved elsewhere. |
CD Track Markers
CD Markers are helpful for producing Cue sheets and TOC files that describe how tracks are laid out on a CD Audio media and how these tracks are named. These markers are displayed on the Location Markers ruler.

Creating CD Markers
Ardour supports two types of CD markers: single and paired. Each one of them works best in a particular scenario (more on that below).
There are several ways to create a single CD marker:
There are also several ways to create paired CD markers:
Choosing Between Single and Paired Markers
Single and paired CD markers both target dedicated use cases, which has a lot to do with how tracks are laid in the Ardour session and how cue sheets work.
Single markers work best when each song starts immediately after the previous one. In that case the cue sheet will only reference the beginning of each song (the 'INDEX 01' section), and the TOC file will contain ranges that last from the beginning of one song to the beginning of the next song.
Paired markers define a range that encompasses a song. This works best when there are gaps between songs in the session. In that case, for each song, the cue sheet will also contain the 'INDEX 00' section that will reference the beginning of the pregap — the gap between songs. This will tell CD authoring software which parts of the audio file to exclude from burning to a CD. The TOC file will create ranges exactly as defined by paired CD markers.
Editing CD Markers
There are several ways to rename CD markers (both single and paired ones):
CD marker name is primarily the name of the track visible in software and equipment capable of displaying individual track names. Other disc metadata, such as band name, year, total count of tracks etc. is defined in the Edit Session Metadata dialog.
There are additional fields for CD markers only available for editing in the Ranges & Marks sidebar. All this extra information is written only into CUE and TOC files for CD authoring software.
| ISRC | The International Standard Recording Code, or ISRC, is a unique recording ID issued by Recording Industry Association of America, Inc. for each track separately. |
|---|---|
| Performer | A band, an orchestra, or an individual musician who performed on the track. |
| Composer | The composer who has authorship over the music in the track. |
| SCMS | This enables the Serial Copy Management System (SCMS) which is a copy protection scheme that targets the use of digital audio tape (DAT) and allows the first generation of copies of the original track while preventing the second generation of copies (copies of copies). |
| Pre-Emphasis | This targets the use of older CD playback equipment that uses a 14-bit converter (while dealing with 16-bit data) and noisy filters to remove frequencies higher than 22050 Hz (the Nyquist frequency). Unless treated specifically, the use of such equipment results in noise especially audible in higher frequencies. The pre-emphasis flag tells the CD authoring software to do two things: apply an equalization curve to boost higher, "weaker" frequencies, as well as write a pre-emphasis flag to the subcode stored alongside audio data so that playback software or equipment capable of de-emphasizing would process the data accordingly. |
Removing CD Markers
CD markers can be deleted in several ways:
More Options
The right-click menu for single and paired CD markers replicates that of location markers and range markers respectively.
Cue Markers
Cue markers allow bridging linear and non-linear approaches to composing music. The idea is that a user can set up entire cues, then place a cue marker on the timeline to launch a cue of choice at a particular point in time. The workflow is explained in more details in the Mixing Linear and Non-Linear Workflows section.
Cue markers are displayed in the Location Markers ruler.

Adding Cue Markers
To add a cue marker, right-click on the Location Markers ruler, then selecting Add > Cue Marker, and then selecting a marker between A and P in the submenu.
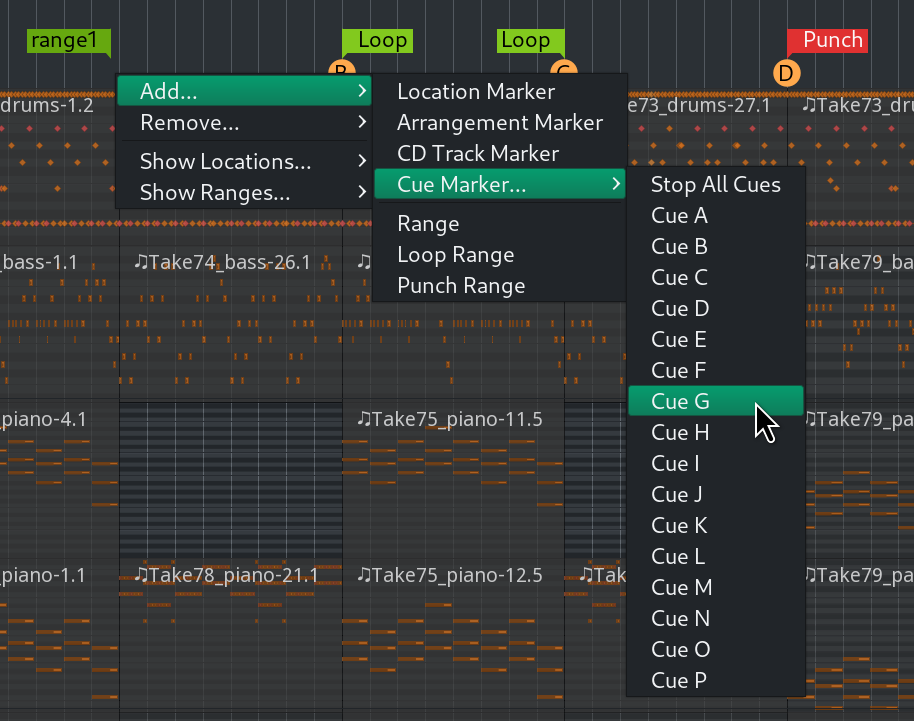
Moving Cue Markers
Left-clicking and dragging moves a single marker to a new location on the timeline.
It is possible to move multiple markers by the same distance. Left-clicking each marker creates a selection of markers that can be dragged left or right together.
Single marker
Left-clicking and dragging moves a single marker to a new location on the timeline.
Multiple markers
It is possible to move multiple markers by the same distance. Left-clicking each discrete marker, or Left-clicking the first and last markers of a range of markers selects them, then dragging one to a new location will move all selected markers together.
Stopping All Cues
Ardour has a special kind of a marker that immediately stops all playing cues. This marker (Stop All Cues) can be added via the right-click menu on the Cue Markers ruler.
Removing Cue Markers
Right-clicking on an existing cue marker opens the context menu with a number of options. Choosing Remove will delete the cue marker of choice.
When all existing cue markers have to be removed, the best option is to right-click on the Cue Markers ruler (any place except an existing marker) and choose Clear All Cues. This will delete all cue markers in the session.
More Options
The context menu for existing markers provides several more options:
| Set Cue: | Picking a cue from the list here will replace the selected marker with a marker for a different cue. |
|---|---|
| Locate to Here | This will move the playhead to the cue marker's position. |
| Play from Here | This will move the playhead to the cue marker's position and start playback. |
| Move Mark to Playhead | This will move the selected cue marker to the current position of the Playhead. |
Arrangement
The Arrangement ruler allows creating range sections that separate meaningful parts of songs form each other and easily creating their copies. An example of using range sections would recording an intro, then the first verse, then the chorus, then recording the second verse, the copy/pasting the chorus with all tracks and automation to follow the second verse.
On the screenshot below, there's a typical setup with an intro, a verse, a chorus, a second verse, a chorus, a bridge, a chorus, and an outro:

Creating range sections
To start a new range section, press Ctrl and single-click on the Arrangement ruler. Ardour will create a new range section marker named 'verseN', where N is a number starting at 1 and incremented each time you create a new range section marker.
Because range section assume ranges, a second marker should be created the same way to define the end of the range. Thus, as the song ends with an 'outro' section, you will need to create the last range section marker at the end of the song and give it a name like 'end'.
Editing range sections
To move the position of a range section marker, single-click and drag it left or right.
To rename a range section marker, either double-click it, or right-click, then select the Rename… menu item. This will open a dialog for editing the caption/name of the range section.
Removing range sections
To remove a range section marker, right-click it ans select the Remove menu item.
Summary

The Summary is a global overview of the session, allowing for a good "bird's eye" view of where in time and tracks the work happens.
Each horizontal line represents a track in the session, with the colored bars being the audio and MIDI regions, colored as per their track's color setting.
Two vertical lines show the position of the Start and End markers, defining the session's length. Their color changes depending on the color theme selected. The red line shows the playhead's position.
The transparent white rectangle represents what's actually displayed in the Editor window, i.e. what part of the session is being looked at on screen.
The Summary also doubles as a navigator:
Bottom pane
The bottom pane is available on the Editor and Cue windows and can be toggled from the application bar on the right. The functionality it provides depends on which window you are on.
Bottom pane in the Editor window
The bottom pane of the Editor window can display one of the two things:
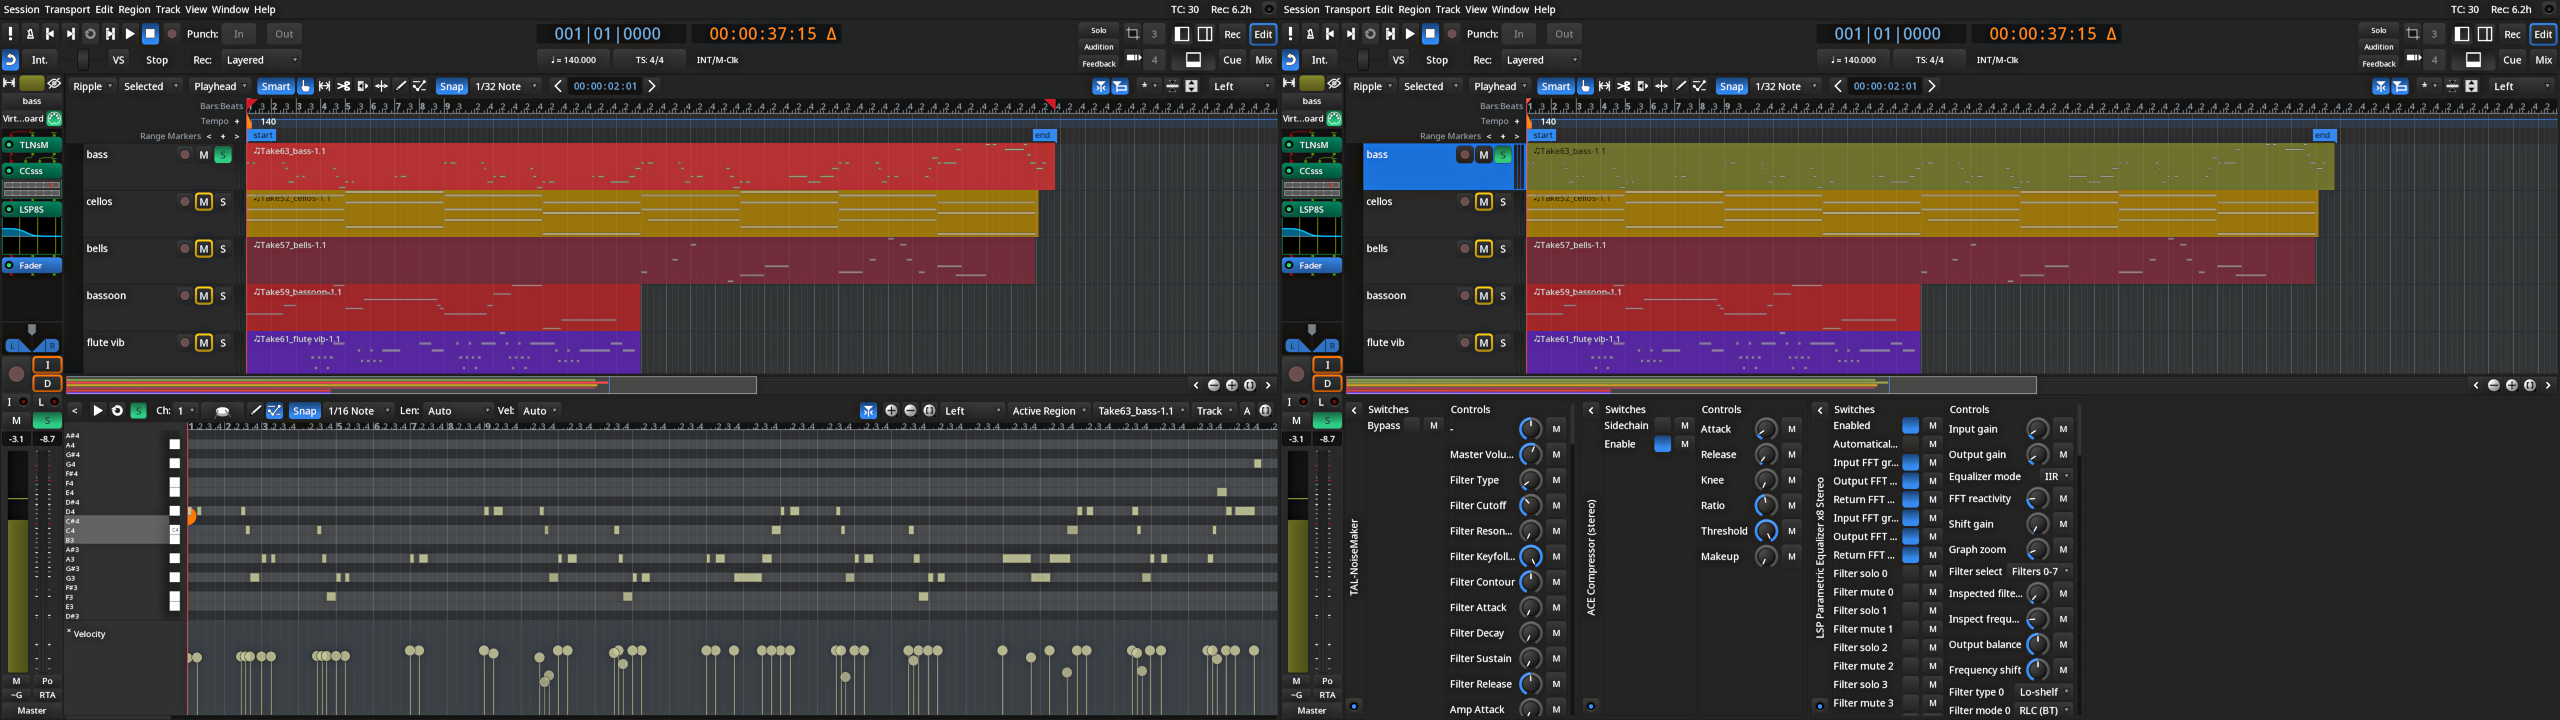
For documentation on using the bottom MIDI region editor, please refer to the Pianoroll Window chapter that covers the user interface and functionality.
For documentation on using the bottom pane plugin views, please refer to the Working with Ardour-built Plugin Editors chapter.
Bottom pane in the Cue window
The bottom pane in the Cue window always displays clip properties and the editor for the selected audio or MIDI clip:
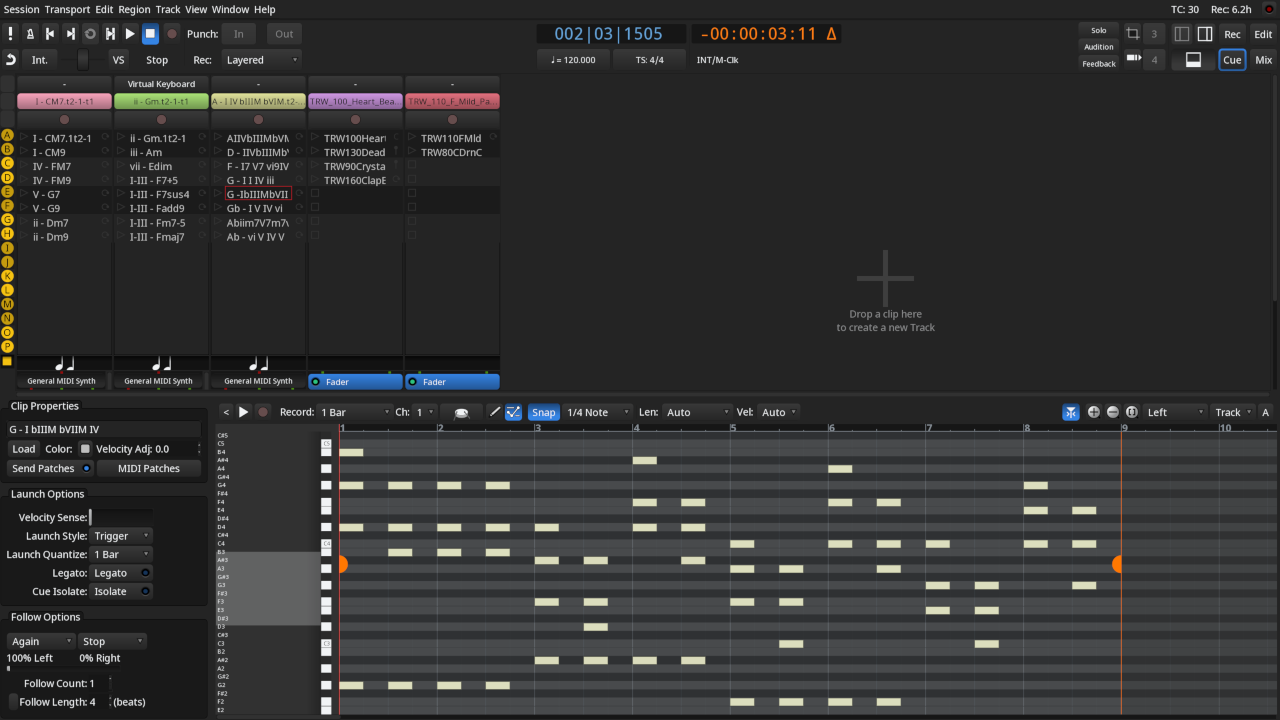
For details on setting clip properties, launch styles, etc., please read the relevant documentation section.
For details on editing clip contents, please read Editing Cues.
Editor and Cue Lists
The Editor and the Cue windows have an optional area called Editor list. It contains multiple lists: tracks and busses, sources, regions, reusable clips, various markers etc.
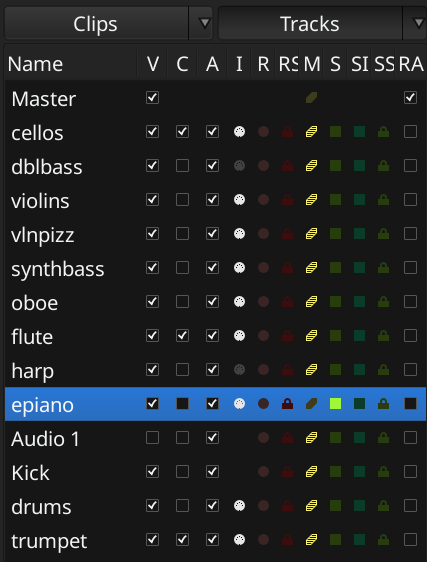
The Editor list is not shown by default when you run Ardour for the first time. It can be hidden or shown using View > Show Editor List menu command.
This area appears on the right side of the window. The left-hand border of the list can be dragged to show more columns where appropriate (alternatively, you can scroll the bottom scrollbar to see more).
The Cue window displays only a part of all possible lists — ones that make sense for this non-linear sequencer: Clips, Tracks, Sources, and Regions.
It's possible to quickly switch between two diferent lists. To select a list and switch to it, click on the part of the button that contains a triangle icon pointing downwards. To switch to an already selected list, click the main part of the button.
The Tracks and Busses List
This lists the tracks and busses that are present in the session. The list order reflects the order in the editor, and track or bus names can be dragged-and-dropped in the editor list to re-order them in the editor. The columns in the list represent the following:
| V | Whether the track or bus is visible; they can be hidden, in which case they will still play, but just not be visible in the editor; this can be useful for keeping the display uncluttered. |
|---|---|
| C | Whether the track is visiable on the Cue page, in which case it can be used for non-linear sequencing in the Cue window, but any content in the track visible in the Editor window will not be played. |
| A | Whether the track or bus is active; inactive tracks will not play, and will not consume any CPU. |
| I | For MIDI tracks, whether the MIDI input is enabled; this dictates whether MIDI data from the track's input ports will be passed through the track. |
| R | Whether the track is record-enabled. |
| RS | Whether the track is record safe; a record safe track cannot be armed for recording, to protect against a mistake. |
| M | Whether the track is muted. |
| S | Track solo state. |
| SI | Track solo-isolated state. |
| SS | Solo safe state. |
Each icon in these columns can be clicked to toggle the track/bus state, which is a very fast way to set multiple tracks/busses state at once.
As with the region list, hovering the mouse pointer over a column heading shows a tool-tip which can be handy to remember what the columns are for.
The Sources List
The Sources list shows all the original audio and MIDI files in the session, either recorded in takes or imported from existing files. Any column caption can be clicked to sort the list according to the clicked value:
| Name | The name of the region, can be modified by double-clicking it. |
|---|---|
| # Ch | The number of channels, only displayed for audio files (it is 0 for MIDI files). |
| Captured for | The name of the track the source was originally captured in. |
| # Xruns | How many dropouts occured while capturing the source. |
| Tags | All the tags assigned to the source. |
| Take ID | The unique ID of the source. Uses the timestamp for when the capturing of source was started. E.g. 2023-10-16 14.08.58 means the capturing started on October 16, 2023, at 2.08pm. This is only used for audio and MIDI sources that were captured, not imported. |
| Orig Pos | The original position at which the capturing of the source was started. The time format is whatever the user chose for the primary clock when the source was captured. Switching between time formats when capturing sources means the time format will not be the same for all captured sources. |
| Path | File name of the captured or imported source. |
Hovering the mouse pointer over a column heading shows a tool-tip which can be handy to remember what the columns are for.
right-clicking on a source in the list brings up a context menu with just one item: Remove the selected Sources. Choosing it gives several options to the user:
The Regions List
The Regions list shows all the regions in the session, with infos about them in a tabular form. Any column caption can be clicked to sort the list according to the clicked value:
| Name | The name of the region, can be modified by double-clicking it |
|---|---|
| # Ch | Number of channels for an audio region (0 for MIDI) |
| Tags | User-added tag text, can be modified by double clicking it |
| Start | position of the start of the region on the global timeline |
| Length | duration of the region |
The time format used for Start and Length follows the Primary Clock one.
At the right of the list are three columns of flags that can be altered:
| □ L | whether the region position is locked, so that it cannot be moved. |
|---|---|
| □ M | whether the region is muted, so that it will not be heard. |
| □ O | whether the region is opaque; opaque regions ‘block’ regions below them from being heard, whereas ‘transparent’ regions have their contents mixed with whatever is underneath. |
Hovering the mouse pointer over a column heading shows a tool-tip which can be handy to remember what the columns are for.
A handy feature of the region list is that its regions can be dragged and dropped into a suitable track in the session.
The Clips List
The Clips list displays all reusable audio and MIDI files available in the custom clips folder. This is explained in more detail in the dedicated part of the user manual.
The Arrangement List
The Arrangement list shows all range sections in the session, with start and end time for each of them in the time domain of the first clock.
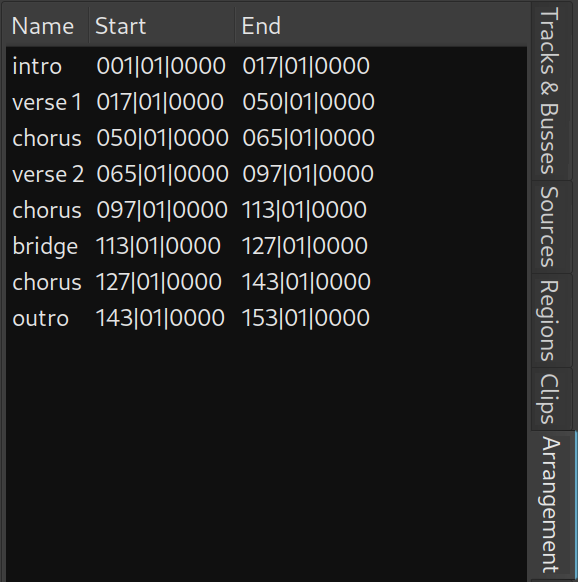
Selecting a range section in the list opens a small window below that display range section timing: end, start, and duration. Its time domain can be selected in the right-click menu.
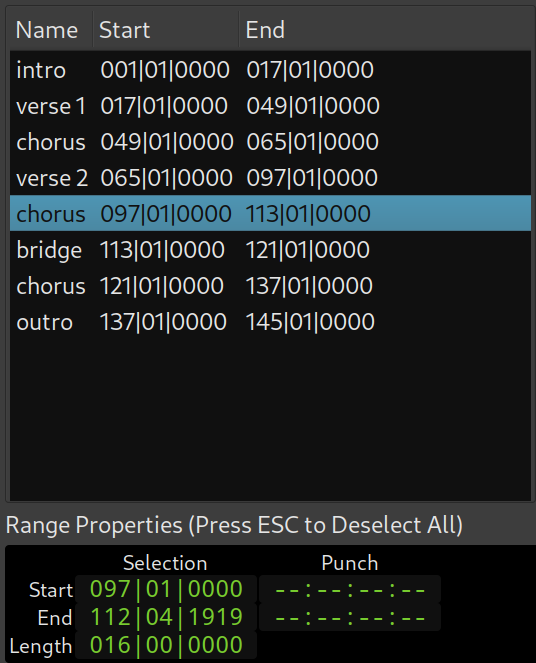
Copying and pasting range sections
An existing range section can be easily copied and pasted using this list editor. Simply pick a range section and drag it up or down to insert between two other existing sections, before the first section, or after the last section.
Renaming range sections
To rename an existing range section, either double-click its name or right-click it and select the Rename the selected Section menu item, then input the new caption of the range section, and press Enter to confirm.
To cancel the renaming before the confirmation, press the Esc key.
Removing range sections
To remove an existing range section, either press the Del key or select the Remove the selected Section menu item.
The Snapshot List
This list gives the snapshots that exist of this session. Clicking on a snapshot name will load that snapshot.
See Snapshots for more information on snapshots.
The Track and Bus Group List
This docks helps manage track/bus groups that exist in the session. These groups allow related tracks to share various properties (such as mute or record enable state). For full details, see the section called Track and Bus Groups.
Columns
The columns in this list are as follows:
| Col | the colour that the group uses for its tab in the editor. |
|---|---|
| Name | the group name. |
| V | whether the tracks and busses in the group are visible. |
| On | whether the group is enabled. |
| G | ticked if the constituents of the group are sharing gain settings. |
| Rel | ticked if shared gains are relative. |
| M | ticked if the constituents share mute status. |
| S | ticked if the constituents share solo status. |
| Rec | ticked if the constituents share record-enable status. |
| Mon | whether the constituents share monitor settings. |
| Sel | whether the constituents are selected together. |
| A | whether the constituents share active status. |
Buttons
The + button under the list allows the creation of an (empty) group, while the − button deletes the selected group (but not the tracks in this group).
Right-click menu
The context menu, reached by right-clicking a group, allows for multiple mixing actions:
| Create New Group From… | Creates a new group based on some track properties. The choice is:
|
|---|---|
| Create New Group with Master From… | Acts exactly as the previous choice, but also creates a Control Master tied to these tracks. |
| Assign Selection to Control Master… | Allows to link all the selected tracks to a chosen Control Master, whether or not they belong to a group. |
| Assign Record Enabled to Control Master… | Allows to link all the record armed tracks to a chosen Control Master. |
| Assign Soloed to Control Master… | Allows to link all the soloed tracks to a chosen Control Master. |
| Enable All Groups | Enable all the groups, i.e. their selected properties are synchronized. |
| Disable All Groups | Disable all the groups, i.e. changing a property in a track won't affect the others. |
When a group is selected, right clicking it adds the following menu entries:
| Create New Group with Master From… | Acts exactly as the previous choice, but also creates a Control Master tied to these tracks. |
|---|---|
| Edit Group… | Shows the Track/bus Group window. |
| Collect Group | Rearranges the tracks/busses order to visually group together the tracks belonging to the same group. |
| Remove Group | Deletes the group (but not the tracks/busses belonging to this group). |
| Assign Group to Control Master… | Allows to link all the tracks in the group to a chosen VCA. |
| Add/Remove Subgroup Bus | Creates/removes a new bus connected to the Master, and send the output of all the tracks in the group to this new bus. |
| Add New Aux Bus (pre/post-fader) | Creates a new bus connected to the Master, and create Aux Sends (pre or post-fader) in all the tracks in the group to this new bus. |
The Ranges and Marks Lists
The Ranges & Marks List is a tab in the Editor Lists area on the right of the Editor window. If the editor list area isn't visible it can be enabled by checking View > Show Editor List. The Ranges & Marks list can be used as a single point of control for all range and location markers (including the punch and loop ranges), or as a supplement to other methods of working with them.
Common elements
Each section has a set of editable clock widgets which display the location of a marker, or the start, end, and duration times of a range, respectively.
The Use PH buttons allows to set the corresponding clock to the current playhead position. A Middle click on any of the clocks will move the playhead to that location. Both functions are also available from the clock context menus.
Right clicking on any of the clocks brings up a context menu that allows changing of the display between Timecode, Bars:Beats, Minutes:Seconds, and Samples.
The — (subtract) button in front of each user-defined range or marker in the list allows that particular item to be removed. The name fields of custom ranges and markers can be edited.
The Hide checkboxes make markers and ranges invisible on the respective ruler to reduce visual clutter; the markers remain active however, and can be used normally.
Selecting Lock prevents the respective marker from being moved until unlocked. Where applicable, Glue fixes the marker position relative to the current musical position expressed in bars and beats, rather than the absolute time. This will make the respective marker follow changes in the tempo map.
At the bottom of the list are buttons to add new markers or ranges.
List sections
| Loop/Punch Ranges | This list shows the current loop and punch range settings. Since these are built-in ranges, they cannot be renamed or removed. |
|---|---|
| Markers (Including CD Index) | This section lists the session's markers. By ticking CD, Ardour is instructed to create a CD track index from this marker, which will be included in the TOC or CUE file when exporting. |
| Ranges (Including CD Track Ranges) | This is the list of ranges (including CD track ranges). Ticking CD will convert the range to a CD track, which will again be included in exported TOC or CUE files. This is relevant for Disk-At-Once recordings that may contain audio data between tracks. |
Favorite Plugins Window
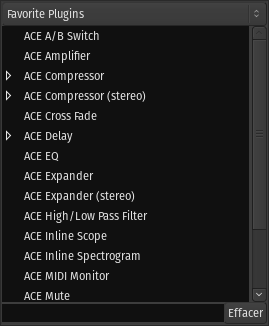
The Favorite Plugins window is on the top-left side of the Mixer Window.
A selector at the top allows to switch between different views of the favorites:
At the bottom of the window is a search field to look for a specific plugin.
Features
The Favorite Plugins window provides easy access to frequently used plugins:
When favorites are added with the Plugin Selector, they are appended to the bottom of the list.
Strips list
The Strips List is a quick way to manage big sessions, with lots of tracks, where the mixer would otherwise be too crowded.
It is a list of all the tracks, busses and VCA in the session, with a tick to allow for hiding or showing them. This visibility status also affects the Editor view, and is exactly the same as toggling the V checkbox in the Tracks and Busses panel of the Editor List.
Dragging and dropping tracks inside the Strips List allows to reorganise the tracks in the session, both in the Mixer and the Editor. Clicking a track scrolls the Mixer to show this track.
It is possible, by right clicking, to act on multiple tracks at once:
The + button under the list is a shortcut to create a new track, bus or VCA, as in clicking Track > Add Track, Bus or VCA….
Mixer Strips
Audio/MIDI Mixer Strips

A mixer strip in Ardour is a vertical view of the track, from a mixing point of view. This view is convenient to deal with I/O, effects, panning/muting, gain, etc… It has a general "top to bottom" flow.
The mixer strips breaks down into:
Headers
At the top of the window, is the group tabs (here, recm…). This allows to group tracks together for common controls.
Below are 3 buttons:
Right clicking on the color bar will bring up a context menu, which is exactly the same as clicking on the Track name button.
Track Name
Clicking the Track name button will bring up a menu:
| Color… | Changes the strip/track color |
|---|---|
| Comments… | Shows an editor to put comments about the track, see below the Comments button |
| Inputs… | Shows the Routing grid for the inputs of the track |
| Outputs… | Shows the Routing grid for the outputs of the track |
| Save As Template… | Allows to save the track without its media content (I/O, effects,…) for later reuse |
| Rename… | Changes the name of the track (effective both in the Mixer and the Editor) |
| Active | Select the active status of the track. An inactive track won't output any sound |
| Strict I/O | While in Strict I/O mode, a track always has as many output as it has inputs, regardless of the effects. When disabled, a stereo effect put on a mono track will result in a stereo output for the strip. |
| Disk I/O | This submenu allows switching between recording pre-fader signal, post-fader signal, or with custom record and playback positions. Only available for tracks. |
| Pin Connections… | Shows the Pin Configuration window that shows (and allows to modify) all the signal flows inside the track. Only available for tracks and busses with at least one processor in the mixer strip. |
| Patch selector… | Opens a dialog for selecting a patch provided by MIDNAM. Only available for MIDI tracks. |
| Fan out to Busses… | Creates one bus per each output of a virtual instrument and connects to created busses. Only available for MIDI tracks where a virtual instrument has more than two audio outputs. |
| Fan out to Tracks… | Creates one track per each output of a virtual instrument and connects to created tracks. Only available for MIDI tracks where a virtual instrument has more than two audio outputs. |
| Protect Against Denormals | Uses a trick to get rid of denormals, which are very small numbers the CPU can have a hard time dealing with. To be used if the CPU consumption for plugins is noticeably higher than expected |
| Duplicate… | Copies the track to a new one, optionally with its playlist |
| Remove | Deletes the track and its playlist |
Inputs
The dropdown button shows the current input port(s), i.e. what's plugged to the "in" of the track. By default, each audio track is connected to the system inputs, ready for recording, as shown by the number(s). Clicking the dropdown Inputs button will allow to change the inputs, through a menu:
| Disconnect | Disconnects everything, i.e. the track has no input |
|---|---|
| In n | Those are the system inputs, e.g. to record from the soundcard. A mono track will have In 1 and In 2 separated, while a stereo track can have In 1+2 |
| Track n output | All the outputs of compatible tracks, e.g., a mono track can only receive a mono signal, a MIDI track can only receive MIDI signal, … |
| Add Audio Port | Adds an audio input to the track, i.e. a mono audio track becomes a stereo one |
| Add MIDI Port | Adds a MIDI input to the track. Adding it to an audio track makes it a mixed Audio/MIDI track. This can be useful e.g. to feed some plugins with a MIDI signal to control the audio, like a vocoder |
| Routing Grid | Shows the Routing Grid window, which allows for more complex input configuration |
The Routing Grid can also be shown by right clicking the dropdown Inputs button. It allows to make the connections through a matrix, and connect things that are not listed in the menu above, or connect to multiple sources at once, reduce the number of inputs, etc…
On audio tracks, is a Trim knob, as on traditional consoles. It set the base input level for the track, avoiding any clipping. Notice that it trims both any input, but (when playing back), also the level of the playlist as displayed in the Editor. It makes sense as while playing, the input of the track is the playlist, on which the mixer strip acts.
On midi tracks, it is replaced by a MIDI Input button, that allows/disallows MIDI input on the track.
Polarity
On audio tracks only, the Polarity button(s), 1 per input, allow to reverse the signal, i.e. a negative value will be positive and vice-versa. This can help deal with phasing issues.
Processor box
The processor box is where the effects are added. By default, one effect is always present: the Fader (see below). The effects can be added pre-fader and appear in brown, or post-fader, where they will appear in dark green. The signal flow is represented by lines, red for the MIDI and green for the audio.
It is also where the Sends come from, whether external or auxiliary.
To learn more about the processor box, see The Processor Box.
Panner
The Panner visually displays how the sound will be distributed between the different outputs. They'll look and behave differently if the track is mono, stereo, or has multiple channels.
Right clicking the Panner will show a menu:
| Bypass | When checked, the panner is grayed, and the signal is not affected by it |
|---|---|
| Reset | Resets the panner to its default settings, e.g. for a mono signal, it is centered |
| Edit… | Shows a Panner dialog, which allows for fine tuning of the panner |
See Panning to learn more about how to control the panner, and what kind of panners are available inside Ardour.
Recording options
The most noticeable button here is the Record Enable one, with a red circle. When enabled, next time the Global record will be armed and playback started, everything that comes from the input of the track will be recorded. Right clicking a disabled record button allows to enable Rec-Safe, thus protecting the track against accidental recording.
The buttons on the right, In and Disk, show what the user is listening to by lighting up, between the Input and the actual content of the playlist on Disk.
They also allow to override the automatic switching by pressing them to lock one source or the other to be what the user is hearing.
Mute/Solo
These buttons allow to Mute (or silence) the track, or Solo them, shutting down the gain of the other tracks (totally by default, can be set to partially in the options). See Muting and Soloing for more information.
Notice that by default, Solo overrides Mute, i.e. if a track is both Soloed and Muted, it will play. That can be changed in the preferences.
The two led button above are related to solo:
Gain & Meter
On the right of this part is a Meter, displaying the level of the track's output after the fader. In can be set to display the signal at any point, see below Metering Point. Right clicking this meter shows a menu allowing to switch the meter type.
The big Gain slider on the left allows to change the gain of the track. Its default OdB value is reminded with a white horizontal line, and its precise value is shown in a text field above it, that doubles as a way to type in a numeric value.
The text field above the meter shows the "Peak", i.e. the maximum value that has been reached during playback. To avoid distortion, the value should stay below OdB, and if it goes above this value, the text field will turn red. Clicking on this field will reset the Peak value (for a new measurement or a new part of the track).
Notice that if any gain automation has been set and the automation state is set on "Play" (see below), then the Gain fader is driven by the automation, and not by the user. The Gain fader will turn grey to show it is inactive.
VCAs
If at least one VCA exists, this button will show up, allowing the user to link this track to any control master.
Clicking the button lists all the available control masters, and a menu option to Unassign all. Notice that a track can be a slave to as many VCAs as they are in the session, hence multiplying the number of VCA buttons. The displayed number is the number of the VCA, not the count of VCAs linked to the track. A track with no VCA assigned will show a unique button with a "-vca-" label instead of this number.
Fader automation/mix group/metering point
Fader automation mode
This button allows to choose the mode used regarding automation:
| Manual | (default) The playback won't use the fader automation data |
|---|---|
| Play | Enables playback/use of fader automation data |
| Write | While the transport is rolling, all fader changes will be recorded to the fader automation lane |
| Touch | While the transport is rolling, touching the fader will initiate recording all fader changes until the fader is released. When the fader is not being touched, existing automation data will be played/used to control the gain level. |
Mix group
This button displays the mix group information as does the tab in the header (see above). It is convenient though, as it allows to quickly switch the track from one group to another with a drop down menu, also allowing to affect the track to a non-adjacent group (which the tab won't easily allow).
Metering Point
The metering displayed in the meter is by default is 'Post', i.e. Post fader. It can be changed with this button to Any point of the signal flow:
| In | The input of the track |
|---|---|
| Pre | Pre-fader |
| Post | Post-fader |
| Out | The output of the track |
| Custom | A Meter processor is added to the processor box and can be set anywhere (by dragging and dropping) to probe the signal flow at that point |
Output(s)
This button is exactly the same as the Input button, but applies to the output of the track.
Comments
This buttons open up a little text editor, that can be used to add some written notes to the track, as e.g. a particular setting. The button's caption is replaced by the beginning of the text, so it can be used as a "sub" name for the track.
Audio/MIDI Busses Mixer Strips

An Ardour bus can be considered a virtual track, as in a track that doesn't have a playlist (so, no regions). Its use is to "group" some audio signals to be treated the same way. One simple use case is to group all the audio tracks containing the different drums of a drum kit. Routing all the drum tracks' outputs to a bus allows, once the different levels amongst the drums have been set, to adjust the global level of the drum kit in the mix.
Bus usage goes way beyond this simple example though: busses, as tracks, can receive plugins for common audio treatment, and be routed themselves as needed. This makes for a very useful tool that is very commonly used both for musical purposes and computing ones: instead of using e.g. ten discrete delay plugins on ten different tracks, busses are often used as receivers of sends, and only one delay plugin is used on this bus, reducing the processing power needed.
Audio Busses vs MIDI Busses
Ardour supports two types of busses: Audio and MIDI. A MIDI bus differs from an audio bus just by:
MIDI busses provide a particularly efficient workflow for virtual drum kits where the arrangement uses different MIDI tracks. Moreover, busses with both Audio and MIDI inputs are well suited for vocoders and similar plugins, where a MIDI signal controls an audio one.
Adding any audio input to a MIDI bus transforms it into an audio bus.
Description
Busses look and behave exactly like tracks, so they share nearly all of their controls. The differences are:
Clicking the Aux button makes every track that sends a signal to this bus through Aux sends blink in turquoise. Right clicking this button brings up a menu:
| Assign all tracks (prefader) | Creates an Aux Send in every track, to this bus. The send is placed just before the fader |
|---|---|
| Assign all tracks and busses (prefader) | Creates an Aux Send in every track and every bus, to this bus. The send is placed just before the fader |
| Assign all tracks (postfader) | Same as above, but the send is placed just after the fader |
| Assign all tracks and busses (postfader) | Same as above, with tracks and busses |
| Assign selected tracks (prefader) | Same as for all tracks, but only applies to the selected tracks |
| Assign selected tracks and busses (prefader) | Same as for all tracks and busses, but only applies to the selected tracks and busses |
| Assign selected tracks (postfader) | Same as above, but the send is placed just after the fader |
| Assign selected tracks and busses (postfader) | Same as above, with tracks and busses |
| Set sends gain to -inf | For all the sends to this bus, put the send fader to −∞ so no signal is sent |
| Set sends gain to 0dB | For all the sends to this bus, put the send fader at the default position, 0dB (100% of th signal is sent) |
Connecting a track to a bus
Depending on the user's workflow and the way busses are used, two possibilities exists:
Connecting a track to a bus via its outputs
Connecting the output(s) of a track to the input(s) of the bus sends all the audio/MIDI to the bus. In the mixer strip, select (at the bottom) the OUTPUT button (often, by default, "Master"), and in the list, choose the input of a bus. Note that only the bus able to receive this output will show up, e.g. a mono bus won't be able to be connected to the output of a stereo track).
Obviously, doing so will (by default) disconnect the output from the Master's input, which means all the audio/MIDI will be routed to the bus. For more complex routing, the OUTPUT button allows to show the Routing Grid that allows to plug the output of the track to multiple outputs at once, be it busses, tracks, Master… The button will then reflect these multiple connections by showing a *number*, number being the number of connections made in the routing grid.
Connecting a track to a bus via Sends
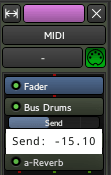
This allows not to interrupt the natural flow of the signal, i.e. the track will
still output to what its connected to (e.g. Master). The signal is "tapped" at
the point of insertion of the send, to be sent to the bus, by right
clicking where in the signal flow the signal should be tapped, and selecting
By left-clicking the send meter, it is possible to adjust the amount of signal sent to the bus. This is often the way tracks are connected to an effect bus, like a Delay bus.
Busses can be plugged to other busses, through outputs or sends. Both example workflows discussed previously, i.e. busses for grouping tracks and busses for effects, can both coexist, as e.g. a "grouping" drum bus can have a send to a reverb bus, and be connected to a compressor bus.
VCA Mixer Strips
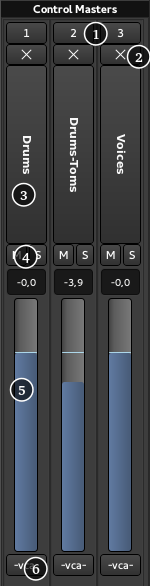
Although track/bus groups offer a certain kind of grouped-control over gain, solo, mute and more, traditional mixing consoles have long had group master channels ("VCAs") which allows to combine both a single fader to control the group level while also allowing to easily adjust the relative levels inside the group. For large projects, this can make mixing much easier to control.
Ardour implements those VCAs in a way that allows to use either or both of the conventions used on different traditional consoles for combining multiple masters:
Description of the VCAs
A VCA strip is made of (from top to bottom in the screenshot):
Right-clicking the name button shows a context menus comprised of:
| Rename | Renames the VCA |
|---|---|
| Color… | Changes the color of the VCA button in the tracks connected to this one |
| Drop All Slaves | Deletes all connections to this VCA, i.e. no tracks are controlled by this VCA anymore |
| Remove | Deletes this VCA |
Connecting to a VCA strip
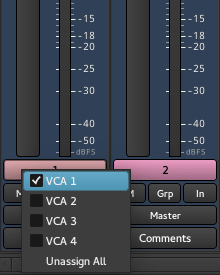
Connecting a track/bus/VCA to a VCA is as simple as clicking the VCA button that appears on any mixer strip under the main fader and choosing the VCA to connect to.
The VCA button only shows up in mixer strips when at least one VCA exists, i.e., a VCA must be created before connecting tracks to it.
Clicking the VCA button shows all the VCAs in the session, and any or all of this VCA can be checked to link them to the track, making this track controlled by multiple VCAs. The track will then show multiple buttons. Disconnecting a VCA from a track is done by unchecking this VCA in the list that pops up, or clicking Unassign All to disconnect from all VCAs at once.
Foldback Section

The Foldback section is an optional feature that provides stage monitoring mixes. Many times the main mix is used for this purpose in a setup with only the control room. However, for a separate studio and multiple monitor mixes for in-ear use, a separate set of Foldback buses provides that flexibility.
These foldback buses may be mono for a stage monitor wedge or stereo to allow in-ear or headphones to have different mixes for each ear, such as one's self in one ear and the rest of the music in the other.
A Foldback bus can be created in the same manner as any other bus is created, from the Track > Add Track, Bus or VCA Window. Once at least one Foldback bus has been created, the Foldback strip will appear in the mixer window.
Foldback sends can be created from the processor box context menu by selecting New Foldback Send and then the Foldback bus desired.

A second method is to select all the source channels and then use the Foldback bus sendbox context menu and select either Assign Selected Tracks or Assign Selected Tracks and Buses.
The View > Mixer: Show Foldback Strip checkbox will determine if the Foldback strip is visible. The Foldback strip appears just to the left of the Master strip in the Mixer window. It comprises:
Previous and Next
The Previous button shows the previous Foldback bus in the Foldback strip. The Next button shows the next Foldback strip. The button will be disabled if there are no more Foldback buses in that direction.
Hide
The hide button hides the Foldback strip when not being adjusted. The Foldback strip can be shown again from the main menu View > Mixer: Show Foldback Strip item.
Name button
The name button shows the name of the current Foldback bus. It has two menus: the Foldback bus selection menu, activated with a mouse button 1 click, and the context menu, activated with a mouse button 3 click. The context menu has these items in it:
Invert Buttons
The invert buttons (one for each channel) invert the audio signal. This may be useful in some situations for controlling feedback. However, proper microphone and monitor placement or the use of head phones or in ear monitoring will be more effective.
Show Sends
Show sends allows the send levels and pan to be controlled from the originating track by using the main fader for the track. The fader and pan controls will change color to indicate this mode and the show sends button will flash to indicate this mode. Changing the current Foldback bus will disable this mode.
The Send Box
The send box shows controls for each send. There is a context menu available by clicking mouse button 3 anywhere in the send box.
The Send Control Block
There is a send control block for every send to the current Foldback bus. The Send control block features three controls:
The Pan Control
This is just like every other track or bus strip and works the same way.
The Processor Box
This processor box is the same as on the other tracks and buses and allows for adding things like reverb to the Foldback mix without writing it to the track. It would also be possible to add in sound from a reverb bus instead.
The Listen Button
This is only available in PFL or AFL mode as it uses the same code as the solo on other tracks and buses. It allows the control room monitor or headphones to hear what the performer will hear in their monitor.
The Foldback Level Knob
This controls the output level being sent to the stage monitor.
The Output Port Selector
This is similar to the output selectors on the tracks and buses. It differs in only a few ways. First it is never automatically connected. A Foldback bus is always meant to be directly connected to an output device and never to master or the monitor bus. The choices shown therefore reflect this.
The Comment Button
Just like the track and bus comment button, this allows opening a window to type in notes about the current Foldback bus for future reference.
Master Bus Strip

The Master strip in Ardour is very similar to the other busses mixer strips. There are nevertheless a few differences due to the nature of the Master strip, that is being the last point of treatment before the output or rendering:
The Master bus strip is always fixed, at the right end of the mixer, regardless of the scrolling position.
Editor Tracks
Audio Track Controls
Each track shows a header section, for settings relevant to this track only.
Changing the height of the track can be done either:
At the top-left of the controls is the name of the track, which can be edited by double-clicking on it. The new name must be unique within the session.
Underneath the name is the track's main level fader. Changing it will affect the whole track :
On the right-hand side of the headers are level meters for the outputs of the track (1 level per output).
The control buttons are:
| ● (Record) | The button with the pink circle arms the track for recording. When armed, the entire button will turn pink, and change to bright red as soon as the transport is rolling and the track is recording. Right clicking will allow to en/disable Rec-safe, protecting the track against accidental recording. |
|---|---|
| M (Mute) | Mutes the track. Right clicking displays a menu which dictates what particular parts of the track should be muted. |
| S (Solo) | Soloes the track. The behaviour of the solo system is described in detail in the section Muting and Soloing. Right clicking will allow to en/disable Solo isolate and Solo safe. |
| P (Playlist) | Opens a playlist menu when clicked. The menu offers various operations related to the track's playlist. |
| A (Automation) | Opens the automation menu for the track. For details see Automation. |
| G (Group) | Allows to assign the track to an existing or a new group. For details see Track and bus groups. |
MIDI Track Controls
A MIDI track has the same basic controls as an audio track, with a number of differences.
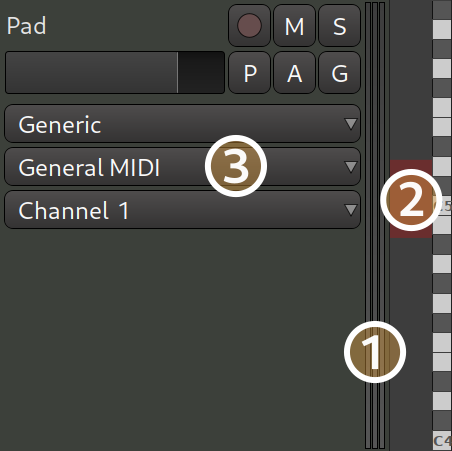
To show the full set of MIDI track controls, the track height must be increased beyond the default
height. MIDI tracks will show only a few of the control elements when there
is insufficient vertical space. As for Audio
tracks, this can be done by either toggling the
track's full screen mode (Track > Height > Fit
selection (Vertical), default : F, or by simply
double-clicking an empty space in the track header, to increase the track's
height.
Further, the External MIDI Device and
External Device Mode comboboxes will not appear if there is
a synth plugin on the track that comes with an associated MIDNAM.
The Scroomer
The Scroomer performs the following functions:
Scroomer's user interface looks lightly differently depending on the currently selected tool. For most tools, the UI is the same as on the screenshot above. However, when either the Draw or the Edit tool is selected, the scroomer will additionally display notes (e.g. 048 C, 049 C#):
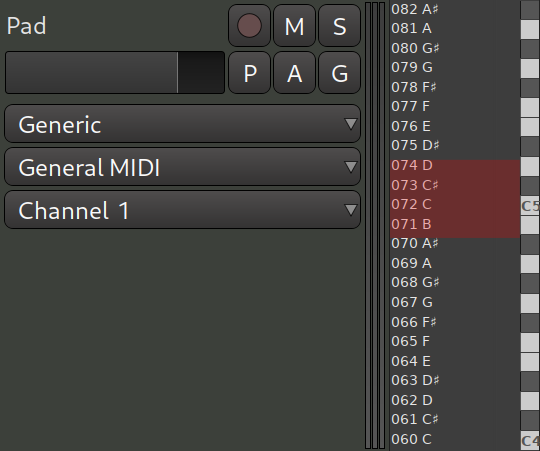
If a virtual instrument loaded into the MIDI track provides MIDNAM data, Ardour will read and display note names rather than notes:
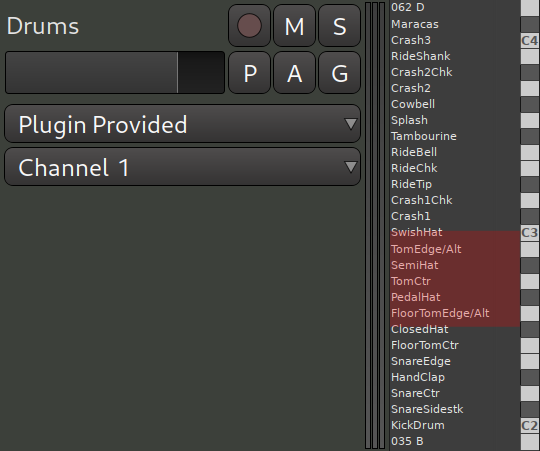
You can configure Ardour to always show note names when they are available or never show them. The setting is on the Appearance > Editor page of the Preferences dialog.
The extent to which scroomer can zoom into the pianoroll depends on the maximum size of a note cell. This setting is available on the MIDI page of the Preferences dialog.
Channel and Patch Selection
The Channel Selector
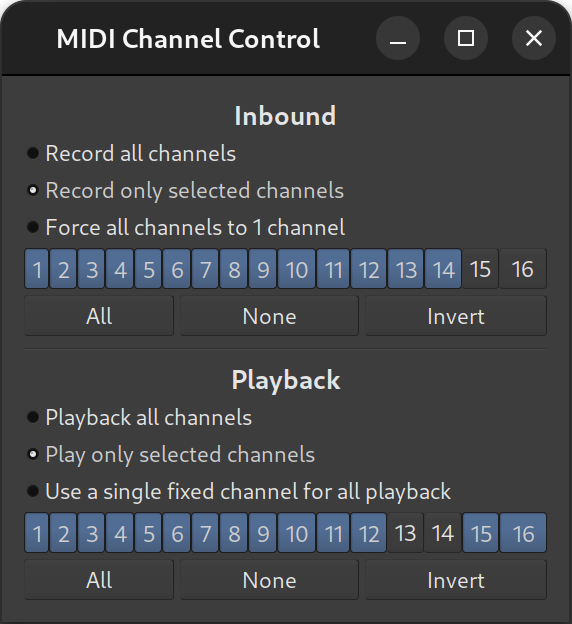
A MIDI track's data may utilize any number of the 16 available MIDI channels, and it is useful to be able to filter out a subset of those or force the input or output to utilize only certain channels. The Channel Selector dialog allows for filtering or modification of both the input and output of any given MIDI track.
The Channel Selector dialog is activated by right-clicking on a MIDI track's header and selecting Channel Selector... from the menu that appears. Filtering or modification of Inbound MIDI events for the given MIDI track is done by selecting among:
Selecting Record all channels does no filtering of inbound MIDI events.
If simple filtering of incoming MIDI events is desired, Record only selected channels should be selected. A 1-by-16 grid of squares with numbers in them will become sensitive to mouse clicks, and the desired channels to be allowed through the filter can then be selected by clicking on them. Channels that are allowed to pass through will be highlighted in green.
Force all channels to 1 channel will rewrite the channel number of all incoming events of the selected MIDI track to whichever channel is highlighted in the 1-by-16 grid of squares. When this option is chosen, one and only one channel can be selected.
Filtering or modification of outbound MIDI events is done by selecting among:
Selecting Playback all channels does no filtering of outbound MIDI events.
Simple filtering of outgoing MIDI events is done similarly to simple filtering of incoming MIDI events, and is done by selecting Play only selected channels. Also similarly to the incoming case, Use a single fixed channel for all playback will rewrite the channel number of all outgoing events of the selected MIDI track to whichever channel is selected.
When either Record only selected channels or Playback only selected channels is selected, a group of three buttons, each appearing below their respective 1-by-16 grids, will become sensitive to mouse clicks. They perform the following functions:
| All | Selects all the channels in the 1-by-16 grid above it; all the squares become lit with green |
|---|---|
| None | Deselects all the channels in the 1-by-16 grid above it; all the squares become unlit |
| Invert | Any channel in the 1-by-16 grid that is lit green becomes unlit, and any unlit channel becomes lit with green |
The Patch Selector
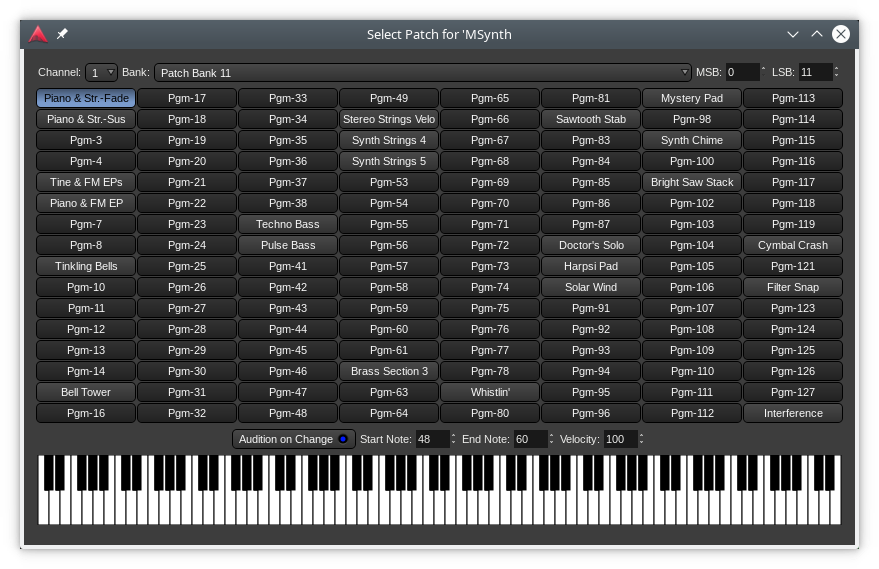
The Patch Selector window is an easy way to set which instrument will be used on any of the MIDI channels. Although patches can be changed at any time using a patch change, this dialog provides an easy and convenient way to preview patches in software and hardware instruments. It integrates fully with Ardour's support for MIDNAM (patch definition files), so Ardour can display named programs/patches for both General MIDI synths and those with MIDNAM files.
The window itself makes it easy to choose a channel, a bank number, optionally choosing a bank number through its MSB and LSB numbers (CC#00 and CC#32) for large banks, then choosing an instrument.
The keyboard at the bottom of the window allows for a quick preview of the selected instrument, either automatically (using the buttons on top of the keyboard) or manually by either clicking a note or using the computer keyboard as a piano keyboard.
Bus Controls
The bus' header is very similar to the audio track header, minus :
For more information about the bus concept, see Understanding basic concepts.
Track and Bus Groups
Tracks and busses can be put into groups. Members of a group can share various settings—useful for managing tracks that are closely related to each other. Examples might include tracks that contain multiple-microphone recordings of a single source (an acoustic guitar, perhaps, or a drum kit).
Tracks and busses can be grouped in various ways. In the editor window, a track's controls might look like the adjacent image.
The green tab to the left of the track header indicates that this track is in a group called Fred. These tabs can be dragged to add adjacent tracks to a group.
Create New Groups
There are several ways to create groups for tracks and busses:
Remove Groups
Context-clicking on a group tab and selecting Remove Group from the menu removes it. Removing a group does not remove the members of a group.
Groups can also be removed by selecting them in the Track and Bus Groups list and then pressing the minus (−) button at the bottom of the list.
Add/Remove Tracks and Busses From a Group
Clicking the g button displays a menu with a list of the available groups. Selecting one of these groups adds the track or bus to that group. Selecting No Group removes it.
Alternatively, a group tab can be dragged to add or remove tracks from the group.
Activate/Deactivate Groups via the Group Tab
Clicking on a group tab toggles the group between being active and inactive. An inactive group has no effect when editing its members. An active group will share its configured properties across its members. Tabs for disabled groups are coloured grey.
Modify Group Properties
Edit the properties of a group is done by right-clicking on its tab and choosing Edit Group…. This opens the track/bus group dialog, which is also used when creating new groups.
Group Color
Clicking on the color selector button changes a group's color. This affects the color of the group's tab in the editor and mixer windows. The color does not affect the color of the group members unless the shared Color property is enabled.
Shared Properties
Gain means that the track faders will be synced to always have the same value; Relative means that the gain changes are applied relative to each member's current value. If, for example, there are two tracks in a group with relative gain sharing, and their faders are set to −3 dB and −1 dB, a change of the first track to a gain of −6 dB will result in the second track having a gain of −4 dB (the difference of the gains remains the same).
Muting, Soloing, record enable, active state, color and monitoring are all straightforward. They simply mean that all member tracks or busses will share the same settings in these respects.
Selection means that if a region is selected or deselected on one member track, corresponding regions on other member tracks will be similarly selected. Since region editing operations are applied to all currently selected regions, this is the way to make edits apply across all tracks in the group.
Overriding grouped status
It's possible to override the shared status of any properties of a group. Holding while clicking on a grouped channel's Mute, Record Enable, In & Out monitoring controls, or fader, will invert the sense of sharing of that control.
For example, if a channel is a member of an active group with "Record Enable" shared, +click on that channel's Record Enable button will toggle only that channel's record enabled status. If a channel is a member of an inactive group, or of an active group that does not have "Record Enable" shared, +click on that channel's Record Enable button will enable or disable the record enable status of all channels in the same group.
Group Tab Context Menu
Context-clicking on the group tab offers a further menu of group-related actions.
| Create a New Group | create a new group |
|---|---|
| Create New Group from… | create a new group and automatically add … |
| Selected | all currently selected tracks and busses |
| Rec-enabled | all currently record-enabled tracks |
| Soloed | all currently soloed tracks and busses |
| Collect Group | moves all the member tracks so that they are together in the editor window |
| Remove Group | removes the group (and only the group, not its members). |
| Add New Subgroup Bus | creates a bus (giving it the name of the group) and connects the output of each member to the new bus. |
| Add New Aux Bus | adds a bus and gives each member a send to that bus. There are two options for this, specifying whether the sends should be placed pre- or post-fader. |
| Fit to Window | will zoom the member tracks so that they fill the editor window. |
| Enable All Groups | makes all group active, including any hidden groups. |
| Disable All Groups | makes all groups inactive, including any hidden groups. |
Quick groups
Having a persistent group of tracks and/or busses has a number of pros, such as being able to control faders of multiple tracks at once, at any moment in time. However, Ardour also supports "quick" temporary groups.
Selecting multiple tracks or busses either in the Editor or in the Mixer window allows treating those tracks and/or busses as a group as long as the tracks/busses are selected. This means:
If one of the selected tracks/busses belongs to a persistent group, selecting it will automatically all the other members of that persistent group and affect respective controls there as well. This can be worked around by opening group's setting and changing what controls are shared in the group.
There are two cases where quick groups will not work as expected:
Monitor Section
The Monitor section is an optional feature that provides Control Room/Monitor Speaker outputs. It can be activated for the current session in the Session > Properties window by enabling the Use monitor section in this session option in the Monitoring tab. By default the Monitor Section is fed with audio from the Master Bus, but depending on solo mode and other functions such as Auditioning, other audio sources may be temporarily heard instead.
When you click the "Mon" button on the Master bus, the Monitor section appears on the right hand side. It comprises:
Status Indicators
The Status indicators, two of which also appear in the Transport tool bar, flash to indicate when that function is in operation:
Solo behaviour selection
The SiP, PFL and AFL controls inter-cancel with each other and select the desired Solo mode. Excl. Solo and Solo Mute then modify the modes behaviour. See Muting and Soloing. The current mode is indicated by the illuminated 'LED' on the button.
| SiP | This selects Solo In Place as the current solo mode and cancels the previous mode. |
|---|---|
| PFL | This selects Pre Fade Listen as the current solo mode and cancels the previous mode. |
| AFL | This selects After Fade Listen as the current solo mode and cancels the previous mode. |
| Excl. Solo | This enables or disables the Exclusive Solo option. |
| Solo » Mute | This enables or disables the Solo Mute option. |
Changing the solo mode (SiP, PFL or AFL) will update the labels on the mixer strips' solo controls accordingly.
The Processors button
Clicking the Processors button show or hides the Monitor Sections processor box. This is used in the same way as processor boxes present in tracks and busses. It can be used to insert plugins, e.g. a room correction EQ or a specific metering type.
As this processing is local to the Monitor Section it is only applied to audio that is ultimately available at the monitor outputs.
Solo level controls
These controls set the level of the audio when a channel or bus solo is engaged.
| Solo Boost | This is the level that will be added to the current main monitor level when a track or bus is soloed, providing a convenient boost in level for the isolated signal. The rotary control has a range of 0dB to +10dB and can be set at any point between these two values. A drop down menu with pre-defined values is also provided for convenience. |
|---|---|
| SiP Cut | Only relevant to Solo in Place mode. This sets the level that all muted tracks or busses will be muted by. By default it is −∞ i.e. the non soloed tracks are totally inaudible. The level can be raised to make the other tracks audible, though dimmed. This is also sometimes referred to Solo in Front. The rotary control has a range of −∞ to +0dB and can be set at any point between these two values. A drop down menu with pre-defined values is also provided for convenience. |
Dim level control
The Dim level control sets the amount by which the monitoring will be reduced when a Dim button is engaged. The rotary control has a range of -20dB to 0dB and can be set at any point between these two values. A drop down menu with pre-defined values is also provided for convenience.
Monitor path controls
Each of the individual paths through the Monitor Section, (e.g. L and R for stereo), can be controlled individually. Four functions are available:
| Mute | Mutes the selected path(s) |
|---|---|
| Dim | Reduces the selected path(s) level by the amount set with the Dim level control |
| Solo | Solos the selected channel(s) |
| Inv | Inverts the selected channel(s) polarity |
Global Monitor controls
Those buttons directly affect the output of the monitoring section:
Global Monitor level
This control sets the level for Monitor Section output. The rotary control has a range of −∞ to +6dB and can be set at any point between these two values. A drop down menu with pre-defined values is also provided for convenience.
Monitoring Output routing
Clicking on this button shows a menu that allows quick and convenient routing of the Monitor Section's outputs to audio hardware outputs, e.g. to feed control room monitors. It also has an option to open Ardour's routing matrix, where more detailed connectivity is available if routing to something other than hardware is required.
Sessions & Tracks
Sessions
What's in a Session?
The Session is the fundamental document type that is created and modified by the Ardour workstation. A Session is a folder on a computer filesystem that contains all the items that pertain to a particular project or "recording/editing/mixing session".
The Session folder includes these files and folders:
A session combines some setup information (such as audio and MIDI routing, musical tempo & meter, timecode synchronization, etc.) with one or more Tracks and Buses, and all the Regions and Plug-Ins they contain.
Ardour supports loading session files created with older versions of the program. The oldest known version is 2.8 released in 2009. With very few exceptions, Ardour will load all session data from such files. The data that cannot be supported (e.g. the old way of storing region fades) will be skipped entirely.
Where Are Sessions Stored?
Sessions are stored in a single folder on the computer's filesystem. The first time Ardour is run, it will ask for the default location for this folder, with the initial choice being the current user's home folder.
After the first-run dialog, the default location can still be changed at any time via Edit > Preferences > Misc > Session Management. A particular (different) location for a session can also be specified when creating it, in the New Session dialog.
New/Open Session Dialog
The initial Session dialog, displayed at each start of Ardour, consists of several consecutive pages:
Recent Page
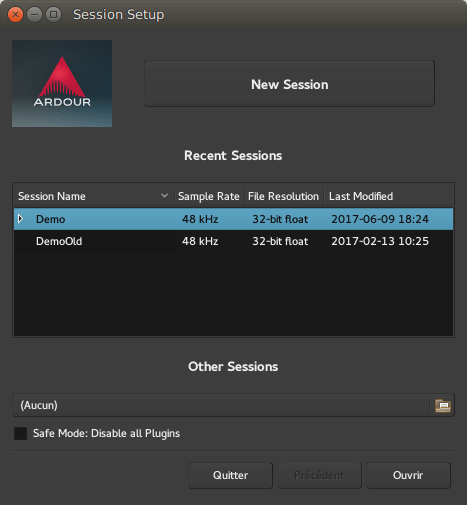
On this page, an existing session can be opened. Any snapshot of a particular session can also be accessed by clicking on the arrow next to the session name to display all snapshots, and then selecting one.
If the session is not displayed in the Recent Sessions list, the Other Sessions button will bring up a file selection dialog to navigate the file system.
Alternatively, a New Session can be created.
Open Page
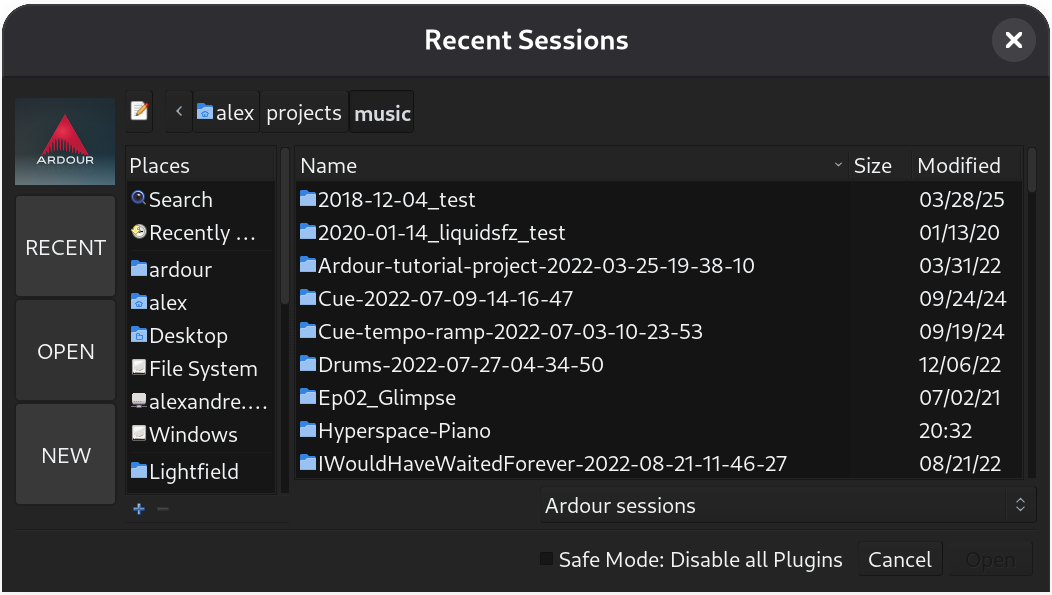
This page allows to open an arbitrary session from the disk.
Available options are:
New Page
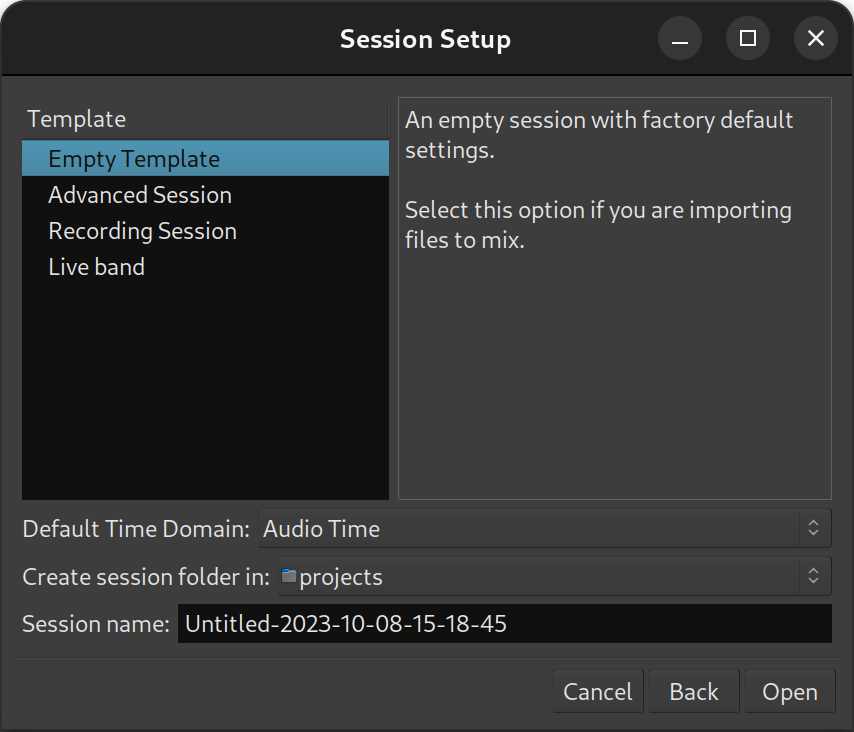
This page allows to type in the name of a session, select a folder to save it in, and optionally use an existing template. The different templates, both the "factory" ones and the ones created by the user, are easily available on the left-side panel.
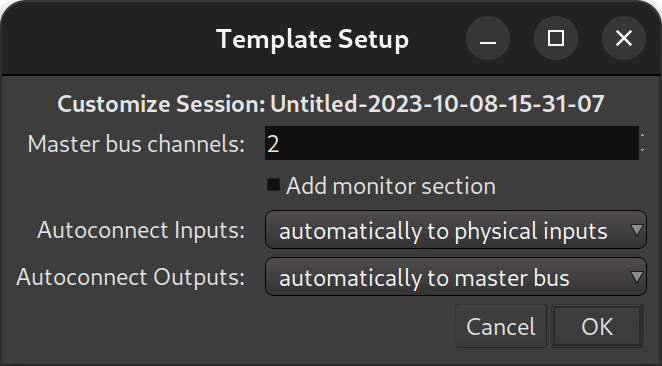
Depending on the chosen template, a specific Template Setup window may be shown, allowing the user to fine-tune the details of the template and/or choose between the different options of the template.
Templates can be huge time savers when working on similar projects, or on usual projects, as they allow to preset and tweak a lot of the session properties, (like the availability of a monitoring section, connection to a Master Bus, etc.), and handle the creation of tracks of any kind.
The Empty Template preset allows to create a session "from scratch". Everything a session template does can be done manually —albeit more tediously— and the resulting sessions will not differ whatsoever.
As of Ardour 5.12, which introduced the new template dialog, the factory templates are:
| Empty Template | Creates an empty session with no tracks and no monitoring. A stereo Master Bus is created, and any track created defaults to output on this bus. |
|---|---|
| Advanced Session | Like the Empty Template, but adds the ability to easily manage the Master bus (channels, hardware connection, and track autoconnection), and the creation of a monitoring section. |
| Recording Session | Like the Empty Template, but allows the fast creation of a number of tracks, optionally ready to record. |
| Live Band | Fast tracks the creation of usual tracks for a band setup (vocals, guitars, piano, ...), and optionally adds usual effects on these tracks. |
Selecting a template will display its description in the right-side panel, while hovering over a template name will show a tooltip indicating if it is a factory template, or, if it is a user-created one, which version of Ardour was used to create it.
Whether or not a template is used, and before the "Template Setup" dialog, the Audio/MIDI Setup will be shown.
The New Session dialog also allows selecting session's time domain — either audio time or beat (musical) time. This defines the defaut selection of visible timeline rulers and units in which various markers operate in.
Audio/MIDI Setup
Audio/MIDI Setup
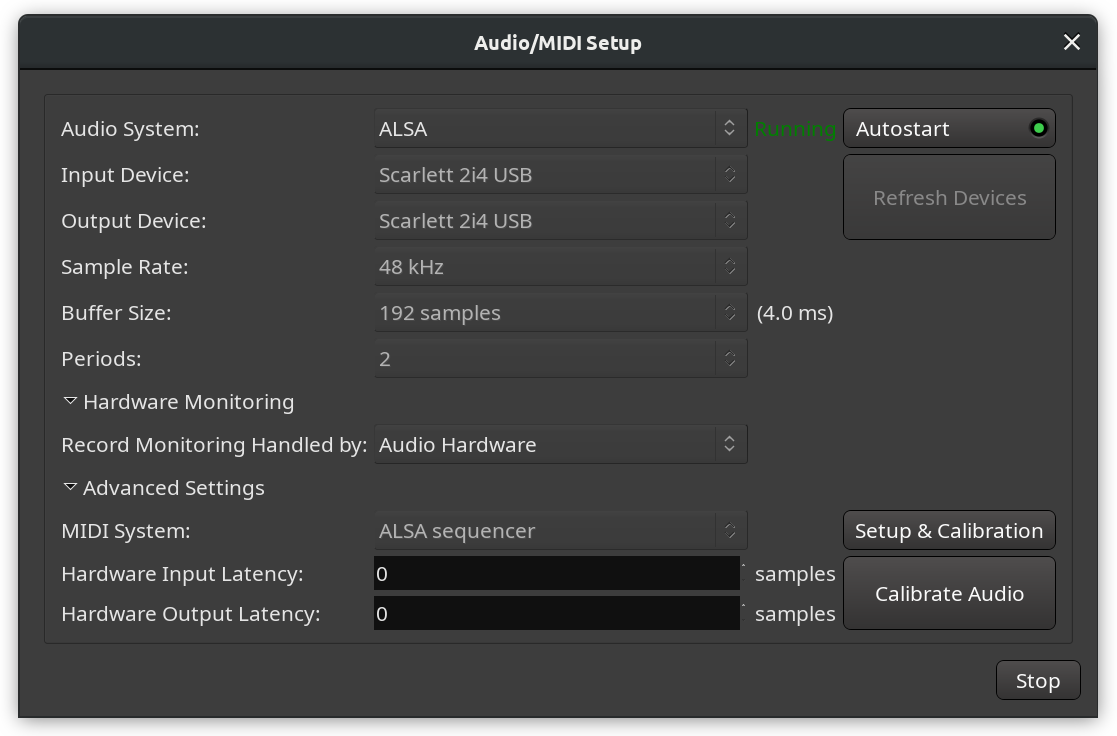
This window exposes the different audio options to be used by Ardour for the current work session, for hardware and software and is made of:
| Audio System | Depending on the operating system, Ardour can possibly use different audio systems, e.g. on Linux, both ALSA, PulseAudio, and JACK are available. On Mac OS X this will typically be CoreAudio. Advanced users on all platforms may also use NetJack which provides network audio I/O. |
|---|---|
| Input Device | The selector should show all available interfaces provided by the audio system above and which are capable of capturing audio. |
| Output Device | The selector should show all available interfaces provided by the audio system above and which are capable of playing audio. |
| Sample Rate | The selector will allow to select from any sample rate supported by the device selected above it. |
| Buffer Size | The size of the buffer used by the audio interface can be adjusted to allow for either lower latency, or lower CPU usage and higher latency. |
| Periods | Number of frames between each hardware interrupt (analog-digital or digital-analog conversion). |
| Hardware Monitoring | This section allows choosing whether Ardour or auidio hardware should be handling recording monitoring. |
| Advanced Settings | This section contains several lower-level settings listed below. |
| MIDI System | This allows choosing a MIDI driver. On macOS, this will be CoreMIDI. On Linux, the choice will be between ALSA sequencer and ALSA raw devices. Choosing "None" will disable the connection to the external MIDI backend and prevent Ardour from being exposed to external MIDI ports while allowing to route MIDI events inside the program. |
| Setup & Calibration | This button runs a semi-automated guided process to obtain precise hardware latency measurements for available MIDI ports. |
| Hardware Input/Output Latency | Specify the hardware delay in samples for precise latency compensation. |
| Calibrate Audio | This button runs a semi-automated guided process to obtain precise hardware latency measurements for available audio ports. |
Renaming a Session
Using the Session > Rename menu allows to give the session a new name. A dialog will appear asking for the new one.
This operation does not make a new session folder—the existing session folder and relevant contents are renamed. If the session was not saved before a rename operation, it will be saved automatically and then renaming will continue.
Ardour's Session > Save As operation will not make a new copy of the session folder and its contents. All it does is create a new session file.
Session Metadata
Session Metadata

Sessions can have various items of metadata attached to them, and saved in the session file. These metadata are filled by the user via Session > Metadata > Edit Metadata….
These metadata will be exported as tags in the audio and video files that support it, as long as the right option is chosen at the export stage. All the video format can retain a subset of the metadata if the Include Session Metadata is checked in the export video window, while only the Ogg-Vorbis (tagged) and FLAC (tagged) audio format will be exported with the metadata (as Vorbis comment).
Ardour can also reuse the metadata from another session file in the current session, with Session > Metadata > Import Metadata…. This menu brings up a file selector, asking for the source ardour session file to extract the data from. This can be handy when reusing a lot of information (Author, Artist Name, etc…) or working on multiple tracks of the same media.
Session Templates
Session templates are a way to store the setup of a session for future use. They do not store any audio data but can store:
Creating a Session Template
The Session > Save Template shows a dialog asking for the name of the new template, and a description.
Using a Session Template
In the New Session dialog, a panel lists the different template (factory and user-created).
Managing Templates
To manage templates, choose Window > Templates. To access this menu item, you have to have a session open.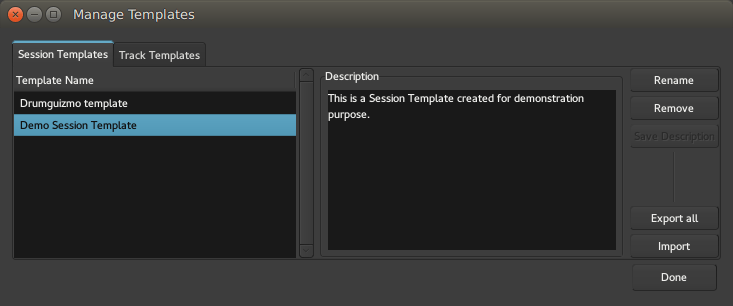
Both Session templates and Track Templates can be managed through the Manage Templates window, which can perform the following actions:
See also Adding Tracks and Busses for information on templates for individual tracks or busses.
Snapshots
A snapshot is a backup of the current state of a session. It differs from a simple save by allowing multiple versions of the session to exist. You can think of a snapshot as either a "frozen" version of the session at a certain point in time, or as a starting point for a different approach to editing and mixing within the same session.
For example, creating a snapshot before changing the entire arrangement of a piece, or drastically altering the signal processing provides a reference to come back to, should that not work out.
This is accomplished by using either of the Session > Snapshot menus. A small dialog will appear, allowing to enter a name for the snapshot. The default name is based on the current date and time.
The difference between the two snapshot menus is:
| Snapshot (& keep working on current version)... | Saves a snapshot of the session, but keeps the current session active, i.e. any subsequent Session > Save will overwrite the original session, and the snapshot will remain unchanged. |
| Snapshot (& switch to new version)... | Saves a snapshot of the session, and uses this snapshot as the current active session, i.e. any subsequent Session > Save will overwrite the snapshot, and the original session will remain unchanged. |
Any number of snapshots can be created.
Creating a snapshot does not modify the session, nor does it save the session. Instead, it saves an alternate version of the session, within the session folder. The snapshot shares all data present in the session.
Switching to a Snapshot
Switching to an existing snapshot is done by navigating the Snapshot List and clicking the the name of the desired snapshot. Ardour will switch to the snapshot, and, if there are unsaved changes in the current session, offer to save them.
Starting Ardour With a Snapshot
Since a snapshot is just another session file stored within the session folder, that "version" can be chosen when loading an existing session. The browser in the "Open Session" dialog will show an expander arrow for sessions that have more than one session file (i.e. snapshots) present. Clicking on it shows the list, and then clicking on the name of the snapshot loads it.
Cleaning Up Sessions
Recording and editing any serious session might leave the session with some unused or misplaced files here and there. Ardour can help deal with this clutter thanks to the tools located in the Session > Clean-up menu.
Bring all media into session folder
When importing media files, if the Copy files to session has not been checked, Ardour uses the source file from its original destination, which can help avoiding file duplication. Nevertheless, when the session needs to be archived or transferred to another computer, moving the session folder will not move those external files as they are not in the folder, as seen in Backup and sharing of sessions.
Using the Bring all media into session folder menu ensures that all media files used in the session are located inside the session's folder, hence avoiding any missing files when copied.
Reset Peak Files
Ardour represents audio waveforms with peak files, that are graphical images generated from the sound files. This generation can be time and CPU consuming, so it uses a cache of the generated images to speed up the display process. To watch for files modification, Ardour relies on the file-modification time. If an external file is embedded in the session and that file changes, but the system-clock is skewed or it is stored on an external USB disk (VFAT), Ardour can't know the change happened, and will still use its deprecated peak files.
Using the Reset Peak Files menu allows to reset this cache, which frees up disk space, and forces the re-creation of the peak files used in the session. It can prove useful if some waveforms are not used anymore, or if a graphical or time glitch happens.
Clean-up Unused Sources…
Recording usually leaves a lot of unused takes behind, be it in midi or audio form, that can clutter the Region List, and eat up a lot of hard drive space. While its generally a good practice to keep as many things as possible while recording, when transferring or archiving the session, some clean up can help a lot in reducing the sessions clutter and size.
Selecting Clean-up Unused Sources… will force
Ardour to detect those unused waveforms by looking for unused regions, and
(through a prompt) for unused playlists. The media files will not be destroyed,
though. At this stage, they are just copied in a particular place of the session
path (namely, in the dead sounds/ sub-folder).
Flush Wastebasket
Although Ardour is a non-destructive audio-editor, it allows for a very careful destruction of unused media materials. This function is closely linked to the previous one. When the unused sources have been cleaned up and quarantined, the Flush Wastebasket menu will allow for their physical destruction.
As a safeguarding mechanism though, Flushing the wastebasket in impossible in the same working session as the Cleaning up of unused sources: the user needs to close the session and reload it before flushing. It allows to test the playback of the session and ensure both that Ardour did not commit any mistake (unlikely, but better safe than sorry), and that the user is absolutely sure of what he does.
All media destroyed this way is not sent to the system's trash can but permanently deleted. If a file is mistakenly destroyed this way, the user will have to rely on data recovery techniques to try getting it back.
Backup and Sharing of Sessions
An Ardour session is stored in a single folder on the computer's filesystem. This makes backup very easy: any tool capable of backing up a folder can be used to backup a session. The location of a session is picked when it is created —by default it will be in the default session location, which can be altered via Edit > Preferences > General > Session.
The single folder approach also makes sharing a project easy. Simply copy the session folder (onto a storage device, or across a network) and another Ardour user (on any platform) will be able to use it.
There is one complication in both cases: a session may reference media files that are stored outside of the session folder, if the user has opted not to select Session > Import > Copy to Session during import. Backing up a session with embedded files will not create a copy of the session containing those files. To bring those external files to the session folder, the Session > Clean-up > Bring all media into session folder menu can be used.
Using the dedicated Zip/Archive Current Session tool

The Zip/Archive Current Session tool is located in the File > Archive… menu.
It allows to create a single file containing everything useful in the session, to share it or back it up, conveniently compressed to a session-archive which is a zip-file (tar.xz to be specific) containing all the audio, MIDI, plugin-settings,... and the currently active session. Ardour can also extract those bundles (Session > Open…).
As opposed to zipping the entire session-folder manually,
The window shows the following options:
| Archive Name | The name of the archive file, defaulting to the name of the session followed by the date and time |
|---|---|
| a dropdown extension selector | allowing to choose between different kind or compressed archive file types |
| Target directory/folder | defining where in the filesystem the archive file will be generated |
| Audio Compression | a dropdown menu allowing to compress the audio files themselves by using an audio-tailored compression format, more on that below |
| Exclude unused audio sources | a checkbox to drop every audio that is in the session, but not actually used in the editor |
The Audio Compression selection accepts any of:
Encoding the audio sources to FLAC allows for a good size reduction of the session. It should be noted though that FLAC is a fixed-point format, meaning that if the audio in the session is in a floating-point format, this conversion will lose some information on the samples values that are rounded, though usually, this lost information cannot be perceived. Choosing "None" for Audio Compression does not compress the audio to FLAC, hence preserving the floating-point data at the cost of a bigger file size. Notice also that converting to FLAC automatically normalizes the audio.
Using the Exclude unused audio sources option allows to only keep the files actually used in the session, which can be useful to leave any unused take or reference material out of the backup, reducing the archive's global file size.
Tracks
Adding Tracks, Busses and VCAs
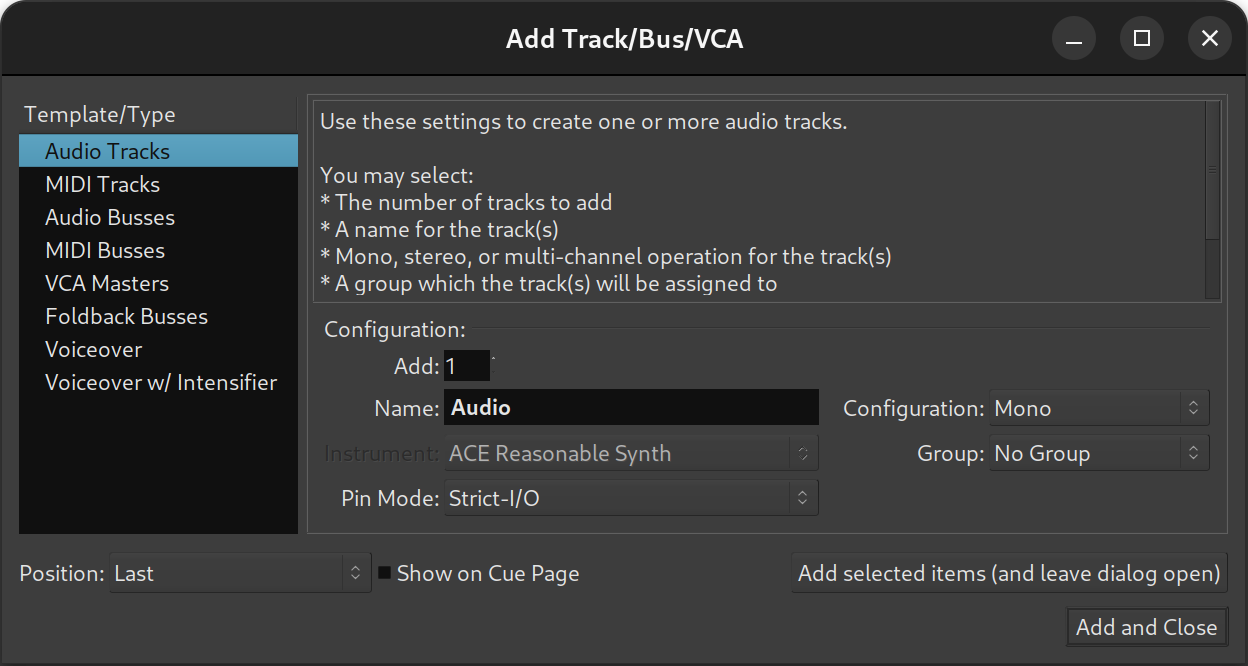
A track, bus or VCA can be added to a session by either:
Any of these actions will open the Add Track/Bus/VCA dialog.
The list of available track templates (both factory and user-created ones) in the left panel allows for choosing the track's type (e.g. Audio, MIDI, bus, VCA, etc.). Some templates can do even more, like the factory-provided Live Band that automatically creates a typical number of tracks for a common band setup. See New Session for more information about templates.
Any template can be fine-tuned using the controls in the dialog:
| Add | Selects the number of tracks, busses or VCAs to create. |
|---|---|
| Name | Defines the name of the new track. If multiple tracks are to be created, or if a track with the same name already exists, a space and number will be appended to the end (e.g.: Audio 1, Audio 2…). |
| Configuration | This menu allows choosing from a number of routing templates, which determines the number of input ports and optionally contains plugins and other mixer strip configurations. The most common choices here are Mono and Stereo. When the Custom option is selected, upon clicking Add, Ardour will ask for the number of channels to initiate a new audio track, bus, or foldback bus with. |
| Instrument | This option is only available for MIDI tracks and busses and allows the selection of a default instrument from the list of available plugins. |
| Group | Tracks and busses can be assigned to groups so that a selected range of operations are applied to all members of the group at the same time (selecting record enable, or editing, for example). This option assigns the new track/bus to an existing group, or creates a new group. |
| Pin Mode | Defines how the number of output responds to adding a plugin with a different number of outputs than the track itself. In Strict I/O mode, plugins cannot alter the track's channel count, while in Flexible I/O mode, it will automatically adapt to the I/O of its plugins. See Signal flow for details. |
| Position | Defines where in the track list is the track created. The default is Last, i.e. after all the tracks and busses, and can also be First, Before Selection (to place it just above the selected track) or After selection. |
Multiple tracks of different types can be created by using the Add selected items (and leave dialog open) button, which, when used in conjunction with the Add field, allows for a very fast and efficient way to create an initial track setup.
New tracks appear in both the editor and mixer windows. The editor window shows the timeline, with any recorded data, and the mixer shows just the processor elements of the track (its plugins, fader, etc).
Removing Tracks and Busses
Removing tracks and busses is done by selecting them, right-clicking and choosing Remove from the menu. A warning dialog will ask for confirmation as track removal cannot be undone; this option should be used with care!
Track Templates
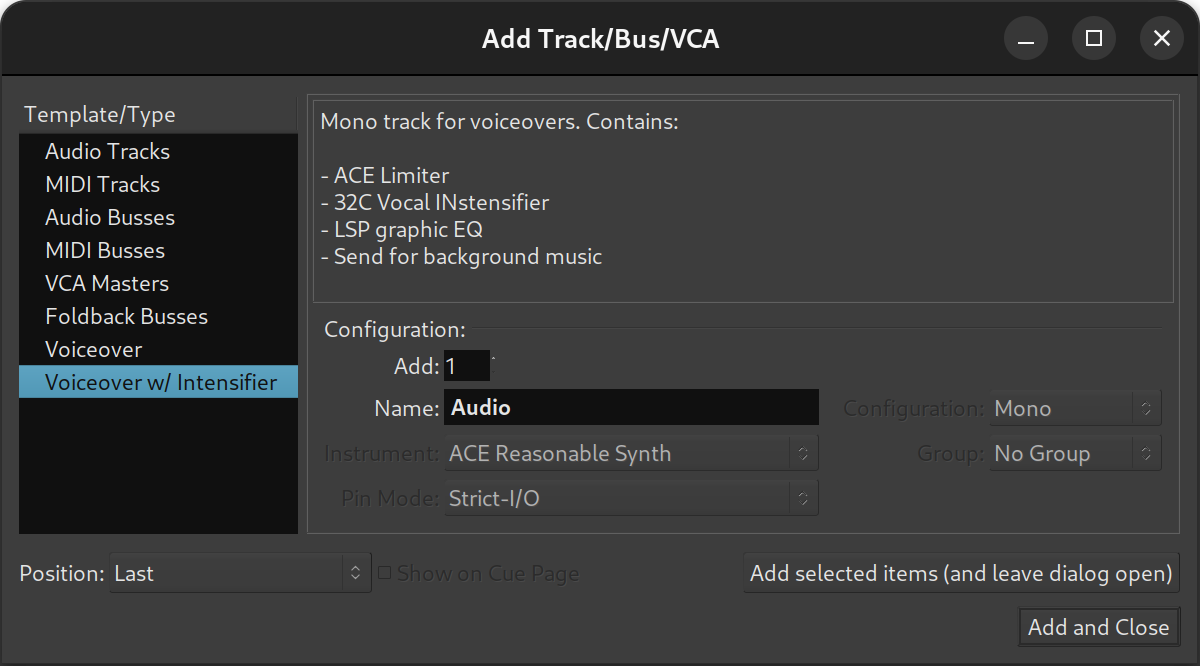
Track templates simplify recording of new material by reusing tried and true I/O and processing settings. They are listed in the Add Track/Bus/VCA dialog below regular options such as audio and tracks, busses, and VCAs.
Each track templates stores the entire state of a track it was created from:
Creating track templates
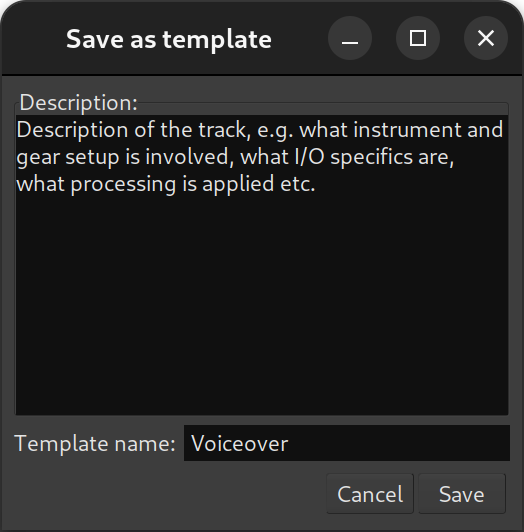
To create a new track template, right-click the name of the track in its mixer channel and select Save Track Template…
In the newly opened dialog, add a description for the template, then give it a name that will be displayed in the Add Track/Bus/VCA dialog, click Save.
A slightly verbose description of a template will be helpful when there are multiple similar templates available.
Managing track templates
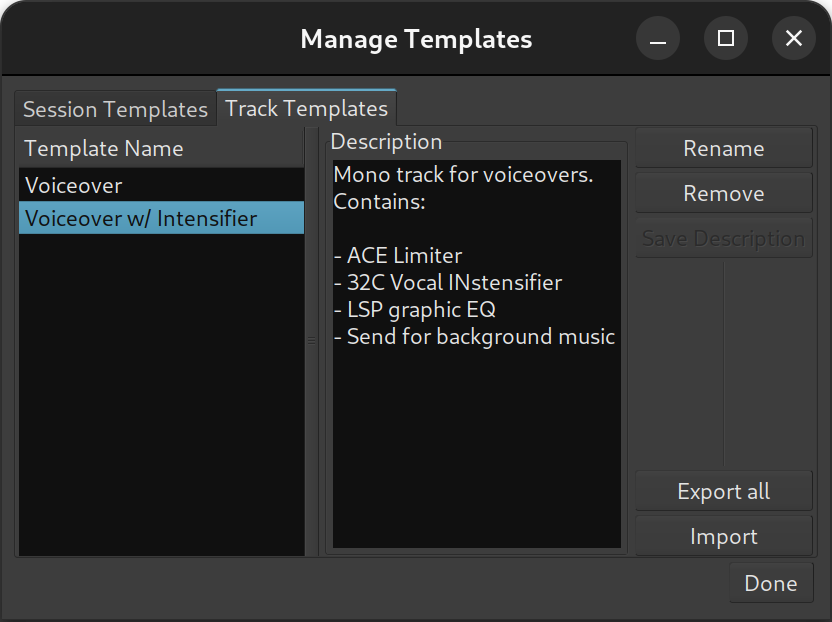
Track templates are managed in the same dialog as session templates.
You can rename existing templates to help differentiate between similar options, change the description, or remove an existing template.
Additionally, you can export all track templates to an archive for sharing, or import track templates from an archive that someone shared with you.
Track Types
Ardour offers three track types depending on the type of data they contain, and differentiates between three track modes, depending on their recording behaviour.
Track types
An Ardour track can be of type audio or MIDI, depending on the data that the track will primarily record and play back. However, either type of track can pass either type of data. Hence, for example, one might have a MIDI track that contains an instrument plugin; such a track would record and play back MIDI data from disk but would produce audio, since the instrument plugin would turn MIDI data into audio data.
Nevertheless, when adding tracks to a session, its content is typically known, and Ardour offers three choices:
| Audio | An Audio Track is created with a user-specified number of inputs. The number of outputs is defined by the master bus channel count (for details see Channel Configuration). This is the type of track to use when planning to work with existing or newly recorded audio. |
|---|---|
| MIDI | A MIDI track is created with a single MIDI input, and a
single MIDI output. This is the type of track to use when planning to
record and play back MIDI. There are several methods to enable playback
of a MIDI track: add an instrument plugin to the track, connect the
track to a software synthesizer, or connect it to external MIDI hardware.
If an instrument plugin is added, the MIDI track outputs audio alongside MIDI data. |
| Audio/MIDI | There are a few notable plugins that can usefully accept both Audio and MIDI data (Reaktor is one, and various "auto-tune" like plugins are another). It can be tricky to configure this type of track manually, so Ardour allows to select this type specifically for use with such plugins. It is not generally the right choice when working normal MIDI tracks, and a dialog will warn of this. |
| Audio or MIDI Bus | A bus is a pseudo-track where multiple audio tracks can be mixed together
for some common processing before being routed to the Master Bus (which itself
is a bus). A bus doesn't contain any regions or audio/MIDI data, it is fed a
signal by sends from one or multiple other tracks, or
by connecting tracks outputs to
the bus' input. Busses are often used to apply one effect on multiple tracks,
with the benefits of having the same parameters and less computer processing
required as only one instance of the plugin is used. Ardour can differentiate Audio busses from MIDI busses, allowing e.g. one instrument plugin to be used for several MIDI tracks. A bus output can also be routed to another bus. |
| VCA | A VCA is a way to group
together tracks or busses to enable grouped-control over gain, solo and mute.
Like the Bus, it does not contain regions, but unlike it, it does not contain
effects either. VCAs are commonly used to group together related tracks (e.g. "drums"
or "vocals") to allow controlling the gain of all those tracks at once in the
mix while retaining their relative gain. VCAs are fed audio by assigning them to one or more tracks or busses. |
Track Modes
Audio tracks in Ardour have a mode which affects how they behave when recording:
| Layered | Tracks in layered mode will record non-destructively — new data is written to new files, and when overdubbing, new regions will be layered on top of existing ones. This is the recommended mode for most workflows. When recording with the layered mode, Ardour only does input monitoring. |
|---|---|
| Non-Layered | Tracks using non-layered mode will record non-destructively—new data is written to new files, but when overdubbing, the existing regions are trimmed so that there are no overlaps. This does not affect the previously recorded audio data, and trimmed regions can be expanded again at will. Non-layered mode can be very useful for spoken word material, especially in combination with push/pull trimming. When recording with the non-layered mode, Ardour only does input monitoring. |
| Sound on Sound | Tracks using Sound on Sound mode will record non-destructively — new data is written to new files, but when overdubbing, new regions will be layered on top of existing ones in non-opaque mode which means both existing and new material will be played back after the recording is over. This is convenient for a variety of use cases, such as adding MIDI Control Change events on top of recorded live performance. When recording in the sound-on-sound mode, Ardour does cue monitoring. |
Results of recording in layered and non-layered modes are visually the same. However, with the sound-on-sound mode lower layers are visible under upper layers, because in that case new regions with overdubs are created with disabled Opaque setting.
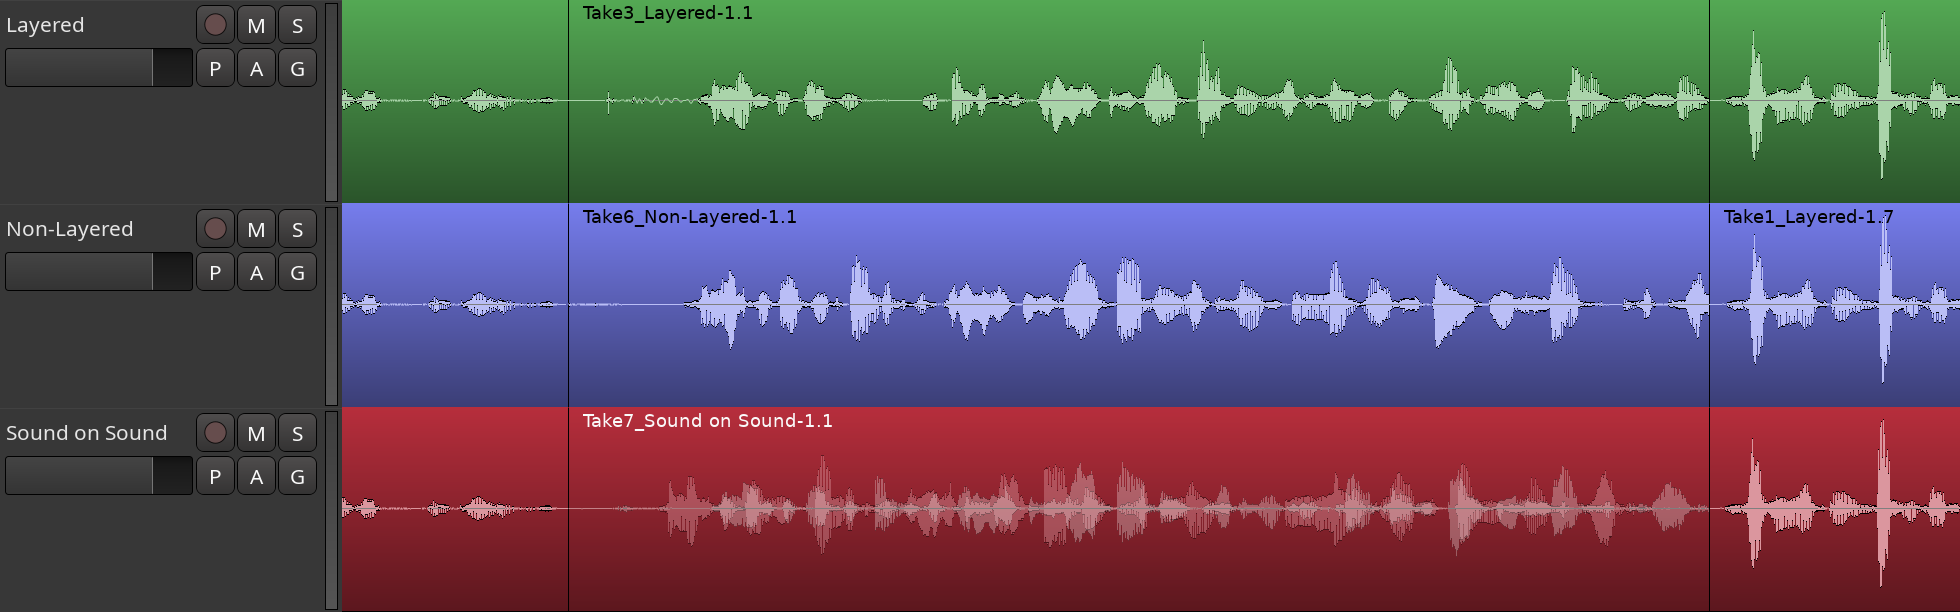
To illustrate the difference, here is the screenshot of the same tracks, but this time — in Stacked track mode (rather than Overlaid as on the screenshot above).
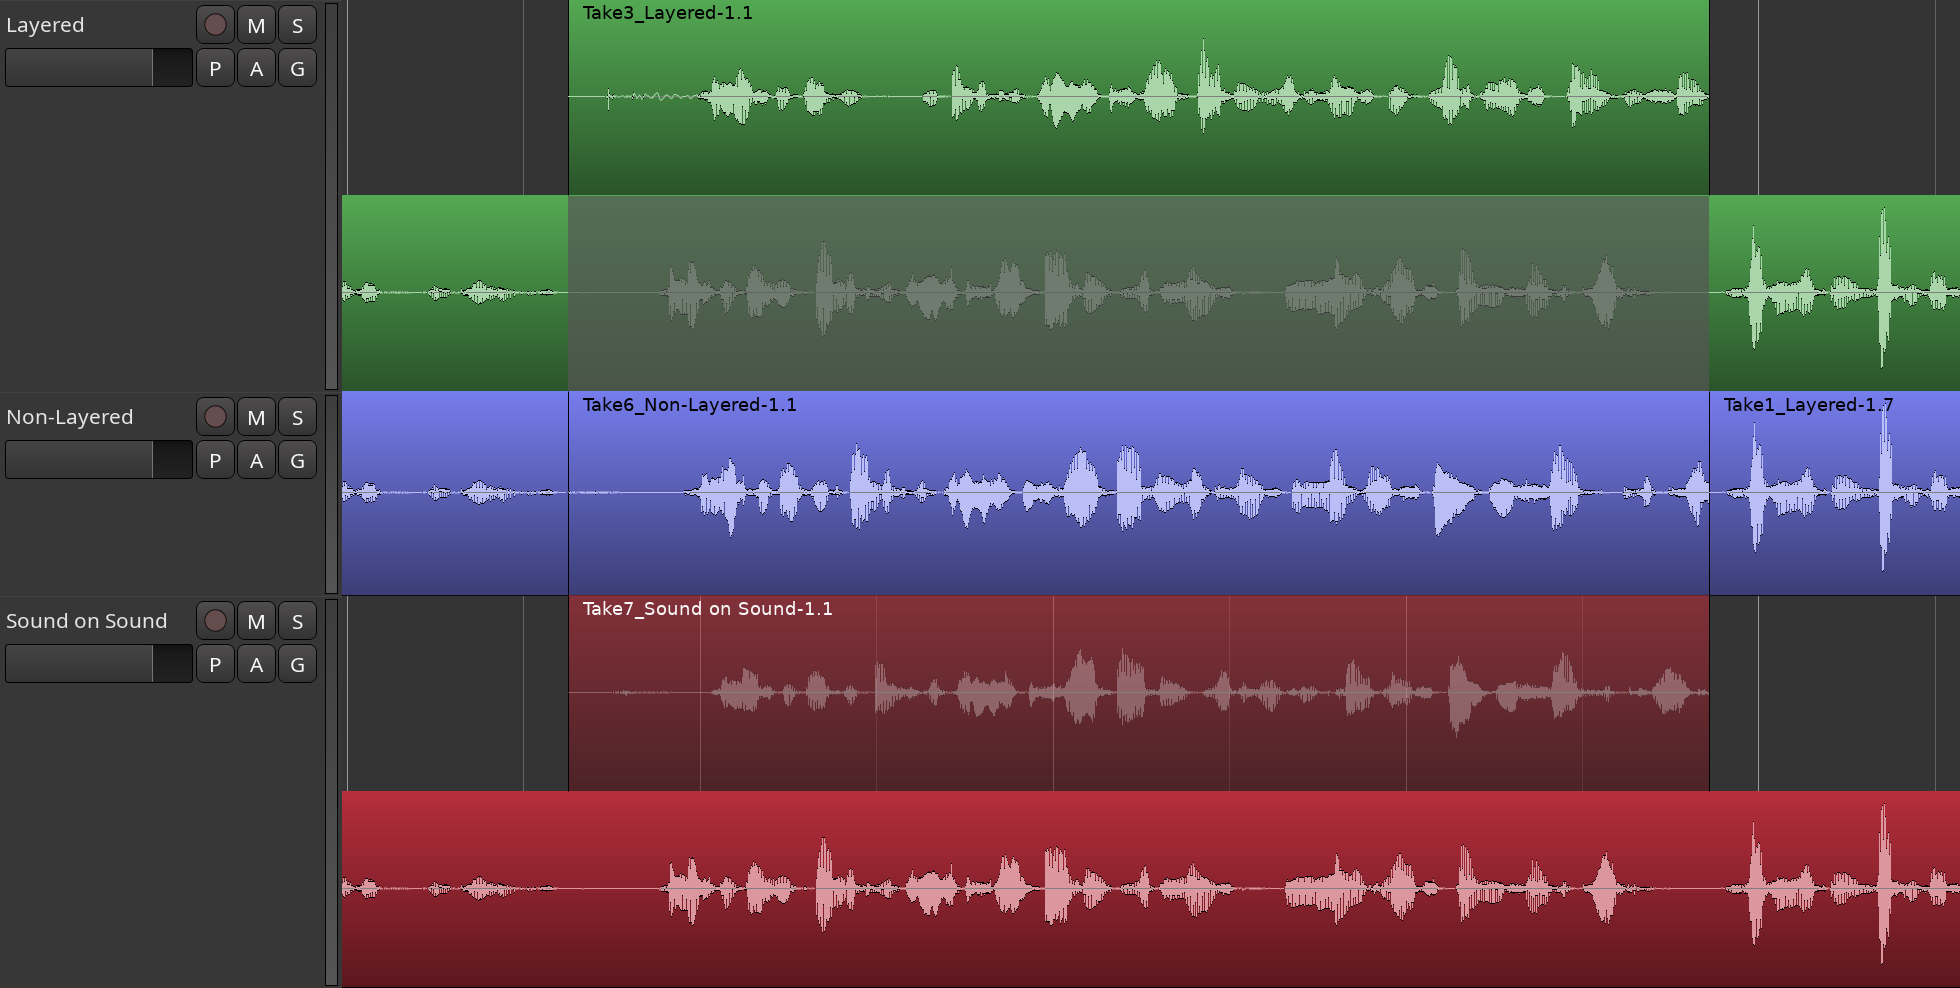
The overdub is an opaque region on top of the original content for the Layered mode. For the Non-Layered mode, it completely replaces the matching part of the original content. And for the Sound on Sound mode, it's a transparent region on top of the original content.
The switch between layered, non-layered, and sound-on-sound modes is a global setting available in the main toolbar right below the buttons enabling Punch In and Punch Out.
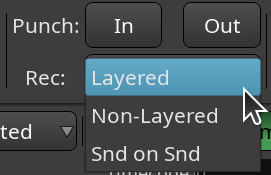
Track Layering
Ardour allows arbitrary layering of regions—there can any number of regions at a given position. By default, the regions are overlaid in the editor window, to save vertical space.
However, this display mode can be confusing for tracks with many overdubs, because its not obvious in which order the overdubs are layered. Although there are other methods of moving particular regions to the top of an overlapping set, and although Ardour also has playlists to manage takes a bit more efficiently than just continually layering, there are times when being able to clearly see all regions in a track without any overlaps is reassuring and useful.
The example below shows a track with a rather drastic overdub situation, viewed in normal overlaid mode:

This display can be changed by right clicking on the
track header, showing the menu displayed above. There are two choices for layers, and
overlaid is currently selected. Clicking on stacked, the track display changes to:

Regions can still be moved around as usual, and can be dragged so that they overlay each other again, but when the mouse button is released, things will flip back to them all being stacked cleanly. The number of lanes for the track is determined by the maximum number of regions existing in any one spot throughout the track, so if a track has 10 overdubs stacked up in one spot, it will end up with 10 lanes. Obviously, using a large track height works much better for this than a small one.
Channel Configuration
Ardour tracks can have any number of inputs and any number of outputs, and the number of either can be changed at any time (subject to restrictions caused by any plugins in a track). However it is useful to not have to configure this sort of thing for the most common cases, and so the Add Tracks dialog allows to select "Mono", "Stereo" and few other typical multichannel presets
The name of the preset describes the number of input channels of the track or bus.
If Ardour is configured to automatically connect new tracks and busses, the number of outputs will be determined by the number of inputs of the master bus, to which the track outputs will be connected.
For example, with a two-channel master bus, a Mono track has one input and two outputs; a Stereo track has two inputs and two outputs.
If Edit > Preferences > Signal Flow > Track and Bus Connections is set to manual, then tracks will be left disconnected by default and there will be as many outputs as there are inputs. It is up to the user to connect them as desired. This is not a particularly useful way to work unless something fairly unusual is done with signal routing and processing. It is almost always preferable to leave Ardour make connections automatically, even if some changes are manually done later.
Track Ordering
Ardour does not impose any particular ordering of tracks and busses in either the editor or mixer windows. The default arrangements are as follows:
Reordering Tracks
The track ordering of the Editor and Mixer is synchronized: if a track is reordered in one window, the ordering in the other window will follow.
Reordering in the Editor Window
There are three ways to reorder tracks/busses in the Editor window:
Reordering in the Mixer Window
Within the Strips List pane at the top left of the Mixer window, tracks and busses can be freely dragged-and-dropped into any desired order.
"Collecting" Group Members
Tracks and Busses that are members of a group can be reordered so that they display contiguously within the Editor and Mixer windows, by Right-clicking on the group tab and choosing Collect.
Ordering of New Tracks
When adding new tracks, the Insert: field allows to determine their placement. New tracks will be placed Last by default, so after the rightmost (in the mixer) or bottom-most (in the editor) selected track. If no tracks are selected, new tracks will be added at the end, regardless of the choice.
Because new tracks are automatically selected, they can be quickly reordered in the editor window via the keyboard shortcuts after adding them.
Track Ordering and Remote Control IDs
Every track and bus in Ardour is assigned a remote control ID. When a control surface or any other remote control is used to control Ardour, these IDs are used to identify which track(s) or buss(es) are the intended target of incoming commands.
Remote IDs are assigned to tracks and busses in the order that they appear in the mixer window from left to right, starting from #1; manual assignment of remote IDs is not possible. The master bus and monitor section can be accessed by name.
Track Color
New tracks in Ardour are assigned a random color from a pastel color palette, so they should never end up being particularly bright or particularly dark.
Changing the color of specific tracks
Changing the color of a track is done by selecting the track(s) and right clicking on the track header of one of them then from the context menu, selecting Color and picking a hue in the color dialog. Every selected track will be re-colored.
If only one track is changed, right clicking on that track's header will be enough to select it, saving the extra mouse click.
Changing the color of all tracks in a group
Tracks that belong to a track/bus group can share a common color by enabling the Color option for the group. With this enabled, any color change will be propagated to all group members.
The group color can also be explicitly changed by context-clicking on the group tab in the Mixer, selecting Edit Group… and then clicking on the Color selector in the displayed dialog.
Track Height
At some stage of the production, a quick overview over as many tracks as possible may be required, or a detailed view into just a few, or a combination of the two. To facilitate this, the height can be configured individually for each track in the editor window, or globally.
Resizing one or a few tracks
A right click on a track header will display the Height menu, and allow to choose from a list of standard sizes. All selected tracks will be redrawn using that height.
Alternatively, moving the pointer to the bottom edge of a track header will change the cursor to a two-way vertical arrow shape. Left-dragging dynamically resizes all selected tracks.
Resizing all the tracks
The three rightmost items of the Zoom Controls, in the toolbar, allow to quickly resize multiple tracks' heights at once, or to display a selected number of tracks in the editor, or all the selected ones, etc.
Fitting to the Editor Window
Fitting one or many tracks to the Editor window can be done by selecting the tracks to display and choosing Track > Height > Fit Selection (Vertical) or using the keyboard shortcut, f. Ardour adjusts the track heights and view so that the selected tracks completely fill the vertical space available, unless the tracks cannot be fitted even at the smallest possible size.
The Visual Undo (default shortcut: Z) can be used to revert this operation.
Waveform display
The display of waveforms (or, more correctly, peak envelopes, since the actual waveform is only visible at the highest zoom levels) is configurable via the Edit > Preferences > Appearance > Editor dialog, to support different use cases and user preferences. The following options are available:
| Show waveforms in regions | By default, Ardour draws waveforms within audio regions. Disable this option to hide them. | |
|---|---|---|
| Waveform scale | Linear | This is the traditional linear (1:1) display of the peak envelope, or, at higher zoom levels, the individual samples. |
| Logarithmic | Alternatively, a logarithmic display of the peak envelope can be used. This will give a better idea of program loudness (it is similar to dBs) and plot soft passages more clearly, which is useful for soft recordings or small track height. | |
| Waveform shape | Traditional | The zero line appears in the middle of the display and waveforms appear as positive and negative peaks above and below. |
| Rectified | The zero line appears at the bottom of the display and waveforms appear as absolute peaks above the line only. | |
Track Context Menu
Within the editor window, context-clicking (right click) on either a region or empty space within a track displays the track context menu. The context menu provides easy access to many track-level operations.
If a region is clicked, the first item in the menu is the name of the region. If a layered region is clicked, the next item in the menu is Choose Top. If selected, a dialog appears that allows to change the vertical order of layers at that point. See Layering Display for more details.
The rest of the track context menu is structured as follows:
| Play | |
|---|---|
| Play from Edit Point | Plays from the location of the current Edit Point. |
| Play from Start | Plays from the start of the session |
| Play Region | Plays the duration of the session from the start of the earliest selected region to the end of the latest selected region |
| Loop Region | Creates the loop range from the start/end positions of selected regions and plays the loop until stopped |
| Select | |
| Select All in Track | Selects all the regions and automation points in the current track |
| Select All Objects | Selects all the regions and automation points in the session |
| Invert Selection in Track | Select the previously unselected regions, and deselect the previously selected ones only in the current track |
| Invert Selection | Select the previously unselected regions, and deselect the previously selected ones |
| Set Range to Loop Range | Creates a range selection on the selected tracks, based on the selected loop markers, and switches to Range Mode tool |
| Set Range to Punch Range | Same as above, based on the selected punch markers |
| Set Range to Selected Regions | Same as above, based on the selected regions (i.e. from the start of the earliest region to the end of the latest one) |
| Select All After Edit Point | Select all the regions and automation points that exist after the Edit Point, even if the region starts before it. If some tracks are selected, only selects on these tracks. |
| Select All Before Edit Point | Same as above, but before the Edit point (i.e. to the left of it) |
| Select All After Playhead | Same as above, but considering the Playhead, regardless of the Edit Point choice |
| Select All Before Playhead | Same as above, with the Playhead |
| Select All Between Playhead and Edit Point | Selects all the regions between the Playhead and the Edit Point |
| Select All Within Playhead and Edit Point | Same as above, but the regions must be totally included between the Playhead and Edit Point |
| Select Range Between Playhead and Edit Point | Creates a Range between the Playhead and the Edit Point |
| Edit | |
| Cut | Deletes the current selection, but puts it in memory ready to be pasted |
| Copy | Copies the current selection to memory |
| Paste | Pastes the memory at the Edit Point, after a Cut or Copy operation |
| Align | Aligns the sync point of all selected regions to the Edit Point |
| Align Relative | Same as above, but considers multiple regions as a block and aligns the whole block, not each regions |
| Insert Selected Region | If a region is selected in the Region List, inserts it in the track |
| Insert Existing Media | Inserts an external media file in the track, same as the Session > Insert Media menu |
| Nudge | |
| Nudge Entire Track Later | Moves all the region to the right by the amount shown in the nudge timer |
| Nudge Track After Edit Point Later | Same as above, but only for regions that begin after the Edit Point |
| Nudge Entire Track Earlier | Same as above, to the left |
| Nudge Track After Edit Point Earlier | Same as above, to the left |
| (un)Freeze | Consolidates all the regions in the track into one frozen region which can be handled as a normal, single region. This operation can be undone at any time with the same sub-menu. |
Playback
Controlling Playback

The playhead is a red vertical line that indicates the current position of playback.
Positioning the Playhead
Positioning the playhead at the current pointer position
Pressing P will set the playhead to the current position of the mouse pointer, if it is within the editor track area.
Positioning the playhead on the timeline
A Left click anywhere on the Ruler will move the playhead to that position.
Positioning the playhead with the transport clocks
Clicking on either the primary or secondary transport clock and editing their value moves the playhead to a specific position.
Positioning the playhead at a marker
Right clicking on the marker and selecting either Locate to Here or Play from Here will place the playhead at the marker's position.
Alternatively, placing the mouse pointer on the marker and pressing P sets the playhead precisely on the marker location.
Looping the Transport
When the loop transport button is pressed, the playhead will jump the start of the loop range, and continue to the end of that range before returning to the start and repeating.
While looping, a light green area is displayed in the Ruler over the tracks to show the loop range.
By default, looping is bound to the l key.
The Big Clock

The Big Clock is a copy of the main primary transport clock, in its own window, and is activated by checking Window > Big Clock.
The window is always on top of other windows (Ardour or others), fully resizable and the clock will always fill the window, making it very useful when working away from the screen but still wanting to see the playhead position clearly (such as when working with a remote control device across a room), or when showing the time on its own screen.
Like most other clocks, it can be right-clicked to change its clock mode. It can also be edited to transport the playhead to a specific point in time. The big clock will also change its visual appearance to indicate when active recording is taking place, by changing color.

Using Key Bindings
Ardour has many available commands for playback control that can be bound to keys. Many of them have default bindings, Some of the most used are found below.
Those keybindings are shown in the corresponding menus. Memorizing at least the most frequently used can be a great time saver.
| Space | switch between playback and stop. |
|---|---|
| Home | Move playhead to session start marker |
| End | Move playhead to session end marker |
| → | Playhead to Next Grid |
| ← | Playhead to Previous Grid |
| 0 | Move playhead to start of the timeline |
| space | Start recording |
| space | Stop and forget capture |
An exhaustive list of the default keyboard bindings can be found in the Appendix.
Recording
The Recorder
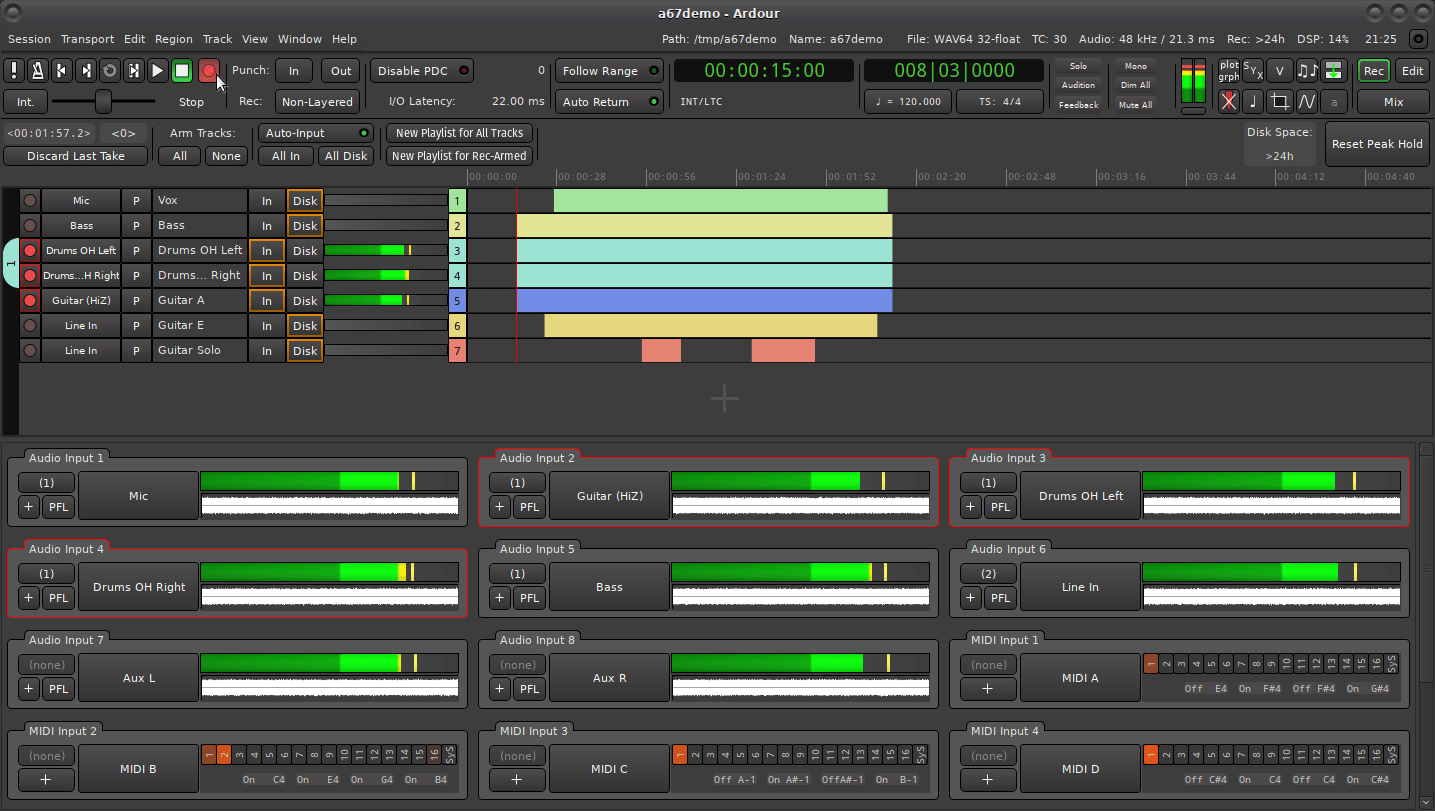
Although all the process of recording an audio or MIDI performance can be done in any mode, the Recorder provides a synoptic view of most parameters and actions related to capturing this performance, hence giving more confidence in the final result.
The Recorder is another view on settings, parameters, and actions that can be set or called in other modes. Any change done in the Recorder is instantly reflected in e.g. the Editor, and vice versa.
The Recorder, being a mode, sports the same main menu, status bar, and toolbar as the Editor and Mixer. It adds a secondary toolbar, a simplified session view, reminiscent of the Editor, and a global input panel.
The Secondary Toolbar
The subsections below describe the secondary toolbar from left to right.
Last Take Manager
This manager displays information about the last (or current) take :
This last button cannot be used while recording, the transport must be stopped. It also has no concept of history, and repeatedly clicking it wont discard previous takes from last to first, in order to prevent destroying good takes. Lastly, it does not reset the playhead position, as the Transport > Stop and Forget Capture menu would.
Global Arm

Like the Monitor Options below, these buttons apply to all the tracks at once.
It is a convenient shortcut to arm (All)/disarm (None) all the tracks for recording.
Monitoring Options
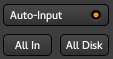
These buttons allow switching the monitoring mode globally, for all the tracks at once. The monitoring mode allows to decide what the user wants to be listening to, between:
The Auto Input switch allows Ardour to auto-select what is played, which is:
'New Playlist' buttons
Recording multiple takes can easily be done in Ardour by using playlists, as a track can have multiple playlists and it is easy to switch from one to another.
The two buttons create new, "blank", playlists to record on:
Creating new playlists is both cheap in terms of CPU and memory, and easy to revert by changing the track's playlist back to its previous one. Playlists on different tracks can also share the same name, allowing for a better workflow when recording: Ardour suggests Take.#n as the name for each playlist, so that they stay somewhat correlated.
Disk space and Reset Peaks
Tracks
The Simplified Session View is a view of the session, specifically tailored for the purpose of recording, that is similar to the Editor (or the Summary) with notable differences, among which:
All those differences are consequences of the aim of this view, which is to keep thing not too busy and clear in a recording context. The most important settings related to the recording process are easily available and to facilitate the work of the operator.
Simplified Session View

Each lane is made of (from left to right):
Like in the Editor or Mixer, a new track, bus or VCA can be created by either double or right-clicking on an empty place in the track list.
The Global Input Panel
This panel lists all the audio and MIDI system inputs.

The inputs are displayed either vertically or horizontally based on the Preferences.
If an input is used by a track that is armed for recording, it sports a red frame.
The controls on each input are:
The right hand side of the input depends on the kind of input, either audio or MIDI. For an audio track:
For an MIDI track:
Monitoring
When recording, it is important that performers hear themselves, and any pre-recorded tracks they are performing with.
Audio recorders typically allow monitoring (i.e. listening to) the input signal of all tracks that are armed for recording, and playing back the unarmed tracks.
Ardour also includes a Foldback section to provide separate monitor mixes for each performer.
Monitor Signal Flow
There are three basic ways to approach monitoring:
External Monitoring
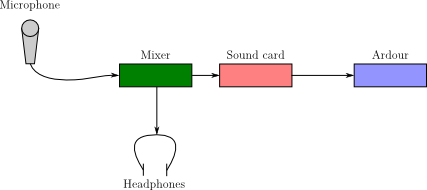
When using external monitoring, Ardour plays no role in monitoring at all. Perhaps the recording set-up has an external mixer which can be used to set up monitor mixes, or perhaps the sound-card being used has a "listen to the input" feature. This approach yields zero or near-zero latency. On the other hand it requires external hardware, and the monitoring settings are less flexible and not saved with the session.
Audio driver Hardware Monitoring
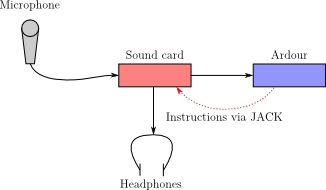
Some sound cards have the ability to mix signals from their inputs to their outputs with very low or even zero latency, a feature called hardware monitoring. Furthermore, on some cards this function can be controlled by Ardour. This is a nice arrangement, if the sound card supports it, as it combines the convenience of having the monitoring controlled by Ardour with the low latency operation of doing it externally.
Software Monitoring
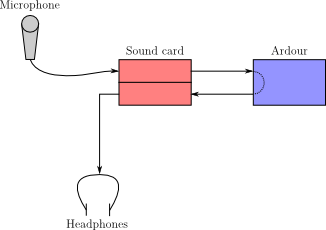
With the software monitoring approach, all monitoring is performed by Ardour—it makes track inputs available at track outputs, governed by various controls. This approach will almost always have more routing flexibility than JACK-based monitoring. The disadvantage is that there will be some latency between the input and the output, which depends for the most part on the buffer size that is being used.
Metronome
The metronome helps performing in correct tempo and time signature when recording. Musicians hear the metronome clicking with an optional emphasis on the first beat.
The button switching the metronome on and off is located to the left from the transport panel:

Launching and stopping the metronome
There are several ways to toggle the metronome:
Setting up the metronome
Right-click the metronome icon in the toolbar to open the Preferences dialog on the Metronome page. The page has several options:
Routing metronome clicks
The metronome has separate outputs in Ardour, so you can route that signal in the Audio Connections dialog (Window > Audio Connections) however you like, e.g. to a foldback bus for each performer in the studio or on stage.
The Click Out port with L and R channels is located on the Ardour Misc tab on the left:
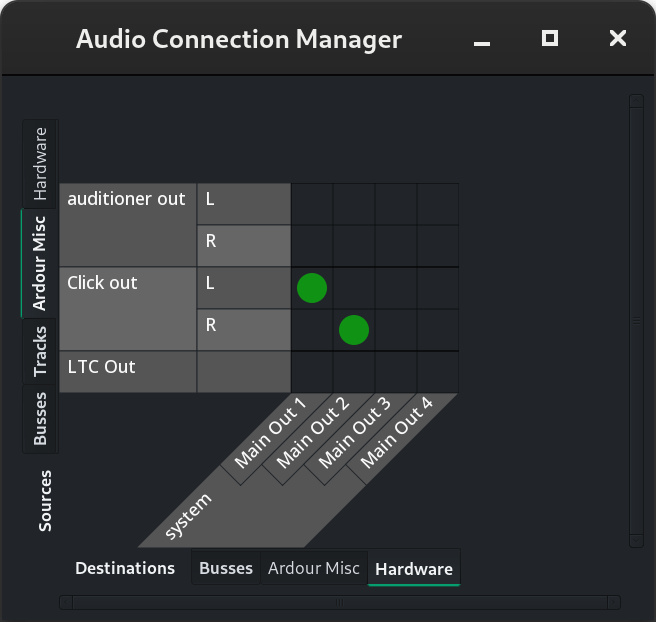
By default, the metronome omits the master bus entirely and connects directly to the first pair of hardware outputs in the output device you selected. This way the clicks don't get processed in the master bus and don't show up in the exported mix.
Latency Considerations
In the days of analog tape recording, the routing of monitor signals was performed with relays and other analog audio switching devices. Digital recorders have the same feature, but may impart some latency (delay) between the time a noise is made and the time that it will come back from the recorder.
The latency of any conversion from analog to digital and back to analog is about 1.5–2 ms. Some musicians claim that even the basic A/D/A conversion time is objectionable. However even acoustic instruments such as the piano can have approximately 3 ms of latency, due to the time the sound takes to travel from the instrument to the musician's ears. Latency below 5 ms should be suitable for a professional recording setup. Because 2 ms are already used in the A/D/A process, extremely low buffer sizes must be used in the workstation I/O setup to keep the overall latency below 5ms. Not all computer audio systems are able to work reliably at such low buffer sizes.
For this reason it is sometimes best to route the monitor signal through an external mixing console while recording, an approach taken by most if not all professional recording studios. Many computer I/O devices have a hardware mixer built in which can route the monitor signal "around" the computer, avoiding the system latency.
In either case, the monitoring hardware may be digital or analog. And in the digital case there will still be the A-D-A conversion latency of 1–2 ms.
I/O Plugins
I/O plugins are a way to process audio outside the normal Ardour session or connect to sources typically unavailable in a DAW, such as outputs of NDI devices. Pre-plugins run before Ardour does any processing, post-plugins run after Ardour has done all processing.
A common use case is wet recording where a number of plugins are applied directly to the physical input. The processed signal then can be routed to any number of tracks or busses in Ardour. This is a lot like doing some of the processing with a chain of guitar pedals, then feeding the signal to an Aux In port on a mixing console or an input port on a multi-effects digital pedalboard.
The rationale for pre-processing with I/O plugins is that it's a more lightweight way to do it as compared to busses. Much of that is because busses have automatable parameters such as fader and panner positions, as well as plugins' parameters. Evaluating parameter automation (even when there's none) adds additional load to the CPU. However I/O plugins are not automatable, so there's no evaluation happening. As far as Ardour is concerned, they are almost like JACK audio server clients running alongside Ardour.
Another use case would be loading an instance of the NDI Input plugin as a pre-processing plugin to be able to capture and mix sources from NDI devices, or loading an instance of the NDI Output plugin to send audio from Ardour over IP to a receiver for broadcasting.
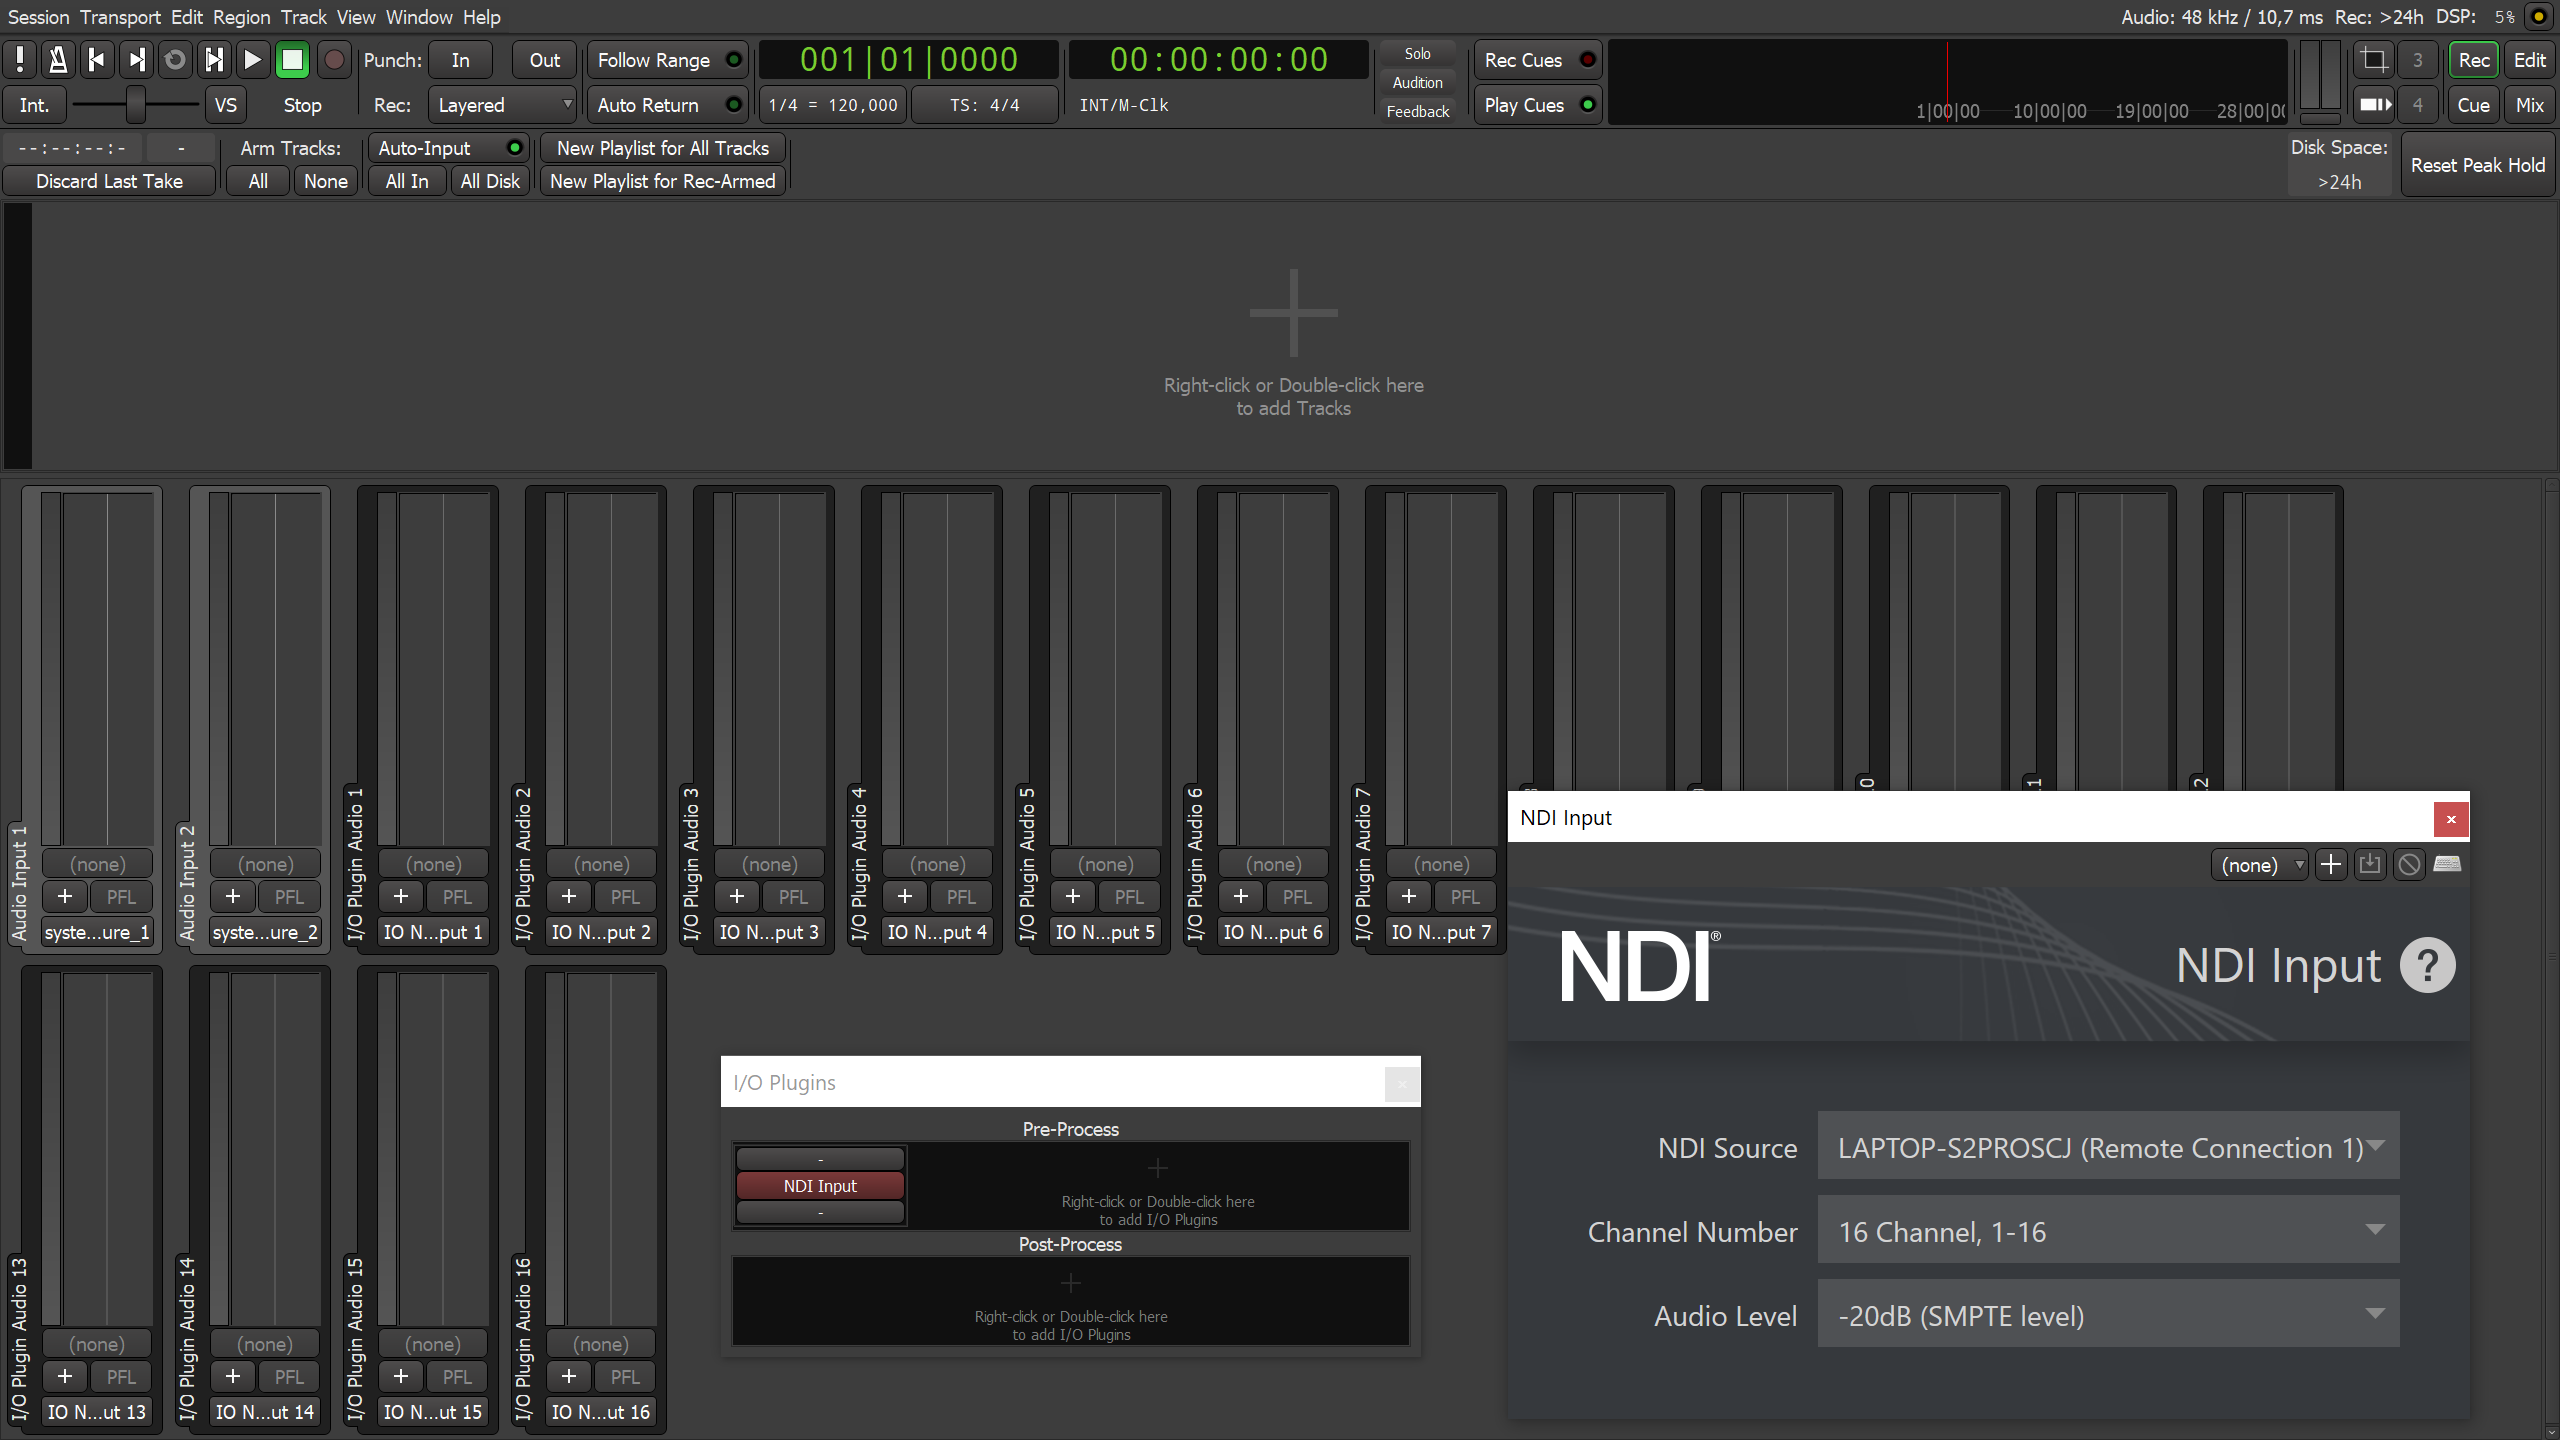
It's also possible to use the post-processing section to load plugins for room correction or signal analysis (VU meters, spectrum analyzers etc.).
Adding I/O plugins
New I/O plugins can be added in the I/O Plugins dialog (Window > I/O Plugins).
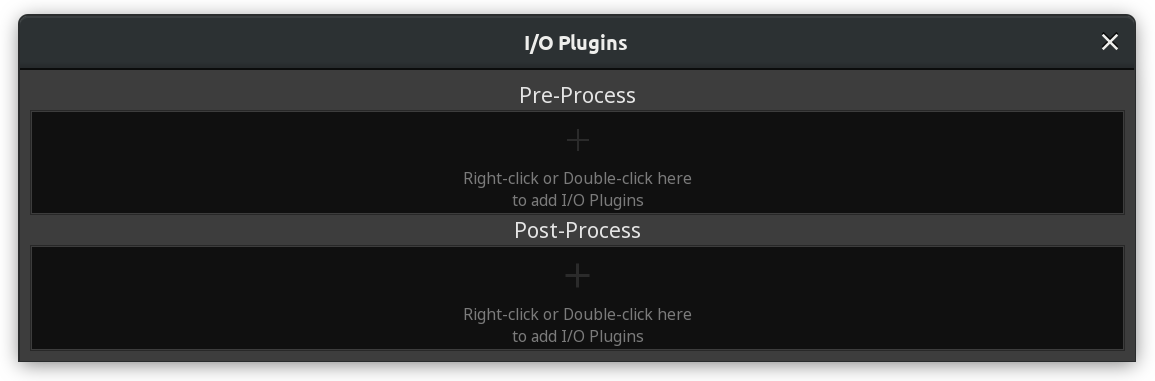
Right-clicking opens the same menu for plugin selection available for mixer channel strips:
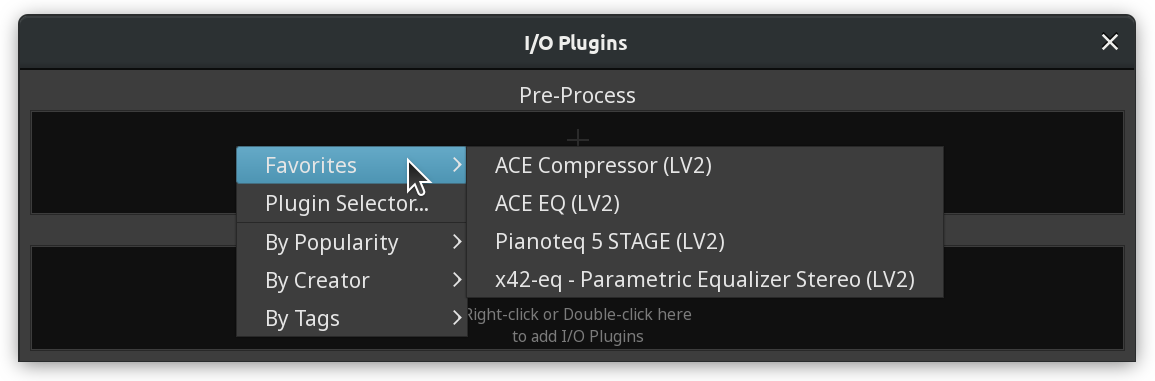
Double-clicking opens the Plugin Selector dialog.
Once a plugin has been selected and added, it shows in either Pre- or Post-process section depending on your choice.
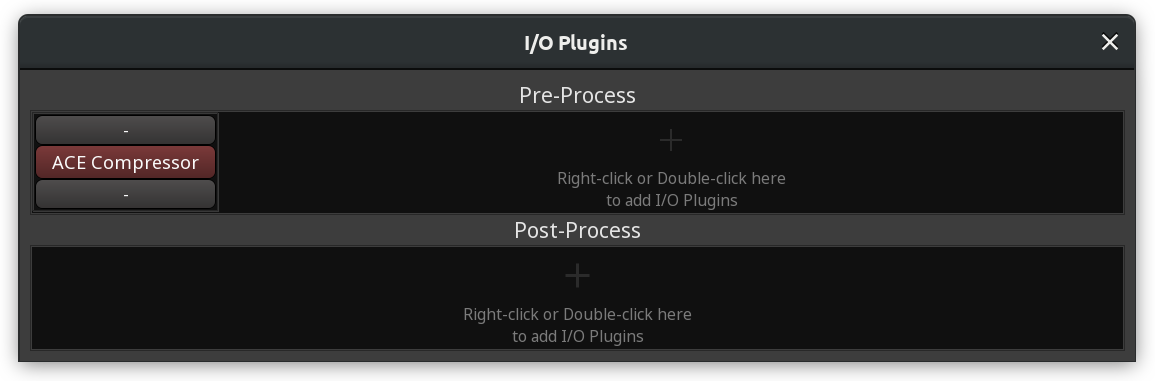
Routing I/O plugins
I/O plugins have the same user interface for setting input and outputs that is also available in mixer channel strips. The button above the plugin name opens a drop-down menu for quickly choosing an input port. The button below opens the drop-down menu for choosing the output port.
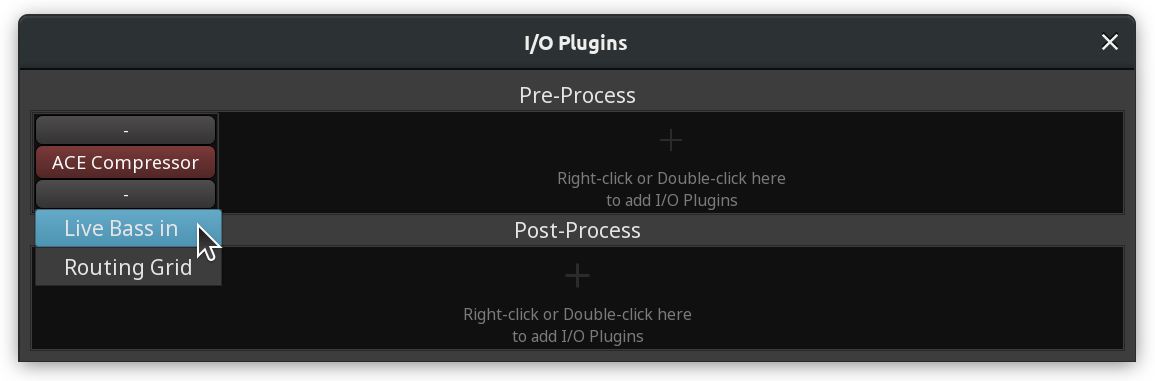
Additionally, new tracks automatically connected to an I/O plugin can be easily created in the Recorder window by clicking the + button and then setting a new for that track.
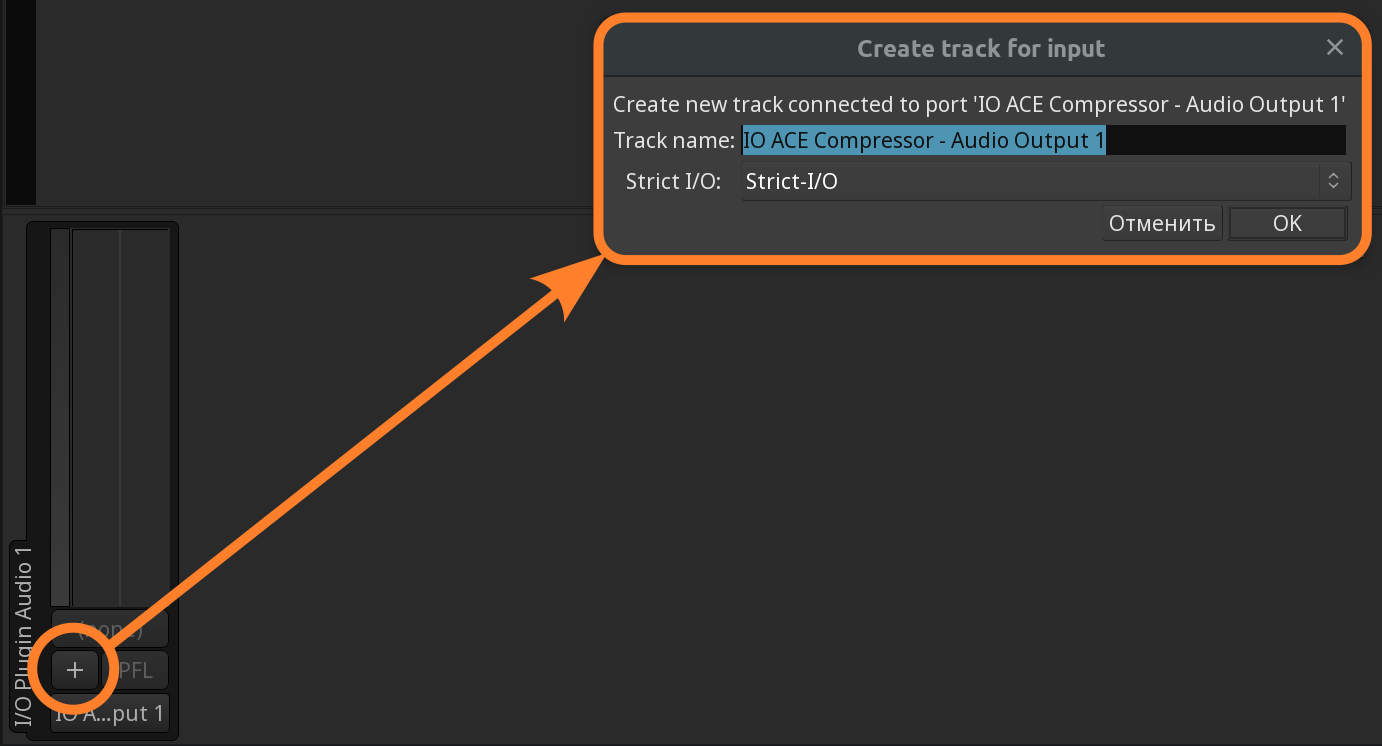
On the Audio Connections dialog, the ports of pre- and post-process plugins are listed on dedicated tabs (I/O Pre and I/O Post), separately from all other ports.
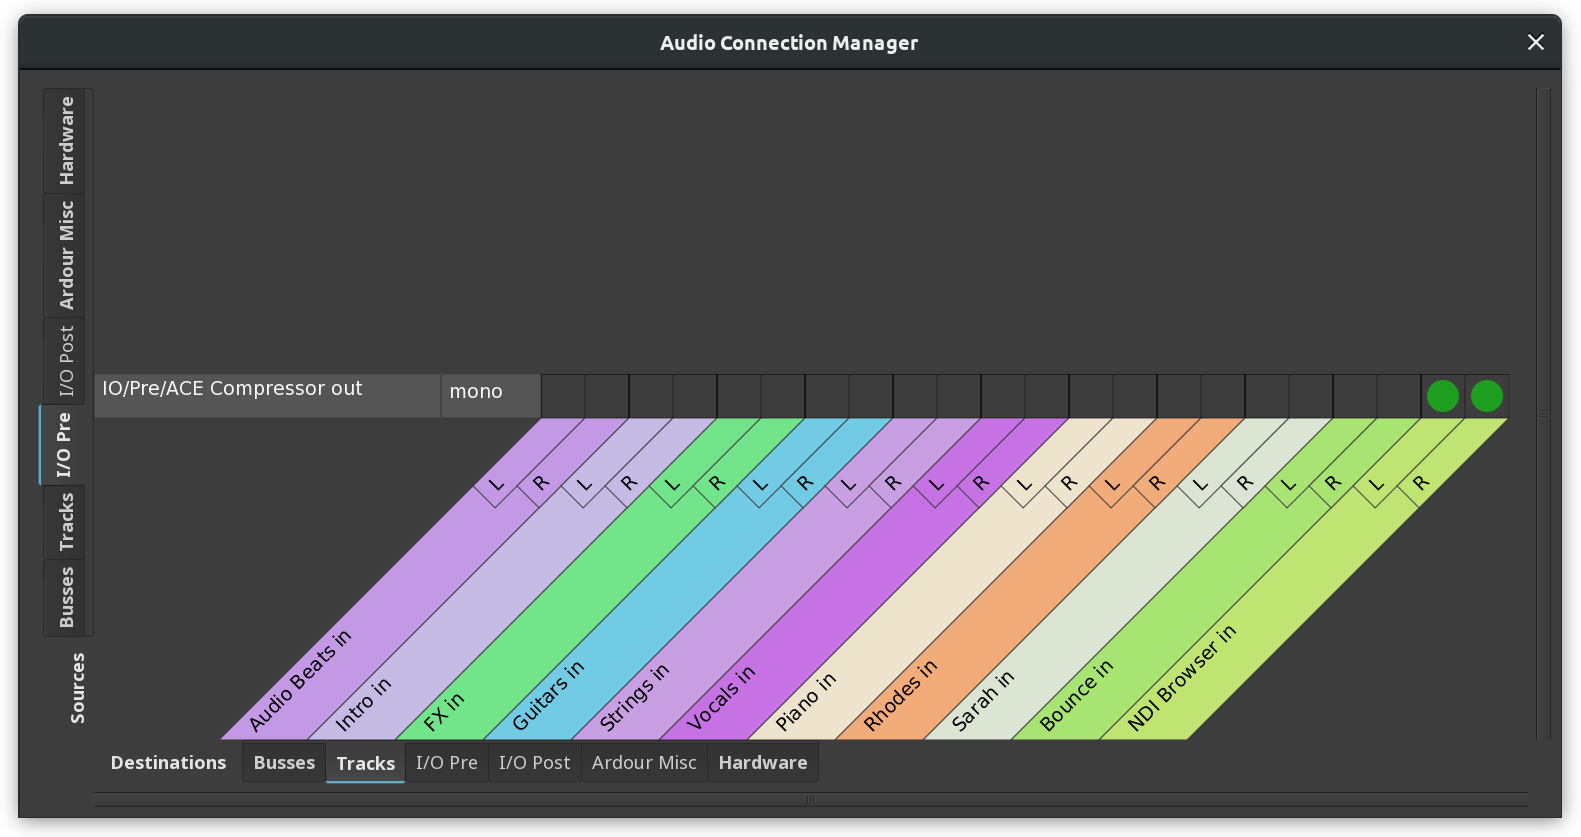
Importing and Exporting
Importing
Adding Pre-existing Material
There are several ways to importing an audio or MIDI file into a session:
These methods are all equivalent: they open the Add Existing Media dialog.
Finally, files can also easily be imported into a project by dragging and dropping a file from some other application (e.g. the system's file manager). Files can either be dragged onto the Region List, into the desired track or into an empty space in the editor track display.
The file will be imported and copied into the session, and placed at the position where the drag ended.
Import Dialog
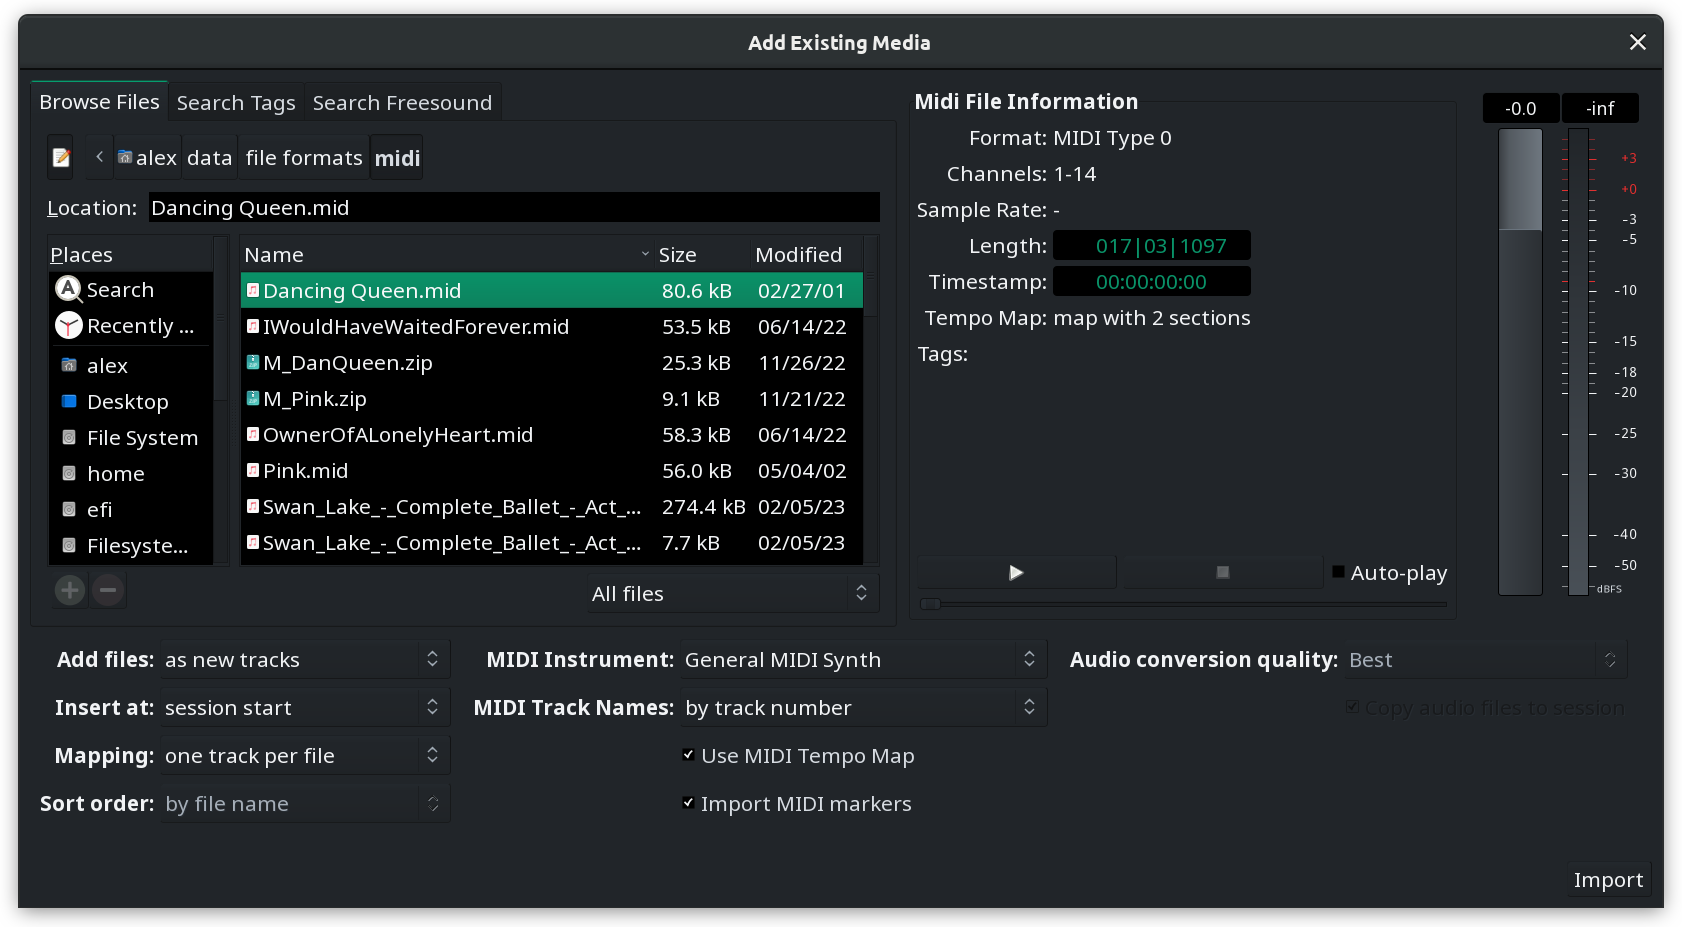
Many sessions will require the use of existing material, whether it consists of audio and/or MIDI data. Using existing samples, loops and riffs from files stored on the system can be the basis for a new session, or a way to deepen and improve one that is already underway.
Importing audio and MIDI data into the session is done with the Add Existing Media dialog, accessed either by the Session > Import menu or, if any tracks have already been added, by right-clicking on the canvas of the Editor window and choosing Insert Existing Media.
The Soundfile Information Box
This box will display information about the currently selected file:
If the sample rate differs from the current session rate, it is displayed in red, which indicates that the file must be resampled before importing.
Resampling is controlled by the Conversion quality option described below.
Auditioner
Files can be auditioned before importing. The slider under the play and stop buttons allows to scrub around, a fader on the right side allows to control the playback volume.
Auditioning MIDI files requires a MIDI instrument to be chosen in the Instrument dropdown list.
Importing options
Through the Add files… option, imported files can be inserted in the session:
| as new tracks | automatically creates new tracks and import the files in it |
|---|---|
| to region list | adds the files to the region list, from where then can be manually dragged into a track |
| as new tape tracks | adds the files as Tape tracks. |
The Insert at option chooses where in time the file will be imported, amongst:
The Channel Mapping option is only available for multi-channel files (i.e. all but mono ones). It is either
| one track/region per file | Creates a multi channel track for each imported file |
|---|---|
| one track/region per channel | Creates only mono channels, as many as there are channels in the imported files |
| sequence files | If multiple files are imported, they can be sequenced into a single track in the order of selection |
The Conversion quality drop-down controls the quality of the resampling process, if the sampling rate of the source file differs from the session rate.
There are three MIDI-specific options as well. First off, you can set a track naming scheme:
| by track number | will automatically assign every track a name that consists of the imported file name and a track number |
|---|---|
| by track name | will automatically assign every track a name that consists of the imported track's name and number |
| by instrument name | will automatically assign every track a name that consists of the imported instrument's name and a track number |
You can also optionally import a tempo map from a MIDI file. The Use MIDI Tempo Map option appears when a MIDI file is selected in the file selection dialog.
The last MIDI-specific option is Import MIDI Markers. If those are present in a MIDI file, they will be rendered right above MIDI clips on the canvas. Editing the MIDI markers is currently unavailable. If MIDI lyrics is available in the file, it was also be imported as region markers (that can be later promoted to location markers).
Finally, and most importantly, the files can be linked or copied to the session with the Copy files to session checkbox. Please read Copying versus Linking for details.
Importing from FreeSound.org
Ardour can import sounds from the public library at FreeSound.org. This feature requires an account with the online service.
Sound clips on FreeSound.org typically have metadata in form of tags that give a general idea what sound is recorded in a clip. Ardour will use that metadata to find sound clips that match your request.

There are two more options for the search:
Ardour will list all sounds clips that match your request right in the window. If there are a lot of option, click the More button to load the next page with results.
When you click on any sound clip in the list for the first time, a FreeSound.org login page will open in your preferred web browser.
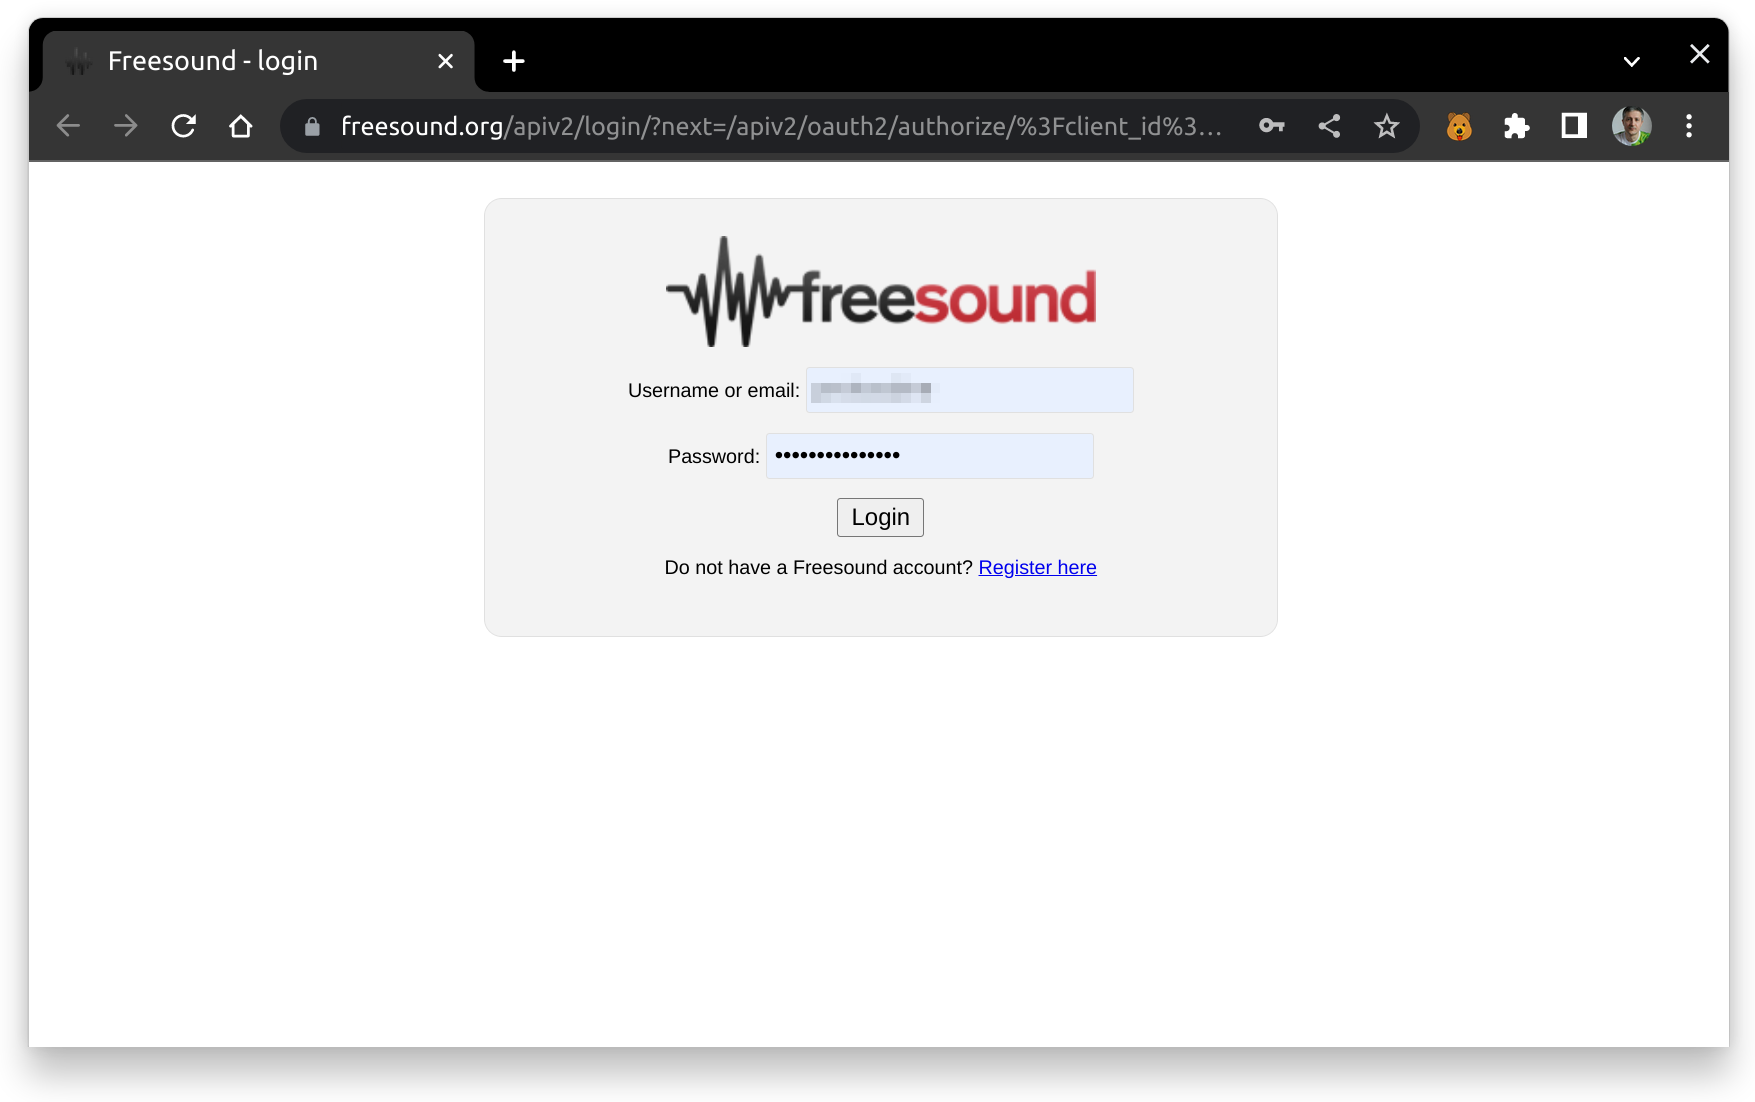
You will then be asked to grant access to Ardour.
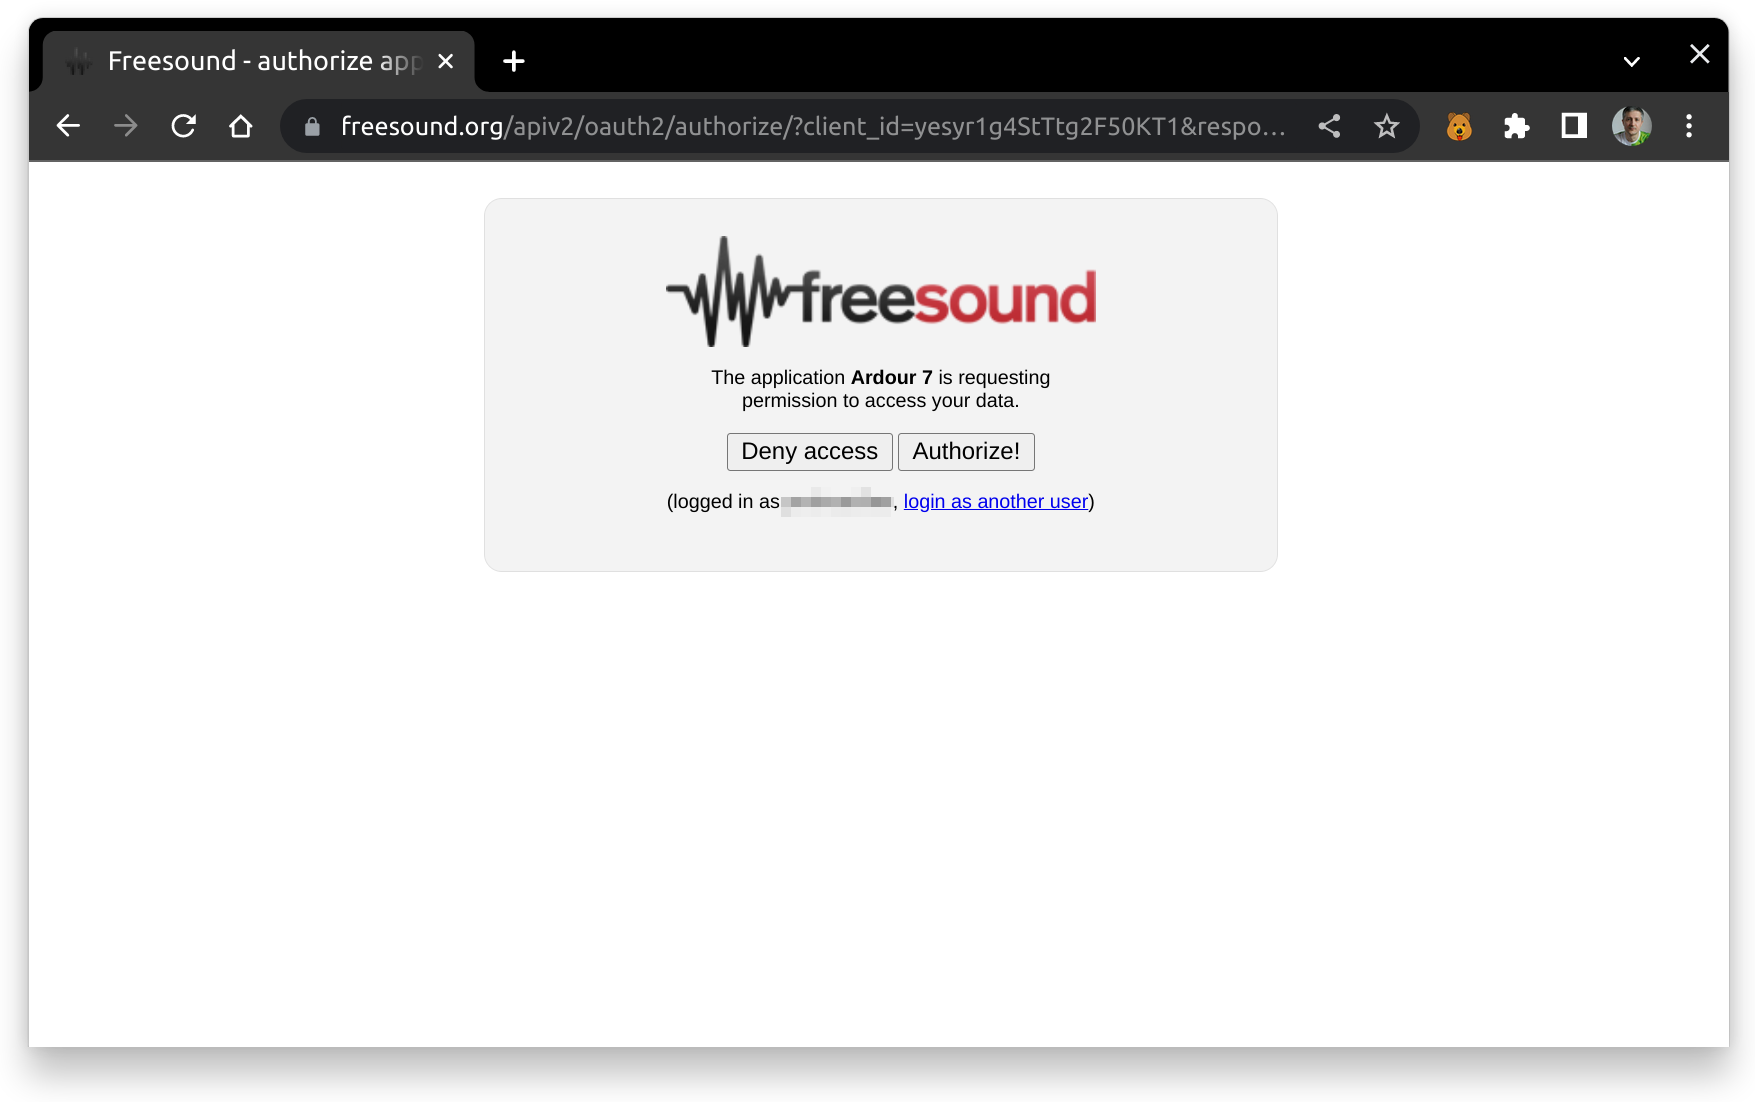
Once you do that, FreeSound.org will generate authorization code that you need to select and copy to the clipboard.
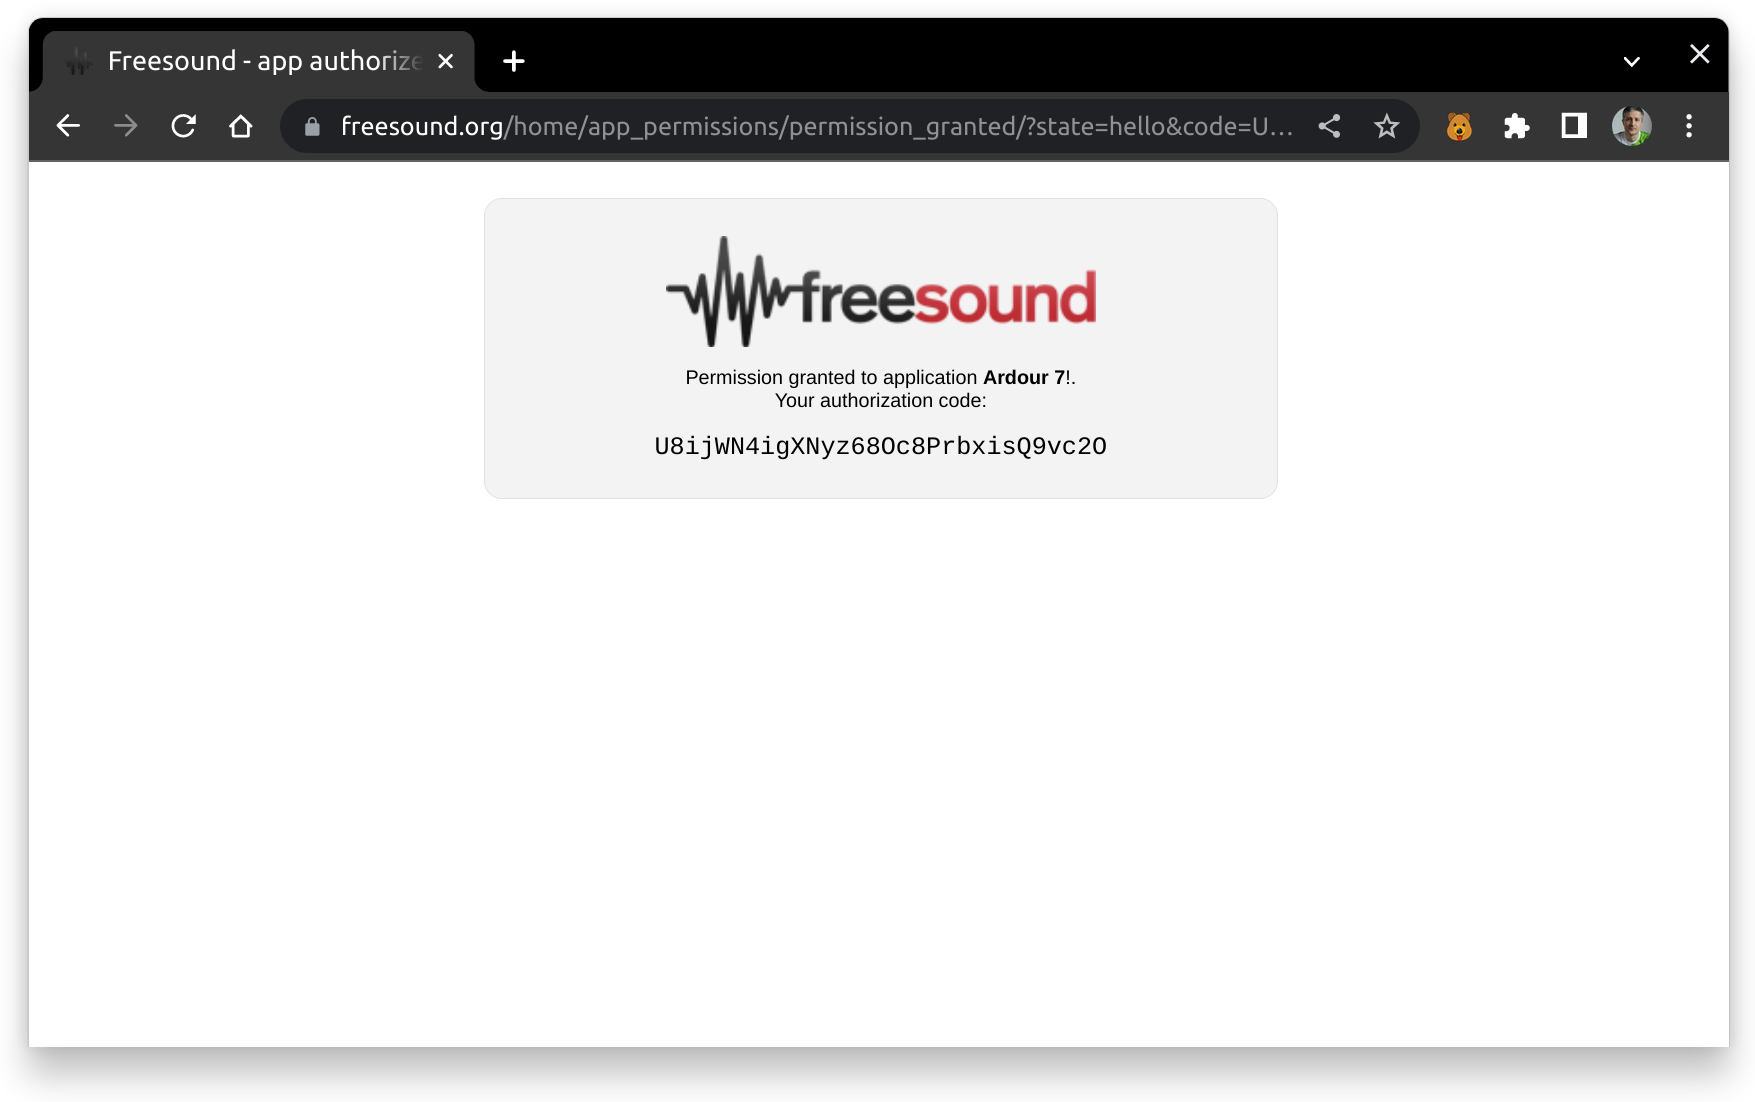
Finally, insert the code into the entry box here and click OK.
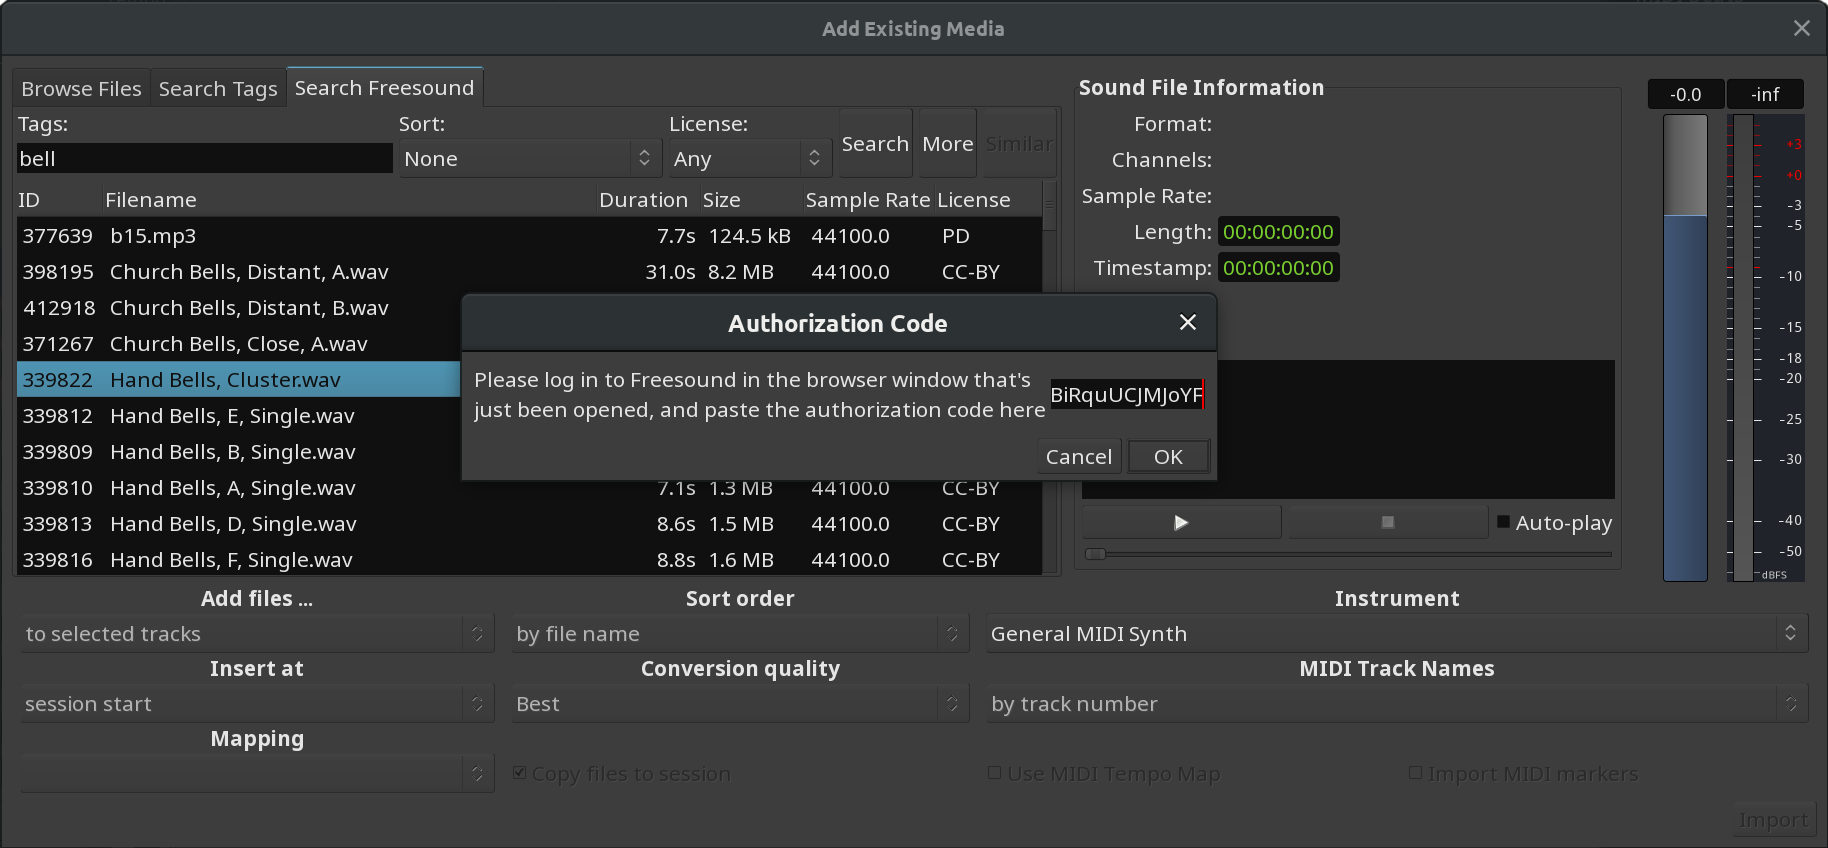
After that, Ardour will be able to download clips for preview in a folder for temporary files that you can select in the Preferences dialog on the General page.
You can preview and insert clips from FreeSound.org like any other sound files.
Please note that authorization code only works as long as Ardour is running. The next time you start Ardour, you will need to authorize it again. This is implementation specifics of FreeSound.org.
Supported File Formats
Ardour supports all common audio file formats, including WAV, FLAC, Ogg/Vorbis, Ogg/Opus, AIFF, AIFC, CAF, W64 and BWF, with all typical sample formats (8-, 16-, 24-, 32-bit integer, floating point, and more).
The list of audio file formats that Ardour can understand is quite long. Most formats are supported based on the functionality offered by libsndfile, an excellent and widely used software library by Australian programmer Erik de Castro Lopo.
A full list of libsndfile's supported formats is available on the libsndfile website.
In addition, Ardour also supports MP3 lossy compression format files. We do not recommend importing these for any serious work, but the option is available if you are forced to use such files.
For MIDI import, Ardour will read any Standard MIDI Format (SMF) file.
Copying Versus Linking
Copying and linking are two different methods of using existing audio files on the computer (or network file system) within a session. They differ in one key aspect:
Copying
An existing media file is copied to the session's audio folder, and if necessary converted into the session's native format.
For audio files, the format can be chosen (e.g. WAVE or Broadcast WAVE). Audio files will also be converted to the session sample rate if necessary (which can take several minutes for larger files).
MIDI files will already be in SMF format, and are simply copied into the session's MIDI folder.
Linking
A link to an existing media file somewhere on the disk is used as the source for a region, but the data is not copied or modified in any way.
While linking is handy to conserve disk space, it means that the session is no longer self-contained. If the external file moves, it will become unavailable, and any changes to it from elsewhere will affect the session. A backup of the session directory will miss linked files.
The Copy file to session option in the Import dialog window allows to choose to copy or link files into the session:
| Copy file to session | This file will be imported in the audio/MIDI folder of the session. |
| Copy file to session | This file won't be copied. |
There is a global preference Edit > Preferences > General > Session > Always copy imported files. If it is enabled, linking a file will not be possible.
Searching for Files Using Tags
A tag is bit of information, or metadata, that is associated with a data file. Specifically, tags are texts, keywords or terms that have some relevance to a particular sound file. Ardour can store these tags in a searchable database so that they can quickly be searched for to retrieve sounds based on the tags that have been assigned to them.
For example if the term 120bpm has been assigned to a sound, search later for this tag will make the file appear in the search list. Tags are independent of the filename or anything else about the file. Tags, and the file paths that they are associated with, are stored in a file called sfdb in the Ardour user folder.
Creating and adding tags
Adding tags to a given file is done by opening the Session > Import dialog, selecting the file in the browser, and typing new tags into the tag area in the soundfile information box on the right.
Tags are stored when the input box loses focus, there is no need to explicitly save them.
To have more than one tag for a file, new tags can either be added on new lines (meaning the Enter key is pressed between two tags) or they can be separated from the previous ones by a comma (,), with or without spaces.
Searching for files by tag
Searching for specific tags is done in the Search Tags tab of the same dialog. Files which have been tagged with the relevant terms will appear in the results window. Selected files can be auditioned and marked with additional tags if required.
Exporting
Export Dialog
When the work in Ardour is finished, one or multiple sound file(s) need to be created, be it to be printed to a medium such as a CD or DVD, uploaded to a streaming site or sent to another person or software for further work. This can be done either using Session > Export > Export to Audio file(s)….
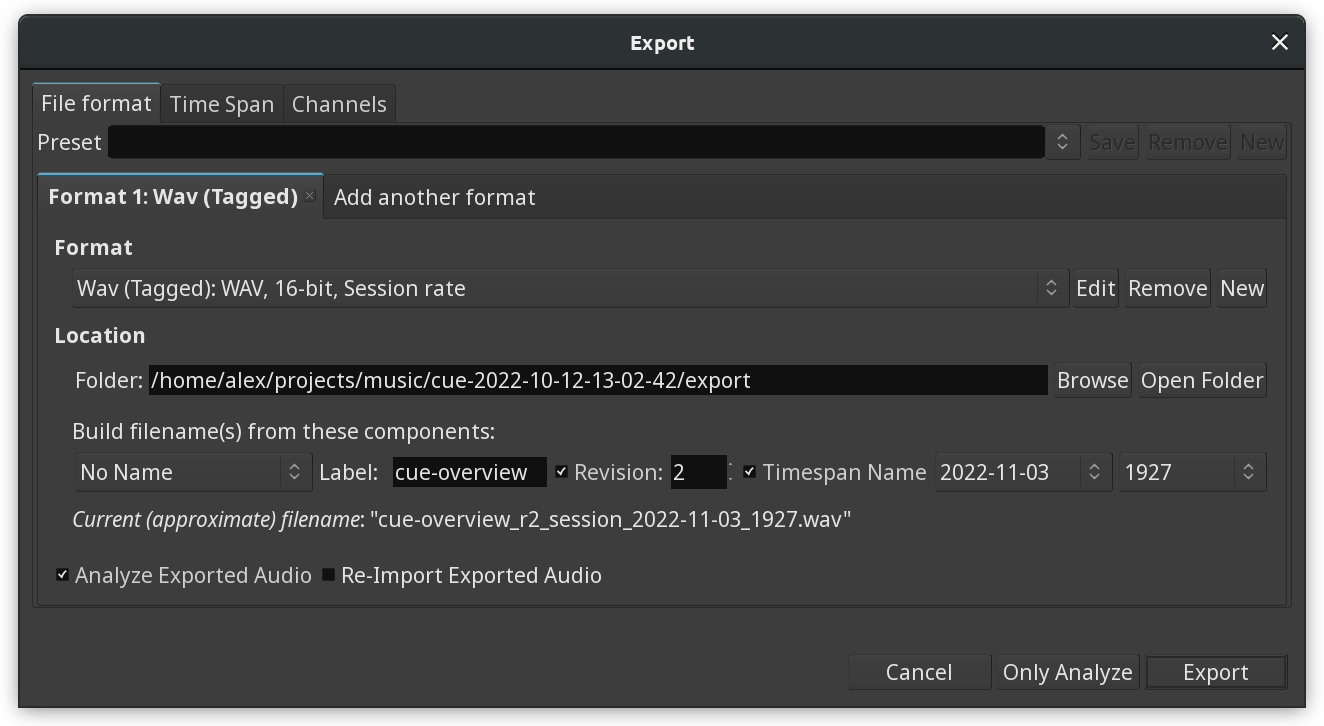
File Format
This tab contains controls for the format of the exported audio file(s). More than one format can be enabled here, in which case each will be exported in turn. Ardour is supplied with a list of export formats, including:
These formats can be edited, or new ones created, with the "Edit Export Format Profile" dialog, which appears when clicking the Edit or New buttons to the right of the drop-down list of formats.
Presets can also be created, consisting of one or more formats. Ardour provides some ready-made presets, too:
The location
Aside from providing a way to tell Ardour where to put the created file(s), the location part of the window allows to name the exported files with a lot of choice regarding the naming convention, hence blending into the user's workflow, and providing a clean way to keep the export folders from being cluttered with poorly named files.
The name of the file(s) can optionally be made of:
As in the screenshot above, when writing a file could erase a present file with the same name, Ardour shows a yellow warning line in the bottom of the window, and a button to list all the files that would be erased and replaced.
Overwriting Files
Ardour checks whether exporting will overwriting existing files. If such files are discovered, it will display a warning in the lower right corner of the window. Clicking the List files button next to the message will display the list of file that will be overwritten.
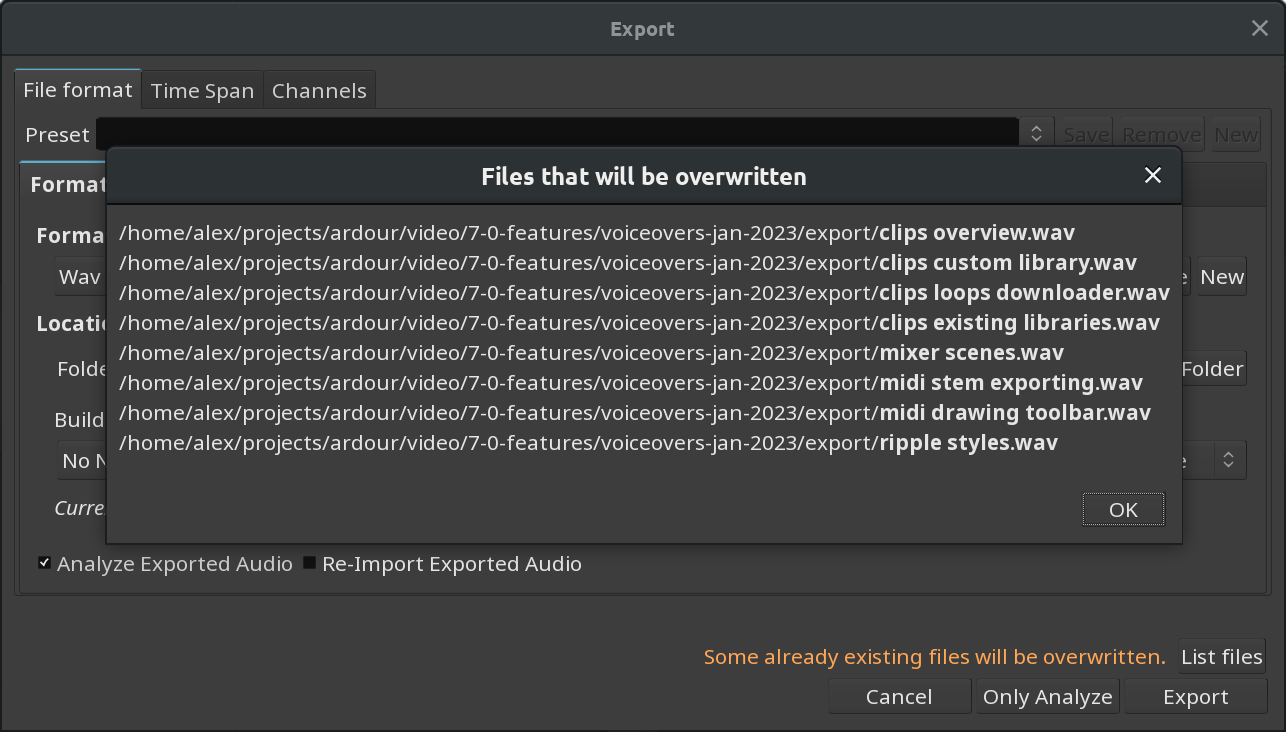
Analyze exported audio
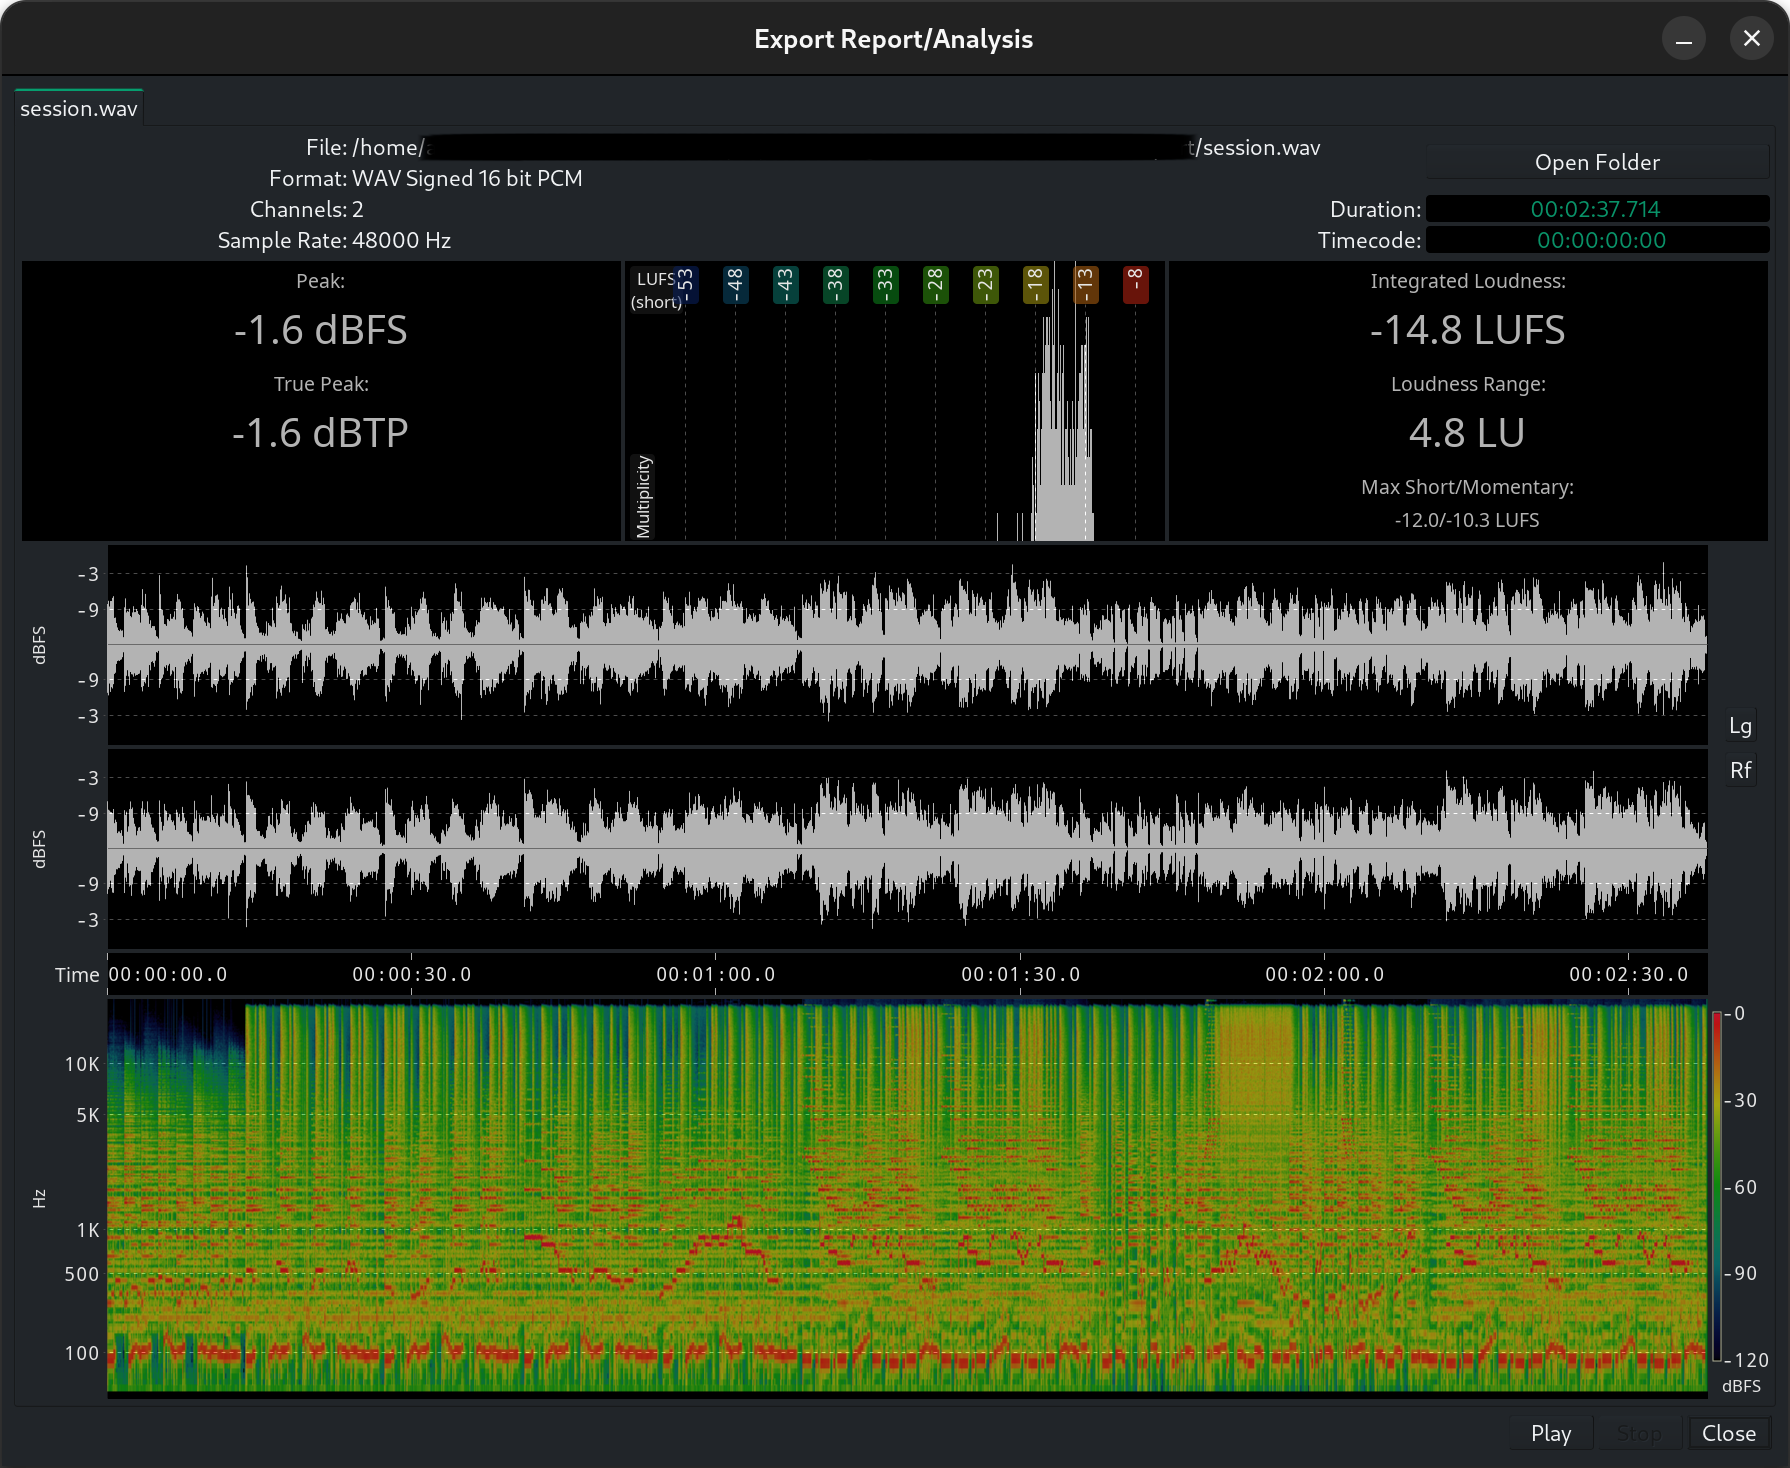
Checking Analyze Exported Audio shows the Export Report/Analysis window. This provides a lot of useful information about the exported file:
It also allows to Play the file, and the Open Folder button gives a quick access to the place where it has been created.
The most prominent feature though, are the two generated views of the audio file in time (waveform) and frequency (sonograph) domain, and the loudness analysis, giving:
Time Span
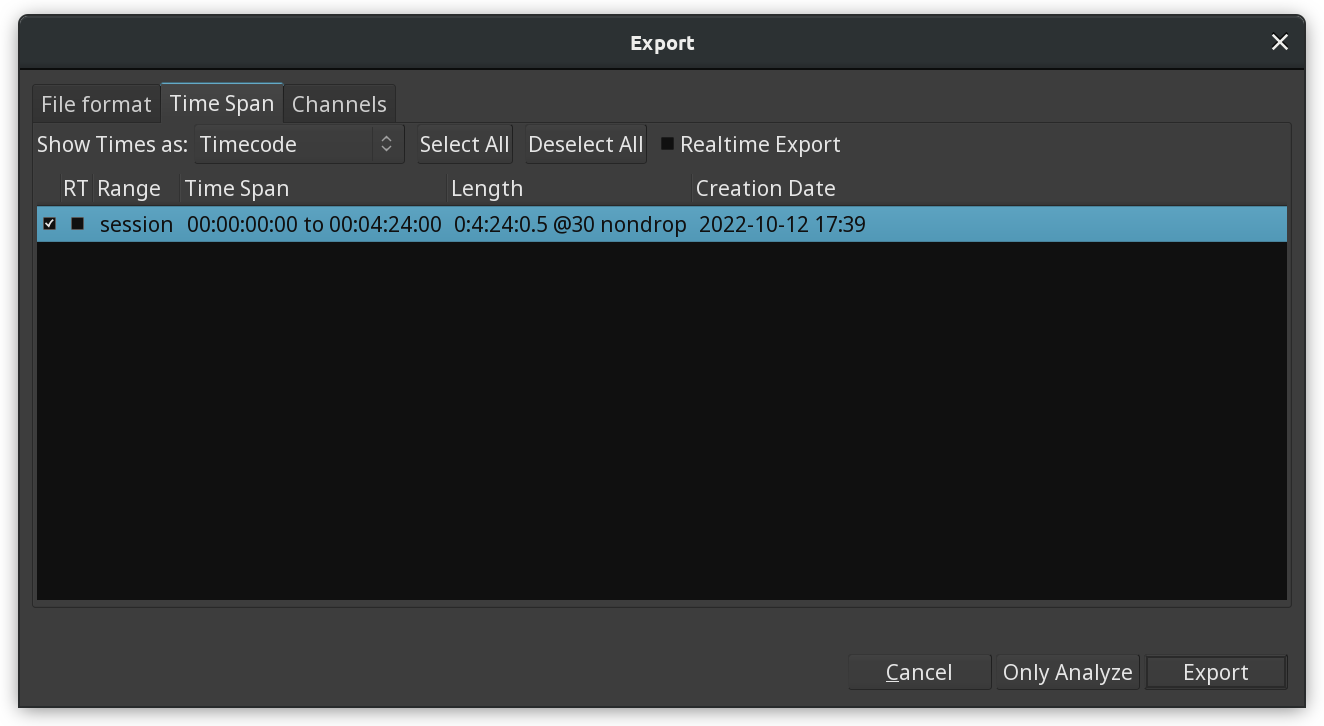
This tab allows to select the range (or ranges) of the timeline to export. By default, "session" is enabled—this will export the whole session from the start marker to the end marker. Any loop or range present in the session can be chosen, or a combination thereof.
The realtime checkboxes allow to export audio as it is played, and not freewheeling to render the file as fast as Ardour can. This can prevent odd behaviours from some plugins (reverbs, etc...). This can be chosen globally (with the Realtime Export checkbox at the top) or individually on a per time span basis, with the RT checkbox next to each time span.
Channels

This tab decides which outputs (tracks or busses) should be sent to the exported file. By default, only the Master Bus is sent.
Quick Audio Export
The Quick Audio Export dialog is a trimmed-down version of its original counterpart. It's best for cases when all the user needs is exporting an entire session (or part of it) to something like a WAV file at the session rate.
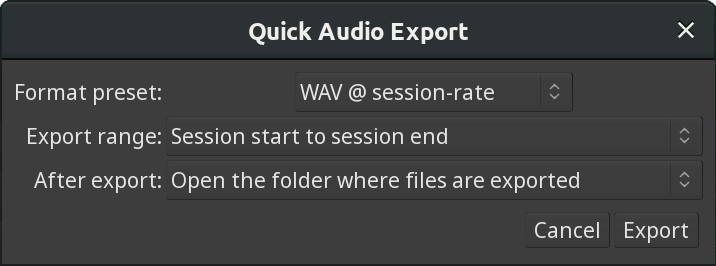
The three available options are:
| Format preset | Lists popular options such as FLAC, WAV @ session rate, MP3, and others. |
|---|---|
| Export range | Allows choosing between exporting a selection (range), the entire session (from session start marker to session end marker), or ranges defined by range markers. If neither selection nor range markers are available, only the entire session can be exported. |
| After export | Allows choosing whether to open the folder where the audio file has been exported to, or do nothing. |
Ongoing export can be canceled by pressing the Abort button.
Export Format Profiles
An Export Format Profile specifies the file format in which Ardour will export audio files, and also other audio file export options.
Export Format Profiles are edited via the Edit Export Format Profile dialog.
Label
The Label field allows to choose the name which will be shown for this format in the drop-down list of export formats in the 'File Formats' tab of the Export dialog.
Pre-Process
If enabled, levels of exported files will be normalized to the level chosen here. The normalization can be either:
Trim silence at start/end
These checkboxes allow to remove any part Ardour considers silent (< −90dB), at the beginning or/and end of each exported track.
Add silence at start/end
These checkboxes allow to add silence at the beginning or/and end of each exported track. The duration of the added silence can be manually fixed in the adjacent 'timer' input fields.
Watermark
This section adds watermarks to the exported audio (e.g. for limited/demo distribution), by overwriting part of the audio with white noise in the exported file.
Both the Mode (how often and how long) and Noise Level (how loud) can be set.
Format
Compatibility
Selecting an item in the 'Compatibility' emphasizes the settings in the other columns that are compatible with the selected standard, by turning incompatible options red. When an incompatible quality/format/sample rate is selected, the compatibility column checkbox disappears.
Quality
The appropriate item in the 'Quality' column will be highlighted when a file format is chosen. At the moment, selecting a Quality setting does not show the compatible File formats.
File format
This column contains a list of Ardour's supported export file types. Selecting one updates the options underneath it.
Note: For MP3 export Ardour relies on libsndfile v1.1.0 and newer to encode the file. For Opus support, Ardour requires a build of libsndfile from git (or future 1.2.0 release). This comes bundled with official Ardour binaries.
Sample rate
A specific sample rate can be chosen for the exported files, or the current session's sample rate (by choosing 'Session rate'), without sample rate conversion.
Encoding
Options relevant to the chosen file format will appear just to the right of the Compatibility/Quality/File format/Sample rate table.
Sample rate conversion quality
In case the chosen sample rate does not match the current session's sample rate, the sample rate conversion quality can be chosen here. Better quality options are slower.
Metadata
These options are presented whatever the chosen format is:
Tag file with session's metadata
If the exported file format supports metadata (e.g. FLAC, Ogg Vorbis), use data entered in the Session Metadata window to tag the exported files.
Create CUE/TOC/chapter mark file
As well as exporting an audio file, Ardour can create a file (in CUE, TOC or MP4ch format respectively) containing CD track information, as defined in the Ranges & Marks List. Those files can then be used to either burn a CD or DVD, or to create "chapters" inside a compatible mp4 video container.
Post Export
If this is not blank, it is considered as a command to be run after the export of each file. Either the command must exist in $PATH, or an absolute path to an executable file can be specified here.
Certain sequences are allowed here to stand for the exported file name and various parameters. Currently these are:
Any part of the command-line enclosed in double-quotes (") will be used as-is.
For example, exporting an mp3 file can be done by inserting lame -b320 %f
which will convert the exported audio file ('%f') to a 320 kbs mp3 using the lame encoder
(provided lame is installed first on the system).
Stem Exports
Stem exporting allows to transfer files between different systems and programs by exporting each track individually, including silence, to keep them in sync. All data will be lost except the actual audio/MIDI. This is one of the most common methods of interchange because it works between all DAWs.
The Stem Export window, accessed via the Session > Export > Stem Export… menu, is very similar to the Export dialog, except the 'Channels' tab appears slightly differently: in this case each chosen channel (track or bus) is exported to its own file, instead of all channels being mixed together into a single file.
The exported tracks or busses can, by checking Apply track/bus processing, be exported with the effects/processors applied, so that the destination system does not need those effects plugins.
The toolbar in the Stem Export window also provides a quick way to select either audio or MIDI tracks or busses.
Bouncing Regions
Selected region or multiple selected regions from any tracks can be exported to dedicated files. This creates audio files on the disk inside project's 'interchange' folder and automatically adds them to the Sources list.
There are two commands to do so: Bouncing without processing and Bouncing with processing, both available in the top-level Region menu, as well as in the context (right-click) menu of regions.
Bouncing without processing
This method disables all processing in the mixer channel, including fader/panner and pre- and post-fader processors. It will however apply non-destructive gain adjustment and fade in/out envelopes to audio clips.
Dropping all processing in the mixer channel effectively means that in the case of MIDI regions, MIDI files will be exported to the disk.
The dialog with bouncing settings will provide different options based on several possible scenarios.
One track, one region
If just one region is selected, Ardour will automatically suggest using the region name as is. It will also provide two options:
Multiple tracks, one region per each track
When the selection contains multiple regions, and each region is on a separate track, this makes it possible to automatically add exported files to respective slots in a cue. However since multiple regions are selected, Ardour will use original region names and prepend them with user-given text, if the user chooses to submit any. E.g. adding "take1-" prefix to "piano" and "bass" regions of respective mono tracks will create "take1-piano.wav" and "take1-bass.wav" files.
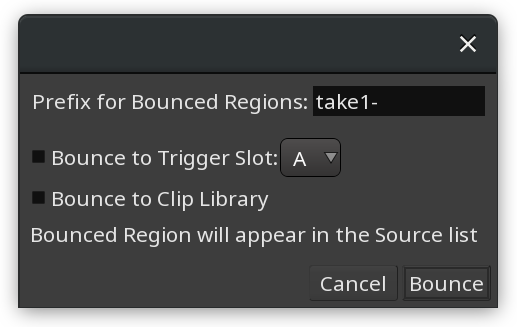
One or more tracks, two and more regions per track
When the selection contains at least two regions in the same track, the option to add bounced files to cue slots is not available, as two and more clips cannot be loaded into the same slot. Ardour will also ask for an optional prefix and provide an option to bounce to the Clips folder.

Bouncing with processing
This method applies all processing in the mixer channel. If the original data is MIDI and it passes a virtual instrument that translates it into audio, an audio file will be exported. Since this changes the nature of the data, bouncing to trigger slots is unavailable as MIDI tracks cannot contain audio data.
Just like in the case of bouncing without processing, availability of options depends on the use case.
One track, one region
In this scenario, Ardour will automatically suggest using region's name and provide an option to bounce to the Clips folder.
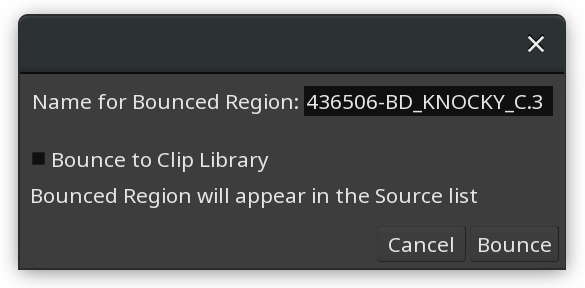
Any amount of tracks and regions per track
In this scenario, Ardour will use an optional user-defined prefix to prepend original region names with it when creating audio files. There also is an option to bounce to the Clips folder.

Interchange with other DAWs
It has never been particularly easy to move sessions or projects from one DAW to another. There are two interchange standards that have reasonably widespread support:
In practice both of these standards have such complex and/or incomplete specifications that different DAWs support them only partially, differently, or not at all.
Transferring an Ardour session from / to another DAW
To move a session from another DAW to Ardour, or from Ardour to another DAW, there are two basic choices:
Importing AAF files
Ardour supports importing AAF session files, including fades, volume automation, pan and multichannel tracks/regions.
To import an AAF file, you have to open the session file selection dialog :
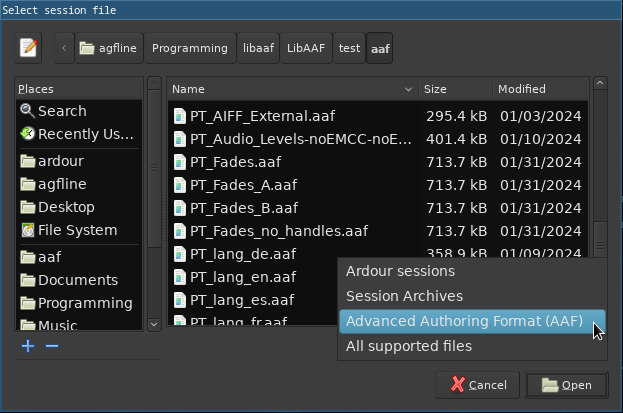
Select Advanced Authoring Format (AAF) in the file type filter, then select an AAF file and click Open.
Importing ProTools® files
Ardour provides a basic import tool for ProTools® sessions, in the Session > Import PT Session menu.
Though incomplete, this import is intended for ptf and ptx files. Protools® 5, 8, 9, 10, 11 have been tested with varying degrees of success. (versions 6 and 7 are not supported).
The elements of the files that are imported are:
Using AATranslator
AATranslator is a Windows application that can convert sessions/projects from many different DAWs into other formats. At the present time (December 2016), it can read and write Ardour 2.X sessions, and can read Ardour 3 sessions.
The program runs very well on Linux using Wine (a Windows environment for Linux). There are equivalent solutions for running Windows applications on OS X, but we have no experience with them at this time. Ardour users have reported great results using AATranslator on Ardour 2.X sessions.
The AATranslator website has full details on supported formats and DAWs. The list includes ProTools, Live, Reaper, OMF, AAF and many more.
AATranslator is closed-source, non-free software (as of this writing, June 2017, the cost is 59 USD for the "Standard" version, and 199 USD for the "Enhanced" version).
Editing
Navigating the Editor
Navigating the Editor window is obviously a very frequent operation. Ardour sticks with a lot of the usual conventions in this regard, to allow for a quick learning. As those operations are so common, it is worth taking the time to learn most of the keyboard and mouse shortcuts in order for these to become fast and natural.
The keyboard shortcuts can, as always, be edited, so the defaults are shown here.
Scrolling
Scrolling can be done on-canvas, or with the Summary.
On Canvas
| Action | Mouse | Keyboard |
|---|---|---|
| Scrolling up | ⇑ | ↑ |
| Scrolling down | ⇓ | ↓ |
| Scrolling up one page | ⇞ | |
| Scrolling down one page | ⇟ | |
| Scrolling left | ⇑ | |
| Scrolling right | ⇓ |
Moving the playhead outside the view may scroll the screen accordingly, so using ← or →, while not scrolling per se, will result in scrolling if Transport > Follow playhead is checked. This is also true with the Navigation Timeline, and anything that moves the Playhead.
In the Summary
Clicking and dragging in the Summary will scroll the view left and right. If the screen view is clicked (the white rectangle) and dragged, the view can also be scrolled vertically.
Additionally, on the left and the right of the Summary, the two < and > arrows buttons allow to scroll one screen either left or right.
Zooming
Zooming (on time) can be done on-canvas (which will always be centered around the mouse cursor), with the Summary, or with the Zoom Controls.
On Canvas
| Zooming in | ⇑ |
|---|---|
| Zooming out | ⇓ |
In the Summary
Resizing the screen view in the Summary (the white rectangle) changes the zoom accordingly.
With the Zoom Controls
With the Zoom Focus set, the − and + buttons will zoom out or in around this focus. The [ ] button zooms to the whole session as defined by the start and end markers.
These controls are bound to the keyboard − and = respectively by default.
Height of the tracks
Changing the height of the tracks results in more or less tracks on screen. This can be done on canvas, with the Summary or with the Zoom Controls.
On canvas
Using ⇓ or ⇑ while hovering over a track reduces or enhances its height, i.e. zooms on the hovered track, regardless of the selection.
The F key resizes the tracks so that only the selected one(s) are displayed. If some unselected tracks are in-between those selected tracks, their visibility will be toggled off.
In the Summary
Resizing the screen view in the Summary (the white rectangle) changes the number of tracks displayed (hence their heights) accordingly. It behaves more like a zoom as the relative height of the tracks are kept.
With the Zoom Controls
The three rightmost buttons of the Zoom Control bar, while not zoom buttons, act upon the height of the tracks:
Editing Basics
Working With Regions
What Regions Are
Regions are the basic elements of editing and composing in Ardour. In most cases, a region represents a single contiguous section of one or more media files. Regions are defined by a fixed set of attributes:
When placed into a playlist, they gain additional attributes:
There are other attributes as well, but they do not define the region. Things to know about regions:
Regions Are Cheap
By themselves, regions consume very little in terms of computer's resources. Each region requires a small amount of memory, and represents a rather small amount of CPU work if placed into an active track. So, multiplying regions creation whenever needed should not be much of an issue CPU wise.
Regions Are Not Files
Although a region can represent an entire audio file, they are never equivalent to an audio file. Most regions represent just parts of an audio file(s) on disk, and removing a region from a track has nothing to do with removing the audio file(s) from the disk (the Destroy operation, one of Ardour's few destructive operations, can affect this). Changing the length of a region has no effect on the audio file(s) on disk. Splitting and copying regions does not alter the audio file in any way, nor does it create new audio files (only recording, and the Export, Bounce and Reverse operations create new audio files).
Selecting regions
Pointing at a region and single-clicking it with the Grab tool selects that region. Multiple regions can be selected at the same time:
Selection of multiple regions is always temporary and is not preserved once you click elsewhere or press Esc. To make such a selection permanent, create a group of regions in one of the following ways:
To break a group of regions back into individual regions, do one of the following things:
Region Operations
Selecting a region with a single-click makes it possible to perform various operations on it. These operations are mostly accessible from the main Region menu on top or from the right-click menu.
Some operations like editing fade in/out are accessible with just the mouse pointer.
Region Editor Pane
The region editor is located at the bottom of Editor and Cue windows. To open a MIDI region for editing, make sure the bottom pane is enabled and click on a region in the timeline.
The user interface largely resembles that of in-place editing in the main window on the timeline and is the same as in the pianoroll windows.
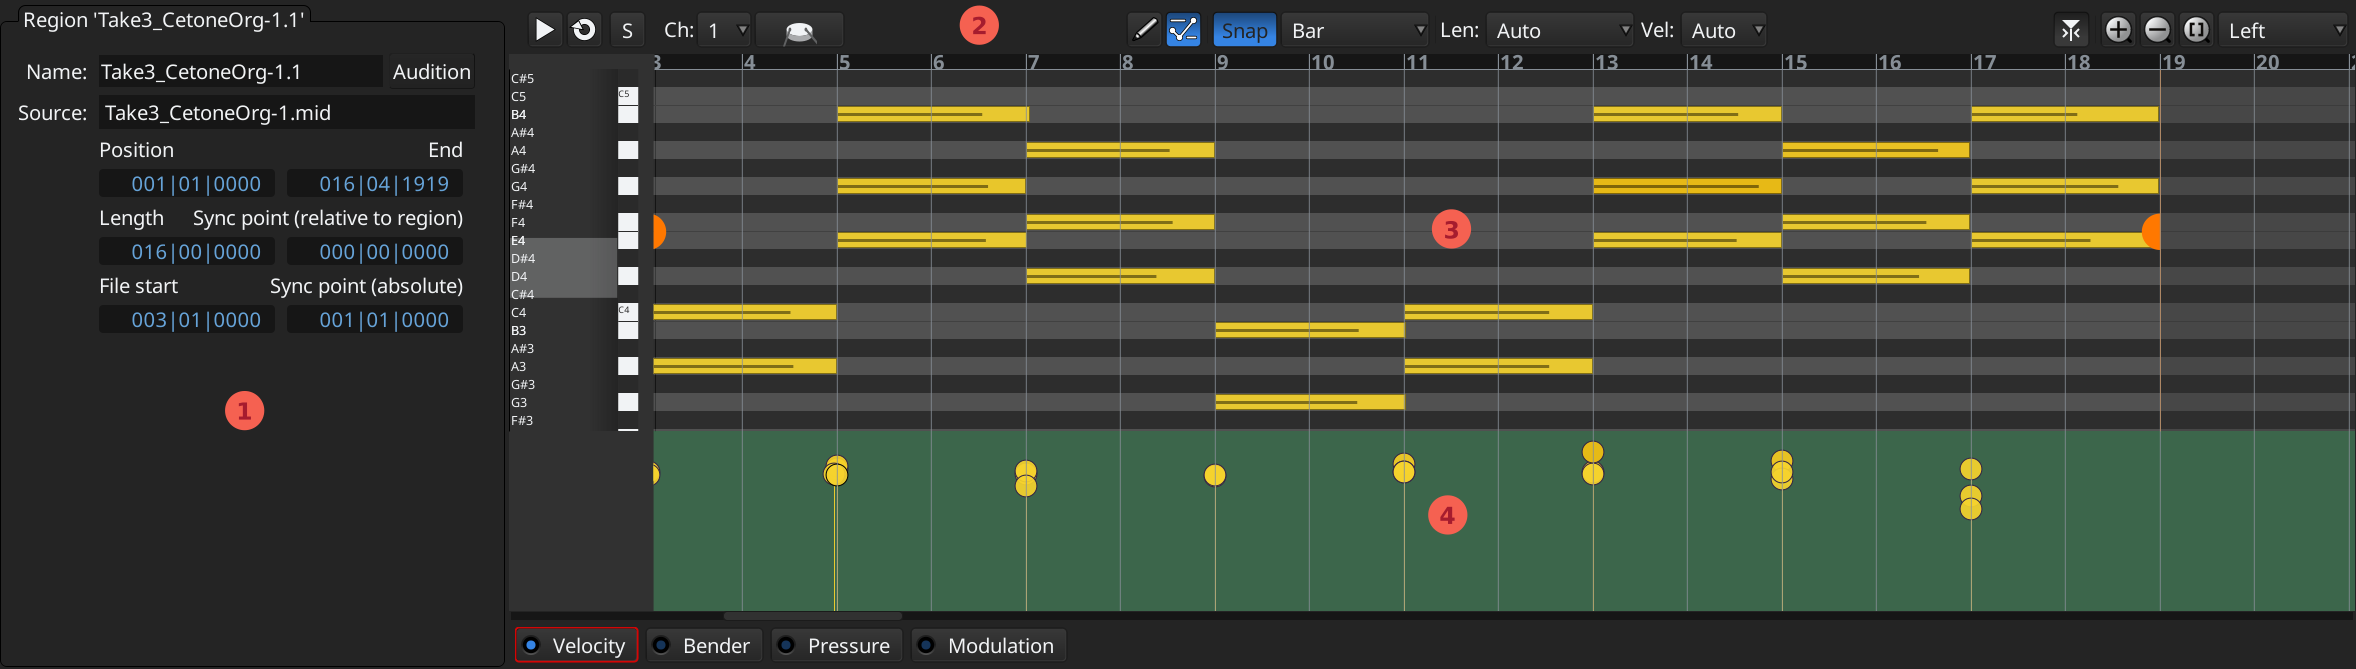
Region properties pane
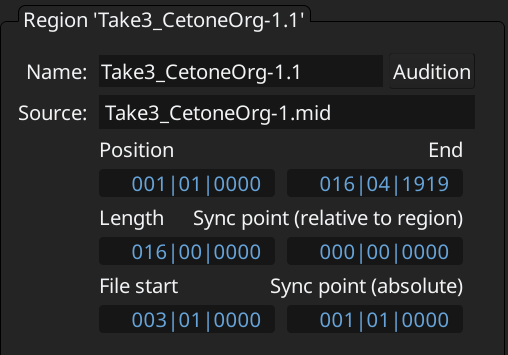
Displays essential information about the MIDI region:
Editor toolbar
The editor toolbar provides playback, editing, and zoom controls.

Playback controls:
Note display controls:
Note editing controls:
Zoom controls:
Note or audio waveform area
For MIDI regions or clips, this areas displays all editable notes and provides control for panning between staves and tweaking the beginning and the end of the region.
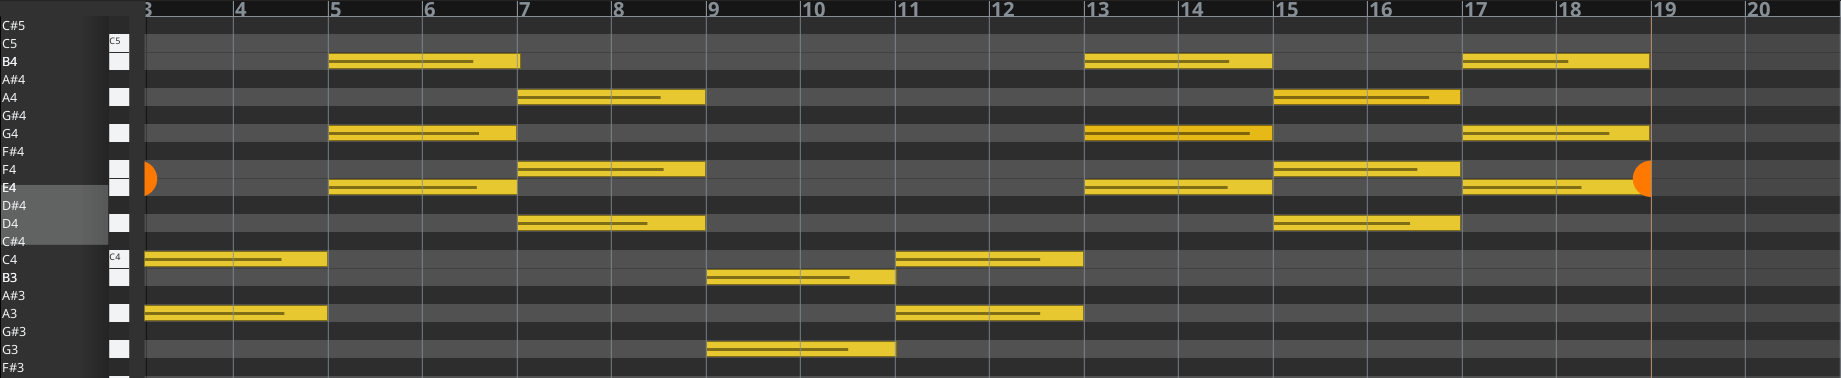
The area on the left controls the visible note range. See here for the detailed explanation how to use the widget.
The orange handles on the left and on the right control the start and the end of the region's visible part. For example, dragging the orange start marker (on the left) to the right is equivalent to using the Grab tool to pick the left side of the region and trim the beginning of the region.
Drawing and editing MIDI notes works the same way as in the main window:
Automation area
For MIDI regions and clips, this area displays note velocity and controllers and is disabled by default. Clicking on any of the available controller options (Velocity, Bender, Pressure, Modulation) enables it.

To enable or disable an automation lane, click on the small LED indicator to the left of its name on the bottom toolbar.
The area can display data from multiple controllers, overlaid on top of each other, but only one automation lane is editable at the time.
To select the automation lane to edit, click on the controller name. The lane data will become editable, and the relevant button will get a red outline (Velocity on the screenshot above).
Region Naming
Region names are initially derived from either:
Whole File Region Names
These are not audio files, but regions that represent the full extent of an audio file. Every time a new recording is done, or a new file is imported to the session, a new region is created that represents the entire audio file. This region will have the name of the track/playlist/original file, followed by a "-", then a number plus a dot and then a number.
For recorded regions, the number will increase each time a new recording is made. So, for example, if there is a track called Didgeridoo, the first recorded whole file region for that playlist will be called Didgeridoo-1. The next one will be Didgeridoo-2 and so on.
For imported regions, the region name will be based on the original file name, but with any final suffix (e.g. ".wav" or ".aiff") removed.
Normally, whole file regions are not inserted into tracks or playlists, but regions derived from them are. The whole-file versions live in the Editor's region list where they act as an organizing mechanism for regions that are derived from them.
Normal Region Names
When a region is inserted into a track and playlist, its initial name will end in a version number, such as .1. For a recorded region, if the whole file region was Hang drum-1, then the region in the track will appear with the name Hang drum-1.1. For an imported region, if the whole file region was Bach:Invention3, then the region in the track will appear with the name Bach:Invention3.1.
Copied Region Names
Duplicating or splitting a region creates new region(s) that are based on the same original files. Hence, they share the same base name (in the example above, Hang drum-1), but their version number will be incremented each time. Duplicating Hang drum-1.4 by left dragging it will create a new region called Hang drum-1.5. Splitting Hang drum-1.5 by hitting the S key will remove the Hang drum-1.5 region and create two shorter regions named Hang drum-1.6 and Hang drum-1.7.
Renaming Regions
Regions can be renamed at any time using the region context menu : right click > name_of_the_region > Rename... . The new name does not need to have a version number in it (in fact, it probably should not). Ardour will add a version number in the future if needed (e.g. if the region is copied or sliced).
Corresponding Regions Selection
Track Groups have a property titled Select which, if enabled, cause Ardour to propagate a region selection in one track of a group to the corresponding regions of the other tracks in that group.
This can be particularly useful when an instrument has been recorded using multiple microphones (e.g. a drum kit): by enabling the Select property for the group, selecting a region in one of the tracks, Ardour will select the corresponding region in every other track of the group, which in turn means that a subsequent edit operation will affect all the tracks together.
How Ardour Decides Which Regions are "Corresponding"
Regions in different tracks are considered to be corresponding for the purposes of sharing selection if they satisfy all the following criteria:
Overlap Correspondence
Sometimes, the rules outlined above are too strict to get Ardour to consider regions as corresponding. Regions may have been trimmed to slightly different lengths, or positioned slightly differently, and this will cause Ardour to not select regions in other grouped tracks.
In this case, changing Edit > Preferences > Editor > Regions in active edit groups are edited together: to whenever they overlap in time will allow regions in different tracks to be considered equivalent for the purposes of selection if they overlap. This is much more flexible and will cover almost all of the cases that the fixed rules above might make cumbersome.
Region Context Menu
In the editor window, right clicking (context clicking) on a region displays a menu with track and region operations. The menu begins with the name of the region, or Selected Regions if multiple regions are selected. Selecting it will display the Region menu for operations on this(these) region(s).
Some items may not be in the exact same order as in the main menu.
If there is more than one region layered at the point clicked, the menu will also contain a Choose Top item. This dialog allows to select which region should be on the top layer. See Adjusting Region Layering for more details.
Below these items is the rest of the Track Context Menu, which provides access to track-level operations.
Common Region Edit Operations
This section covers a set of region editing operations that are likely to be used often while working on a session. Depending on work habits (and experience of other DAWs), some of these operations will be critical while others are used only rarely.
All of these operations can be carried out from the keyboard (see Default Keyboard Shortcuts for a list). Equivalent operations can be performed with the mouse in most cases.
Some of these operations make use of the edit point/range and affect specific regions.
| Spot (Align) | Move selected regions to the edit point. |
|---|---|
| Split | Split selected regions at the edit point. |
| Trim Start | Adjust the start of selected regions to the edit point (or as close as possible). |
| Trim End | Adjust the end of selected regions to the edit point (or as close as possible). |
| Duplicate | Make a copy of each selected region and position it immediately after the original. |
| Crop | Truncate selected regions to the edit range. |
| Separate | Split selected regions at both ends of the edit range. |
| Set Fade In | Adjust selected audio regions' fade in to end at the edit point. |
| Set Fade Out | Adjust selected audio regions' fade out to end at the edit point. |
| Toggle Fade In | Turn selected audio regions' fade in on or off. |
| Toggle Fade Out | Turn selected audio regions' fade out on or off. |
| Play Region | Play session from the start of the earliest selected region. |
| Zoom To Region | Zoom horizontally so that the selected regions span the editor track view. |
| Set Sync Point | Set the sync point of all selected regions to the edit point. |
| Insert | Inserts the currently selected regions in the Region List at the edit point. |
Copy Regions
Copy a Single Region
Copying a region is done using the Grab mouse mode, by moving the mouse pointer into the region and left-dragging. Ardour creates a new region and follows the mouse pointer as it moves. See Move Regions for more details on moving the copied region.
Copy Multiple Regions
Copying multiple regions requires them to be selected before copying. Then left-dragging one of the selected regions will copy the regions as they move. The copied regions will keep their positions relative to each other.
Fixed-Time Copying
Copying region(s) to other track(s) while keeping the copies at the same exact position on the timeline as the originals is done by simply using a Middle-drag instead.
Move Regions With the Mouse
Moving or copying a region is done using the Grab mouse mode, or the Smart mode with the pointer in the lower half of the region to begin a move or copy operation.
With the pointer in the region, using a Left-drag will make the region follow the pointer as it is moved around. By default, the region can move freely along the timeline.
To move a region from one track to another, the move must be started as described above, but the pointer should end in the desired track. The region will follow the pointer.
if some other kinds of tracks are visible, the region will remain where it is as the pointer moves across them, and will then jump to the new track. This serves as a visual reminder that an audio region cannot be dragged into an automation track or a bus, for example.
Move Multiple Regions
In order to move multiple regions, they should be selected before moving. Then Left-dragging one of the selected regions will move all the regions, keeping their positions relative to each other.
Fixed-Time Motion
Moving region(s) to other track(s) while keeping them at the same exact position on the timeline is done by simply using a Middle-drag instead.
On macOS, where the middle click might not be available, the same effect can be achieved by switching to the Lock mode (as opposed to Slide or Ripple) in the top-left area of the screen.
Align (Spot) Regions
Aligning regions (sometimes called "spotting") means moving one or more regions based on a defined location, which in Ardour is always the edit point. An alignment operation moves the region(s) so that some part of the region is positioned at the edit point. Available alignment commands include:
| Align Region starts a | Selected region(s) are moved so that their start is located at the current edit point |
|---|---|
| Align Region ends a | Selected region(s) are moved so that the end is located at the current edit point |
| Align Region sync points a | Selected region(s) are moved so that their sync point is located at the current edit point |
| Align Region starts relative a | Selected region(s) are moved so that the start of the earliest region is located at the current edit point, and all others maintain their relative position relative to that region |
Edit Mode and Tools
Editing Clocks
Clock Modes
Every clock in Ardour has multiple different, selectable clock modes. Each mode displays time using different units. The clock mode can be changed by Right-clicking on the clock and selecting the desired mode from the menu. Some clocks are entirely independent of any other clock's mode; others are linked so that changing one changes all clocks in that group. The different modes are:
| Timecode | Time is shown as SMPTE timecode in Hours:Minutes:Seconds:Frames, measured from the timecode zero point on the timeline (which may not correspond to the session start and/or absolute zero on the timeline, depending on configurable timecode offsets). The frames value is dictated by either the Timecode frames-per-second session property, or, if slaved to an external timecode master, the master's setting. Under the transport clocks is an indication of the current timecode source (INT means that Ardour is its own timecode source). |
|---|---|
| Bars:Beats | Time is shown as Bars:Beats:Ticks, indicating musical time. |
| Minutes:Seconds | Time is shown as Hours:Minutes:Seconds.Milliseconds. |
| Seconds | Time is shown as Seconds.Deciseconds. |
| Samples | Time is shown as a sample count. The number of samples per second is given by the current sample rate. |
Changing clock values with the keyboard
New values for the clock can be typed in after clicking on the relevant clock. Clicking on the clock will show a thin vertical cursor bar just to the right of the next character to be overwritten. Time should be typed in the same order as the current clock mode—if the clock is in Timecode mode, it should be hours, minutes, seconds, frames. So, to change to a time of 12:15:20:15 one would type 12152 015. Freshly typed numbers will appear in a different color, from right to left, overwriting the existing value. Mid-edit, after typing 3222 the clock might look like this:

Finishing the edit is done by pressing ENTER or Tab. The ESC key allows to exit an edit without changing the clock. If an entry is mis-typed so that the new value would be illegal (for example, resulting in more than 30 frames when Timecode is set to 30 frames per second), the clock will reset at the end of the edit, and move the cursor back to the start to allow for another try.
Avoiding the mouse entirely
There is a shortcut available to edit the transport clocks entirely without the mouse. It can be found in the Keyboard Shortcuts window, Global > Transport > Focus On Clock. If bound to a key (/ by default), then pressing that key is equivalent to clicking on the primary (left) transport clock, and editing can begin immediately.
Entering Partial Times
One detail of the editing design that is not immediately obvious is that it is possible to enter part of a full time value.
As an example, supposing that the clock is in Bars:Beat mode, displaying 024|03|0029, altering the value to the first beat of the current bar can be done by clicking on the clock and typing 010000. Similarly, if it is in Minutes:Seconds mode, displaying 02:03:04.456, getting to exactly 2 hours can be achieved by clicking on the clock and typing 0000000 to reset the minutes, seconds and milliseconds fields.
Entering Delta Times
Values can also be typed into the clock that are intended as a relative change, rather than a new absolute value, by ending the edit by pressing + or - (the ones on any keypad will also work). The plus key will add the entered value to the current value of the clock, minus will subtract it. For example, if the clock is in Samples mode and displays 2917839, moving it back 2000 samples is done by typing 2000 and -, rather than ending with Enter or Tab.
Changing clock values with the mouse
Using a scroll wheel
With the mouse pointer over the clock, moving the scroll wheel changes the clock values. Moving the scroll wheel up (⇑) increases the value shown on the clock, moving it down (⇓) decreases it. The step size is equal to the unit of the field hovered over (seconds, hours, etc.).
Dragging the mouse
With the mouse pointer over the clock, pressing the left mouse button and dragging also affects the clocks: dragging upwards increases the value shown on the clock, dragging downwards decreases it, again with a step size equal to the unit of the field where the drag began on.
Which Regions Are Affected?
This section explains the rules used to decide which regions are affected by editing operations. They don't really have to be understood—hopefully things will Just Work—but it may be useful eventually.
Editing operations in Ardour either operate on a single point in time (Split being the obvious example) or on two points (which can also be considered to be a range of sorts), Separate is a good example of this.
Most operations will operate on the currently selected region(s), but if no regions are selected, the region that the mouse is in will be used instead. Single-point operations will generally pick a set of regions to use based on the following rules:
The rationale here for the two different rules is that the mouse Edit Point is special in that its position indicates both a time and a track; the other edit points (Playhead,Marker) indicate a time only.
Making Selections
Many editing operations in Ardour require to first select one or more regions to change them in some way. A single region, or multiple regions can be selected, including regions in different tracks. When a region is selected, it will appear in a darker color than unselected regions.
If a track is a member of a group that is active and has the Select property enabled, then Ardour will attempt to match whatever selections is made in one track across every other track of the group. See Corresponding Regions Selection for more information on precisely how selections will be propagated to other tracks.
Track Selection
Tracks are selected by clicking on the Track header at the left of the Editor window. Multiple tracks can be selected with Left clicks, or a range of consecutive tracks with Left.
Region Selection
Using the Grab Mode tool, left clicking on a region selects it. If Smart mode is enabled, the lower half of the region must be clicked.
Deselecting a Region
Still using the Grab Mode tool, Left-clicking the region deselects it. If Smart mode is enabled, the lower half of the region must be clicked.
Note that a left click simply toggles the selected status of an object, so it can be used to select unselected regions too.
Selecting Multiple Regions in a Track
This can be achieved in different ways:
Selecting All Regions in a Track
The Select > Select All In Track option in the context menu (Right click on the track) selects all the regions in the track at once.
See the Track Context Menu for more information on other per-track selection operations that are available.
Selecting Multiple Regions Across Different Tracks
This can be achieved by a left-click or Left-click on the regions to select.
Selecting a Region From the Region List
Clicking the name of the region in the Region List. selects it. This will do nothing for whole-file regions, since they do not exist anywhere in a playlist or track.
Editing Regions and Selections
Trimming Regions
Changing the length of a region is a very common editing operation, often known as trimming. There are several ways to accomplish this with Ardour, and some very useful specialized trimming operations.
Drag-Trimming With the Mouse
In Grab mode, moving the pointer near the beginning or end of the region changes the cursor to indicate that trimming is possible, and the edge of the region can then be Left-dragged in both directions.
Trimming will obey Snap settings.
Other Trimming operations
There are several commands for region trimming. Some use the edit point to determine where to trim to. Some are not bound to any keys by default (but could be via the Keybindings Editor).
These command are both in the Region > Trim main menu (with a region selected) or in the context menu of a region, right click on a region > Name_Of_The_Region > Trim
| Trim Start at Edit Point (j) | Trim selected region(s) start to edit point. |
|---|---|
| Trim End at Edit Point (k) | Trim selected region(s) end to edit point. |
| Trim to Loop/Punch | Trim selected region(s) beginning and end to the loop/punch boundaries (if it exists). |
| Trim to Previous (j) | Trim the start of selected region(s) to the end of the previous region. If the region is too short, it is extended to its maximum to the left. |
| Trim to Next (k) | Trim the end of selected region(s) to the start of the following region. If the region is too short, it is extended to its maximum to the right. |
Push/Pull Trimming
Normally, when trimming regions by dragging with the mouse, it affects only the selected regions. Their lengths are directly affected by the trim operation, but nothing else is. Sometimes though, when trimming a region that directly adjoins another, the desired result is to move the boundary between the regions and not to make these regions overlap. This requires trimming both regions on either side of the junction, in opposite directions. Push/Pull trim, activated by pressing key before starting the drag, will do just that.
The following pictures show the difference in the results of a normal trim and a push/pull trim:

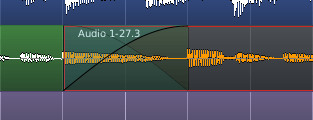
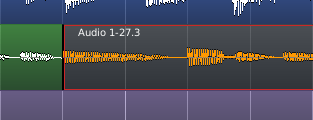
In the initial situation, before trimming, two adjacent regions are present, the rightmost-one being selected.
The simple trim, obtained by dragging the selected region's starting position earlier, overlaps the earlier region. A crossfade has been manually created between them, so their sound will fade from the leftmost region to the rightmost one.
If the same trim is done, but by Left-dragging to turn it into a push-pull trim instead, there is no overlap, and the end of the earlier region has been moved along with the start of the later region, so that they still directly adjoin each other. In effect, it is like doing a simple trim to reduce the leftmost region, then doing a simple trim to extend the rightmost one to fill the gap.
Move Region Contents
It's possible to move the contents of regions in time, without moving the regions' start or end points. This is sometimes known as "slip editing".
To do this, hold the and keys while dragging the region or regions. As you click, the cursor will change to a double-headed arrow, and when you start dragging, the time from the start of the underlying content to the start of the clicked region is displayed.
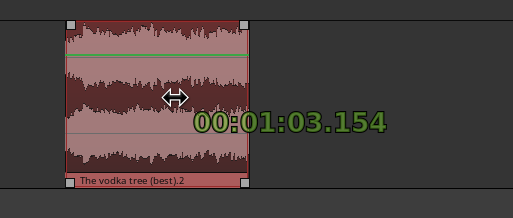
As you drag, the region start and end points will remain
fixed, but the audio or MIDI content of the region will move,
as long as the underlying source extends beyond the region bounds.
Stretching
The Stretch Mode tool can be switched to by selecting it in the Toolbox, or simply by hitting the T key.
It allows to extend or reduce the duration of a region, optionally maintaining its pitch. This is one of the few operations in Ardour that affect the underlying audio data from a region, even if the original audio is kept safely—no data is lost in the process.
This operation is usually used to fit an audio sequence with a different rhythm into a session, but can be used in a wide area of cases, due to its ability to maintain or alter the pitch.
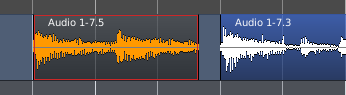
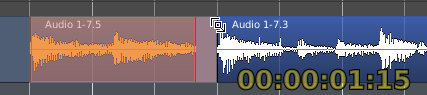
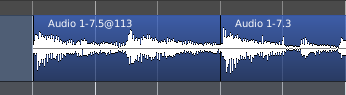
The Stretch Mode tool is very similar in use to doing a trim in grab mode: the boundary (start or end) is left-clicked and dragged to its wanted position. Notice a timer appearing, showing the new duration of the region using the same clock mode as in the primary transport clock.
Stretching is a complex operation (phase vocoding), involving resampling, frequency analysis and synthesis. The parameters used to transform the audio data are user tweakable, and exposed to the user as the left mouse button is released:

The Time Stretch Audio window is made of:
| Duration | The target duration of the region, expressed using the primary transport clock's mode |
|---|---|
| Percent | The target duration of the region, expressed as a percentage of the region's original length. Can be either higher than 100% (to expand the region) or lower (to shrink it) |
| Contents | The type of audio the region is made of. Ardour will fine-tune its algorithm based on this content, see below |
| Minimize time distortion | Tries to reduce the smearing of the audio created by the phase vocoding process |
| a Progress bar | showing the operation in progress. |
The Contents should be selected to best fit the actual content of the region, amongst:
| Content | Disable phase resynchronisation at transients | Band-limit phase resync to extreme frequencies | Disable phase locking to peak frequencies | Use longer processing window (actual size may vary) | Use shorter processing window |
| Mushy | X | X | X | ||
| Smooth | X | X | |||
| Balanced multitimbral mixture | X | ||||
| Unpitched percussion with stable notes | X | ||||
| Crisp monophonic instrumental (default) | |||||
| Unpitched solo percussion | X | X | |||
| Resample without preserving pitch | see below | ||||
While the table above details how the different kinds of audio material alter the fine-tuning of the DSP, from an user point of view, the operation often consists in trying different settings and listening to the result.
The best way to start experimenting is to consider the material itself:
Separate Under
Separate Under
When one region is over another, and the lower region has to be cut so that it directly adjoins both ends of the overlapping one, with no overlaps, the Separate Under tool can be a very efficient time-saver. With the upper region selected, the Edit > Separate > Separate Under menu will split the lower region so that it no longer overlaps the upper region at all.
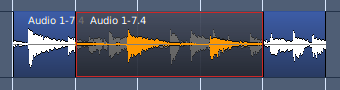
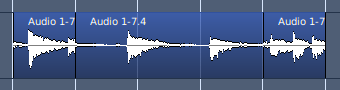
If the upper region covers only one end of the lower region, then this operation is equivalent to Trim to Next or Trim to Previous, depending on which end is covered.
Separate Using Range
A loop or punch range can also be used to slice a region. By using the Edit > Separate > Separate Using Loop/Punch Range, any selected regions that are covered by the range at both ends of the range, or just one if the range only covers part of the region. This makes it easy to generate regions that correspond precisely to a range.
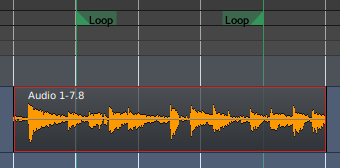
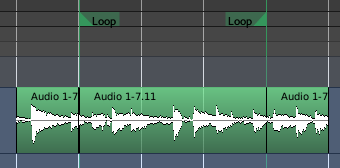
Strip Silence from Audio Regions
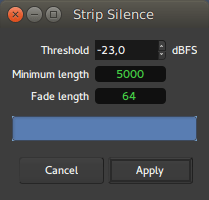
The Strip Silence tool allows to remove the parts of one or multiple regions that are below a user-defined silence threshold. It does not destroy the underlying audio, but trims the regions according to the silence threshold parameter. The edit applies to all selected regions, allowing batch processing.
The window, accessible either through the Region > Edit > Strip Silence menu or right click on a region > Name_Of_The_Region > Edit > Strip Silenceis made of:
| Threshold | The audio level under which the audio is considered silent (in dBFS) |
|---|---|
| Minimum length | A minimum number of samples for Ardour to create a split. Under this number, the region won't be sliced |
| Fade length | Ardour adds fades, both in and out, to the trimmed regions, to the created region (so the sliced regions are longer by both the in and out fades duration, expressed in samples) |
| A progress bar | showing the time Ardour takes to compute the trimming based on the current parameters |
Changing any parameter in the window is reflected in the main editor: the silent segments are highlighted and the number and durations of the shortest segments is displayed, helping fine-tune the parameters.
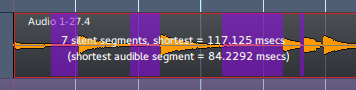
The minimum length for silence can be useful when editing very percussive material and just needing to automatically trim the ends of a region.
Insert/Remove Time
Insert Time
The Insert Time window allows to insert blank space in the timeline, on the selected track(s). It is accessed through the Track > Insert Time menu.
The Insert Time window not only allows to set the time inserted, but also some fine-tuning options:
| Insert Time starting at: | Sets the point in the session where the time will be added. By default, it is the playhead's position |
|---|---|
| Time to insert: | Duration of the blank space inserted |
| Intersected regions should: | A choice as to what happens to regions that exists at the Insert Time set above. See below. |
| Apply to all the track's playlists | As a track can have multiple playlists, the insertion can happen either only on the active playlist or on all the playlists of this track. |
| Move markers | As a marker can be locked, this option and the two subjacent ones allow to shift the time position of those markers. |
| Move tempo and meter changes | The tempo and meter markers, that can be used to change the tempo along the session, can also be shifted in the process. Though, moving the tempo markers while e.g. keeping the MIDI regions unaffected can create oddities. |
Both the two time fields have a useful context menu, that allows to copy/paste the time and change the display among one of the clock modes. The Insert Time field also has two options to Set from Playhead (to get the insertion time from the playhead, which is what happens by default) and Locate to This Time which moves the playhead to the time field value, useful if the field has been manually edited to better visualize the insertion point.
The "Intersected regions should" dropdown allows to select what happens to regions that cross the insertion position:
| stay in position (default) | The crossed regions are not affected by the time insertion. Only regions after the insertion point are moved. |
|---|---|
| move | The crossed regions are shifted in time. |
| be split | The crossed regions are split, and the section after the time insertion point is shifted in time. |
This last mode allows a brute force insertion, creating a blank space in all the selected tracks, and replacing multiple operations.
Note: One interesting option is, if a range selection (created with in Range Mode) exists, it is used as the default parameters in the window, instead of the playhead, for both the start time and duration.
Remove Time
The Remove Time window, accessed through the Track > Remove Time menu, is very similar to the previous, and its options are very similar. Only the "Intersected regions should" option is not present.
The range selection note above can be especially useful in this context.
Region Properties
Region properties

The Region properties window brings information about the selected regions, and allows to fine tune its sequencing. It is accessed through the Region > Properties… menu, or by right clicking the region, Name_of_the_Region > Properties….
This window also allows to manually set the different values.
| Field | Meaning | Editable |
|---|---|---|
| Name: | The name of the region in the editor | X |
| Audition | This button allows to listen to the region and only the region, dry (with no effects, regardless of the processors applied to the track). For MIDI, the default MIDI synth, set in the Preferences, is used to audition the region. | |
| Position: | Position in time of the left-hand side of the region | X |
| End: | Position in time of the right-hand side of the region | X |
| Length: | Duration of the region (=End−Position) | X |
| Sync point (relative to region): | Position in time of the Sync Point, relative
to the beginning of the region. No manual sync point means the sync point is
the beginning of the region (=Position), so will show as "0" in time
and 001|01|0000 in Bars:Beats notation. |
X |
| Sync point (absolute): | Position in time of the Sync Point, relative to the beginning of the session. No manual sync point means the sync point is the beginning of the region, and will be equal to the Position. | X |
| File start: | Position in time of the beginning of the region relative to the source file start. If the region has not been trimmed on the left, then the regions start is the file start and this value is 0. | |
| Source: | Name of the source audio/MIDI file the region is extracted from. A region can be a part of or a whole audio/MIDI file, and multiple regions can be based on the same source file. | X |
| Region gain: | (Audio files only) Manual gain, in dB, applied constantly to the whole region, regardless of the global track's gain, automation, etc… | X |
| Peak amplitude: | (Audio files only) Maximum level the signal reaches inside the region. Expressed in dBFS (Full Scale), where 0 is the numeric maximum a signal can reach. |
All the fields marked as "editable" in the table above allow the user to manually enter a value in the field, to manually set this value.
Right-clicking on a field allow to switch between the different clock modes.
The context menu that pops up also allows the relevant fields (Position, End, and both Sync points) to be set from the playhead location, which can be used to e.g. trim a region to the playhead or place a sync point exactly on a beat.
Sections
Sections represent significant self-contained parts of the timeline. Common examples of a section are a verse, a chorus, or a bridge in a song.
Sections are represented in two ways in the editor window:
There are also several commands in the main Edit menu:
When Ardour treats a range as a section, it cuts or copies audio and MIDI data and their automation (hidden or visible) across all tracks, as well as markers and unused playlists. When pasting the cut or copied data, it ripples all tracks at the edit point. It's also possible to repeatedly copy and paste an existing section.
Fades and Crossfades
Every Region has a fade-in and fade-out. By default, the region fade is very short, and serves to de-click the transitions at the start and end of the region. By adjusting the regions fade length, a more gradual transition can be accomplished.
Region Fades
Region fades are possible at the beginning and end of all audio regions. In object mode, a grip appears at the top left and top right of an audio region when the cursor hovers over it. Placing the cursor over the top of the grip displays the region fade cursor tip. Clicking and dragging the grip left or right in the timeline adjusts the length of the fade.
Crossfades
Crossfades refer to the behavior of two audio regions transitioning smoothly (mixing) from one to another on the same track. Historically, this was done by splicing two pieces of analog tape together, and this concept was carried forward into digital editing. Each track is a sequence of sound files (regions). If two regions are butted against each other, there needs to be a method to splice them smoothly together. The crossfade allows one region to fade smoothly out, while the next region fades smoothly in, like two pieces of tape that have been cut at an angle, and overlapped.
But Ardour uses a more refined "layered" editing model, and therefore it is possible for multiple regions to be stacked on a single location with arbitrary overlaps between different layers. For this reason, crossfades must be implemented differently. It can't be assumed that a crossfade is an entity that exists between two regions; instead each region must have its own associated crossfades at each end, and the topmost region must always crossfade down to the underlying region(s), if any.
Ardour solves this problem by putting a crossfade at the beginning and end of every region. The fades of the bottom-most region are first rendered, and then each region is rendered on top of the one below it, with fades at the end of each region providing a crossfade to the region(s) beneath it.
It is important to understand that region fades are crossfades. When one region has another region or multiple regions beneath its fade area, then what will be heard is the topmost region fade-out mirrored as a fade-in on the underlying region(s). The grip for the topmost region will allow changing the length and type of the crossfade into the underlying region(s). In this way complicated series of crossfades can be created, and then another region layered atop the others, and faded into a complicated series.
If a region doesn't have any region(s) under it, then the region is crossfaded to silence; for convenience this is called a "fade" rather than a crossfade.
Fade Shapes
To activate/deactivate or change the shape of a region's fadein or fade-out, the cursor has to be hovered over the region fade grip until the cursor tip indicates region fade editing, then right clicked to bring up a context menu. In the context menu is a list of options for the region fade. Activate/Deactivate enables and disables the region fade.
Ardour has a setting for the type of fade that's used by default. It can be changed in the Edit > Preference > Editor.
Because each fade is also a crossfade, it has an inverse fade shape for the audio beneath the fade. It is important to know how the shapes differ, and which are most suitable for various editing tasks.
The different types of fades are:
| Linear | A simple linear coefficient decrease, and its mathematical inverse. A Linear fade starts attenuating quickly, and then cuts off even more abruptly at lower levels. When used as a crossfade, the signals are each -6dB attenuated at the midpoint. This is the correct crossfade to use with highly-correlated signals for a smooth transition. |
|---|---|
| Constant Power | The constant power curve starts fading slowly and then cuts off abruptly. When used as a crossfade between 2 audio regions, the signals are symmetrically attenuated, and they each reach -3dB at the midpoint. This is the correct crossfade to use when splicing audio in the general (uncorrelated) case. |
| Symmetric | The Symmetric fade starts slowly, then attenuates significantly before transitioning to a slower fade-out near the end of the fade. When used as a crossfade, the Symmetric curve is not mathematically correct like the Constant Power or Linear curves, but it provides a slower fade-out at low volumes. This is sometimes useful when editing 2 entire music works together so that the transition is more gradual. |
| Slow | The Slow curve is a modified linear decibel fade. The initial curve starts more gradually so that it has a less abrupt transition near unity. After that, it sounds like a perfectly smooth fader or knob moved to silence. This shape is excellent as a general-purpose fade-out. When used as a crossfade, the inverse fade curve maintains constant power but is therefore non-symmetric; so its use is limited to those cases where the user finds it appropriate. |
| Fast | The Fast curve is a linear decibel fade; It sounds like a perfectly smooth fader or knob moved to silence. This shape is excellent as a general-purpose fade-in. When used as a crossfade, the inverse fade curve maintains constant power but is therefore non-symmetric; so its use is limited to those cases where the user finds it appropriate. |
Although these fade shapes serve specific purposes, any of the shapes is usable in any situation, so the final decision is mostly an artistic choice.
These fade curves are developed to provide a range of common uses, and are developed with the least possible amount of changes in the "slope" of the line. This provides artefact-free crossfades. Some DAWs provide complicated fade editors with parametric "spline" controls of the fade curves. While it might be interesting to develop a fade curve with a faster cutoff, the mathematical difference between this and simply shortening the fade is vanishingly small; and the amount of effort to shorten the fade is much easier than messing with a crossfade editor dialog.
Adjusting Gain
Region Gain
Ardour allows adjusting region gain by a constant amount as opposed to adjusting gain envelope where it's possible to change it gradually over time. Like everything in Ardour, this is a non-destructive change. The result can be adjusted at any a later time or discarded altogether. Internally, region gain is an inherent property of regions, it can be edited directly in the region properties dialog.

There are two additional ways to adjust region gain: by boosting or cutting gain with a 1dB step, or by normalizing audio.
Boosting and Cutting Gain
The quickest way to increase or decrease gain of selected regions without involving the gain envelope is to use Boost Gain and Cut Gain commands respectively.
These commands can be accessed via the main Region > Gain menu or region's context menu. A much easier way is to use shortcuts: Alt+6 boosts gain by 1dB, Alt+7 cuts gain by 1dB.
When gain is boosted or cut, the region caption in the bottom of the affected region specifies the amount in parentheses. In an example below, gain was cut by 2dB.
Normalizing Audio Regions
Audio normalization is a way to bring the amplitude of a signal to a target level by applying the same amount of gain to an entire piece of audio data. Unlike other ways to treat perceived loudness, such as compression, normalization retains the original dynamic range.
Normalization is a common step in exporting an entire project to an audio file. However, with Ardour, it's also possible to normalize some of the regions. This effectively changes the region gain setting, the same one that the boost/cut gain commands change.
Region-level normalization in Ardour can be accessed via the Region > Gain > Normalize… menu command
The normalization tool locates the part of the audio region that has the largest amplitude and adjusts the whole region so that that part matches the normalization target. In an example below, an audio region was normalized to -3dBFS, which led to -2.5dB gain reduction, and this is the part with the largest amplitude hitting the exact -3dBFS target:
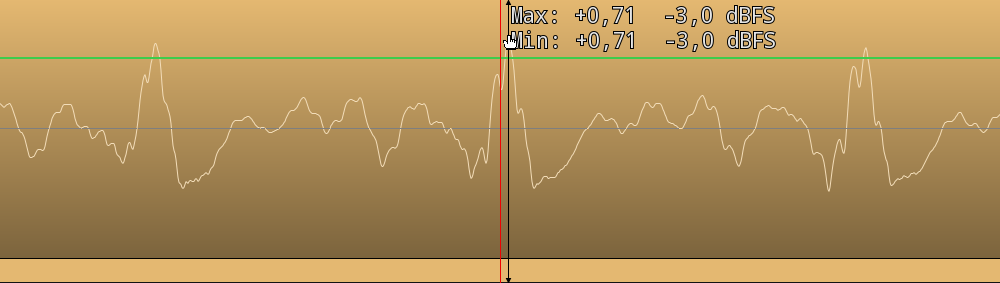
It's also possible to apply additional constraints by analyzing perceieved loudness of the material. The first option is to constraint root mean square (RMS) to a certain amplitude value. The second option is to constrain loudness units (LUFS) to a certain value.
The normalization tool will use the peak amplitude value, but will also correct the calculated gain adjustment when the constraint demands that. In the example below the same region as in example above was normalized to the same peak amplitude of -3dB but with an additional constraint of -21LUFS. The normalization tool took the peak amplitude into account and made sure it wouldn't exceed the target value of -3dBFS, then adjusted the region gain further from -2.5dB to -3.3dB to meet the LUFS constraint demands. This resulted in the peak amplitude hitting -4.2dBFS rather than the target -3dBFS.
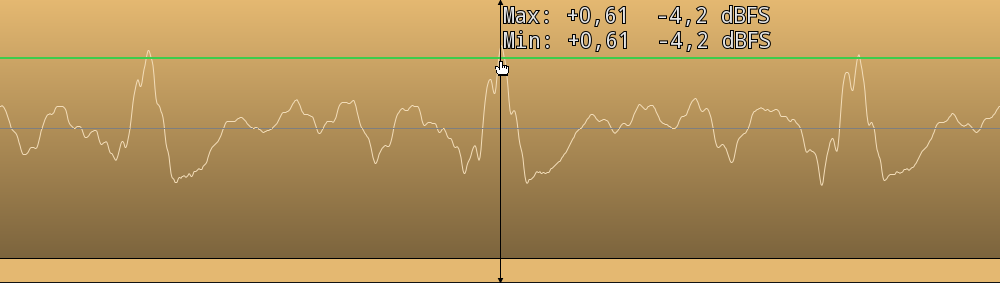
Resetting Gain
To reset gain correction for a region entirely you can either set it to 0 in the region properties dialog or use the Region > Gain > Reset Gain menu command.
Gain Envelopes
In Ardour, every audio region has a gain envelope. It is a form of automated gain change that is embedded in the region. The gain envelope remains associated with the region when it is moved or copied.
Region Gain envelope is only visible in the Draw and Edit modes. Clicking on the Draw tool will cause all the gain envelopes on all regions to show themselves. These will appear as lines with square dots (control points) at the beginning and end of each region. The vertical axis represents gain, with the top of the region representing +6dB and the bottom representing -inf dB (silence). By default, the line starts and ends at 0dB; the control points can be moved up and down to change the amount of gain at that point.
Gain follows the line between control points continuously and accurately during playback, and adjusts the gain for that region accordingly. Unlike fader gain automation, region-gain is not smoothed to prevent zipper-noise or amplitude modulation.
Manipulating Gain Envelopes
The default envelope is neutral (0dB) and disabled (gray line). Changing the gain by dragging any of the two existing points or adding new points in draw mode automatically enables the envelope. Clicking anywhere in the region where there are no existing control points adds a control point to the envelope; it will appear on the line at the X-axis of the mouse's current position in the region.
Region gain envelope can be disabed for selected regions via Region > Gain > Envelope Active.
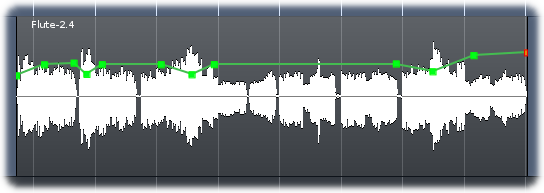
Once added, a control point can be Left clicked and dragged to the desired location. Hovering over a control point will show its current level in dB. Left clicking a control point and pressing Delete, or Right clicking a control point deletes it.
Playlists
Understanding Playlists
A playlist is a list of regions ordered in time. It defines which parts of which source files should be played and when. Playlists are a fairly advanced topic, and can be safely ignored for many types of audio production. However, the use of playlists allows the audio engineer more flexibility for tasks like multiple takes of a single instrument, alternate edits of a given recording, parallel effects such as reverb or compression, and other tasks.
Each audio track in Ardour is really just a mechanism for taking a playlist and generating the audio stream that it represents. As a result, editing a track really means modifying its playlist in some way. Since a playlist is a list of regions, most of the modifications involve manipulating regions: their position, length and so forth. This is covered in the chapter Working With Regions.
This page covers some of the things that can be done with playlists as objects in their own right.
Tracks are not Playlists
It is important to understand that a track is not a playlist. A track has a playlist. A track is a mechanism for generating the audio stream represented by the playlist and passing it through a signal processing pathway. At any point in time, a track has a single playlist associated with it. When the track is used to record, that playlist will have one or more new regions added to it. When the track is used for playback, the contents of the playlist will be heard. The playlist associated with a track can be changed at (almost) any time, and tracks can even share playlists.
Some other DAWs use the term "virtual track" to define a track that isn't actually playing or doing anything, but can be mapped/assigned to a real track. This concept is functionally identical to Ardour's playlists. We just like to be little more clear about what is actually happening rather than mixing old and new terminology ("virtual" and "track"), which might be confusing.
Playlists are Cheap
One thing to bear in mind is that playlists are cheap. They do not cost anything in terms of CPU consumption, and they have very minimal efforts on memory use. So generating new playlists whenever needed is recommended. They are not equivalent to tracks, which require extra CPU time and significant memory space, or audio files, which use disk space, or plugins that require extra CPU time. If a playlist is not in use, it occupies a small amount of memory, and nothing more.
Playlist Operations
In the track header (editor window, left pane) is a button labelled p (for "Playlist"). A click on this button displays the following menu:
| (Local Playlists) | Shows all of the playlists associated with this track, and indicates the currently selected playlist |
|---|---|
| Select… | Allows switching playlists, either for this track or multiple ones (more about that later) |
| Rename… | Displays a dialog to rename the current playlist |
| New Playlist… | Creates a new empty playlist, and the track switches to the new playlist |
| Copy Playlist… | Creates a new playlist that is an independent copy of the current playlist; the track switches to the new playlist |
| Clear Current | Removes all regions from the current playlist |
| Advanced | |
| Copy from … | Creates a new playlist that is an independent copy of a playlist from this track or another one; the track switches to the new playlist |
| Share with … | Uses a playlist from this track or another one; any edit to this playlist will be reflected on the other track(s) that use this playlist |
| Steal from … | Uses a playlist from this track or another one and removes it from the local playlists in the "robbed" track. Otherwise, behaves like "Share with …" |
When Stealing a playlist, it does not remove the playlist from the robbed track. The playlist now belongs to the current track, and the robbed track uses the playlist as a shared playlist with the new owner. Hence, this playlist won't be in the (Local Playlists) list from the robbed track anymore, but will now appear in the current track's local playlists.
Sharing vs copying Playlists
It is entirely possible to share playlists between tracks. The only slightly unusual thing that should be noted when sharing is that edits to the playlist made in one track will magically appear in the other. It is an obvious consequence of sharing. One application of this attribute is parallel processing, described in Playlist Use Cases.
To avoid this kind of behaviour, and nevertheless use the same (or substantially the same) playlist on two tracks, the desired playlist must be copied and not shared. This generates an independent copy of it for that track, which can then be edited without affecting the original.
Select menu

In its most basic use, the Select … menu allows:
When used for Only this track/group, in the selector below, it is the same as using the New Playlist … and Copy Playlist … from the Playlist menu.
But the selector also allows to apply these operation (changing playlist, creating an empty new one or creating an independent copy) for Rec-armed tracks or ALL tracks. This can be useful in a recording situation with many microphones and multiple takes to deal with.
These playlist operations, on multiple tracks, are also available directly on the secondary toolbar in Recorder mode.
Playlist Usecases
Using Playlists for Parallel Processing
One of the uses of playlists is to apply multiple effects to the same audio stream. For example, applying two different non-linear effects such as distortion or compression to the same audio source (linear effects can be just applied one after the other in the same track) can be done by creating a new track, applying the original track's playlist, and then applying effects to both tracks independently.
The same result could be achieved by feeding the track to multiple busses which then contain the processing, but this increases the overall latency, complicates routing and uses more space in the Mixer window.
Using Playlists for "Takes"
Using Playlists for takes is a good solution when one needs the ability to edit individual takes, and select between them.
Each time a new take is started, a new playlist should be created with p > New. Thus, later, any previous or later takes can be selected as desired.
Creating a composite edit from multiple takes, can be achieved either:
Using Playlists for Multi-Language Productions
The same approach as for takes is useful when recording or editing content in multiple versions, such as dubbed movie dialog in several languages: having all versions on the same track allows to apply the same processing, making it easy to switch language before exporting the session.
Rhythm Ferret
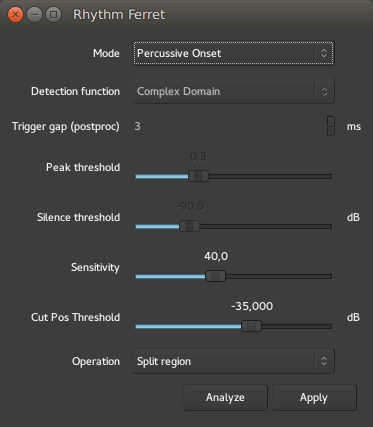
The Rhythm Ferret is a dedicated tool to speed up the usually labor intensive task of slicing and adjusting a sound region to match a specific time grid. It is especially useful for drum tracks, either to match a different tempo, or to adjust a slightly out of tempo performance.
It is not limited to this use though, as it supports both percussive and note type detection, and can be used on melodic material too.
Accessing the Rhythm Ferret
The Rhythm Ferret window can be accessed by right clicking any audio region, then Name_Of_The_Region > Edit > Rhythm Ferret.
Once the window is open, selecting any region will make it the focus of the Rhythm Ferret's detection, hence allowing to process multiple regions sequentially without reopening the window each time.
The window itself is made of:
The "Mode" selection
As the Rhythm Ferret is able to detect both percussive hits and melodic notes, it is important to choose the best suited mode for the considered material, so that Ardour can perform the detection with the greatest accuracy :
The Percussive Onset mode
In this mode, only two parameters are active:
| Sensitivity (%) | The proportion of the samples that must exceed the energy rise threshold in order for an onset to be detected (at frames in which the detection function peaks). This roughly corresponds to how "noisy" a percussive sound must be in order to be detected. |
|---|---|
| Cut Pos Threshold (dB) | The rise in energy amongst a group of samples that is required for that to be counted toward the detection function's count. This roughly corresponds to how "loud" a percussive sound must be in order to be detected. |
As those parameters are very material-related, there is no recipe for a perfect match, and a good peak detection is a matter of adjusting those two parameters by trial and error, and trying using the Analyze button after each try.
Vertical grey markers will appear on the selected region, showing where Ardour detects onsets as per the parameters. This markers can be manually adjusted, see below.
The Note Onset Mode
In the Note Onset mode, more parameters are active:
| Detection function | The method used to detect note changes. More on this below. |
|---|---|
| Trigger gap (postproc) (ms) | Set the minimum inter-onset interval, in milliseconds, i.e. the shortest interval between two consecutive onsets. |
| Peak threshold | Set the threshold value for the onset peak picking. Lower threshold values imply more onsets detected. Increasing this threshold should reduce the number of incorrect detections. |
| Silence threshold (dB) | Set the silence threshold, in dB, under which the onset will not be detected. A value of -20.0 would eliminate most onsets but the loudest ones. A value of -90.0 would select all onsets. |
The Detection function, used in Note Onset mode to choose the mathematical strategy used to detect the note changes, is user-selectable:
| Energy based | This function calculates the local energy of the input spectral frame |
|---|---|
| Spectral Difference | Spectral difference onset detection function based on Jonathan Foote and Shingo Uchihashi's "The beat spectrum: a new approach to rhythm analysis" (2001) |
| High-Frequency Content | This method computes the High Frequency Content (HFC) of the input spectral frame. The resulting function is efficient at detecting percussive onsets. Based on Paul Masri's "Computer modeling of Sound for Transformation and Synthesis of Musical Signal" (1996) |
| Complex Domain | This function uses information both in frequency and in phase to determine changes in the spectral content that might correspond to musical onsets. It is best suited for complex signals such as polyphonic recordings. |
| Phase Deviation | This function uses information both energy and in phase to determine musical onsets. |
| Kullback-Liebler | Kulback-Liebler onset detection function based on Stephen Hainsworth and Malcolm Macleod's "Onset detection in music audio signals" (2003) |
| Modified Kullback-Liebler | Modified Kulback-Liebler onset detection function based on Paul Brossier's "Automatic annotation of musical audio for interactive systems" (2006) |
Ardour defaults to Complex Domain, which usually gives good result for harmonic material.
Manual adjustment

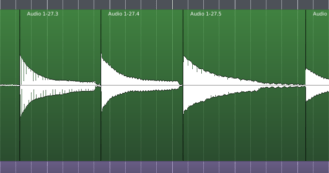
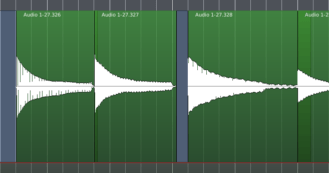
Using the Rhythm Ferret consists usually in finding the right parameters to split the audio, by adjusting them and clicking the Analyze button. Each time an analysis is run, Ardour erases the previous results, and creates grey markers on the region according to the parameters. Those markers can be manually dragged with the LEFT mouse button to adjust their positions.
Once the markers are suitably placed, the second button in the down hand side
of the Rhythm Ferret window allows to Apply the operation.
At the moment of writing, only the
Those regions can then be manually aligned, or have their sync points set to the closest grid (as per the Grid settings in effect), by selecting all the regions, and using the right click then Selected Regions > Position > Snap position to grid.
MIDI
MIDI Overview
MIDI (or Musical Instrument Digital Interface) is a method of representing musical concepts in a form suitable for use in computers. MIDI defines 16 different channels, along which messages are passed to instruments or synthesizers that understand the MIDI protocol; notes are played by sending appropriately crafted NoteOn messages that are followed by NoteOff messages. MIDI channels can be manipulated with special controller messages to alter the pitch of instruments, or their volume or timbre, and they can also tell the instrument or synthesizer what sound to play using Program Change and Bank Select messages.
Typically Program Change and Bank Select messages are collectively referred to by the singular term Patch Change.
Key features of Ardour MIDI handling
Notable differences compared to other DAWs and sequencers
Creating MIDI Tracks
A MIDI track is created much like any other track (see Adding Tracks, Busses and VCAs). However, there are a few things that are unique to creating MIDI tracks.
When adding a MIDI track using the Add Track/Bus/VCA dialog, the MIDI Tracks item should be highlighted in the Template/Type list on the left. This will enable the Instrument combobox while disabling the Configuration and Record Mode comboboxes.
The Instrument combobox allows the selection of a plugin for the track to be created that will generate audio in response to MIDI data; if the track is intended to drive an external device then -none- should be selected instead.
Creating MIDI Regions
Although recording MIDI on an existing track is a common way to create new MIDI regions, it is often desirable to create new MIDI regions as part of the editing and/or arranging process.
A new MIDI region can be created with the mouse by entering Draw Mode (entered by pressing the d key or clicking on the Draw tool) and then left-clicking anywhere in an existing MIDI track; this will create a region that is one bar long. If longer regions are desired, they can be created by left-clicking anywhere in an existing MIDI track and dragging the mouse until the region is the desired length.
Once created, all the typical methods of editing audio regions will work the same as they do for MIDI regions. See Editing Regions and Selections for more details.
MIDI Editing
Ardour's handling of MIDI and how it allows the editing of MIDI data differs in key ways from most other DAWs and MIDI sequencers. Also, unlike its handling of audio data, the editing of MIDI data in Ardour is necessarily destructive by nature.
Key features of Ardour MIDI editing
Pianoroll Window
Pianoroll windows are a conventional user interface for editing MIDI data. It's possible to open several regions for editing in dedicated pianoroll windows at a time:
The user interface largely resembles that of in-place editing in the main window on the timeline.
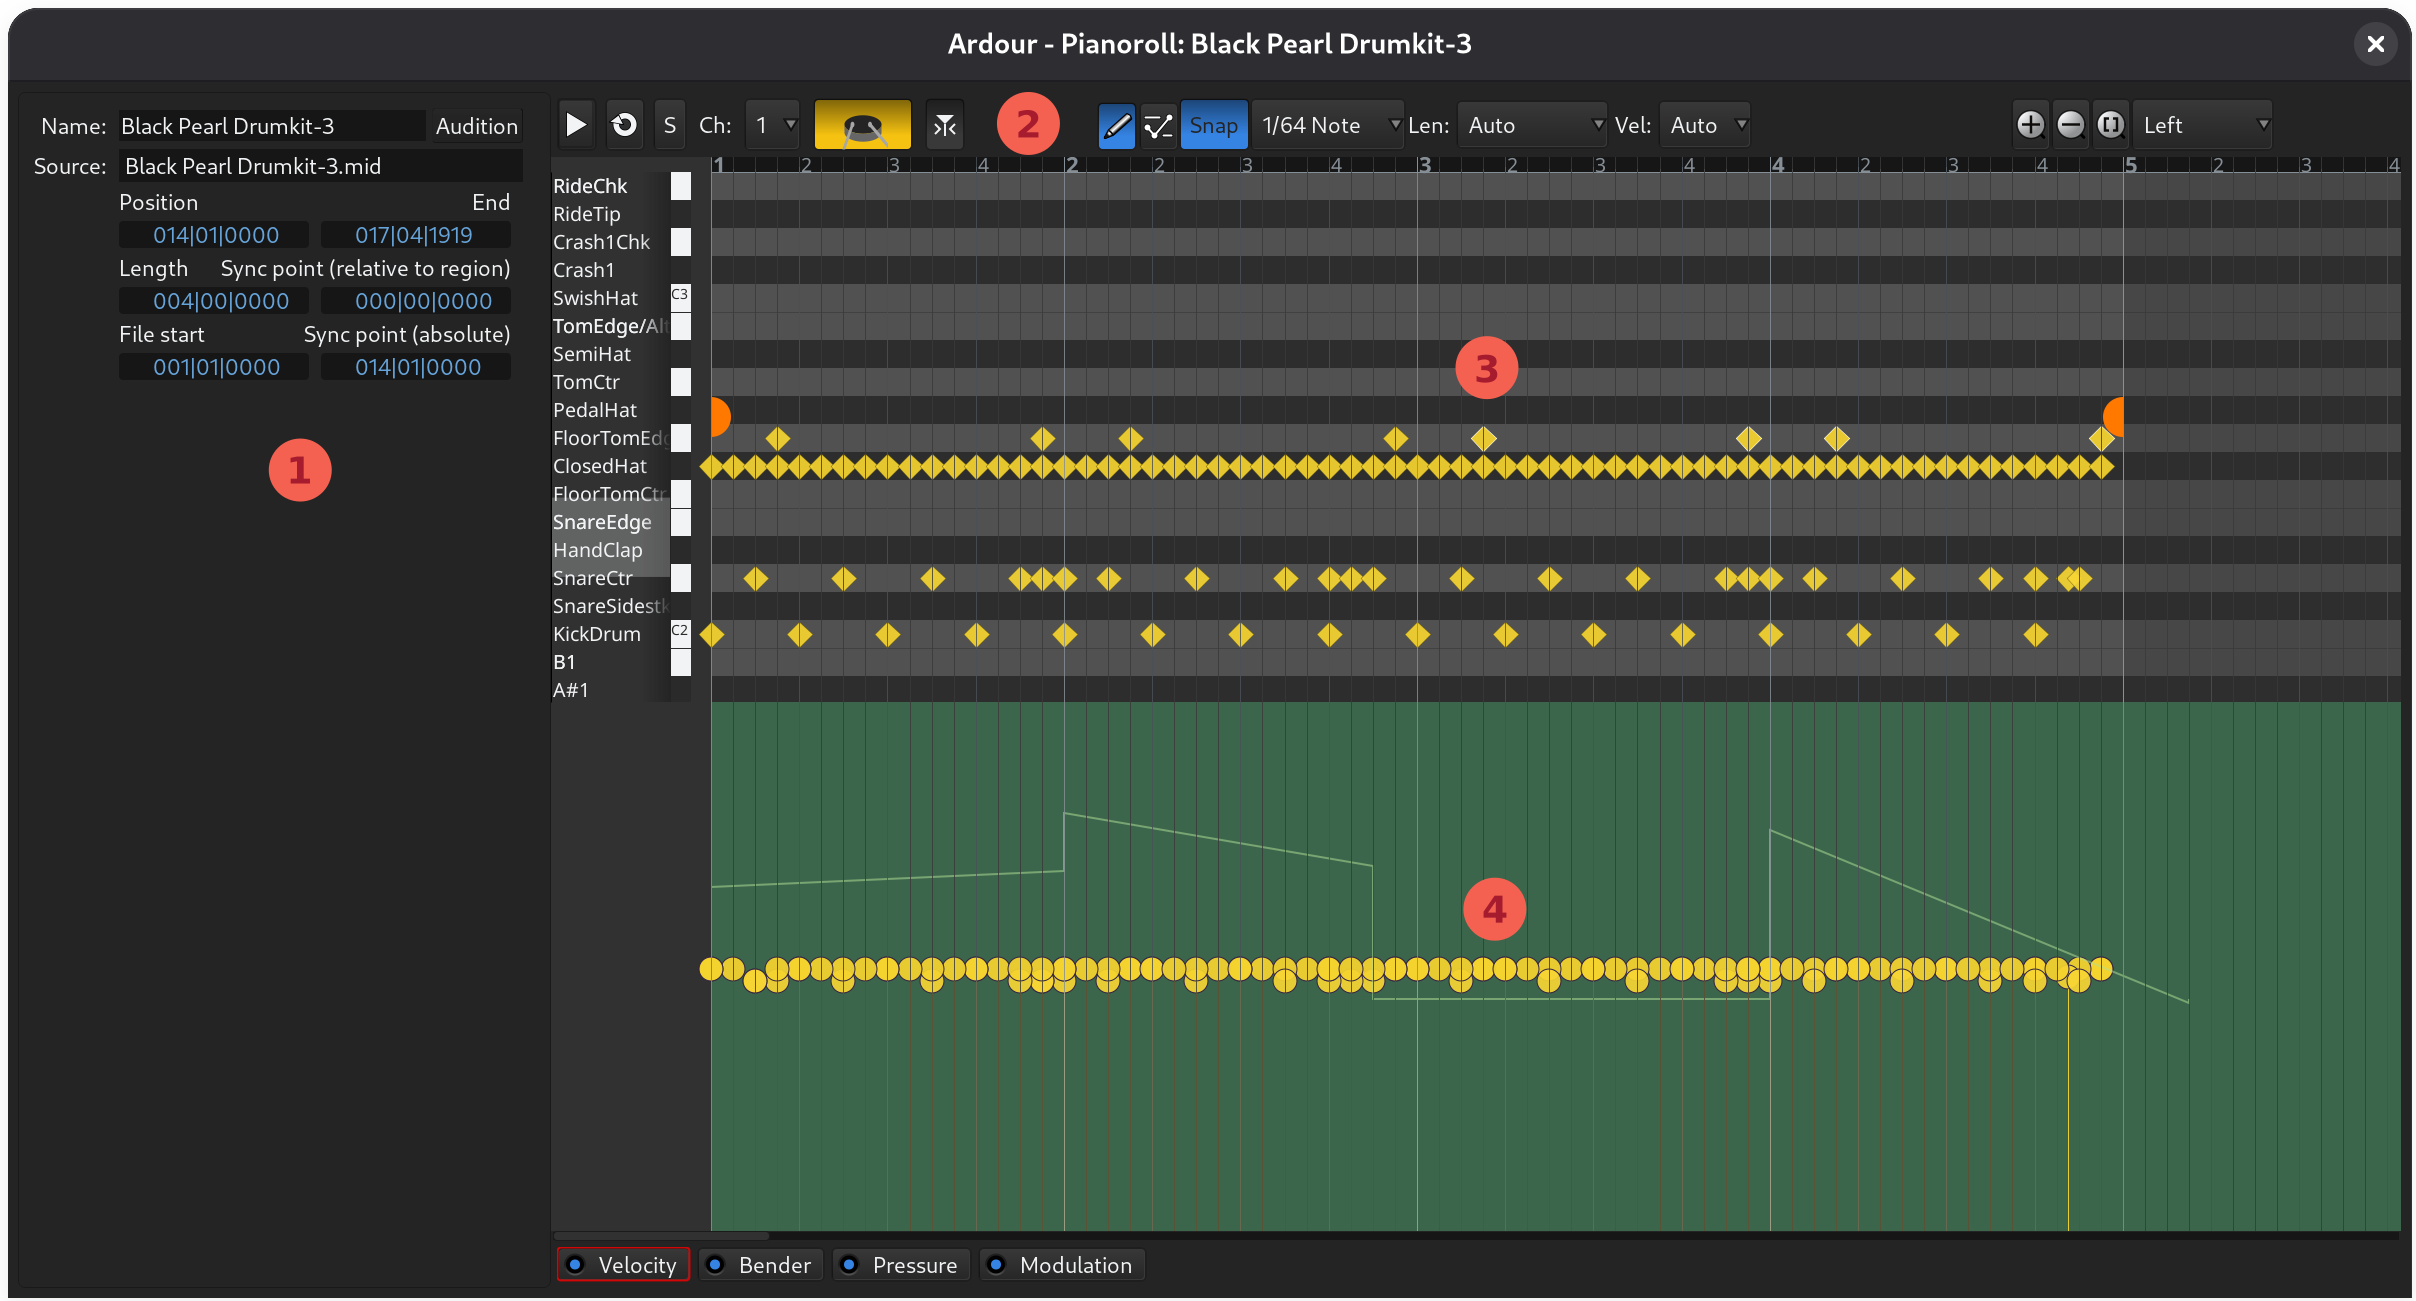
MIDI Inspector pane
The MIDI Inspector pane contains three section:
The pane is hidden by default. To enable it, click on this button in the toolbar:
Chord Editing
The Chord Editing part of the pianoroll sidebar helps insert new chords to MIDI regions and edit existing chords.
For a guide on adding and editing chords, see Adding and Editing Chords.
Quantize
The Quantize section of the pane help quickly quantize notes to a specific grid unit for captured live MIDI performance.

The user interface is the same as in the separate Quantize dialog used in the inline MIDI editor of the main Editor window. To apply quantization in the pianoroll window, select notes, set quantization parameters, then hover over the notes, and press Q.
Region properties
Displays essential information about the MIDI region:
Editor toolbar
The editor toolbar provides playback, editing, and zoom controls.
Playback controls:
Note display controls:
Note editing controls:
Zoom controls:
Note area
This areas displays all editable notes and provides control for panning between staves and tweaking the beginning and the end of the region.
The area on the left controls the visible note range. See here for the detailed explanation how to use the widget.
The orange handles on the left and on the right control the start and the end of the region's visible part. For example, dragging the orange start marker (on the left) to the right is equivalent to using the Grab tool to pick the left side of the region and trim the beginning of the region.
Drawing and editing MIDI notes works the same way as in the main window:
Automation area
This area displays note velocity and controllers and is disabled by default. The area can display data from multiple controllers, stacked above each other.
To enable or disable an automation lane, click the A button at the right end of the pianoroll toolbar and select a controller.
You can toggle multiple lanes by hovering over them one by one and pressing spacebar on your keyboard.
To draw new automation or edit existing one, use the Draw and Internal Edit modes just like when you do edit automation in the main Editor window.
To clear all automation in a lane, click on the respective
Editing Multiple MIDI Regions
Ardour allows to open and edit multiple regions in the same pianoroll interface. To do that, follow these steps
This will open one MIDI region as the currently active one and display the contents of other regions in faded colors for reference.
The name of the currently active MIDI region is displayed at the top in a drop-down list:
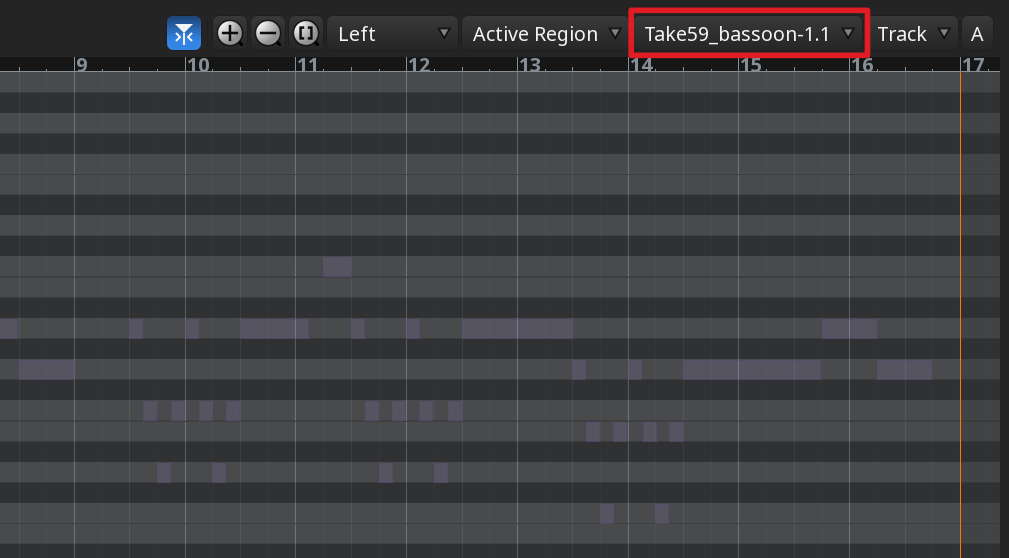
Clicking on the drop-down list displays the full list of MIDI regions you had selected when you opened the pianoroll interface. Choosing a different region will make it the active one, inactive regions' contents will be rendered in faded colors.
In cases when notes are neatly spread out across octaves between regions, it may be a good idea to enable viewing and editing all regions at once. To do that, click on Active Region in the toolbar and select All Regions instead:
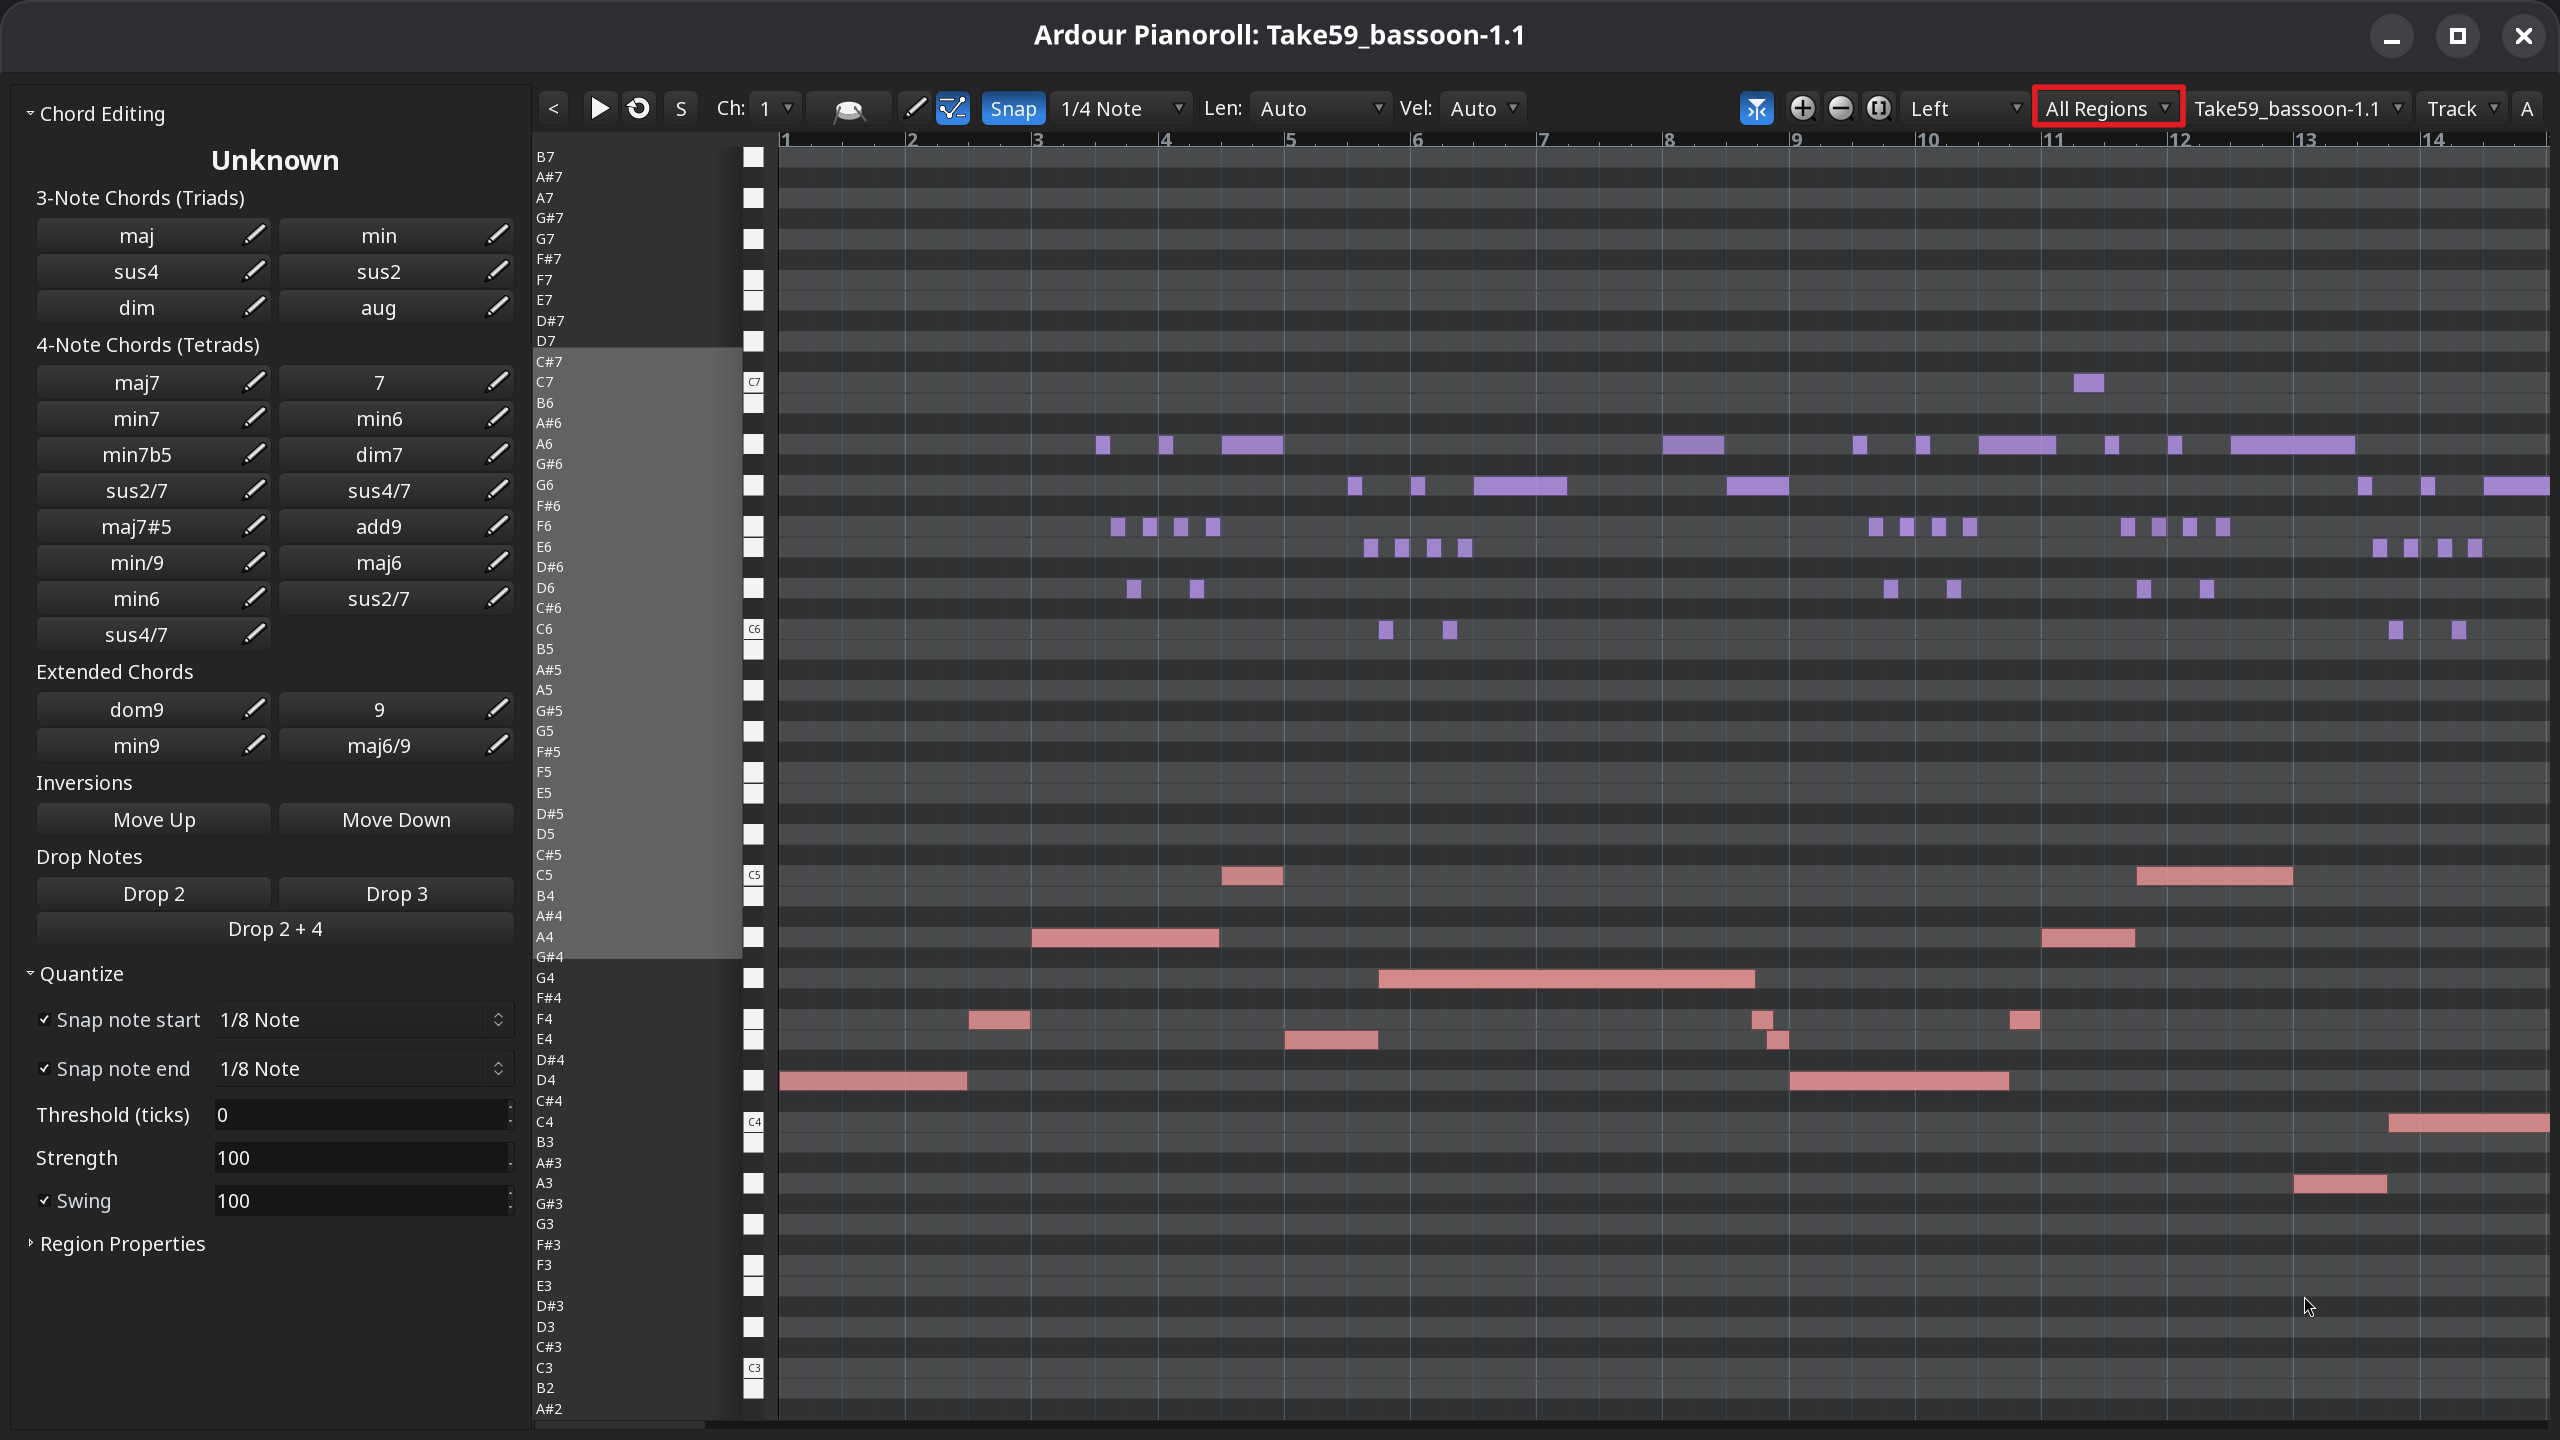
Controlling Visible Note Range
The visible note range in a MIDI track can be controlled in two principle ways: the note scroomer, or the scroll wheel of your mouse.
Setting the defaults
The default note range shown in new MIDI tracks is controllable in
Edit > Preferences > MIDI
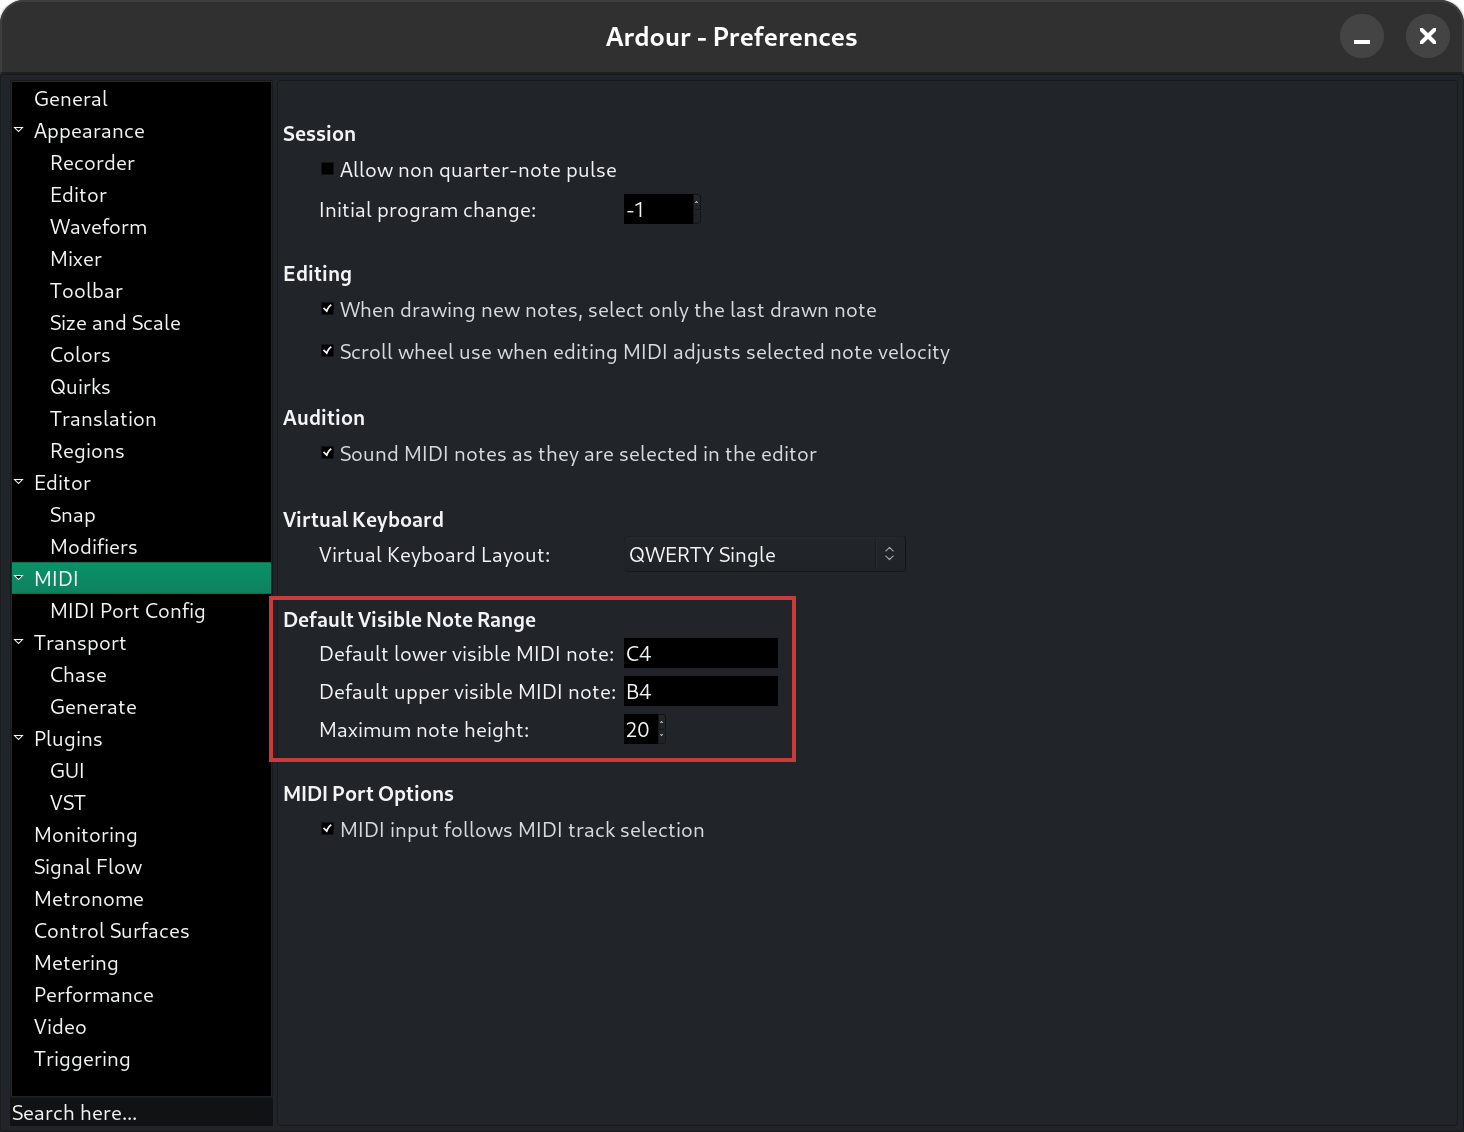
Using the scroomer
The scroomer offers two kinds of control.
Shift the note range
"Grab" the scroomer in the middle and move it up or down—this adjusts the absolute note range displayed up or down.
Expand or shrink the note range
"Grab" the top or bottom handle of the scroomer, and move that up or down—this adjusts the extent of the note range displayed.
Using your scroll wheel
While in internal edit mode (used for editing MIDI), several scroll operations can be used to control the visible note range:
Adding New Notes
MIDI notes can be added a few different ways in Ardour:
Using the mouse
Drawing notes with the mouse requires that a MIDI track exists, and a blank MIDI region has been created in this track.
In the Draw Mode new notes can be added with a click or a click-and-drag: a mouse click creates a note at the pointer location (or the nearest grid anchor if grid is enabled), and its duration is one Grid unit. A mouse drag creates the note like a click does, but allows continuously setting the duration of the note until the mouse button is released.
It's also possible to brush notes by pressing Shift, clicking, and dragging to the right. New notes will be painted at an interval defined by global quantization (Edit > Snap & Grid > Global Quantization), with the length defined in the editor toolbar (see below).
The toolbar available in the Draw mode helps drawing notes of exact length, in a certain MIDI channel, with predefined velocity:

While the Velocity drop-down list only displays presets, you can hover it and use mouse wheel scrolling to increment the current value by 1. Scrolling above the other two drop-down lists will cycle through the presets.
The Auto option in three drop-down lists works differently in all three cases:
| Length | The length will be defined by the grid snapping setting |
|---|---|
| Channel | This value will be inherited from the closest note |
| Velocity | The value will be an interpolation between two closest notes, the position of the newly added note relative to either of the two notes will also be taken into consideration |
Using Step Entry
The Step Entry editor allows to enter a melody in sequence along time, using a virtual keyboard and specific controls. It can be a very handy and fast way to create MIDI lines, in a kind of typewriter way, all the more when using its different keyboard shortcuts.
The Step Entry window is shown by right clicking the record button in the MIDI track header and selecting Step Entry. This will automatically create a MIDI region to type into at the playhead position, which will automatically expand at each step.
Using the Virtual Keyboard
The Virtual MIDI Keyboard — or a real MIDI keyboard plugged in as the tracks input — can be used to record MIDI, as a microphone would record audio.
It can be started by choosing the Window > Virtual Keyboard menu. Exactly like for audio recording, the track(s) must be armed for recording, the main record engaged, then the transport started. As for the Step Entry, a MIDI region will be auto-generated at the playhead position, and expanded as long as the recording lasts.
Handling Overlapping Notes
Every MIDI note consists of two messages, a NoteOn and a NoteOff. Each one has a note number and a channel (also a velocity, but that isn't relevant here). The MIDI standard stresses that it is invalid to send a second NoteOn for the same note number on the same channel before a NoteOff for the first NoteOn. It is more or less impossible to do this with a physical MIDI controller such as a keyboard, but remarkably easy to trigger when editing in a DAW—simply overlapping two instances of the same note will do it.
Ardour offers many options for how to deal with instances where two instances of the same note overlap. Which one to use is a per-session property and can be modified from Session > Properties > Misc > MIDI Options.
| never allow them | Edits that would create note overlaps are not allowed |
|---|---|
| don't do anything in particular | Ardour leaves overlapping notes alone—the behaviour of a MIDI receiver (plugin or hardware) is undefined |
| replace any overlapped existing note | When one note is moved to overlap another, remove the one that wasn't being moved |
| shorten the overlapped existing note | When one note is moved to overlap another, shorten the one that wasn't moved so that there is no overlap |
| shorten the overlapping new note | When one note is moved to overlap another, shorten the one that was moved so that there is no overlap |
| replace both overlapping notes with a single note | When one note is moved to overlap another, merge them both to form one (longer) note |
Changing the option in use will not retroactively make changes—it will only affect new note overlaps created while the option remains chosen.
Ardour does not check for note overlaps across tracks or even across regions. Dealing with the consequences is up to the user.
Note Selection
Navigating/Selecting notes with the keyboard
tab selects the next note in a MIDI region, while tab selects the previous note. Holding down the key as well prevents previously visited notes from being deselected.
Selecting notes with the mouse
While in Internal Edit Mode, any note can be clicked on to select it. Once a note has been selected, left-clicking on another note selects all notes between the first note selected and the second one. Adding or removing a note to or from the selection is done by left-clicking it. Clicking and dragging outside of a note will rubberband select any notes enclosed by the selection rectangle; holding down the key will prevent any previously selected notes from being deselected.
In any mode, left-clicking on a note on the Scroomer (the piano header of the track, see MIDI Track Controls) will add all occurrences of that note to the selection, while middle-clicking will only select/deselect all occurrences of that note, clearing the previous selection. Scroomer selections work on all MIDI regions of a track at once.
Listening to Selected Notes
If Edit > Preferences > MIDI > Sound MIDI notes as they are selected is enabled, Ardour will send a pair of NoteOn/NoteOff messages through the track as notes are selected. Assuming there is an appropriate device or synthesizer attached to the track, these should be audible.
Note Cut, Copy and Paste
While in Internal Edit Mode, selected notes can be cut, copied, pasted, or deleted using the following keyboard shortcuts:
| Cut | x |
|---|---|
| Copy | c |
| Paste | v |
| Delete | delete |
Pasted notes will appear, in the region they were cut from, at the Edit Point.
Note Splitting and Joining
It is possible to evenly split (tuple) and join notes in both the Draw and the Internal Edit modes.
Splitting notes
To split a note or a group of notes into tuplets, first select the notes.
Press S to split selected notes into two tuplets. In the example below, each note with a duration of two whole notes will be split into two notes, each with a duration of one whole note. For each newly created note, Ardour will display its velocity inherited from the original notes.
Repeatedly pressing S will increment the amount of tuplets. Thus, the next key press will divide the original note into 3 notes 2 and 2/3 beats long each, then 4 notes 2 beats long each etc. Ardour will display a temporary message at the bottom of the MIDI region to tell how many subdivisions have been created.
To stop incrementing the amount of subdivisions, deselect notes by clicking elsewhere in the MIDI region or by pressing Esc.
Joining notes
To join several notes into one, select the notes, then press J:
If non-adjacent notes are selected, and there is a blank space between them, the note will extend from the beginning of the earliest note to the end of the latest note and fill the blank spaces with itself:
If non-adjacent notes are selected, and there is at least one note between them, newly created note will overlay the existing note:
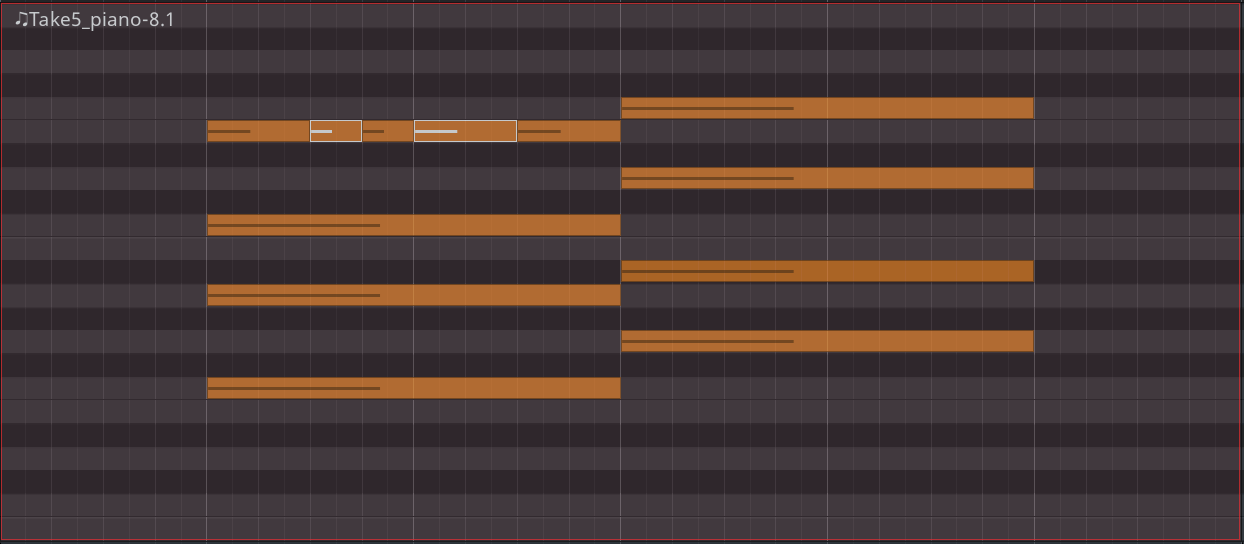
Adding and Editing Chords
The Chord Editing part of the pianoroll sidebar helps insert new chords to MIDI regions and edit existing chords.
The pianoroll sidebar is hidden by default for both pianoroll windows and the bottom region editor. To enable it, click on this button in the toolbar:
The controls in Chord Editing are separated into the following groups:
| Group | Can create new chords | Can edit existing chords |
|---|---|---|
| 3-Note Chords (Triads) | Yes | Yes |
| 4-Note Chords (Tetrads) | Yes | Yes |
| Extended Chords | Yes | Yes |
| Inversions | No | Yes |
| Drop Notes | No | Yes |
Adding chords
To add a new 3-note, 4-note, or an extended chord, follow these steps:
The rest of the chord's note will be added as soon as you stop drawing the root note.
Editing chords
Ardour provides three ways to manipulate the existing chords in MIDI regions: changing them to other chords (swapping), inverting them, and dropping notes.
Swapping chords
To change an existing chord to a different one, follow these steps:
Note that you can freely switch between 3-note, 4-note, and extended chords, e.g., go from a 3-note chord to a 5-note chord and vice versa.
Inverting chords
You can invert chords by either moving the lowest pitch up by 1 octave
(
To invert a chord, follow these steps:
Dropping notes
You can transform tight, closely-spaced chords into wider, more open ones. Ardour provides three options to do that:
To drop notes, follow these steps:
Changing Note Properties
All details about selected notes can be viewed by context-clicking on them. The dialog that pops up also allows for the modification of all properties of the selected notes. Individual properties can also be modified more efficiently using the techniques described below:
| Moving notes | ← and → move selected notes earlier and later in time. |
|---|---|
| Changing pitch values |
↑ raises the pitch of the selected notes. ↓ lowers the pitch of the selected notes. If any of the selected notes are already at their minimum or maximum values, no changes will be made to them, to preserve their relative pitches. This can be overridden with . The default shift distance is one semitone. alters this to one octave. |
| Changing velocity values |
↑ increases the velocity of the selected notes.
↓ reduces the velocity of the selected notes. If any of the selected notes are already at their minimum or maximum values, no changes will be made to them, to preserve their relative velocities. This can be overridden with . Also, pressing v pops up a dialog that allows setting the absolute velocity value of all selected notes. Finally, the scroll wheel ⇑ ⇓ will also adjust notes in the same way as the arrow keys (note that, like the arrow keys, it only affects selected notes—not the note the pointer is over). |
| Changing channel | Pressing c brings up a dialog that allows viewing and/or altering the MIDI channel of the selected notes. If the selected notes use different channels, they will all be forced to the newly selected channel. |
| Changing start/end/duration |
To make the note longer, , (comma) will alter the start time of the note. . (period) will alter the end time of the note. To make the note shorter (move the start later, or end earlier), ,/. can be used. Whether shortening or lengthening the note, its length will be altered by the current grid setting. To change the start/end positions by 1/128th of a beat, the modifier must be added to these shortcuts. |
| Quantization | q will display the Quantize dialog to allow editing the current quantize settings, and then will quantize the selected notes. The default quantize settings are: quantize note starts to the current grid setting, no swing, no threshold, full strength. |
| Step Entry, Quantize, etc. | Refer to the Step Entry, Quantizing MIDI, etc. specific pages. |
Editing Velocity
Velocity lane
To open the velocity lane, right-click on the MIDI track header and select Automation > Velocity.
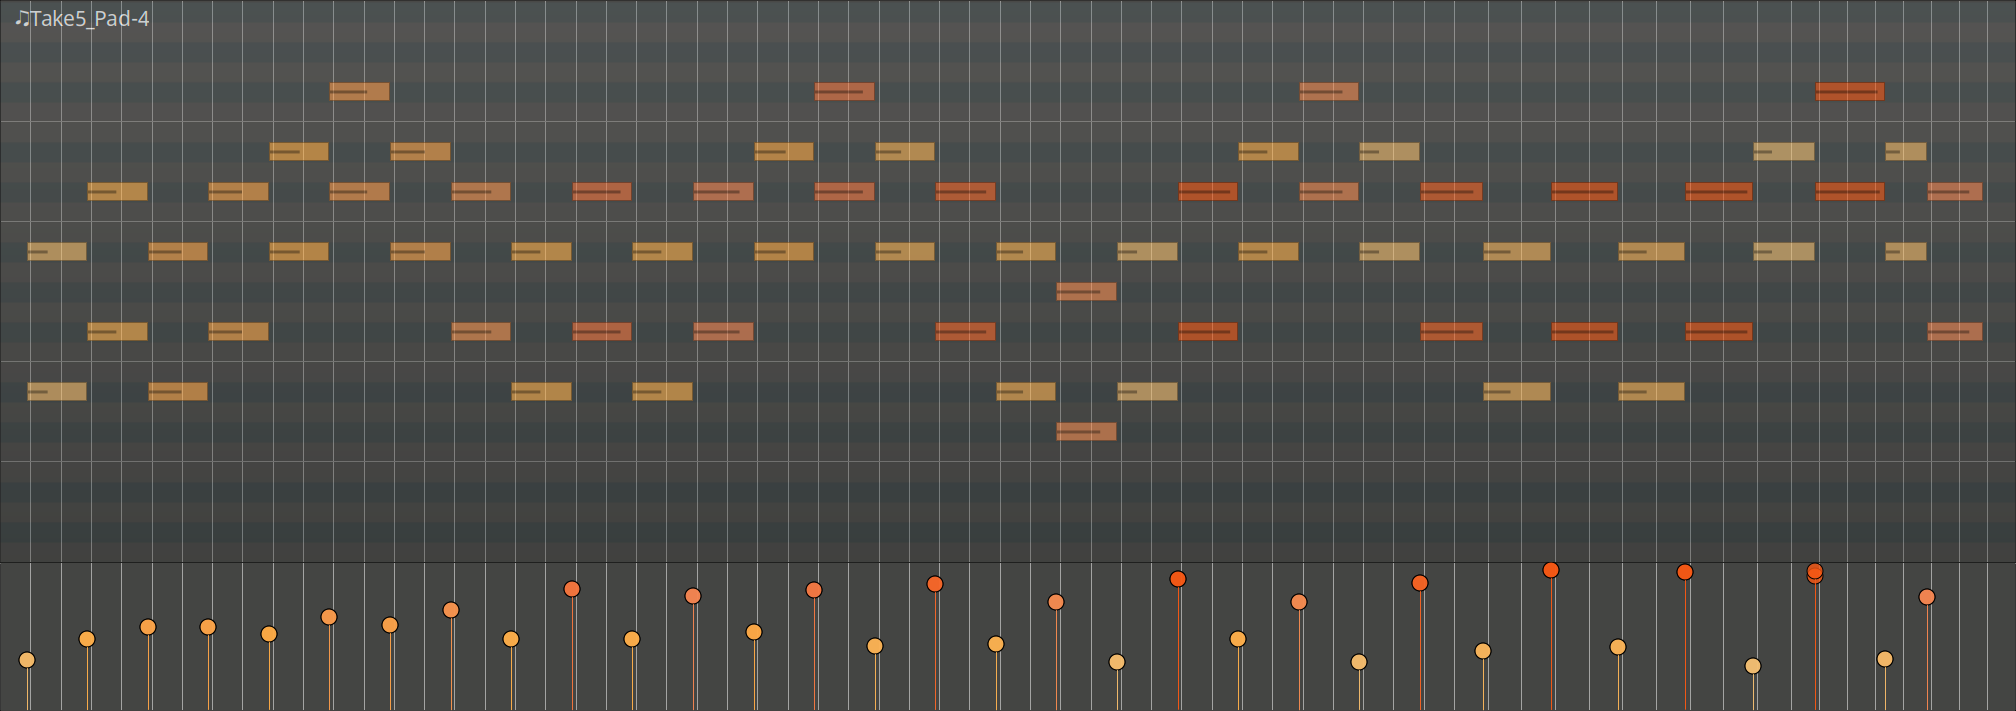
Each notes's velocity is represented as a lollipop-shaped object. Each lollipop object has two characteristics that represent the velocity value:
Editing single notes
To edit a single note's velocity on the timeline, click to select the note in either Draw or Edit mode, then scroll the mouse wheel up or down. The new value will be displayed in an overlay.
To edit a single note'velocity on the velocity lane, switch to the Edit mode, grab the note's velocity lollipop, then drag it up or down:
To edit a single note in a chord on the velocity lane, switch to the Edit mode, select the note in the timeline, then draw its velocity lollipop up or down:
Editing multiple notes
To edit velocities of multiple notes on the timeline, in the Edit mode, do a rubberband selection to select adjacent notes or press Ctrl to select non-adjacent notes (Shift will select entire chords), then hover one of the selected notes and rotate the mouse wheel up or down. Velocities will be adjusted in all selected notes relatively, i.e. by the same amount.
It's also possibly to edit the velocity of multiple notes in a MIDI region by drawing free or straight lines in the velocity lane.
To draw a free line, in Draw mode, click and draw the mouse pointer over the velocity lane from left to right:
To draw a straight line, in Draw mode, press and hold Ctrl, then click and drag the mouse pointer to draw a straight line. Once you get the line you expected, release the mouse button and then the Ctrl key.
Just like with automation lines, you can also combine free and straight lines in one go. Draw a free line, then press Ctrl to draw straight line, release the Ctrl key, continue drawing free lines, release the mouse button when you are'done drawing.
When multiple notes are selected on the pianoroll, free and straight lines in the velocity lane will only affect selected notes.
Patch Change
A Patch Change is Ardour's description for a combination of MIDI program change and bank select messages, that typically instruct a synthesizer or sampler to select a sound to use on any given channel. Patch changes are shown within MIDI regions as small rectangles or flags, with a vertical line showing where in the region the patch change will occur.
Inserting Patch Changes

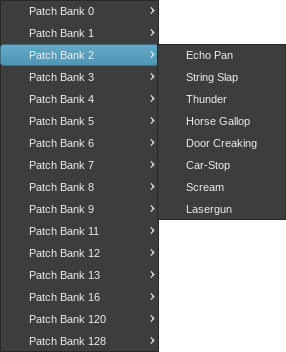
A patch change is inserted by first ensuring that the mouse is in Grab Mode, then right-clicking on the MIDI region where the patch change is desired, then selecting <Region Name> > MIDI > Insert Patch Change.... The desired patch is then chosen from the dialog that appears.
Inserted patch changes always appear in the selected region at the Edit Point.
Modifying Patch Changes
A patch change can be modified in Internal Edit Mode by right-clicking on it, then selecting the desired patch from the menu that appears. A patch change can also be modified by hovering the mouse pointer over the patch change to be modified and moving the mouse wheel until the desired program number is selected. The bank number can be modified similarly by holding down the key while moving the mouse wheel until the desired bank is selected.
Moving Patch Changes
A patch change can be moved, within the region in which it resides, by left-clicking it and dragging it to the desired location.
Removing Patch Changes
A patch change can be removed by holding down the key and then right-clicking on it.
Names for Patch Numbers: MIDNAM files
MIDNAM files assign human-readable names to the "sound coordinates" (Program Change, Bank Select) of MIDI synthesizers and devices. A number of MIDNAM files come bundled with Ardour; if the MIDNAM for a device is not included with Ardour, a custom MIDNAM file can be created for device in question.
Selecting a device
Selecting a MIDNAM is only possible if there is no MIDI synth on the track in question or the MIDI synth does not have a MIDNAM associated with it. In this case, it is possible to select the desired MIDNAM from a combobox in the MIDI track's header, usually directly below the track's fader. See MIDI Track Controls for more details.
Independent and Dependent MIDI Region Copies
When copying a MIDI region, Ardour has to decide whether to make the copy refer to the same data as the original or not. If it does refer to the same data, then editing either the copy or the original will affect the both of them. If it refers to an independent copy of the data then each one can be edited without affecting the other.
Changing dependent/independent copying for the entire session
Session > Properties > MIDI > MIDI region copies are independent can be used to control the default behaviour when making a copy of a MIDI region.
When enabled, every new copy of a MIDI region results in a copy being made of the MIDI data used by the region, and the new copy of the region will refer to that data.
When disabled, every new copy of a MIDI region will refer to the same MIDI data, and thus editing any copy will change the contents of all of them.
Changing the status of this option has no effect on the existing dependent/independent status of existing region copies.
Making an existing copy of a MIDI region independent
Right clicking on the MIDI region to be independent then selecting MIDI > Unlink From Other Copies makes it independent: the copy is now using its own version of the data, and edits to the copy will affect only the copy. Other copies will continue to share data.
Note that the copied data only covers the extent of the region when the copy is made. If the region was already trimmed and then a copy is made, an independent copy will have no access to data that is earlier or later than the bounds of the region it was copied from. Put differently, making an independent copy of a trimmed MIDI region only retains the visible part of it.
Quantizing MIDI

Quantizing a MIDI region, usually one recorded from a MIDI instrument, consists in perfectly aligning the notes with the grid by shifting the notes positions to the closest grid line. The result is a perfectly timed MIDI region, allowing to correct rhythmically poor performance.
This dialog is accessed via the Region > MIDI > Quantize... while having a MIDI region selected, or by right clicking a MIDI region, Name_Of_The_Region > MIDI > Quantize... or with the default 5 shortcut and includes:
| Snap note start | If checked, the start of the notes will be aligned to the grid as defined in the following combo-box (see below) |
|---|---|
| Snap note end | If checked, the end of the notes will be aligned to the grid as defined in the following combo-box (see below) |
| Threshold (ticks) | Defines how close from a grid point a note must be in order to be quantized. Notes farther than this number of ticks will not be affected. |
| Strength | Defines how close to its new position the note must be moved, as a percentage of the nominal distance (allowing for a non-perfect quantization, i.e. just making the performance rhythmically better without giving it a machine-generated feel) |
| Swing | Applies a swing to the midi notes, i.e. delays every 2nd note by this amount, to e.g. simulate a groovy drummer |
The grid selection combo boxes allow a choice between the current main grid, or many beat subdivisions.
Both note start and note end can be selected at once, resulting in a 2-pass quantization: the note starts are aligned to the grid (with or without the swing and Strength parameters), then their ends are aligned.
The swing is a value between 0 and 130, and is relative to the user-selected grid type: every note which is considered a second note (i.e. close enough to an odd grid line as per the threshold value) will be delayed by this number of ticks.
Transposing MIDI
A whole region, or multiple regions, can be transposed at once, with the help of the Transpose MIDI dialog, accessed by right clicking a region > name_of_the_midi_region > MIDI > Transpose… .
This very simple dialog allows to choose either a number of semitones to add or subtract to all the notes inside the region(s), and/or for more significant changes, octaves (12 semitones).
MIDI List Editor
The List Editor is a way to look at the MIDI data of a region, not graphically as they are displayed in the Editor, but in a tabular form. This way of seeing the MIDI data allows for quicker "debugging" of a MIDI region, and for fast non-graphical (i.e. no mouse involved) editing. The list has a vertical flow, i.e. the first events (in time) are at the top of the window, and the last are at the bottom.
It is accessed by selecting the Region > MIDI > List Editor… menu while having one MIDI region selected, or by Right clicking the MIDI region and choosing Name_Of_The_Region > MIDI > List Editor….
The window displays the following MIDI data:
| Start | the timestamp of the start of the note |
|---|---|
| Channel | the MIDI channel of the event |
| Num | The MIDI number of the note |
| Name | The MIDI name of the note, made of its English name and octave (e.g. "C4") |
| Vel | the velocity of the note, i.e. its volume, between 0 (silent) and 127 (full) |
| Length | duration of the note, either expressed as a number (in ticks, related to the tempo) or as a text (fraction of a beat, also related to the tempo) |
At the top of the window is a Sound Selected MIDI Notes button, which toggles playing a note as it is selected.
Each value can be manually modified, by left clicking it. However, the Name field is derived from the Number field, and cannot be edited. To change a note, its number must be changed, which will be reflected in the Name field.
Transforming MIDI with Mathematical Operations
Considering the numerical nature of MIDI events, it can be useful to transform a MIDI region by applying mathematical operations to it. Ardour makes this kind of powerful transformation very easy with the Transform tool. The tool makes possible things such as humanizing (randomizing the velocity, start time and duration of all the notes), creating arpeggios, automating tedious tasks, transposing, etc.
The Transform tool is accessed by right-clicking the MIDI region > name_of_the_region > MIDI > Transform….
First, the property to be modified in the Set field is selected, then the target value is changed using the two fields that follow. If more operands are desired, the + button is clicked to create new lines. Any superfluous line can be removed by clicking on the - button on the right side of the line to be removed. Finally, once everything is set as desired, the Transform button is pressed to apply the transformation.
In the image above, the Transform tool has been used to add a bit of humanization, by slightly changing the velocity of each note of the region by a random number between -19 and +19 from its original velocity. So the following three operations are applied:
Each note will trigger a unique calculation, where its velocity will be increased by a random number between 1 and 20, then decreased by a random number between 1 and 20. This will result in a new velocity being applied to the note, which will be the original velocity plus or minus a value <19.
The parameters that can be transformed are:
and the transformation can be based on any of the following:
The mathematical operators are:
While the Transform tool is powerful, it is not infallible. Things like division by zero (which does nothing), using the note's index and thinking that it starts at one (instead of zero), etc. can yield unexpected results.
MIDI Recording
ADD CONTENT PLEASE
Step Entry
Entering notes in Ardour can be done by using a connected MIDI device like a MIDI keyboard or pad controller, or by using the mouse. A third option, which provides for fine-grained control, precision and speed comes from using Ardour's Step Entry dialog.

The step entry dialog is accessed by right-clicking on the ● (Rec-Enable) button of the MIDI track to be edited and selecting Step Entry from the menu that appears.
Step editing and recording MIDI via the track's MIDI port cannot happen simultaneously.
The dialog (closely modelled on Logic's) contains:
Almost all actions in the step entry dialog can be driven directly from the keyboard, so that moving back and forth from the keyboard to the mouse is typically not necessary—even for complex data entry. The default key bindings are:
| ` (grave accent) | Set octave 0 |
| 1 to 9 | Set octave 1 to 9 |
| 0 | Set octave 10 |
| f1 | Set note length to whole |
| f2 | Set note length to half |
| f3 | Set note length to third |
| f4 to f8 | Set note length to quarter to sixtyfourth |
| a | Insert C |
| w | Insert C♯ |
| s | Insert D |
| e | Insert D♯ |
| d | Insert E |
| f | Insert F |
| t | Insert F♯ |
| g | Insert G |
| y | Insert G♯ |
| h | Insert A |
| u | Insert A♯ |
| j | Insert B |
| tab | Insert a one note length rest |
| tab | Insert a one grid unit rest |
| backspace | Moves the cursor back one note length |
| z | Set note velocity 𝆏𝆏𝆏 |
| x | Set note velocity 𝆏𝆏 |
| c | Set note velocity 𝆏 |
| v | Set note velocity 𝆐𝆏 |
| b | Set note velocity 𝆐𝆑 |
| n | Set note velocity 𝆑 |
| m | Set note velocity 𝆑𝆑 |
| , (comma) | Set note velocity 𝆑𝆑𝆑 |
| ↑ | Set next note velocity |
| ↓ | Set prev note velocity |
| ↑ | Set next note length |
| ↓ | Set prev note length |
| ' | Toggle triplet |
| . | Set single dotted |
| . | Clear dotted |
| | (bar) | Toggle chord |
The Virtual MIDI Keyboard
The Virtual Keyboard is a software MIDI instrument, similar to VMPK that can be used like a hardware musical keyboard would, to emit MIDI events.

It can be used to test or record MIDI notes or events, as the computer keyboard can be (and is, by default) mapped to the virtual MIDI keyboard. The keyboard layout can be chosen in the MIDI Preferences.
The lower part of the window is a piano keyboard. The current keyboard mapping is overlaid on the notes, as are the different C notes, indicating what octaves are shown.
The upper part comprises (from left to right):
MIDI Automation
ADD CONTENT PLEASE
MIDI automation works in a similar way to regular audio automation, but has a few key differences.
Pitch Bend & Aftertouch
Adding pitch bending or aftertouch can add a lot of subtlety to an otherwise plain sounding midi region and help humanize it.
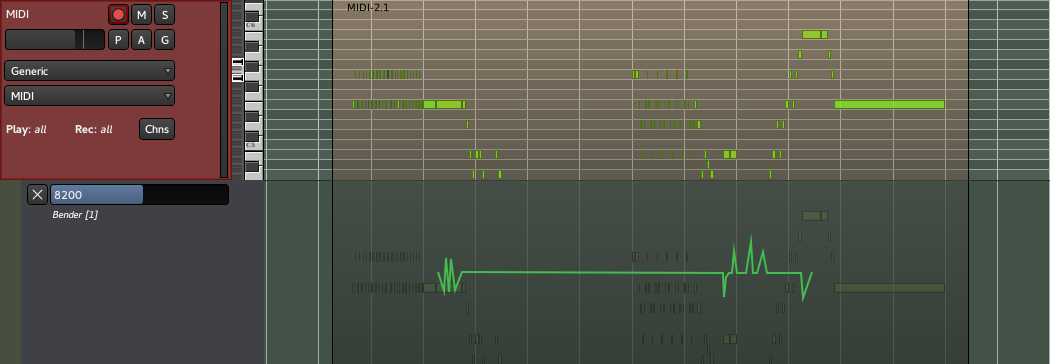
Pitch bending and aftertouch both work the same way, through automation, by right clicking the MIDI track's header > Automation > Bender (or Pressure) > the channel to bend.
Using the Draw tool, as for all the automations, allows to create a gradual change from one drawn point to another. A line in the center produces no change to the pitch, while a line above the center will bend the pitch to a higher note and a line going under the middle will bend the pitch to a lower note.
The pitch change depends on the synth-plugin used. Common ranges are an change of either ± 1, ± 2 or ± 4 semitones for the range 0 to 16383. The range is usually defined by the soundfont for each instrument. A value of 8192, which is also the default, means no pitch change.
Aftertouch works very similarly, though the values are between 0 and 127. It should be noted that aftertouch differs from velocity, as aftertouch allows to slightly change the timbre or create a vibrato, while the velocity sets the power with which the note is played (e.g. on a keyboard, the key is hit).
MIDI Scene Automation
Ardour is capable of being used to both record and deliver MIDI "scene" automation. These are MIDI messages typically used to switch presets or "scenes" on a variety of external equipment (or software), including lighting and other audio/video tools. A common use case is to automatically change presets between songs or to change lighting conditions based on a specific position on the timeline.
Each change from one scene to another is represented by a marker in the "Marker" bar.
Typically, scene changes are delivered as a combination of bank and program change MIDI messages. MIDI allows for 16384 banks, each with 128 programs.
Recording Scene Changes
Ardour has a dedicated MIDI port named "Scene In". Recording scene changes can be done by connecting this port to whatever source(s) of MIDI scene (bank/program change) messages should be recorded.
Whenever the global record enable button is engaged and Ardour's transport is rolling, a new marker will be created for each scene change message received via the "Scene In" port. Markers created for MIDI scene changes are automatically named as "scene [N]", where N is the program number that Ardour captured.
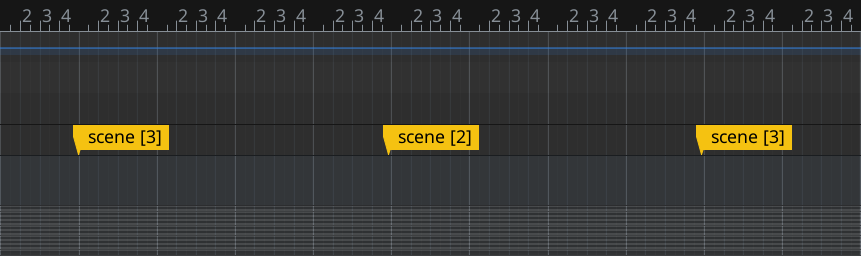
Ardour will also capture program change events as MIDI data and display them inside MIDI regions.

If two different scene changes are received within a certain time period, only the later one will be recorded as a new marker. The default threshold for this is 1 millisecond.
If a scene change message is received while the playhead is close to an existing marker with an associated scene change, the recording process will alter the scene change in the existing marker rather than adding a new one. The default threshold for this "proximity" test is 1 millisecond.
Manually Creating Scene Changes
All location markers carry MIDI scene change information, thus adding a new location marker creates a scene change. Whether this information is processed depends on what plugin, software, or hardware unit is listening to the MIDI events that Ardour transmits.
Playing Back Scene Changes
Ardour has a dedicated MIDI port named "Scene Out". Playing back scene changes can be done by connecting this port to whatever target(s) of MIDI scene (bank/program change) messages should be sent to.
When the global record enable button is not enabled, the relevant message(s) will be sent via the "Scene Out" port as the playhead rolls past each marker with a scene change associated with it.
Editing Scene Changes
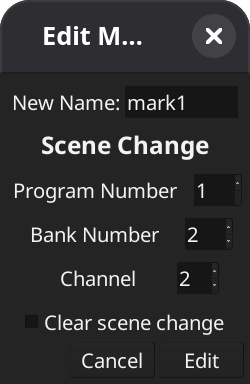
To edit a MIDI scene change, double-click on a location marker and change program number, bank number, and channel number as required, and click Edit to confirm the changes.
To reset scene change to defaults (program number 1, bank number 1, channel 1), double-click on a location marker, enable the Clear scene change checkbox, and click Edit.
Disabling Scene Changes
This feature is not currently implemented. However, you can prevent MIDI scene change data from being transmitted outside Ardour. To do that, disconnect the Scene Out port from whatever port it is connected to.
MIDI Tracer
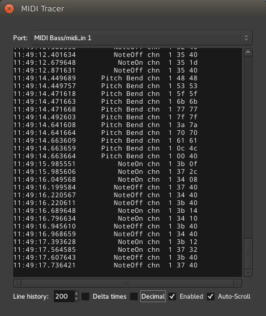
The MIDI Tracer window, which is accessed by selecting Window > MIDI Tracer from the main menu, is similar to the MIDI List Editor in that it displays MIDI information as tabular text, and has a vertical flow (i.e. the events follow a top to bottom time-oriented order).
Its use is different however, as it is not bound to a specific region or track; the MIDI shown in the MIDI Tracer window is any global input or output Ardour presents to the system. As such, it is a very useful way to monitor MIDI traffic, whether it is an external controller or device or the input or output of any track.
The MIDI Tracer can list all types of MIDI and "audio" events, and scene automation and timecode events as well.
The window consists of:
| Port | A list of all the MIDI ports Ardour presents to the system. They are both internal and external and are the same ports Ardour presents to JACK, if enabled |
|---|---|
| The events list | Where all the events for this port are listed, see below |
| Line history | How many lines should be kept in the events list; once this limit is reached, older events will be removed from the list |
| Delta times | If checked, shows the times as the duration since the last event, instead of absolute times |
| Decimal | If checked, shows the MIDI data as decimal values instead of hexadecimal |
| Enabled | If checked, events are displayed in the events list as they occur, otherwise stops the logging |
| Auto-Scroll | If checked, the events list scrolls as new events are logged, keeping the newest events on screen |
| Scroll | When clicked, this deletes all previous recorded events from the list. |
The events list displays the events as columns:
| Time of the event | Either absolute or relative, based on the Delta times checkbox |
|---|---|
| MIDI status (event type) | What MIDI events happened (e.g. Note On, Note Off, Pitch Bend, etc.) |
| MIDI channel | The MIDI channel the event happened in |
| MIDI data bytes (event parameters) | Parameters of the event, e.g. for a Note On: what the note was, and its velocity |
Clips
Clips Overview
The Clips browser provides a way to easily reuse little pieces of music across sessions. You can also drop audio and MIDI clips on a timeline in the Editor window or use them in trigger slots in the Cue window.
Clips Browser Interface
In the Editor window, the Clips browser is part of the Editor sidebar and thus can be hidden from the main window. In the Cue window, the Clips browser is an essential part of the workflow and is always visible.

The Clips browser has three main parts:
Library Locations
The Clips browser is capable of handling multiple locations of clips and loops. There are several types of locations supported by the browser:
List of Clips
The Clips browser will provide access to all supported media file types available in a selected location. Typically those would be, WAV, FLAC, and MID files.
If there are subfolders in the clip library's folder, the Clips browser will display them using as a tree view. The browser will also lazy-load subfolders: instead of loading the entire list of all supported files in the library location, it will only display top-level folders and load their content when you start expanding subfolders you are interested in.
Preview Options
The preview section has simple playback controls, a volume control, as well as an option to automatically play back a clip when you click it in the list. For MIDI clips, you can also select a virtual instrument (Ardour defaults to ACE Reasonable Synth).
When playing a clip, Ardour will automatically pause the transport and resume playback when the clip playback is done. Ardour will also use the audition channel for playback, so you can control the preview volume using the monitor level control in the Monitor section of the Mixer.
Clips in the Editor
There are two main uses for the Clips browser in the Editor window:
Reusing existing clips
You have two options how to reuse a clip in the Editor.
Creating new clips
You can create new clips for further reuse in the Editor window. Please see the Managing Custom Clips page for more detail.
Clips in the Cue Window
The Clips browser is an integral part of the non-linear workflow and thus is always visible in the Cue window.
You can freely drag and drop clips between triggers slots and the Clips browser.
Pick a clip in the library, play it to see if that's what you need, then drag it towards the matrix view and drop to any slot. Please note that dropping a clip onto a slot that already has a clip will replace that clip with the new one.
If you added a clip to a trigger slot by bouncing a region or a range directly to a scene and you like how it sounds, you might want to add that clip to the library. For that, simply pick it from the trigger slot, drag towards the Clips library and drop it there. The file will be copied to the custom library folder and become available for other sessions.
Adding Local Clip Libraries
You can add as many sample library locations as you like and easily switch between them using the drop-down list at the top of the Clips browser.
There are two ways to add new library location. The first one is by using the Edit Sample Library Path window directly:
Alternatively, you can drop a folder from a file manager into the list of clips in the Clips browser. This will add a new clip library location stored across sessions.
Now when you click the drop-down list at the top of Clips, you will see all the paths you added.
Should you need to delete any path you previously added, open the Edit Sample Library Path dialog again, select the path and click Delete.
Managing Custom Clips
Managing the custom clips folder
As of version 7.0, Ardour does not provide a way to reorganize clips in the main custom folder. For the time being, it is suggested to use a file manager to manage the folder.
As all the clips you already added to the project have been copied, you do not need to close Ardour to reorganize clips in the custom clips folder. Feel free to create new subfolders and move files around. All the changes will be reflected in the clips browser after you switch to another folder and back.
You do not need a fast drive for custom clips folders. Playing back a short clip will have little impact on the performance, and copying a file into the project should be likewise fast even from a hard disk. You can even use a network drive to store and access all your clips and loops.
Adding custom clips
There are three major ways to add new clips to your custom Clips folder.
Changes will take effect in Ardour once you switch to another folder and back.
Removing custom clips
Likewise, changes will take effect in Ardour once you switch to another folder and back.
Cue
Non-Linear Workflow Principles
The Cue window allows working with music ideas in a non-linear fashion. Instead of navigating the timeline and placing regions of audio and MIDI data at a particular point in time, short clips that contain rhythmic and melodic patterns can be triggered to play a certain amount of times, then automatically trigger another clip to be played.
The concept has been introduced and popularized by Ableton and since then found its way into many other applications. Ardour draws many ideas from Ableton Live, as well as from several other digital audio workstations, and adapts them to Ardour's specifics. Someone familiar with Live will find many aspects to be similar, but the Cue's feature set is not a 100% copy of that from any other application.
Here are some basics concepts of the non-linear workflow shared by multiple applications including Ardour.
Grid and scenes
All clips are organized in a kind of a grid. The grid provides an overview of all the musical ideas, all the rhythmic patterns, short melodies, and sound effects that can be used in a composition.
One dimension of the grid, usually represented by a track, would accumulate clips played with roughly the same kind of an instrument, e.g. all drum patterns, or all basslines etc.
The other dimension, usually called scenes (or cues, in Ardour) would organize these clips so that it is possible to play multiple clips at the same time by pressing just one button. So if one wants a particular bassline played along a particular drum sequence, they should be placed in the same scene.
Ardour specifics are explained in the Cue window elements chapter.
Slots and clips
Cells in a grid are usually called slots. They are a kind of a container that can hold an audio or a MIDI clip. Typically, a clip can be loaded into a slot from a disk by pointing the file selector to it, or loaded from a pre-recorded library of reusable clips, or recorded in place. More information about that cqan be found in the Populating the cue grid chapter.
Launching
In a non-linear workflow, a clip can be triggered to play in multiple ways. Most of the time it's either pressing a corresponding silicon pad on an external grid controller attached via MIDI, or scrolling the mouse wheel downwards over the slot that contains the clip, or just clicking a 'Play' button next to clip's name.
Usually, a slot can be configured to respond to some ways to trigger clip playback and ignore others. This is discussed in depth in the Clip Launch Options chapter.
Follow actions
A clip can play in a loop until stopped directly, or it can play a user-defined amount of time and then trigger another clip in the track. As an example, a composition can start with one rhythmic pattern played four times and the next rhythmic patterns is played eight times, then a third one is started.
This is typically achieved through so called follow actions. In an example above, for the first clip (or, rather, slot), a follow count must be set (4 times), and the follow action usually called "Next" is used. This will get the clip in that first slot to play 4 times then trigger the playback of a clip in the second slot.
Every application has its own set of follow actions. Most common ones are repeating the clip indefinitely, triggering the previous/next slot, or jumping to a slot in a particular scene.
More information about follow actions in Ardour can be found here.
Musical time and stretching
In a non-linear workflow, all work is happening in musical time: both audio and MIDI clips are measured in bars and beats.
By default, an application that supports a non-linear workflow will attempt to estimate beats per minute in an audio clip and then stretch or squeeze the clip so that it would match the bpm of the session and wrap neatly around bars. That way, a clip that originally has a different tempo that the one in the session would stay in sync with other clips.
Stretch options in Ardour are explained here.
Cue window elements
For cues, Ardour generally follows the design pattern of other applications that support a grid-based non-linear workflow.
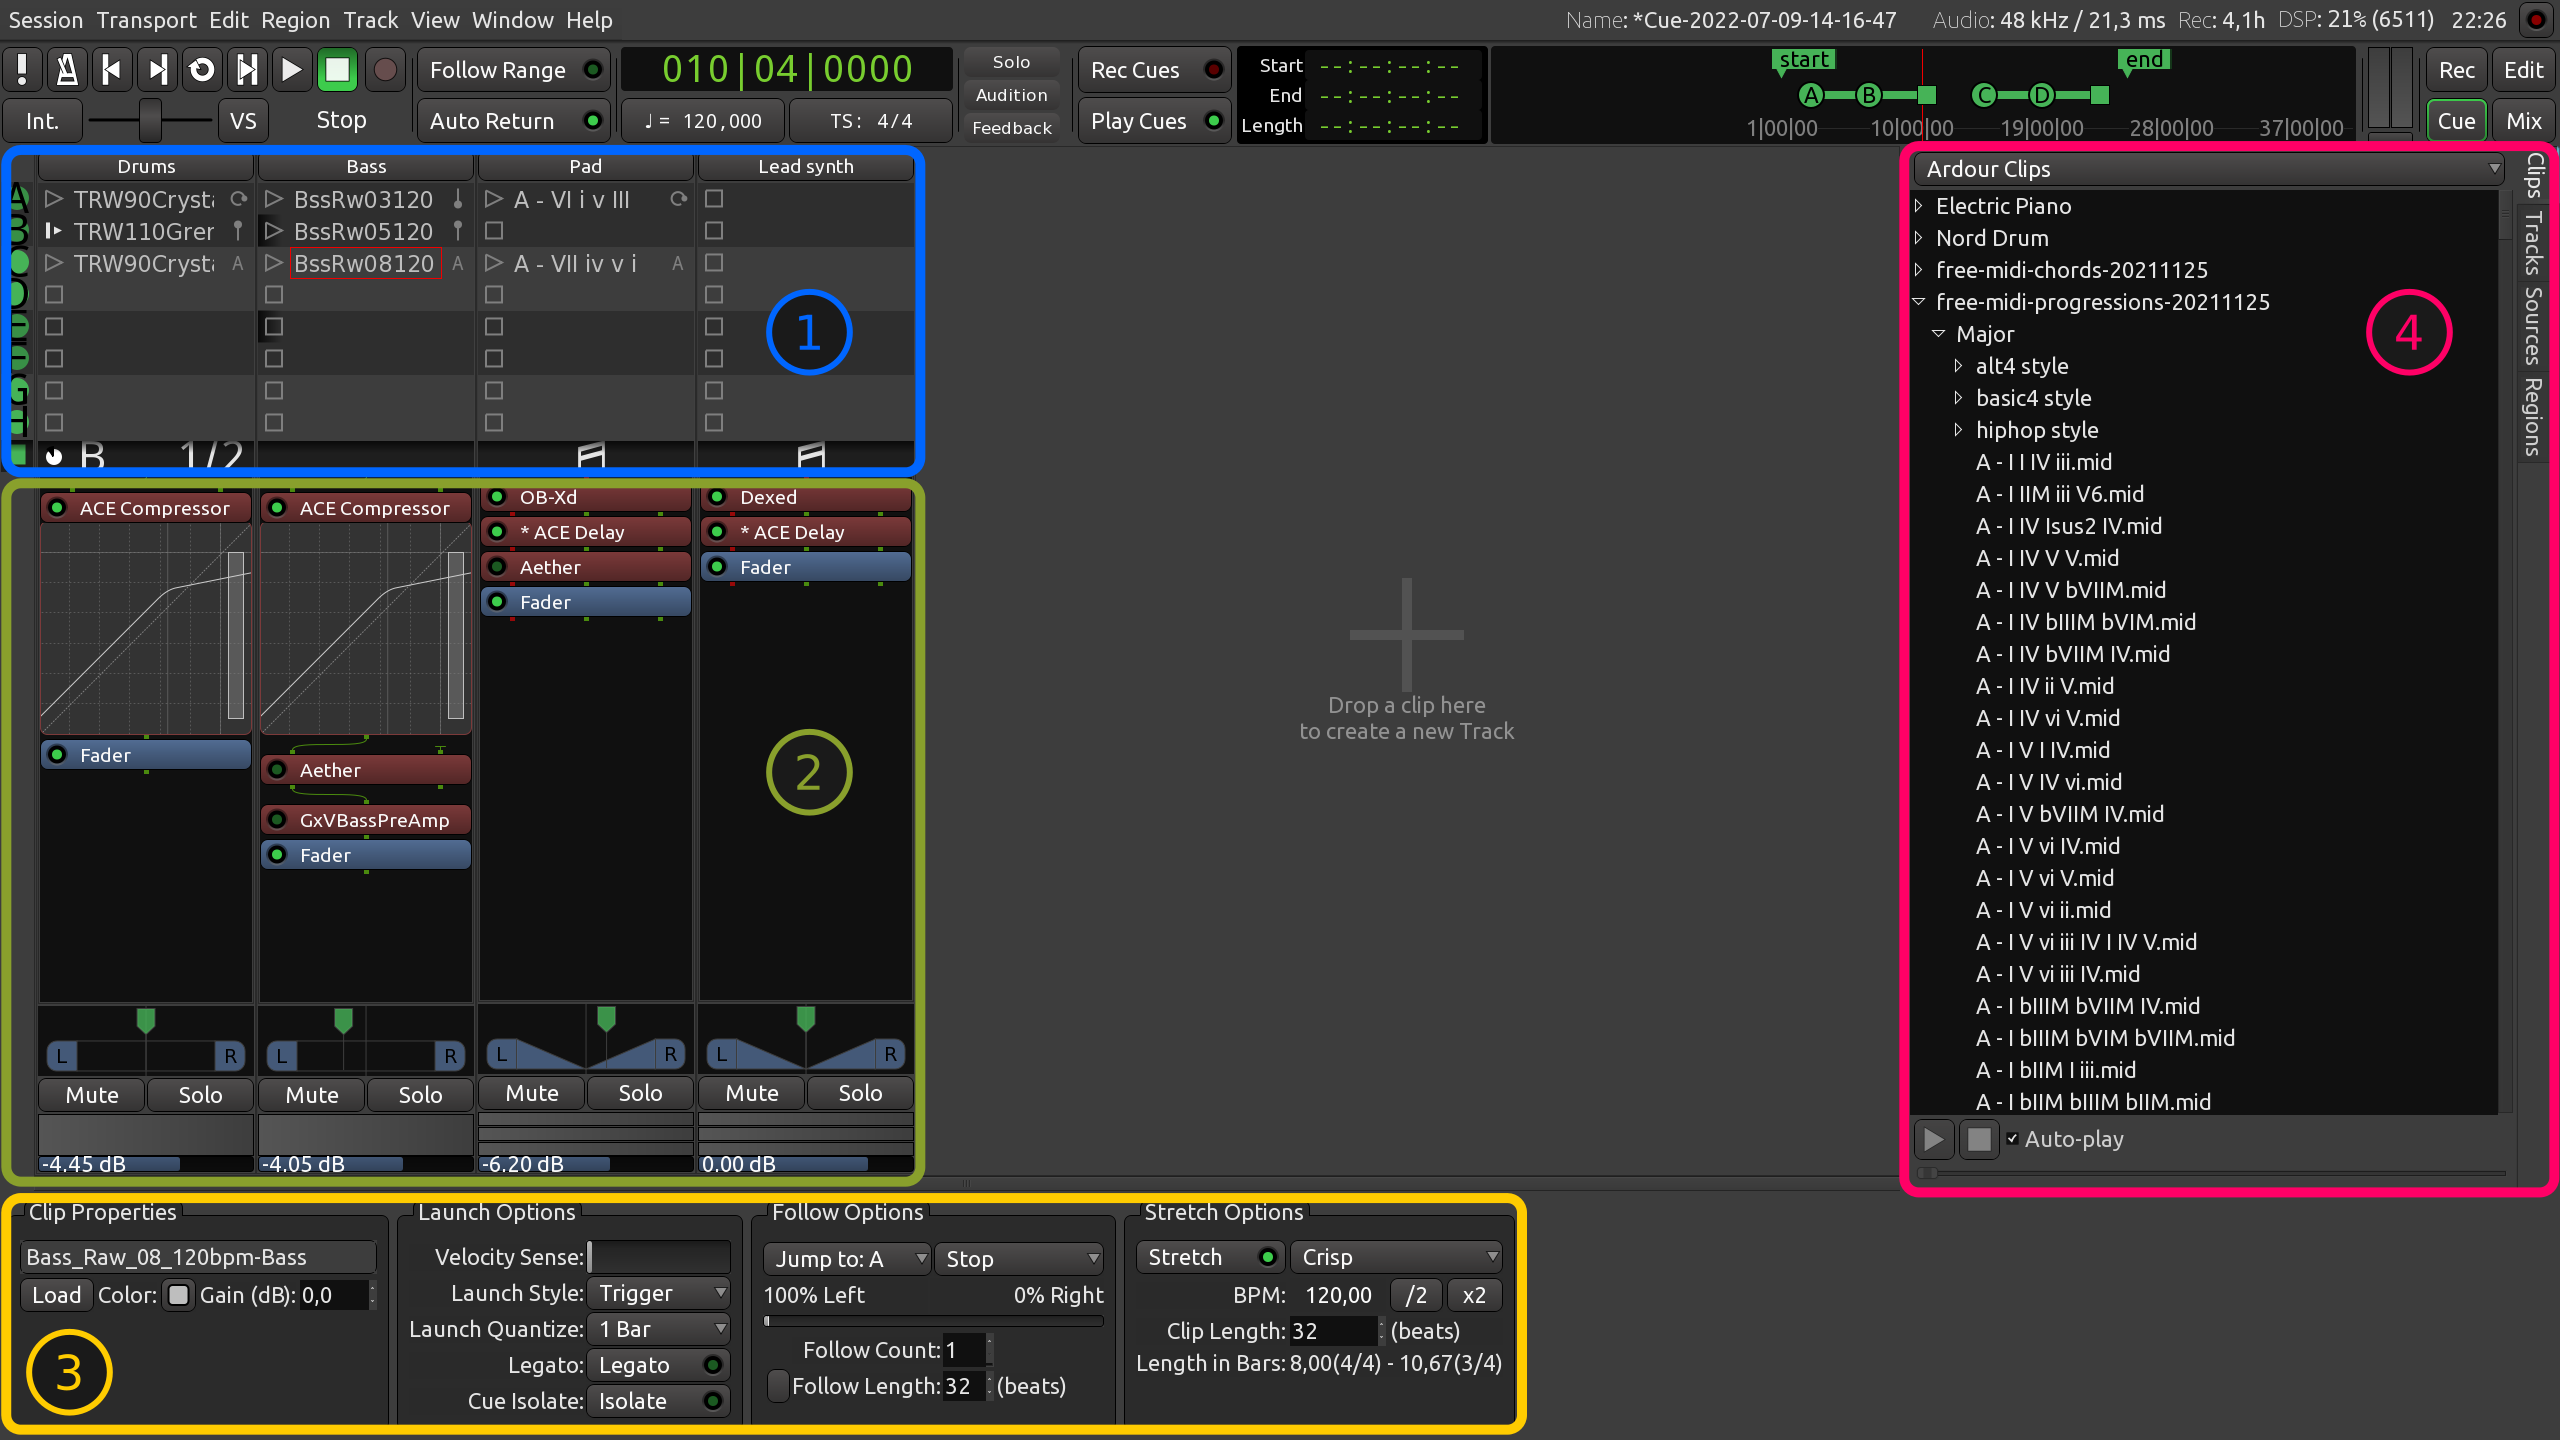
The main elements of the Cue window are:
Grid
The trigger slots grid is comprised of tracks (stacked horizontally) and cues (stacked vertically). Tracks group clips played by roughly the same instrument (or set of instruments, in case of drums and percussion). Cues group clips that will be played simultaneously.
Every trigger slot with a clip inside contains three elements: launch button/indicator, clip title, and follow action selector/indicator.
Cue buttons (A to P) to the left of the grid initiate the playback of an entire cue. Right-clicking on them opens a menu where it's possible to set the same options for all clips and trigger slots in that cue:
The playback indication area displays four pieces of data for each track:
Similarly to cue playback buttons, the playback indication area has a right-click menu where it's possible to set the same options for all clips and trigger slots in a track of choice.
This chapter provides more information on playback in the Cue window.
Mixer channel section
The mixer channel section is very similar to what's available in the Mixer window: there's the processor box, the same panner, as well as the mute and the solo buttons. Both the fader and the meter are horizontal, there is no choice for a type of meter.
Clip and trigger slot options
The bottom section contains several groups of controls:
Sidebar
Ardour defaults to displaying the Clips tab as the clips browser is commonly used for pulling reusable clips into the project.
In the Cue context, the Tracks tab is mostly useful for marking a track as visible or not visible in the Cue window.
Both the Sources and the Regions tabs can work as drag-and-drop sources for:
Setting Up Cues
Populating the Cue Grid
Adding tracks
It's possible to add tracks in the Cue window the usual way, either by double-clicking on the free space in the canvas or by choosing the Track > Add Track, Bus, or VCA menu item. The important part is to enable the Show on Cue Page checkbox in the newly opened dialog.
Alternatively, it's possible to drop an existing audio or MIDI file into the empty part of the canvas to automatically create the cue track and fill the first empty trigger slot with it.
Trigger slots not only work as a drag-and-drop target, they also work as a drag-and-drop sources. It's possible to drag the contents of an existing trigger slot into the empty part of the canvas to create a new track and fill the first slot with the contents of the original slot. It's also possible to drag and drop the contents of one slot into another in case one wants to use the same clip with some variations (e.g. a custom follow length).
Loading clips to slots
There are several ways to load a clip into a trigger slot:
The type of data must match the type of tracks a clip is being inserted to. E.g. it's impossible to place a MIDI clip into a trigger slot of an audio track.
Clearing trigger slots
There are two ways to remove an assigned clip from a selected trigger slot:
Playing Back the Cues
It is possible to play both individual clips and entire cues.
Playing and Stopping Individual Clips
There are generally two ways to trigger a slot with a clip inside.
How Ardour responds to releasing the mouse button or sending a note-off event depends on the trigger launch style. This chapter covers that topic.
Once the clip starts playing, the playback indication panel for that track lights up with some information:
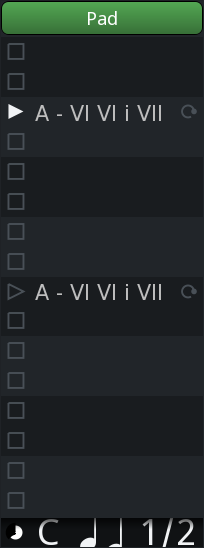
Left to right:
One way to stop a playing clip is to click the square-shaped icon in any of the empty slots in the track of interest.
Ardour allows assigning arbitrary keys on MIDI controllers to trigger cue slots by:
An existing assignment can be removed using the MIDI un-Learn command in the same right-click menu.
This use of MIDI devices and its learning function is separate from, functions differently to, and is not to be confused with the use of MIDI devices as control surfaces.
For a MIDI device to be used to trigger clips it must be defined as
Default trigger input in the Triggering
page of the Preferences dialog and/or be
connected to the ardour:Cue Control in MIDI port.
Playing and Stopping Entire Cues
Clicking a round-shaped button with a Latin letter inside launches the playback of the entire cue, that is, all clips in all trigger slots of a cue.

The time when playback of each slot starts depends on the launch quantization setting. If there is no quantization selected, playback will start immediately regardless of the playhead's position. However, if the launch quantization is set to 1 bar, playback will only start once the playhead passes the start of the closest bar. This ensures that however long each clip is when measured in beats, all clips in one cue will play in sync.
Clicking the square-shaped button under the last letter-coded cue (P) will stop playback of all cues and all clips in all trigger slots. Just like with playback, the time playback stops depends on quantization settings of each trigger slot.
Setting Up Clip Properties
The contents of this options box partially depends on the type of data in the clip, audio or MIDI. The common settings are:
The only audio-specific setting is Gain (dB) which adjusts the output volume of a clip.
For MIDI clips, there are several specific options:
Setting Up Launch Options
Velocity Sense
This control defines how much the velocity coming off a MIDI device affects clip's volume. At 0%, which is the default, it doesn't matter how hard a key or a pad is pressed, the volume will be what it is set to. At 100%, hitting a key as hard as possible produces maximum volume, and pressing the key or a pad really softly produces a barely audible sound.
Launch Style
The Launch Style defines how the user interacts with the clip's playback. Ardour makes a distinction between pressing a button or a key (the 'down' event for a mouse or the note-on MIDI event) and releasing a button or a key (the 'up' event for a mouse or the note-off MIDI event).
A trigger slot can be set up so that pressing a silicon pad on an external grid controller, would make Ardour play the clip in that slot indefinitely on repeat. Or it could be set up so that Ardour would only repeat that clip as long as the pad is kept pressed and stop playing it as soon as the pad is released.
| Trigger | Clicking will trigger the playback of a clip. Further clicks, as well as mouse up and note-off events will be ignored. | |
|---|---|---|
| Retrigger | Clicking will trigger the playback of a clip. Another click will restart (retrigger) the playback from the beginning, quantization will be taken into consideration. Mouse up and note-off events will be ignored. | |
| Gate | The clip will be played back as long as the mouse button or the MIDI key/pad is kept pressed. Quantization defines how soon playback starts after pressing the button/key down and ends after releasing the button/key. | |
| Toggle | The clip will keep playing until the button is clicked again or another note-on event is sent from a MIDI device | |
| Repeat | The contents of the clip will be played to the extent of the quantization setting. |
Launch Quantize
This setting defines how long Ardour will wait till beginning the playback of a clip in a trigger slot. If the transport is already rolling, and quantization is set to 1 bar, which is the default, Ardour will wait for the next bar, then start playing the clip. Quantizing to a whole bar or several bars typically guarantees that downbeats of a drums track and a bassline track align.
The quantization value can be as large as 4 bars and as small as 1/64 bar. When 'None' is selected, playback with a rolling transport will start immediately.
Legato
The Legato mode helps keeping two clips of the same track in sync when switching from one to another. With Legato on, Ardour will pick up the playback of the second clip at the position where the first one left off. Please note that quantization applies here.
Cue Isolate
When an entire cue is played, all slots that belong to it get triggered. Solo Isolate is a way to disable that for selected slots. An isolated slot will only be triggered when either mouse-down or note-on event is sent directly to it.
Isolated slots are visually separated from others: they have a linear black-to-transparent gradient fill in the background of the trigger button.

On the screenshot above, the Bass, Lead Synth and El Piano tracks all have at least one isolated trigger slot.
Setting Up Follow Actions
Follow Actions
When the contents of one trigger slot has been played a user-defined number of times, Ardour can do one of the two things: stop playing or switch to a different trigger slot. This is defined by follow actions. A commonly used follow action is playing a clip in the next trigger slot down the grid.
Here are the currently available follow actions. Please note that to help distinguishing between them, Ardour will display an icon next to the name of a clip in a slot:
| None | No icon | Play the contents of the slot once and stop |
|---|---|---|
| Stop | Stop after playing back the amount of times set with Follow Count or via Follow Length (see below) | |
| Again | Repeat the contents of the trigger slot over and over again | |
| Reverse | Play back and go to the previous trigger slot | |
| Forward | Play back and go to the next trigger slot | |
| Jump |
|
Play back and jump to a particular scene. Selecting multi-jump and multiple trigger slots will result in randomly playing one of the selected slots. |
Note that the follow action can be set right in the grid. It is achieved by clicking the icon that corresponds to the currently selected follow action for a slot and choosing a different one in the newly opened menu.
Follow Actions Probability
Ardour can help explore ideas by bringing an element of randomness. Two possible follow actions can be set to randomly alternate between, then the percentage of probability of the left or the right follow action to be triggered can be adjusted:
Playback Duration
There are two options here that affect the playback duration one way or another.
Follow Count defines how many times a clip will be played back before triggering the follow action.
Follow Length overrides clip length and defines the new one in beats. By default it's as long as the clip is long. Making this value lower will cut the clip short, making it longer will add some silence at the end of the clip.
Setting Up Stretch Options
Stretching
When loading an audio clip into a trigger slot, Ardour applies some heuristics to estimate its tempo in beats per minute. Unless a metadata in the file source provides information, minibpm is used to analyze and detect the file's BPM.
After tempo is estimated, the clip is time-stretched to match the session's tempo map. This means that should session's tempo change over time (in either ramped or constant mode), all audio clips will be re-stretched to accommodate for that.
Disabling stretching when original clip's tempo doesn't match that of the session will most of the times make the clip audibly go out of sync with the beat.
Stretch modes
Once stretching is enabled, there are several options how to apply it:
BPM
This is where the estimated tempo is displayed. It can also be progressively divided or multiplied by two.
Supposing session's tempo is currently 120bpm and original clip's tempo is 90bpm, stretching the clip to match session's tempo will make it sound faster that it originally is.
If the estimated clip's tempo is divided by 2, stretching the resulted 45bpm back to 120bpm will make the clip sound faster. Vice versa, multiplying the original clip's tempo by 2 and then stretching it down from 180bpm to 120bpm will make the clip sound slower than it originally is.
Clip Length
This control allows adjusting the estimated tempo in a finer manner, by changing the amount of beats it takes to play the clip in the selected trigger slot. The change is immediately displayed in the BPM field above.
Length in Bars
This is an estimate of the clip's length as measured in bars for two popular time signatures: 4/4 and 3/4.
Recording cues
You can record audio and MIDI from respective inputs into trigger slots to play them back. Here is the workflow.
By default, the recording will be 1 bar long; you can change this in the clip properties area, using the length dropdown selector above the pianoroll:
If you select "Until Stopped", then recording will continue until you explicitly stop the recording, most typically by pressing the space bar on your computer.
Ardour will count down (the number of beats depends on launch quantization and position of the playhead) and start recording.
As soon as the playhead reaches the end of the defined recording length, Ardour will stop recording and start playing back the clip you've just recorded.
Note that if you use the rec-enable button just to the left of the recording length selector, it will also enable the track for cue recording if it is not already enabled.
Editing Cues
You can edit pre-loaded or recorded clips in trigger slots directly on the Cue page. Simply click on a clip to open clip properties and the editor in the bottom pane.
The editor interface is largely the same as in the region editor on the Editor page and the separate pianoroll window.
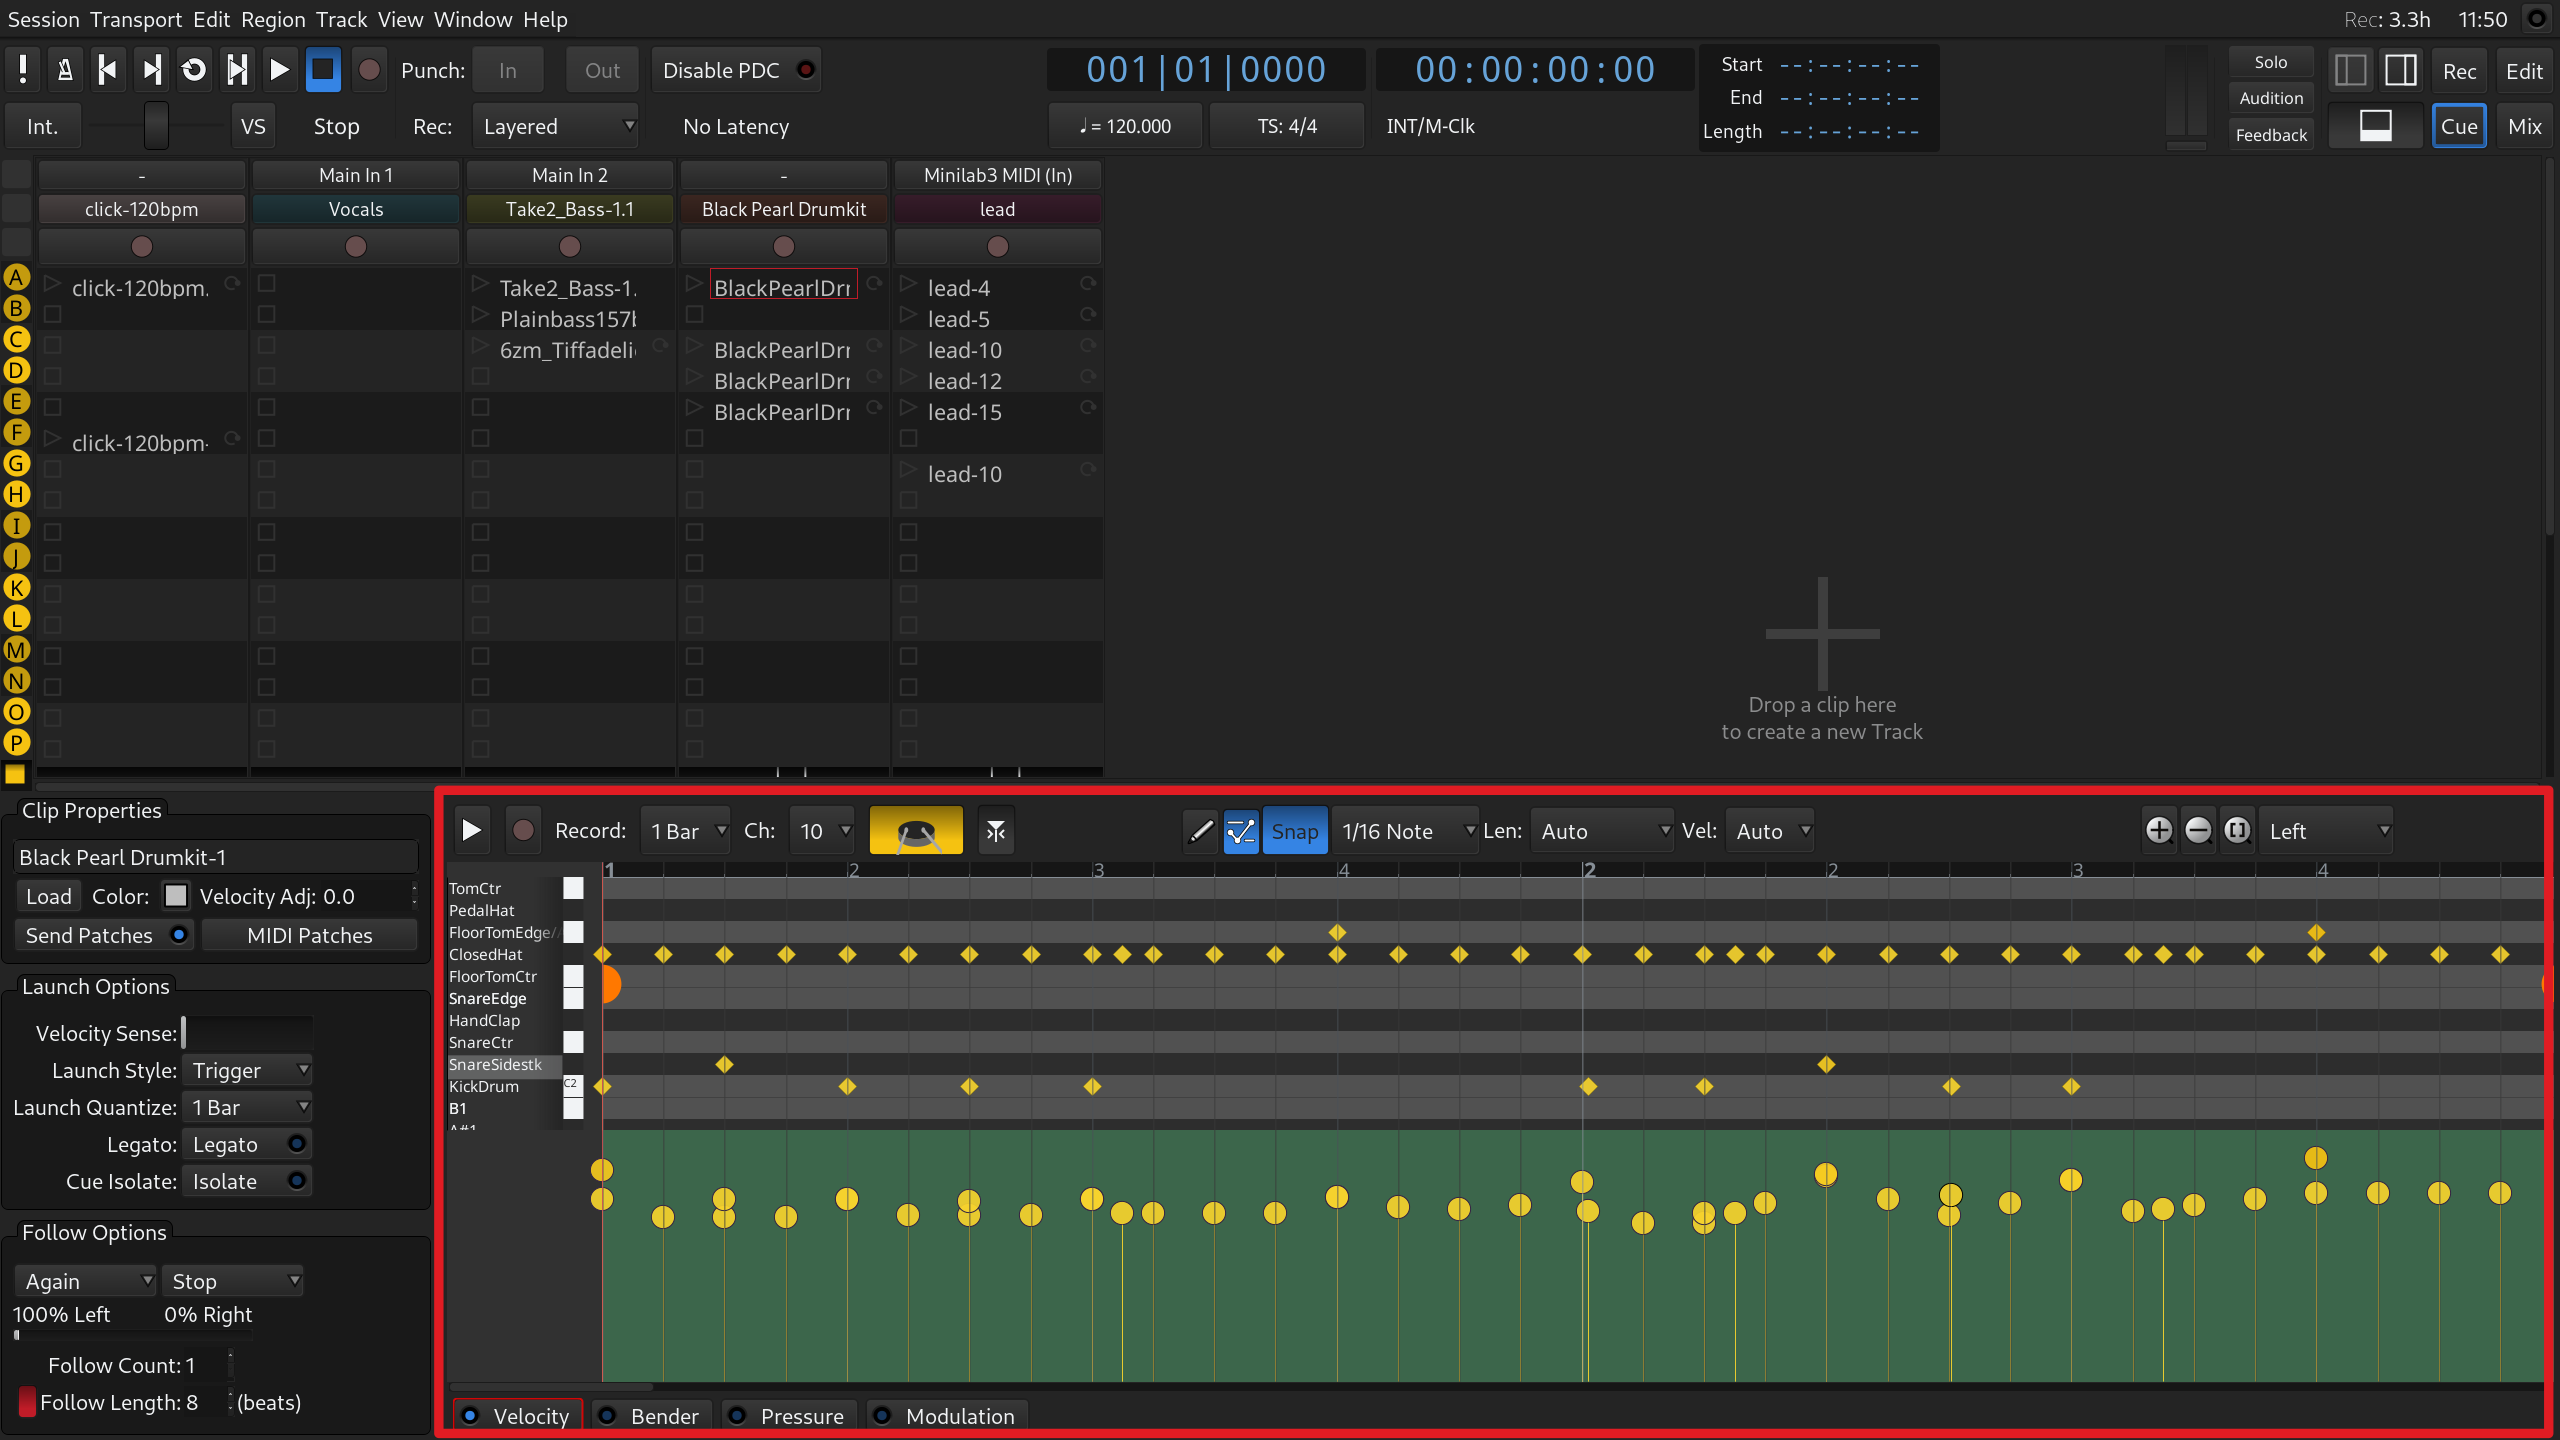
The main areas are:
Editing notes
There are two available editing modes: Draw and Edit.
With the Draw mode, you can:
See this chapter for details on adding MIDI notes.
With the Edit mode, you can:
Editing automation
You can create new automation in the Draw mode and edit existing automation in the Edit mode. Please refer to this chapter for details on editing workflows and methods.
The automation editing area displays note velocity and controllers and is disabled by default. Clicking on any of the available controller options (Velocity, Bender, Pressure, Modulation) enables it.
To enable or disable an automation lane, click on the small LED indicator to the left of its name on the bottom toolbar.
The area can display data from multiple controllers, overlaid on top of each other, but only one automation lane is editable at the time.
Mixing Linear and Non-Linear Workflows
It's possible to combine the linear workflow, i.e. working with regions on the timeline, and the non-linear workflow, i.e. launching clips from trigger slots.
The general steps to do so are:
In the example below, cue A starts at bar 3, followed by cue B at bar 7, then all cues are stopped at bar 11. After that, cue C is triggered on bar 15, then cue D on bar 19, then all cues are stopped at bar 23.
Just like any other markers, cue markers can be repositioned. Moreover, right-clicking on an existing marker allows changing the cue that should be triggered.
The rest of the composition would be written the usual way, by adding consecutive audio and/or MIDI regions to the canvas.
A session that is set up in such a way can be exported just like any other, into a single audio file or through stem exporting.
Arranging
Time, Tempo and Time Signature
Tempo and Time Signature
Tempo and time signature belong together. Without both, there is no way to know where a beat lies in time.
Tempo provides a musical pulse, which is divided into beats and bars by a time signature. When tempo is changed or an audio-locked time signature is moved, all objects on the timeline that are glued to bars and beats (locations, regions) will move in sympathy.
When performing time signature or tempo operations, it is advisable to use the BBT ruler (available by right-clicking an existing marker or ruler name), and ensure that the constraint modifier is set ( by default, may be changed in Preferences > Editor > Modifiers) so that no other modifiers share its key combination. The constraint modifier is the "Constrain drags using: " setting under the "When Beginning a Drag" heading. One viable setting is .
Tempo
Tempo can be adjusted in several ways:
When dragging the BBT ruler, musical snap has no effect, however be warned that non-musical snap is in effect if enabled. Snapping to a minute while dragging a beat may result in some very slow tempos. Snapping a beat to a video frame however is an incredibly useful way to ensure a soundtrack is punchy and synchronized to the sample.
A tempo may be locked to audio or musical time. This can be changed by right-clicking on a tempo. If a tempo is locked to music, an entry will be available to lock it to audio. Similarly an audio-locked tempo may be locked to music by right-clicking it and selecting the "Lock to Music" entry.
Audio locked tempo marks stay in their frame position as their neighbor's positions are altered. Their pulse (musical) position will change as their neighbors move. Music locked tempo marks move their frame position as their neighbors are moved, but keep their pulse position (they will move as the music is moved).
A tempo may be constant or ramped:


To add a new tempo, right-click on the tempo line at the desired position. The new tempo will be the same as the tempo at the position of the mouse click (it will not change the shape of the ramp).
To copy a tempo, use right button to drag the tempo to be copied.
Time signature
Time signature positions beats using the musical pulse of a tempo, and groups them into bars using its number of divisions per bar.
The first time signature in a new session may be moved freely. It has an associated tempo which cannot be dragged by itself (although all others can). It can be moved freely and is locked to audio.
New time signatures are locked to music. They may only occur on a bar line if music locked.
An audio locked time signature provides a way to cope with musical passages which have no time signature (rubato, pause), or to allow a film composer to insert a break in music which cannot be counted in beats.
If a time signature is audio-locked, its bar number is fixed from the point at which it left the main score. That bar number cannot be changed, nor can tempo motion allow the previous bar to overlap. If another bar is needed, lock the time signature to music again (right > Lock to Music), drag the time signature to the desired bar and re-lock to audio. The new bar can be freely dragged again.
Techniques for Working with Tempo and Time Signature
Matching a recorded tempo with a tempo ramp
As a general approach, the best way to control tempo ramps is to use them in pairs.
One typical use of tempo ramps is to match the click to a drum performance recorded in 'free time', like in the (admittedly bad) 4/4 example on the left.
Step 1: First time signature

The first thing needed is determining where the first beat is in the recording and left dragging the first time signature to that position.
Step 2: Locating the nth bar
Now the first click will be in time with the first beat. By listening to the recorded drums, the position of bar n (here, 9th beat, 3rd bar) is visually located (the playhead may be moved to this location to "pin" it).
Step 3: Aligning the ruler with the tempo
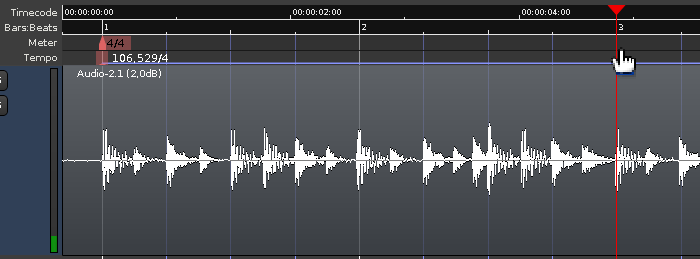
Holding the constraint modifier ( by default, may be changed in Preferences > Editor > Modifiers), the third bar marker in the BBT ruler is dragged at the position of the third bar in the recording (where the playhead is located). This drag can be done either in the Time Signature or in the Tempo rulers. The tempo (on the first and only tempo marker) reflects the new value based on this change.
The click now matches the first 8 beats, but after that it can wander off, which will be reflected in the tempo lines thet won't quite match the drum hits.
Step 4: Placing a new tempo marker

A new tempo marker is placed on the last position where the click matches the recorded audio, by -clicking the Tempo ruler. This will "anchor" the value of the tempo at that position.
Step 5: Placing another tempo marker at the nth beat
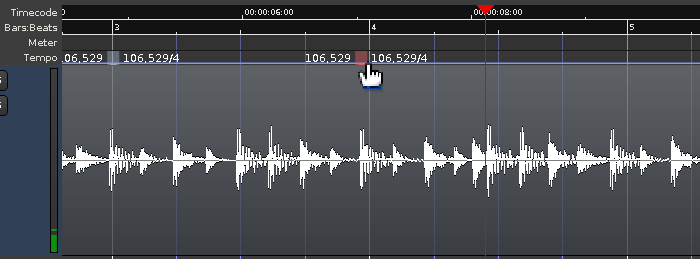
Another tempo marker is placed n beats after the previous marker (here, 4 beats, 1 bar).
Step 6: Changing the tempo to a new value
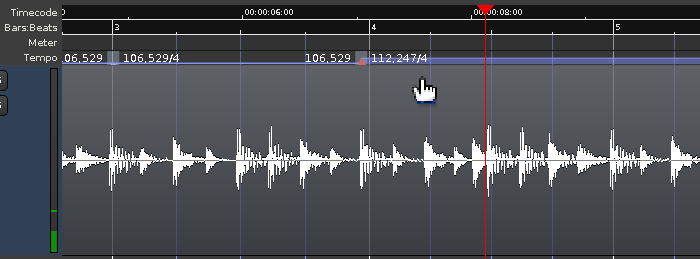
Now, -dragging any beat after the second new tempo marker will allow to align the drum audio and tempo after the second marker.
Step 7: Ramping the tempo change
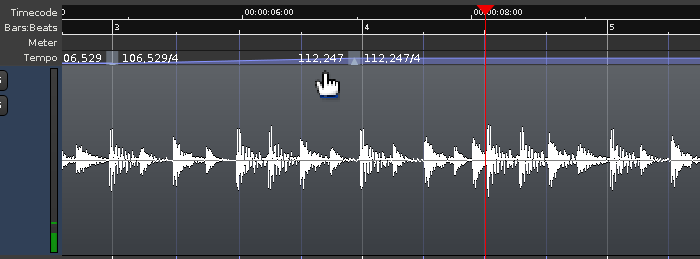
Although it may be unnecessary in some cases where the tempo changes abruptly, most of the time, the tempo change is progressive in time, like an instrumentist drifting in tempo. In those cases, the tempo change should be progressive too, and Ardour allows that by ramping the tempo change.
Right-clicking the first tempo marker, a menu appears, allowing to Ramp to Next. This will make the tempo between the two markers linearly change from the first marker's value to the second's.
Again, some time later the click will probably drift again, so the same technique has to be repeated: adding two new tempos and dragging the BBT ruler after the newest tempo so that the beats align with the audio again.
In a general sense, adding tempo markers in pairs allows to 'pin' the tempo at the marker's location while moving further to the right.
Other use cases
Audio-locked time signatures can be useful when composing, as they allow a continuous piece of music to be worked on in isolated segments, preventing the listening fatigue of a fixed form. Reassembly is left as an exercise for the reader.
Tempo ramps can also be used in a video context, e.g. for an accelerando, by snapping to TC frames and dragging the ruler so that a bar ends up on a significant video frame.
Mixing
Basic Mixing
Metering in Ardour
Introduction
An engineer reading and using audio level meters compares to a musician reading or writing sheet-music. Just like there are virtuoso musicians who can't read a single note, there are great sound-engineers who just go by their ears and produce great mixes and masters without ever looking at a single meter.
Yet, in order to work in or with the broadcast industry, it is usually unavoidable to use meters.
Audio level meters are very powerful tools that are useful in every part of the entire production chain:
Meter Types
A general treatise on metering is beyond the scope of this manual. It is a complex subject with a history… For background information and further reading we recommend:
There are different metering standards, most of which are available in Ardour. In short:
| Digital peak-meter | A Digital Peak Meter displays the absolute maximum signal
of the raw audio PCM signal (for a given time). It is commonly used when
tracking to make sure the recorded audio never clips. To that end, DPMs
are always calibrated to 0 dBFS, or the maximum level that can be represented digitally
in a given system. This value has no musical reason whatsoever and depends
only on the properties of the signal chain or target medium. There are
conventions for fall-off-time and peak-hold, but no
exact specifications.
Various conventions for DPM fall-off times and dBFS line-up level can be chosen in Edit > Preferences > Metering. |
|---|---|
| RMS meters | An RMS-type meter
is an averaging meter that looks at the energy in the signal. It
provides a general indication of loudness as perceived by humans. Ardour
features three RMS meters, all of which offer additional peak indication.
|
| IEC PPMs | IEC-type
PPMs are a mix between DPMs and
RMS meters, created mainly for the purpose of
interoperability. Many national and institutional varieties exist (EBU, BBC, DIN).
These loudness and metering standards provide a common point of reference which is used by broadcasters in particular so that the interchange of material is uniform across their sphere of influence, regardless of the equipment used to play it back. For home recording, there is no real need for this level of interoperability, and these meters are only strictly required when working in or with the broadcast industry. However, IEC-type meters have certain characteristics (rise-time, ballistics) that make them useful outside the context of broadcast. Their specification is very exact, and consequently, there are no customizable parameters. |
| VU meters | VU meters are the dinosaurs (1939) amongst the meters. They react very slowly, averaging out peaks. Their specification is very strict (300ms rise-time, 1–1.5% overshoot, flat frequency response). Ardour's VU meter adheres to that spec, but for visual consistency it is displayed as a bar-graph rather than needle-style (more below). |
Ardour Specifics
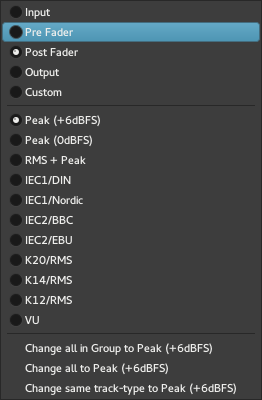
Meters are available in various places in Ardour:
They all share the same configuration and color-theme which is available in preferences and the theme-manager. Settings for the Peak and RMS+Peak meters as well as VU meter standards are found in Edit > Preferences > Metering.
The type of meter and the metering point (the place in the signal chain where the meter taps the signal) are configurable in the context menu of each meter. Depending on the Edit > Preferences > Mixer settings, the metering point is also accessible via a button in each Mixer strip.
Regardless of meter type and standard the meter display will highlight red if the signal on the given channel exceeds the configured peak threshold.
Left clicking on the peak-indicator button resets the
peak-hold indicator of a single channel.
Left clicking resets a whole group, and
Left clicking resets all meters.
Overview of meter types
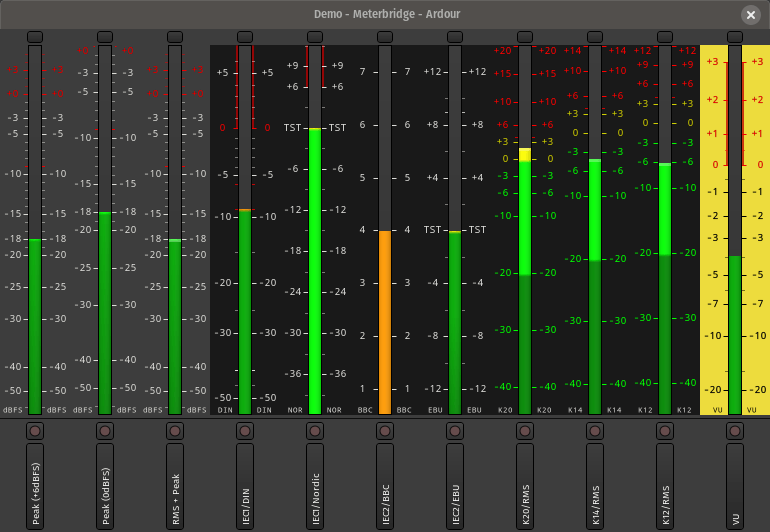
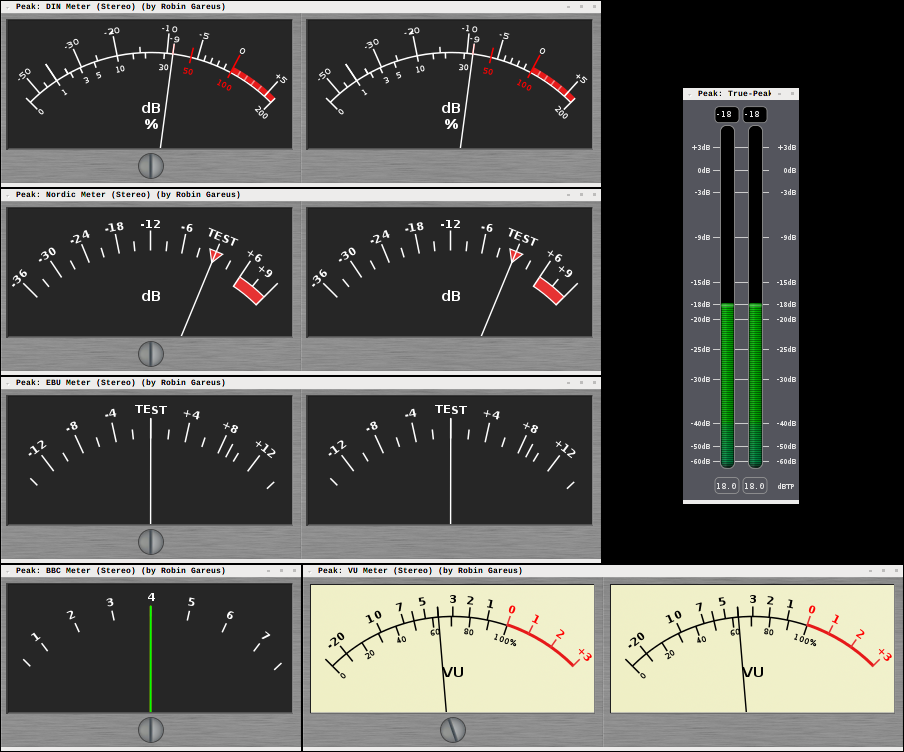
The figure on the left shows all available meter-types in Ardour when fed with a -18 dBFS 1 kHz sine wave.
Due to layout concerns and consistent look and feel all meters available in Ardour itself are bar-graph type meters. Corresponding needle-style meters—which take up more visual screen space—are available as LV2 plugins (see image on the right): meters.lv2.
Meterbridge
Meterbridge is a compact view of all meters in a session. It is designed to assist for large recording sessions, particularly live recording where the amount of mics is too large to get a good overview of the entire session in either the Mixer or the Recorder window.
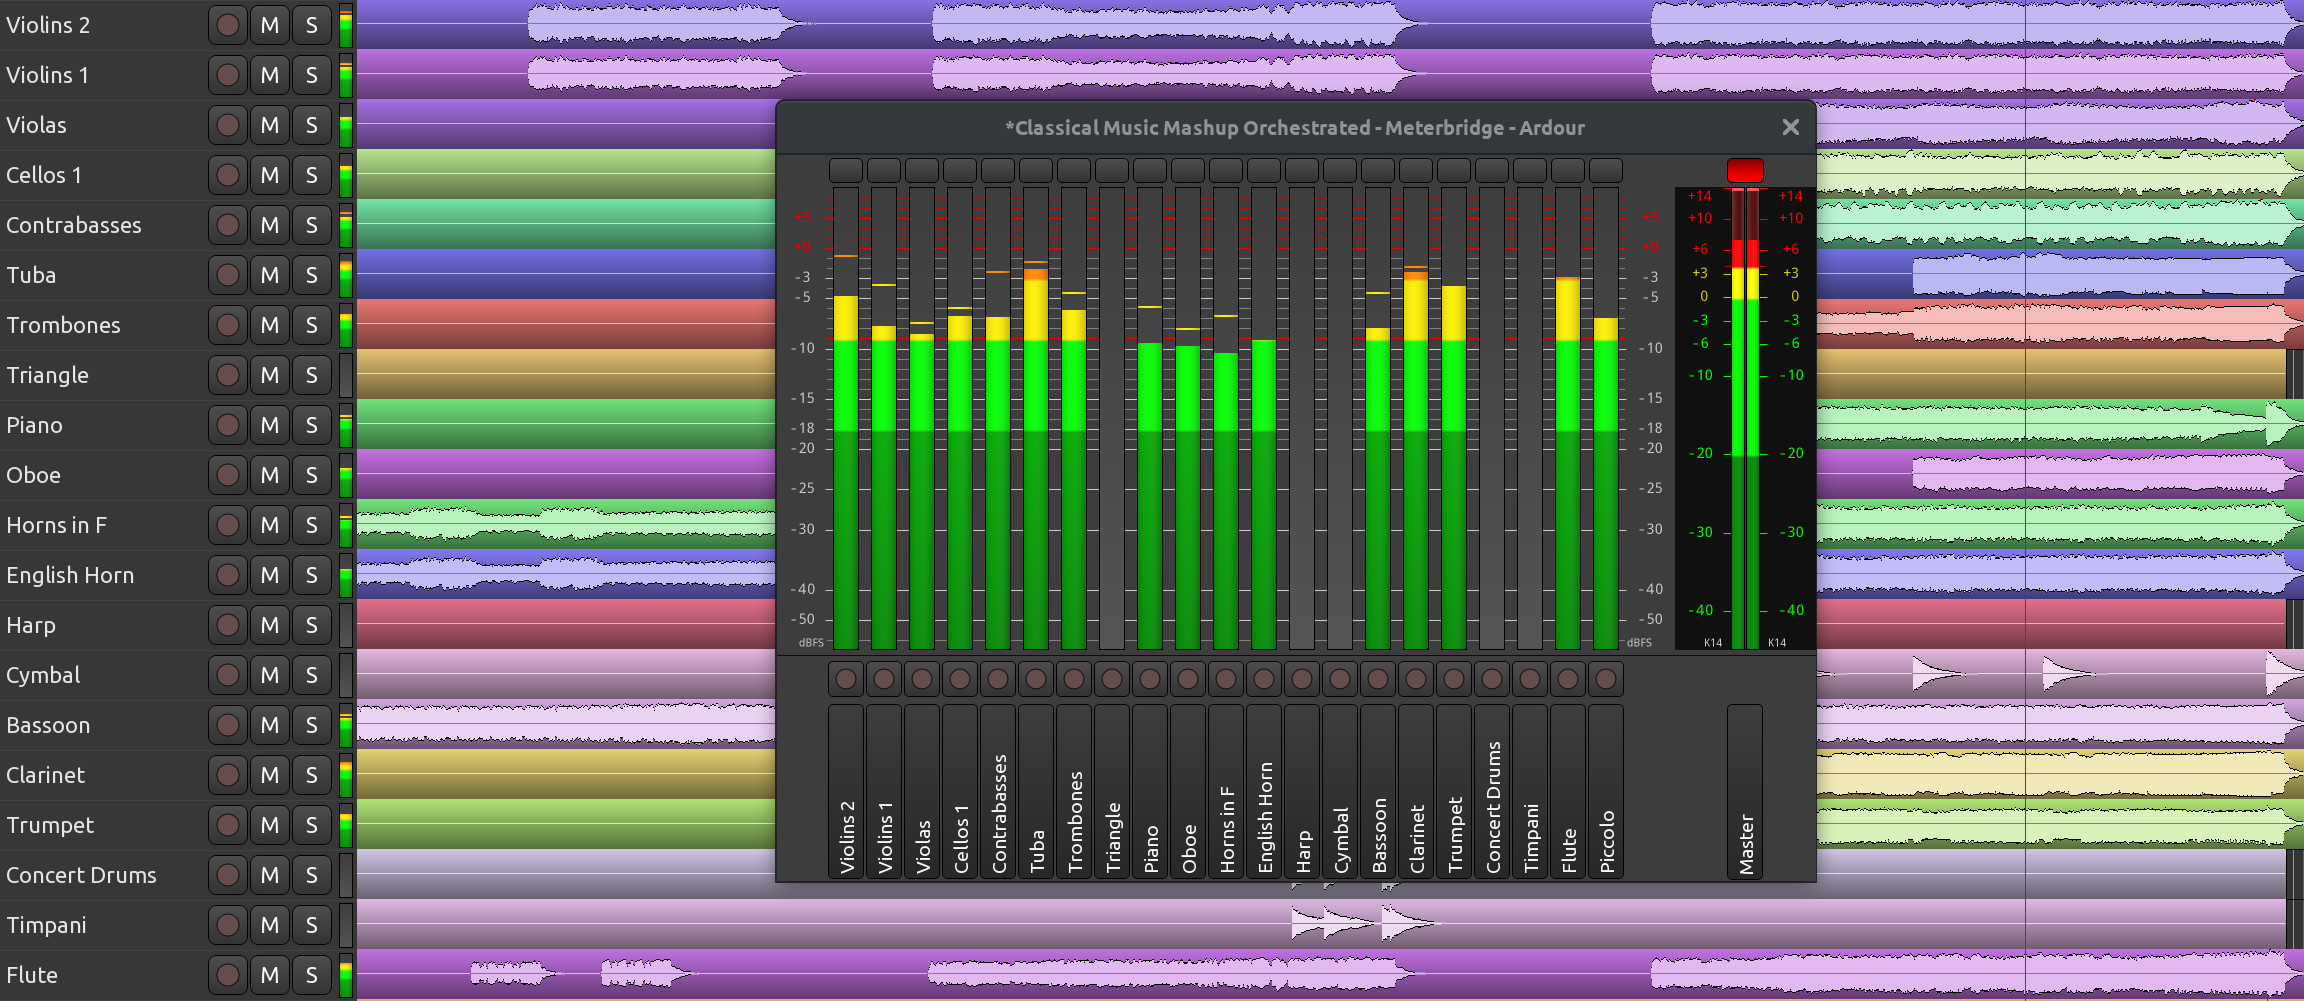
By default, the Meterbridge window displays a meter per each track with the track's name at the bottom and allows resetting the meter's peak as well as arm a track for recording.
Each meter has a right-click menu to select the type of the meter. Just like in the mixer channel view, tracks and regular audio busses default to Peak (+6 dBFS) and the master bus defaults to K14 (RMS). It's also possible to set the same meter type to all same-type tracks.
Additionally, it's possible to select the height of the track name panel by right-clicking above it and selecting one of the options going from Short to Venti (which is a coffee cup size reference).
Just like in the usual mixer channel view, the Arm for Recording button has a right-click menu to enable rec-safe mode to avoid accidental recording to a track of choice.
The set of readily available controls can be customized per each session on the Meterbridge page of the Session Properties dialog.
Additional controls include:
It's also possible to toggle visibility of MIDI tracks, busses, and the master bus.
Signal Routing
Routing for audio tracks
Ardour exposes multiple ports for various parts of the signal chain to link those parts: track inputs and outputs, bus inputs and outputs, sends and inserts, monitor section outputs. When using the JACK audio backend, these ports are also accessible by other applications and can be routed externally.
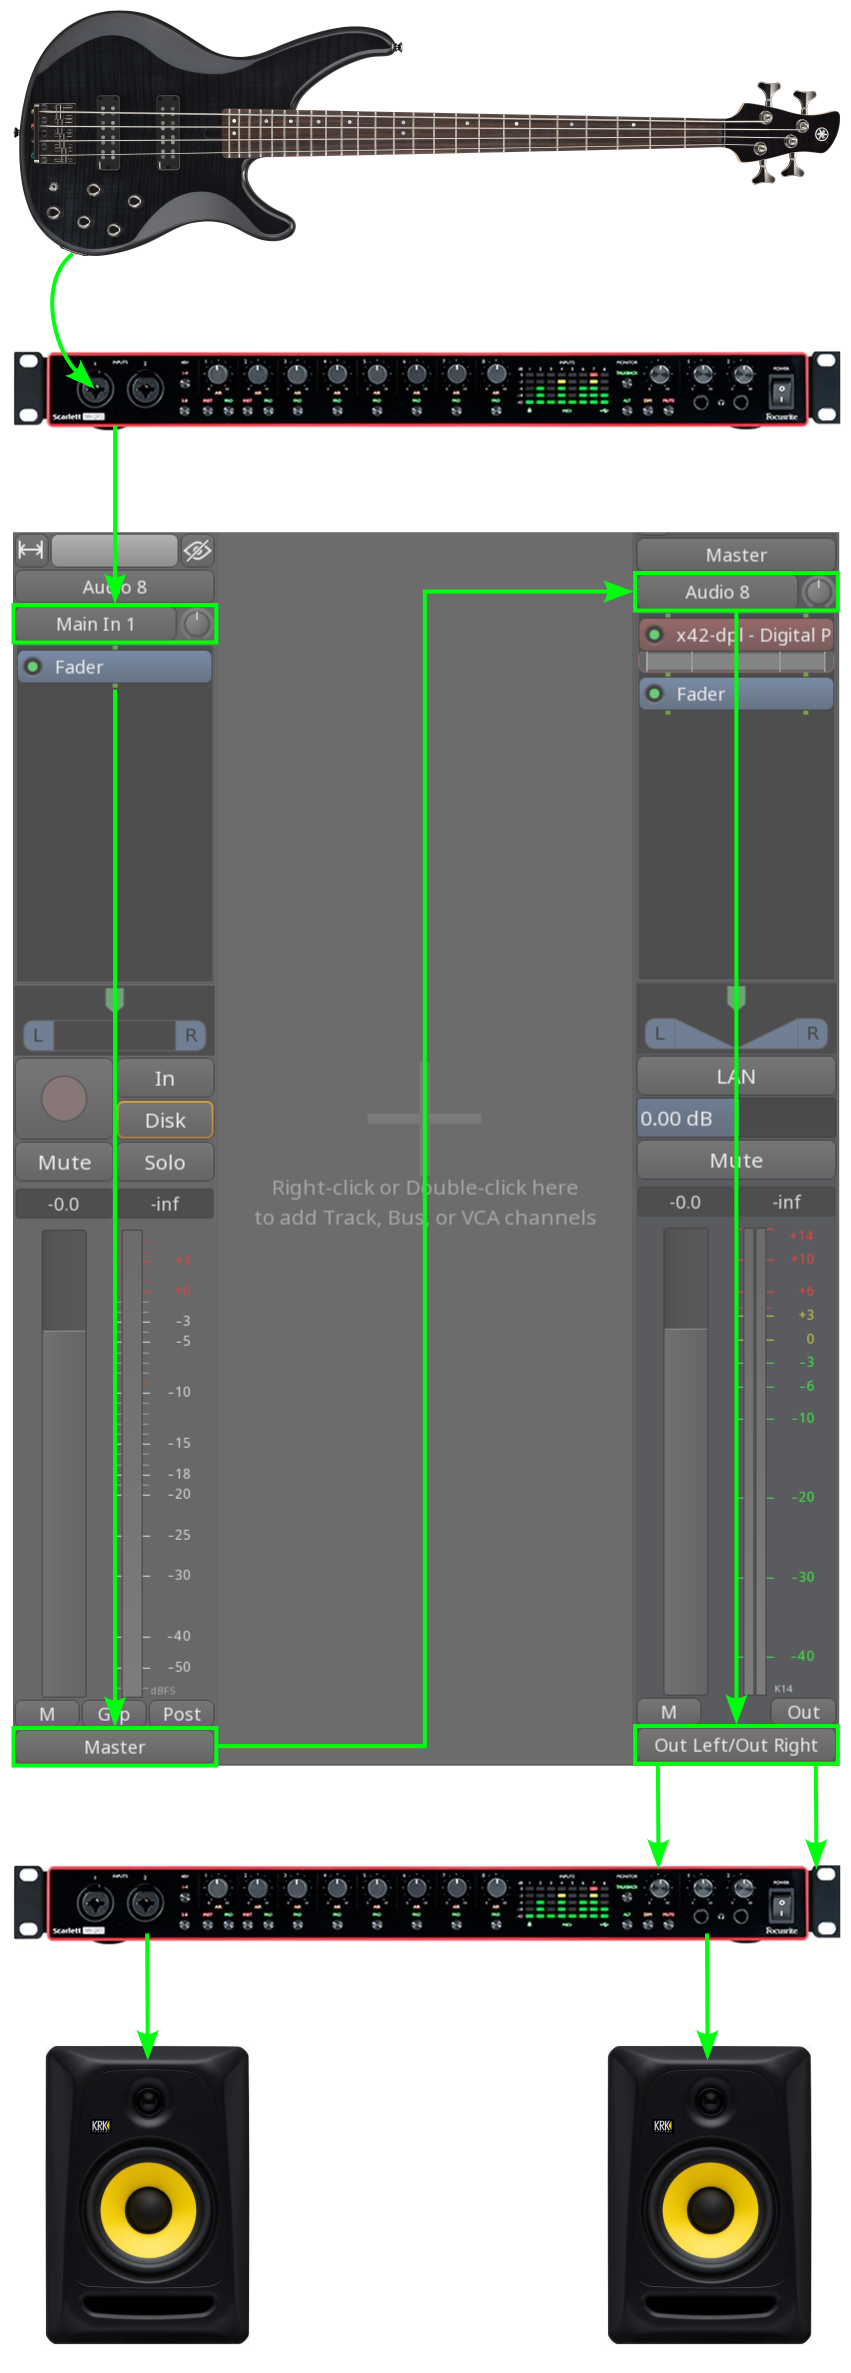
The chart on the right demonstrates a common signal flow for recording an instrument: a guitar is plugged into a front input of an audio interface, the signal then goes directly into the track output, passes the processor box with plugins, fader, and panner, connects to the input of the master bus, passes its processor box, the goes into the monitor section, then finally connects to physical outputs like studio monitors or headphones.
This configuration can have multiple variations, such as:
When Ardour creates multiple tracks and/or busses at once, this is what happens.
This configuration is sufficient to do basic tracking and playback of many sessions without any adjustment by the user. Changing these connections is generally not necessary and often leads to problems.
However, for many workflows during mixing, more complicated signal routing is required. Ardour offers many possibilities for connecting things to fit any particular workflow.
Routing for MIDI tracks
Typical routing for MIDI tracks is very similar to that of audio tracks.

A MIDI keyboard output goes into MIDI IN port of an audio interface, then MIDI events are transmitted over USB to a MIDI track where they are sent to a software synthesizer. The synthesizer plugin outputs two or more audio channels that are automatically connected to the master bus, and master bus outputs are connected to studio monitors or headphones.
Notably, the processor box for MIDI tracks and busses always has a MIDI THROUGH port that carries a copy of all events coming through MIDI IN.
There are also some variations here possible:
Ardour uses the same round-robin logic to connect MIDI ports to MIDI tracks when multiple MIDI tracks are created. However, when no MIDI device is connected, Ardour will connect the newest created track to its own internal virtual MIDI keyboard and keep the other MIDI tracks not connected.
Bundle Manager
The Bundle Manager simplifies connecting I/O channels in cases where similarly purposed instruments/mics are scattered across a multi-channel audio interface. A common scenario is recording a drumkit with 6 mics. If you need to re-route the mics in the session, instead of connecting each and every one of them separately, you can create a bundle and connect just the bundle.
Bundles can be created for both sources (e.g. mic inputs) and destinations (e.g. studio monitors). You can create as many bundles as you like.
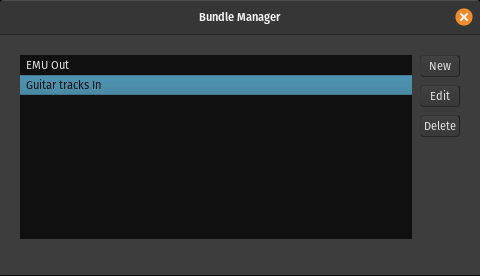
Creating a bundle
Click New button to create a new bundle. In the newly opened dialog, give it a name, choose whether you want this to be a bundle of source or destination channels, then connect the ports that you want to collect to the bundle port.
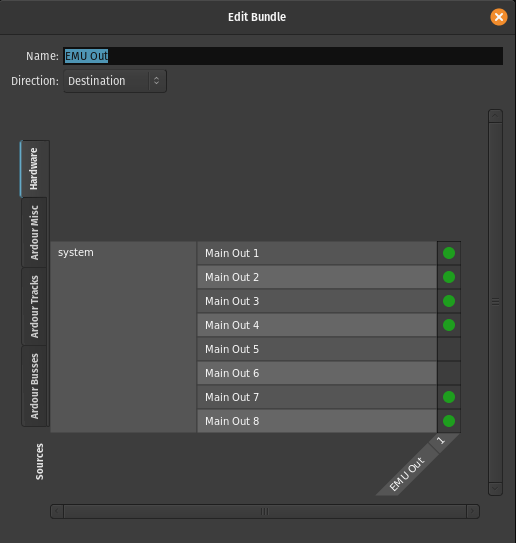
Close the dialog to apply changes.
Connecting a bundle
When connecting a bundle to a port, it works as a convenience proxy for the physical ports. Clicking to connect a bundle (here, "Guitar tracks in") to an input automatically connects all the actuel ports in the bundle at once.
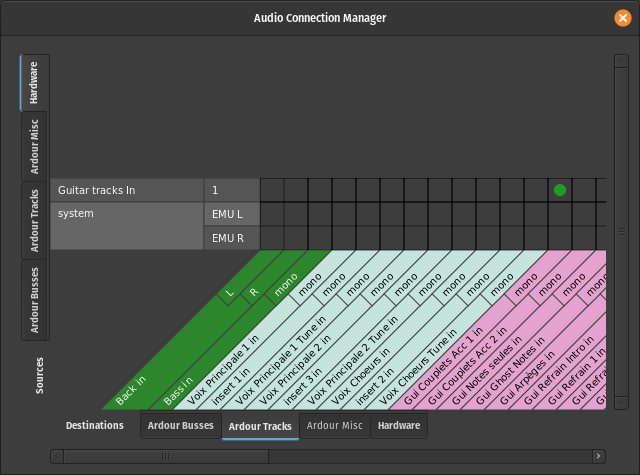
Editing and deleting bundles
At any time you can re-open the Bundle Manager window, select a bundle, click Edit and change connection of physical ports to the bundle. Close the window to apply changes.
You can easily delete an existing bundle. Open the Bundle Manager window, select a bundle, click Delete.
Reusing bundles
As bundles are part of a session rather than a global setting, you can save them as part of a template for further reuse. Simply create a new session, create and connect tracks, busses, and bundles, then save your session as a template. Choose this template when creating a new session.
Aux Sends
Auxiliary sends are simple processors in a bus or track channel strip. They tap the signal at a specific point in the signal flow (pre-fader, post-fader, before or after EQs and other plugins, etc.) and send a copy of that signal to a bus, without affecting the normal signal flow downwards to the channel fader.
Aux sends from several tracks are collectively sent to a bus in Ardour, to create a monitor mix for a musician, or to feed an effect unit. A bus used in this way is considered an auxiliary bus or Aux bus even though it is the same as any other bus. The output of such a bus might be routed to separate hardware outputs (in the case of headphone or monitor wedge mixes), or returned to the main mix (in the case of an effect).
Aux sends do not show up outside of Ardour either on the audio device or as JACK ports, External Sends should be used to send audio to the audio device or Jack ports. External Sends can send the tapped signal somewhere else directly, which is not usually possible on hardware mixers.
It may be useful to compare and contrast the use of aux sends with subgrouping.
Adding a new aux bus
New busses can be created using the Session > Add Track, Bus or VCA… menu, and selecting Audio Busses in the Template/Type selector on the left of the Add Track/Bus/VCA dialog.
Adding a send to an aux bus
Context-clicking on the processor box for the track to send to the bus, and choosing New Aux Send … shows a submenu, listing the busses. Choosing one bus will add a send (which will be visible in the processor box). Note that if the only existing bus is the Master Bus, the menu will be grayed out.
Pre-fader and Post-fader Aux Sends
Depending on whether the context-click happened above or below the fader in the processor box, the new aux send can be placed before or after the fader in the channel strip.
The color of the processor will reflect this pre/post position (red for Pre, green for Post). Dragging and dropping the send inside the processor box before or after the Fader processor changes the type of fader accordingly.
Adding a new aux bus and sending a Track Group to it
All members of a group can be sent to a new aux bus at once with a single click. After creating the track group (and adding tracks to it), context-clicking on the group tab allows to choose either Add New Aux Bus (pre-fader) or Add New Aux Bus (post-fader). A new aux bus will be created, and a new aux send added to every member of the track group that connects to this aux bus.
Altering Send Levels
The amount of the signal received by a send that it delivers to the bus it connects to can be altered in two ways:
Using the Send Fader
Every send processor has a small horizontal fader that can be adjusted in the usual way. It is not very big and so this can be a little unsatisfactory if a very fine control over the send level is required.
Map Aux Sends To Main Faders
In Mixer mode, pressing the button marked Show Sends on a aux bus will alter the channel strip for every track or bus that feeds the aux bus. Many aspects of the strip will become insensitive and/or change their visual appearance. More importantly, the main fader of the affected channel strips will now control the send level and not the track gain. This gives a larger, more configurable control to alter the level. Clicking the Show Sends button of the aux bus again reverts the channel strips to their normal use.
Disabling Sends
Clicking on the small LED in the send display in the processor box of the channel strip will enable/disable the send. When disabled, only silence will be delivered to the aux bus by this track. When enabled, the signal arriving at the send will be delivered to the aux bus.
Send Panning
Send panners can be configured to either be independent of the main panner, or to follow it. The latter could be useful for Reverb effects, or for in-ear monitor mixes delivered in stereo.
Comparing Aux Sends and Subgroups
Auxes and Subgroups share a common concept—they both provide a way for one or more tracks (or busses) to send their signal to a single bus so that common signal processing can be applied to the mix of their signals.
Aux sends leave the existing signal routing to the main mix in place, and are typically used to create a separate mix to send to (for example) monitors or headphones (for performer monitor mixes):
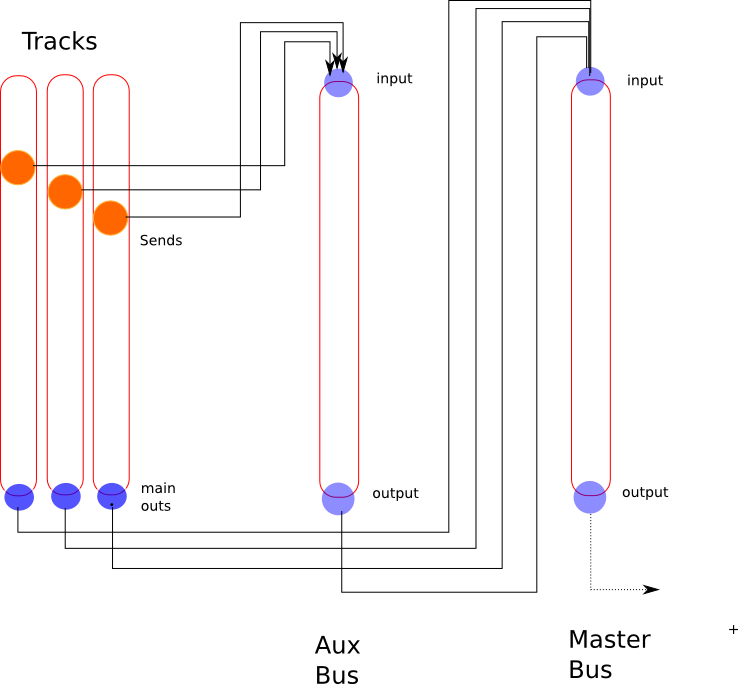
Subgroups usually remove the original signal routing to the main mix and replace it with a new one that delivers the output of the subgroup bus to the main mix instead.
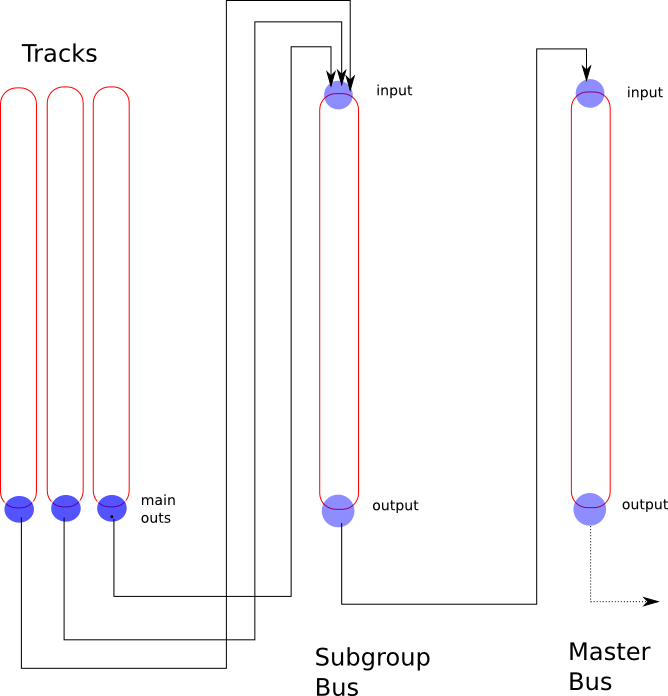
External Sends
Like a normal aux send, an external send taps the signal at a specific point within a channel strip, but delivers it to an external application or piece of hardware rather than an Ardour bus. By itself, an external send has no effect whatsoever on the audio signals within Ardour—it is a one-way signal routing that leaves all existing signal processing just as it was.
Most people will not have much use for this, but it can be useful to experiment with external applications or hardware signal processing applications.
Adding an External Send
Context-clicking on the processor box in a channel strip (at the desired location, pre or post fader) and choosing Add new External Send will show a dialog containing the standard Ardour patchbay to allow to connect the send to the desired destination.
Removing an External Send
An external send can be removed in several ways:
Altering Send Levels
Just below the send in the processor box is a small fader that can be used like all other faders in Ardour to control the gain applied to the signal delivered by the send. Dragging it alters the level, Shift-click restores to unity (0dB) gain.
Disabling Sends
Clicking the small LED in the send display within the processor box turns it on and off. When turned off, silence will be delivered to the send. When turned on, the signal within the channel strip will be delivered.
Editing Send Routing
Double-clicking on the send in the processor box will re-display the patchbay dialog that gives full control over the routing of the send, as well as additional controls: gain fader, panner, signal meter, and phase inverter.
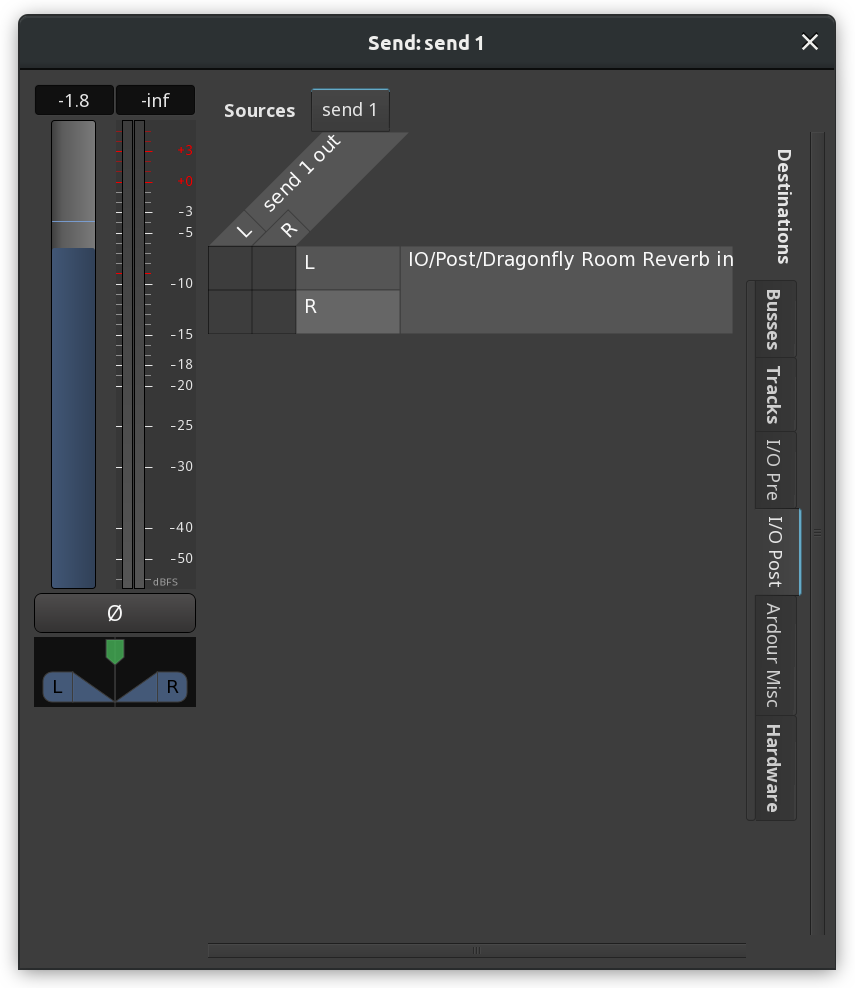
Inserts
Inserts are signal tap points that can be placed anywhere inside a channel strip. Unlike Auxes, they will interrupt the signal flow, feeding the signal from before the insert point to its Insert send(s), and connecting the remainder of the channel strip to the Insert return(s), both of which are either audio device or JACK ports.
When an insert is created, the signal will be interrupted until the relevant connections to the insert ports are made!
While jack ports are visible to other JACK applications, ALSA ports are only useful for patching in audio equipment external to the computer. If inserting a software processor is required, a plugin would be the first choice. If a plugin is not available then the jackd audio backend would have to be used. This is not very common any more but there are some older jack clients that require using jack.
Inserts work the same as the inserts on analog consoles except they are not normalled like most jacks on an analog console.
An insert allows to either use a special external DSP JACK application that is not available as a plugin, or to splice an external analog piece of gear into a channel strip, such as a vintage compressor, tube equalizer, etc. In the latter case, the inserts would first be connected to a pair of hardware ports, which are in turn connected to the outboard gear. This is done on the Send/Output and Return/Input tabs of the Insert dialog respectively.
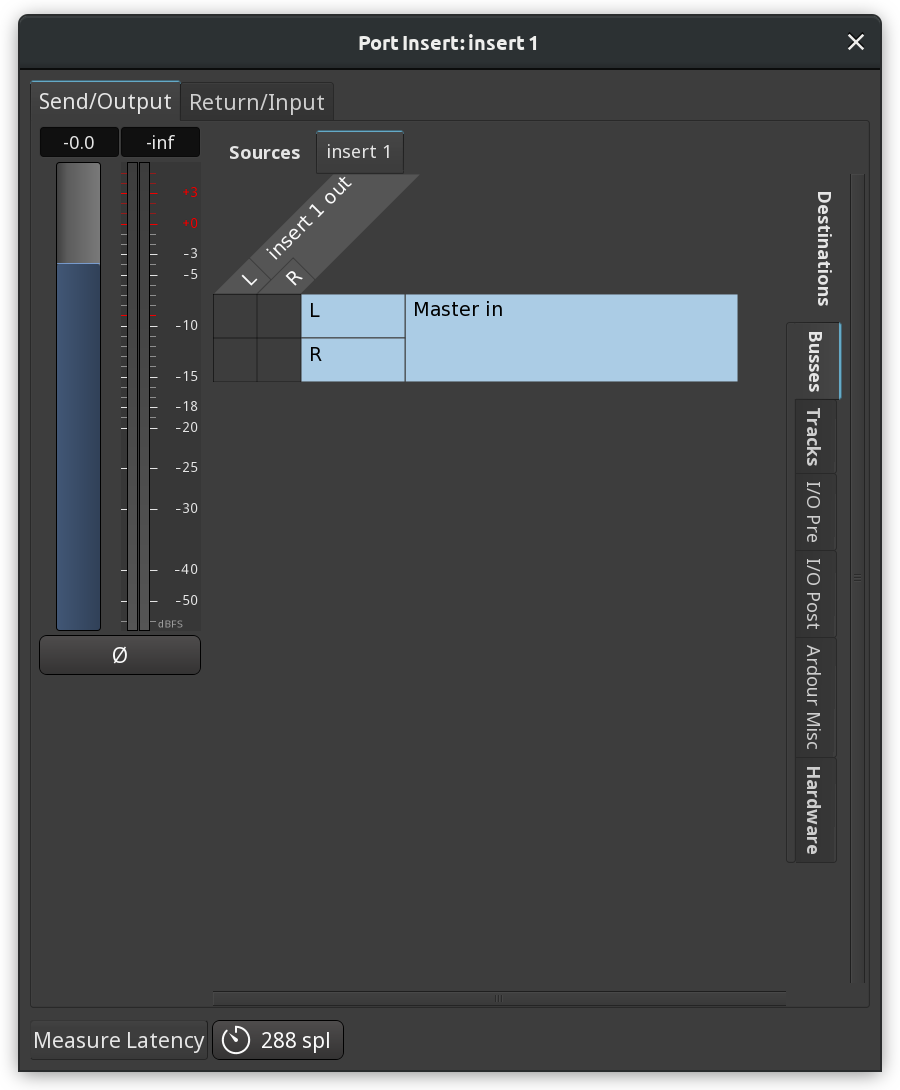
Apart from providing access to the connections matrix, the dialog allows adjusting the output gain and toggling phase inversion for Send/Output, as well as measuring and adjusting latency for the insert.
Inserts will incur an additional period of latency, which can be measured and compensated for during mixing, but not during tracking!
Disabling (bypassing) an insert is done by clicking on its LED in the processor box.
Subgrouping
Subgrouping (sometimes known as "Grouping" or "Audio Grouping") is a way to collect related signals together to apply some common treatment, before sending them on to the main mix. One standard application is to group several tracks belonging to the same instrument or section (such as a drum kit or horn section), to be able to adjust their volume with a single fader, after their inner balance has been set using the track faders.
Ardour supports both audio and MIDI subgroup busses, so it's possible to collect MIDI events from multiple tracks and send them to a multi-voice software synth or sampler.
Ardour also provides VCAs that is a very flexible way to adjust the volume of a group of tracks/busses when no additional processing is needed.
Create a subgroup from an existing Track/Bus group is done by right-clicking on the relevant group tab, and choosing Add New Subgroup Bus. A new bus will be created and every member of the track group will have its outputs disconnected from other destinations and then connected to the new bus inputs. The bus outputs will feed the master bus unless manual connections have been selected in the session preferences. The bus will be named after the track group name.
Alternatively, a group can be created manually, by first adding a new bus, then, for each track to be fed in the subgroup bus, disconnecting its outputs from the master and connecting it to the inputs of the subgroup bus instead. This can be done in the global audio patchbay or on a track by track basis via the output button of each track's channel strip.
Remove a subgroup (bus) is done by right -clicking on the track group tab, and selecting Remove subgroup bus. Simply deleting the bus itself will not restore signal routing to the way it was before the addition of the subgroup bus —tracks that had been subgrouped will be left with their main outputs disconnected.
Patchbay
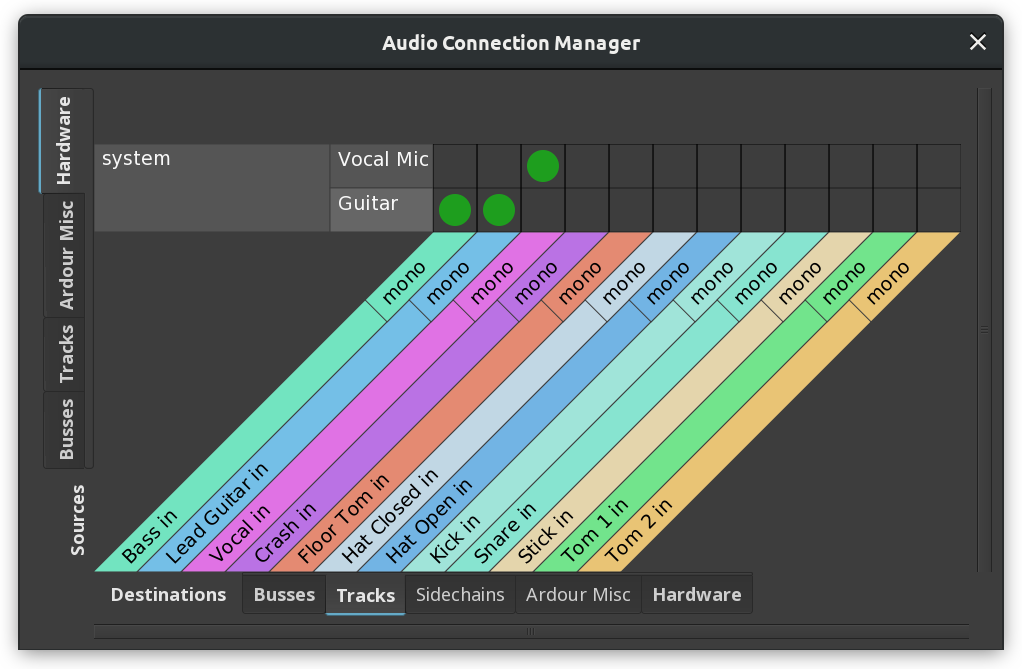
The patchbay is the main way to make connections to, from and within Ardour's mixer.
Notable exceptions are internal aux sends and connections to the monitor bus (when using one): these cannot be controlled from a patchbay, and are basically not under manual control at all.
The patchbay presents two groups of ports; one set of sources (which produce data), and one of destinations (which consume data). Depending on the relative number of each, the sources will be placed on the left or the top of the dialogue, and the destinations on the right or the bottom. Thus, in general, signal flow is from top or left to right or bottom.
Both sources and destinations are divided up into groups, with each group being given a tab:
| Hardware | These are ports which are connected to a physical piece of hardware (a sound card or MIDI interface). |
|---|---|
| Ardour Misc | These are other ports that do not fit into the previous two categories; for example, the ports on which the metronome click is output, and MIDI ports for things like control surfaces and timecode. |
| I/O Pre | All ports of I/O Pre-Process Plugins. |
| I/O Post | All ports of I/O Post-Process Plugins. |
| Tracks | All ports belonging to tracks. |
| Busses | All ports belonging to busses. |
| Other | If the Jack backend is being used and if there are other JACK clients running, their ports will be found here. If there are no such ports, the tab will not exist (on one or both axes of the grid). |
The main part of the patchbay is a matrix grid. Within this grid, green dots represent connections, and any of the squares can be clicked on to make or break connections. Clicking and dragging draws a line of connections, which is sometimes useful for making many connections at once.
In the example patchbay shown above we can note various things. We are using the Ardour Tracks sources tab, so we see the output ports of the three tracks in our session: Fred, Jim and Foo. Our destinations are from the Ardour Busses tab, so we have the inputs of a session bus, Sheila, and the inputs of the master bus. Fred and Jim have stereo outputs, so have L and R connections. Foo is a MIDI track, so it only has one connection, and its squares in the grid are coloured light grey to indicate that no connection can be made between Foo (a MIDI output) and our busses (which are all audio-input).
The green dots in the example show that both Fred and Jim are connected to the master bus, left to left and right to right.
Variants on the Patchbay
Slightly different versions of the patchbay are available from different places in Ardour. A global view of all audio connections is available, in Window > Audio Connections, or by pressing P. A corresponding MIDI Connection Manager can be opened using P.
There is also a patchbay available when connecting individual tracks; clicking on the input or output buttons of a mixer strip will open a connection manager which has the corresponding track input or output as the only destination or source, with all other ports available for connection to it.
Other patchbay features
right-clicking on a port name in the connection manager opens a context menu which provides a few handy options:
| Add audio port and Add MIDI port |
These options add audio or MIDI ports to the clicked source, if this is possible. In this way, for example, tracks and busses can be extended to have more inputs or outputs. |
|---|---|
| Remove port_name | Removes the given port, if possible. Right-clicking a port will do the same. |
| Disconnect all from port_name | Disconnects everything from the given port. |
| Rescan | If Ardour is using the JACK backend, Ardour will try to keep abreast of any changes to the JACK ports on the system, and reflect them in any connection managers which are open. If for some reason this fails, this can be used to re-scan the list of ports and update the manager. |
| Show individual ports | If a session has lots of multi-channel tracks or busses, it may be an unnecessary detail that left has to be connected to left and right to right every time a connection is made. This obviously gets worse with higher channel counts (such as for 5.1 or Ambisonics). To make life easier with such sessions, Show individual ports can be unticked. After that, the channels of tracks and busses will be hidden, and any green dots added in the connection manager will automatically connect each channel of the source to the corresponding channel of the destination (left to left, right to right and so on). In this mode, a half-circle in the connection grid indicates that some (but not all) of the source's ports are connected to the destination. |
| Flip | This will flip the visible ports on the vertical axis with those on the horizontal. If, for example, the top of the connection manager is showing Ardour Busses and the right is showing Hardware, flip will swap the view to the opposite. Flipping can also be done by pressing f. Note that if there are no matching tabs on both axes, flipping will be impossible. |
Track/Bus Signal Flow
Overview
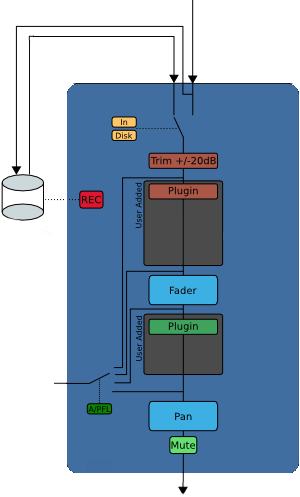
In each individual Track or Bus the signal flow is top to bottom, as shown in the diagram on the right.
Trim, Fader and Panner are provided by Ardour. The Processor Box can hold third party plugins or host-provided redirects (insert, aux-send, etc.).
An important aspect is that the signal flow is multi-channel and not fixed throughout the track. For example, a track can have a mono input, a mono to stereo plugin (e.g. reverb) flowing into a surround panner with 6 outputs.
The design of Ardour is that the width of the signal flow is defined by the passage through plugins in the processor box, followed by panning. The number of inputs to the panner is defined by the number of outputs of the last plugin in the chain. The number of panner outputs is equal to the track's outputs ports, which can be added and removed dynamically. This schema is called Flexible I/O. It is very powerful and a distinctive feature of Ardour.
The golden rule of processor signal flow: The number of outputs of one link of the process chain defines the number of inputs of the next, until the panner.
Due to this rule there is one very common case that is hard to achieve: keeping a mono track mono. With Flexible I/O, if a stereo plugin is added on a mono track, the signal flow after that plugin becomes stereo.
Strict I/O
Strict I/O enforces a simple rule: plugins have the same number of inputs as they have outputs. By induction the track will have as many output ports as there are input ports.
Adding a plugin will not modify the signal flow. The number of plugin outputs is forced to the number of inputs present at the point of insertion. If a plugin pin is missing, it is ignored. If a plugin pin is not connected, it is fed with silence. Non-connected plugin outputs are ignored.
Strict I/O enforces the number of output ports. The number of inputs to the panner (outputs of last plugin) defines the number of track outputs (after panner). Required ports are automatically added, excess ports are removed. The user cannot manually add or remove output ports.
Strict I/O is set when creating the track and can later be enabled or disabled dynamically in the context menu of every mixer strip.
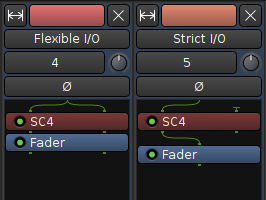
There are two exceptions to the above rule:
Customizing the Signal Flow: The Pin Connection window
The signal flow though the mixer can be customized at every processor node via Pin Configuration in the context menu of every processor. User customization overrides all automatic (Flexible and Strict I/O mode) inferred output port settings.
The Pin Connection window is made of three vertical sections:
By default, the I/O config is set to Automatic, i.e. the Manual Config LED light is turned off. In this mode, the diagram will display the standard input/outputs for this plugin, i.e. the number of ports (inputs & outputs) is equal to the number of pins on the plugin, and a one-to-one connection is automatically created.
Adding new instances of the plugin allows to apply this plugin to more inputs or outputs. E.g., a mono effect can be applied to each channel of a n-channels track by adding as many instances of the plugins as there are input channels (i.e. ports). This happens automatically when adding, e.g., a mono effect to a stereo track:
Output channels can also, in Manual Config mode, be added or removed, whether they are audio or MIDI.
Using the Pin Connection overrides the I/O config setting (Flexible vs. Strict). A processor can, even in Strict I/O mode, have a different number of outputs than inputs. Non-customized plugins downstream will follow suit depending on the selected route mode. e.g. adding an additional output to a plugin on a track set to Strict I/O will trickle down the process chain to the output and result in the addition of an output port. This is useful for example in case of a mono to stereo reverb.
The window allows connection of the I/O ports to the plugin pins and other I/O ports, provided they are compatible (MIDI vs. audio), just by dragging and dropping the end connectors on top of one another. A dotted connector's line is a "thru" line that directly connects an input to an output without connecting to a pin on the plugin—hence without any audio modification. These "thru" connections are latency compensated, with respect to those being affected by the plugin, in order to avoid phasing issues.
An example of using "thru" connections, shown below, is separate left/right channel equalization using two mono plugins on a stereo track:
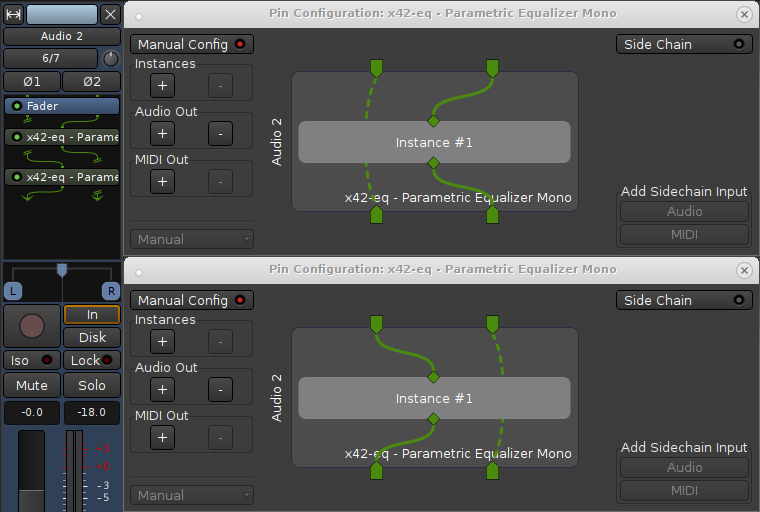
The only way to add inputs to a processor is via Sidechaining from another signal. This is done by "tapping" the signal from another track or bus at any point.
Adding a sidechain signal in Ardour is as simple as enabling the Side Chain button in the Pin Configuration window, and choosing an Audio or MIDI sidechain in the Add Sidechain Input lower right hand section. A new drop-down menu appears, which displays a list of the tracks/busses available to be sidechained, or, for a more complex setup (e.g. sidechaining from hardware directly), the Routing Grid (also accessible with a Right-click on the drop-down menu).
The sidechain ports can then be connected, as other inputs, to a pin of the plugin, or an output port as a "thru".
Sidechaining
Dynamic Processors—such as compressors—in general use the the original input signal for analysis and operate on the same signal. Side-chaining uses the signal level of another input to control the compression level of the original signal.
Effect Processors which have a side-chain input (sometimes also called key input) have an additional input pin to receive a signal from an external input. In Ardour that extra input can be connected in the plugin's Pin Configuration dialog: the signal from one track can be tapped off and used as an input to a plugin on a different track. This dialog is accessed via the plugin's context-menu > Pin Connections….
In case a plugin has a dedicated sidechain input, Ardour automatically creates a port for the input. This is a normal I/O port which can be fed by any external signal. The Pin Configuration dialog is not limited to processors with a dedicated sidechain input, it also allows to manually create (or remove) a sidechain input port and provides for flexible connection of the signal to plugin pins.
The operational flow in the Ardour GUI starts at the processor which is to receive the signal: a sidechain source is selected, and Ardour creates a dedicated send-processor in the source processor box, the level of which can be adjusted either in the Pin Configuration window or directly on the source's send.
A simple example: Sidechain compression
One example is the use of a bass drum track to trigger the compression on a bass track. The sidechain compressor (a-Compressor) will be placed on the bass track, and will need to receive the signal from the bass drum track as a way to trigger the compression.
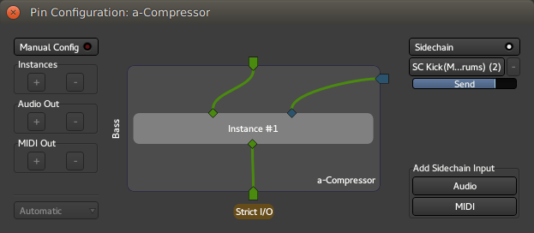
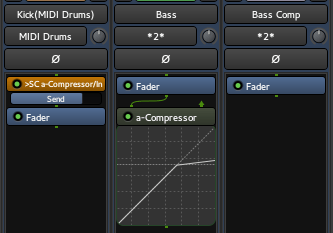
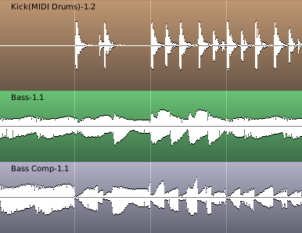
Here, on the bass track, an a-Compressor has been added, and the Drum track has been set as the sidechain source. The mixer reflects this by showing an SC-send processor in the drum track, very similar to a send. The bass track also shows an arrow as one of the a-compressor input.
As a result, in the editor, each peak in the kick drum track triggers the compression on the bass track and the resulting track shows the compression kicking in on each kick drum peak, hence reducing the gain. The compression is applied to the bass, but only based on the level of the drum track.
This is commonly used for ducking effect, when e.g. a radio speaker's voice triggers the compression on the audio playing.
MIDI Sidechaining
Ardour allows the sidechain sources to be either audio or MIDI tracks/busses. This is particularly useful when a MIDI signal is used to control an audio effect, like a vocoder or an auto-tuner, like fat1, the LV2 port of Fons Adriaensen's Zita AT1 by Robin Gareus:
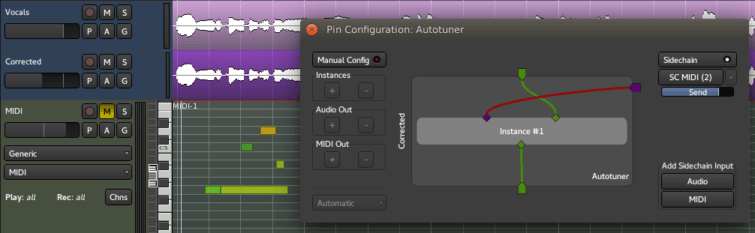
Here, the MIDI track is inputted to the plugin's MIDI IN pin through a sidechain, indicating to the plugin what note the source audio should be corrected to.
Notice that in the example above, the output of the "Vocals" track is connected to the input of the "Corrected" track. We could have chosen to insert the "Vocals" track content as an audio sidechain too, totally disconnecting the input from the plugin, and connecting the plugin's input pin to the audio sidechain port.
Pre-processing the sidechained signal
Sometimes, the effects of a sidechain signal on a plugin can be enhanced by pre-processing the signal.
In the first example above, if the entire drum part is on one track, then compressing with this signal as a sidechain will result in every peak triggering the compression, be they bass drum kicks or snare, cymbals, etc.
In this case, adding an EQ to the drum track with a low pass filter would filter out the peaks created by the high pitched instruments of the drum kit, and allow for a better triggering, though to avoid damaging the original drum track, a send to an intermediary track would be better suited to place the EQ on. This track won't be connected to the Master, as its content is of no musical interest except for its use as a trigger, allowing for some extreme EQ.
Muting and Soloing
Each track and bus has two buttons which have important implications for signal flow: mute and solo. The behaviour of these buttons is configurable in Ardour, to suit different studio set-ups.
Without a monitor bus
When using Ardour without a monitor bus, there is only one way in which mute and solo will work:
The Solo status indicator button in the Toolbar blinks when one or more tracks are being soloed. Clicking this button disables any active explicit and implicit solo on all tracks and busses.
With a monitor bus
For setups with a monitor bus, more options are available, mostly governed by the setting of the Solo controls are Listen controls option in Edit > Preferences > Monitoring.
With Solo controls are Listen controls unticked, behaviour is almost exactly the same as the situation without a monitor bus. Mute and solo behave the same, and the monitor bus is fed from the master bus, so it sees the same thing.
With Solo controls are Listen controls ticked, the master and monitor busses behave differently. In this mode, solo controls are more properly called listen controls, and Ardour's solo buttons will change their legend from S for Solo to show the listening point, either A for After fader or P for Pre fader.
Now, without any mute or listen, the monitor bus remains fed by the master bus. Also:
When solo controls are listen controls, the listening point can be set to either After-Fade Listen (AFL) or Pre-Fade Listen (PFL). The precise point to get the signal from can further be configured using the PFL signals come from and AFL signals come from options.
The solo-mute arrangement with a monitor bus is shown below:
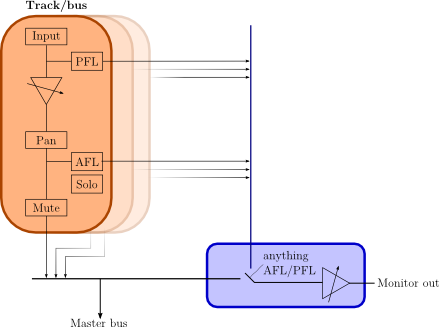
Here we have a number of tracks or busses (in orange). Each one has an output which feeds the master bus. In addition, each has PFL and AFL outputs; we have a choice of which to use. PFL/AFL from each track or bus are mixed. Then, whenever anything is set to AFL/PFL, the monitor out becomes just those AFL/PFL feeds; the rest of the time, the monitor out is fed from the master bus.
In this scheme Solo has no effect other than to mute other non-soloed tracks; with solo (rather than listen), the monitor out is fed from the master bus.
Other solo options
Edit > Preferences > Monitoring has some more solo options:
Solo-in-place mute cut
When using solo-in-place (SiP), in other words when soloed tracks are being listened to on the master bus, this fader specifies the gain that will be applied to other tracks in order to mute them. Setting this level to −∞ dB will mean that other tracks will not be heard at all; setting to some higher value less than 0dB means that other non-soloed tracks will be heard, just reduced in volume compared to the soloed tracks. Using a value larger than −∞ dB is sometimes called "Solo-In-Front" by other DAWs, because the listener has the sense that soloed material is "in front" of other material. In Ardour, this is not a distinct mode, but instead the mute cut control offers any level of "in-front-ness" that is desired.
Exclusive solo
If this is enabled, only one track or bus will ever be soloed at once; soloing track B while track A is currently soloed will un-solo track A before soloing track B.
Show solo muting
If this is enabled, the mute button of tracks and busses will be drawn outlined to indicate that the track or bus is muted because something else is soloed. This is enabled by default, and it is recommended to leave it that way unless extremely comfortable with Ardour's mute/solo behaviour.
Soloing overrides muting
If this is enabled, a track or bus that is both soloed and muted will behave as if it is soloed.
Mute affects…
These options dictate whether muting the track will affect various routes out of the track; through the sends, through the control outputs (to the monitor bus) and to the main outputs.
Panning
Panning is the process of distributing one or more signals across a series of outputs so that the listener will have the experience of them coming from a particular point or area of the overall listening field.
It is used to create a sense of space and/or a sense of motion in an audio mix. Different signals can be spread out across the space, and moved over time.
Types of Panners
The way a panner works depends a great deal on how many signals it is going to process and how many outputs it will send them to. The simplest case is distributing a single signal to 2 outputs, which is the common case when using a "mono" track and a stereo speaker setup.
But panning in Ardour could theoretically involve distributing any number of signals to any number of outputs. In reality, Ardour does not have specific panners for each different situation. Currently, it has dedicated panners for the following situations:
Even for each of these cases, there are many different ways to implement panning. Ardour currently offers just one solution to each of these situations, but in the future will offer more.
In addition to the panners, Ardour has a balance control for subtle corrections to existing stereo images.
Mono Panner
The default mono panner distributes 1 input to 2 outputs. Its behaviour is controlled by a single parameter, the position. By default, the panner is centered.
Mono Panner User Interface

The mono panner looks quite similar to the stereo panner interface. The difference is that the L/R labels in the lower half of the mono panner do not move because there is no "width" to control.
On the adjacent picture, the panner is centered, as shown by the central position of the slider, called position indicator.
Using the mouse
To change the position smoothly, press the right button and drag anywhere within the panner. Note: grabbing the position indicator is not needed in order to drag.
| Reset to defaults | Click right |
|---|---|
| Change to a "hard left" | Double click right in the left side of the panner |
| Change to a "hard right" | Double click right in the right side of the panner |
| Set the position to center | Double Click right in the middle of the panner |
Keyboard bindings
When the pointer is within a mono panner user interface, the following keybindings are available to operate on that panner:
| ← / ← | move position 1° / 5° to the left |
|---|---|
| → / → | move position 1° / 5° to the right |
| 0 | reset position to center |
Using the scroll wheel/touch scroll
When the pointer is within a mono panner user interface, the scroll wheel may be used as follows:
| ⇑ or ⇐ | move position to the left by 1° |
|---|---|
| ⇑ or ⇐ | move position to the left by 5° |
| ⇓ or ⇒ | move position to the right by 1° |
| ⇓ or ⇒ | move position to the right by 5° |
Balance Control
For stereo tracks, it is possible to switch between the default stereo panner and a traditional balance control by right-clicking on the panner widget.
When the balance is centered, the incoming signals will be unaffected. Moving it to one side will linearly attenuate the signal of the opposite side.
While the balance control is considerably less flexible than the stereo panner, it works with arbitrary content without danger of introducing comb filter artefacts.
Stereo Panner
The default stereo panner distributes two inputs to two outputs. Its behaviour is controlled by two parameters, width and position. By default, the panner is centered at full width.
The stereo panner assumes that the signals to distribute are either uncorrelated (i.e. totally independent), or that they contain a stereo image which is mono-compatible, such as a co-incident microphone recording, or a sound stage that has been created with pan pots.*
With the default values it is not possible to alter the position, since the width is already spread entirely across both outputs. To alter the position, the width must first be reduced.
Stereo Panner User Interface

The panner user interface consists of three elements, divided between the top and bottom half. Clicking and/or dragging in the top half controls position; clicking and/or dragging in the bottom half controls width (see below for details).
In the top half is the position indicator, which shows where the center of the stereo image is relative to the left and right edges. When this is the middle of the panner, the stereo image is centered between the left and right outputs. When it all the way to the left, the stereo image collapses to just the left speaker.
In the bottom half are two signal indicators, one marked L and the other R. The distance between these two shows the width of the stereo image. If the width is reduced to zero, there will only be a single signal indicator marked M (for mono), whose color will change to indicate this special state.
It is possible to invert the outputs (see below) so that whatever would have gone to the right channel goes to the left and vice versa. When this happens, the entire movable part of the panner changes color to indicate clearly that this is the case.
Position vs. L/R
Although the implementation of the panner uses the "position" parameter, when the user interface displays it numerically, it shows a pair of numbers that will be familiar to most audio engineers.
| Position | L/R | English |
|---|---|---|
| 0 | L=50% R=50% | signal image is midway between left and right speakers |
| -1 | L=100% R=0% | signal image is entirely at the left speaker |
| 1 | L=0% R=100% | signal image is entirely at the right speaker |
One way to remember this sort of convention is that the middle of the USA is not Kansas, but "Los Angeles: 50% New York: 50%".
Examples In Use
| Appearance | Settings |
|---|---|
| Width=100%, L=50 R=50 |
 | Width=0%, L=50 R=50 |
 | Width=-100%, Position = 0 (center) |
 | Width=36%, L=44 R=56 |
 | Width=0%, L=0 R=100 |
Mouse operations in the upper half of the panner adjust the position parameter, constrained by the current width setting.
Mouse operations in the lower half of the panner adjust the width parameter, constrained by the current position setting.
The position can be changed smoothly, by pressing the right button and dragging within the top half of the panner, then releasing. The position will be limited by the current width setting. Note: it is not necessary to grab the position indicator in order to drag.
The width can also be changed smoothly, by pressing the right button and dragging within the lower half of the panner, then releasing. The width will be limited by the current position setting. Note: it is not necessary to grab the L/R indicators in order to drag.
| Reset to defaults | Click right |
|---|---|
| Change to hard left | Double click right in the upper left half of the panner |
| Change to a hard right | Double click right in the upper right half of the panner |
| Move position as far left as possible, given width | Double click right in the upper left half of the panner |
| Move position as far right as possible, given width | Double click right in the upper right half of the panner |
| Set the position to center | Click right in the upper middle of the panner |
| Reset to maximum possible width | Double click right on the lower left side |
| Invert (flip channel assignments) | Double click right on the lower right side |
| Set width to 0° | Double click right in the lower middle |
When the pointer is within a stereo panner user interface, the following keybindings are available to operate on that panner:
| ↑ / ↑ | increase width by 1° / 5° |
|---|---|
| ↓ / ↓ | decrease width by 1° / 5° |
| ← / ← | move position 1° / 5° to the left |
| → / → | move position 1° / 5° to the right |
| 0 | reset position to center |
| ↑ | reset width to full (100%) |
When the pointer is within a stereo panner user interface, the scroll wheel may be used as follows:
| ⇐ / ⇐ | increase width by 1° / 5° |
|---|---|
| ⇒ / ⇒ | decrease width by 1° / 5° |
| ⇑ / ⇑ | move position 1° / 5° to the left |
| ⇓ / ⇓ | move position 1° / 5°to the right |
Stereo panning caveats
The stereo panner will introduce unwanted side effects on
material that includes a time difference between the channels, such
as A/B, ORTF or NOS microphone recordings, or delay-panned mixes.
When the width is reduced, two highly correlated signals with a delay are
effectively summed, which will cause comb filtering.
Let's take a closer look at what happens when a source is recorded at 45° to the right side with an ORTF stereo microphone array and then the width manipulated.
For testing, we apply a pink noise signal to both inputs of an Ardour stereo bus with the stereo panner, and feed the bus output to a two-channel analyser. Since pink noise contains equal energy per octave, the expected readout is a straight line, which would indicate that our signal chain does not color the sound:
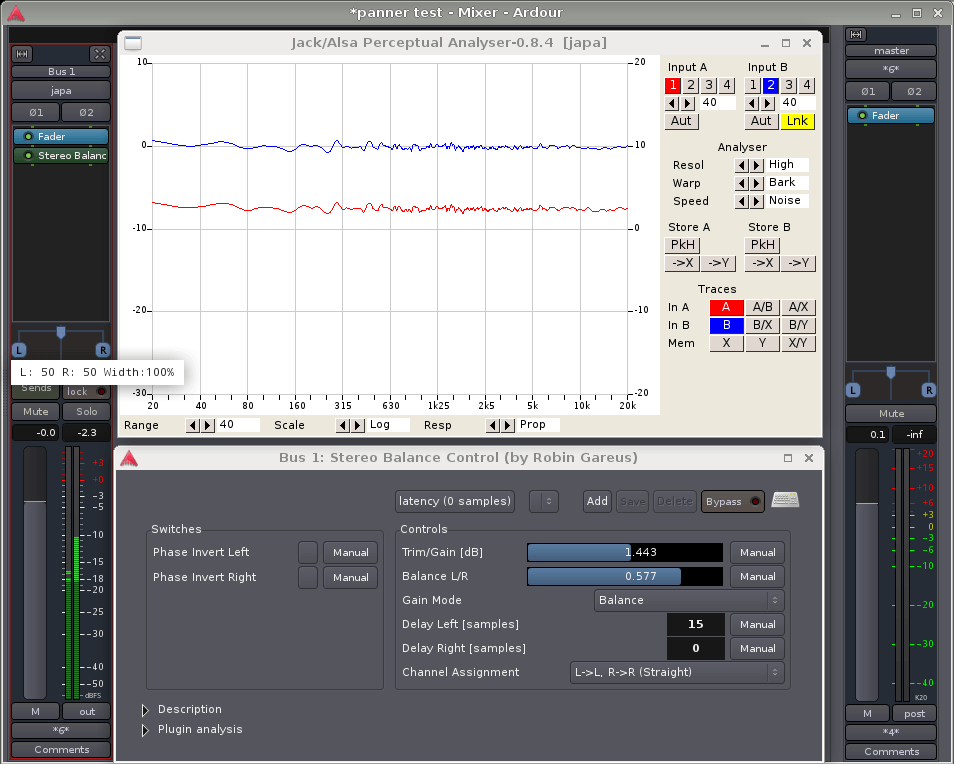
An ORTF is simulated using Robin Gareus' stereo balance control LV2 to set the level difference and time delay. The Trim/Gain can be ignored—its purpose is just to align the test signal with the 0dB line of the analyser.
An ORTF microphone pair consists of two cardioids spaced 17 cm apart, with an opening angle of 110°. For a far source at 45° to the right, the time difference between the capsules is 350 μs or approximately 15 samples at 44.1 kHz. The level difference due to the directivity of the microphones is about 7.5 dB (indicated by the distance between the blue and red lines in the analyser).
Now for the interesting part: if the width of the signal is reduced to 50%, the time-delayed signals will be combined in the panner. What happens to the frequency response of the left and right outputs is shown in the following picture:
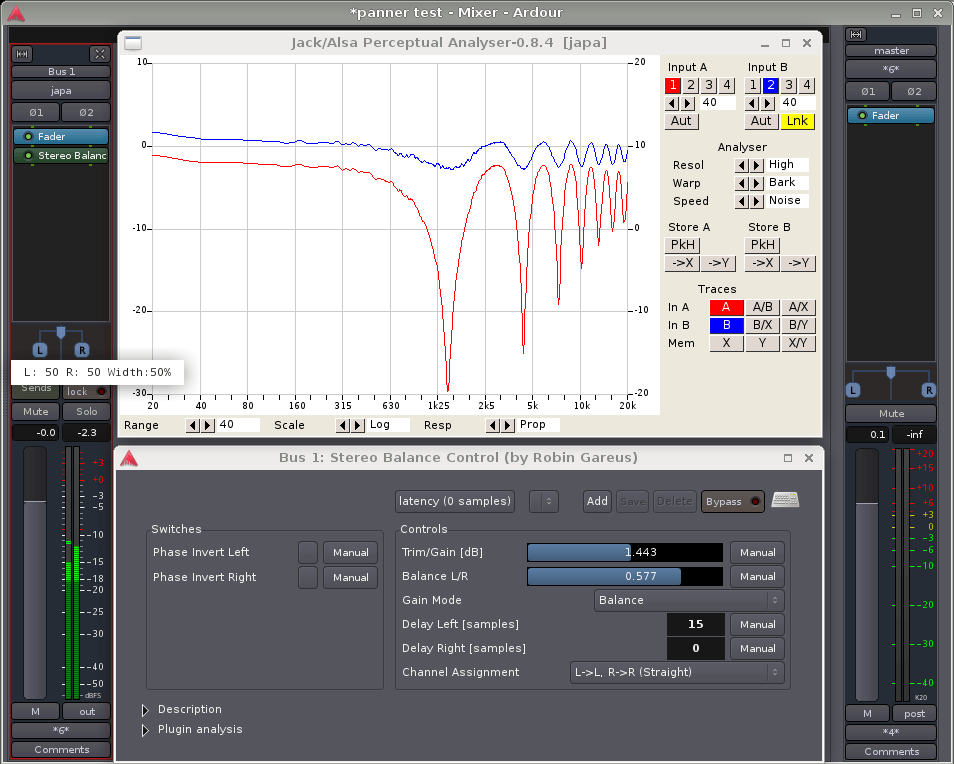
It can be argued that all spaced microphone recordings will undergo comb filtering later, when the two channels recombine in the air between the speakers. Perceptually however, there is a huge difference: our hearing system is very good at eliminating comb filters in the real world, where their component signals are spatially separated. But once they are combined inside a signal chain, this spatial separation is lost and the brain will no longer be able to sort out the timbral mess.
Depending on the material and on how much the width needs to be manipulated, some degree of comb filtering may be acceptable. Then again, it may not. It is advised to listen carefully for artefacts when manipulating unknown stereo signals—many orchestra sample libraries for example do contain time-delay components.
VBAP Panner
Ardour's VBAP panner is currently in development, and its semantics may
change in the near future, possibly affecting mixes using it. It is advised not
to rely on it for important production work while the dust settles.
The Panner only works in fixed static mode, it does not support
automation playback.
VBAP is a versatile and straightforward method to pan a source around over an arbitrary number of speakers on a horizontal polygon or a 3D surface, even if the speaker layout is highly irregular.
Basic concepts
VBAP was developed by Ville Pulkki at Aalto University, Helsinki, in 1997. It works by distributing the signal to the speakers nearest to the desired direction with appropriate weightings, aiming to create a maximally sharp phantom source by using as few speakers as possible:
Thus, if the panner is moved onto a speaker, only this speaker will get any signal. This is handy when precise 1:1 routing is needed.
The drawback of VBAP is that a moving source will constantly change its apparent sharpness, as it transitions between the three states mentioned above.
An horizontal VBAP panner has one parameter, the azimuth angle. A full-sphere panner offers an additional elevation angle control.
More elaborate implementations of VBAP also include a spread parameter, which will distribute the signal over a greater number of speakers in order to maintain constant (but no longer maximal) sharpness, regardless of position. Ardour's VBAP panner does not currently include this feature.
Speaker layout
Each VBAP panner is specific to its speaker layout—the panner has to "know" about the precise location of all the speakers. A complete VBAP implementation must therefore include the possibility to define this layout.
Ardour currently uses a simplified approach: if a track or bus has more than two output channels (which implies stereo), it assumes that there are N speakers distributed in a regular N-gon. That means that for irregular layouts such as 5.1 or 7.1, the direction dialed in will differ a bit from the actual auditory result, but any desired spatialisation can still be achieved.
Experimental 3D VBAP
For tracks with 10 outputs, Ardour will currently assume a 3-dimensional speaker layout corresponding to Auro-3D 10.1, which is a horizontal 5.1 system, four elevated speakers above L, R, Ls, and Rs, and an additional "voice-of-god" speaker at the zenith.
N:M panning
For tracks and busses with more than one input, Ardour will (for now) assume that the inputs are distributed symmetrically along the latitude around the panner direction. The width parameter controls the opening angle of the distribution sector.
Mixer Scenes
Mixer Scenes are a convenient way to keep multiple variations of a mix with the same set of tracks, busses, and plugins. In a recording studio environment, you can use it to quickly navigate between versions of a mix. In a broadcasting situation, it's a convenient way to quickly "add" a new mic when another guest joins a conversation.
The user interface is located in the bottom left part of the Mixer window. Scenes are numbered as 1 through 8 and have title to the right of the numbers.
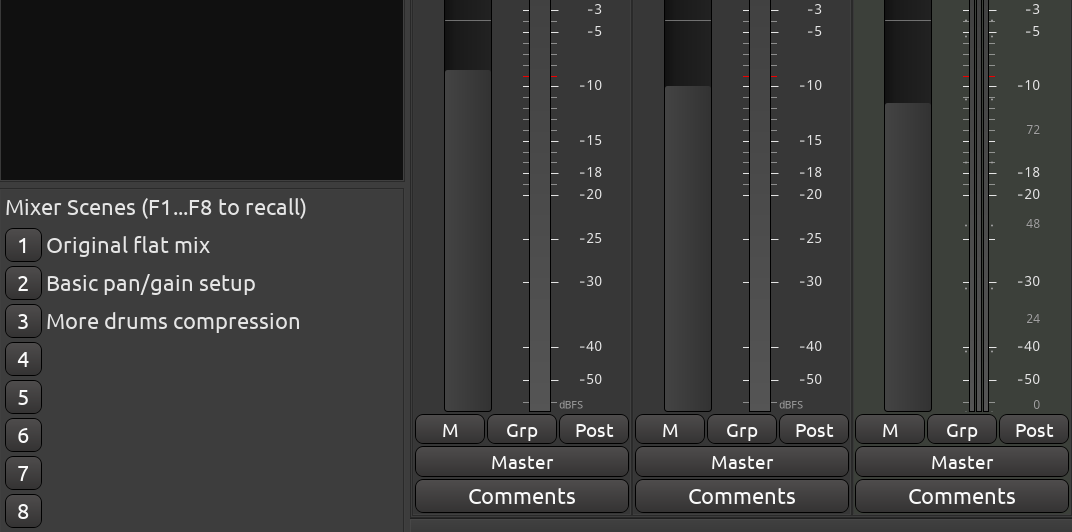
You can store a new mixer scene, recall it, overwrite it, rename it, or clear it. All interactions involve right-clicking, middle-clicking, or left-clicking a button with a number that represents a scene.
What mixer scenes can and cannot do
As part of a mixer scene, you can store and recall only the controls that you can automate:
Mixer scenes do not cover:
Storing a mixer scene
All mixer scenes are enumerated in the user interface. Hover the mouse pointer over an unused scene slot, right-click, then select Store.
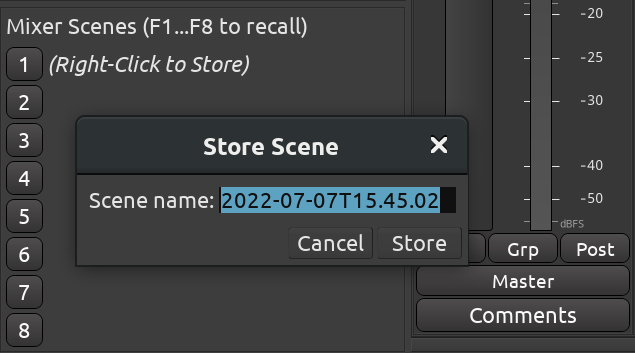
When you create a new mixer scene, the name defaults to the timestamp of the moment you are creating this scene. Instead, you can give scenes meaningful names. That way you can reopen a session months later and be able to tell which scene corresponds to which variation of the mix.
Recalling a mixer scene
To switch to an existing mixer scene (i.e. to recall it), simply left-click on the button with the scene number.
It's possible to recall a mixer scene only for a selection of tracks/busses. Select tracks or busses of interest by pressing and then clicking inside respective processor boxes, then right-click the mixer-scenes recall button for a context menu and choose the Restore for selected tracks menu item.
When restoring a mixer scene, any control that is in automation Write or Touch mode will not be restored.
If you want to quickly compare the current scene against a different one, hover the numbered button of the other scene, middle-click it and hold. Release the mouse button when you're done comparing.
Renaming a mixer scene
You can rename a scene at any time later. Right-click over the button with scene's number, choose Rename, the enter a new name in the newly opened dialog.
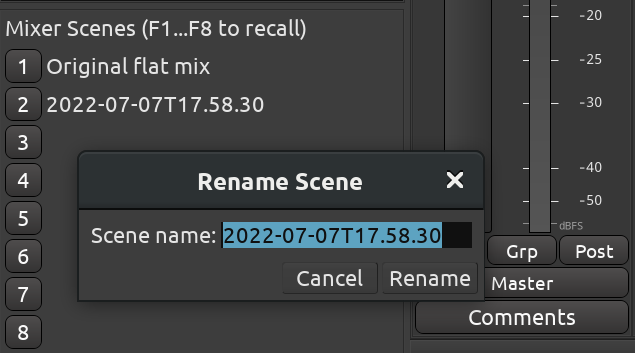
Clearing a mixer scene
If you don't need a scene anymore or if you want to reserve it for something else in the future, you can clear it. Right-click over the button with scene's number, and choose Clear. This will empty the scene slot.
If the scene you've just cleared was the one currently loaded, all positions of faders, panners etc. will remain intact. You can continue making further adjustments.
Overwriting a stored scene
If you made some adjustments and want them to be saved into an existing scene, simply choose Store in the right-click menu for that scene. Ardour will ask your confirmation for overwriting it and will suggest renaming the scene (clicking the Store button without changing the name will effectively keep the old name).
Accessing more mixer scenes
Ardour only exposes 8 mixer scenes in the user interface for simplicity's sake. However the actual number of scenes is larger. There are two ways to work around that and store, recall, and clear more mixer scenes:
† Until Ardour 8.6.318 monitor output level was saved with mixer scenes.
Saving and Importing Mixer Strips
Reusing Mixer Strips
It's possible to reuse mixer strips in other sessions. This involves importing:
Other settings of the affected internal tracks/busses are retained.
The three available options for loading processing from mixer strips are:
Saving Mixer Strips
To save mixer strips for further reuse, select track and busses whose processing you want to save, then choose Session > Save Mixer Strips…. In the newly opened dialog:
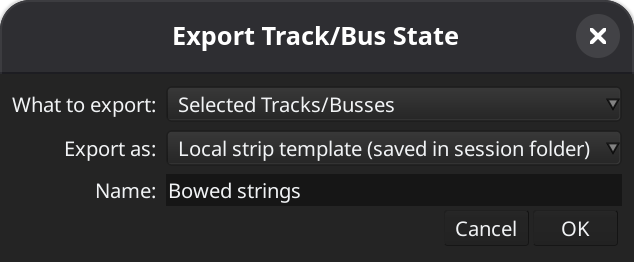
Importing Mixer Strips
To load mixer strips, select Session > Import Mixer Strips…, then pick an arbitrary session from disk, one of the recently opened sessions, or other global or local strip template.
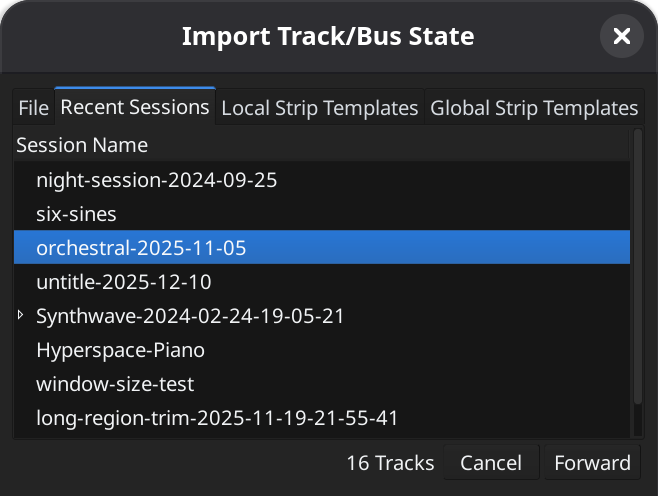
Once you select the source of mixer strips, Ardour will display the number of tracks in either the session or the strip template. Click Forward to continue.
At the next step, Ardour allows you to map internal strips (already available in the session) and external strips (from the selected Ardour session or strip template).

The Local track/bus columns is a list of tracks and busses in the currently opened session. Ardour defaults to displaying pairs of internal tracks/busses and externals states with matching names. Other tracks can be selected from the drop-down list below. Selecting "-- New Track --" will create a new track with a mixer strip selected on the right.
The External State column is a list of mixer strips available in either selected Ardour session or local/global template.
For a new pair of internal track/bus and external state, click the + button to add the mapping to the list.
The Actions drop-down list contains three shortcuts:
The Show all local tracks toggle enabled displaying all available tracks and busses in the currently opened session rather than the the first three ones by default.
Click OK to complete importing mixer strips to the current session.
Managing Mixer Strip Templates
Global mixer strip templates are available for managing in the Template Manager.
Loudness Analyzer and Normalizer
The Loudness Analyzer and Normalizer tool is useful at the end of the mixing process to make the final audio file comply with different specs regarding loudness.
This is a rather advanced mode. When using the Loudness Analyzer &
Normalizer (or LAN), one has to make sure than normalization
is disabled when exporting.
In general, it is recommended to just use
automatic export normalization, in the Export
dialog. This can also produce results for multiple targets at the
same time.
It is enabled by checking Enable master-bus output gain control in the Preferences. The Master Bus strip then shows a LAN button to start the analysis, and a volume slider that is the global gain that can be set either manually or by the loudness normalizer.
The LAN can also be started from the Session > Loudness assistant… menu. If the option above is not enabled, Ardour will link to the relevant page of the Preferences.
Either method show the following window:
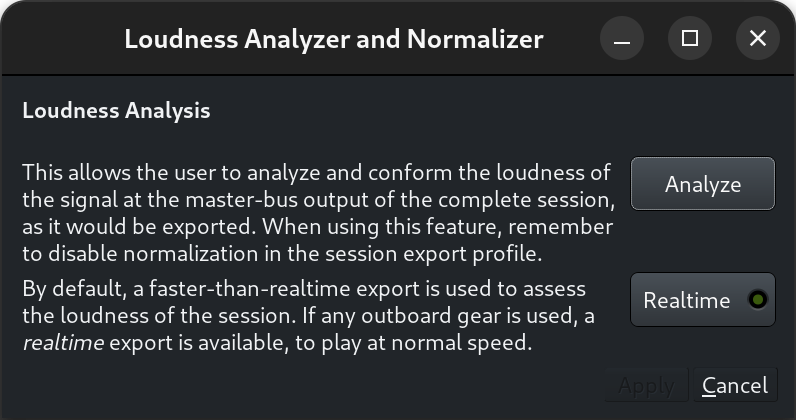
This window allows to start the loudness analysis. A choice is offered between freewheeling (i.e. Ardour renders the session as fast as possible to measure the loudness), by default, or Realtime, for cases where freewheeling would not accurately render the session, e.g. if a hardware or JACK effect is used in the session, by clicking on the Realtime toggle button.
After the analysis is over, the Loudness Analyzer and Normalizer is shown:
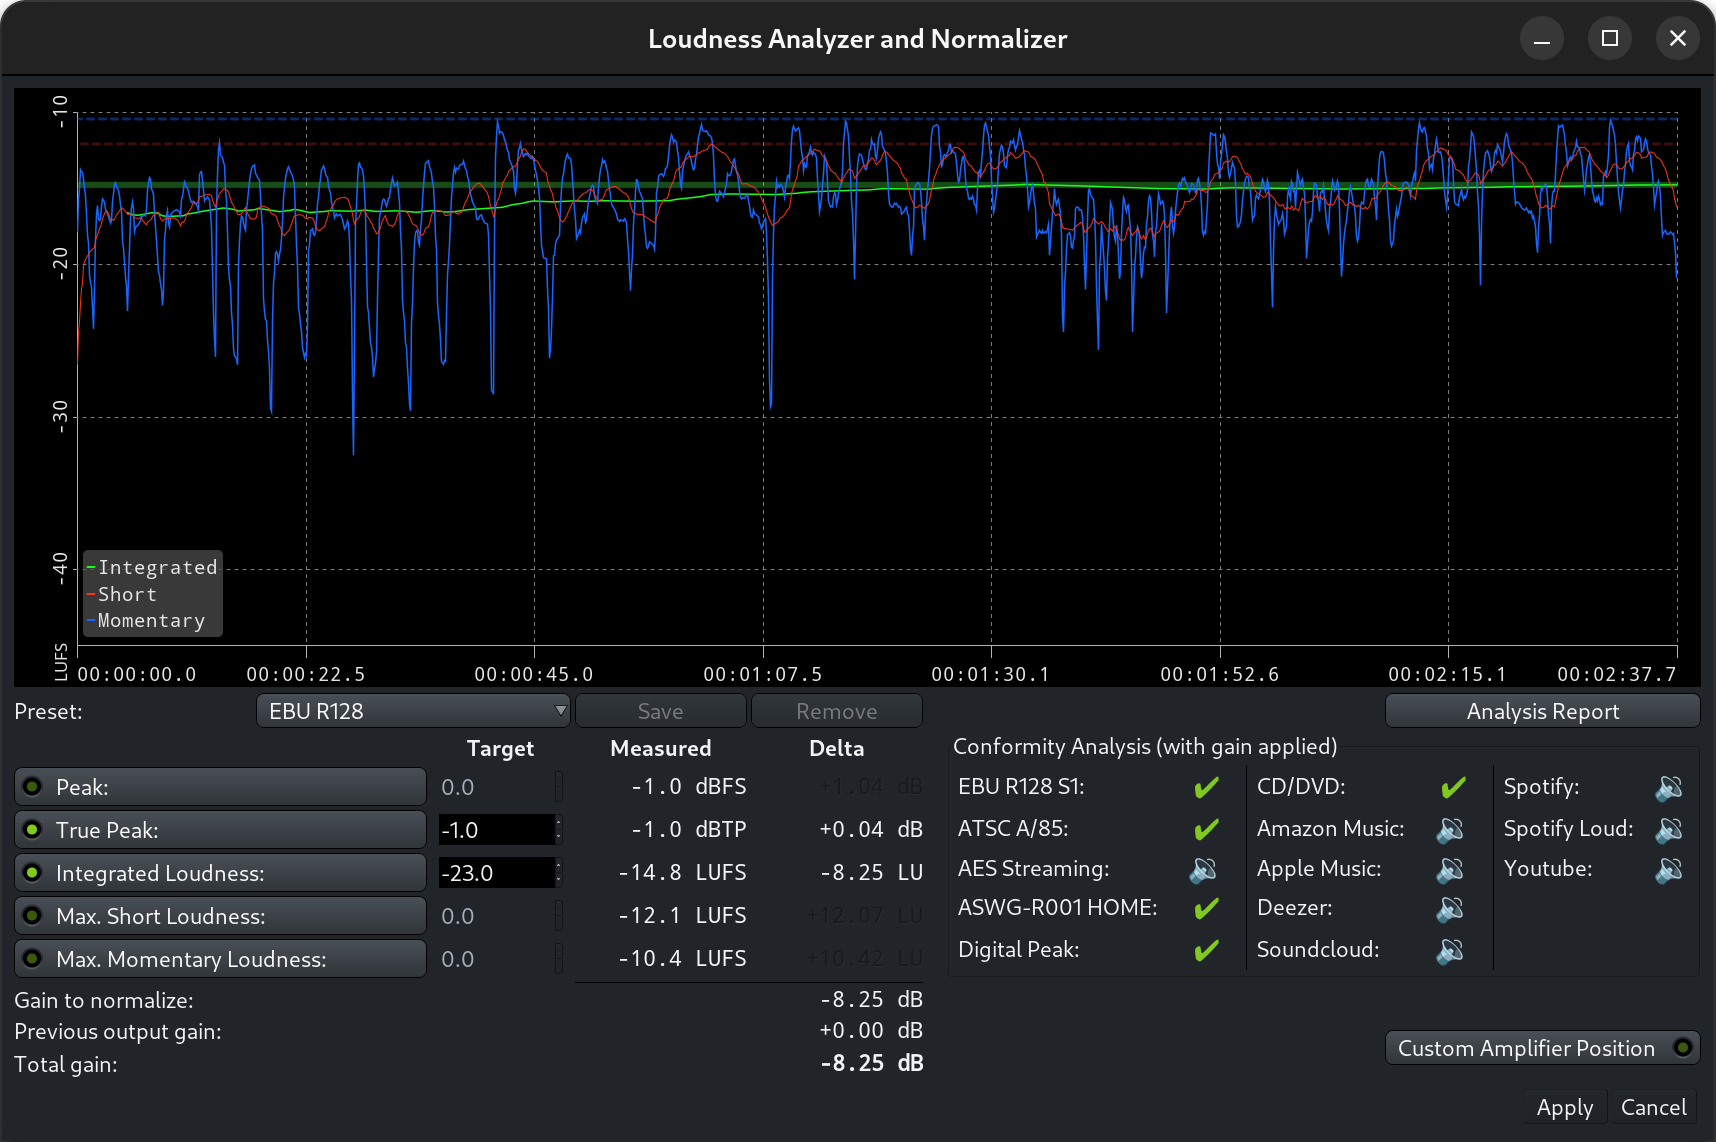
The Loudness Graph
At the top of the window, a loudness graph visually represents the analysis. The x-axis represents the time, and the y-axis represents the perceived loudness in LUFS:
Normalization Parameters
As loudness is a perceived sonic energy, and depends on the level, frequency, duration and nature of the sound, this window allows to base the calculation of the loudness normalization on different parameters :
Any combination of these parameters can be taken into account when determining the gain normalization, by checking its momentary button, and setting a Target value.
Ardour shows both the Measured value of the parameters, and the Delta value, i.e. the difference between the Target and Measured values, hence the gain correction.
The maximum Delta value is the Gain correction to apply to fit all the Target values.
Ardour shows, under the parameters, a summary of the calculation :
Presets
A selection of presets is offered to simplify the normalization. These presets apply the relevant parameters and their target values. Below is a table of these presets:
| Parameter name: | dbFS | dBTP | LUFS | short | mom. | FS | TP | int | sht | mom | maxIntg | notes |
|---|---|---|---|---|---|---|---|---|---|---|---|---|
| EBU R128 | false | true | true | false | false | 0 | -1.0 | -23 | 0 | 0 | -22.5 | -23.5 |
| EBU R128 S1 | false | true | true | true | false | 0 | -1.0 | -23 | -18 | 0 | -22.5 | -23.5 |
| ATSC A/85 | false | true | true | true | false | 0 | -2.0 | -24 | 0 | 0 | -22.0 | -26.0 |
| AES Streaming | false | true | true | false | false | 0 | -1.0 | -18 | 0 | 0 | -16.0 | -20.0 |
| ASWG-R001 HOME | false | true | true | true | false | 0 | -1.0 | -24 | 0 | 0 | -22.0 | -26.0 |
| Digital Peak | true | false | false | false | false | 0 | 0.0 | 0 | 0 | 0 | 0.0 | -200.0 |
| CD/DVD | true | true | true | false | false | 0 | -0.1 | -9 | 0 | 0 | 0.0 | -200.0 |
| Amazon Music | false | true | true | false | false | 0 | -2.0 | -14 | 0 | 0 | -9.0 | -19.0 |
| Apple Music | false | true | true | false | false | 0 | -1.0 | -16 | 0 | 0 | -15.0 | -17.0 |
| Deezer | false | true | true | false | false | 0 | -1.0 | -15 | 0 | 0 | -14.0 | -16.0 |
| Soundcloud | false | true | true | false | false | 0 | -1.0 | -10 | 0 | 0 | -8.0 | -13.0 |
| Spotify | false | true | true | false | false | 0 | -1.0 | -14 | 0 | 0 | -8.0 | -20.0 |
| Spotify Loud | false | true | true | false | false | 0 | -2.0 | -11 | 0 | 0 | -5.0 | -17.0 |
| Youtube | false | true | true | false | false | 0 | -1.0 | -14 | 0 | 0 | -13.0 | -15.0 |
New presets can be created at will and saved/removed using the Save and Remove buttons next to the preset choice. The Standard presets listed above can not be removed or edited.
The Analysis Report button allows to visually represent the analysis with a graph in a very similar window to the one in the Post-Export analysis.
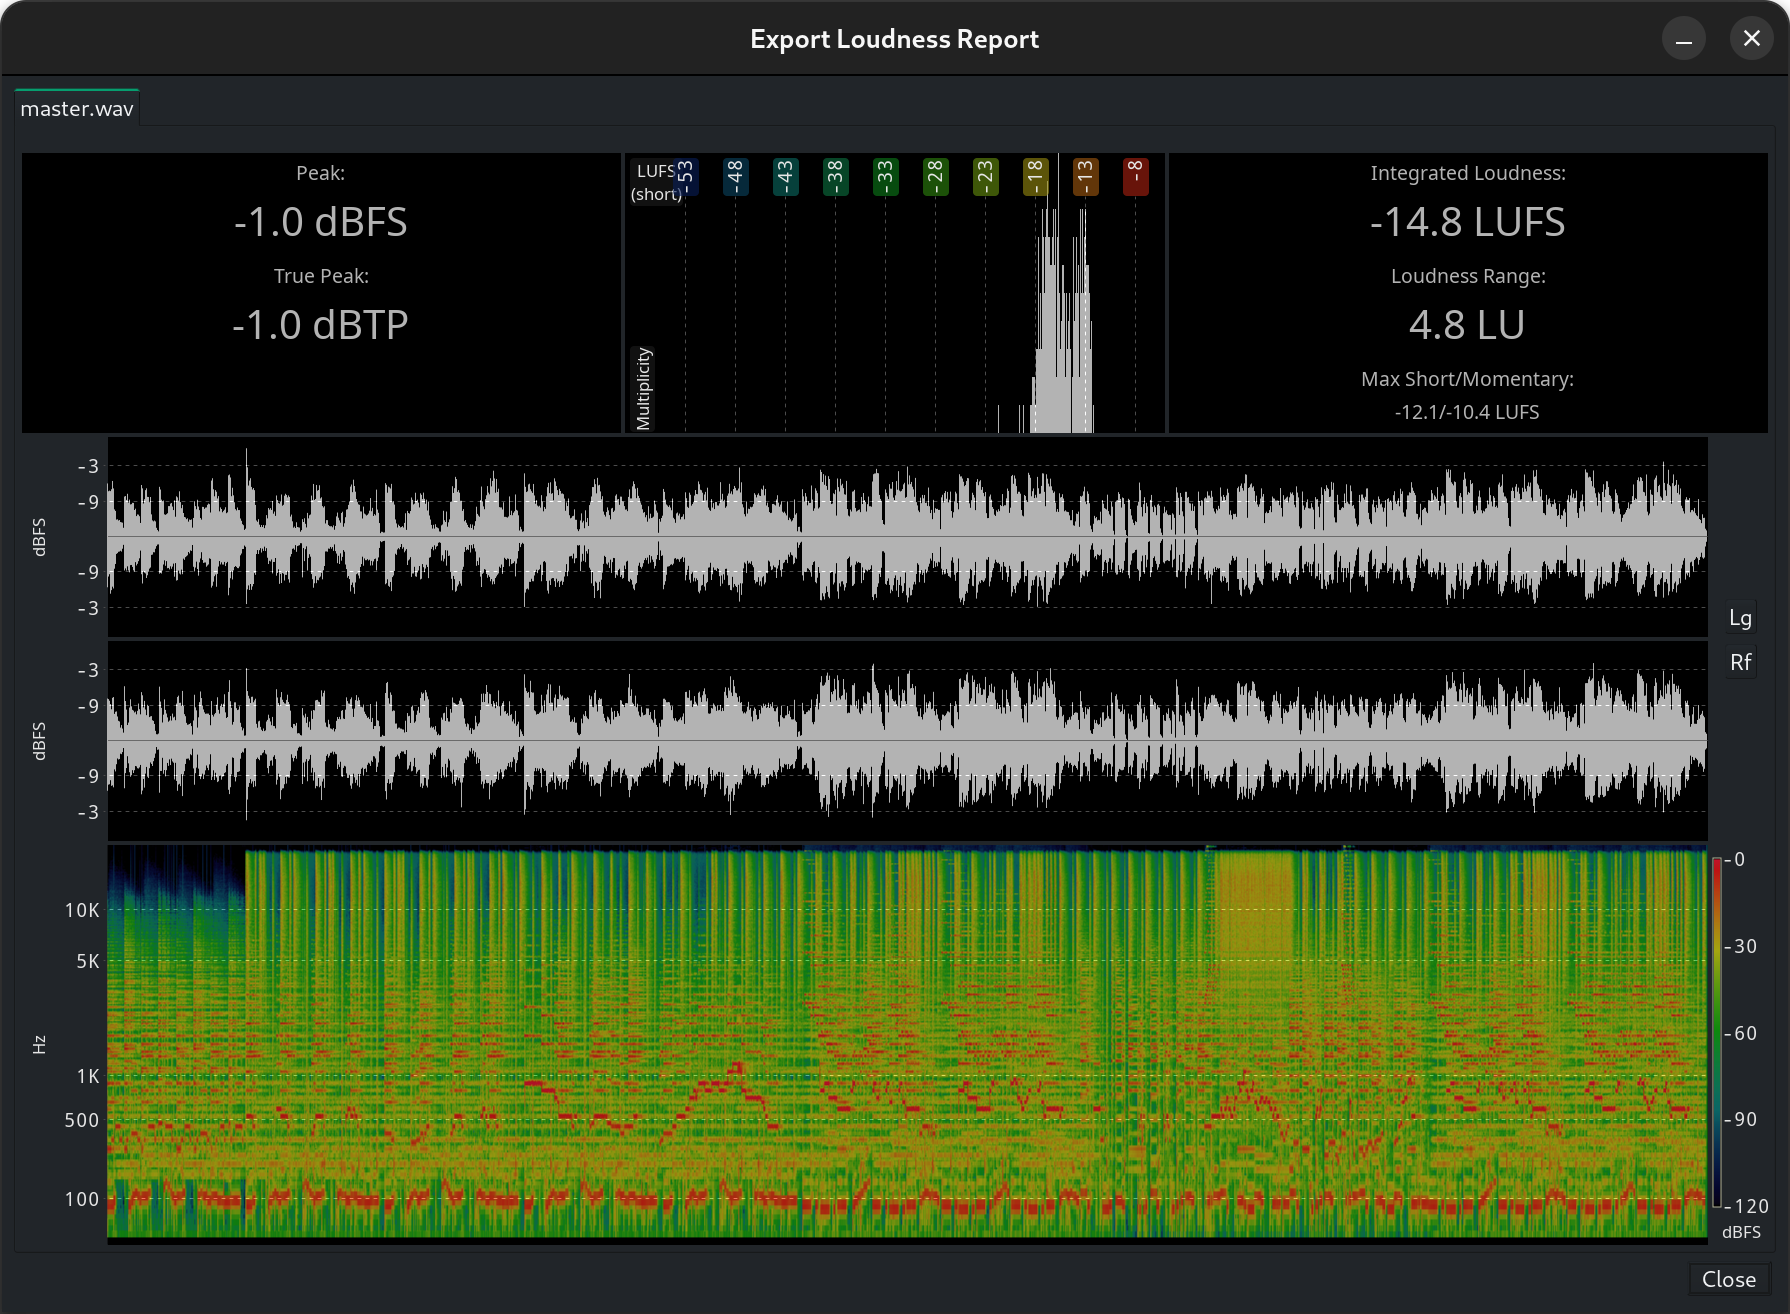
The Conformity Analysis Panel
At the lower right end of the window is a Conformity Analysis info panel indicating, for each of the presets above, if the corrected gain would fit the required values:
Lastly, the gain correction is, by default, applied after all the processors of the master bus. This can also be changed, either by checking the Custom Amplifier Position temporaty button in this window, or in the Master strip, by Right-clicking the gain slider and checking Custom LAN Amp Position. The gain normalizer then becomes a processor in the processors box of the Master strip, that can be moved as needed like any processor/effect.
Realtime Perceptual Analyzer

The built-in perceptual analyzer allows one to visualize the live spectrum of multiple tracks and/or busses.
The overlaid visualization of multiple sources helps discover which track contributes a given of frequency range to the overall mix, find conflicting ranges or holes in the spectrum.
Adding sources to analysis
By default, the real-time analyzer (RTA) window displays the spectrum of the signal coming out of the master bus. To add more sources, toggle the RTA button on either the Editor Mixer or the channel strip in the Mixer window. This will add a new source to the analyzer and open the RTA window.
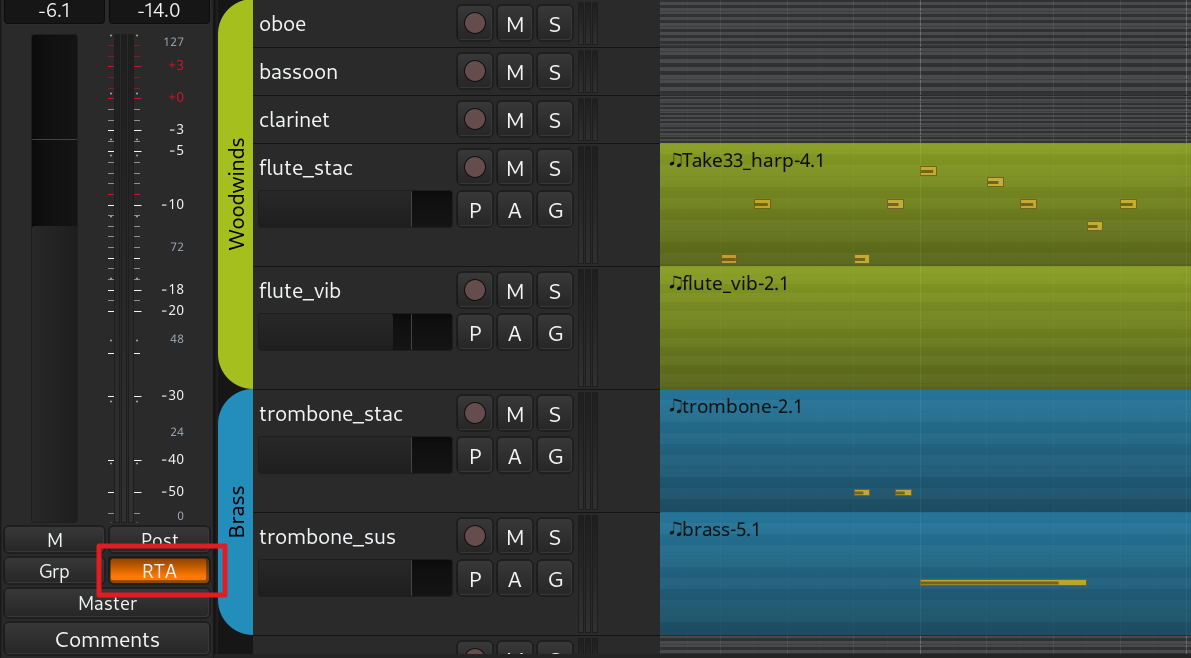
Reading the spectrum display
The perceptual analyzer displays how much power (dB) each part of the sound spectrum (Hz) contains. The horizontal axis represents frequency from low (20Hz) on the left to high (20kHz) on the right, while the vertical axis shows power level going from 0dB at the top to -60dB at the bottom.
By default, the RTA window displays values in the 0dB..-60dB range. To see the opposite ends of the power range (0db to 6ddB and -60dB to -80dB), hover over the right side of the dialog and use the scrollbar.
You can also drag the top and the bottom ends of the scrollbar position indicator to zoom in and out.
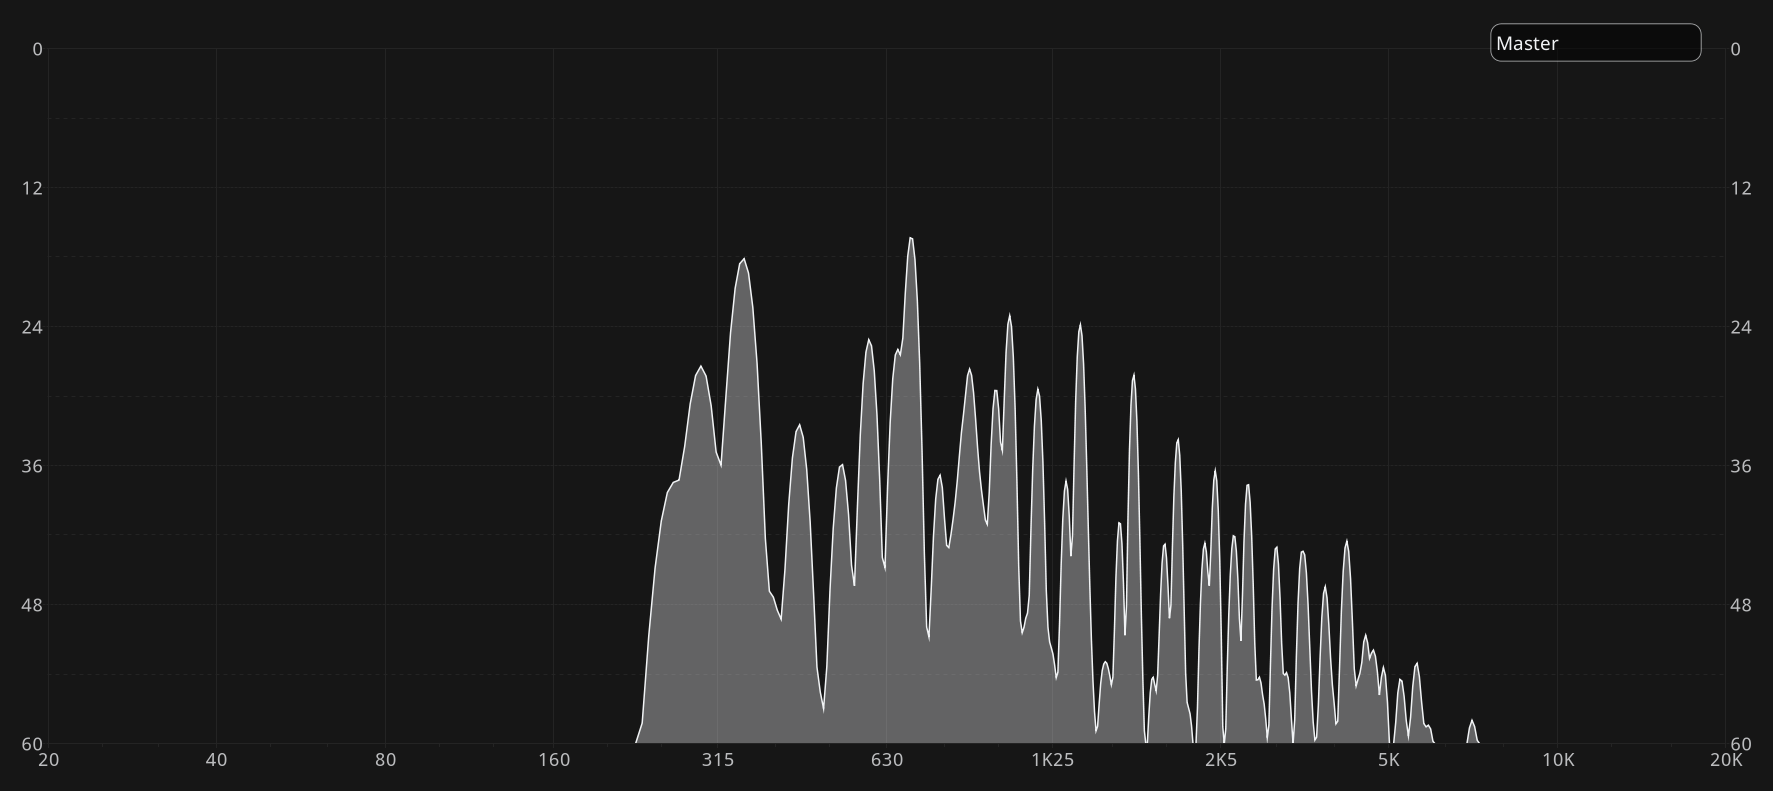
Taller "peaks" indicate frequencies with more power, while "valleys" show frequencies with less power.
Hovering over the chart displays the frequency/power pair at the bottom of the dialog numerically.
As audio plays, the display updates continuously. It's possible to temporarily pause the visual update of the spectrum display to inspect it in detail. There are two ways to do it:
Removing sources from analysis
To remove selected sources from analysis, toggle the RTA button in respective mixer channels.
To remove all sources except the master bus, click on the Clear button in the RTA window.
Real-time analyzer options
The real-time analyzer has two options:
Controlling RTA performance
Real-time spectrum analysis is CPU-intensive. You can control how many spectrum displays Ardour should attempt to handle simultaneously. The Limit concurrent RTA spectra setting is available on the Metering page of the Preferences dialog.
Plugin and Hardware Inserts
Working With Plugins
Plugins are bits of software that get loaded by Ardour in order to:
They are usually written by 3rd parties, though a few come bundled with Ardour (some are only available in official builds distributed from ardour.org). The sources for plugins are many and varied; see here for some information on how to get them.
Ardour supports a variety of different plugin standards:
| LADSPA | An early, simple, lightweight plugin API, audio effects only, plugins have no editors/GUI of their own (Ardour provides one, however). |
|---|---|
| LV2 | An extensible, full-featured plugin API, audio and MIDI, plugins can provide their own GUIs but may use the one Ardour provides instead. |
| AU | OS X only, full featured, audio and MIDI, plugins can provide their own GUI |
| VST | Plugins using Steinberg's VST2 and VST3 plugin standard. |
Adding/Removing/Copying Plugins
Within Ardour, plugins are just another type of Processor and so the techniques for adding/removing/copying/moving processors apply to plugins as well. These techniques are covered on the Processor Box page.
Processor Box
In Ardour terminology, a processor is anything which treats the signal in some way and gets plugged into a mixer strip. Ardour provides several builtin processors such as the fader or panners. Processors can also be plugins used for effects or as instruments, as well as sends or inserts which affect signal routing.
The arrangement of processors is arbitrary, and there is no limit to how many there can be. The Processor Box will automagically add a scrollbar to itself if there are more processors in it than can be shown in the given space.
The main box in the top half of a mixer strip shows the processor box. Processors are shown as colored rectangles, with a small LED beside them that lights up when the processor is enabled. The color of the processor depends on its location in the sequence; processors that are pre-fader are colored in red, and post-fader processors are colored green (in the default theme).
The processor box will always contain a blue Fader processor. This indicates where in the processor chain the main channel fader is located; this is the fader shown in the lower half of the strip. It can be enabled and disabled like any other processor.
Adding Processors
Processors can be added to the chain by Right-clicking in the processor list, This does three things:
From the menu, new processors can be inserted.
Processors can also be dragged and dropped from the Favorite Plugins window to an appropriate spot in the Processor Box.
The Favorite Plugins window can be populated via the Plugin Selector, or by dragging and dropping an existing processor from the processor box to the Favorite Plugins window.
To Reorder (Move) Processors
Processors can be re-ordered using drag and drop. Dragging a processor allows it to be moved around within the chain, or copied to another processor list on another track or bus.
To Enable/Disable a Processor

To the left of the name of each processor is a small LED symbol; if this is lit-up, the processor is active. Left-clicking on the LED symbol, or Middle-clicking anywhere on the processor will deactivate the processor and effectively bypass it. Click again to reactivate the processor.
Some processors have their own bypass controls that are independent of the one that Ardour provides; this can make it appear that the plugin is non-responsive when its independent bypass control is active.
Selecting Processors
A processor in the processor box can be selected with a Left-click on it; it will be highlighted in red. Other processors can be selected at the same time by Left-clicking on them while holding down the key, and ranges can be selected by Left-clicking on them while holding down the key.
Renaming Processors
Context-click on the processor to be removed and select Rename. In the newly opened dialog set a new name and click "Rename". The caption of the processor will be instantly changed in the mixer strip.
To restore the original name which, for plugins, is typically the plugin's name, open the same dialog and click the button to the right of the text input box, then click "Rename".
Removing Processors
Context-click on the processor to be removed, and select Delete; or Right-click on it; or Left-click on it and press the Delete key. If multiple processors are selected, they will all be deleted at the same time.
Plugin Selector
The Plugin Selector serves two purposes. Primarily it is used to control the display status of plugins. It can also be used to find and insert plugins into the Processor Box. It is displayed either by a double-click in the Processor Box or by choosing New Plugin > Plugin Selector… from the Processor Box context menu.
Displayed for each plugin is the status (favorite, hidden), name, tags, creator (author), type, and the number of audio and MIDI connections. The plugins can be sorted by clicking on a column header.
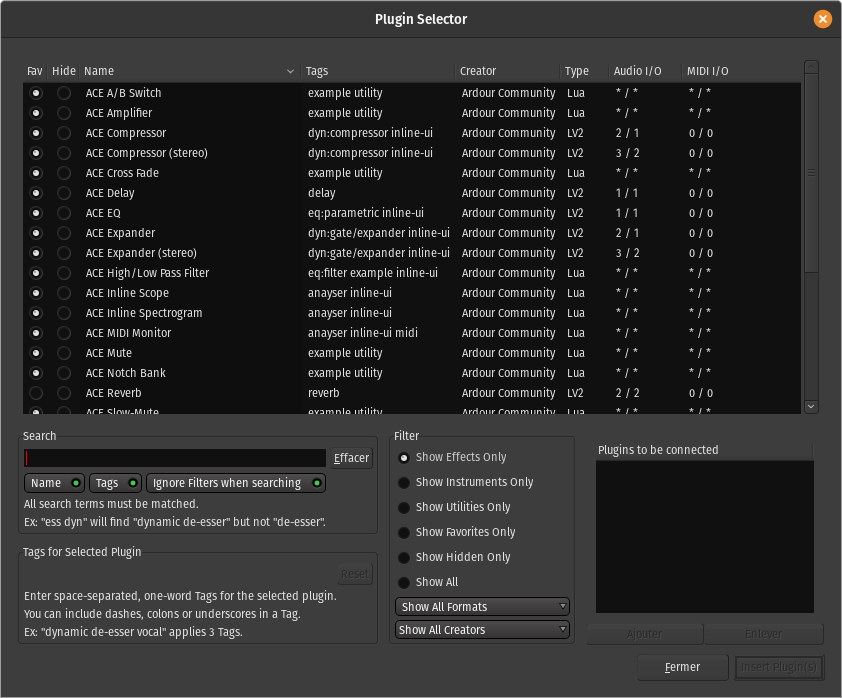
Plugin Display Status
Clicking on a Fav(orite) or Hide radio button changes a plugin's display status. Clicking on an already selected radio button will cancel it, returning the plugin to the normal display status. Plugins marked as a favorite show up in the Processor Box context menu under New Plugin > Favorites and in the Favorite Plugins window. Setting the hide radio button on a plugin will keep the plugin from showing in the Processor Box context menus New Plugin > By Creator or New Plugin > By Category.
Filtering Listed Plugins
The bottom left part of the Plugin Selector is used to filter the listed plugins.
The center Filter column allows to show only some of the plugins, based on what they are, their properties, format, creator...
Moreover, direct text search are available in the the Search text-field on the bottom left. Only the plugins that match all the search terms (space separated) will show up in the upper list.
This textual search can be matched against Name and/or Tags by checking the relevant momentary buttons under the search field. Ignore Filters when searching displays all the matching plugins, regardless of the active Filters.
Tags
Tags are text labels that can be used to mark a plugin. They are totally free in their content, allowing the user to mark a plugin with whatever info is relevant to him, but cannot include spaces (as spaces are used to separate tags) or special characters except dashes, colons and underscores.
Adding or removing tags is as simple as editing the Tags for Selected Plugin field while the targeted plugin is selected.
Ardour comes with a large selection of tags for provided or usual plugins, that are used by default but can be modified at will. It is possible to go back to this "standard" tagging for a plugin by clicking the Reset button.
Inserting Plugins in the Processor Box
The bottom-right part of the Plugin Selector Plugins to be connected shows plugins that have been selected for insertion into the Processor Box. A plugin can be added by either double clicking the plugin entry in the top part, or, if already selected in top left part, by clicking the Add button.
Plugins can be removed from the right part with a double click, or, if already selected, by clicking Remove.
Plugin Manager
The Plugin Manager provides a convenient interface to various operations on plugins and is the primary troubleshooting tool when something goes wrong with plugins. It works on both plugin files and the plugins index.
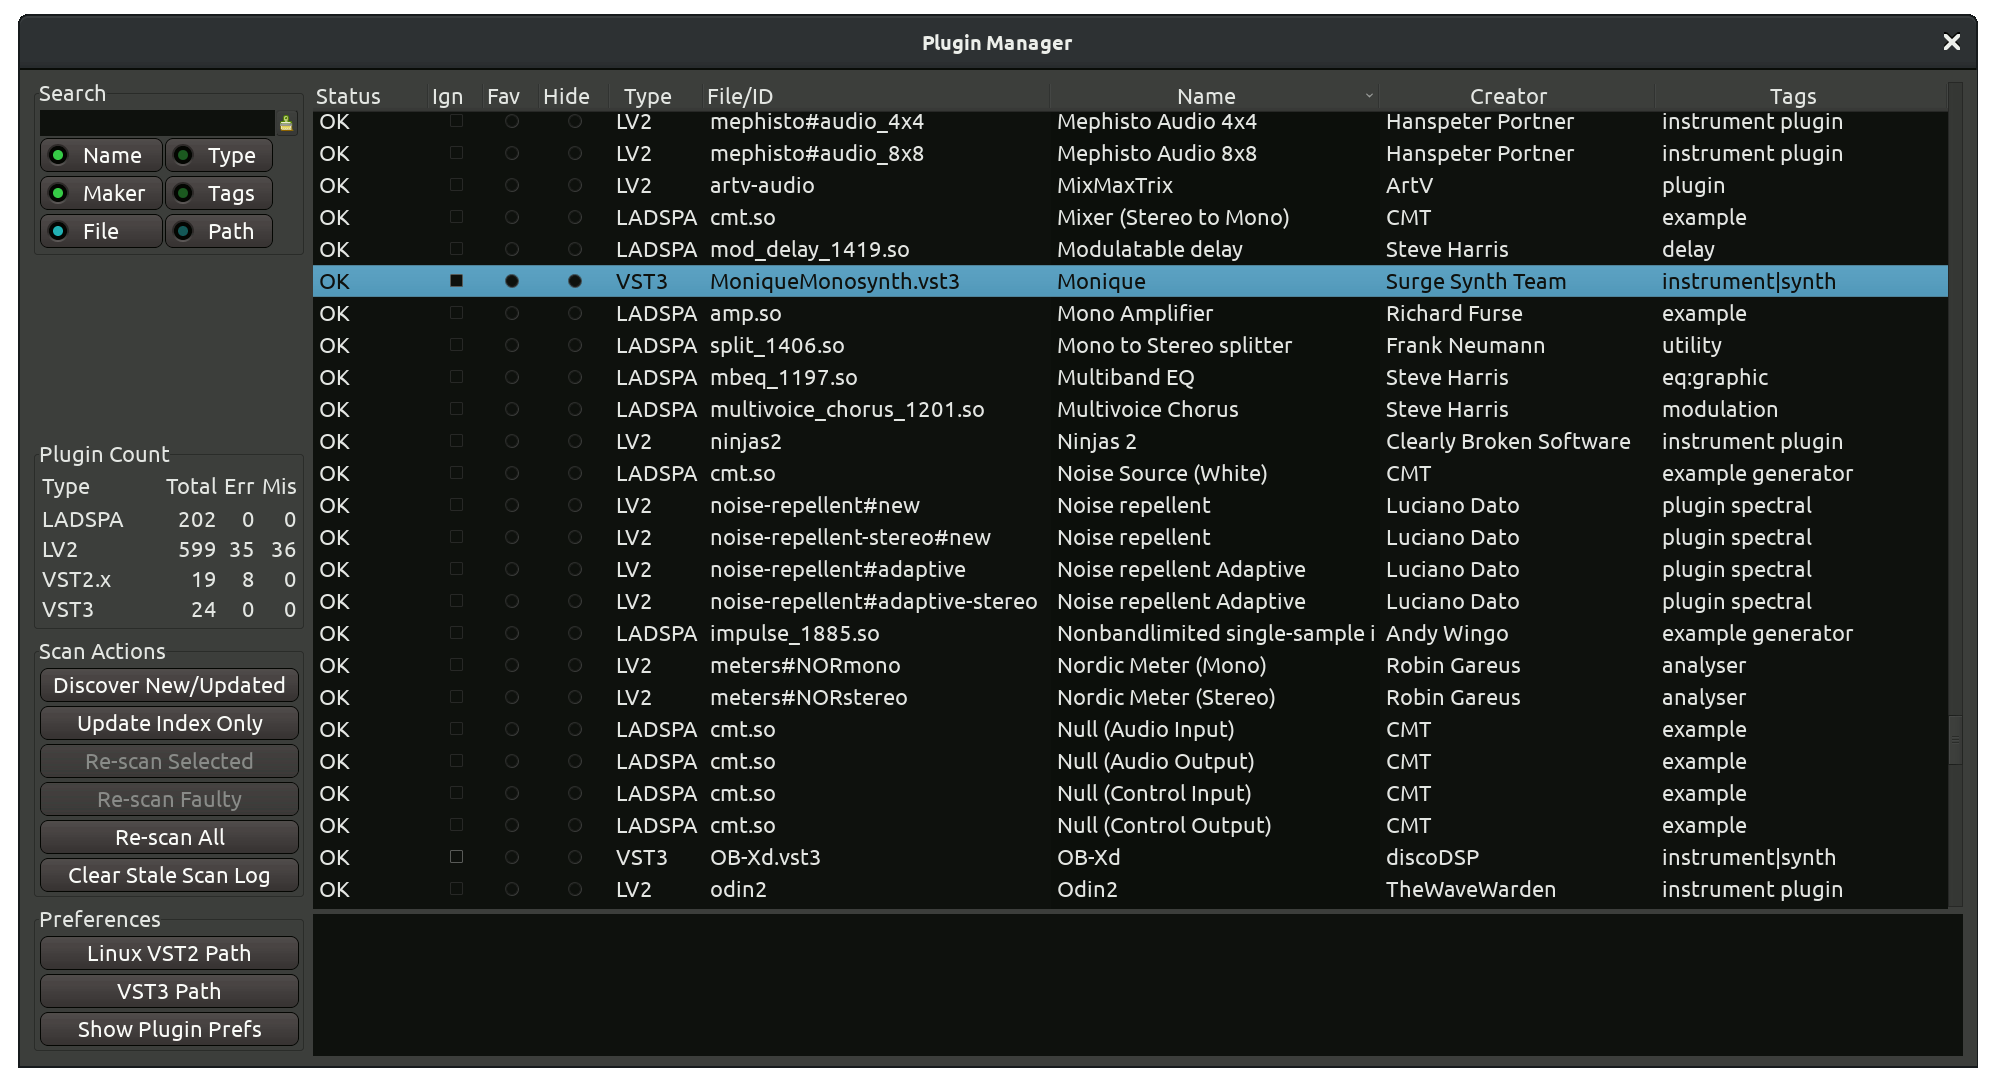
What is a plugins index?
For each type of a plugin (e.g. VST3 or AU) there are pre-configured paths where these plugins are located. Every time Ardour runs, it re-scans plugins in these paths and recreates an index — a kind of inventory of available plugins. Whenever you open the Plugin Selector dialog, Ardour reads the list of available plugins from that index and displays them for you to pick.
Re-scanning paths is important because it's common for plugins to change on the disk (e.g. when you installed a newer version) or get removed (when you don't need a plugin anymore). Sometimes plugins get corrupted due to a hardware failure. Indexing them often helps identifying issues early on, and the Plugin Manager helps reviewing the general state of affairs with plugins.
Ardour also treats LV2 plugins slightly differently and scans them on startup unconditionally. You can disable the scanning of VST2, VST3, and AU plugins entirely in the Preferences dialog.
Plugins info
The main part of the Plugin Manager window is the table where all plugins known to Ardour are listed. You can use it to both view information about a plugin and control some of its aspects:| Status | Ardour will displays the status of every plug-in file. See below for more information |
|---|---|
| Ign | Do not load this plugin file at all |
| Fav | Set or unset the Favorite status for a plugin |
| Hide | Load this plugin file, but do not show it in the Plugin Selector |
| Type | The name of the API this plugin has been built with: VST2, VST3, AU, LADSPA, LV2 |
| File/ID | Displays the file name for LADSPA, VST2, and VST3, as well as the ID for LV2 and AU |
| Name | User-visible name of the plugin |
| Creator | Developer of team of developers who created the plugin |
| Tags | Metadata that classifies the plugin by type, e.g. 'instrument|synth' or 'analyzer' |
The Status field specifically has the following options:
| OK | The plugin file has loaded without any issues and the information in the cache about it is up to date |
|---|---|
| New | The plugin file has just been discovered and successfully loaded for the first time |
| Updated | The plugin file changed on the disk, the plugin cache has been updated accordingly, the plugin file loaded successfully |
| Concealed | A VST2 plugin will be hidden from Plugin Selector, if a corresponding VST3 plugin exists. The same applies to LV1 (LADSPA) and LV2 |
| Error | There was a problem loading the plugin file |
| Stale | A plugin changed on the disk but hasn't been re-scanned by Ardour yet |
| Incompatible | Scan the plugin failed. Typical reasons are 32/64-bit mismatch, attempt to load a .dll on Linux or a .dylib on Windows |
The Plugin Count section in the sidebar provides basic information on available plugins: how many plugins of every supported type are available through Ardour in total, how many failed to load, and how many are missing.
Searching
You can search for a specific plugin or a group of plugins. Simply place the cursor inside the input text box in the upper left corner and type. Ardour will search in the index
By default, Ardour will search through plugin names, makers, and file names. Additionally, you can search through Type, Tags, and Paths.
Scan actions
This section of the sidebar contains commands that operate on the plugins index.
| Discover New/Updated | This will run a full scan on all known paths to plugin of all supported types |
|---|---|
| Update Index Only | This will check which plugins were updated without scanning them |
| Re-scan Selected | This will re-scan plugin files selected in the main part of the window |
| Re-scan Faulty | This will only re-scan plugins that previously failed to load |
| Re-scan All | This will re-scan all currently known plugins |
| Clear Staled Scan Log | This will remove all entries from the index on plugins that changed on the disk but haven't been re-scanned |
Preferences
This section of the sidebar allows settings paths to VST2 and VST3 plugins, as well as quickly open the Preferences dialog on the Plugins page where you can set various options for scanning plugins and controlling their default behavior.
Managing Plugin Presets
All plugin control widgets, whether they are created by Ardour or by the plugin, have a common set of controls at the top of the window. These include 4 controls for managing plugin presets.

What Is a Plugin Preset?
A preset for a plugin is simply a saved set of values for all of a plugin's parameters. If you load a preset, you are restoring all the parameters of that plugin to the values stored in the preset. This is an easy, fast way to manage your preferred settings for particular plugins.
The Preset Selector
The preset selector (1) is a regular selector that can be clicked to display a list of all known presets for this plugin. This will include presets that have been created by the user, and for some plugin formats, presets that come with the plugin itself.
Loading a New Preset
Clicking on the preset selector pops up a menu showing the names of all available presets. Clicking on the name of a preset loads it, and various controls in the plugin editor change to reflect the new value of some or all parameters.
Creating a Preset
Saving the current plugin settings as a new preset is done by clicking on the Add button (2) at the top of the window. A dialog will appear asking for a name for the preset.
Saving a Preset
To modify the settings in an existing preset, the preset selector must be used to load the preset, then, when the settings have been adjusted, the Save button (3) clicked. The new values will be stored, overwriting the previous version of this preset.
Deleting a preset
Deleting an existing preset is achieved by loading the preset first, then clicking the Delete button (4). The preset will be removed, and the preset selector turns blank, showing that no preset is currently loaded (although the settings will stay as they were).
Working with Ardour-built Plugin Editors
Ardour displays its generic user interface for arbitrary plugins in two places:
Generic Plugin Editor
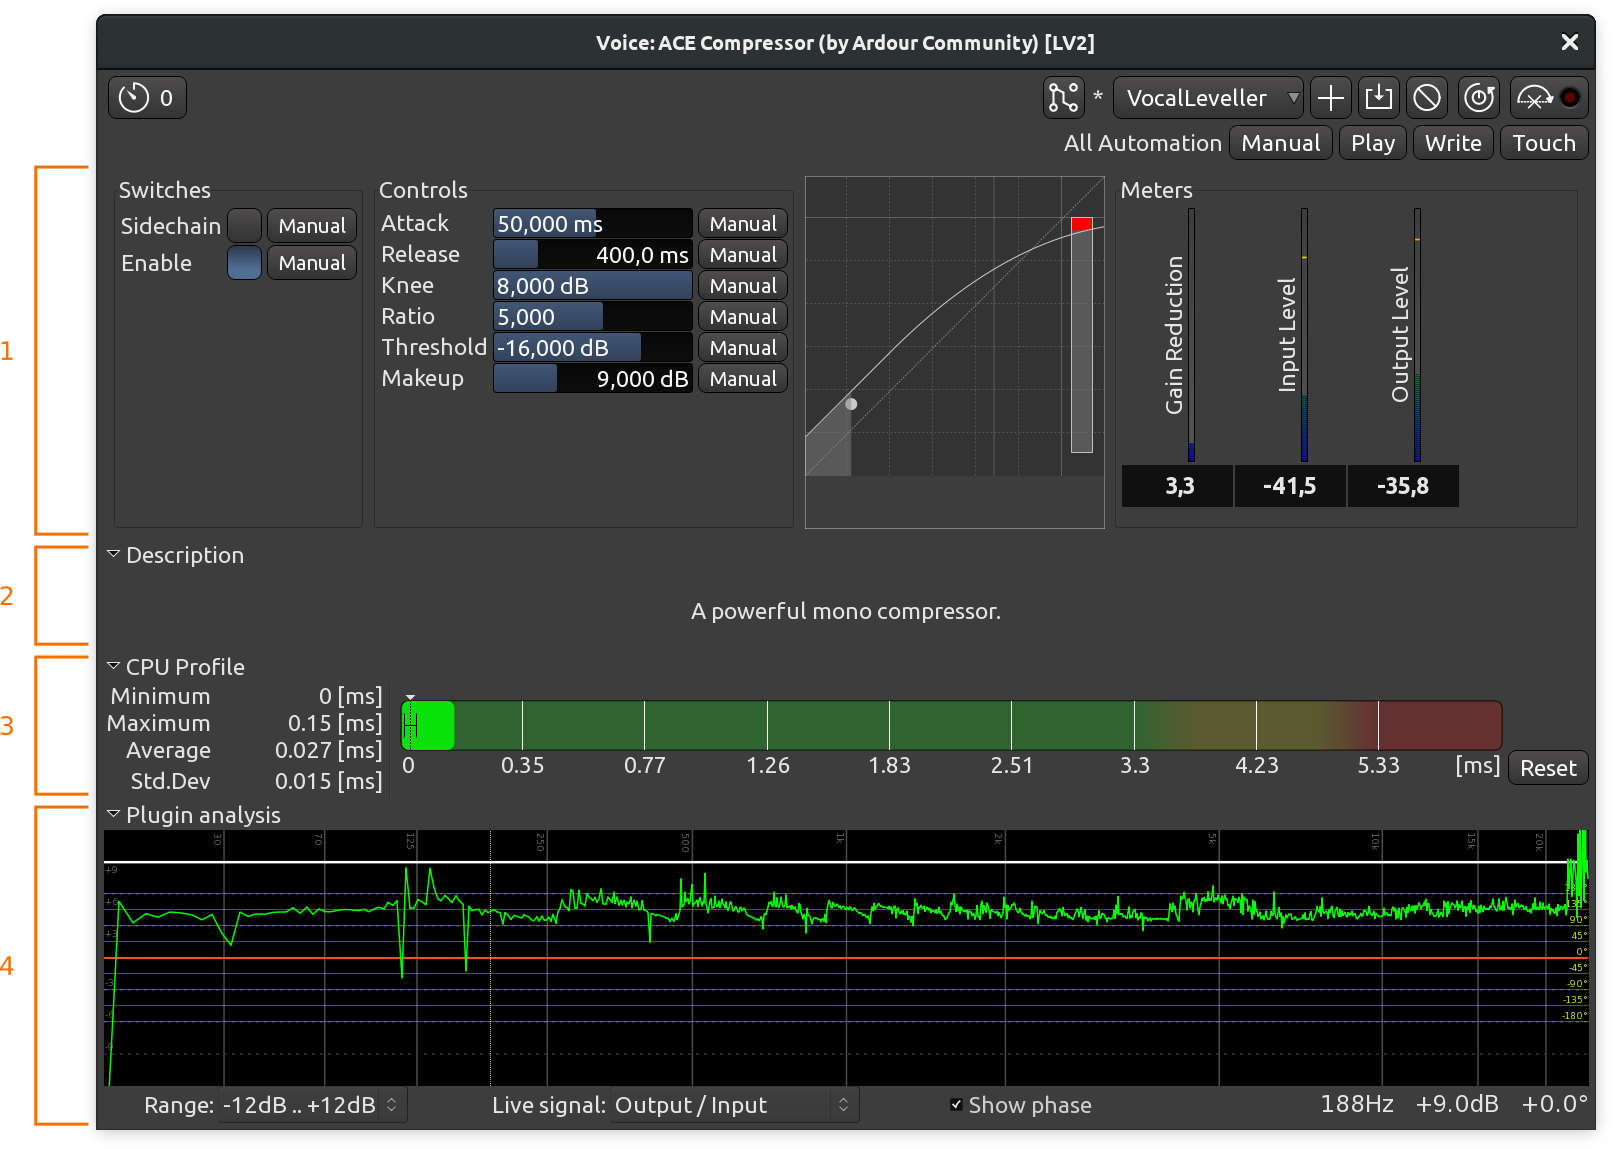
If a plugin does not have its own GUI, Ardour will construct a generic plugin editor from a small set of common control elements. Ardour will do this even for plugins that have their own, if Edit > Preferences > GUI > Use Plugins' own interface instead of Ardour's is disabled.
The generic UI can be temporarily switched to by right-clicking on a processor and selecting Edit with generic controls. This is necessary in order to access the plugin automation controls.
In the generic UI, any controller can be reset to its default state by Left-clicking on it.
Description
This is a rarely used section that displays the contents of the description metadata of a plugin.
CPU Profile
This section displays CPU time measurements for the currently opened plugin. For more information, please see the documentation on the Plugin DSP Load window.
Analysis Graph
At the bottom of the generic plugin editor, clicking the arrow displays the Analysis Graph.
This graph displays:
The transfer function plots the output amplitude of the plugin (considered as a "black box") against its input amplitude, along the audio spectrum.
The phase response, that can be switched on or off using the Show phase checkbox, plots the phase of the plugins output against its input phase, along the audio spectrum. The scale is shown in yellow on the right.
The green spectrum plots the output signal spectrum, after the plugin (for tracks that have a signal on).
The dB scale selector in the bottom left allows to change the vertical scale of the graphs.
MIDI instruments specificities

The generic UI provides, for all MIDI instruments plugins, a keyboard, that can be used either with the mouse, or by using a QWERTY keyboard as a piano. Both the channel and the velocity can be set above the keyboard.
Bottom pane in the Editor window
Enabling the bottom pane in the editor makes it possible to see all parameters of all plugins used in a selected track or buss with generic user interface.
For every plugin, Ardour will rendering the following:
Automation

Automation is the ability to dynamically control various aspects of a track's innate attributes and the attributes of any processors attached to it. In Ardour, automation can be used to make dynamic changes to a track's:

Any combination of these can be enabled on a single track; as such, it offers a lot of power and flexibility over how a track will ultimately sound when played back.
Activating automation for a track is done by clicking the A icon on the track head and checking the type of automation needed. A new "pseudo-track" will appear, showing the waveform in the background, called an "automation lane", where the value of the parameter can be edited : the x axis is the time, and the y axis is the value of the parameter.
If the Edit > Show Automation Lane on Touch is checked, clicking any parameter in a plugin window, a hardware controller, etc... will result in this parameter's automation lane being temporarily shown, and clicking another parameter will hide this lane to show the new one.
Automation Nomenclature
Track automation occurs in one or more lanes. Each lane has a control that allows setting the amount or position of a certain parameter associated with the lane. Parameters are things that can be controlled on a track's automation lane, such as volume, panning, muting, trim, etc. Automation curves typically consist of lines connected by control points, that live within the confines of a lane; these tell Ardour how to change a given parameter over time. Automation modes define how Ardour creates the values in between the control points of a given automation curve, either by connecting them with continuous lines or not. Automation states govern how a given automation lane will behave during playback.
Automation States
In order to understand how automation in Ardour works, it is necessary to understand the five states of automation. They are: Manual, Play, Write, Touch, and Latch.
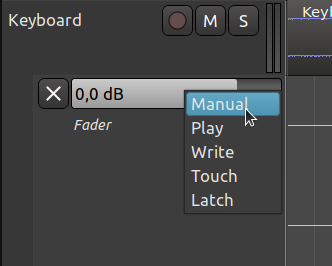
Manual state is basically analogous to a processor's bypass switch. Whenever an automation lane is in this state, it is inactive and any level that is manually set for controlling the lane's parameter will persist during playback like normal.
In Ardour, every track and processor parameter is initially set to Manual state.
Play state tells Ardour to use the automation curve in the automation lane to control the level of the parameter controlled by the lane during playback. The control that normally sets the parameter will be unresponsive to manual input and will move automatically in accord with the lane's automation curve during playback.
Write state allows continuous, dynamic setting of a control during playback; all such settings are written to the lane the control is in. This defines the lane's automation curve in the interval being played, and overwrites any existing automation curve in the lane being manipulated. As this might be sometimes dangerous, this state is automatically changed to Touch state when playing is stopped.
Touch state is similar to Write state, except it only overwrites sections of a lane's automation curve when the control is changed in some way. This allows for changing only the parts of an automation curve that are desired to be changed, while leaving the rest unchanged.
Latch state is similar to Touch
state as it will also change automation when the control is changed in some way
during session play back.
But additionally it will overwrite the automation curve with the last
value that it was changed to until play-back is stopped.
Latch state is also useful when the user wants Touch-style behavior but is using a device incapable of sending messages to indicate the start and end of the "touch".
Automation Lanes
An automation lane is similar to a track in that it holds data that can be played back. However, unlike a track, it is not an independent entity—it is always attached to the track that it controls. Automation lanes also contain zero to one automation curves. Each lane controls one and only one parameter of the track it is attached to.
Every track will have at least five automation lanes associated with it: trim, fader, mute, and pan (which consists of two lanes: L/R and Width); it can possibly have many more if there are any processors associated with it. All these lanes are automatically attached to the track but hidden, and initially they are all empty (have no automation curves in them).
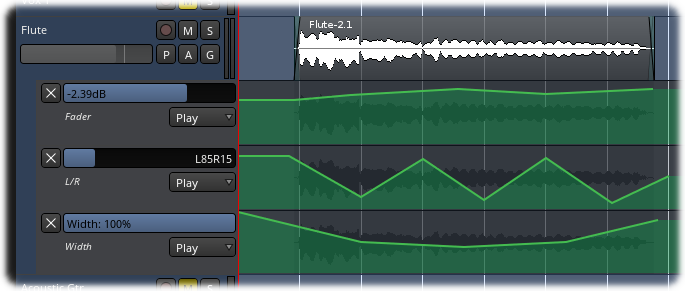
Automation lanes typically have the following controls:
The hide button, as the name implies, hides the automation lane. The horizontal fader controls the level of the parameter that the lane controls; manipulating this while in Write or Touch mode during playback will make changes to the lane's automation curve. The automation mode selector selects which mode the lane is in (Manual, Play, Write, or Touch).
The hide button will only hide the lane; it does not remove it from the track. The automation lane never really goes away—the closest one can get to that is to clear the automation curve and hide the lane.
Automation Curves
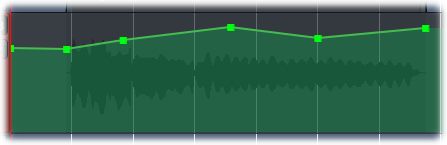
An automation curve is a series of lines connected by control points that typically defines a continuous line. As the curve is traversed from left to right, the line defines the level of the parameter controlled by the automation lane.
There are two types of automation curves: Linear and Discrete. The most common type is Linear, in which the space between any two contiguous control points is continuously interpolated; in other words, the values between any two contiguous control points at any given time is given by the straight line connecting them. The second type of automation curve is Discrete, in which no interpolation between control points is done; whatever value the control point is set at is the value it will yield until it reaches the next control point, at which point it will give that value until the next control point, and so on until there are no more control points.
The curve by itself does nothing; it will only control playback if the lane it resides in is in Play mode.
Automation Modes
Ardour offers two modes for interpolating automation control points: Linear and Discrete. The mode is changed by a Right click on the automation lane header and choosing the mode from the mode menu.


Linear mode interpolates values between control points in a given automation curve by connecting them with straight lines; the values played back are derived from the points that lie on the lines thus defined. Typically, this is what is desired and is the default mode for all automation lanes.
Discrete mode does no interpolation between control points in a given automation curve. The values set by the control points do not change until the following control point is reached at which time the value is then set to its value; this continues on until there are no more control points. Typically this is used for parameters such as mute or sustain pedal (e.g., on a MIDI piano track).
When recording automation via MIDI (e.g., pitch bend from a MIDI keyboard), Ardour always uses discrete mode.
Controlling a Track with Automation
A parameter on a given track can be automated by clicking on the track's A button and selecting a parameter to control from the menu that appears. The same menu is displayed in the Automation submenu in track's right-click menu.
Once a parameter has been selected, an automation lane for that parameter will appear beneath the track. The lane thus shown will be empty; from here an automation curve must be defined.
If the height of the automation lane is too small to see all of its controls, the height can be increased by left-clicking on the bottom border of the lane and dragging it down.
There are three ways to define an automation curve:
Recording an Automation Curve Using Write Mode
To create an automation curve using Write mode, first set the lane's mode selector to Write, then set the playhead to the position where the automation curve should start, then set the transport to play. While the playhead is moving, Ardour will continuously record any changes made with the lane's fader. Even if no changes are made to the fader, they will overwrite anything that existed in the lane where the playhead is moving. When the desired automation curve has been recorded, stop the transport.
After the transport is stopped, the lane's mode selector will automatically switch to Touch mode—it is generally a bad idea to leave an automation lane in Write mode, as it is a destructive operation that makes it easy to inadvertently overwrite existing automation curves.
Recording an Automation Curve Using Touch Mode
Creating an automation curve using Touch mode is similar to the method employed in creating one using Write mode; the only difference is that changes are written to the automation curve only when the lane's fader is moved—at all other times, whatever was in the automation curve will remain as it was.
Touch mode is useful when only small parts of the automation curve need touching up versus Write mode, which is usually used to create the automation curve in the first place.
Drawing an Automation Curve Using the Mouse
In Draw mode, control points can be entered in the automation lane in multiple ways.
It's possible to combine free and straight lines in one go by pressing Ctrl for when you need a straight line and releasing the button when you're done drawing a straight line segment.
Controlling the Track
Once an automation curve has been defined through any of the methods outlined above, the track won't do anything with it until the lane that the curve was defined in is set to Play mode. Then, during playback, as the playhead moves through the automation curve, the lane's control will move in accord with the curve.
The lane's fader will not be responsive to manual input while it is in Play mode.
Removing Automation
To remove a control point, left-click it and press Delete, or right-click on it.
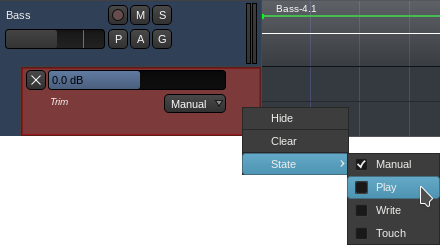
Clearing the entire automation lane is done by right-clicking on the lane to be cleared, and selecting Clear from the menu that appears.
Applying effects to regions separately

With Ardour, it's possible to apply effects to separate regions rather than entire tracks. The effect and its automation remain with the region, even when it is moved around on the timeline.
Applying effects directly to regions on the timeline is convenient for many workflows. The given effect is rendered into memory and does not add any additional DSP load during playback.
The controls for region FX are available in the bottom pane when it's enabled and the region properties dialog (Region > Properties in the menu).
Adding a region effect
To add a new region effect, right-click in the processor box of the Region Properties dialog or bottom pane, then select an effect from the list or use Plugin Selector.
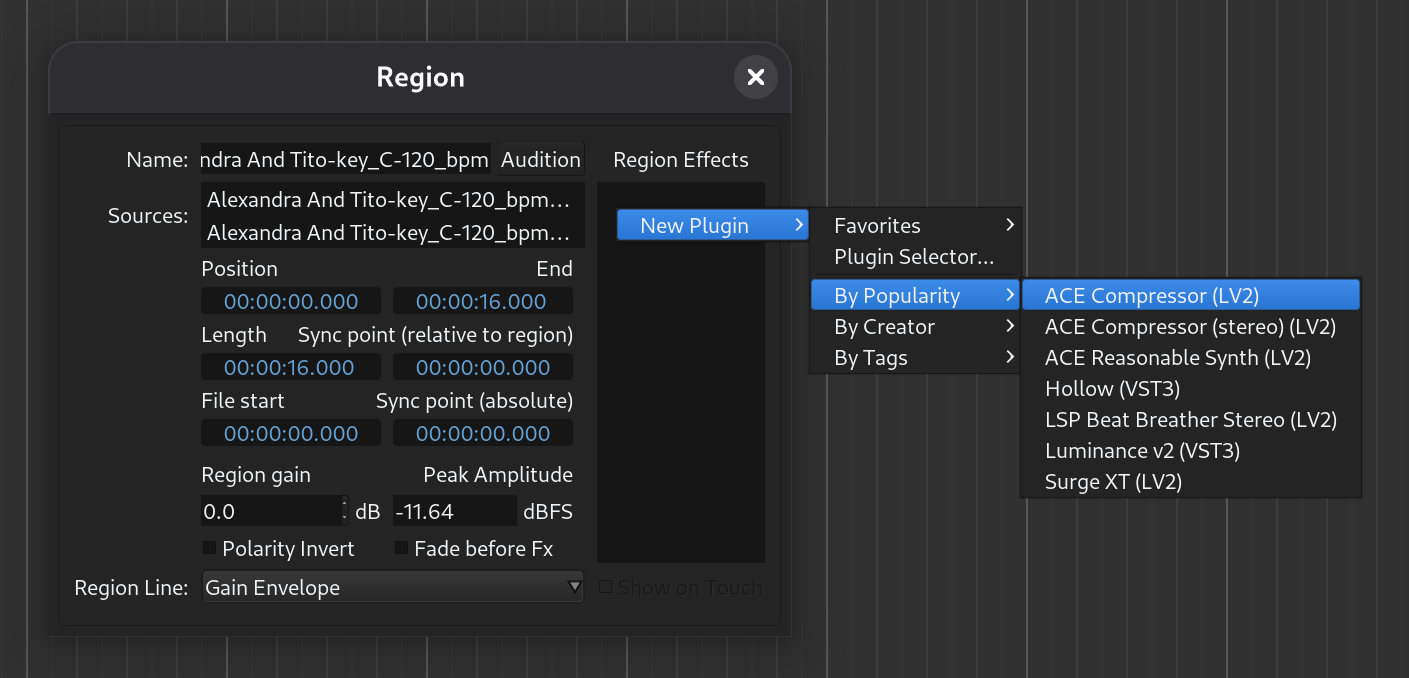
The selected effect will be added to the processor box:
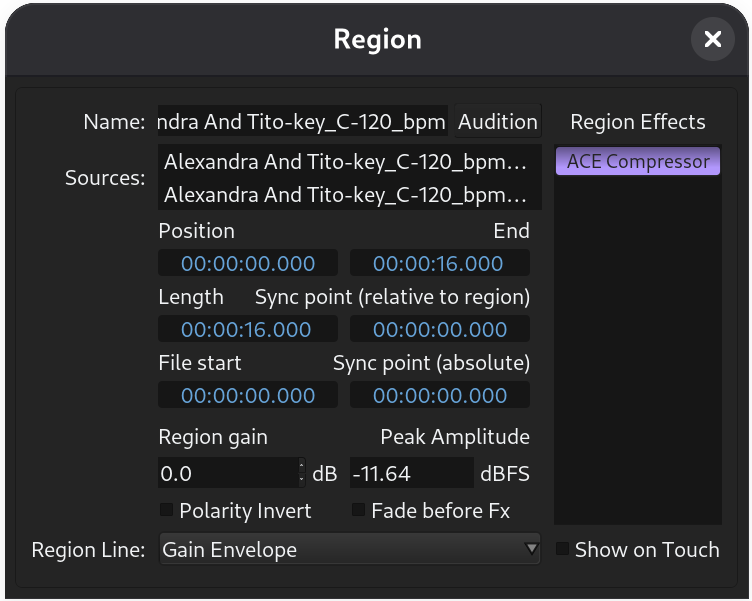
Editing a region effect
To edit the effect parameters, double-click its name in the processor box.
Reordering region effects
To reorder region effects, pick and effect in the processor box, then drag and drop it to the desired position.
Removing a region effect
To remove a region effect, right-click on its name in the processor box and select Delete in the menu.
Selecting region line
Ardour defaults to displaying the gain automation line in the Internal Edit mode. To choose an effect parameter instead, click on the Region Line drop-down list in the Region Properties dialog, select an effect, then a parameter.
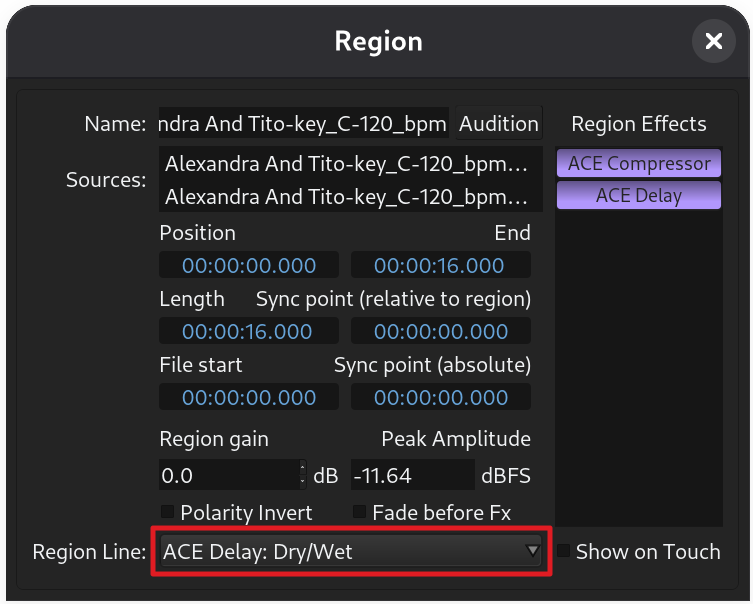
Bundled Plugins
Filters and Effects
ACE Compressor
The job of this filter is to make an audio recording perceivably louder by reducing the dynamic range, that is, the difference between the loudest and the quietest parts. ACE compressor lowers the volume of loud sounds above a user-defined threshold measured in dB, then the gain of all the sound gets increased to make up for lost loudness.
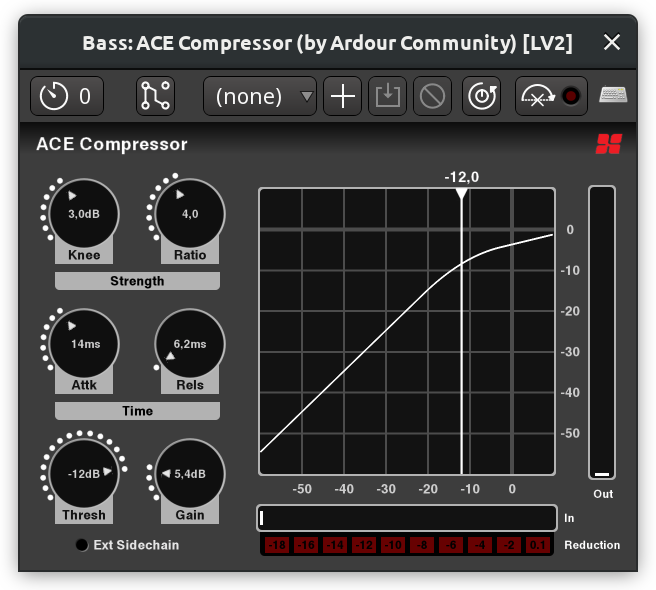
Available settings are:
The plugin also provides an opt-out inline display that shows input signal, threshold, and resulting gain reduction:
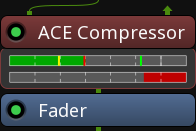
ACE Expander
Contrary to compressors, expanders increase the dynamic range either by making quite sounds quieter (downward expanders) or by making loud sounds louder (upward expanders). ACE Expander is a downward expander. It reduces the level of a signal below a user-defined threshold by user-defined ratio, then optionally increases the overall gain to make up for lost loudness.
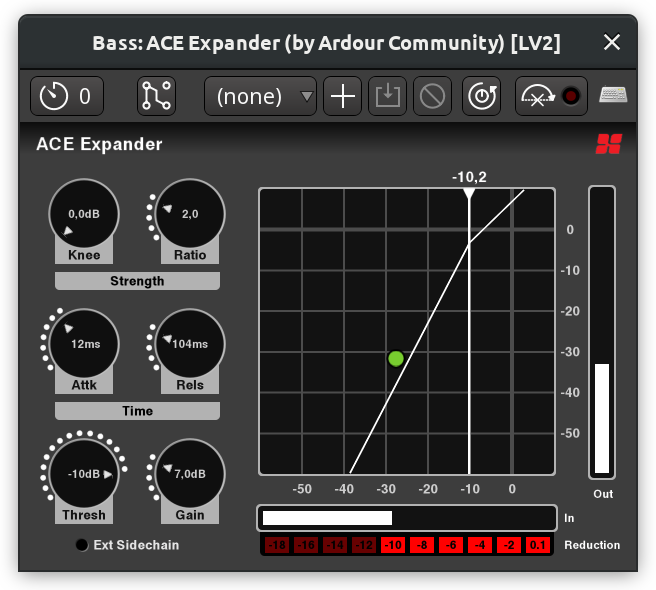
Available settings are:
ACE Expander also comes with an inline widget for mixer channels that displays the input signal level, the threshold, and the amount of reduced signal.
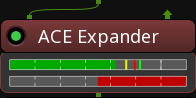
ACE Delay
Delay effects repeat original signal after a user-defined interval. In ACE Delay, the interval is calculated from the tempo and the divisor — a musical time unit like a 1/4th note or a dotted 1/16th note. When using a delay in music production, it's usually best to sync to project's tempo, especially if there are tempo ramps in a song.

Available settings are:
ACE Reverb
A reverb effect emulates sound waves reflecting off the walls in a closed space which could be a a small room or a cathedral. The effect is usually applied to a "dry" audio recording, that is, one typically made in a very small room with acoustic absorption treatment so that there are little-to-no reflections. That way, a reverb effect makes the most sense as it gives you a clean slate and more freedom to shape your sound.
The ACE Reverb effect is a very simple one, based on early research to artificial reverberation by Manfred Schroeder and Ben Logan (see here for technical details). There are just two controls:
ACE High/Low Pass Filter
High-pass and low-pass filters reduce the signal below and above a certain frequency respectively. The ACE High/Low Pass filter combines the two filters in one.
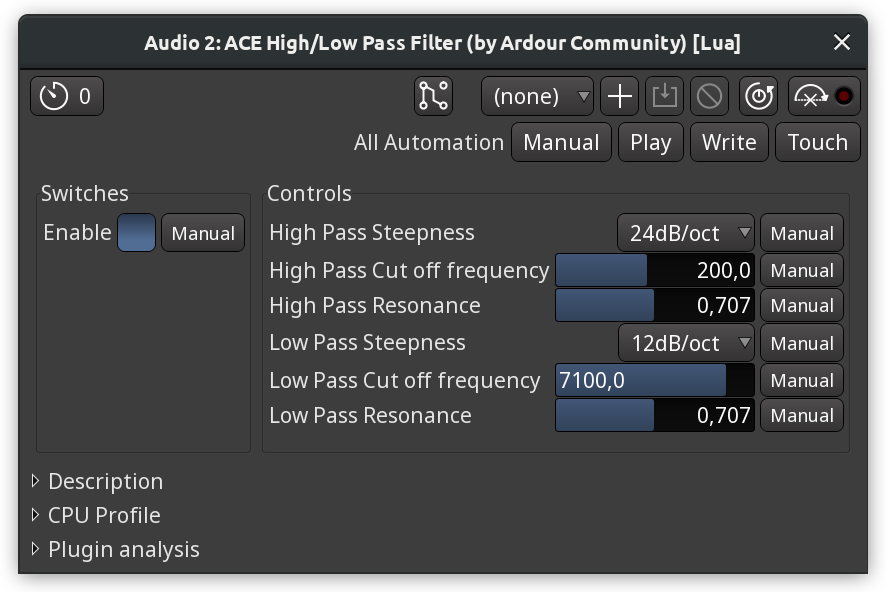
Each of the two bandpass filters has three controls:
The plugin also comes with an inline display visualizing the effect that the filters have.
ACE EQ
Equalizers are commonly used to shape the sound, change timbre of an instrument and generally help it sit better in a mix.
ACE EQ is a simple 4-band equalizer with a low and a high shelves. All bands and shelves are optional and can be disabled by clicking on the outer border of respective parameters boxes.
For each band it's possible to set the base frequency, the gain level, and the bandwidth. The latter defines how much frequencies around the base frequency are affected by the gain adjustment. In an example below, the first band has the narrowest bandwidth of 0.1, and the third band has the default banwidth of 1.0. While both bands have a gain of +10dB, the first one is very narrow, but the third one is wide enough so that changes begin affecting frequencies that belong to neighboring frequency bands.
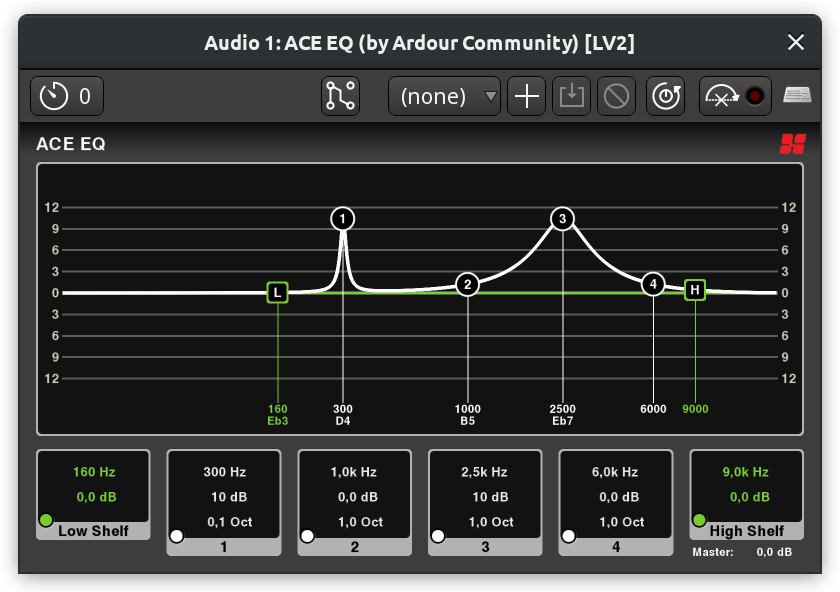
There are three ways to adjust both frequency, gain, and bandwidth:
ACE EQ also provides an inline display for mixer channels:
ACE Notch Bank
This is a very basic harmonic filter that suppresses a user-defined number of harmonics (stages) starting at a user-defined base frequency. The filter is mostly useful as a demonstration for Ardour's built-in biquadratic filter that can be used in Lua scripts.
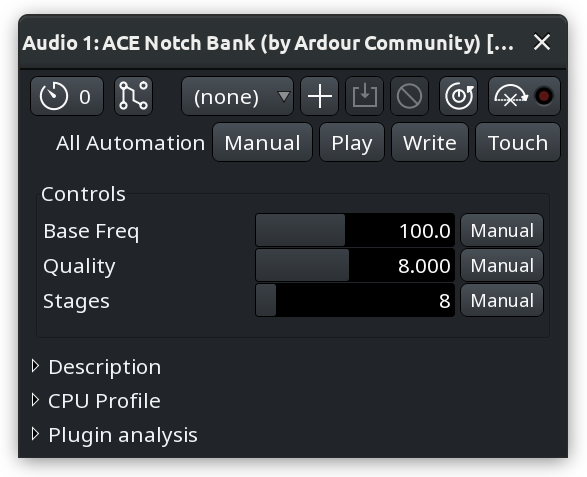
An example below is a sine wave at 120Hz with added harmonics, each at a lower magnitude than the previous one. Applying the ACE Notch Bank filter starting at 120Hz with 8 stages completeles silences the signal (the purple line for processed signal is not even visible):
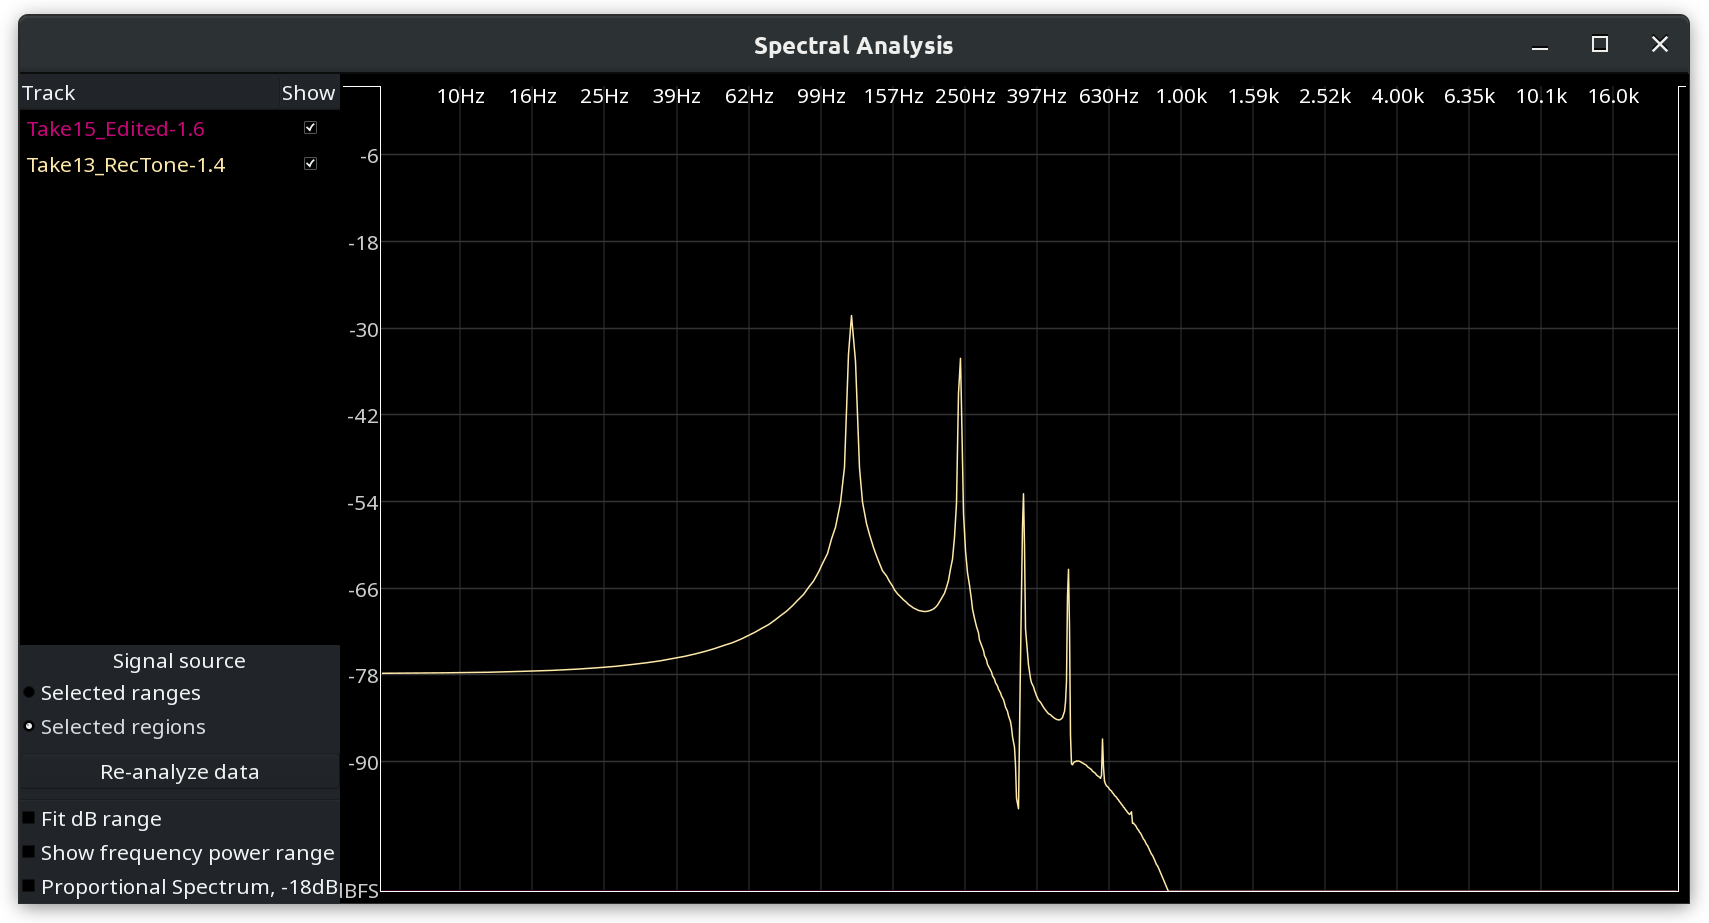
Instruments
ACE Fluid Synth
This is a simple FluidSynth-based synthesizer that uses SF2 samples and comes with two built-in effects that are part of FluidSynth: reverb and chorus.
Available settings are:
This instrument plugin doesn't work without 3rd party SF2 files, otherwise it will be silent. This thread on the Ardour forum has a number of links to royalty-free samples in the SF2 file format.
General MIDI Synth
This is a convenience plugin for playing standard MIDI files. It uses the FluidSynth engine and the GeneralUser GS soundfont by S. Christian Collins. The plugin comes with a MIDI map for simple patch selection in the user interface. General MIDI Synth was developed outside Ardour and comes bundled with it as 3rd party software in the official builds available from Ardour's website.
ACE Reasonable Synth
This is a very minimal synth with a piano-like sound, developed primarily for auditioning MIDI files. It comes with no controls, however it can be used creatively with a number of effects running on top of it.
Utilities
ACE Amplifier
This plugin can adjust gain by +/- 20dB anywhere in the processor box. It's typically useful in scenarios where a plugin's output needs to be adjusted, but the plugin does not provide its output level control.
Gain is the only available setting. It can be set in the generic plugin editor dialog or adjusted on the respective automation lane.
ACE A/B Switch and ACE Cross Fade
These two plugins are very similar and allow switching between two plugins earlier in the processing chain using an automation lane and custom pin connections.
In the example below, the processor box for a 1-channel track has two ACE Delay plugins processing the input differently. Each plugin has one manually added output so that the original signal would flow into one instance of a plugin while bypassing the other one. All two resulting outputs then flow into the ACE A/B Switch plugin. Input 1 is considered the A version, input 2 is the B version.

Both ACE A/B Switch and ACE Cross Fade will default to the A version. Using an automation lane, it's switch to the B version and back. This is where the difference between the two plugins comes into play.
With ACE A/B Switch, the switch is instant, it's either A or B:

With ACE Cross Fade, however, it's possible to gradually transition to the B version and then back, mixing A and B signal in different ratios.
The plugins support 1-, 2-, and 4-channel configurations:
ACE Mute
This plugin can mute the signal anywhere in the processing chain as opposed to automating the mute state of the track that works on all processed audio only. Using ACE Mute in the very beginning of the signal chain means that in the muted state no signal is processed by plugins further in the processing chain.
ACE Mute has no settings. All user interaction happens in the dedicated automation lane:
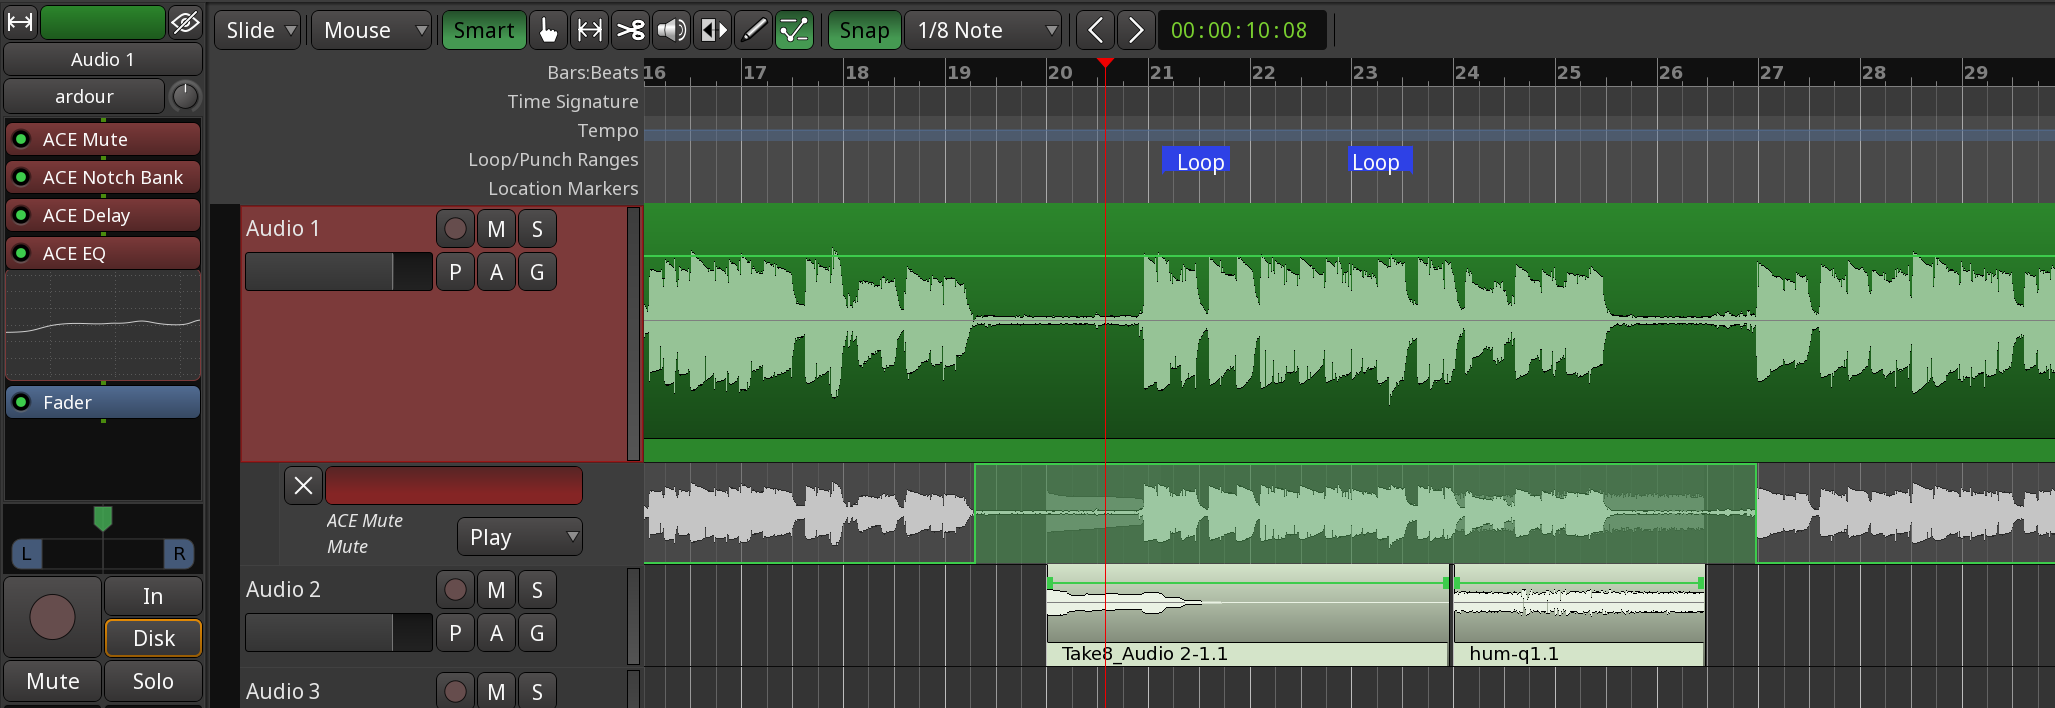
Ardour also ships with a variation of ACE Mute called ACE Slow Mute that applies a 1 second long fade out/in before/after the muting.
Voice/Level Activate
This plugin rolls the transport when the signal level on the plugin's input exceeds a user-defined level. A common scenario where this is helpful is recording in a home studio where an instrument or a vocal mic is at a distance from the computer. Arming a track for recording, toggling recording mode, then clapping in front of a mic or plucking a string will roll the transport and start recording to a track of choice.
The only configurable setting is the input level threshold.
MIDI Note Mapper
Maps arbitrary MIDI notes to others. This affects both note-on and note-off events, as well as polyphonic key pressure. A single note can be mapped twice, but only the last mapping is used.
Arpeggiators
Arpeggiators commonly take a chord and play it note by note in a certain pattern: up (from the lowest note to the highest note), down (from the highest note to the lowest one), up and down, down and up, or in a random fashion.
They also have a number of additional settings like division that defines the rate at which an arpeggiator will repeat the pattern. Or the number of octaves the arpeggiator will jump between while transposing a repeating note.
All three arpeggiators shipped with Ardour — simple arpeggiator, Barlow arpeggiator, and Raptor arpeggiator — share these basic settings. However, some of their design specifics vary.
The simple arpeggiator allows setting different velocities for notes at the bar line, beat line, and subdivisions. It also has a swing setting.
The Barlow arpeggiator has sample-accurate triggering and automatically adjusts to the current time signature. It also allows setting min and max velocity.
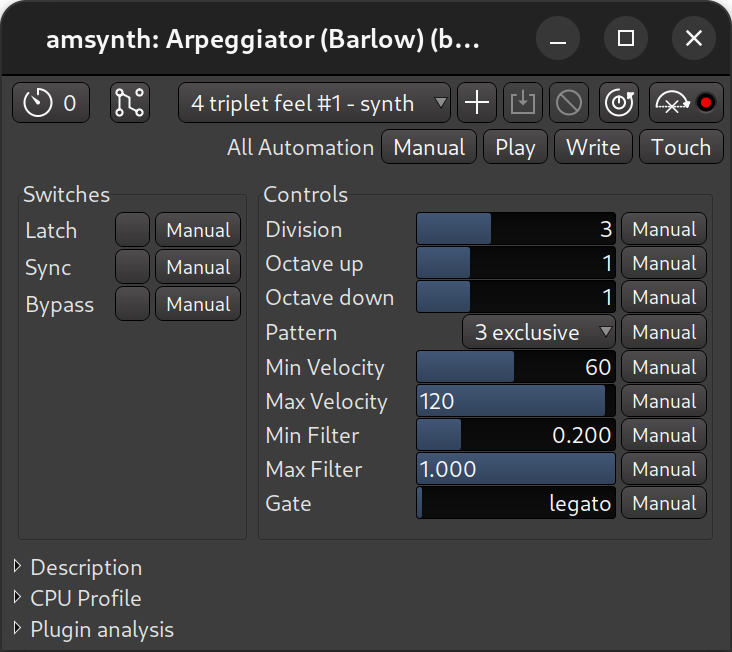
The Raptor arpeggiator has harmonic controls, input pitch and velocity tracking, and a few other features.
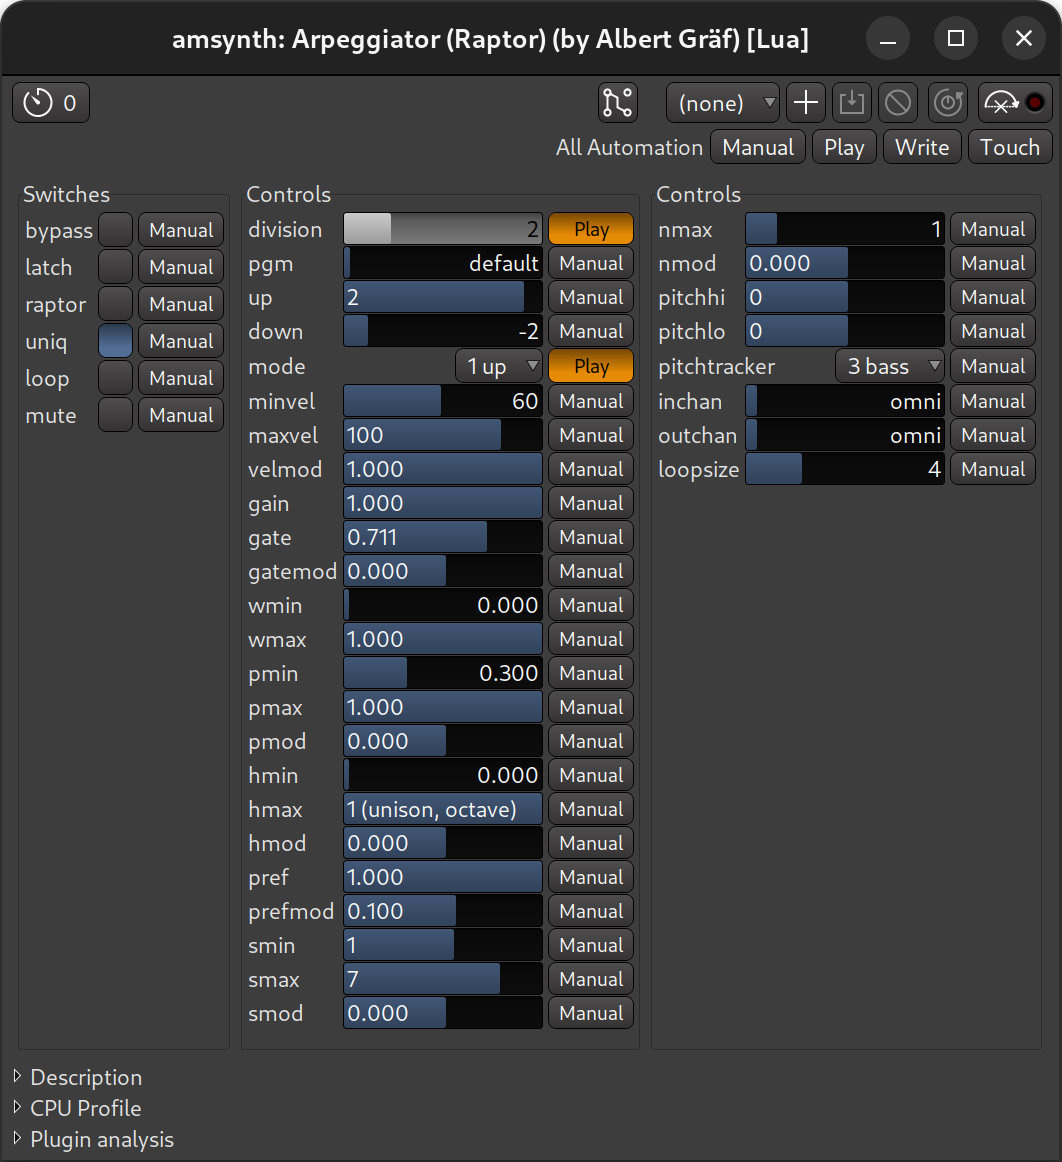
Inline Scopes
ACE Inline Scope
This inline scope displays the waveform of audio being played in the track or streamed into track's input. The waveform moves downwards.
The scope has a few settings:
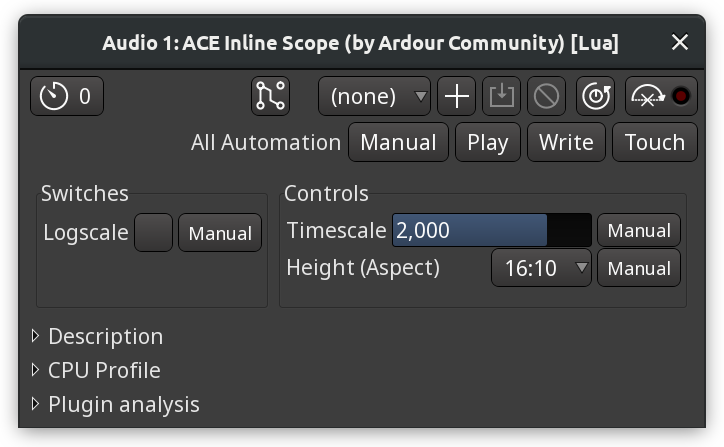
ACE Inline Spectrogram
This plugin displays a spectrogram of audio signal being played in the track or streamed into track's input.
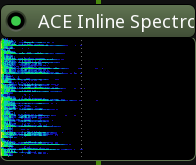
The plugin has a number of options:
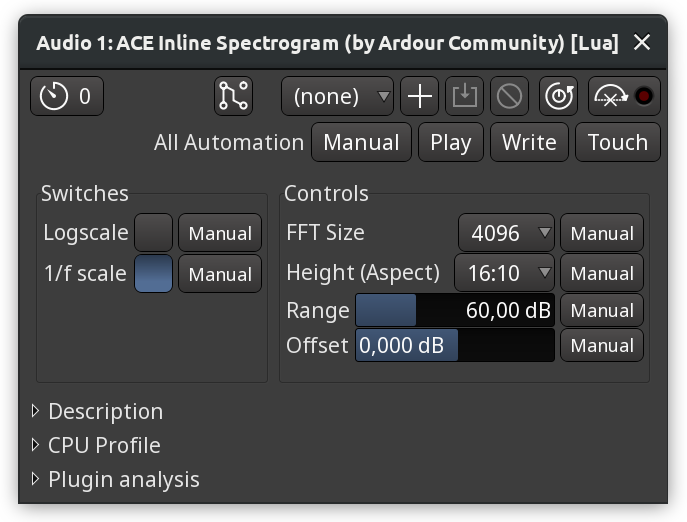
ACE MIDI Monitor
This inline tool displays all incoming or outgoing MIDI events in a track or a bus.
There are several options:
LTC Reader
This is a Linear Timecode (LTC) decoder with an inline display in the mixer strip. It can display either the LTC data from regions in a track or any LTC data streamed into track's input.

Video
Video Timeline and Monitoring
Ardour offers a video timeline and video monitoring for convenient audio mixing and editing to video, in order to produce film soundtracks and music videos, or perform TV post-production tasks.
The video capabilities are:
The setup of the video subsystem is modular and can be configured in different ways, including:
Ardour does not:
Video Timeline Setup
No configuration is required if everything is to meant be run on a single machine, and the version of Ardour comes from http://www.ardour.org. Everything is pre-configured and included with the download/install.
Single Machine
If Ardour is compiled from source, or installed from a 3rd party repository, three additional tools will need to be installed manually, which are used by Ardour to provide video features:
Ardour requires xjadeo ≥ version 0.6.4, harvid ≥ version 0.7.0 and ffmpeg (known to work versions: 1.2, 2.8.2, 5.0)
The Ardour development team is in control of the first two applications.
ffmpeg however can be a bit of a problem. To avoid conflicts with distribution
packages, Ardour looks for ffmpeg_harvid and
ffprobe_harvid.
All four applications need to be found in $PATH (e.g.
$HOME/bin or /usr/local/bin). For convenience the
binary releases of harvid include ffmpeg_harvid and ffprobe_harvid.
Ardour binaries from ardour.org do include all relevant tools and most
GNU/Linux distributions also provide those.
Binary releases of the video-tools are available from ardour.org via a dedicated installer script: install_video_tools.sh.
The easiest way to install the video-utilities on Linux is by running the following line in a terminal:
sh -c "$(curl -s -L http://git.io/tVUCkw)"Studio Setup
As Setting up a proper A/V post-production studio can be a complicated task, it is advised to read the info in the previous section to get familiar with the tools involved first. As much as the Ardour team streamlines and simplifies the single machine setup, the studio setup is focused on modularity.
Transcoding, Formats and Codecs
This chapter provides a short primer on video files, formats and codecs – because it is often cause for confusion:
A video file is a container. It usually contains one video track, one or more audio tracks, and possibly subtitle tracks, chapters… The way these tracks are stored in the file is defined by the file format. Common formats are avi, mov, ogg, mkv, mpeg, mpeg-ts, mp4, flv, or vob.
Each of the tracks by itself is encoded using a Codec. Common video codecs are h264, mpeg2, mpeg4, theora, mjpeg, wmv3. Common audio codecs are mp2, mp3, dts, aac, wav/pcm.
Not all codecs can be packed into a given format. For example the mpeg format is limited to mpeg2, mpeg4 and mp3 codecs (not entirely true). DVDs do have stringent limitations as well. The opposite would be .avi: pretty much every audio/video codec combination can be contained in an avi file-format.
To make things worse, naming conventions for video codecs and formats are often identical (especially MPEG ones) which leads to confusion. All in all it is a very wide and deep field. Suffice there are different uses for different codecs and formats.
Ardour specific issues
Ardour supports a wide variety of video file formats codecs. More specifically, Ardour itself actually does not support any video at all but delegates handling of video files to ffmpeg, which supports over 350 different video codecs and more than 250 file formats.
When importing a video into Ardour, it will be transcoded (changed from one format and codec to another) to avi/mjpeg for internal use (this allows reliable seeking to frames at low CPU cost—the file size will increase, but hard disks are large and fast).
The export dialog includes presets for common format and codec combinations (such as DVD, web-video,..). If in doubt, one of the presets should be used.
As a last note: every time a video is transcoded, the quality can only get worse. Hence for the final mastering/muxing process, one should always go back and use the original source of the video.
Workflow and Operations
Overview of Operations
| Session > Open Video… | Add/replace a video to/on the timeline |
|---|---|
| Window > Video Monitor | Open/close external video monitor window |
| View > Video Monitor > … | Various settings of the video monitor |
| Session > Export > Export to Video File… | Export session and multiplex with video-file |
| Left-drag the video in the timeline | Re-align video and move 'locked' audio-regions along |
| Context-menu on the video-timeline: Lock | Prevent accidental drags |
| Audio region context menu: Name_Of_The_Region > Position > Lock to video | Mark audio region(s) to be moved along with the video. |
Adding a video
Adding a video is a two-step process: selecting a video file, and choosing import mode and optionally selecting an audio track to extract. Only one video can be present in the session, so opening a video when one is already opened results in replacing the video.
Launching the video server (optional)
Importing a video makes Ardour start the video server automatically. If the Show video Server Startup Dialog option in the Video section of the preferences is checked, the Launch Video Server window is shown, allowing more complex operations, e.g. connecting to a remote video server instead of a local one.
Selecting a file
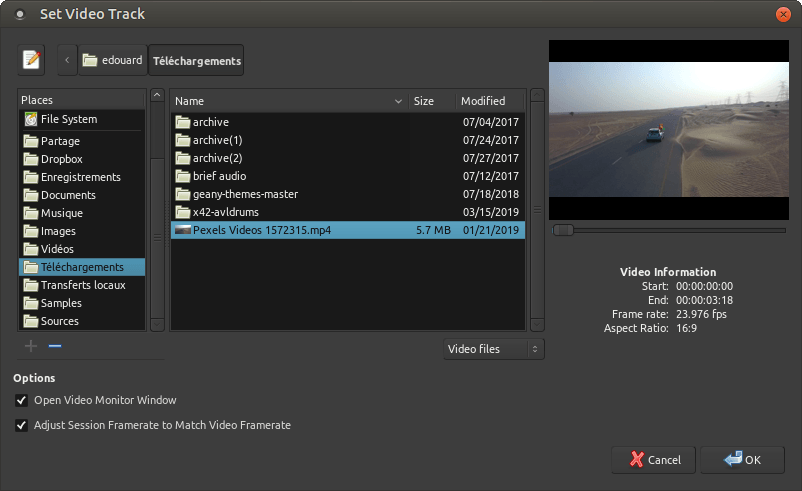
This step is rather straight-forward. The panel on the right side allows to seek through the video and displays basic file information. It is also useful to check if the video format/codec is supported.
The lower part of the window shows some options:
Import options
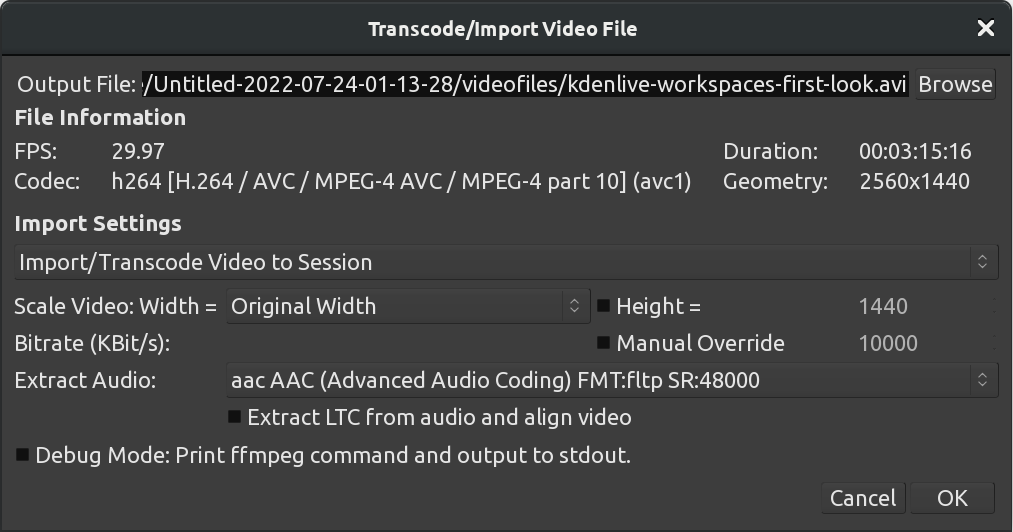
This step analyzes the video file in more detail and offers import options:
| Import/Transcode Video to Session | This is the default. The video will be imported in a suitable video format/codec for the timeline and video monitor and saved inside the session folder. A location other than the session folder can also be chosen (external disk, or network storage of the video server on a different machine) by using the Output File: field. |
|---|---|
| Reference from Current Location (Previously Transcoded Files Only) | Only useful for opening files that were previously encoded (are already in a good format/codec for Ardour). Should be used with care. |
| Do not Import Video (Audio Import Only) | Useful for extracting audio only. |
By default the video is imported using the original width/height. If it is a large video (e.g. Full HD), it makes sense to scale it down to decrease the CPU load and disk I/O required to decode and play the file.
A small, low-quality representation of the image is usually sufficient for editing soundtracks. The default bitrate in kbit/sec is set to use 0.7 bits per pixel (in comparison, the average DVD medium uses 5000 kbit/s; at PAL resolution this is about 0.5 bits per pixel, but the DVD is using the mpeg2—a denser compression algorithm than the mjpeg codec used by Ardour).
The Extract Audio: offers options regarding the Audio part of the stream, allowing to either not extract audio, or to choose which audio stream to add to the session.
When extracting any audio, if it includes LTC timecodes, those can be extracted and used to sync the video by checking the option below.
Working with A/V
Working with A/V in Ardour is similar to working in a pure audio setup, except for the presence of a video timeline in the ruler zone, and a Xjadeo video window, showing a preview of the result.
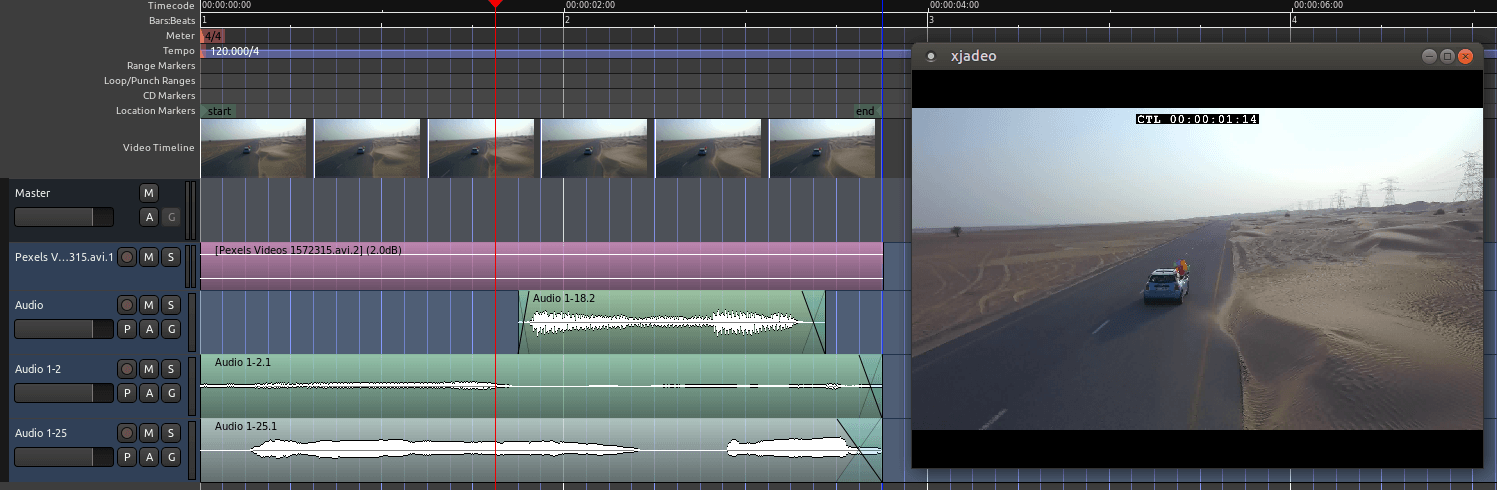
The Xjadeo window supports some user interactions, such as showing some OSD information or changing the zoom level. Xjadeo's documentation is available on its website.
Exporting Video
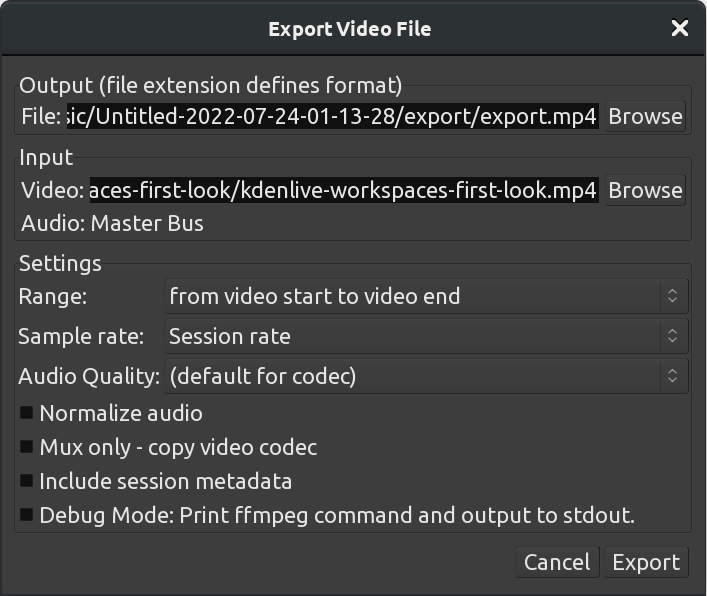
The video export will take audio from the current Ardour session and multiplex it with a video file. The soundtrack of the video is taken from an audio export of Ardour's master bus.
An arbitrary video file can be chosen. For high quality exports, the original file (before it was imported into the timeline) should be used. This is the default behaviour if that file can be found. If not, Ardour will fall back to the imported proxy-video which is currently in use on the timeline. Any existing audio tracks on this video file are stripped.
The range selection allows to cut or extend the video. If the session is longer than the video duration, black frames are prefixed or appended to the video. (Note: this process may fail with non-standard pixel aspect ratios). If Ardour's session range is shorter, the video will be cut accordingly.
Audio sample rate and normalization are options for Ardour's audio exporter. The remaining settings are options that are directly passed on to ffmpeg.
The file format is determined by the extension chosen for it (.avi, .mov, .flv, .ogv, .webm,…). Note: not all combinations of format, codec, and settings produce files which are according to specifications. For example, flv files require sample rates of 22.1 kHz or 44.1 kHz, mpeg containers can not be used with AC-3 audio codec, etc. If in doubt, one of the built-in presets should be used.
Ardour's video exporter is not recommended for mastering! While ffmpeg (which is used by Ardour) can produce high-quality files, this export lacks the possibility to tweak many settings. We recommend using winff, devede or dvdauthor to mux and master. Nevertheless this video exporter comes in handy to do quick snapshots, intermediates, dailies or online videos.
Control Surfaces
Using the Ableton Push 2
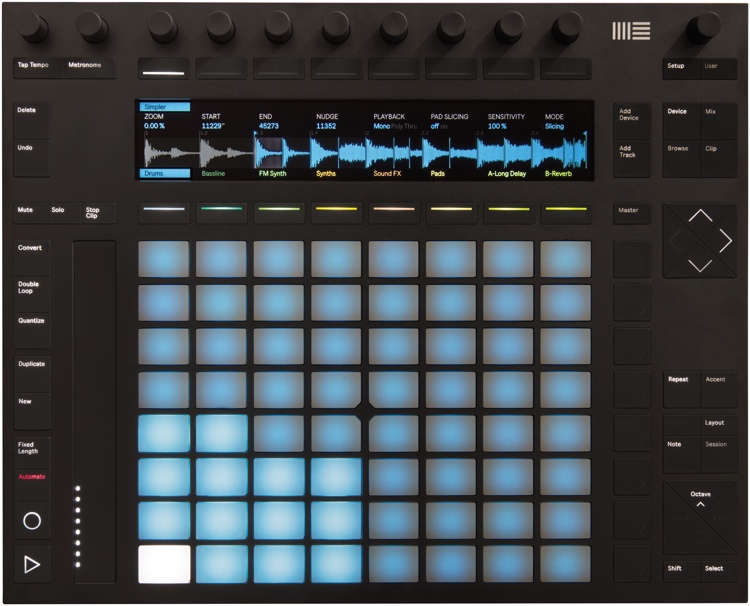
Since version 5.4, Ardour has had extensive support for the Ableton Push2. This is an expensive but beautifully engineered control surface primarily targeting the workflow found in Ableton's Live software and other similar tools such as Bitwig. As of version 5.4, Ardour does not offer the same kind of workflow, so we have designed our support for the Push 2 around mixing and editing and musical performance, without the clip/scene oriented approach in Live. This may change in future versions of Ardour.
Connecting the Push 2
Plug the USB cable from the Push 2 into a USB2 or USB3 port on your computer. For brighter backlighting, also plug in the power supply (this is not necessary for use).
The Push 2 will be automatically recognized by your operating system, and will appear in any of the lists of possible MIDI ports in both Ardour and other similar software.
Linux does not provide normal users access to arbitrary USB
devices by default (this is a security measure). To give yourself
access to the Push2, you need to create a file in
the /etc/udev/rules.d folder (directory). The name of
the should be something like "50-Ableton-Push2.rules" (the only
critical parts are that it ends in ".rules" and is unique). The
file should contain the following single line:
Note that you will need to be member of the group named in the "GROUP" property ("audio" in the example above).
Normally, Ardour should be able to automatically detect a connected Push 2 device. If it fails, open the Preferences dialog, and then click on "Control Surfaces". Click on the "Enable" button in the line that says "Ableton Push 2" in order to activate Ardour's Push 2 support.
Once you select the input and output port, Ardour will initialize the Push 2 and it will be ready to use. You only need do this once: once these ports are connected and your session has been saved, the connections will be made automatically in this and other future sessions.
Push 2 Configuration
The only configuration option at this time is whether the pads send aftertouch or polyphonic pressure messages. You can alter this setting via the Push 2 GUI, accessed by double-clicking on the "Push 2" entry in the control surfaces list.
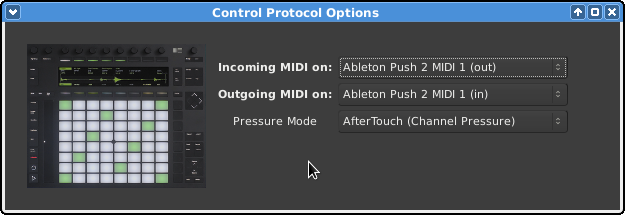
Basic Concepts
With the Push 2 support in Ardour 5.4, you can do the following things:
| Perform using the 8 x 8 pad "grid" | The Push 2 has really lovely pressure-sensitive pads that can also generate either aftertouch or note (polyphonic) pressure. |
|---|---|
| Global Mixing | See many tracks at once, and control numerous parameters for each. |
| Track/Bus Mixing | View a single track/bus, with even more parameters for the track. |
| Choose the mode/scale, root note and more for the pads | 37 scales are available. Like Live, Ardour offers both "in-key" and "chromatic" pad layouts. |
Musical Performance
Messages sent from the 8x8 pad grid and the "pitch bend bar" are routed to a special MIDI port within Ardour called "Push 2 Pads" (no extra latency is incurred from this routing). Although you can manually connect this port to whatever you wish, the normal behaviour of Ardour's Push 2 support is to connect the pads to the most recently selected MIDI track.
This means that to play a soft-synth/instrument plugin in a given MIDI track with the Push 2, you just need to select that track.
If multiple MIDI tracks are selected at once, the first selected track will be used. Note that messages originating from all other controls on the Push 2 will not not be delivered to the "Push 2 Pads" port. This makes no difference in practice, because the other controls do not send messages that are useful for musical performance.
Global Mix
This is the default mode that Ardour will start the Push 2 in. In this mode, the 8 knobs at the top of the device, the 8 buttons below them, the video display and the 8 buttons below that are combined to provide a global view of the session mix.

The upper buttons are labelled by text in the video display just below them. Pressing one of the buttons changes the function of the knobs, and the parameters that will shown for each track/bus in the display.
As of Ardour 5.4, the possible parameters are:
| Volumes | The display shows a knob and text displaying the current gain setting for the track, and a meter that corresponds precisely to the meter shown in the Ardour GUI for that track. Changing the meter type (e.g. from Peak to K12) in the GUI will also change it in the Push 2 display. The physical knob will alter track/bus gain. |
|---|---|
| Pans | The display shows a knob indicating the pan direction/azimuth for the corresponding track/bus. Turning the physical knob will pan the track left and right. If the track/bus has no panner (i.e. it has only a single output), no knob is shown and the physical knob will do nothing. |
| Pan Widths | For tracks with 2 outputs, the display will show a knob indicating the pan width setting for the corresponding track/bus. The physical knob can be turned to adjust the width. Unlike many DAWs, Ardour's stereo panners have "width" parameter that defaults to 100%. You cannot change the pan direction/azimuth of a track with 100% width, but must first reduce the width in order to pan it. Similarly, a track panned anywhere other than dead center has limits on the maximum width setting. If these concepts are not familiar to you, please be aware than many DAWs use a "panner" that actually implement "balance" and not "panning", hence the difference. |
| A Sends | The display shows a knob indicating the gain level for the first send in that track. If the track has no send, no knob will be shown, and the physical knob for that track will do nothing. |
| B Sends, C Sends, D Sends | Like "A Sends", but for the 2nd, 3rd and 4th sends of a track/bus respectively. |
To change which tracks are shown while in global mix mode, use the left and right arrow/cursor keys just below and to the right of the display. Tracks and busses that are hidden in Ardour's GUI will also be hidden from display on the Push 2.
To select a track/bus directly from the Push 2, press the corresponding button below the display. The track name will be highlighted, and the selection will change in Ardour's GUI as well (and also any other control surfaces).
Soloing and Muting in Global Mix mode
The Solo and Mute buttons to the left of the video display can be used to solo and mute tracks while in Global Mix mode. The operation will be applied to the first currently selected track(s).
There are two indications that one or more tracks are soloed:
To cancel solo, either:
Track Mix
Track Mix mode allows you to focus on a single track in more detail than is possible in Global Mix mode. To enter (or leave) Track Mix mode, press the "Mix" button.
In Track Mix mode, various aspects of the state of the first selected track/bus will be displayed on the Push 2. Above the display, the first 4 knobs control track volume (gain), pan directiom/azimuth, pan width, and where appropriate, track input trim.
Below the display, 7 buttons provide immediate control of mute, solo, rec-enable, monitoring (input or disk or automatic), solo isolate and solo safe state. When a a track is muted due to other track(s) soloing, the mute button will flash (to differentiate from its state when it is explicitly muted).
The video display also shows meters for the track, which as in Global Mix mode, precisely match the meter type shown in Ardour's GUI. There are also two time displays showing the current playhead position in both musical (beats|bars|ticks) format, and as hours:minutes:seconds.
To change which track is visible in Track Mix mode, use the left/right arrow/cursor keys just below and to the right of the video display.
Scale Selection
Press the Scale button to enter Scale mode. The display will look like this:

In the center, 37 scales are presented. Scroll through them by either using the cursor/arrow keys to the lower right of the display, or the knobs above the display. The scale will change dynamically as you scroll. You can also scroll in whole pages using the upper right and upper left buttons above the display (they will display "<" and ">" if scrolling is possible).
To change the root note of the scale, press the corresponding button above or below the video display.The button will be lit to indicate your selection (and the text will be highlighted).
By default, Ardour configures the Push 2 pads to use "in-key" mode, where all pads correspond to notes "in" the chosen scale. Notes corresponding to the root note, or the equivalent note in higher octaves, are highlighted with the color of the current target MIDI track.
In "chromatic" mode, the pads correspond to a continuous sequence of notes starting with your selected root note. Pads corresponding to notes in the scale are illuminated; those corresponding to the root note are lit with the color the current target MIDI track. Other pads are left dark, but you can still play them.
To switch between them, press button on the lower left of the video display; the text above it will display the current mode (though it is usually visually self-evident from the pad lighting pattern).
To leave Scale mode, press the "Scale" button again. You may also use the upper left button above the display, though if you have scrolled left, it may require more than one press.
Specific Button/Knob Functions
In addition to the layouts described above, many (but not all) of the buttons and knobs around the edges of the Push 2 will carry out various functions related to their (illuminated) label. As of Ardour 5.4, this includes:
| Metronome (button and adjacent knob) | Enables/disables the click (metronome). The knob directly above it will control the volume (gain) of the click. |
|---|---|
| Undo/Redo | Undo or redo the previous editing operation. |
| Delete | Deletes the currently selected region, or range, or note. Equivalent to using Ctrl/Cmd-x on the keyboard. |
| Quantize | If a MIDI region is selected in Ardour, this will open the quantize dialog. |
| Duplicate | Duplicates the current region or range selection. |
| Rec-Enable | Enables and disables Ardour's global record enable state. |
| Play | Starts and stops the transport. Press Shift-Play to return to the session start. |
| Add Track | Opens Ardour's Add Track/Bus dialog. |
| Browse | Open's Ardour's import dialog to select and audition existing audio and MIDI files. |
| Master | Pressing this button jumps directly to Track Mix mode, with the master out bus displayed. |
| Cursor arrows | These are used by some modes to navigate within the display (e.g Scale mode). In other modes, the up/down cursor arrows will scroll the GUI display up and down, while the left/right cursor arrows will generally scroll within the Push 2 display itself. |
| Repeat | Enables/disables loop playback. This will follow Ardour's "loop is mode" preference, just like the loop button in the Ardour GUI. |
| Octave buttons | These shift the root note of the current pad scale up or down by 1 octave. |
| Page buttons | These scroll Ardour's editor display left and right along the timeline. |
| Master (top right) knob | This knob controls the gain/volume of Ardour's main output. If the session has a monitor section. |
Using the Contour Design Shuttle Devices
ShuttlePRO and ShuttleXpress are simple shuttle-centric control devices by Contour Design, designed for user of digital audio workstations and non-linear video editors.

Connecting the Contour Design Shuttle
Plug the USB cable from the shuttle into a USB2 or USB3 port on your computer. The device will be automatically recognized by your operating system and will appear in any of the lists of possible MIDI ports in Ardour.
Normally, Ardour should be able to automatically detect a connected Contour Design Shuttle device and enable it. If it fails, connect the shuttle to Ardour, open the Preferences dialog, then click Control Surfaces. Tick the Enable checkbox opposite to "Contour Design" to activate Ardour's Contour Design shuttles support.
Once the device is activated, click Show Protocol Settings and in the newly opened window configure the device.
Contour Design Configuration
The configuration dialog allows setting up various settings for supported models of Contour Design shuttles:
Ardour ships with some sensible defaults for shuttle buttons.
Generic MIDI
Generic Midi allows synthesizers and other devices communicate with Ardour. MIDI devices can send commands relating to playback (such as play or stop), performance (such as volume, play, stop), and almost any other function (such as Edit, or Undo).
Many MIDI control surfaces use predefined MIDI protocols such as the "Mackie Control Protocol". In such cases it is best to use Ardour's implementation of that protocol as it is likely more feature complete.
Generic MIDI Binding Maps
Ardour 2.X supported MIDI learning for more or less any control. This was a nice feature that quite a few other DAWs are providing by now, but it didn't allow Ardour to work "out of the box" with sensible defaults for existing commercial MIDI controllers. In Ardour 3 and later versions, we have augmented the MIDI learn feature with the ability to load a MIDI binding map for a given controller, which can set up an arbitrary number of physical controls with anything inside Ardour that can be controlled.
As of this writing we offer presets for the following devices/modes:
At this time, new binding maps need to be created with a text editor.
MIDI binding maps are accessible by double-clicking Edit > Preferences > Control Surfaces > Generic MIDI. Ardour will retain your selection after you choose one.
Creating new MIDI maps
The Basic Concept
Since the beginning of time (well, sometime early in the 2.X series), Ardour has had the concept of identifying each track and bus with a remote control ID. This ID uniquely identifies a track or bus so that when messages arrive from elsewhere via MIDI or OSC, we can determine which track or bus they are intended to control. See remote control IDs for more information. You just need to know that there is a "first track" and its remote control ID is 1, and so on.
Getting Started
MIDI bindings are stored in files with the suffix ".map" attached to their name. The minimal content looks like this:
<?xml version="1.0" encoding="UTF-8"?>
<ArdourMIDIBindings version="1.0.0" name="The name of this set of bindings" manufacturer="Maker of the MIDI device">
</ArdourMIDIBindings>
So, to start, create a file with that as the initial contents.
The file should be located in the midi_maps sub directory located in the Ardour configuration directory
Finding out what your MIDI control surface sends
This is the most complex part of the job, but it's still not very hard.
You need to connect the control surface to an application that will show
you the information that the device sends each time you modify a knob,
slider, button etc. There are a variety of such applications (notably
gmidimon and kmidimon, but you can actually use
Ardour for this if you want. Start Ardour in a terminal window, connect
MIDI ports up, and in the Preferences window, enable "Trace Input" on the
relevant MIDI port. A full trace of the MIDI data received will show up in
the terminal window. (Note: in Ardour3, you get a dedicated, custom dialog
for this kind of tracing.)
Types of Bindings
There are two basic kinds of bindings you can make between a MIDI message and something inside Ardour. The first is a binding to a specific parameter of a track or bus. The second is a binding to something that will change Ardour's state in some way (the "something" could either be called a function or an action, see below).
Binding to Track/Bus controls
A track/bus binding has one of three basic structures
  <Binding msg specification  uri="… control address …"/>
  <Binding msg specification  function="… function name …"/>
  <Binding msg specification  action="… action name …"/>
Message specifications
You can create a binding for either 3 types of channel messages, or for a system exclusive ("sysex") message. A channel message specification looks like this:
<Binding channel="1" ctl="13" …
This defines a binding for a MIDI Continuous Controller message involving
controller 13, arriving on channel 1. There are 16 MIDI channels, numbered
1 to 16. Where the example above says ctl, you can alternatively
use note (to create binding for a Note On message) or
pgm (to create a binding for a Program Change message).
Continuous Controllers (CCs) have coninued to evolve for different controllers. The use of Encoders, RPN, NRPN, and controller buttons that give a 0 value when released instead of toggling are now supported. These all have their own type. The whole list of CC types are:
- ctl - sets a CC to the value sent (works the same as
notewith themomentaryparameter set) - ctl-toggle - for CC controls that send a 127 for button press
and 0 for button release. The release is ignored and the value is
toggled with each press. (works the same as
note) - ctl-dial - passes the CC value to the controlled object
- rpn - The CC value may be a 14 bit value
- nrpn - The CC number and the value may both be 14 bit values
- rpn-delta - The value is expected to be a signed 14bit value that is added to the current value. For use with encoders
- nrpn-delta - The value is expected to be a signed 14bit value that is added to the current value. For use with encoders
- enc-r, enc-l, enc-2 and enc-b - For 7 bit encoders. Learn more about working with encoders
Ardour 5.12 has a bug with the encoder detection where the first encoder message resets the control to 0. Setting "Enable Feedback" on allows encoders to work as expected.
You can also bind sysex messages:
  <Binding sysex="f0 0 0 e 9 0 5b f7" ….
  <Binding sysex="f0 7f 0 6 7 f7" ….
The string after the sysex= part is the sequence of MIDI bytes,
as hexadecimal values, that make up the sysex message.
Finally, you can bind a totally arbitrary MIDI message:
  <Binding msg="f0 0 0 e 9 0 5b f7" ….
  <Binding msg="80 60 40" ….
The string after the msg= part is the sequence of MIDI bytes, as
hexadecimal values, that make up the message you want to bind. Using this is
slightly less efficient than the other variants shown above, but is useful for
some oddly designed control devices.
As of Ardour 4.6 it is possible to use multi-event MIDI strings such as two event CC messages, RPN or NRPN.
The sysex= and msg= bindings will only work with
function= or action= control addresses. They
will not work with the uri= control addresses.
Controls used with uri= require a Value which is
only available in a known place with channel mode MIDI events.
Control address
A control address defines what the binding will actually control. There are quite a few different things that can be specified here:
Enable Feedback applies to these "Control Addresses" only.
| /route/gain | the gain control ("fader") for the track/bus |
|---|---|
| /route/trim | the trim control for the track/bus (new in 4.1) |
| /route/solo | a toggleable control for solo (and listen) of the track/bus |
| /route/mute | a toggleable control to mute/unmute the track/bus |
| /route/recenable | a toggleable control to record-enable the track |
| /route/panwidth | interpreted by the track/bus panner, should control image "width" |
| /route/pandirection | interpreted by the track/bus panner, should control image "direction" |
| /route/plugin/parameter | the Mth parameter of the Nth plugin of a track/bus |
| /route/send/gain | the gain control ("fader") of the Nth send of a track/bus |
Each of the specifications needs an address, which takes various forms too. For track-level controls (solo/gain/mute/recenable), the address is one the following:
| a number, e.g. "1" | identifies a track or bus by its remote control ID |
|---|---|
| B, followed by a number | identifies a track or bus by its remote control ID within the current bank (see below for more on banks) |
| S, followed by a number | identifies a selected track in order they have been selected, S1 should be the same track as the Editor Mixer |
| one or more words | identifies a track or bus by its name |
For send/insert/plugin controls, the address consists of a track/bus address (as just described) followed by a number identifying the plugin/send (starting from 1). For plugin parameters, there is an additional third component: a number identifying the plugin parameter number (starting from 1).
One additional feature: for solo and mute bindings, you can also add
momentary="yes" after the control address. This is useful
primarily for NoteOn bindings—when Ardour gets the NoteOn it
will solo or mute the targeted track or bus, but then when a NoteOff
arrives, it will un-solo or un-mute it.
Bindings to Ardour "functions"
There is currently no feedback available for functions.
Rather than binding to a specific track/bus/plugin control, it may be useful to have a MIDI controller able to alter some part of Ardour's state. Ardour's Generic MIDI support provides a small number of easily-used "functions" to do the most common operations, using a binding that looks like this:
<Binding channel="1" note="13" function="transport-roll"/>
In this case, a NoteOn message for note number 13 (on channel 1) will start the transport rolling.
Note that a much greater number of operations are possible using actions, described below.
The following function names are available:
transport-stop
|
stop the transport |
|---|---|
transport-roll
|
start the transport "rolling" |
transport-zero
|
move the playhead to the zero position |
transport-start
|
move the playhead to the start marker |
transport-end
|
move the playhead to the end marker |
loop-toggle
|
turn on loop playback |
toggle-rec-enable
|
toggle the global record button |
rec-enable
|
enable the global record button |
rec-disable
|
disable the global record button |
next-bank
|
move track/bus mapping to the next bank (see Banks below) |
prev-bank
|
move track/bus mapping to the previous bank (see Banks below) |
Binding to Ardour "actions"
It is not possible to have feedback available for actions because these represent keyboard shortcuts which are input only.
You can also bind a sysex or arbitrary message to any of the items that occur in Ardour's main menu (and its submenus). The list of actions shows all available values of action-name.
To create a binding between an arbitrary MIDI message (we'll use a note-off on channel 1 of MIDI note 60 (hex) with release velocity 40 (hex)), the binding file would contain:
<Binding msg="80 60 40" action="Editor/temporal-zoom-in"/>
The general rule, when taken an item from the keybindings file and
using it in a MIDI binding is to simply strip the
<Action> prefix of the second field in the
keybinding definition.
Transport controls via MMC
Some controllers like the Arturia KeyLab 49 have transport control
buttons that send MIDI Machine Control (MMC) commands by default. In
Ardour, MMC commands are mapped automatically to their corresponding
transport functions, but need to be received on the
ardour:MMC in MIDI port. In Window
> MIDI Connections, ensure that the MIDI controller is
connected to the MMC in port found in the Ardour
Misc right-hand side tab.
Additionally in Transport > Chase preferences, make sure that Respond to MMC commands is checked and Inbound MMC device ID: is the same as the MIDI controller's internal setting (usually 127 or 0).
Banks and Banking
Because many modern control surfaces offer per-track/bus controls
for far fewer tracks & busses than many users want to control,
Ardour offers the relatively common place concept of banks. Banks
allow you to control any number of tracks and/or busses easily,
regardless of how many faders/knobs etc. your control surface has.
To use banking, the control addresses must be specified using the
bank relative format mentioned above ("B1" to identify
the first track of a bank of tracks, rather than "1" to identify
the first track).
One very important extra piece of information is required to use banking: an extra line near the start of the list of bindings that specifies how many tracks/busses to use per bank. If the device has 8 faders, then 8 would be a sensible value to use for this. The line looks like this:
<DeviceInfo bank-size="8"/>
In addition, you probably want to ensure that you bind something
on the control surface to the next-bank and
prev-bank functions, otherwise you and other users
will have to use the mouse and the GUI to change banks, which
rather defeats the purpose of the bindings.
The Selected Strip
Often times one wants to just deal with the strip currently selected by the GUI (or the control surface). In the same way as with banks above the selected strip can be designated with S1.
A Complete (though muddled) Example
<?xml version="1.0" encoding="UTF-8"?>
<ArdourMIDIBindings version="1.0.0" name="pc1600x transport controls" manufacturer="Peavey">
  <DeviceInfo bank-size="16"/>
  <Binding channel="1" ctl="1"   uri="/route/gain B1"/>
  <Binding channel="1" ctl="2"   uri="/route/gain B2"/>
  <Binding channel="1" ctl="3"   uri="/route/send/gain B1 1"/>
  <Binding channel="1" ctl="4"   uri="/route/plugin/parameter B1 1 1"/>
  <Binding channel="1" ctl="6"   uri="/bus/gain master"/>

  <Binding channel="1" note="1"  uri="/route/solo B1"/>
  <Binding channel="1" note="2"  uri="/route/solo B2" momentary="yes"/>

  <Binding channel="1" note="15"  uri="/route/mute B1" momentary="yes"/>
  <Binding channel="1" note="16"  uri="/route/mute B2" momentary="yes"/>

  <Binding channel="1" enc-r="11"   uri="/route/pandirection B1"/>
  <Binding channel="1" enc-r="12"   uri="/route/pandirection B2"/>

  <Binding sysex="f0 0 0 e 9 0 5b f7" function="transport-start"/>
  <Binding sysex="f0 7f 0 6 7 f7" function="rec-disable"/>
  <Binding sysex="f0 7f 0 6 6 f7" function="rec-enable"/>
  <Binding sysex="f0 0 0 e 9 0 53 0 0 f7" function="loop-toggle"/>

  <Binding channel="1" note="13" function="transport-roll"/>
  <Binding channel="1" note="14" function="transport-stop"/>
  <Binding channel="1" note="12" function="transport-start"/>
  <Binding channel="1" note="11" function="transport-zero"/>
  <Binding channel="1" note="10" function="transport-end"/>
</ArdourMIDIBindings>
Please note that channel, controller and note numbers are specified as decimal numbers in the ranges 1-16, 0-127 and 0-127 respectively (the channel range may change at some point).
Generic MIDI Learn
Philosophy
There are no "best" ways to map an arbitrary MIDI controller for controlling Ardour. There may be very legitimate reasons for different users to prefer quite different mappings.
Basics
- Enable Generic MIDI control: Edit > Preferences > Control Surfaces > Generic MIDI
- Connect Ardour's MIDI port named control to whatever hardware or software you want (using a MIDI patchbay app)
- Middle-click on whatever on-screen fader, plugin parameter control, button etc. you want to control
- A small window appears that says "Operate Controller now"
- Move the hardware knob or fader, or press the note/key.
- The binding is complete. Moving the hardware should control the Ardour fader etc.
There's a complication to this story, however. You cannot use MIDI learn with the GUI provided by the plugin. This is true no matter what the plugin format or platform is. When we refer to "whatever on-screen fader ..." above, we are referring to an “Ardour-owned” control of some sort. You can get access to that in one of 3 ways:
- right click on the processor element in the mixer strip, and choose “Edit with Generic GUI”
- right click on the processor element in the mixer strip, and from “Controls”, make the desired parameter visible inline in the mixer strip
- in the editor, click on the “A” (automation) button for the track, find the desired parameter. This will make the automation lane for that parameter visible, and it comes with a fader you can use for MIDI learn.
Cancelling a Learned MIDI Binding
To unlearn a learned MIDI binding, Middle-click on the control in the same way as you did to learn it in the first place, but click on the popup to cancel it.
Avoiding work in the future
If you want the bindings you set up to be used automatically in every session, the simplest thing to do is to use Session > Save Template. Then, when creating new sessions, select that template and all the bindings will be automatically set up for you.
Generic MIDI and Encoders
Encoders are showing up more frequently on controllers. However, they use the same MIDI events as Continuous Controllers and they have no standard way of sending that information as MIDI events.
Encoders that send the same continuous values as a pot would are not
discussed here as they are already supported by ctl.
Encoders as this page talks about them send direction and offset that the DAW will add to or subtract from the current value.
The 4 kinds of 7 bit encoders supported are:
-
enc-r: Relative Signed Bit. If the most sign bit is set, Then
the offset is positive. The lower 6 significant bits are the
offset.
<Binding channel="1" enc-r="13" …The offset value is formed as0svvvvvv. Where s is the sign or direction and vvvvvv is the number of ticks turned. -
enc-l: Relative Signed Bit 2". If the most sign bit is unset,
Then the offset is positive. The lower 6 significant bits are the
offset. This is the same as enc-r but with the direction of turn
reversed. This is the method the Mackie Control Protocol
uses.
<Binding channel="1" enc-l="13" …The offset value is formed as0svvvvvv. Where s is the sign or direction and vvvvvv is the number of ticks turned. -
enc-2: Relative 2s Complement. Positive offsets are sent as normal
from 1 to 64 and negative offsets are sent as 2s complement negative
numbers. This is a signed 7 bit int.
<Binding channel="1" enc-2="13" … -
enc-b: Relative Binary Offset. Positive offsets are sent as offset
plus 64 and negative offsets are sent as 64 minus offset. 64 is zero,
65 is +1, 63 is -1.
<Binding channel="1" enc-b="13" …
If the wrong one is chosen, either the positive or negative side will act incorrectly. It is not really possible to auto detect which one the controller is using. Trial and error is the only way if the specification of the controller is not known.
Many controllers have more than one choice as well, check the manual for the surface.
14 bit encoders are also supported with:- rpn-delta - The value is expected to be a signed 14bit value that is added to the current value. For use with encoders
- nrpn-delta - The value is expected to be a signed 14bit value that is added to the current value. For use with encoders
Mackie Control Devices
Since Mackie and Logic made the first Logic Control Surface, Mackie and other surface manufactures have been making control surfaces that use the same protocol to communicate with a DAW. Ardour supports the MCP and will work with all these control surfaces.
Devices Using Mackie/Logic Control Protocol
This will walk you through the process of configuring and using a MIDI control surface with Ardour that uses the Mackie Control protocol (MCP) or Logic Control protocol. Devices that have been tested and are known to work include the SSL Nucleus, Mackie Control Pro (plus extenders), Behringer devices in Mackie/Logic mode, and Steinberg CMC devices.
Enabling Mackie Control in Ardour
Navigate to Edit > Preferences > Control Surfaces. Tick the Mackie option and click on the Show Protocol Settings button to see the setup dialog:
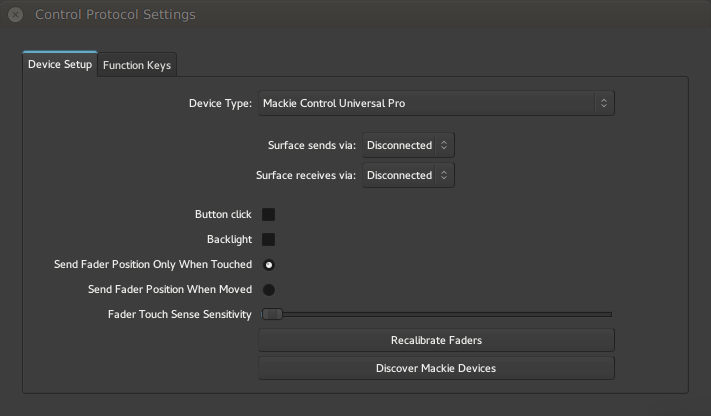
From the selector at the top, choose the type of device you are using. ( What to do if your device is not listed).
Update the controls description
Once your setup is complete, click "OK" to close the dialog. Now click on the enable checkbox for "Mackie Control".
Devices using ipMIDI
If you are using a device that uses ipMIDI, such as the SSL Nucleus, no MIDI port connections are required—Ardour and your control surface will be able to talk to each other automatically so long as your control surface and computer are both connected to the same network.
Connecting control surface and Ardour MIDI ports
Before attempting to use a Mackie Control device that communicates via a standard MIDI cable or a USB cable, you should ensure that your MIDI environment is setup. If you are using a device that uses normal MIDI (via a standard MIDI or USB cable), you need to connect Ardour's Mackie Control in and out ports to the MIDI ports leading to and coming from the control surface.
When you have made these connections once, Ardour will recreate them for you in the future, as long as you leave Mackie Control enabled.
Customizing your control surface
Every possible global Mackie Control button can be bound to any action present in Ardour's GUI. Please check your control surface page for suggestions.
Preparing your device for use with Ardour
Most interfaces will require some configuration to send and respond to MCP.
When setting up the control surface, do not use "Pro Tools" mode. Pro Tools is the only DAW that still requires HUI. The rest of world uses Mackie Control Protocol. Ardour does not support HUI at this time.
SSL Nucleus
The Nucleus, from Solid State Logic, is a 16 fader Mackie Control device that includes many buttons, separate meters, two LCD displays and other features. The device is not cheap (around US$5000 at the time of writing), and has some design features (or lack thereof) which some Ardour developers find questionable. Nevertheless, it is a very flexible device, and makes a nice 16 fader surface without the need to somehow attach an extender to your main surface.
Pre-configuring the Nucleus
Your Nucleus comes complete with a number of "profiles" for a few well-known DAWs. At the time of writing it does not include one for Ardour (or related products such as Harrison Mixbus).
We have prepared a profile in which as many buttons as possible send
Mackie Control messages, which makes the device maximally useful
with Ardour (and Mixbus). You can
download the
profile
and load it to your Nucleus using the Edit Profiles
button in SSL's Nucleus Remote application. Be sure to select it for
the active DAW layer in order to make Ardour work as well as
possible. Note: unfortunately, the Nucleus Remote application
only runs on OS X or Windows, so Linux users will need access to
another system to load the profile. We will provide notes on the
profile settings at a future time.
Connecting the Nucleus
Unlike most Mackie Control devices, the Nucleus uses an ethernet connection to send and receive the MIDI messages that make up the Mackie Control protocol. Specifically, it uses a technology called "ipMIDI" which essentially "broadcasts" MIDI messages on a local area network, so that any connected devices (computers, control surfaces, tablets etc.) can participate.
All other DAWs so far that support the Nucleus have chosen to do so by using a 3rd party MIDI driver called "ipMIDI", which creates a number of "virtual" MIDI ports on your computer. You, the user, tells the DAW which ports to connect to, and ipMIDI takes care of the rest.
Ardour has builtin ipMIDI support, with no need of any 3rd party packages, and no need to identify the "ports" to connect to in order to communicate with the Nucleus. This makes setting it up a bit easier than most other systems.
Unless … you already installed the ipMIDI driver in order to use some other DAW with your Nucleus. If ipMIDI is configured to create any "ports", it is not possible for Ardour's own ipMIDI support to function. We decided to offer both methods of communicating with your Nucleus. If you regularly use other DAWs, and appreciate having ipMIDI permanently set up to communication with the Nucleus—that's OK, you can tell Ardour to use the ipMIDI driver you already have. But if you're not using other DAWs with the Nucleus (and thus have not installed the ipMIDI driver), then you can ignore the ipMIDI driver entirely, and let Ardour connect directly with no configuration.
Connecting via Ardour's own ipMIDI support
This is usable only on computers with no 3rd party ipMIDI driver software installed and configured. If you have the OS X or Windows ipMIDI driver from nerds.de, it MUST be configured to offer ZERO ports before using this method.
Open Preferences > Control Surfaces. Ensure that the
Mackie protocol is enabled, then double-click on it to open the
Mackie Control setup dialog.
Ensure that the device selected is "SSL Nucleus". The dialog should show a single numerical selector control below it, defining the ipMIDI port number to use (it should almost always be left at the default value of 21928).
Communication is automatically established with the Nucleus and you need do nothing more.
If this does not work, then make sure your network cables are properly connected, and that you are not running other ipMIDI software on the computer.
Connecting via 3rd party ipMIDI support
This is usable only on computers with 3rd party ipMIDI driver software installed and configured for (at least) 2 ports.
Open Preferences > Control Surfaces. Ensure that the
Mackie protocol is enabled, then double-click on it to open the
Mackie Control setup dialog.
Ensure that the device selected is "SSL Nucleus (via platform MIDI)". The dialog should show four combo/dropdown selectors, labelled (respectively):
Main Surface receives viaMain Surface sends via1st extender receives via1st extender sends via
You should choose "ipMIDI port 1", "ipMIDI port 1", "ipMIDI port 2" and "ipMIDI port 2" for each of the 4 combo/dropdown selectors.
Communication should be automatically established with the Nucleus.
If this does not work, then make sure your network cables are properly connected, and that you are running the appropriate ipMIDI driver and have configured it for 2 (or more) ports.
Nucleus Design Discussion
You might be reading this part of the manual seeking some guidance on whether the Nucleus would make a suitable control surface for your workflows. We don't want to try to answer that question definitively, since the real answer depends on the very specific details of your workflow and situation, but we would like to point out a number of design features of the Nucleus that might change your opinion.
Cons
| No Master Faster | It is not possible to control the level of the Master bus or Monitor section. Really don't know what SSL was thinking here. |
|---|---|
| No dedicated rec-enable buttons | You have to press the "Rec" button and convert the per-strip "Select" buttons into rec-enables |
| No dedicated automation buttons | You have to press the "Auto" button and convert the first 4 vpots into 4 automation-related buttons, losing your current view of the session. |
| No buttons with Mackie-defined "Marker" functionality | Mackie's design intentions for the interoperation of the Marker, rewind and ffwd buttons requires profile editing in order to function properly. |
| No "Dyn" button | This is hard to assign in an edited profile. To be fair, other Mackie Control devices also lack this button. |
Pros
| Single cable connectivity | No need for multiple MIDI cables to get 16 faders |
|---|---|
| Broadcast connectivity | Connecting to multiple computers does not require recabling |
| 16 faders from a single box | No need to figure out how to keep extenders together |
| Meters separated from displays | Contrast with the Mackie Control Universal Pro, where meters interfere with the display |
| DAW profiles | Easy to flip profiles for use by different DAWs. |
Ambiguous
| Ability to make buttons generate USB keyboard events | The extent to which this is useful reflects the target DAWs inability to manage all of its functionality via Mackie Control |
|---|---|
| Sophisticated "profile" editing | It is nice to be able to reassign the functionality of most buttons, but this is only necessary because of the relatively few global buttons on the surface. |
| Builtin analog signal path | SSL clearly expects users to route audio back from their computer via the Nucleus' own 2 channel output path, and maybe even use the input path as well. They take up a significant amount of surface space with the controls for this signal path, space that could have been used for a master fader or more Mackie Control buttons. The USB audio device requires a proprietary driver, so Linux users can't use this, and OS X/Windows users will have to install a device driver (very odd for a USB audio device these days). The analog path also no doubt adds notable cost to the Nucleus. There's nothing wrong with this feature for users that don't already have a working analog/digital signal path for their computers. But who is going to spend $5000 on a Nucleus that doesn't have this already? |
Behringer Devices in Mackie/Logic Control Mode
Behringer BCF-2000 Faders Controller
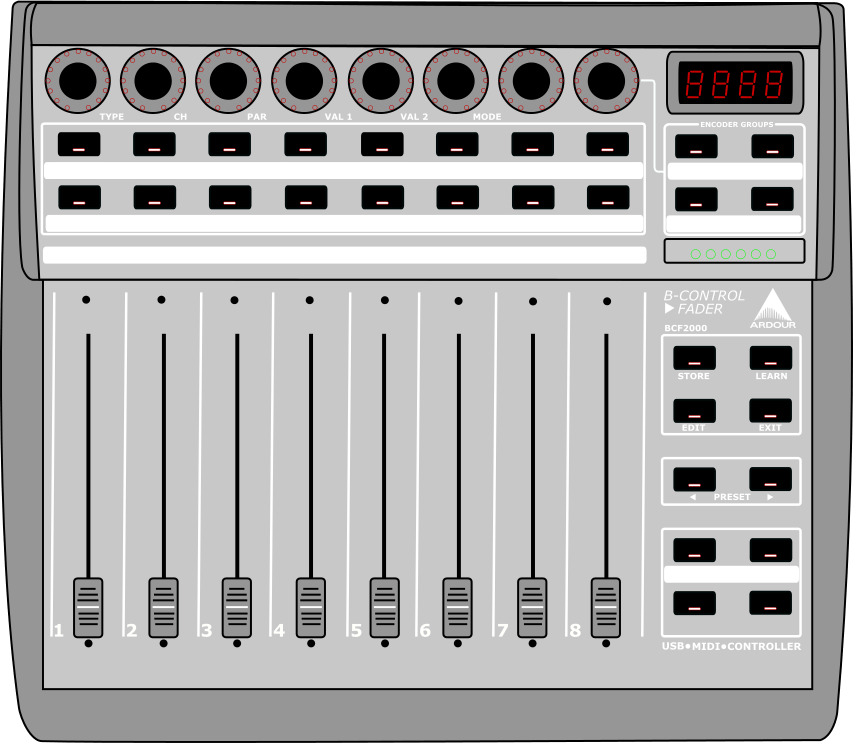
The Behringer BCF-2000 Fader Controller is a control surface with 8 motorized faders, 8 rotary encoders and 30 push buttons. The device is a class compliant USB Midi Interface and also has standard Midi DIN IN/OUT/THRU ports. The device has included a Mackie/Logic Control Emulation Mode since firmware v1.06. Any devices with a firmware older than v1.06 will require an update before Mackie Control Emulation works as described here.
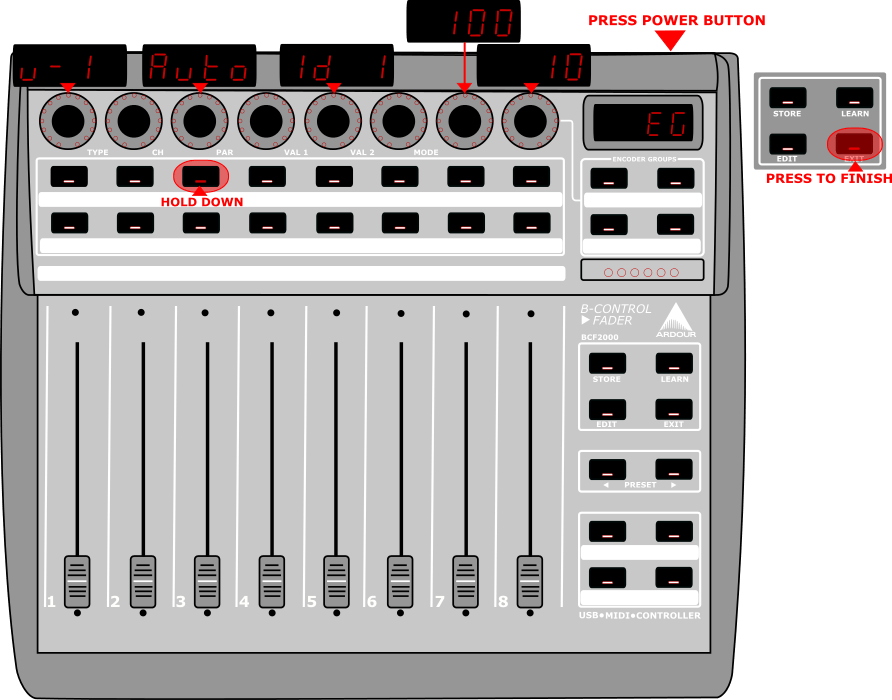
In order to put the controller into Mackie/Logic control mode, the unit must be turned on while holding the third button from the left in the top most row of buttons (under the rotary encoder row). The button must be held down until EG or edit global mode is displayed on the LCD screen of the unit. The global parameters can then be edited using the 8 rotary encoders in the top row.
- Encoder #1 sets the operating mode and should be set to U-1 or USB mode 1 if using with a USB cable connection.
- Encoder #3 sets the foot switch mode and should most likely be set to Auto to detect how the foot switch is wired.
- Encoder #5 sets the device id, if you are using only 1 device the id should be set to ID 1. If you are using multiple BCF/BCR2000 each device is required to be set up sequentially and one at a time.
- Encoder #7 controls the MIDI Dead Time or the amount of milliseconds after a move has been made that the device ignores further changes, this should be set to 100.
- Encoder #8 controls the MIDI message Send Interval in milliseconds and should be set to 10
To exit the EG mode press the Exit button. The device is now ready to use with Ardour.
Modes of Operation
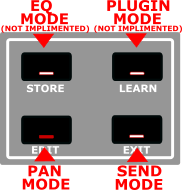
The four buttons arranged in a rectangle and located under the Behringer logo are the mode selection buttons in Logic Control Emulation Mode, currently Ardour has implemented support for two of these modes.
The surface can be broken into 8 groups of controls:
- The rotary encoders at the top of the device
- The first row of buttons under the encoders
- The second row of buttons under the encoders
- The row of motorized faders
- The group of 4 buttons at the top right that will be referred to here as the Shift Group
- The group of 4 buttons under the Shift Group referred to here as the Mode Group
- The group of 2 buttons under the Mode Group referred to here as the Select Group
- The group of 4 buttons under the Select Group referred to here as the Transport Group
Mixer Pan Mode
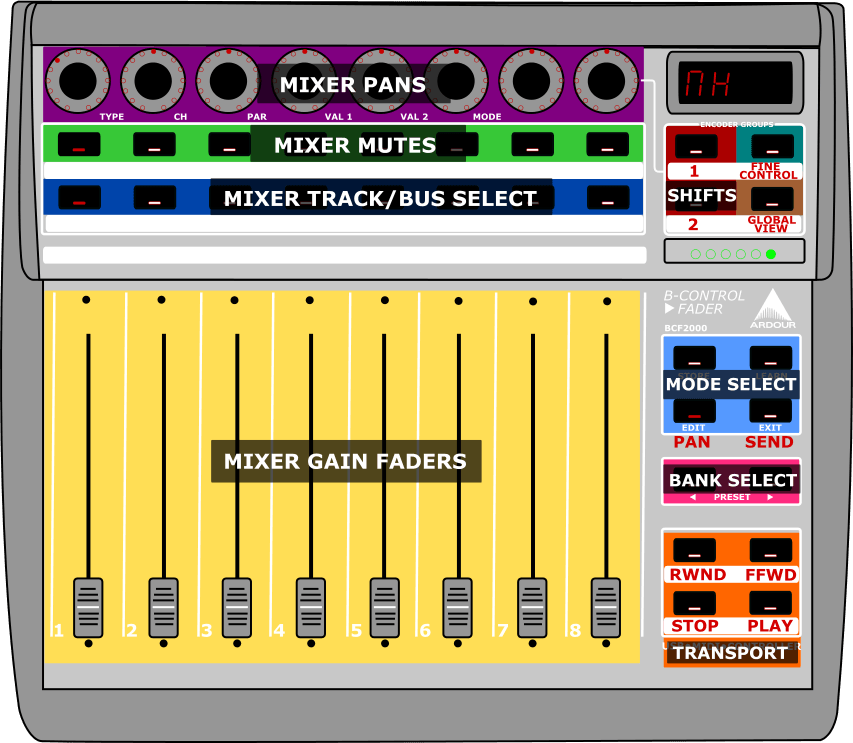
This is the standard work mode that organizes the control surface to emulate a standard mixer layout where controls for each track/bus are arranged vertically. The order of the faders is either controlled by the order of the tracks in the mixer or can be set manually by the user.
| Encoders | Mixer Pans. The red LEDs show the amount of pan left or right |
|---|---|
| First Row of Buttons | Mixer Mutes. The button led lights up if the track is currently muted |
| Second Row of Buttons | Select Active Track/Bus. Currently selected track/bus is indicated by the button led |
| Faders | Mixer Gains |
| Shift Group |
|
| Mode Group |
|
| Select Group | In this mode they function as bank select left and right. If the current session has more than 8 tracks the next set of 8 tracks is selected with the right button and the faders will move to match the current gain settings of that bank of 8 tracks/busses. If the last bank contains less than 8 tracks/busses the unused faders will move to the bottom and the pan lights will all turn off. An unlimited amount of tracks can be controlled with the device. |
| Transport Group |
|
Send Mode
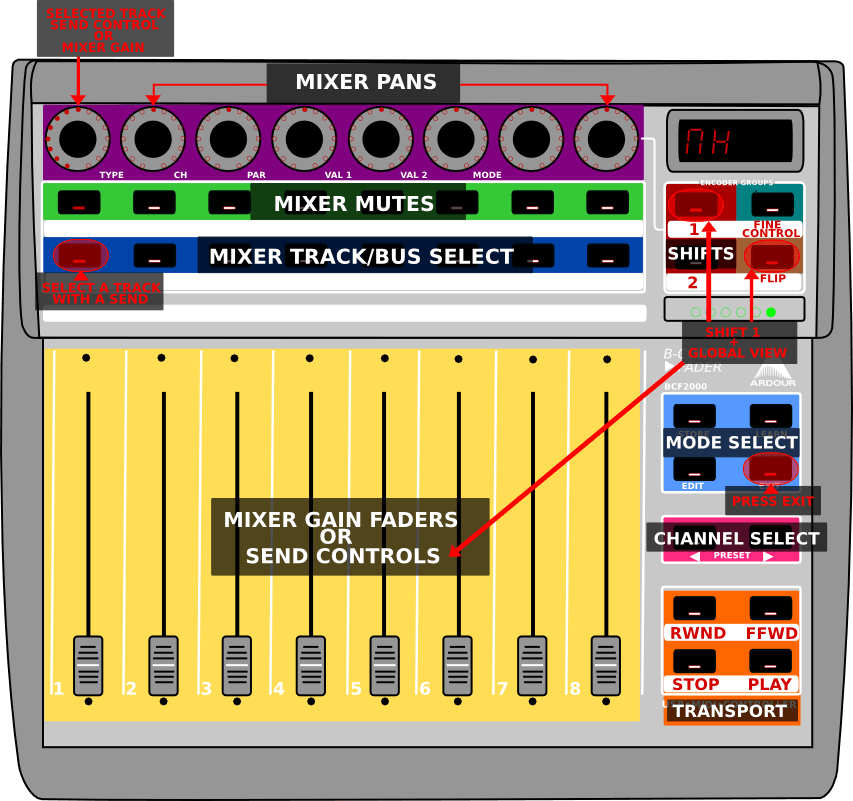
Send mode allows for the top row of encoders to control the sends for a selected channel. One interesting option is to flip the controls from the encoders to the faders by pressing the shift 1 button and the global view button at the same time.
| Encoders | In send mode, the encoders control sends from left to right instead of mixer pans. If there are less than 8 sends the behavior of the encoder will be to continue controlling the mixer pan. Visually it is indicated by the change in the LED from originating at the 12 o'clock position to originating at the 7 o'clock position. If FLIP is pressed the encoder will control the mixer gain for the selected track/bus. |
|---|---|
| First row of buttons | No Change |
| Second row of buttons | No Change. |
| Faders | No change unless FLIPis pressed then it controls the send for the selected track/bus. |
| Shift Group | No Change |
| Select Group | No Change |
| Transport Group | No Change |
Mixer Pan While Holding Shift 1
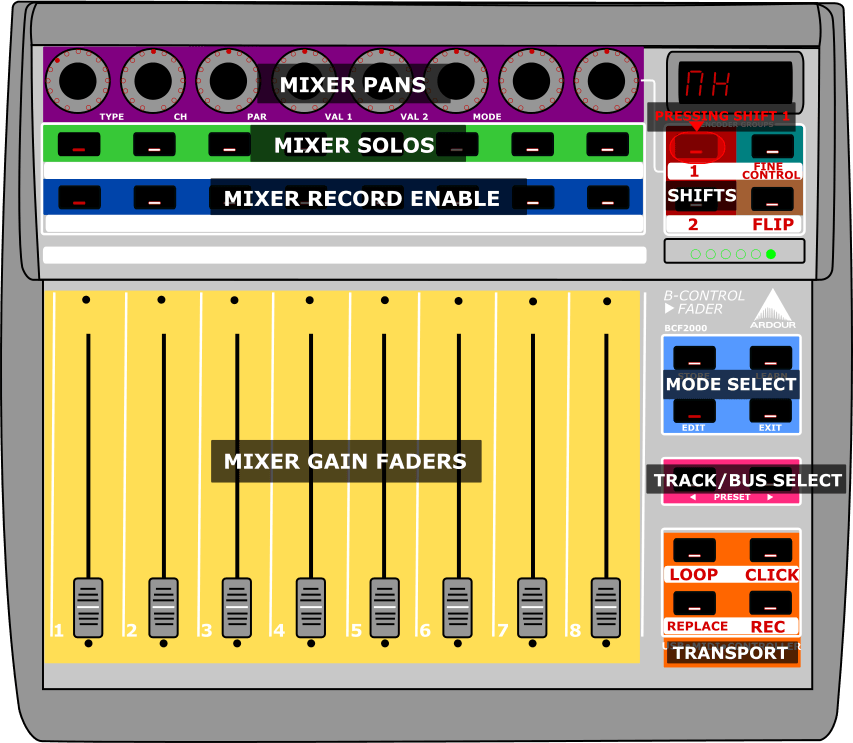
The operations of various buttons change while holding down the Shift 1 button:
| Encoders | No Change |
|---|---|
| First row of buttons | These now control the Soloing of each track/bus in the current bank |
| Second row of buttons | These now control the Enable Record for each track |
| Faders | No Change |
| Shift Group | No change |
| Mode Group | No Change |
| Select Group | These now change the current bank of tracks being controlled over by one. So if tracks 1-8 where controlled, pushing the right button will change the controlled tracks to 2-9, and pressing the left would then shift back to controlling tracks 1-8. |
| Transport Group |
|
Mixer Pan While Holding Shift 2

The operations of various buttons change while holding down the Shift 2 button:
| Encoders | No Change |
|---|---|
| First row of buttons | FIX ME |
| Second row of buttons | These now control setting up different Views. See below for more info |
| Faders | No Change |
| Shift Group | No change |
| Mode Group | No Change |
| Select Group | Left button controls Undo(FIXME: NEEDS VERIFICATION) |
| Transport Group | FIX ME |
Views

Behringer X-Touch
The Behringer X-Touch is a direct emulation of the Mackie Control and has all the buttons the Mackie device does. There is a "Behringer X-Touch" map included with Ardour. The X-Touch can be connected to the computer with USB or through a MIDI port. Using USB keeps MIDI ports free for other uses. The Ethernet port uses RTP MIDI which should show up as MIDI devices on MacOS computers.
Behringer X-Touch Compact
The Behringer X-Touch Compact has a Mackie Control mode. From the device manual:
"To switch between standard operating mode and MC (Mackie Control) mode, press and hold down the MC button in the bottom left corner, and then turn on the unit’s power switch. Keep holding down the MC button until the MC MODE LED lights continuously to show that the unit is in MC mode."
There is a "Behringer X-Touch Compact" map included with Ardour. The X-Touch can be connected to the computer with USB or through a MIDI port. Using USB keeps MIDI ports free for other uses.
The Behringer X-Touch Compact has fewer controls than the Mackie control and therefore less function as well. See pages 19-21 of the Behringer X-Touch Compact Quick Start Guide For an explanation of what controls on the Compact map to which Mackie Control buttons.
Behringer X-Touch Mini
The Behringer X-Touch Mini says it can emulate Mackie control as well. There is a "Behringer X-Touch Mini" map included with Ardour. The control layout in Mackie Control mode is shown below.
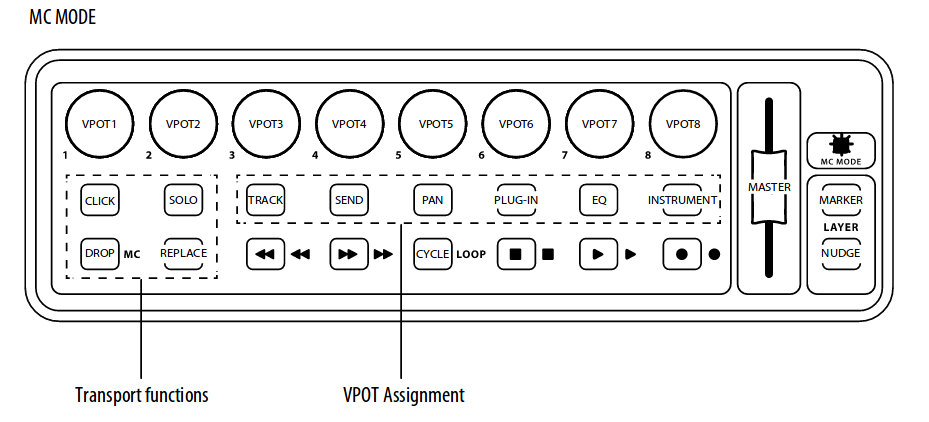
Missing content
What to do if your Device is not Listed
All Mackie Control devices are based on the original Logic Control and the documentation in the user manual that came with it. The Mackie Control and the Mackie Control Pro and so on, all use this same protocol. Any units from other manufactures will also use the same encoding as best the hardware will allow. If the unit in use has more than one Mackie Control option, it is best to choose Logic Control or LC. Any Templates for the buttons should be chosen the same way as the Function key Editor uses these button names. The "Mackie Control" option should be considered default and should be tried with any unlisted device before attempting to create a custom definition file.
Working With Extenders
There are currently 5 devices pre-configured to work with extenders.
Two of them are for one master and one extender with the master on the
right side or master on the left side. There are three presets for a
master and two extenders with the master on the left, in the center
and on the right. While these files will work for many uses there may
be cases where a custom device profile makes more sense.
The best way is to start with the *.device file in the
Source Tree that matches your
master device and copy it to a new name such as xt+mc.device in the
user config sub directory mcp and then edit that file. It is best to
name the file with the order the devices are expected to be used in as
the position of the master device is specified in this file.
The three lines of interest are:
 <Name value="Device name"/>
 <Extenders value="0"/>
 <MasterPosition value="0"/>
Add any lines that are not present.
The Name value should be a unique name so it is obvious
in the list of devices (so change it).
The Extenders
value is the number of extenders used and should not include the master in
that number.
When an Extenders value of greater than 0 is used, extra midi
ports will appear for the extenders to be connected to. The MIDI ports
for the controllers will be named mackie control in/out for
the master, mackie control in/out ext #* where * is the
position of the extender from left to right. So for a master in the middle
with an extender on either side, the ports from left to right will be
mackie control in/out ext #1, mackie control in/out and mackie control in/out ext #3.
If using the MCP GUI to connect surfaces the top surface is the leftmost and the bottom is the rightmost. The GUI shows explicitly the position of the main or master surface within the group of surfaces.

The MasterPosition value is the position the master unit
(with the master fader) is located at within the group of surfaces.
The surfaces are numbered from 1 at the left side and up. So if there
are three surfaces, <MasterPosition value="1"/> will
expect the master on the left, <MasterPosition value="2"/>
would be master in the middle and <MasterPosition value="3"/>
would be master on the right.
The default value of <MasterPosition value="0"/> has
the same effect as <MasterPosition value="1"/>.
If the MasterPosition value does not properly match the
physical position and MIDI port, the master fader and global controls will
not work. The master unit will act like an extender.
Using the Novation Launch Control XL
Novation Launch Control XL is a compact control surface with 8 faders, 24 encoders, and various keys like track selection, muting, soloing, and arming a track for recording.

Please refer to the Launch Control XL user manual for specifics on operating your controller.
Connecting the Launch Control XL
Plug the USB cable from the Launch Control XL into a USB2 or USB3 port on your computer. The device will be automatically recognized by your operating system and will appear in any of the lists of possible MIDI ports in Ardour.
To connect the Launch Control XL to Ardour, open the Preferences dialog, and then click Control Surfaces. Tick the Enable checkbox opposite to "Novation Launch Control XL" to activate Ardour's Launch Control XL support.
Once the device is activated, click Show Protocol Settings and in the newly opened window select the device in the drop-down lists for incoming and outgoing MIDI events.
Once you select the input and output port, the Launch Control XL will be ready to use. You only need do this once: once these ports are connected and your session has been saved, the connections will be made automatically in this and other future sessions.
Behavior and Configuration
The Launch Control XL was designed for use with Ableton Live, so it has a Mix mode for controlling the mixer and a Device mode for controlling various devices. Therefore, For Ardour, only a subset of features is available out of the box. The vast majority of supported features are not configurable, the user interface exposes only one setting: making the 8th fader control the master bus.
Features supported out of the box are:
| Faders | Control faders of 8 tracks at the same time |
|---|---|
| Track selection | In the Mix mode, these buttons shifts the track focus by one track allowing to control e.g. track 2..9 or 3..10 rather than the default 1..8. |
| Mute button | Switches the Track Control row of buttons to toggle the mute status of tracks |
| Solo button | Switches the Track Control row of buttons to toggle the solo status of tracks |
| Arm button | Switches the Track Control row of buttons to toggle the record-arm status of tracks |
Using the Novation Launchkey mk4
Novation Launchkey mk4 series was introduced in August 2024 and has been supported in Ardour since v8.7, with the minor exception for Linux-based distributions running any v6.x version of the kernel.
There are currently 6 devices in the series:
- Launchkey Mini 25 and 37 have 16 pads, 8 encoders, no faders, and only 2 transport controls.
- Launchkey 25 and 37 have 16 pads, 8 encoders, no faders, all transport controls.
- Launchkey 49 and 61 have 16 pads, 8 encoders, 9 faders, 9 track buttons, all transport controls.
This documentation covers the full set of features that is only available in Launchkey 49 and 61. It partially applies to junior models in the series. Please refer to the Launchkey user manual for specifics on operating your controller.

Configuration
All configuration of the devices is expected to be done in Novation Components. Thus in Ardour, you can only select ports for incoming and outgoing MIDI messages.
General behavior
Ardour ships with a number of hardcoded mappings between hardware controls and the DAW's features:
- Track selection: you can press left-pointing and right-pointing buttons to select the previous or the next track.
- Faders: 8 faders are mapped to the first 8 tracks, 1 fader (on the right) is mapped either to the monitor (if the monitor section exists) or to the master bus (if there is no monitor section).
- Basic transport controls: rolling, stopping, toggling rec-mode.
- Workflow buttons: Undo/Redo (Shift+Undo), Metronome toggle. Capture MIDI is not a function available in Ardour, thus there is no mapping for it.
Encoder modes
Launchkey mk4 controllers come with 4 predefined encoder modes and 4 custom modes. To switch to a particular mode, press and hold the Shift button and then press the corresponding pad.
| Plugin | Encoders control plugin parameters. |
|---|---|
| Mixer | Encoders can be used for pan, the first 2 sends, and additional gain controls; pads do solo & mute. |
| Sends | Encoders control 8 sends of the selected track. |
| Transport | Encoders control playhead, loop points, can be used to jump between markers, visual zoom. |
Pad modes
Launchkey mk4 controllers come with 4 predefined pad modes and 4 custom modes. To switch to a particular mode, press and hold the Shift button and then press the corresponding pad.
Ardour only requires predefined mappings for the DAW pad mode. In that case pads function to control 2 scenes/cues of 8 tracks. See the Cue support section below for more details.
Additional modes — Drum, User Chord, Arp Patterns — do not require DAW involvement. All MIDI processing happens inside the box, the keyboard only sends final MIDI events to the output.
Cue support
In the DAW mode, the 2 by 8 pads matrix represents 2 cues in 8 tracks. You can use arrow up/down buttons to scroll up and down the cues. Pressing pads will toggle playback of individual clips in trigger slots. The arrow-right button will trigger an entire cue.
Using the Novation Launchpad Pro Mk3
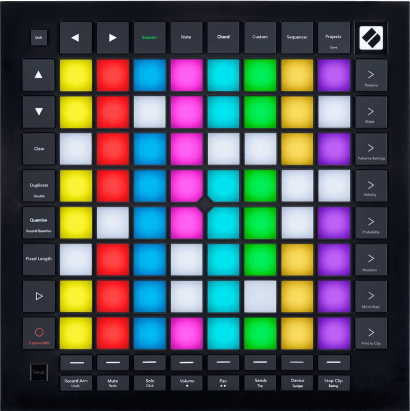
Since version 8.0, Ardour has had extensive support for the Novation Launchpad Pro Mk3, a relatively inexpensive grid/pad controller that unlike some similar has its own internal capabilities in addition to those provided by DAW interactions.
Connecting the Launchpad Pro
Plug the USB cable from the Launchpad Pro into a USB2 or USB3 port on your computer.
The Launchpad Pro will be automatically recognized by your operating system, and will appear in any of the lists of possible MIDI ports in both Ardour and other similar software.
Normally, Ardour should be able to automatically detect a connected Launchpad Pro device. If it fails, open the Preferences dialog, and then click on "Control Surfaces". Click on the "Enable" button in the line that says "Launchpad Pro" in order to activate Ardour's Launchpad Pro support.
Once you select the input and output port, Ardour will initialize the Launchpad Pro and it will be ready to use. You only need do this once: once these ports are connected and your session has been saved, the connections will be made automatically in this and other future sessions.
Open Sound Control (OSC)
OSC lets synthesizers and other devices communicate with Ardour. OSC devices can send commands relating to playback (such as play or stop), performance (such as volume, play, stop, and almost any other function (such as Edit, or Undo).
Basics
OSC lets synthesizers and other devices communicate with Ardour. OSC devices can send commands relating to playback (such as play or stop), performance (such as volume, play, stop), and almost any other function (such as Edit, or Undo).
Note: OSC control has changed dramatically since Ardour 4.7. The Path structure has been completely redone, Banking has been introduced, The controller is now able to tell Ardour what kind of feedback it can work with (including bank size) and the gain controls have new math calculations.
- Control Surface Set
- Master or Global messages
- Transport Control
- Recording control
- Transport Information
- Editing-related
- Master and Monitor strip control
- Track specific operations
- Selected Strip Operations
- Selected Plugin Operations
- Menu actions
Ardour is probably one of the most OSC-controllable audio applications around, but as with all OSC-controllable apps, you can't do much without knowing what messages can be sent. This document describes the various categories of messages that Ardour understands. It is subject to change, particularly the "Actions" part below, since this relates to the GTK GUI for Ardour rather than the backend.
Connecting to Ardour via OSC
OSC support is not enabled by default, but can be turned on via
Edit > Preferences > Control Surfaces.
Once enabled, Ardour will listen on port 3819 by default.
This port number can be changed by editing $ARDOUR_CONFIG
and adding this line within the <Config> section:
Ardour sends any feedback to the port and address that sent any feedback request or to a port set manually in the setup dialog. The port does not have to match Ardour's port. In fact it is better not to. This means that Ardour can deal with more than one controller at a time. The two controllers can bank independently and even use different math for faders. This could be used to allow talent to adjust their own monitor mix using a tablet or phone that can run an OSC controller. For a full explanation of how Ardour's feedback works please read OSC feedback In Ardour.
Control Surface Set Up
Control surface set up allows the controller to tell Ardour about its capabilities. The surface can tell Ardour how many control strips it has for banking, if it is capable of setting its faders or buttons to values set by Ardour's GUI or automation, What kind of math the faders use and more.
Any time the /set_surface command is sent, the current bank is recalculated and if feedback is turned on, the values of each strip's controls are sent (or refreshed) as well. This will also refresh the Master feedback setup.
As of Ardour 5.1, There is now a GUI setup in response to those using tablets with applications such as touchOSC or AndrOSC who need to be able to set a port for Ardour to send to. It can also change the default setting for set_surface. For more information about Ardour's OSC configuration GUI please read Ardour's Setup Dialog.
If /set_surface is not sent, the default values are used:
- Bank Size: 0 — No banking (or infinite bank size).
- Strip Types: 159 — All strip types except hidden and special.
- Feedback: 0 — All off.
- Fader Mode: 0 — gain in dB (not relevant with feedback off)
- Send Page Size: 0 — No Send Paging.
- Plugin Page Size: 0 — No Plugin (parameter) Paging.
- reply port: 8000 — control surface will receive feedback on port 8000
- Link set: 0 — no linking for this control surface
- Link ID: 0 — no link ID
These values give the same behaviour as prior versions of Ardour. (or the closest possible)
/set_surface bank_size strip_types feedback fadermode send_page_size plugin_page_size port linkset linkidSee below for an explanation of each parameter.
The /set_surface message may have all values except the last in-line.
For example: /set_surface/8/31/8403/0/8 i 16 would be valid.
Do be careful of switches which send a 0 on release, it may be necessary
to set the value as the release value rather than the press value.
The /set_surface message may have less than the full set of parameters. those left out will remain as they were before the /set_surface message was sent. All parameters included must be valid. For example, setting send page size would require also setting bank_size, strip_types, feedback and gain mode. using only two parameters will set bank_size and strip_types. Sending /set_surface with no parameters will result in Ardour returning a /set_surface message with the current settings. Surfaces using /set_surface iiii b st fb gm as was the case in versions of Ardour older than 5.10 will continue to work.
bank_size
Bank Size is the number of channel strips the controller supports without banking. Setting this to 0 turns banking off by setting the bank size to infinite.
Bank size can also be set with /set_surface/bank_size size.
strip_types
strip_types is an integer made up of bits. The easy way to deal with this is to think of strip_types items being worth a number and then adding all those numbers together for a value to send. Strip Types will determine what kind of strips will be included in bank. This would include: Audio, MIDI, busses, VCAs, Master, Monitor and hidden or selected strips.
Aside from setting the track types for the main mix assignments, using /set_surface/strip_types with more than one surface button will allow switching between modes for example: inputs only, busses only, selected only, hidden only, by having the buttons send values of: 3, 12, 256, 512. A full mix button might have a value 31.
While Master and Monitor are listed as possibilities, most surfaces will not use them. Using /master and /monitor makes more sense. However, in the case where there are no master or monitor fader strips on the surface, it may be necessary to include them in the banked strips.
Please see: Calculating Feedback and Strip-types Values.
Strip types can also be set with /set_surface/strip_types types.
feedback
Feedback is an integer made up of bits. The easy way to deal with this is to think of feedback items being worth a number and then adding all those numbers together for a value to send.
Please see: Calculating Feedback and Strip-types Values.
Feedback can also be set with /set_surface/feedback feedback.
gainmode
Gainmode is an int:
- 0: dB value as a float from -193 to +6. Sent as /strip/gain SSID value. (-193 or below are the same as −∞)
- 1: A positional fader based on the same math as Ardour's GUI. A Float from 0 to 1. Sent as /strip/fader SSID value. At the same time the gain value in dB is sent to the channel name as text. The name will be restored after a short timeout.
- 2: A positional fader based on the same math as Ardour's GUI. A Float from 0 to 1. Sent as /strip/fader SSID value. At the same time the gain value in dB is sent as /strip/gain SSID value.
- 3: A positional fader based on the same math as Ardour's GUI. A Float from 0 to 1. Sent as /strip/fader SSID value.
Gainmode applies only to feedback values. The controller can choose which gain math to use by choosing to use the /*/gain or /*/fader path to send to Ardour. This makes sure a controller that doesn't set up Ardour's OSC can still use either math. The gainmode for feedback also determines the path Ardour uses for feedback so that the feedback messages match the control messages.
Gain mode can also be set with /set_surface/gainmode gainmode.
send_page_size
Send_page_size is an int for the number of send channels that can be controlled at one time. Each channel has a name, level and enable control. (added in Ardour 5.10)
Send page size can also be set with /set_surface/send_page_size send_page_size.
plugin_page_size
plugin_page_size is an int for the number of plugin controls that can be controlled at one time. Each control has a name and level. As each plugin is different (as is each parameter), the surface should expect to control the plugin parameters with a variable control (pot or slider) with a float value from 0 to 1 (even on/off switches). (added in Ardour 5.10)
Plugin page size can also be set with /set_surface/plugin_page_size plugin_page_size.
port
The port the controller would like to receive it's feedback on. Starting
with Ardour 6.0, the surface can directly set the manual port or set
it's host to auto port mode.
The value for port can be 0 for auto port mode or any
port value above 1024. It is suggested not to use Ardour's port number
of 3819 as controllers on the same machine that try to use the same
port will fail.
If the surface does not
tell Ardour which port to use, the default is 8000 or the setting
set up in the OSC setup GUI. There can only be one port setting per
host. If that setting is auto, than more than one
controller can be run on that host, but if a manual port is set there
can only be one. In the case of auto mode, the control
surface must set it's receive port to be the same as it's send port.
If that is not possible, then manual port mode must be used. This
allows a smart controller to use a number of ports on the same ip while
a smartphone set up as a personal monitor control can use the default
manual port.
The host's port can also be set with /set_surface/port port.
Changing the port will remove feedback from a device on the same host using a different port.
Link set and Link ID
Please see Linking Surfaces For more information.
Querying Ardour for information
The control Surface may wish to control the type a frequency of updates it receives. It can do this with querying commands. See: Querying Ardour with OSC.
Using more than one surface
Ardour can use more than one surface at a time that both control the same controls in Ardour. It is also possible to use two surfaces in concert with each other. See: Linking Surfaces for more information.
List of OSC messages
Parameter types show how the value will be used. However, they may be sent as a different type if needed, see: Parameter Types in OSC.
This list shows all messages that can be sent to Ardour to control it. Most of these messages are also sent back as feedback when the corresponding value changes. There exist additional feedback-only messages, see: Feedback for more information.
Master or Global messages
Transport Control
| /transport_stop | Stops a rolling transport |
|---|---|
| /transport_play | Puts transport in play mode |
| /toggle_roll | Toggles between play and stop |
| /stop_forget | Stop transport and delete/forget last take |
| /set_transport_speed speed | where speed is a float ranging from -8.0f to 8.0f |
| /ffwd | Adds 1.5 times to transport speed to maximum +8 times normal speed |
| /rewind | Adds -1.5 times to transport speed to maximum -8 times normal speed |
| /goto_start | Move playhead to start of session |
| /goto_end | Move playhead to end of session |
| /jump_bars bars | Where bars is a float (+/-) of the number of bars to jump |
| /jump_seconds seconds | Where seconds is a float (+/-) of the number of seconds to jump |
| /toggle_click | Toggle metronome click on and off |
| /marker marker | Where marker may be a float or int of the nth marker or a string with the marker name to locate to (new Ardour 6.0). If the playhead is at a marker and the marker is unique, the marker at the playhead will be renamed to the string sent |
| /add_marker | (adds marker to the current transport position) |
| /remove_marker | Removes marker at the current transport position (if there is one) |
| /next_marker | Move playhead to next marker |
| /prev_marker | Move playhead to previous marker |
| /locate spos roll | where spos is the target position in samples and roll is a bool/integer defining whether you want transport to be kept rolling or not |
| /loop_toggle | Toggle loop mode on and off |
| /loop_location start end | start is the beginning of a loop and end is the end of a loop both are integer frame positions. |
| /midi_panic | Ardour will send an all notes off to all midi tracks |
| /cancel_all_solos | Cancel All Solos/PFLs/AFLs |
New for Ardour 5.9.
| /scrub delta | Where delta is a float indicating forward or reverse movement. See OSC Scrub Modes |
|---|---|
| /jog delta | Where delta is a float indicating forward or reverse movement |
| /jog/mode mode | Where mode is an int from 0 to 7 indicating what the /jog command controls. See OSC Jog Modes |
Recording control
| /toggle_punch_in | |
|---|---|
| /toggle_punch_out | |
| /rec_enable_toggle | Toggles master record enable |
Transport Information
| /transport_frame | Ardour sends /transport_frame current_frame |
|---|---|
| /transport_speed | Ardour sends /transport_speed speed |
| /record_enabled | Ardour sends /record_enabled recordenable_status |
Editing-related
| /undo | |
|---|---|
| /redo | |
| /save_state | (this is the regular Session > Save operation) |
| /session_name new_name | Set session name to new_name (if new_name is legal and unique) |
Master and Monitor strip control
| /master/gain dB | dB is a float indicating the desired gain in dB |
|---|---|
| /master/fader position | position is a float between 0 and 1 setting the desired position of the fader |
| /master/db_delta delta | where delta is a float that will increase or decrease the gain of master by the amount of the delta. (Ardour 5.11+) |
| /master/trimdB dB | dB is a float from -20 to +20 representing the desired trim gain in dB |
| /master/pan_stereo_position position | position is a float from 0 to 1 representing the desired pan position |
| /master/mute key | key is an optional float 1 representing a master bus select |
| /master/select state | state is an int of o or 1 representing the desired mute state |
| /monitor/gain dB | dB is a float indicating the desired gain in dB |
| /monitor/fader position | position is a float between 0 and 1 setting the desired position of the fader |
| /monitor/db_delta delta | where delta is a float that will increase or decrease the gain of monitor by the amount of the delta. (Ardour 5.11+) |
| /monitor/mute state | state is an int of 0 or 1 where 1 is muted |
| /monitor/dim state | state is an int of 0 or 1 where 1 is dimmed |
| /monitor/mono state | state is an int of 0 or 1 where 1 is mono mode |
Track specific operations
For each of the following, ssid is the Surface Strip ID for the track
As of Ardour 6.0, the user may use a subset all available strips. See: Making a user selected strip list.
SSID has a different meaning than RID in Ardour version 4.7 and before. Effectively, banking is always being used and the SSID is generated on the fly. The SSID is the position of the strip within bank as an int 1 to bank size. There are no gaps as there have been in the past. Depending on the value of strip_types sent to Ardour, Master and Monitor, may be included in the list of SSIDs or not as set in /set_surface.
Some Surfaces (many Android applets) are not able to deal with more than one parameter in a command. However, the two parameter commands below can also be sent as /strip/command/ssid param. In this case the param should be a float even if an int is required below.
| /bank_up | Change bank to the next higher bank. |
|---|---|
| /bank_up delta | Where delta is a float of 1 to bank up and -1 is bank down for use with an encoder (Ardour 5.11+) |
| /bank_down | Change bank to the next lower bank. |
| /use_group state | Where state is a float of 1 to use group or 0 to not use group. more info on use_group |
| /strip/spill ssid | Use strips this strip is grouped with or those that feed this bus (if this strip is a bus) or that this vca (if this is a VCA) controls. See Spill Strips for more details |
| /strip/hide ssid y/n | Where y/n = 1 hide this strip, 0 for show this track. Hiding strips. |
| /strip/name ssid strip_name | where strip_name is a string representing the desired name for the strip |
| /strip/group ssid group_name | where group_name is a string representing the name of the group desired. See groups for more details |
| /strip/mute ssid mute_st | where mute_st is a bool/int representing the desired mute state of the track |
| /strip/solo ssid solo_st | where solo_st is a bool/int representing the desired solo state of the track |
| /strip/solo_iso ssid state | where state is a bool/int representing the desired solo isolate state of the track |
| /strip/solo_safe ssid state | where state is a bool/int representing the desired solo safe/lock state of the track |
| /strip/monitor_input ssid monitor_st | where monitor_st is a bool/int where 1 is forced input monitoring. |
| /strip/monitor_disk ssid monitor_st | where monitor_st is a bool/int where 1 is forced disk monitoring. When input and disk are both off, Auto monitoring is enabled. |
| /strip/recenable ssid rec_st | where rec_st is a bool/int representing the desired rec state of the track |
| /strip/record_safe ssid rec_st | where rec_st is a bool/int representing the desired record safe state of the track |
| /strip/polarity ssid invert | where invert is a bool/int representing the desired polarity of the track |
| /strip/gain ssid gain | where gain is a float ranging from -193 to 6 representing the desired gain of the track in dB. |
| /strip/fader ssid position | where position is a float ranging from 0 to 1 representing the fader control position. |
| /strip/db_delta ssid delta | where delta is a float that will increase or decrease the gain of a track by the amount of the delta. (Ardour 5.11+) |
| /strip/*/automation ssid mode | where mode is an int ranging from 0 to 3 representing the desired automation mode for the control. See OSC Automation. |
| /strip/*/touch ssid state | where state is an int of 1 for touched and 0 for released. See OSC Automation. |
| /strip/trimdB ssid trim_db | where trim_db is a float ranging from -20 to 20 representing the desired trim of the track in dB. |
| /strip/pan_stereo_position ssid position | where position is a float ranging from 0 to 1 representing the desired pan position of the track |
| /strip/pan_stereo_width ssid width | where width is a float ranging from 0 to 1 representing the desired pan width of the track |
| /strip/send/gain ssid sendid send_gain | where sendid = nth_send, send_gain is a float ranging from -193 to +6 representing the desired gain in dB for the send |
| /strip/send/fader ssid sendid send_gain | where sendid = nth_send, send_gain is a float ranging from 0 to 1 representing the desired position for the send as a fader |
| /strip/send/enable ssid sendid state | where sendid = nth_send, state is 1 for enabled and 0 for disabled |
| /strip/list | see: Querying Ardour with OSC. |
| /strip/sends ssid | see: Querying Ardour with OSC. |
| /strip/receives ssid | see: Querying Ardour with OSC. |
| /strip/plugin/list ssid | see: Querying Ardour with OSC. |
| /strip/plugin/descriptor ssid | see: Querying Ardour with OSC. |
| /strip/plugin/reset ssid piid | where piid = nth Plugin, will reset all values to the plugin's original values |
| /strip/plugin/activate ssid piid | where piid = nth Plugin, will set the plugin's state to active |
| /strip/plugin/deactivate ssid piid | where piid = nth Plugin, will set the plugin's state to inactive |
| /strip/plugin/parameter ssid piid param value | where piid = nth Plugin, param = nth param, value is a float ranging from 0 to 1 representing the desired parameter value |
| /strip/name ssid name | where name is a string for the desired name of the track |
Selected Strip Operations
New for Ardour 5, A whole set of operations that work on the selected or expanded strip.
Selected strip operations are complex enough for their own page. Please read: Selection Considerations in OSC. This is most important if more than one OSC surface is being used with Ardour.
There are two kinds of selection in OSC. GUI selection and local expansion. By default expansion follows selection.
- GUI selection: Use /strip/select to set. Selecting a strip in the GUI will set OSC surface select and the surface will set GUI selection as well.
- Local expansion: Use /strip/expand to expand a strip without changing overall selection. When /strip/expand is set to 0 or false, the select channel will go back to using the strip selected by the GUI. While expand is turned on, selecting a strip on the GUI does not select the OSC strip. Sending a /strip/select message will override the expand as if it had been set to false. Good for more than one OSC controller at a time.
| /strip/select ssid y/n | Where y/n = 1 for select. Sets both GUI select and strip to expanded mode. (0 is ignored) |
|---|---|
| /strip/expand ssid y/n | Where y/n = 1 for expanded mode. Sets only local strip to Expanded. Setting to 0 resets the expansion to follow selection. |
| /select/expand y/n | Where y/n = 1 for expanded mode, 0 for Select mode. |
| /select/hide y/n | Where y/n = 1 hide this strip, 0 for show this track. Hiding strips. |
| /select/name strip_name | where strip_name is a string representing the desired name for the strip |
| /select/comment comment | where comment is a string representing the desired comment for the strip |
| /select/group group_name | where group_name is a string representing the name of the group desired. See groups for more details |
| /select/group/enable state | where state is an int representing the desired enable state of the group the selected strip is a part of |
| /select/group/gain state | where state is an int which sets the gain sharing of the group the strip belongs to. See Track and Bus Groups for more details |
| /select/group/relative state | where state is an int which sets relative state of thew group the strip belongs to. See Track and Bus Groups for more details |
| /select/group/mute state | where state is an int which sets the mute sharing of the group the strip belongs to. See Track and Bus Groups for more details |
| /select/group/solo state | where state is an int which sets the solo sharing of the group the strip belongs to. See Track and Bus Groups for more details |
| /select/group/recenable state | where state is an int which sets the recenable sharing of the group the strip belongs to. See Track and Bus Groups for more details |
| /select/group/select state | where state is an int which sets the select sharing of the group the strip belongs to. See Track and Bus Groups for more details |
| /select/group/active state | where state is an int which sets the route active sharing of the group the strip belongs to. See Track and Bus Groups for more details |
| /select/group/color state | where state is an int which sets the color sharing of the group the strip belongs to. See Track and Bus Groups for more details |
| /select/group/monitoring state | where state is an int which sets the monitoring sharing of the group the strip belongs to. See Track and Bus Groups for more details |
| /select/recenable y/n | Where y/n is 1 for enabled and 0 for disabled |
| /select/record_safe y/n | Where y/n is 1 for safe and 0 for unlocked |
| /select/mute y/n | Where y/n is 1 for enabled and 0 for disabled |
| /select/solo y/n | Where y/n is 1 for enabled and 0 for disabled |
| /select/solo_iso state | where state is a bool/int representing the desired solo isolate state of the track |
| /select/solo_safe state | where state is a bool/int representing the desired solo safe/lock state of the track |
| /select/monitor_input y/n | Where y/n is 1 for monitor from input and 0 for auto |
| /select/monitor_disk y/n | Where y/n is 1 for monitor from disk and 0 for auto |
| /select/polarity invert | where invert is a bool/int representing the desired polarity of the track |
| /select/gain gain | Where gain is a float ranging from -193 to 6 representing the desired gain of the track in dB. |
| /select/fader position | Where position is an float ranging from 0 to 1 representing the fader control position. |
| /select/db_delta delta | where delta is a float that will increase or decrease the gain of the selected track by the amount of the delta. (Ardour 5.11+) |
| /select/vca name state | where name is a string with the name of the VCA, and state is an int that determines if the named VCA will control this strip. (Ardour 6.0) |
| /select/vca/toggle name | where name is a string with the name of the VCA. This toggles the use of the named vca with this strip. Any trailing "[_]" will be ignored. (Ardour 6.0) |
| /select/spill | show only strips this strip is grouped with or those that feed this bus or that this vca controls. See Spill Strips for more details |
| /select/*/automation mode | where mode is an int ranging from 0 to 3 representing the desired automation mode for the control. See OSC Automation. |
| /select/*/touch state | where state is an int of 1 for touched and 0 for released. See OSC Automation. |
| /select/trimdB trim_db | where trim_db is a float ranging from -20 to 20 representing the desired trim of the track in dB. |
| /select/pan_stereo_position position | where position is a float ranging from 0 to 1 representing the desired pan position of the track |
| /select/pan_stereo_width width | where width is a float ranging from 0 to 1 representing the desired pan width of the track |
| /select/pan_elevation_position position | where position is a float ranging from 0 to 1 representing the desired pan elevation of the track |
| /select/pan_frontback_position position | where position is a float ranging from 0 to 1 representing the desired front to back position of the track |
| /select/pan_lfe_control value | where value is a float ranging from 0 to 1 representing the desired LFE control value for the track |
| /select/send_gain sendid send_gain | where sendid = nth_send, send_gain is a float ranging from -193 to +6 representing the desired gain in dB for the send |
| /select/send_fader sendid send_gain | where sendid = nth_send, send_gain is a float ranging from 0 to 1 representing the desired position for the send as a fader |
| /select/send_enable sendid state | where sendid = nth_send, state is 1 for enabled and 0 for disabled |
| /select/send_page delta | where delta is an int or float selecting another send as a delta from the current send. |
/select/send_page and /select/plugin_page may be used
with a page up and page down switch by using a switch with a value of 1
for page up and a switch with a value of -1 for page down. An encoder
can be used as well. (these commands were added in Ardour version 5.10)
Selected Plugin Operations
These operations control the selected plugin on the selected strip. Plugins and parameters are specified by their position in the list of plugins and controllable parameters. Parameters are paged to allow accessing all parameters on a surface with limited inputs, the plugin (parameter) page size is configured with /set_surface.
When the selected strip is changed, the plugin in the same position in the newly selected strip is made the selected plugin (even if it is a different type of plugin). If the new strip has fewer plugins, the last plugin is selected. If the new strip has no plugins, no plugin is selected.
| /select/plugin delta | where delta is an int or float selecting another plugin as a delta from the currently selected plugin index. |
|---|---|
| /select/plug_page up_or_down | where up_or_down is 1 for page up or -1 for page down (0 is ignored). |
| /select/plugin/activate y/n | where y/n is 1 for activating and 0 for deactivating the selected plugin. (new Ardour 6.0) |
|
/select/plugin/parameter piid paid value /select/plugin/parameter paid value /select/plugin/parameter/piid/paid value /select/plugin/parameter/paid value |
where piid = nth plugin, paid = nth
parameter and value is a float from 0 to 1. If
piid is omitted, the currently selected plugin is used.
Otherwise, the specified plugin is made the selected plugin and its
parameter modified. Feedback messages omit the piid argument. The paid is normally passed as an argument (second form) but can be put in the path (last form) using the /set_surface/feedback state command. See Calculating Feedback and Strip-types Values. |
The paid argument is specified as a 1-based index into the list of controllable parameters only (as specified by the controllable flag in the /strip/plugin/descriptor query message, skipping non-controllable-only parameters).
Using groups with strip and select (new for Ardour 6.0)
No grouping will occur unless use_group is set either
by using /set_surface/strip_types with the use groups bit set
or by using /use_group i 1.
The result for /strip/group or /select/group is determined by the parameter passed in the command and the current group and available list of groups. The group name the control surface sends may be:
- "none", "" or " " will remove this strip from this group. If this was the only strip in this group, the group is deleted. Some OSC controllers have trouble sending an empty string and a list of groups contains "none" as well so a dropdown can just send a text item and work.
- The name of a group this strip does not belong to will remove this strip from it's current group and add it to the named group. If this strip was the only strip in the group it was removed from, that group will be deleted.
- An unused name when this strip is not part of a group will create a new group with the group name sent and add this strip to that group
- An unused name when this strip is already a part of a group will rename this group to the name sent.
To create a new group from a strip that is already joined to a group, the strip must first remove itself from the current group.
Spill Strips
/select/spill or /strip/spill will:
- set the current set of strips in use to include only the strips that are a part of the group the strip is a part of so long as that strip is a track.
- set the current set of strips to the set of strips that feed this strip if it is a bus. In the case where this strip is being fed by sends rather than strip outputs, the strips that feed this bus will have their names set to the name of the strip with -send appended to it and the fader, pan and mute will control the send rather than the strip. The other strip controls will be disabled in this mode. This only happens when the strip that calls spill is a bus. In the case where a strip that is part of a group is chosen as above where the group all sends to a common bus this will not happen. This can be useful for a group that uses "Add New Aux Bus" to switch from sends to faders.
- set the current set of strips to the set of strips that are controlled by the VCA if this strip is a VCA.
spill/group, spill/bus or spill/vca can also be used to force the type of spilling that is done. This may be useful if the strip is a bus that is a part of a group and the group variation is required.
In all cases, if there is a bus or VCA attached to the group of strips it will be included as well.
What is less obvious, is how to return to the normal set of strips. There are a number of ways of doing so depending on the operator's wishes. The most obvious way is to use /set_surface/strip_types to set the strip list as desired. It is expected that a control surface may have more than one strip types button in any case to see only inputs or only busses etc and of course one to give a full mix. Another option is to reselect the custom set of strips with /strip/custom/mode mode.
Controlling plugins
Menu actions
Every single menu item in Ardour's GUI is accessible via OSC. There is a single common syntax to trigger the action as if it was selected with the mouse (or keyboard):
/access_action action_nameAs of Ardour 5.9, access_action can be inlined for control surfaces that are unable to send string parameters. The action_name is composed of a group and an action in the form of Group/action which fits very well as an OSC path extension:
/access_action/Group/action key_pressedThe key_pressed is optional, but if present is a float 1 or 0 where the command is ignored if key_pressed is 0.
Some of the Menu Actions duplicate other OSC commands. In all cases it is better to use the OSC commands rather than the Menu Actions if possible as the OSC commands are more direct.
The list of actions shows all available values of action-name for Ardour.
Using the setup dialog
Starting with Ardour 5.1 OSC has a graphic setup dialog. This dialog can be accessed from Preferences->Control Surfaces. Select OSC and click on the Show Protocol Settings.
The Ardour OSC dialog has three tabs. The main tab, the Strip Types tab and the Feedback tab.
Many OSC devices get their IP from a DHCP making it difficult to set an IP in Ardour's OSC settings. Therefore, most of the settings are default settings. Values are set and the next OSC surface to send an OSC message to Ardour will use those settings. Any change to a setting will reset all device settings. The use of /set_surface will override all settings except Port Mode. Port Mode affects all connected surfaces and so all surfaces must use either the set manual port or send OSC messages from the same port they expect to receive feedback on.
Dialog settings
OSC setup tab
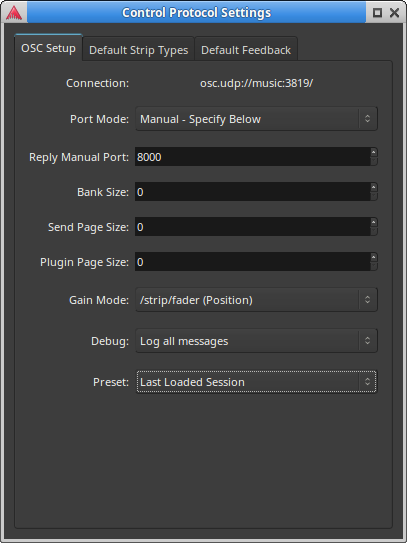
Connection:
This field is informational only. It shows where Ardour will receive OSC messages. The system Name and the Port are the most important parts. Normally, Ardour will use 3819 as its server port. However, if some other server is already using this port, Ardour will try to use the next port up and will keep trying up to 10 ports up.
Port Mode:

This drop down allows the choice of Auto or Manual outbound port setting. The Auto port mode, will send OSC messages back to the port messages from that surface are received from. This setting allows two surfaces on the same IP to operate independently. However, there are a number of OSC control surfaces that do not monitor the same port they send from and in fact may change ports they send from as well. Manual allows the outgoing port, the port the surface will receive on, to be manually set. In Manual port mode only one control surface per IP can work. Most phone or tablet OSC controllers like touchOSC or Control need Manual port mode. More than one controller can be used so long as each has it's own IP.
Manual Port:
This is an Entry box for setting the outgoing port when in Manual port mode.
Bank Size:
This sets the default bank size for the next surface to send a /set_surface/* OSC message. Bank size 0 (the default) sets no banking and allows controlling all strips included in strip_types at once. The entry area will be bright blue for a port that is not valid (ports below 1024 or 3819).
Send Page Size:
This allows setting the size of pages for sends. In the case there are more sends than controls. A size of 0 is the same as no paging and all sends are directly controllable.
Plugin Page Size:
This allows setting the size of pages for plugin controls. Some plugins have hundreds of controls and so it may be necessary to page the plugin controls to a limited number of physical controls. A size of 0 is the same as no paging and all plugin controls are directly controllable.
Gain Mode:
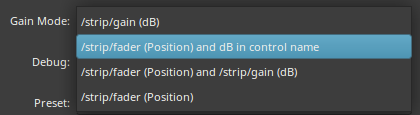
Sets the faders (and sends faders) feedback math to position where a value between 0 and 1 represents the fader position of the same fader in the mixer GUI or dB where the feedback from fader movement will be returned as a dB value. When the Gain Mode is set to position, there are also options to send the gain in dB either to the channel name, /*/name feedback for the channel will show dB values in text while the fader is being adjusted and then return the name text. It can also be set to send both position and gain or just position.
Debug:
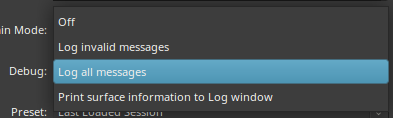
For debugging purposes this allows logging either all OSC messages Ardour receives or invalid messages received or none. The last option: Print surface information to Log window prints the internal information that Ardour uses to create feedback for all surfaces Ardour knows about.
Preset:
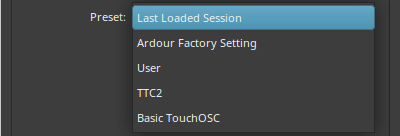
Ardour now allows the use of preset settings. The default settings used are the settings from the last session or the factory defaults the first time OSC is enabled. As soon as any of these settings are changed, the Preset will change to "User" and the new settings will be save to the osc directory in the Ardour configuration directory as user.preset. This preset file can be renamed for future use. It is suggested to also change the name value inside to avoid confusion in the preset listing. Ardour will ship with some of it's own presets that go with some popular OSC control and map combinations.
Clear OSC Devices
This button has been removed after Ardour 5.10. Instead this action is triggered by any change in the settings.
This button clears operating device profiles so that Ardour will reset all devices settings to use the new defaults from changed settings. a device may still override these new settings with the /set_surface set of commands. The reason for setting defaults settings is that some OSC controllers are not able to send more than one parameter at a time and so having correct defaults allows one "Connect" button rather than 4.
Default Strip Types tab
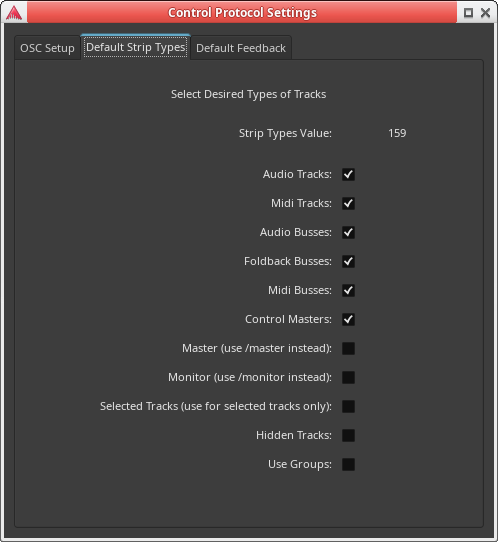
This allows selecting which of Ardour's mixer strips will be available for control. The Factory default is all strips except master, monitor and hidden strips. If it is desired to only see input tracks the others can be deselected. It is also possible to change these settings from the control surface. A set of buttons could select showing only inputs or only busses. If a group is selected in the GUI then showing only selected strips will show only that group. Showing hidden tracks is handy for cases where a groups of tracks that grouped to a bus or controlled by a VCA are hidden, but one of those tracks needs a tweak.
Default Feedback tab

This allows setting up which controls provide feedback. The Factory default is none. If the controller is unable to receive feedback, this should be left blank. In the case of metering, Metering as a LED strip only works if Metering as a Float is disabled.
Linking Surfaces
As of Ardour 6.0, Ardour provides the possibility of linking two or
more surface to work as one surface. This means that two surfaces,
one with 8 strips and one with 6 strips would look like a single 14
strip surface. A /bank_up or down on either surface with bank the two
so that they bank in 14 strip increments.
Ardour 5.0 to 5.12 can use two surfaces as shown in Example 3.
Surface Linking Concepts
- A group of surfaces linked together are called a
Link Set. ALink Setis called by a positive integer number. - There may be more than one
Link Setat a time used with Ardour. - Each surface inside a
Link Sethas aLink Id. - The
Link IDis a positive integer numbering consecutive surfaces starting from 1 for the left most and going up to the right. So if there are three surfaces in aLink Set, The left surface will have aLink Idof 1, the middle surface will have aLink Idof 2 and the right surface will have aLink Idof 3. - There may not be skipped
Link Ids. If there are a surface 1 and 3, there must also be a surface 2. Surface 1 must always exist. If any surface is missing, the track names will indicate theLink Idof the first device missing. - In most things, surfaces are separate and can do things independently.
- Each surface can have a different
Gain Mode - Each surface has it's own
Bank Size - Each surface has it's own
Feedback - Each surface has it's own Expanded Strip
Link Set:- Banking is done as a unit and each surface bank start is
determined by the
Link Set. Any surface can Bank Up or Bank Down. - All surfaces share the same strip types. Setting
Strip Types in any one surface sets it for the whole
Link Set.
- Each surface can have a different
Setting Up a Link Set
There are only two OSC commands needed to set up a Link Set:
| /link/set linkset linkid | Where linkset is the Link Set this surface will be added to and linkid is the Link Id of this surface. |
|---|---|
| /link/bank_size linkset banksize | Where linkset is the Link Set this surface will be added to and banksize is the target bank size for this Link Set. This Link Set will not operate unless the total strip numbers is banksize. |
It is also possible to send link set and ID values as part of a
/set_surface command.
/set_surface bank_size strip_types
feedback fadermode send_page_size plugin_page_size
port linkset linkid
The /link/bank_size command is optional. Ardour defaults
to linking with auto sizing banks where the Link Set
bank size is determined by adding the available surface bank sizes
together. So long as the Link Ids are consecutive, the
Link Set is considered ready. If the surface wants to make
sure all surfaces are present before the Link Set is
ready, the /link/bank_size command will not allow the
Link Set to be ready until the surface bank sizes add up
to the Link Set's bank size.
Setting up a linked set of surfaces is a simple as choosing a number
for the Link Set, 1 will work fine if there is
only one linked set of surfaces, and giving each surface a
Link Id. This can be done with the same method as the
/set_surface command is sent or by having each surface send
the /link/set command. As with other commands, the first
parameter (linkset) may be sent inline: /link/set/1 linkid
for those surfaces unable to send multi parameter OSC messages.
Example Multi Device Surfaces
Example 1
Assuming two devices, the left device has 8 strips and very little else on it's main page or tab. It may have secondary pages or tabs or a physical control section to access the extra selected strip controls like send levels or plugin controls. The right device has only 6 strips because it also has Master and Monitor channel as well as transport controls. It also has a select section. As part of it's Global controls it has a Bank up and a bank down button. (there is nothing stopping the left surface from also having banking buttons) The left surface will be linkid 1 and the right surface will be linkid 2. For this example the linkset will be 1.
Device 1 will have a "Connect" button that will send:
/set_surface iiiiiiiii 8 159 8323 0 0 0 0 1 1 and the second
device will have two buttons. One will be a "Connect" button that
sends: /set_surface iiii 6 159 8403 0 and the other
will be a "Link" button that will send: /link/set ii 1 2.
These devices use two different methods of setup both to illustrate
their use and because this will allow them to be used unlinked. Device
1 even as a linked device will operate on it's own as a one
device Link Set. However, device 2 would show
an error condition if device 1 is not present so we have a
separate "Link" button. This is an optional way of doing things and
both could use just one "Connect" button or both could have a separate
"Link" button. Device 2 could also have an "Unlink" button
that sends: /link/set ii 0 0 if desired.
To use these two devices as one, the "Connect" button on both devices and the "Link" button on the second device are pressed in any order. The two surfaces will now act as one surface with 14 bankable strips.
Example 2
This example will be more complex and use a total of five devices. The first three devices will form Link Set 1 and have 8 strips each. They are similar to the left device above, but will only show "input" strips. The last two devices will form Link Set 2. Device 1 will be similar to the first three devices with 8 strips and the other will be similar to the 6 strip device in example 1 having Master and transport controls as well. The devices in Link Set 2 will be set up to only use bus and VCA strips and so don't need to include record enable buttons etc. It is expected that all devices have banking buttons, but at least one surface in each Link Set would have to have them.
Devices 1 to 3 (from left to right) would each have a "Connect"
button that sends: /set_surface iiiiiiiii 8 3 8323 0 0 0 0 1 n
where n is the position or Link Id of that surface from 1 to
3, left to right. Device 4 would use: /set_surface iiiiiiiii 8
156 8323 0 0 0 0 2 1 and device 5 would use: /set_surface
iiiiiiiii 6 156 8403 0 0 0 0 2 2.
As before, the "Connect" on each surface is pressed in any order and the resulting surface would have 24 input strips where the banking buttons on any of the first three surfaces would bank those three surfaces 24 strips at a time through the input strips (assuming more than 24 input strips are available). The last two strips would form a master and bus section with 14 bus only strips that will bank through the bus strips (assuming more than 14 bus strips). This combined surface would have 38 strips (plus Master) all together.
Example 3
In this example there are two devices as in example 1. However, the
goal is to have only input strips on the left device and only bus strips,
Master and transport controls on the right device. In this case linking
is not needed. The left device would use a "Connect" button that sent:
/set_surface iiii 8 3 8323 0 and the right device would
use a "Connect" button that sent: /set_surface iiii 6 156 8403 0.
The banking buttons on the left surface would bank through the input
channels and the banking buttons on the right surface would bank
through the buses and VCAs. As this example does not use Ardours OSC
linking commands, it will also work with Ardour versions 5.0 to 5.12.
Querying Ardour
In order to make a custom controller that knows what strips Ardour has, the controller needs to be able to query Ardour for that information. These set of commands are for smarter control surfaces That have the logic to figure out what to do with the information. These are not of value for mapped controllers like touchOSC and friends. The controller will need to send these queries to Ardour as often as it needs this information. It may well make sense to use regular feedback for things that need to be updated often such as position or metering. Here are the commands used to query Ardour: (added in Ardour 5.5)
| /strip/list | Ask for a list of strips |
|---|---|
| /strip/sends ssid | Asks for a list of sends on the strip ssid |
| /strip/receives ssid | Asks for a list of tracks that have sends to the strip ssid points to |
| /strip/plugin/list ssid | Asks for a list of plug-ins for strip ssid. |
| /strip/plugin/descriptor ssid piid | Asks for a list of descriptors for plug-in piid on strip ssid |
| /set_surface | Ask for the current surface setting. Reply is in the same form as setting the surface would be. |
| /surface/list | Print a list of known surfaces and Link Sets to the log window. |
A list of strips
/strip/list asks Ardour for a list of strips that the
current session has. Ardour replies with a message for each
strip with the following information:
- Strip type - One of:
- AT - Audio Track
- MT - MIDI Track
- B - Audio Bus
- MB - MIDI bus
- FB - Foldback bus
- V - VCA
- Strip name
- Number of inputs
- Number of outputs
- Muted
- Soloed
- Ssid (strip number)
- Record enabled
- The text
end_route_list - The session frame rate
- The last frame number of the session
- Monitor section present
The /set_surface should be set before this is called. That way
The right set of strips will be sent in return (though the default is good
for most uses) and feedback will start correctly.
If the surface is using /strip/list, the surface needs to know
if the strips have changed. This would be true if a strip gets moved, created or
deleted. When this happens Ardour sends /strip/list to the surfaces
that have previously requested a /strip/list. This lets the
surface know that its list of strips is no longer valid.
A bus will not have a record enable and so a bus message will have one less parameter than a track. It is the controllers responsibility to deal with this.
A list of sends
/strip/sends ssid asks Ardour for a list of
sends for strip number ssid. The reply is sent back to the
controller as one message with the following information:
- Ssid that information is for
- Each send's information:
- The send's target bus ssid
- The send's target bus name
- The send id for this strip
- The send gain as a fader position
- The Send's enable state
The controller can tell how many sends there are from the number of parameters as each send has 5 parameters and there is one extra for ssid.
A list if tracks that send audio to a bus
/strip/receives ssid will return a list of
tracks that have sends to the bus at the ssid. The reply will
contain the following information for each track connected to this
bus:
- The ssid of the track sending
- The name of the sending track
- The id of the send at that track
- It's gain in fader position
- The send's enable state
A list of plug-ins for strip
/strip/plugin/list ssid will return a list of
plug-ins that strip ssid has. The reply will contain the following
information:
- Ssid that information is for
- Each plugin's information:
- The plug-in's id
- The plug-in's name
A list of a plug-in's parameters
/strip/plugin/descriptor ssid piid will
return the plug-in parameters for ppid plug-in on the ssid strip. The
reply will be sent as a number of messages, one for each parameter.
Each message will contain the following information:
- Ssid of the strip the plug-in is in
- The plug-in id for the plug-in
- The plug-in parameter id for the plug-in
- The plug-in parameter's name
- Information about that parameter:
- A bitset of flags (see below)
- Data type
- Minimum value
- Maximum value
- The number of scale points
- zero or more scale points of one value and one string each
- The current parameter value
The plug-in parameter id is the position in the full list of plugin paramaters, but messages for controlling parameter values and their feedback use the position in the list of controllable parameters only (as specified by the controllable flag, see below).
After all the parameters have been sent this way, one final message"
/strip/plugin/descriptor_end is sent with these parameters:
- Ssid of the strip the plugin is in
- The plug-in id for the plug-in
The flag bitset above has been defined as (from lsb):
- 0—enumeration
- 1—integer step
- 2—logarithmic
- 5—sample rate dependent
- 6—toggled
- 7—controllable
- 8—hidden
While this seems complex, it is really not that bad. Minimum, maximum and value will in most cases give you all you need. For simpler access to plug-ins, the /select/plugin/ set of commands will handle most needs.
Obtaining a list of surfaces Ardour knows about
Ardour can work with more than one OSC control surface at a time.
Sometimes it is useful to know the information stored about all
surfaces. Sending /surface/list from any surface or selecting:
Print surface information to Log window from
the Debug dropdown in the OSC setup dialog,
will list all the information Ardour uses to calculate the feedback
it sends. The Log window can be opened from the menu with
Window > Log.
This would be useful information to include with any OSC
related Bug report. The output is printed in this format:
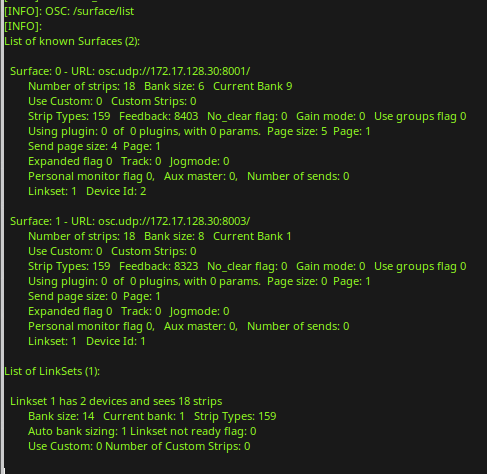
Feedback
Feedback from the Ardour to the the control surface is very useful for a number of things. Motor faders need to know where the the track they have been attached to is at before they were assigned otherwise the DAW fader will jump to where the controller fader is. Likewise, the buttons on each strip need to know what their value is so they can light their LED correctly. Transport controls should let you know if they are active too. This is what feedback is all about.
Ardour does feedback by sending the same path back that is used to control the same function. As such any controls that have feedback have a parameter that is the value of the control or its state (on or off). In the case of OSC paths listed on the main OSC page as having no parameter, if they have feedback, they will also work with a 1 for button press and 0 for button release. This is because many OSC controllers will only use exactly the same path for feedback as for control. For example:
| /transport_stop |
|---|
can be used also in the form:
| /transport_stop press | where press is an int/bool indicating if the button is pressed or not. |
|---|
The feedback does not have the same meaning as the control message. Where the button release sent to Ardour will be ignored and has no meaning. Both states have meaning in feedback to the controller. The feedback will be:
| /transport_stop state | where state is an int/bool indicating if the transport is stopped or not. |
|---|
With feedback turned on, OSC control commands that try to change a control that does not exist will get feedback that resets that control to off. For example, sending a /strip/recenable to a buss will not work and Ardour will try to turn the controller LED off in that case. Also note that Pan operation may be limited by pan width in some cases. That is with pan width at 100% (or -100%) there is no pan position movement available.
It may come as a surprise, but feedback often generates more network traffic than control itself does. Some things are more obvious like head position or meters. But even a simple button push like transport start sends not only a signal to turn on the play LED, but also one to turn off the stop LED, the Rewind LED, the Fast Forward LED and the Loop LED. That is still minor, think instead of a surface refresh such as happens when the surface is first connected and then most of that happens every time the fader strips are banked. This is why feedback is enabled in sections so that as little feedback as is actually needed is sent. This is also a consideration if the surface is connected via wifi.
List of OSC feedback messages
Feedback only
These messages are feedback only. They are sent as status from Ardour and some of them may be enabled separately from other feedback. See: Calculating Feedback and Strip-types Values.
See strip section below for info about ssid and wrapping it into the path. Also /master and /monitor support what the /strip does.
In the case where Gainmode is set to position, the track name will show the dB value while values are changing.
| /strip/name ssid track_name | where track_name is a string representing the name of the track |
|---|---|
| /strip/*/automation_name ssid name | where name is a string representing the current automation mode for the control. See OSC Automation. |
| /session_name session_name | where session_name is a string representing the name of the session |
| /strip/meter ssid meter | where meter is a value representing the current audio level. (the exact math used is determined by the feedback bits set) |
| /strip/signal ssid signal | where signal is a float indicating the instantaneous audio level is -40dB or higher. |
| /position/smpte time | where time is a string with the current play head time. Seconds as per smpte. |
| /position/bbt beat | where beat is a string with the current play head bar/beat. |
| /position/time time | where time is a string with the current play head time. Seconds are in milliseconds |
| /position/samples samples | where samples is a string with the current play head position in samples. |
| /heartbeat LED | where LED is a float that cycles 1/0 at 1 second intervals. |
| /record_tally state | Some record enable is true or "ready to record". For a "Recording" sign at studio door. |
Transport Control
| /transport_stop state | state is true when transport is stopped |
|---|---|
| /transport_play state | state is true when transport speed is 1.0 |
| /ffwd state | state is true when transport is moving forward but not at speed 1.0 |
| /rewind state | state is true when transport speed is less than 0.0 |
| /marker position | position is a string in the form previous <-> next or current (new Ardour 6.0) |
| /loop_toggle state | state is true when loop mode is true |
| /cancel_all_solos state | Where state true indicates there are active solos that can be canceled. |
| /jog/mode/name name | Where name is a string indicating the name of the current jog mode. |
Recording control
| /rec_enable_toggle state | Master record enabled. |
|---|
Master and monitor strips
Master and monitor strips are similar to track strips but do not use the SSID. Rather they use their name as part of the path:
| /master/gain dB | where dB is a float ranging from -193 to +6 representing the actual gain of master in dB |
|---|---|
| /master/fader position | where position is an int ranging from 0 to 1023 representing the fader control position |
| /master/trimdB dB | where dB is a float ranging from -20 to +20 representing the actual trim for master in dB |
| /master/pan_stereo_position position | where position is a float ranging from 0 to 1 representing the actual pan position for master |
| /master/mute state | where state is a bool/int representing the actual mute state of the Master strip |
| /monitor/gain dB | where dB is a float ranging from -193 to 6 representing the actual gain of monitor in dB |
| /monitor/fader position | where position is an int ranging from 0 to 1023 representing the fader control position |
| /monitor/mute state | where state is a bool/int representing the actual mute state of the Monitor strip |
| /monitor/dim state | where state is a bool/int representing the actual dim state of the Monitor strip |
| /monitor/mono state | where state is a bool/int representing the actual mono state of the Monitor strip |
Track specific operations
For each of the following, ssid is the surface strip ID for the track
Some Surfaces (many Android applets) are not able to deal with more than one parameter in a command. However, the two parameter commands below can also be sent as /strip/command/ssid param. Feedback can be set to match this with the /set_surface/feedback state command. See Calculating Feedback and Strip-types Values.
| /bank_up LED | where LED is a bool that indicates another bank_up operation is possible. |
|---|---|
| /bank_down LED | where LED is a bool that indicates another bank_down operation is possible. |
| /strip/name ssid strip_name | where strip_name is a string representing the name of the strip |
| /strip/group ssid group_name | where group_name is a string representing the name of the group the track belongs to |
| /strip/mute ssid mute_st | where mute_st is a bool/int representing the actual mute state of the track |
| /strip/solo ssid solo_st | where solo_st is a bool/int representing the actual solo state of the track |
| /strip/monitor_input ssid monitor_st | where monitor_st is a bool/int. True/1 meaning the track is force to monitor input |
| /strip/monitor_disk ssid monitor_st | where monitor_st is a bool/int. True/1 meaning the track is force to monitor disk, where both disk and input are false/0, auto monitoring is used. |
| /strip/recenable ssid rec_st | where rec_st is a bool/int representing the actual rec state of the track |
| /strip/record_safe ssid rec_st | where rec_st is a bool/int representing the actual record safe state of the track |
| /strip/gain ssid gain | where gain is a float ranging from -193 to 6 representing the actual gain of the track in dB. |
| /strip/fader ssid position | where position is an float ranging from 0 to 1 representing the actual fader position of the track. |
| /strip/*/automation ssid mode | where mode is an int ranging from 0 to 3 representing the actual automation mode for the control. See OSC Automation. |
| /strip/trimdB ssid trim_db | where trim_db is a float ranging from -20 to 20 representing the actual trim of the track in dB. |
| /strip/pan_stereo_position ssid position | where position is a float ranging from 0 to 1 representing the actual pan position of the track |
Selected Operations
Selection feedback is the same as for strips, only the path changes from /strip to /select and there is no ssid. there are some extra feedback and commands that will be listed here.
| /select/n_inputs number | where number number of inputs for this strip |
|---|---|
| /select/n_outputs number | where number number of outputs for this strip |
| /select/comment text | where text is the strip comment |
| /select/solo_iso state | where state is a bool/int representing the Actual solo isolate state of the track |
| /select/solo_safe state | where state is a bool/int representing the actual solo safe/lock state of the track |
| /select/polarity invert | where invert is a bool/int representing the actual polarity of the track |
| /select/pan_stereo_width width | where width is a float ranging from 0 to 1 representing the actual pan width of the track |
| /select/send_gain sendid send_gain | where sendid = nth_send, send_gainis a float ranging from -193 to +6 representing the actual gain in dB for the send |
| /select/send_fader sendid send_gain | where sendid = nth_send, send_gainis a float ranging from 0 to 1 representing the actual position for the send as a fader |
| /select/send_name sendid send_name | where send_name is a string representing the name of the buss this send goes to. |
| /select/group/enable state | where state is an int representing the current enable state of the group the selected strip is a part of |
| /select/group/gain state | where state is an int which shows the gain sharing of the group the strip belongs to. See Track and Bus Groups for more details |
| /select/group/relative state | where state is an int which shows relative state of thew group the strip belongs to. See Track and Bus Groups for more details |
| /select/group/mute state | where state is an int which shows the mute sharing of the group the strip belongs to. See Track and Bus Groups for more details |
| /select/group/solo state | where state is an int which shows the solo sharing of the group the strip belongs to. See Track and Bus Groups for more details |
| /select/group/recenable state | where state is an int which shows the recenable sharing of the group the strip belongs to. See Track and Bus Groups for more details |
| /select/group/select state | where state is an int which shows the select sharing of the group the strip belongs to. See Track and Bus Groups for more details |
| /select/group/active state | where state is an int which shows the route active sharing of the group the strip belongs to. See Track and Bus Groups for more details |
| /select/group/color state | where state is an int which shows the color sharing of the group the strip belongs to. See Track and Bus Groups for more details |
| /select/group/monitoring state | where state is an int which shows the monitoring sharing of the group the strip belongs to. See Track and Bus Groups for more details |
| /select/vcas name state ... | where name is a string with the name of the VCA, and state is an int that determines if the named VCA will control this strip. Note that this lists all VCAs in a session. (Ardour 6.0) |
Selected Plugin
Feedback about plugin parameters is sent only for a single, selected plugin (parameters for other plugins and other strips can be changed with /select/plugin/parameter and /strip/plugin/parameter, but without feedback). Whenever the plugin (or strip) changes, the name and activation of the plugin and name and value of a number of its parameters (determined by the plugin page size) is sent as feedback.
| /select/plugin/name name | where name is a string with the name of the selected plugin |
|---|---|
| /select/plugin/parameter/name paid name | where name is a string with the name of the specified parameter. |
| /select/plugin/parameter paid value | where value is a float ranging from 0 to 1 representing the current parameter value. |
Menu actions
There is no feedback for Menu actions.
Every single menu item in Ardour's GUI is accessible via OSC. However, there is no provision for returning the state of anything set this way. This is not a bad thing as most menu items either do not have an on/off state or that state is quite visible. Bindings that affect other parameters that OSC does track will show on those OSC controls. Examples of this might be track record enable for tracks 1 to 32, play or stop.
Feedback and strip-types values
/set_surface has two values the user needs to calculate before use. In general these will not be calculated at run time, but beforehand. There may be more than one button with different values to turn various kinds of feedback on or off or to determine which kinds of strips are currently viewed/controlled.
Both feedback and strip-types use bitsets to keep track what they are doing. Any number in a computer is made out of bits that are on or off, but we represent them as normal base 10 numbers. Any one bit turned on will add a unique value to the number as a whole. So for each kind of feedback or strip type to be used, that number should be added to the total.
strip_types
strip_types is an integer made up of bits. The easy way to deal with this is to think of strip_types items being worth a number and then adding all those numbers together for a value to send. Strip Types will determine What kind of strips will be included in bank. This would include: Audio, MIDI, busses, VCAs, Master, Monitor and hidden or selected strips.
- 1: AudioTracks.
- 2: MidiTracks.
- 4: AudioBusses.
- 8: MidiBusses.
- 16: VCAs.
- 32: Master.
- 64: Monitor.
- 128: FoldbackBusses.
- 256: Selected.
- 512: Hidden.
- 1024: Use Group.
Selected and Hidden bits are normally not needed as Ardour defaults to showing Selected strips and not showing Hidden strips. The purpose of these two flags is to allow showing only Selected strips or only Hidden strips. Using Hidden with other flags will allow Hidden strips to show inline with other strips.
Use Group on will tell ardour that any control on a strip that is part
of a group will affect all strips within that group. Default is off
or the control should only affect the strip the control is applied to.
The /use_group f state command can be used to temporarily
change this on the fly.
Some handy numbers to use might be: 15 (all tracks and busses - 1 + 2 + 4 + 8), 31 (add VCAs to that - 15 + 16). Master or Monitor strips are generally not useful on a surface that has dedicated controls for these strips as there are /master* and /monitor* commands already. However, on a surface with just a bank of fader strips, adding master or monitor would allow access to them within the banks. Selected would be useful for working on a group or a set of user selected strips. Hidden shows strips the GUI has hidden. As such, a control surface will likely have a number of buttons with different strip_types for convenience.
- Mixer - All strip types /set_surface/strip_types 159
- Audio Tracks - Just Audio tracks that can record /set_surface/strip_types 1
- MIDI Tracks - Tracks with at least 1 MIDI input that can record /set_surface/strip_types 2
- Busses - A mix of all busses, possibly including VCAs /set_surface/strip_types 156
- Selected - All strips that are currently selected /set_surface/strip_types 256
- Hidden - All hidden strips /set_surface/strip_types 512
- Custom - see Making a user selected strip list. /strip/custom/mode 1
Using hidden strips
Ardour allows any of it's strips to be hidden so that they do not show up on the GUI mixer or editor. OSC follows the GUI by default and will not show hidden strips. As of Ardour 6.0 the OSC commands include /select/hide y/n for the selected strip and /strip/hide ssid y/n for any strip. This allows the control surface to hide or unhide a strip. What may not be obvious is that hiding a strip makes it disappear and become unselected. So if a selected strip is hidden, it is no longer selected and the select channel will show the default select strip (Master). In order to show a hidden strip, the hidden strips need to be shown first using the /set_surface/strip_types 512 command to show only hidden strips. Then use the /strip/hide SSID 0 or /select/hide 0 to show that strip. Of course, because only hidden strips are showing, the strip you have set to no long hide will seem to vanish. A /set_surface/strip_types 159 will then show the default strip types or replace the 159 with the desired strip_types.
When hiding more than one strip in a row, check the strip name before
hiding as the strips will move as each strip is hidden just as it does
with the GUI mixer. So to hide strips 5, 6 and 7, the hide button
for ssid 5 is pressed 3 times. A more intuitive method
would be to hide strips from right to left (7, 6 and 5) which will
work as expected.
In short, shown strips can only be hidden when they are viewable and hidden strip can only shown (or un-hid) when strip_types include hidden strips.
feedback
Feedback is an integer made up of bits. The easy way to deal with this is to think of feedback items being worth a number and then adding all those numbers together for a value to send.
- 1: Button status for strips.
- 2: Variable control values for strips.
- 4: Send SSID (or for `/select/*` messages the send or plugin parameter id) as path extension.
- 8: heartbeat to surface.
- 16: Enable master section feedback.
- 32: Send Bar and Beat.
- 64: Send timecode.
- 128: Send meter as dB (-193 to +6) or 0 to 1 depending on gainmode
- 256: Send meter a 16 bit value where each bit is a level and all bits of lower level are on. For use in a LED strip. This will not work if the above option is turned on.
- 512: Send signal present, true if level is higher than -40dB
- 1024: Send position in samples
- 2048: Send position in time, hours, minutes, seconds and milliseconds
- 8192: Turn on select channel feedback
- 16384: Use OSC 1.0 /reply instead of #reply
- 32768: Report 8x8 Trigger Grid status
- 65536: Report Mixer Scene status
So using a value of 19 (1 + 2 + 16) would turn on feedback for strip and master controls, but leave meters, timecode and bar/beat feedback off.
Jog Modes
The /jog command will have a different affect depending
on which jog mode is selected. The jog system has two commands and
gives feedback of the mode chosen.
| /jog delta | Where delta is a float indicating the amount and direction. |
|---|---|
| /jog/mode mode | Where mode is an int from 0 to 7 indicating the mode |
Feedback is as below
| /jog/mode/name name | Where name is a string indicating the name of the current jog mode. |
|---|---|
| /jog/mode mode | Where mode is an int from 0 to 7 indicating the current jog mode. |
Jog Modes
- 0 Jog, each tick moves the Playhead forward or backward .2 seconds.
- 1 Nudge, Moves the Playhead forward or backward by the amount of the nudge clock.
- 2 Scrub, see Scrub mode.
- 3 Shuttle, each tick raises or lowers the transport speed by 12.5%.
- 4 Marker, Moves the Playhead to the previous or next Marker.
- 5 Scroll, each tick scrolls the edit window by one, forward or back.
- 6 Track, moves the current bank left or right by one strip.
- 7 Bank, Moves the current bank left or right by one bank.
The jog mode may be set using a slider with 0 to 7 limits, a group of switches or radio buttons. What works in any situation will depend on the controller.
Scrub
Scrub deserves special mention. In an ideal world, scrub would be jog with sound. However, Ardour does not have that functionality yet. So scrub starts the transport rolling at either 50% or 100% depending on how fast the jog wheel is turned. The position of the last tick is always saved and if no more ticks are received, the transport is located there when stopped at time out. If the jog wheel gives a value of 0 when released the transport stops at the location the value 0 is sent.
Custom Strip Lists
It is sometimes desirable to work only with a set of strips out of the whole list of available strips. This could be in any case where there is more than one engineer and one of them is responsible for only a group of strips such as all percussion, all sound effects, choir only, orchestra only, etc.
New Ardour 6.0
After a strip is added to the custom strip list, it will retain the same SSID for the life of the session so long as banking is not used. If a strip is removed it will leave a gap in the SSID list. Custom strip lists do not survive a session reload and need to be recreated at session start.
A custom strip list will only affect the surface that sets it. Any other surface will continue to operate on all strips or may have it's own set of custom strips.
The commands below control the use of a custom strip set.
| /strip/listen ssid ... | where ssid is an integer or list of integers representing tracks to add to the custom track list |
|---|---|
| /strip/ignore ssid ... | where ssid is an integer or list of integers representing tracks to remove from the custom track list |
| /strip/custom/mode mode | where mode is an integer representing the desired mode of custom strips. |
| /strip/custom/clear | disables custom strips and clears the previously set custom strip list |
Setting up a custom strip set
The control surface may set up a custom strip list all at once or one
strip at a time. A control surface that uses banking would probably
be best served by setting up one strip at a time, while one that does
no banking (bank_size = 0) and uses /strip/list would
probably be best served by having them all selected at once.
-
One at a time example:
/strip/listen 2adds strip 2 to custom strip list
-
Many at a time example:
/strip/listen 2 4 6 8Adds strips 2, 4, 6 and 8 to the custom strip list
/strip/listen will only work with custom enable turned off.
Using /strip/listen while in custom mode will have no effect.
Using the custom strip set
Once the custom strip set has been set up as shown above, it must be enabled.
This is done from the control surface with the /strip/custom/mode mode
OSC command. Mode may be 0: Off, 1: Use custom
strip set in selected order or 2: Use custom strip set
in mixer order. /strip/list will now show the custom strip list
and and its SSIDs. No more strips may be added to the custom strip list while
in custom mode. To add more strips to the end of the list, first send the
/strip/custom/mode 0 then more strips can be added to the end
of the list. After adding the next strips send the
/strip/custom/mode mode
to re-enable custom mode. It is possible to switch back and forth between
normal and custom mode as desired.
Custom Strip ordering
The ordering of strips in the custom strip set is affected by both the
custom mode and the bank_size setting for the
surface.
A bank_size of 0 is also described as having
banking turned off. In such a case all strips are shown.
-
Mode 0
Custom mode Off. All strips will be used as set by
strip_types. -
Mode 1
If
modeis set to 1 the custom strip ordering is always "first come, first served". That is,/strip/listen 2 4followed by/strip/listen 1 3will result in strip 2 showing as SSID 1 , strip 4 as SSID 2, strip 1 as SSID 3 and strip 3 as SSID 4 when in custom mode 1. Once these SSID are set in this way, they will remain linked to this SSID with banking turned off and will at least remain in the same order with banking on. -
Mode 2
If
modeis set to 2 the custom strip ordering will be set to mixer order and any deleted strips will not leave a blank strip in the set. -
With banking on
If
bank_sizeis set to greater than 0, Then banking is turned on. In this casestrip_typeswill be honored and only strips from the custom strip set that matchstrip_typeswill be shown in a bank. However, the order that the strips appear will still be affected by themode.
Removing a strip from the custom strip list
/strip/ignore ssid will remove that strip from the
custom strip list if custom strip use is enabled. In mode
1 there will be a blank strip at that SSID and all other
SSIDs will remain the same for no banking. With banking
in use, strip_types are honored and so removed strips
which have no type, will not be shown.
/strip/custom/clear will remove
all strips and SSIDs allowing custom strip lists to be restarted from
SSID 1. Custom mode will be set to 0.
Automation
Ardour has automation modes for many of its controls. As of version 5.9, OSC can control what automation mode a fader uses. (See Automation.)
The form of the automation mode command is:
/strip/[control]/automation ii ssid mode
- /strip may also be /select in which case the only parameter is the mode.
- [control] as of Ardour version 5.9 control can be:
- gain
- fader
- ssid can be a parameter as shown or inline (automation/[ssid]). /select has no ssid.
- mode can be one of:
0Manual mode1Play mode2Write mode3Touch mode
The next version of Ardour will add /strip/[control]/automation_name is ssid mode_name
as feedback. A surface may choose to use only the first character of the string (M, P, W or T) instead of
the whole string (this is in git now).
The touch mode needs more input so there is a Touch command as well (added post 5.9). It is almost identical to the automation command:
/strip/[control]/touch ii ssid touch
The only difference is the last parameter is 1 for touched and 0 for touch released. All of the rest of the explanation above applies.
Personal Monitoring Control
Personal monitoring can allow a performer with a smart phone to set their personal monitor mix for a floor wedge or in-ear monitoring. In Ardour 5.6 OSC commands to allow this were added for use with aux buses. Ardour 6.0 added Foldback buses for this purpose and these commands work directly for those.
Setup
Foldback buses can be added from the GUI (see: Foldback section) or using the /cue/new_bus OSC command.
- Create a bus for each performer who will have personal monitoring. A good practice is to name the bus with the performers name.
- Connect the output of that bus to one of the audio interface's playback ports that is not otherwise used.
- Add a foldback send to each channel the performer needs to hear in their personal mix. Many performers only need three or four sources to be mixed. If the performer needs to hear a a set of inputs that are combined into a bus, adding the foldback send to that bus may make more sense than adding ten drum channels for example.
- If the performer wishes to hear effects in their monitor, an extra send from the effects bus or a plugin can be added in line in the foldback bus itself. Foldback sends are always just before the Fader.
This gives stage or studio monitoring for the performer.
The OSC commands and feedback for personal monitoring
All of the personal monitoring commands and feedback start with a /cue. It is expected that a surface used as a personal monitor control will use only /cue commands.
There is one OSC command apart from the /cue
commands: /select/add_fldbck_send
Most phone OSC applets (TouchOSC, Control) require manual port to be set. There are certainly more controls than needed. Using send enables for example, may lead to wasted time discovering why a send has no sound. A good easy to use controller that fits on most phones while still being controllable even with big fingers might look like:
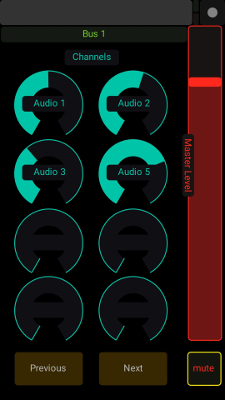
|
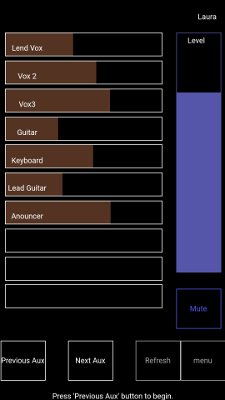
|
Ardour is not limited to talking to one personal monitor controller at a time, but is able to deal with many simultaneously, each controlling its own foldback bus.
The send controls and feedback all have the send id (1 to n) in line as part of the OSC path. So the path for the second send would be /cue/send/fader/2 to set the level. It is considered that most surfaces used for this will only be able to handle one parameter.
Commands
| /cue/connect | Returns a list of foldback busses and connects to the first. |
|---|---|
| /cue/bus index | where index is an integer or float which is the foldback bus number this surface will use. |
| /cue/next_bus | Sets the the foldback bus to one bus higher. |
| /cue/previous_bus | Sets the foldback bus to one bus lower. This can also be used as a "connect" button to save space in a phone layout. |
| /cue/connect_output output | where output is a string that is the name of an output port or the number of the output port if the port is a system:playback port to connect the foldback bus to. |
| /cue/new_bus name l-output r-output | where name is the name for the new foldback bus as a string, l-output (optional) is the name of the output port to connect to. And r-output (if present) will make the new foldback bus stereo and connect the right output port to the named port. All parameters are string type. |
| /cue/new_send strip | where strip is a string with the name of the strip to add a foldback send to that sends to the current foldback bus. |
| /cue/fader position | where position is a float for the position of the fader between 0.0 and 1.0. |
| /cue/mute state | where state is a float of 0.0 for mute off and 1.0 for the foldback bus mute on. |
| /cue/send/fader/id position | where position is a float for the position of the send fader between 0.0 and 1.0. |
| /cue/send/enable/id state | where state is a float of 0.0 for disable and 1.0 for enable. |
Feedback
| /cue/name name | where name is a string that is the name of the currently selected foldback bus. |
|---|---|
| /cue/name/id name | where name is a string that is the name of the foldback bus that id belongs to. |
| /cue/fader position | where position is a float from 0.0 to 1.0 that shows the fader position for the selected foldback bus. |
| /cue/mute state | where state is a float of 0.0 or 1.0 that shows the state of the mute for the selected foldback bus. |
| /cue/signal activity | where activity is a float of 0.0 or 1.0 that shows audio activity for the selected foldback bus. |
| /cue/send/name/id name | where name is a string that is the name of the channel that send id belongs to. |
| /cue/send/fader/id position | where position is a float from 0.0 to 1.0 that is the position for the fader for the send that id belongs to. |
| /cue/send/enable/id state | where state is a float of 0.0 or 1.0 that is the state of the enable for the send that id belongs to. |
While a fader is being adjusted, the corresponding /*/name text will give the level in db.
Setting up a Foldback bus from a selected strip
A selected or expanded strip can create a foldback send and create a foldback bus at the same time using: /select/add_fldbck_send name where name is a string with the name of the desired foldback bus. If the name matches an existing foldback bus the new send will be added to the selected or expanded strip that feeds that bus. If there is no strip of that name, one will be created.
Parameter Types
An OSC message is laid out in this form:
/path/of/command type parameterThe type is there to indicate what the parameter is. This gives the idea that parameter types are quite strict and if the command requires an Integer "i" then the controller had better send it. However, the checking of the parameter type is left to the receiving software.
What this means in practical terms is that the surface can get away with sending the wrong type of parameter. There are some places where that just doesn't make sense. For example, a parameter that is specified as a Float with a range of 0 to 1, could be sent as an Integer, but would only have full scale and minimum value with nothing in between. This is not much use for a fader, though OK for a button.
There are a number of OSC controllers based on iOS and Android tablets that only send or receive parameters as floats or text. These controllers should have no problem sending bool or int values as floats. Ardour will interpret the values as required.
Selection and Expansion Considerations
Ardour does not send every possible feedback value for each channel. It does send expanded information on the selected channel. There are also extra commands for the selected strip. All the feedback and select commands have their own path /select. This means that for the selected channel the surface does not have to keep track of the strip ID. The /select strip will follow the "current mixer strip" in the GUI editor window.
There are two major uses for this:
- Single strip control surfaces. Using /access_action Editor/select-next-route or /access_action Editor/select-prev-route to step through the mixer strips.
- Using a "Super strip" section of knobs to control parts of the strip that are changed less often such as polarity, sends or plugin parameters.
Selection in Ardour's OSC implementation are complicated by the possibility of using more than one OSC controller at the same time. User "A" may select strip 4 and use a selected controller to make changes to that strip. User "B" may subsequently select strip 7 to make changes on. This leaves user "A" making changes to strip 7 which they did not choose.
For this reason Ardour offers local expansion aside from the GUI selection. Local expansion only affects the one OSC controller. GUI selection is global and affects all controllers using GUI selection as well as the GUI.
Both select and expansion use the /select set of commands.
In general, in a one user situation where that one user may use either the OSC surface or the GUI, using GUI based selection makes the most sense. This is the default because this is the more common use.
When there is more than one operator, then expansion only is the mode of choice. It may make sense for one of the surfaces to use GUI selection where the operator is also using the GUI for some things. However, the set up should be carefully analyzed for the possibility of selection confusions. Expansion should be considered the safe option.
It is always OK to use expansion on the surface even in a one user scenario. This allows the user to use GUI and surface selection for different uses.
It is also possible to use both if desired. /strip/select will ways set the GUI select, but /strip/expand will set the select feedback and commands locally without changing the GUI select. Another /strip/expand or a /strip/select will override that expand command and releasing the /strip/expand or /select/expand (setting it to 0 or false) will set the /select set of commands and feedback back to whichever strip the GUI has selected at that time. This could be used to switch between the GUI select and the local expand to compare two strips settings.
Using the PreSonus FaderPort
Ardour has full support for the Presonus Faderport controller. This is a compact control surface featuring a single motorized fader, a single knob (encoder) and 24 buttons with fixed labels. It is a relatively low-cost device that functions very well to control a single (selected) track or bus, along with a variety of other "global" settings and conditions.
Connecting the Faderport
The Faderport comes with a single USB socket on the back. Connect a suitable USB cable from there to a USB port on your computer. As of the end of 2015, you should avoid USB3 ports—these cause erratic behaviour with the device. This issue might get fixed by Presonus in the future.
Ardour uses the Faderport in what Presonus calls "native" mode. You do not need to do anything to enable this—Ardour will set the device to be in the correct mode. In native mode, the Faderport sends and receives ordinary MIDI messages to/from the host, and the host understands the intended meaning of these messages. We note this detail to avoid speculation about whether Ardour supports the device via the HUI protocol—it does not.
The Faderport will be automatically recognized by your operating system, and will appear in any of the lists of possible MIDI ports in both Ardour and other similar software.
To connect the Faderport to Ardour, open the Preferences dialog, and then click on "Control Surfaces". Click on the "Enable" button in the line that says "Faderport" in order to activate Ardour's Faderport support. Then double click on the line that says "Faderport". A new dialog will open, containing (among other things) two dropdown selectors that will allow you to identify the MIDI ports where your Faderport is connected.
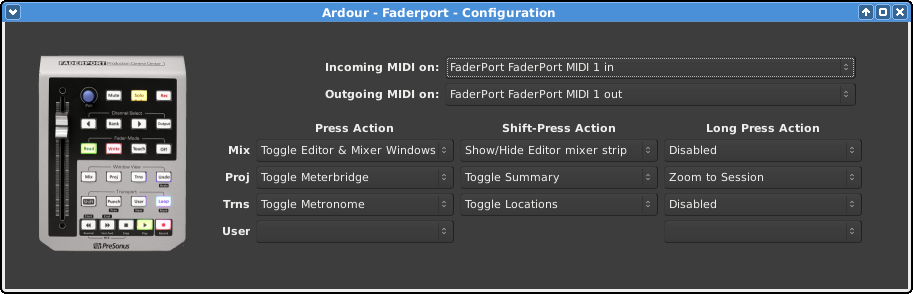
Once you select the input and output port, Ardour will initialize the Faderport and it will be ready to use. You only need do this once: once these ports are connected and your session has been saved, the connections will be made automatically in this and other future sessions.
You do not need to use the power supply that comes with the Faderport but without it, the fader will not be motorized. This makes the overall experience of using the Faderport much less satisfactory, since the fader will not move when Ardour tells it to, leading to very out-of-sync conditions between the physical fader position and the "fader position" inside the program.
Using the Faderport
The Faderport's controls can be divided into three groups:
- Global controls such as the transport buttons
- Controls which change the settings for particular track or bus
- Controls which alter which track or bus is modified by the per-track/bus controls.
Because the Faderport has only a single set of per-track controls, by default those controls operate on the first selected track or bus. If there is no selected track or bus, the controls will do nothing.
Transport Buttons
The transport buttons all work as you would expect.
| Rewind |
When pressed on its own, starts the transport moving backwards. Successive presses speed up the "rewind" behaviour. If pressed while also holding the Stop button, the playhead will return to the zero position on the timeline. If pressed while also holding the Shift button, the playhead will move to the session start marker. |
|---|---|
| Fast Forward |
When pressed on its own, starts the transport moving faster than normal. Successive presses speed up the "fast forward" behaviour. If pressed while also holding the Shift button, the playhead will move to the session end marker. |
| Stop | Stops the transport. Also used in combination with the Rewind button to "return to zero". |
| Play | Starts the transport. If pressed while the transport is already rolling at normal speed, causes the playhead to jump to the start of the last "roll" and continue rolling ("Poor man's looping"). |
| Record Enable | Toggles the global record enable setting |
Other Global Controls
The Mix, Proj,
Trns buttons do not obviously correspond to any
particular functions or operations in Ardour. We have therefore
allowed users to choose from a carefully curated set of possible
actions that seem related to the button labels in some clear
way. This can be done via the Faderport configuration dialog
accessed via Preferences > Control Surfaces. Each
button has 3 possible actions associated with it:
- Plain Press: action to be taken when the button is pressed on its own.
- Shift-Press: action to be taken when the button is pressed in conjunction with the Shift button.
- Long Press: action to be taken when the button is pressed on its own and held down for more than 0.5 seconds.
Click on the relevant drop-down selector to pick an action as you prefer.
The User button also has no obvious mapping to specific Ardour functionality, so we allow users to choose from any possible GUI action. The menu for selecting the action is somewhat confusing and it can be hard to find what you're looking for. However, all possible actions are there, so keep looking!
| Mix |
Possible actions include:
|
|---|---|
| Proj |
Possible actions include:
|
| Trns |
Possible actions include:
|
| Undo/Redo | Undo Causes the last operation carried out in the editor to be undone. When pressed in conjunction with the Shift button, it causes the most recent undone operation to be re-done. |
| Punch |
When pressed on its own, toggles punch recording. If there is no punch range set for the session, this will do nothing. When pressed in conjunction with the Shift button, this moves the playhead to the previous Marker |
| User |
See above. Any and all GUI-initiated actions can be driven with by pressing this button on its own, or with a "long" press. When pressed in conjunction with the Shift button, this will move the playhead to the next marker. |
| Loop |
When pressed on its own, this toggles loop playback. If the Ardour preference "Loop-is-mode" is enabled, this does nothing to the current transport state. If that preference is disabled, then engaging loop playback will also start the transport. When pressed in conjunction with the Shift button, this will create a new (unnamed) marker at the current playhead position. |
Per-track Controls
| Mute | This toggles the mute setting of the currently controlled track/bus. The button will be lit if the track/bus is muted. |
|---|---|
| Solo | This toggles the solo (or listen) setting of the currently controlled track/bus. The button will be lit if the track/bus is soloed (or set to listen mode). |
| Rec | This toggles the record-enabled setting of the currently controlled track/bus. The button will be lit if the track is record-enabled. This button will do nothing if the Faderport is controlling a bus. |
| Fader | The fader controls the gain applied to the currently controlled track/bus. If the Faderport is powered, changing the gain in Ardour's GUI or via another control surface, or via automation, will result in the fader moving under its own control. |
| Knob/Dial/Encoder |
The knob controls 1 or 2 pan settings for the current controlled track/bus. When used alone, turning the knob controls the "azimuth" or "direction" (between left and right) for the panner in the track/bus (if any). This is all you need when controlling tracks/busses with 1 input and 2 outputs. If controlling a 2 input/2 output track/bus, Ardour's panner has two controls: azimuth (direction) and width. The width must be reduced to less than 100% before the azimuth can be changed. Pressing the "Shift" button while turning the knob will alter the width setting. The knob can also be turned while the "User" button is held, in order to modify the input gain for the currently controlled track. |
| Read | Enables playback/use of fader automation data by the controlled track/bus. |
| Write | Puts the fader for the controlled track/bus into automation write mode. While the transport is rolling, all fader changes will be recorded to the fader automation lane for the relevant track/bus. |
| Touch | Puts the fader for the controlled track/bus into automation touch mode. While the transport is rolling, touching the fader will initiate recording all fader changes until the fader is released. When the fader is not being touched, existing automation data will be played/used to control the gain level. |
| Off | This disables all automation modes for the currently controlled track/bus. Existing automation data will be left unmodified by any fader changes, and will not be used for controlling gain. |
Track Selection Controls
You can manually change the track/bus controlled by the Faderport by changing the selected track in Ardour's editor window. If you select more than 1 track, the Faderport will control the first selected track and only that track/bus.
| Left (arrow) | This causes the Ardour GUI to select the previous track/bus (using the current visual order in the editor window), which will in turn cause the Faderport to control that track. If there is no previous track/bus, the selected track/bus is left unchanged, and the Faderport continues to control it. |
|---|---|
| Right (arrow) | This causes the Ardour GUI to select the next track/bus (using the current visual order in the editor window), which will in turn cause the Faderport to control that track. If there is no next track/bus, the selected track/bus is left unchanged, and the Faderport continues to control it. |
| Output |
Pressing the Output button causes the Faderport to control the fader, pan, mute and solo settings of the Master bus. If your session does not contain a Master bus, it does nothing. This is a toggle button—pressing it again returns Faderport to controlling whichever track/bus was selected before the first press of the Output button. If your session uses Ardour's monitor section, you can use Shift-Output to assign it to the Faderport in the same way that Output assigns the Master bus. This is also a toggle setting, so the second Shift-Output will return the Faderport to controlling whichever track/bus was selected before. If you press Shift-Output after a single press to Output (i.e. control the Monitor Section while currently controlling the Master bus) or vice versa (i.e. control the Master bus while currently controlling the Monitor Section), the press will be ignored. This avoids getting into a tricky situation where it is no longer apparent what is being controlled and what will happen if you try to change it. |
| Bank | The "Bank" button is currently not used by Ardour |
Using the PreSonus FaderPort 2/8/16
Ardour supports a variety of controllers in the Presonus FaderPort product line. The documentation below is written with FaderPort™ 8 in mind. However, it equally applies to FaderPort 2 and FaderPort 16 as the main difference between these units is the amount of motorized faders. For the documentation on using 1st generation FaderPort devices please refer to this chapter instead.
Connecting the FaderPort 8
The FaderPort 8 (FP8) comes with a USB socket on the back. Connect a suitable USB cable from there to a USB port on your computer. The FP8 will be automatically recognized by your operating system, and will appear in any of the lists of possible MIDI ports in both Ardour and other similar software.
Ardour uses the FaderPort 8 in what PreSonus calls "Studio One" or "native"
mode. To use the FaderPort8 with Ardour's FP8 Control Surface, make sure that
the device is in "Studio One" mode. (If you would like to change the mode at
any point, power on the unit while holding down the two leftmost Select
buttons, see the FaderPort 8 manual for further details. Also note that at
least firmware version 1.01 is required. NB. "factory default" resets the
firmware, see the PreSonus FaderPort8 Owner's manual chapter 9.4.)
While the FaderPort provides a Mackie Control Universal (MCU) mode, which
works with Ardour's Mackie Control Surface, MCU does not support various
elements available on the FP8 (e.g. colored buttons, and the custom mode
scribble strips).
Normally, Ardour should be able to automatically detect a connected Faderport 8 device and enable it. If it fails, open the Preferences dialog, select "Control Surfaces" and enable "PreSonus FaderPort 8". Then open the "Protocol Settings" dialog for the FP8. Which (among other things) allows to select the the MIDI ports corresponding to the FP8.
Once you select the input and output port, Ardour will initialize the FP8 and it will be ready to use. You only need do this once: Once these ports are connected and your session has been saved, the connections will be made automatically in this and other future sessions.
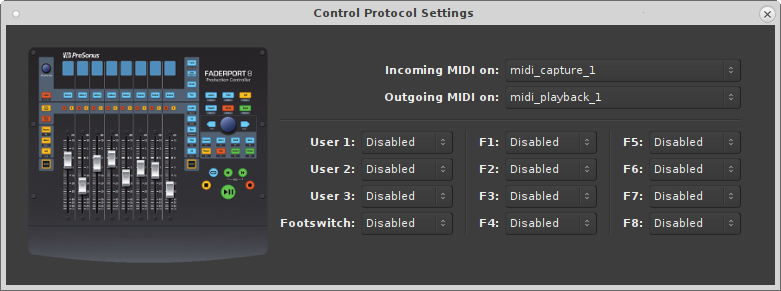
Using the FaderPort 8
The FaderPort's controls can be divided into five groups:
- Transport buttons
- Session Navigation controls
- Fader modes
- Mix management
- Channel strip
In general the control mapping described in the FaderPort 8 Owner's Manual for Studio One (chapter 2) applies to Ardour as well. There are however subtle differences where the DAWs differ.
Buttons generally act on release (not press), with exception of transport-control (since 6.0pre) and individual exceptions mentioned below.
Transport Buttons

- Stop: Stops the transport. Press twice to return to session start.
- Loop: Toggles loop playback. A loop-range needs to be defined in the session for looping to be engaged.
- Play/Pause: Roll/Stop the transport (note that Ardour has no "pause" mode: Pause is equivalent to stop). During vari-speed playback, pressing "play" resets to 100% forward speed.
- Rewind: Rewind, roll backwards. Successive presses or holding the button incrementally changes the speed.
- Fast Forward: Roll forward. Successive presses or holding the button accumulate speed. Pressing (Rewind and Fast Forward) simultaneously stops playback and returns the playhead to zero.
- Record: Toggles the global record enable setting.
Session Navigation
Session Navigation allows quick navigation and provides access to session-wide controls. Each of the eight buttons alters the function of the push-button encoder and the Prev, Next buttons. With exception of Click the seven modes are exclusive (radio buttons).

- Channel: The Prev / Next buttons select the previous/next mixer-strip. If no strip is selected, Next selects the first, Prev the last mixer-strip in the session. Pressing the encoder knob moves the most recently selected mixer-strip into view on the FP8. The encoder scrolls the editor-canvas up/down.
- Master: The encoder controls the master-bus level. If a session includes a monitor-section, the encoder controls monitor-out by default. Hold the button to control the master-bus level. Press the encoder knob to reset the gain to 0dB. The Prev / Next navigation buttons bank the visible strips on the FP8 by one track left/right.
- Zoom: The encoder controls horizontal zoom of the editor. Press the encoder to zoom to fit the session. Prev / Next navigation buttons zoom selected track(s) vertically (or all tracks if none are selected).
- Click: Toggle the metronome on/off. While holding the Click button, the encoder modifies the volume of the metronome click (press the encoder while holding Click to reset the metronome level to 0dBFS).
- Scroll: The encoder scrolls the timeline (hold Shift for finer steps). Pressing the encoder zooms to fit the session. The Prev / Next navigation buttons bank the visible strips on the FP8 by one track left/right.
- Section: The Prev / Next navigation buttons nudge the selected region by the time configured in the nudge-clock. If no region is selected the playhead position is nudged. The encoder always nudges the playhead position.
- Bank: Encoder and navigation buttons scroll through mixer-strips in banks of eight. Pressing the encoder moves the most recently selected mixer-strip into view on the FP8.
- Marker: The encoder scrolls the timeline (hold Shift for finer steps). The Prev / Next navigation buttons jump to prev/next markers. Press the encoder to drop a new marker.
When combined with Shift, the eight buttons will access custom functions, which can be configured in the Preference Dialog. The buttons will light up if an action has been assigned to a button.
The following tables shows a condensed overview of the session-navigation modes:
| Prev / Next | Encoder knob | Encoder Press | |
|---|---|---|---|
| Channel | Select prev/next mixer-strip | Scroll Editor up/down | Bank to show selected strip on FP8 |
| Master | Bank visible strips on FP8 by 1 | Adjust master/monitor level | Reset master/monitor to 0dB |
| Zoom | Vertical zoom (editor track-height) | Horizontal timeline zoom (time) | Horizontal zoom to session |
| Scroll | Bank visible strips on FP8 by 1 | Scroll the timeline (move playhead) | Horizontal zoom to session |
| Section | Nudge the selected region | Nudge the playhead | - |
| Bank | Bank visible strips on FP8 by 8 | Bank visible strips on FP8 by 1 | Bank to show selected strip on FP8 |
| Marker | Move to prev/next marker | Scroll the timeline (move playhead) | Drop a new marker |
| Press and hold Click | (mode dependent) | Adjust metronome Level | Reset metronome level to 0dBFS |
Shift Button

The two Shift buttons are identical, they're copied to provide
convenient access to the modifiers. Pressing and holding the Shift
button updates the lights (and colors on RGB buttons) to indicate the modified
control.
Pressing and holding the Shift button for one second without
pressing any other button enters shift-lock mode. Press Shift again
to reset.
The Shift button engages directly on press. Activating an action
while the button is held will void the shift-lock mode.
Fader Modes
The eight faders on the FP8 can be assigned to various automatable controls present in the current session. The four fader-mode buttons change the behavior of the mixer-strip and scribble strip displays. (Note: with the 1.01 firmware these buttons always act on press.)

- Track: In Track-mode, the motorized faders display and control a mixer-strip's signal level. The Pan/Param encoder modifies the azimuth of the panner (hold Shift to control the width, if the track's panner supports it). Mute and Solo affect the respective mixer-strip.
- Edit Plugins: When Edit Plug-ins mode is active, the
motorized faders will control the parameter settings of a given
plugin-insert.
Press the Edit Plugins button to view all available plugin-inserts on a strip. If no plugins are available, Edit Plugins will not engage and the FP8 automatically switches back to Track-mode.
Select Plugin Mode: Use the Select buttons under the scribble strip to pick a plugin to edit.
The Select button color indicates the bypass/enable state of the plugin (red: bypassed, green: enabled). Use Shift + Select to toggle the bypass state.
Selecting a plugin enters Parameter Edit Mode: The faders and the Select buttons will respectively control the parameters and toggle controls of the selected plugin (once a plugin has been selected, it stays in edit mode regardless of track selection). If there are more than eight parameters, the Pan/Param encoder allows to scroll through available control-parameters (hold Shift to bank by 8).
If the plugin has any presets, pressing the Pan/Param encoder switches to the plugin-preset display: Plugin preset names are displayed on the scribble-displays, the Select button below each loads the preset. The "Pan/Param" encoder can be used to scroll through presets if there are more than seven (right-most, 8th, slot is reserved to unload/clear a loaded preset, hold Shift to bank by 7). The Select button color is used to indicate the currently loaded preset (if any) and blinks if a parameter has been modified since loading the preset. Loading a preset or pressing the Pan/Param encoder again switches back to the Plugin Parameter Edit Mode.
In Parameter Edit Mode, the "Open" (Shift + Macro) allows to toggle the Plugin GUI visibility.
Press the Edit Plugins button again to return to the Select Plugin Mode. - Sends: In Sends mode, each of the faders is mapped to the send-level of aux-sends of the selected track. If there are more than eight sends on a given track, the Pan/Param encoder can scroll through them. Send-mode follow the selection. If there are no sends on a given track, the FP8 automatically switches back to Track-mode.
- Pan: When Pan mode is active, the motorized faders will display and control the panner's azimuth. The Pan/Param controls the pan-width of the selected mixer-strip.
Shift + Track toggles timecode display on/off (middle row of the scribble-strip). The timecode format can be configured in the Control Surface Preference Dialog (Timecode, musical-time: bar/beat/tick).
Channel Strip

- Touch-Sensitive Fader: The fader can be used to control volume levels, aux send levels, panning, or plugin parameters, depending on the fader-mode (see above).
- Pan/Param: The encoder controls panning in Track and Pan mode. In Plugin and Send fader-modes, the encoder banks parameters. See Fader modes above for details. When "Link" is engaged, the encoder can control any automatable parameter (see Miscellaneous below).
- Mute: Toggle the mute-control of the corresponding mixer-strip. Mute engages on press, and disengages on release. Press and hold the button for at least 0.5sec for momentary.
- Solo: Toggle the solo or listen (AFL,PFL) control of the corresponding mixer-strip. Solo engages on press, and disengages on release. Press and hold the button for at least 500ms for momentary.
- Select: In Track and Sends and Pan mode the Select
button select/de-select a given mixer-strip.
Since selection is not limited to a single mixer-strip, the button acts in tri-state. A mixer-strip light indicates selection:- Any Selected Track: The select button is lit with the track's color.
- Any Not Selected Track: The select button is off (dimly showing the track's color).
- Most Recently Selected Track: Only one track at a time. The select button blinks with the track's color.
- Select: The track is exclusively selected and also becomes the most-recently selected.
- Shift + Select any selected track: Deselect the track.
- Shift + Select any unselected track: Adds the given track to the selection and make it most-recently selected).
While holding the ARM button the Select button lights change to red and the Select buttons controls the record-arm of the given track. Mixer-strips that cannot be record-armed have a dim white light.
Shift + ARM record-arms all tracks in the session.
Mix Management
These buttons allows to select which mixer-strips are spilled on the FP8 channel-strips.

- Audio: View Audio Tracks only.
- VI: Show tracks with virtual instrument plugins.
- Bus: Display only Busses.
- VCA: Show VCAs.
- All: Display all Tracks, Busses (incl master-bus) and VCAs.
In combination with the Shift modifier ten total filters are available:
- Shift + Audio Inputs: shows all record-armed tracks (Audio and MIDI).
- Shift + VI MIDI: View all MIDI tracks.
- Shift + Bus Outputs: Show the Master and Monitor Bus.
- Shift + VCA FX: Shows Aux-Busess.
- Shift + All User: Display all currently selected mixer-strips only.
Automation Controls
The Automation Controls provide access to the currently selected mixer-strips. The automation enable lights indicates the mode of the most recently selected mixer-strip (blinking selection button). The action affects all selected mixer-strips. The automation controls are currently only available in Track and Pan fader modes where they affect the fader and pan automation modes respectively.

- Latch: Currently not available in Ardour.
- Trim: Currently not available in Ardour.
- Off: Select "Manual" automation mode.
- Read: Select "Play" automation mode.
- Write: Select "Write" automation mode (note at the end of a write pass, Ardour automatically puts the track into "Touch" mode.
- Touch Select "Touch" automation mode.
The Automation Controls also double as session state controls when combined with Shift.
- Shift + Latch Save: Save the session. The button lights up red if the session is modified.
- Shift + Trim Redo: Redo a previously undone operation. The button lights up green if redo is possible.
- Shift + Off Undo: Undo the most recent operation. The button lights up green if undo is possible.
With Shift, the bottom row allows to bind three custom user actions.
Miscellaneous

- Solo Clear: Reset all solo controls in the session. If the FP8 was used to clear solo-state, pressing the button again will restore the previous state (unless solo state was modified manually since).
- Mute Clear: Unmute all mixer-strips in the session. If the FP8 was used to clear mute-state, pressing the button again will restore the previous mute state (unless mute-state was changed manually since).
- Bypass: The behavior depends on the edit-mode:
- Track + Pan Mode: A/B bypass toggle any plugins on all selected mixer-strips.
- Edit Plugin Parameter: Toggle bypass of of the plugin that is currently being edited. Bypass state is indicated by color: red for bypassed, green for enabled (not bypassed).
- Shift + Bypass Bypass All: A/B bypass toggle any plugins on all selected mixer-strips.
- Macro: Toggle Editor and Mixer Windows/Tabs.
- Shift + Macro Open: The
behavior depends on the edit-mode:
- Edit Plugin Parameter: Toggle Plugin GUI visibility (if it has a GUI) of the plugin that is currently being edited.
- all other modes: Show the Import Audio Dialog.
- Link: Activate Control-Link Mode (only available in
Track and Pan modes).
The Pan/Param encoder controls the element over which the mouse-cursor hovers in the GUI. One can access any parameter which can be automated.
Pressing the Pan/Param encoder resets the control-parameter to the default value.
The buttons color is used to indicate the link-state:- orange: Link is enabled, but the mouse-cursor is not over an element which can be controlled.
- yellow: Link is enabled, and the cursor is hovering over a controllable element.
- green: Link is locked to a given element (see below).
- turquoise: Link lock is possible (when pressing Shift while link-mode is enabled).
- red: Link-lock is not possible (only when pressing Shift while link-mode is enabled without a valid element to control.
- Shift + Link Lock:
When in Link-mode (see above), this allows to lock the current control to
the Pan/Param encoder. Link will no longer follow the GUI mouse-cursor.
If Link-mode is not enabled, Lock, locks the GUI (alike Session > Lock) to prevent accidental changes.
Link and Link-Lock mode will automatically disengage when entering Sends or Edit Plugins mode.
Harrison Mixbus
The above also applies to Ardour-derivatives Harrison-Mixbus and Mixbus 32C with a few subtle differences:
- Mix Management Bus shows Mixbusses only, while FX spills Aux-busses.
- The Mixbus built-in EQ and Compressor are present on every track and bus and always available. They are displayed as special plugins on right-side in Select Plugin Mode. When editing those processors, the parameters follows track selection (for other plugins this is not possible since they may not be present).
- Fader mode Sends shows mixbus-assigns first (before any optional aux-sends). The master-bus-assign is available on the "S"olo button of the right-most strip.
Using the Softube Console1
Ardour has a good support for the Softube Console1 controller.
Connecting the Console1
Console1 comes with a single USB Socket on the back. Connect a suitable USB cable from there to a USB port on your computer.
Ardour uses the Console1 as a generic MIDI controller. You do not need to do anything to enable this—The Console1 sends and receives ordinary MIDI controller messages to/from the host, and the host understands the intended meaning of these messages. We note this detail to avoid speculation about whether Ardour supports the native mode, which sends MIDI Sysex Messages—it does not.
The Console1 will be automatically recognized by your operating system, and will appear in any of the lists of possible MIDI ports in both Ardour and other similar software.
To connect the Console1 to Ardour, open the Preferences dialog, and then click on "Control Surfaces". Click on the "Enable" button in the line that says "Console1" in order to activate Ardour's Console1 support. Then double click on the line that says "Console1". A new dialog will open, containing two dropdown selectors that will allow you to identify the MIDI ports where your Console1 is connected.
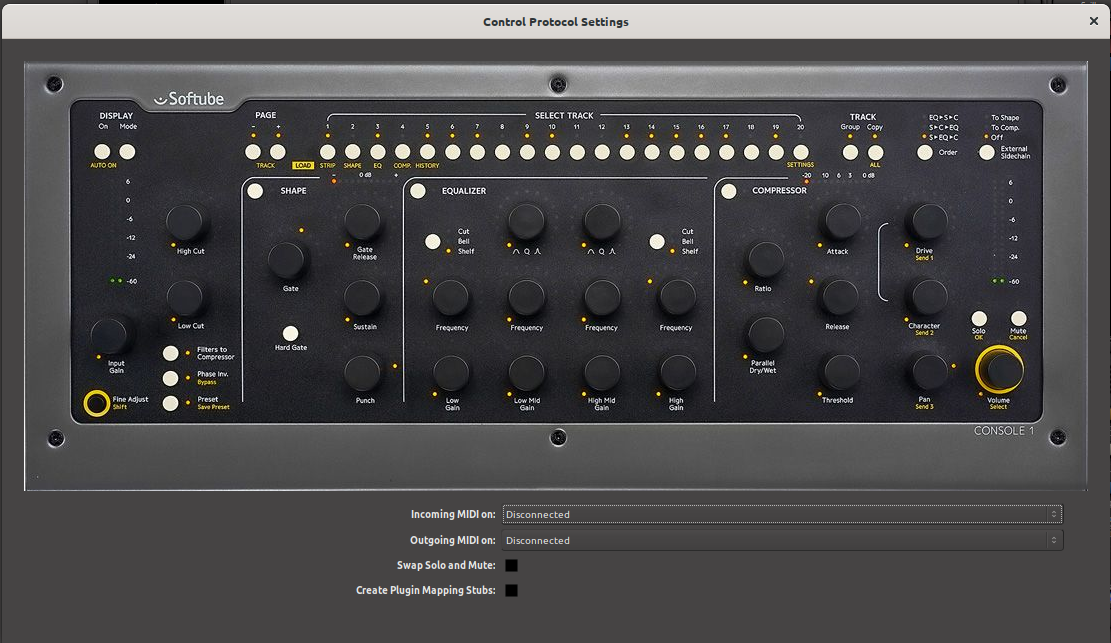
Once you select the input and output port, Ardour will initialize the Console1 and it will be ready to use. You only need do this once: once these ports are connected and your session has been saved, the connections will be made automatically in this and other future sessions.
Checkboxes
The checkbox "Swap Solo and Mute" does exactly that. In Ardour and Mixbus, these buttons are arranged exactly the other way round than in Console1. Since this can be irritating, the assignment can be reversed here.
Work in Progress
The checkbox "Create Plugin Mapping Stubs" automatically creates mapping files for external plugins - if they does not already exists. See the last section "External Plugins" for further information.
Harrison Mixbus & Mixbus 32c
A lot of functionality is developed to be used with Harrison Mixbus
and Harrison Mixbus32c, therefore the assignment of the controls might
sometimes feels a little arbitrary. However, in the future it might
be possible, to control plugins with this surface.
Controls only used by Harrison Mixbus (32c) are marked with
[Mixbus]
Controls inside a Mixbus only section which are working in
Ardour as well marked with [Ardour]
Using the Console1
The Fine Adjust / Shift button unfortunately does not work in the generic MIDI mode. Therefore the Preset / Save Preset button is used as a shift button. In the following this will be simply referred to as the Shift button
The controls
General
| On | Is lit when a mixer strip is in solo mode and can disables all solo modes.Rude Solo | |
|---|---|---|
| Mode | Zooms to selection | |
| Page Up / Page Down | Switches 20 mixer strips up or down. Only lit if there is another page/bank | |
| 1...20 | Select the nth mixer strip of the current bank.The Master channel is always the last mixer strip | |
| Track Group/Track Copy | Unused | |
| Order | [Mixbus]Switches between the compressor modes: Leveler/Compressor/Limiter — see Compressor section | |
| External Sidechain | Switches between Edit, Cue and Mixer Screen | |
| Input | Trim | |
| Input Meter | Unused | |
| High Cut | [Mixbus]High Cut | |
| Low Cut | [Mixbus]Low Cut | |
| Filter to Compressor | [Mixbus]Filters on/off | |
| Phase | Switches the phase of all channels. If only one of more channels is switched in the GUI, the LED blinks | |
| Preset | The Global 'Shift' button | |
| Pan | Pan | |
| Solo | Solo button for the mixer strip | |
| Mute | Mute button for the mixer strip, blinks, when the mixer strip is muted due to another mixer strips Solo-Mode | |
| Volume Meter | Shows the mixer strip volume | |
| Volume | Sets the mixer strip volume |
Shape-Section [Mixbus]
| Shape | Switches the Gate section on or off | |
|---|---|---|
| Shape Meter | Shows the Gain reduction of the gate | |
| Gate | Threshold for the gate | |
| Gate Release | Release time for the gate | |
| Shift+Gate Release | Hysteresis for the gate | |
| Sustain | Attack time for the gate | |
| Shift+Sustain | Hold time for the gate | |
| Punch | Depth for the gate | |
| Shift+Punch | Sidechain filter frequency | |
| Hard Gate | Sidechain filter on / off | |
| Shift+Hard Gate | Sidechain filter listen |
Equalizer Section [Mixbus]
All encoders in the EQ section are working as sends if the shift button is activated. See the bus send section.
| Equalizer | Switches the Equalizer section on or off | |
|---|---|---|
| Low Gain | The Gain (reduction or boost) of the semiparametric bass eq | |
| (Low) Frequency | The frequency of the semiparametric bass eq | |
| (Low) Cut / Bell / Shelf | Switches between Cut/Boost or Shelf (this uses only two of the three states | |
| Low Mid Gain | The Gain (reduction or boost) of the semiparametric low mid eq | |
| (Low Mid) Frequency | The frequency of the semiparametric low mid eq | |
| (Low Mid) Shape | [Ardour]The eleventh send of a mixer strip / Send to the eleventh mixbus | |
| High Mid Gain | The Gain (reduction or boost) of the semiparametric high mid eq | |
| (High Mid) Frequency | The frequency of the semiparametric high mid eq | |
| (High Mid) Shape | [Ardour]The twelfth send of a mixer strip / Send to the twelfth mixbus (see section Mixbusses) | |
| High Gain | The Gain (reduction or boost) of the semiparametric treble eq | |
| (High) Frequency | The frequency of the semiparametric treble eq |
Compressor Section [Mixbus]
| Compressor | Switches the Compressor on or off | |
|---|---|---|
| Compressor Meter | Shows the gain reduction of the leveler/compressor/limiter | |
| Order | Above this section Switches between the compressor modes: Leveler/Compressor/Limiter | |
| Ratio | Ratio of the compressor | |
| Parallel Dry/Wet | Makeup gain of the compressor | |
| Attack | Attack time of the compressor | |
| Release | Release time of the compressor | |
| Threshold | Threshold of the compressor |
Sends
Additionally the Low-Mid and High-Mid shape encoders are sends to the mixbusses eleven and twelfe. The Idea behind this is to have some common effects on this two mixbusses which are accessible without 'shift'. Currently, this is focused on Mixbus.
The functionality will be extended to fit better with Ardour in a second development phase. However, if a mixer strip in Ardour has sends to busses, these are accessible with the send encoders as well. These are numbered from top to bottom. The topmost send can be changed by the send 1 encoder Shift+(Low) Frequency, the next send below by the send 2 encoder Shift+(Low Mid) Frequency and so on.
| Shift+(Low) Frequency | Send 1 | |
|---|---|---|
| Shift+(Low Mid) Frequency | Send 2 | |
| Shift+(High Mid) Frequency | Send 3 | |
| Shift+(High) Frequency | Send 4 | |
| Shift+Low Gain | Send 5 | |
| Shift+Low Mid Gain | Send 6 | |
| Shift+High Mid Gain | Send 7 | |
| Shift+High Gain | Send 8 | |
| Shift+(Low Mid) Shape | Send 9 | |
| Shift+(High Mid) Shape | Send 10 | |
| (Low Mid) Shape | Send 11 | |
| (High Mid) Shape | Send 12 |
External Plugins
Pressing Group will set Console1 into external plugin mode. External plugins are all plugins in case of Ardour and in case of Mixbus all plugins which are not a fixed part of the mixerstrips.
| Group | Set or unset the Console 1 into "External Plugin Mode" | |
|---|---|---|
| 1-20 | Select the plugin at position [selected number]. Pressing repeatedly then shows or hides the plugin.The LED of the selected channel stay on permanently, the channel LED of the plugin number stays in 'blinking mode'. | |
| Mute | Disables the plugin |
All other assignements needs to be done with the mapping files. A stub of such a mapping file can be automatically created when the checkbox "Create Plugin Mapping Stubs" in the "Control Protocol Settings" dialog is enabled.
The mapping files are created in a subdirectory "c1mappings" of the Ardour/Mixbus settings directory
This is the example of a mapping file for the a-compressor. The file name is created from the unique URL of the plugin. In this case its urn:ardour:a-comp.xml
<?xml version="1.0" encoding="UTF-8"?>
<c1plugin-mapping
        ID="urn:ardour:a-comp"
        NAME="ACE Compressor">
        <param-mapping id="0">
                <name>Attack</name>
                <mapping shift="false">COMP_ATTACK</mapping>
        </param-mapping>

        <param-mapping id="1">
                <name>Release</name>
                <mapping shift="false">COMP_RELEASE</mapping>
        </param-mapping>

        <param-mapping id="2">
                <name>Knee</name>
                <mapping shift="false"></mapping>
        </param-mapping>

        <param-mapping id="3">
                <name>Ratio</name>
                <mapping shift="false">COMP_RATIO</mapping>
        </param-mapping>

        <param-mapping id="4">
                <name>Threshold</name>
                <mapping shift="false">COMP_THRESH</mapping>
        </param-mapping>

        <param-mapping id="5">
                <name>Makeup</name>
                <mapping shift="false">COMP_PAR</mapping>
        </param-mapping>

        <param-mapping id="6">
                <name>Sidechain</name>
                <mapping shift="false"></mapping>
        </param-mapping>
</c1plugin-mapping>
It is planned to allow creating the mapping file for the plugins inside the setup dialog. This, however, might take some time.
Using the Steinberg CC121
Steinberg CC121 is a compact control surface originally designed for use with the Cubase™ digital audio workstation.

Connecting the CC121
Plug the USB cable from the CC121 into a USB2 or USB3 port on your computer. The device will be automatically recognized by your operating system and will appear in any of the lists of possible MIDI ports in Ardour.
To connect the CC121 to Ardour, open the Preferences dialog, and then click Control Surfaces. Tick the Enable checkbox opposite to "Steinberg CC121" to activate Ardour's CC121 support.
Once the device is activated, click Show Protocol Settings and in the newly opened window select the device in the drop-down lists for incoming and outgoing MIDI events.
Once you select the input and output port, the CC121 will be ready to use. You only need do this once: once these ports are connected and your session has been saved, the connections will be made automatically in this and other future sessions.
CC121 Configuration
Ardour supports a subset of features available in the CC121. Various actions in the program can be mapped to the following buttons and encoders on the device:
- Function 1 through Function 4 buttons
- Value encoder
- Lock button
- EQ type button
- All Bypass button
- EQ1 through EQ4 toggles
Here is an example of a customized setup:
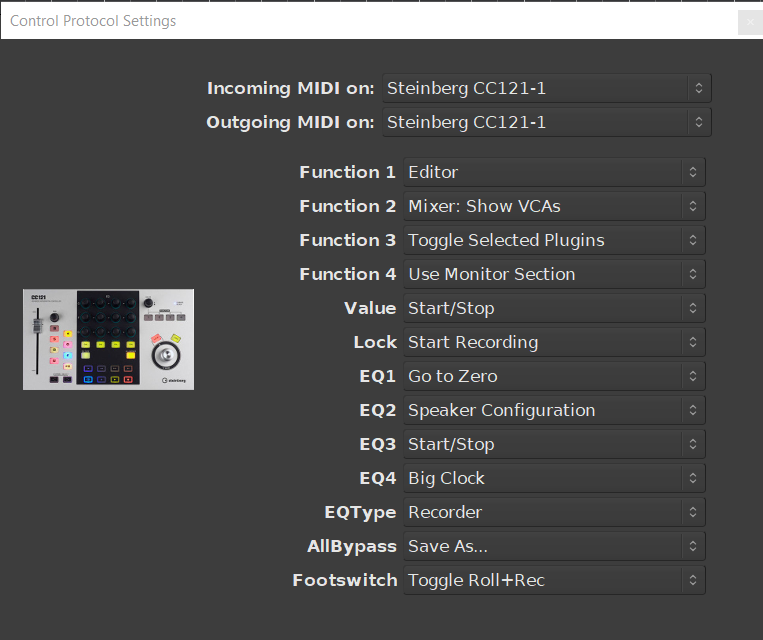
Some additional behavior cannot be configured:
| Fader | Controls the fader of the selected track or bus |
|---|---|
| Pan encoder | Controls the panner of the selected track or bus |
| M button | Mutes the selected track or bus |
| S button | Soloes the selected track or bus |
| R button | Read automation, sets the fader to the play mode, can only be disabled by pressing E, Edit instrument or Write automation |
| W button | Write automation, sets the fader to the write mode, can only be disabled by pressing E, Edit instrument or Read automation |
| Speaker button | Alternate between In, Disk, In/Disk, and In and Disk both disabled |
| O button | Arms a track for recording |
| E (edit) button | Sets the fader to touch mode, can only be disabled by pressing Edit instrument, Read automation, or Write automation |
| Edit instrument button | Sets the fader to the manual mode, can only be disabled by pressing E, Read automation or Write automation |
| Channel Select | Left-pointing button selects the previous track, right-pointing button selects the next track |
| Jog Wheel | Jogs through audio with Jog button enabled, zooms in/out with Jog button disabled |
| Previous button | Moves the playhead to the previous marker |
| Rewind | Moves the playhead back in time |
| Forward | Moves the playhead forward in time |
| Next button | Moves the playhead to the next marker |
| Loop/Cycle button | Enables/disables region looping |
| Stop | Stops the transport |
| Play | Rolls the transport |
| Record |
Starts to blink when pressed, when a track has record enable set and play is pressed, recording to the track will start and it will be lit during recording. When pressed again during recording, track will keep playing but is no longer recording and the button will no longer be lit. When a track does not have record enable set, the record button will keep blinking when play is pressed, the track will play but not record. Once the record enable button is pressed, recording has started and the button will be lit. |
Using the Tascam US-2400
TASCAM US-2400 is a control surface that features 3 by 8 channels strips, each with a continuous rotary encoder, a motorized fader, MUTE, SOLO and SEL. It also has a master section with a motorized fader for the master bus, transport controls, a joystick, a jog dial, and several function keys.

Connecting the US-2400
Plug the USB cable from the US-2400 into a USB2 or USB3 port on your computer. The device will be automatically recognized by your operating system and will appear in any of the lists of possible MIDI ports in Ardour.
To connect the US-2400 to Ardour, open the Preferences dialog, and then click Control Surfaces. Tick the Enable checkbox opposite to "Tascam US-2400" to activate Ardour's US-2400 support.
Once the device is activated, click Show Protocol Settings and in the newly opened window configure the device.
US-2400 Configuration
The configuration dialog allows setting up send and receive ports, as well as map functions keys to various actions in Ardour. To make it work, you need to select mode 4 on the US-2400 unit.
It's possible to define MIDI send/receive ports for the three groups of faders (1..8, 9..16, 17..24) and the joystick.
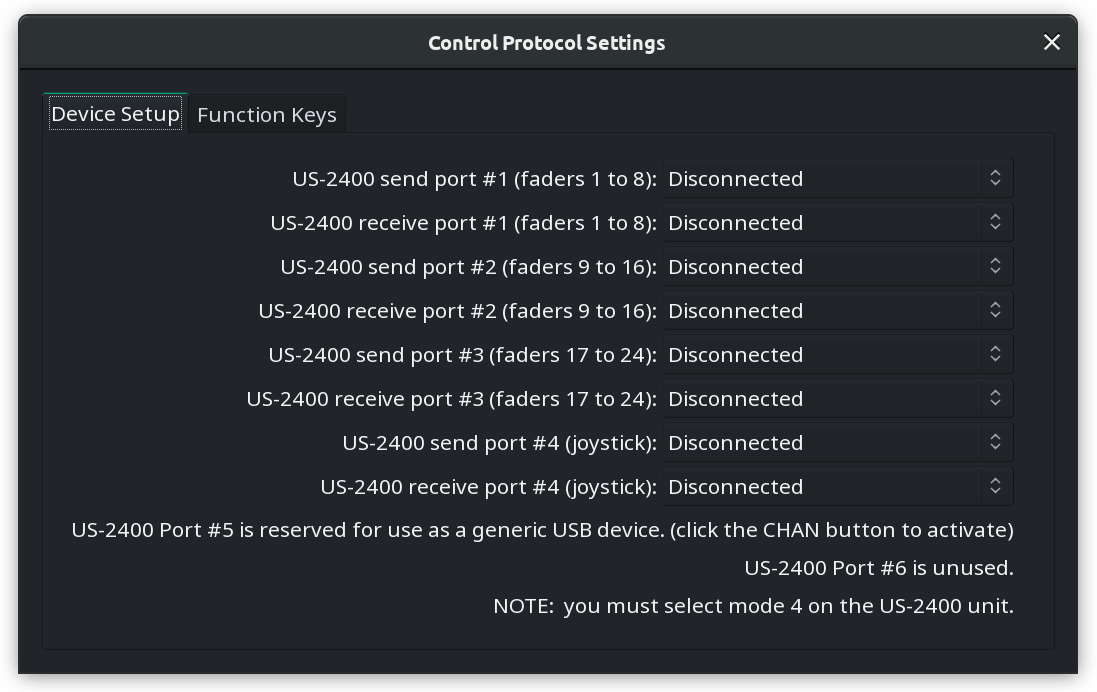
It's also possible to map device keys to various actions in Ardour:
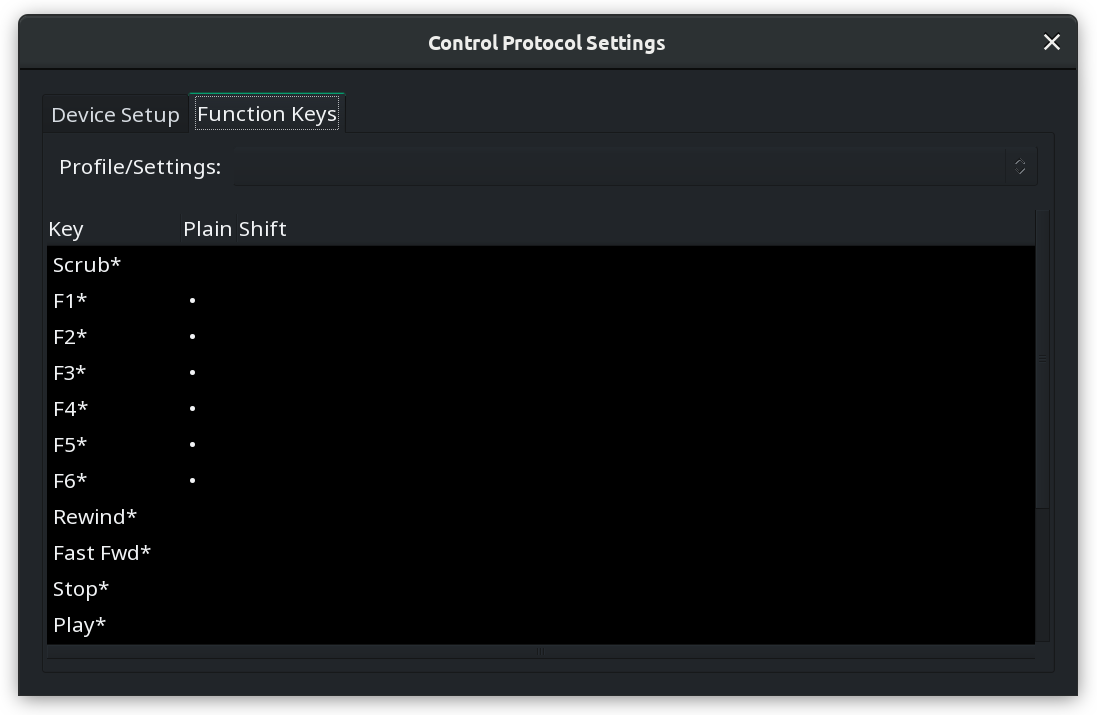
Using the WebSockets Server
The WebSockets Server is an experimental control surface that allows controlling a running Ardour session via a web browser on any computer in the same local network.
The connection between the WebSockets server and a running instance of Ardour is two-way: any changes made in the web-based surface are immediately available in Ardour, and vice versa.
The experimental status means that this control surface is not feature-complete and might have bugs.
Supported features are currently limited to:
- Adjusting positions of channel faders and panners in tracks and the master bus, as well as muting and unmuting tracks.
- Changing settings of LV2 plugins that have already been loaded into tracks or the master bus.
- Rolling or pausing transport.
Enabling and Accessing the WebSockets Server
To enable the WebSockets Server surface, open the Preferences dialog and go to the Control Surfaces page. Click on the Web Sockets Server (Experimental) to enable it. This will immediately run the server and make it available on port 3818. You can verify that it's running by opening a web browser on the same computer and visiting http://localhost:3818/. You should see the home page that looks like this:
To access the server from any device in the same network you need to know the broadcast IP address or the hostname of the computer running Ardour. To do that, open Window > Log right after enabling the control surface and look at the message that says something like this:
2025-02-28T21:42:14 [INFO]: ArdourWebsockets: listening on: http://fedora:3818/
Alternatively, you can use system's specific tools to discover the IP address. Once you know the address or the hostname, you can open the control surface web app in a browser by visiting the IP address with appended port number. E.g. if the IP address of the computer running Ardour is 192.168.1.68, the entire URL will be http://192.168.1.68:3818/.
Using the WebSockets Server control surface
Various features available in the control surface are spread across three pages: Mixer, Transport, and Protocol.
Mixer
This is where you can view VU meters for each track and the master bus, as well as make a number of adjustments:
- Change positions of faders and panners.
- Enable and disable the Mute status.
- Adjust settings of LV2 plugins loaded into mixer channels.
The control surface only supports changing settings for LV2 plugins presently. LADSPA, VST2/VST3, and AU plugins will not be listed. When an LV2 plugin has been loaded into a mixer channel, a button with "f" caption appears on top of the mixer channel. Clicking it opens this kind of an overlay:
Transport
The Transport view displays the timecode of the current playhead position and allows toggling playback.
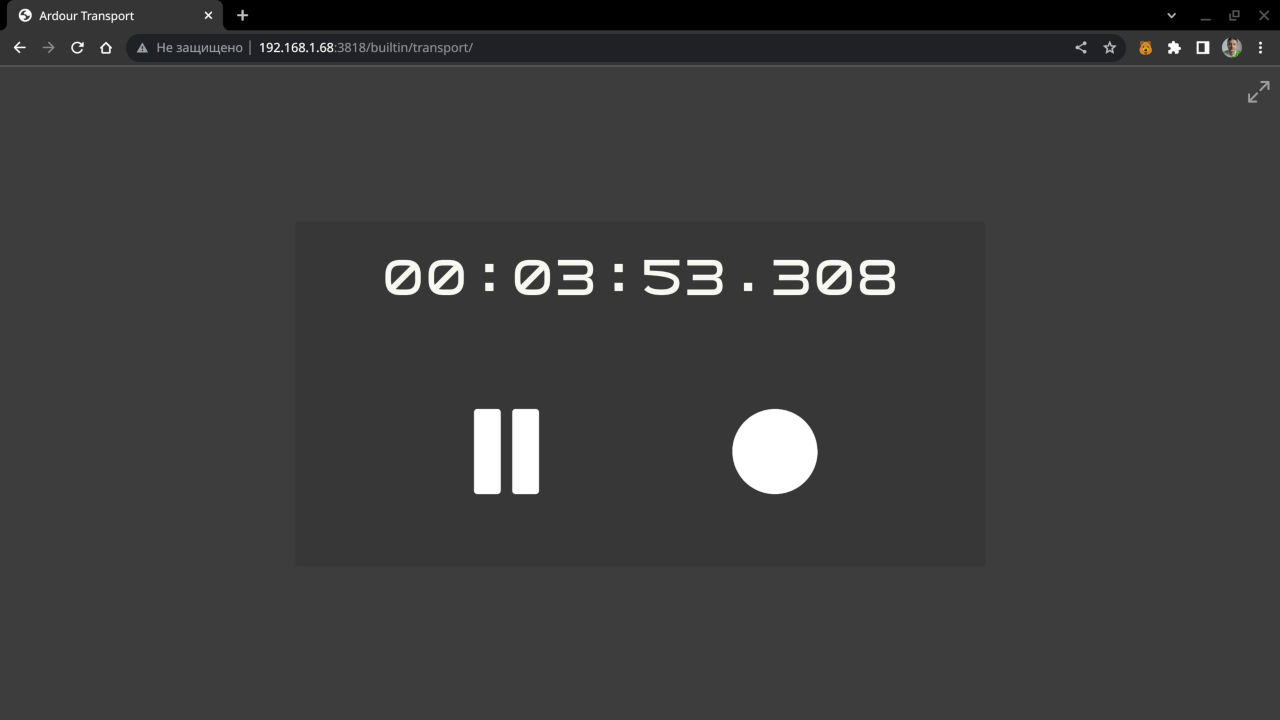
The Record toggle is currently non-functional.
Protocol
This page is targeted at developers willing to enhance the WebSockets Server control surface. It displays the data passed between Ardour and the web browser.
Using the MCP HTTP Surface
The MCP HTTP control surface is an experimental server that lets an MCP-capable assistant inspect and control a running Ardour session.
In this context, MCP means Model Context Protocol. It is not the Mackie Control Protocol used by hardware control surfaces. Model Context Protocol is a way for applications to expose tools and data to AI assistants and other compatible clients.
It is intended for practical assisted workflows such as session setup, transport control, track and bus management, plugin adjustment, marker and range editing, and MIDI region editing. The surface exposes these operations as MCP tools over a local HTTP endpoint.
MCP clients can make changes to the current session. Use snapshots or save the session before asking an assistant to perform destructive edits such as deleting markers, moving regions, normalizing audio, or changing many plugin parameters.
Enabling the MCP HTTP Surface
To enable the surface, open the Preferences dialog and go to the Control Surfaces page. Enable MCPHttp, then open its settings dialog.
The settings dialog provides the MCP endpoint information and these options:
- The HTTP listen port. The default port is
4820. - A debug level for logging MCP requests in Ardour's log window.
- An option to listen on all network interfaces.
By default, the server listens on all interfaces of the local machine, including but not limited to localhost:
http://127.0.0.1:4820/mcp
Listening on all network interfaces can expose Ardour control to other devices on the network. Only enable this on trusted networks and only when a remote MCP client needs to connect to Ardour.
Client Setup
Use the endpoint shown in the MCPHttp settings dialog when configuring an MCP client. The transport is HTTP. Server-Sent Events transport is not used.
Codex CLI
codex mcp add ardour_http --url http://127.0.0.1:4820/mcp
The equivalent entry in ~/.codex/config.toml is:
[mcp_servers.ardour_http]
url = "http://127.0.0.1:4820/mcp"
Gemini CLI
gemini mcp add ardour-http http://127.0.0.1:4820/mcp --type http
Claude Desktop
Claude Desktop can connect through mcp-remote. In
Settings > Developer, add:
{
  "mcpServers": {
    "ardour-http": {
      "command": "npx",
      "args": [
        "mcp-remote@latest",
        "http://127.0.0.1:4820/mcp"
      ]
    }
  }
}
Copilot CLI
In Copilot CLI, run /mcp add and fill in the form with an HTTP
MCP server named ardour-http using the URL
http://127.0.0.1:4820/mcp.
Available Tool Areas
Exact tool names can be inspected through the MCP client's tool listing. The MCP HTTP surface currently exposes tools in these areas:
- Session information, saving, undo, redo, renaming, snapshots, and mixer scenes.
- Transport state, locate, play, stop, loop, punch, record enable, and marker navigation.
- Track and bus listing, creation, selection, renaming, fader, pan, mute, solo, record enable, and record safe.
- Sends, including adding sends, removing sends, level control, and pre-fader or post-fader placement.
- Plugin discovery, insertion, removal, order, position, bypass, and parameter control.
- Markers, ranges, loop ranges, punch ranges, and arrangement markers.
- Region inspection, move, copy, resize, split, gain, and normalization.
- MIDI region creation, note insertion, note listing, note editing, and bulk JSON import or export.
Example Tool Names
Some tools use explicit names to avoid ambiguous argument combinations. For example, locating by bars and beats uses a different tool from locating by sample.
transport_get_statetransport_locate_bbttransport_locate_sampletracks_listtracks_addbuses_addtrack_get_infotrack_set_fader_dbtrack_set_fader_positiontrack_set_send_level_dbplugin_list_availableplugin_add_by_plugin_idplugin_set_parameter_by_index_valuemarkers_listmarkers_addmarkers_add_range_bbtregion_move_by_beatsregion_copy_to_bbtmidi_region_add_bbtmidi_note_import_json_into_region
Working With MIDI JSON
For creating more than a few notes, prefer the MIDI JSON tools over adding one note at a time. They allow an assistant to create or edit a complete phrase, drum groove, or chord pattern in one tool call.
MIDI JSON timing is relative to the start of the target region. In this
format, bar: 1 and b: 1 mean the first beat of the
region, regardless of where that region starts in the session timeline.
The b value is the beat within the bar and may be fractional.
For example, b: 1.5 represents an off-beat eighth-note position
in common 4/4 timing. The t value is an additional tick offset
within the beat, using the JSON file's ticks_per_quarter value.
In drum mode, note-off events are optional. Drum hits can be supplied as note-on events only; Ardour writes them as zero-length notes, with note-on and note-off at the same timestamp. For non-drum material, use note-on and note-off timing pairs for sustained notes and chords.
Prompt Examples
Some MCP clients allow a system message, startup message, project instruction, or reusable chat preamble. The following text can help an assistant use Ardour MCP tools more reliably:
You are connected to Ardour through the Ardour MCP HTTP control surface.

Use Ardour MCP tools when answering questions about the current Ardour session
or when making requested session changes. Prefer reading current state before
editing: list tracks, get track info, list markers, inspect regions, and inspect
plugins as needed.

When changing the session, use exact IDs returned by Ardour whenever possible.
Track names, marker names, plugin names, and region names may not be unique. If
there is ambiguity, ask before making the change.

Use musical time when the user describes bars and beats. Bar and beat values are
one-based. Fractional beats are allowed, for example beat 3.5 means halfway
between beats 3 and 4. MIDI JSON note positions are relative to the start of the
target region: bar 1 beat 1 is the start of that region, not the session.

For larger generated MIDI parts, prefer the MIDI JSON import tools instead of
adding one note at a time. Use individual note tools for small corrections or
short phrases. In MIDI JSON, provide clear timing, pitch, velocity, and channel
data, and use drum mode for drum grooves when appropriate.

When setting levels, prefer dB values when the tool supports them. Do not assume
linear fader positions are dB. For panning, follow the Ardour MCP tool
description because Ardour's pan value convention may differ from other systems.

Before destructive actions such as deleting markers, deleting plugins, deleting
sends, overwriting ranges, or moving/copying many regions, briefly confirm the
target if the user's request is not explicit.

After making a change, verify it with a readback call and summarize what changed
using track names, region names, marker names, plugin names, and musical
locations where useful.
The following examples show the kind of requests an MCP-capable assistant can translate into Ardour operations:
- Show the transport state and list all markers.
- Set the loop range from bar 32 for 8 bars and enable loop playback.
- Create tracks for a live band: lead vocal, two backing vocals, two guitars, bass, stereo drums, and stereo keys.
- Create a bus called Vocal Verb and add post-fader sends from the vocal tracks to it.
- List available EQ plugins and add one to the Rose track.
- Set the send level from Frank to Vocal Verb to -12 dB.
- Add marker Frank at bar 7 beat 3.5.
- Add arrangement section Solo 2 at bar 40.
- Create a MIDI region on MCP MIDI Test from bar 3 for 2 bars.
- Insert a C major up-and-down scale using eighth notes with velocity around 80.
- Add 4 bars of steady drum groove in the existing drum MIDI region.
- In bar 4, add solid quarter-note chords in the key of F on each beat.
- Move region Test Part A by 2.5 beats later on the same track.
- Copy this region four times every two bars.
Client Compatibility
Tool responses include structured MCP data and a JSON text fallback. The text fallback is intentional because some MCP clients display only text content and do not expose structured result data to the assistant.
Known Limitations
- The surface is experimental and may change based on user feedback.
- Most edit operations identify tracks, plugins, regions, and markers by explicit IDs or names.
- Selected-region targeting is not implemented.
- MCP clients and models vary in how well they use tool descriptions and structured return data.
Troubleshooting
Plugin DSP Load
The Plugin DSP Load window is helpful in cases where some of the plugins need too much CPU time to process buffers, resulting in audible clicks and pops in the output, but you aren't quire sure which ones are causing this exactly or you do know, but you need actual stats.
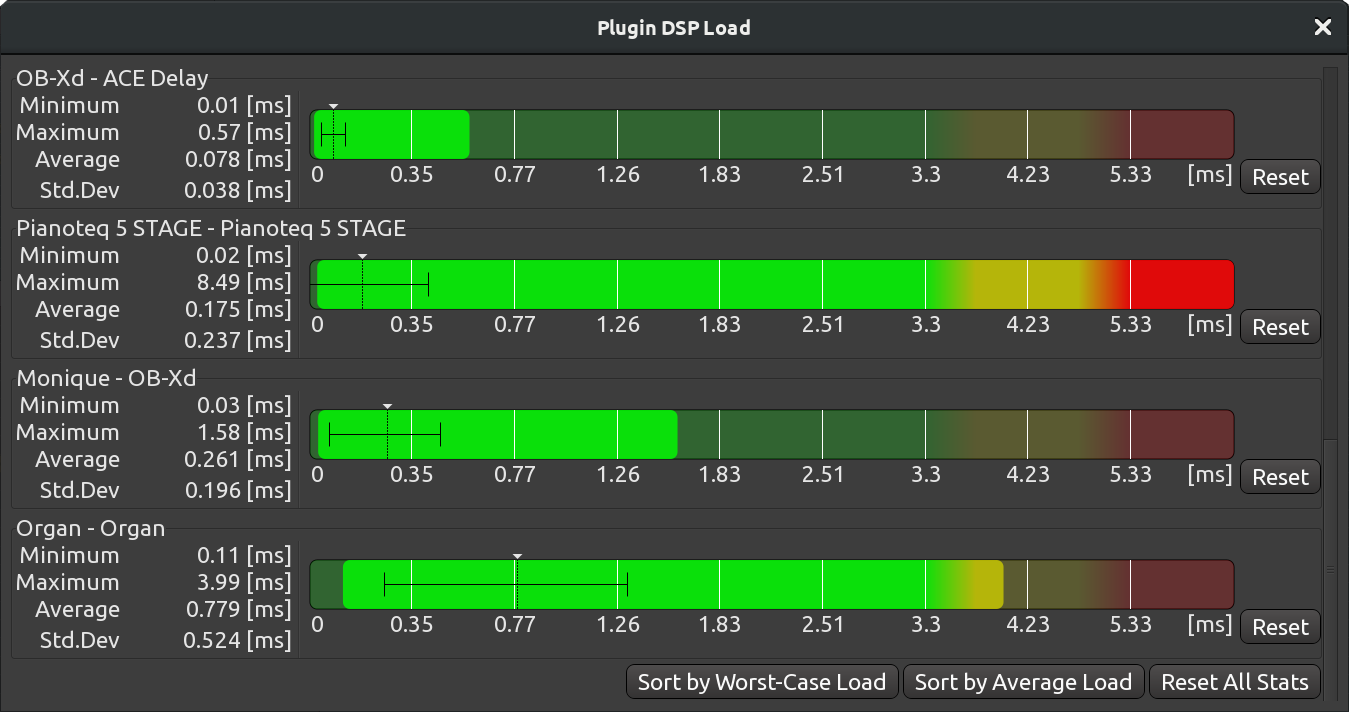
For each plugin in use, there is a chart and numeric data that represents minimum, maximum, and average CPU time used, as well as standard deviation. This, along with simple color coding — green for safe amount of CPU time, red for too much CPU time required — gives you a good overview of what's going on in the session.

The Plugin DSP Load window has basic sorting options: by worst-case load or by average load. This helps easily locating the worst offenders. You can also click to reset all stats.
You can use the data provided by the Plugin DSP Load window to decide whether you want to replace a plugin with a less resource-hungry one, freeze a track, or report a potential bug to the plugin's developer and wait for an update.
It's worth noting that certain type of plugins, like convolution reverbs and guitar amp simulators, tend to consume more resources.
Performance Meters
The Performance Meters window provides low-level metering of the digital signal processing taking place inside Ardour. One of the scenarios where this is useful is when you need to determine whether Ardour is in charge for excessive xruns.
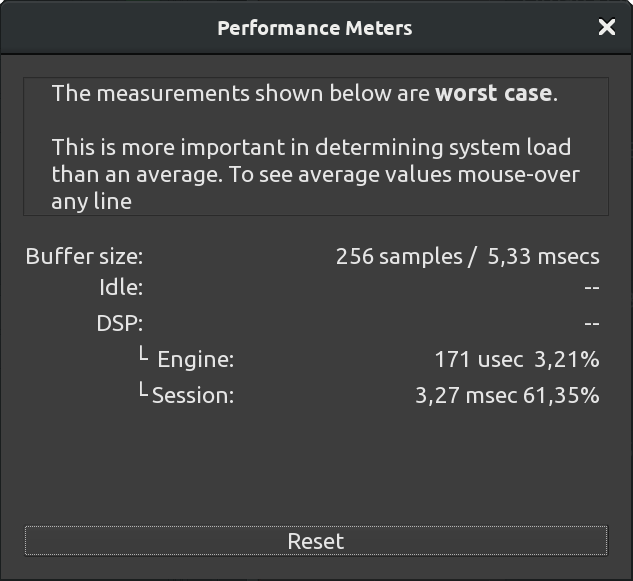
This window displays worst case scenario measurements that do not necessarily match the DSP meter in the top right corner of the window. To see average and standard deviation values, hover either the Engine or the Session values with the mouse pointer to see the tooltip.
Scripting
Lua Scripting
Starting with version 4.7.213, Ardour supports Lua scripts.
This Documentation is Work in Progress and far from complete. Also the documented API may be subject to change.
Preface
There are cases that Ardour cannot reasonably cater to with core functionality alone, either because they're session-specific or user-specific edge cases.
Examples for these include voice-activate (record-arm specific tracks and roll transport depending on signal levels), rename all regions after a specific timecode, launch an external application when a certain track is soloed, generate automation curves or simply provide a quick shortcut for a custom batch operation.
Handling cases like these requires extending the DAW without actually changing the DAW itself. This is where scripting comes in.
"Scripting" refers to automating tasks that would normally be done interactively by a human operator.
Lua is a tiny and simple language which is easy to learn, yet allows for comprehensive solutions. Lua also allows tying existing Ardour components together in unprecedented ways, and most importantly Lua is one of the few scripting languages which can be safely used in a real-time environment.
A good introduction to Lua is the book Programming in Lua. The first edition is available online for free, but if you have the means we recommend you buy a copy of the book - it helps support the Lua project and provides a much nicer reading and learning experience.
Overview
The core of Ardour is a real-time audio engine that runs and processes audio. One interfaces with an engine by sending it commands. Scripting can be used to interact with or modify the active Ardour session, just like a user uses the Editor/Mixer GUI to modify the state or parameters of the session.
Doing this programmatically requires some knowledge about the objects used internally. Most Ardour C++ objects and their methods are directly exposed to Lua and one can call functions or modify variables:
session->set_transport_speed (1.0);
Session:set_transport_speed (1.0)
You may notice that there is only a small syntactic difference in this case. While C++ requires recompiling the application for every change, Lua script can be loaded, written or modified while the application is running. Lua also abstracts away many of the C++ complexities such as object lifetime, type conversion and null-pointer checks.
Close ties with the underlying C++ components is where the power of scripting comes from. A script can orchestrate interaction of lower-level components which take the bulk of the CPU time of the final program.
At the time of writing Ardour integrates Lua 5.3.5: Lua 5.3 reference manual.
Integration
Like Control surfaces and the GUI, Lua Scripts are confined to certain aspects of the program. Ardour provides the framework and runs Lua (not the other way around).
In Ardour's case Lua is available:
| Editor Action Scripts | User initiated actions (menu, shortcuts) for batch processing |
|---|---|
| Editor Hooks/Callbacks | Event triggered actions for the Editor/Mixer GUI |
| Session Scripts | Scripts called at the start of every audio cycle (session, real-time) |
| DSP Scripts | Audio/Midi processor - plugins with access to the Ardour session (per track/bus, real-time) |
| Script Console | Action Script commandline |
There are is also a special mode:
| Commandline Tool | Replaces the complete Editor GUI, direct access to libardour (no GUI) from the
commandline. Be aware that the vast majority of complex functionality is provided by the Editor UI. |
|---|
Managing Scripts
Ardour searches for Lua scripts in the scripts folder in $ARDOUR_DATA_PATH,
Apart from scripts included directly with Ardour, this includes
| GNU/Linux | $HOME/.config/ardour8/scripts |
|---|---|
| Mac OS X | $HOME/Library/Preferences/Ardour8/scripts |
| Windows | %localappdata%\ardour8\scripts |
Files must end with .lua file extension.
Scripts are managed via the GUI
| Editor Action Scripts | Menu → Edit → Scripted Actions → Manage ; or alternatively right-click on an action-script button top-right in the toolbar |
|---|---|
| Editor Hooks/Callbacks | Menu → Edit → Scripted Actions → Manage |
| Session Scripts | Menu → Session → Scripting → Add/Remove Script |
| DSP Scripts | Are added like other plugins to a mixer-strip's processor box |
| Script Console | Menu → Window → Scripting |
Script Layout
- Every script must include an
ardourdescriptor table. Required fields are "Name" and "Type". - A script must provide a Factory method: A function with optional instantiation parameters which returns the actual script.
- [optional]: list of parameters for the "factory".
- in case of DSP scripts, an optional list of automatable parameters and possible audio/midi port configurations, and a
dsp_runfunction, more on that later.
A minimal example script looks like:
	ardour {
	  ["type"]    = "EditorAction",
	  name        = "Rewind",
	}

	function factory (unused_params)
	  return function ()
	   Session:goto_start()  -- rewind the transport
	  end
	end
The common part for all scripts is the "Descriptor". It's a Lua function which returns a table (key/values) with the following keys (the keys are case-sensitive):
| type [required] | one of "DSP", "Session", "EditorHook",
"EditorAction" (the type is not case-sensitive) |
|---|---|
| name [required] | Name/Title of the script |
| author | Your Name |
| license | The license of the script (e.g. "GPL" or "MIT") |
| description | A longer text explaining to the user what the script does |
Scripts that come with Ardour (currently mostly examples) can be found in the Source Tree.
Action Scripts
Action scripts are the simplest form. An anonymous Lua function is called whenever the action is triggered. A simple action script is shown above.
There are 10 action script slots available, each of which is a standard GUI action available from the menu and hence can be bound to a keyboard shortcut.
Session Scripts
Session scripts similar to Actions Scripts, except the anonymous function is called periodically every process cycle. The function receives a single parameter - the number of audio samples which are processed in the given cycle
ardour {
  ["type"]    = "session",
  name        = "Example Session Script",
  description = [[
  An Example Ardour Session Script.
  This example stops the transport after rolling for a specific time.]]
}


-- instantiation options, these are passed to the "factory" method below
function sess_params ()
  return
  {
    ["print"]  = { title = "Debug Print (yes/no)", default = "no", optional = true },
    ["time"] = { title = "Timeout (sec)", default = "90", optional = false },
  }
end

function factory (params)
  return function (n_samples)
    local p = params["print"] or "no"
    local timeout = params["time"] or 90
    a = a or 0
    if p ~= "no" then print (a, n_samples, Session:frame_rate (), Session:transport_rolling ()) end -- debug output (not rt safe)
    if (not Session:transport_rolling()) then
      a = 0
      return
    end
    a = a + n_samples
    if (a > timeout * Session:frame_rate()) then
      Session:request_transport_speed (0.0, true, ARDOUR.TransportRequestSource.TRS_UI)
    end
  end
end
Action Hooks
Action hook scripts must define an additional function which returns a Set of Signal that which trigger the callback (documenting available slots and their parameters remains to be done).
ardour {
  ["type"]    = "EditorHook",
  name        = "Hook Example",
  description = "Rewind On Solo Change, Write a file when regions are moved.",
}

function signals ()
  s = LuaSignal.Set()
  s:add (
    {
      [LuaSignal.SoloActive] = true,
      [LuaSignal.RegionPropertyChanged] = true
    }
  )
  return s
end

function factory (params)
  return function (signal, ref, ...)
    -- print (signal, ref, ...)

    if (signal == LuaSignal.SoloActive) then
      Session:goto_start()
    end

    if (signal == LuaSignal.RegionPropertyChanged) then
      obj,pch = ...
      file = io.open ("/tmp/test" ,"a")
      io.output (file
      io.write (string.format ("Region: '%s' pos-changed: %s, length-changed: %s\n",
        obj:name (),
        tostring (pch:containsFramePos (ARDOUR.Properties.Start)),
        tostring (pch:containsFramePos (ARDOUR.Properties.Length))
        ))
      io.close (file)
    end
  end
end
DSP Scripts
See the scripts folder for examples for now.
Some notes for further doc:
- required function:
dsp_ioconfig (): return a list of possible audio I/O configurations - follows Audio Unit conventions. - optional function:
dsp_dsp_midi_input (): return true if the plugin can receive midi input - optional function:
dsp_params (): return a table of possible parameters (automatable) - optional function:
dsp_init (samplerate): called when instantiation the plugin with given samplerate. - optional function:
dsp_configure (in, out): called after instantiation with configured plugin i/o. - required function:
dsp_run (ins, outs, n_samples)ORdsp_runmap (bufs, in_map, out_map, n_samples, offset): DSP process callback. The former is a convenient abstraction that passes mapped buffers (as table). The latter is a direct pass-through matching Ardour's internal::connect_and_run()API, which requires the caller to map and offset raw buffers. - plugin parameters are handled via the global variable
CtrlPorts. - midi data is passed via the global variable
mididatawhich is valid duringdsp_runonly. (dsp_runmap requires the script to pass raw data from the buffers according to in_map) - The script has access to the current session via the global variable Session, but access to the session methods are limited to realtime safe functions
Accessing Ardour Objects
The top most object in Ardour is the ARDOUR::Session.
Fundamentally, a Session is just a collection of other things:
Routes (tracks, busses), Sources (Audio/Midi), Regions, Playlists, Locations, Tempo map, Undo/Redo history, Ports, Transport
state and controls, etc.
Every Lua interpreter can access it via the global variable Session.
GUI context interpreters also have an additional object in the global environment: The Ardour Editor. The Editor
provides access to high level functionality which is otherwise triggered via GUI interaction such as undo/redo, open/close
windows, select objects, drag/move regions. It also holds the current UI state: snap-mode, zoom-range, etc.
The Editor also provides complex operations such as "import audio" which under the hood, creates a new Track, adds a new
Source Objects (for every channel) with optional resampling, creates both playlist and regions and loads the region onto the
Track all the while displaying a progress information to the user.
Documenting the bound C++ methods and class hierarchy is somewhere on the ToDo list. Meanwhile luabindings.cc is the best we can offer.
Concepts
- There are no bound constructors: Lua asks Ardour to create objects (e.g. add a new track), then receives a reference to the object to modify it.
- Scripts, once loaded, are saved with the Session (no reference to external files). This provides for portable Sessions.
- Lua Scripts are never executed directly. They provide a "factory" method which can have optional instantiation parameters, which returns a Lua closure.
- No external Lua modules/libraries can be used, scripts need to be self contained (portable across different systems (libs written in Lua can be used, and important c-libs/functions can be included with Ardour if needed).
Ardour is a highly multithreaded application and interaction between the different threads, particularly real-time threads, needs to to be done with care. This part has been abstracted away by providing separate Lua interpreters in different contexts and restricting available interaction:
- Editor Actions run in a single instance interpreter in the GUI thread.
- Editor Hooks connect to libardour signals. Every Callback uses a dedicated Lua interpreter which is in the GUI thread context.
- All Session scripts run in a single instance in the main real-time thread (audio callback)
- DSP scripts have a separate instance per script and run in one of the DSP threads.
The available interfaces differ between contexts. For example, it is not possible to create new tracks or import audio from real-time context; while it is not possible to modify audio buffers from the GUI thread.
Current State
Fully functional, yet still in a prototyping stage:- The GUI to add/configure scripts is rather minimalistic.
- The interfaces may change (particularly DSP, and Session script
run(). - Further planned work includes:
- Built-in Script editor (customize/modify Scripts in-place)
- convenience methods (wrap more complex Ardour actions into a library). e.g set plugin parameters, write automation lists from a Lua table
- Add some useful scripts and more examples
- Documentation (Ardour API), also usable for tab-expansion, syntax highlighting
- bindings for GUI Widgets (plugin UIs, message boxes, etc)
Examples
-Please see the example scripts included with the source-code. All the files that start with a leading underscore are not included with releases, but are intended as example snippets.
Commandline Session
The standalone tool luasession allows one to access an Ardour session directly from the commandline.
It can also be used as #! interpreter for scripted sessions.
Interaction is limited by the fact that most actions in Ardour are provided by the Editor GUI.
luasession provides only two special functions load_session and close_session and
exposes the AudioEngine instance as global variable.
for i,_ in AudioEngine:available_backends():iter() do print (i.name) end

-- pick one --
if false then
	backend = AudioEngine:set_backend("JACK", "", "")
elseif false then

	backend = AudioEngine:set_backend("ALSA", "", "")
	for i,_ in backend:enumerate_devices():iter() do print (i.name) end

	backend:set_device_name("HDA Intel PCH")
	backend:set_peridod_size(3)
	backend:set_buffer_size(1024)

else
	AudioEngine:set_backend("None (Dummy)", "", "")
end

print (AudioEngine:current_backend_name())

print (backend:buffer_size())
print (AudioEngine:get_last_backend_error())

s = load_session ("/home/rgareus/Documents/ArdourSessions/lua2/", "lua2")

assert (s)

s:request_roll (ARDOUR.TransportRequestSource.TRS_UI)
print (s:transport_rolling())

s:goto_start()

ARDOUR.LuaAPI.usleep (10 * 1000000) -- 10 seconds

close_session()
Lua Bindings Class Reference
This documentation is far from complete may be inaccurate and subject to change.
Overview
The top-level entry point are ARDOUR:Session and ArdourUI:Editor. Most other Classes are used indirectly starting with a Session function. e.g. Session:get_routes().
A few classes are dedicated to certain script types, e.g. Lua DSP processors have exclusive access to ARDOUR.DSP and ARDOUR:ChanMapping. Action Hooks Scripts to LuaSignal:Set etc.
Detailed documentation (parameter names, method description) is not yet available. Please stay tuned.
Short introduction to Ardour classes
Ardour's structure is object oriented. The main object is the Session. A Session contains Audio Tracks, Midi Tracks and Busses. Audio and Midi tracks are derived from a more general "Track" Object, which in turn is derived from a "Route" (aka Bus). (We say "An Audio Track is-a Track is-a Route"). Tracks contain specifics. For Example a track has-a diskstream (for file i/o).
Operations are performed on objects. One gets a reference to an object and then calls a method.
e.g obj = Session:route_by_name("Audio") obj:set_name("Guitar").
Lua automatically follows C++ class inheritance. e.g one can directly call all SessionObject and Route methods on Track object. However lua does not automatically promote objects. A Route object which just happens to be a Track needs to be explicitly cast to a Track. Methods for casts are provided with each class. Note that the cast may fail and return a nil reference.
Likewise multiple inheritance is a non-trivial issue in Lua. To avoid performance penalties involved with lookups, explicit casts are required in this case. One example is ARDOUR:SessionObject which is-a StatefulDestructible which inherits from both Stateful and Destructible.
Object lifetimes are managed by the Session. Most Objects cannot be directly created, but one asks the Session to create or destroy them. This is mainly due to realtime constrains: you cannot simply remove a track that is currently processing audio. There are various factory methods for object creation or removal.
Pass by Reference
Since Lua functions are closures, C++ methods that pass arguments by reference cannot be used as-is. All parameters passed to a C++ method which uses references are returned as Lua Table. If the C++ method also returns a value it is prefixed. Two parameters are returned: the value and a Lua Table holding the parameters.
void set_ref (int& var, long& val)
{
	printf ("%d %ld\n", var, val);
	var = 5;
	val = 7;
}
local var = 0; ref = set_ref (var, 2); -- output from C++ printf()0 2-- var is still 0 here print (ref[1], ref[2])5 7
int set_ref2 (int &var, std::string unused)
{
	var = 5;
	return 3;
}
rv, ref = set_ref2 (0, "hello");
print (rv, ref[1], ref[2])
3 5 hello
Pointer Classes
Libardour makes extensive use of reference counted std::shared_ptr to manage lifetimes.
The Lua bindings provide a complete abstraction of this. There are no pointers in Lua.
For example a ARDOUR:Route is a pointer in C++, but Lua functions operate on it like it was a class instance.
shared_ptr are reference counted. Once assigned to a Lua variable, the C++ object will be kept and remains valid.
It is good practice to assign references to Lua local variables or reset the variable to nil to drop the ref.
All pointer classes have a isnil () method. This is for two cases:
Construction may fail. e.g. ARDOUR.LuaAPI.newplugin()
may not be able to find the given plugin and hence cannot create an object.
The second case if for std::weak_ptr. As opposed to std::shared_ptr weak-pointers are not reference counted.
The object may vanish at any time.
If Lua code calls a method on a nil object, the interpreter will raise an exception and the script will not continue.
This is not unlike a = nil a:test() which results in en error "attempt to index a nil value".
From the Lua side of things there is no distinction between weak and shared pointers. They behave identically. Below they're indicated in orange and have an arrow to indicate the pointer type. Pointer Classes cannot be created in Lua scripts. It always requires a call to C++ to create the Object and obtain a reference to it.
Class Documentation
ℕ ARDOUR
| Methods | ||
|---|---|---|
| RCConfiguration | config () | |
| int | inflate_demo_session (std::string, std::string) | |
| std::string | user_cache_directory (int) | |
Returns the path to the directory used to store user specific caches (e.g. plugin indices, blacklist/whitelist) it defaults to XDG_CACHE_HOME | ||
| std::string | user_config_directory (int) | |
user_config_directory() exists IF version was negative. Returns the path to the directory used to store user specific configuration files for the given version of the program. If version is negative, the build-time string PROGRAM_VERSION will be used to determine the version number. | ||
↠ ARDOUR:Amp
C‡: std::shared_ptr< ARDOUR::Amp >, std::weak_ptr< ARDOUR::Amp >
is-a: ARDOUR:Processor
| Methods | ||
|---|---|---|
| float | apply_gain (AudioBuffer&, long, long, float, float, long) | |
| GainControl | gain_control () | |
| bool | isnil () | |
Inherited from ARDOUR:Processor
| Methods | ||
|---|---|---|
| void | activate () | |
| bool | active () | |
| long | capture_offset () | |
| void | deactivate () | |
| std::string | display_name () | |
| bool | display_to_user () | |
| long | input_latency () | |
| ChanCount | input_streams () | |
| long | output_latency () | |
| ChanCount | output_streams () | |
| long | playback_offset () | |
| long | signal_latency () | |
| Cast | ||
| Amp | to_amp () | |
| Automatable | to_automatable () | |
| DelayLine | to_delayline () | |
| DiskIOProcessor | to_diskioprocessor () | |
| DiskReader | to_diskreader () | |
| DiskWriter | to_diskwriter () | |
| PluginInsert | to_insert () | |
| InternalSend | to_internalsend () | |
| IOProcessor | to_ioprocessor () | |
| Latent | to_latent () | |
| PeakMeter | to_meter () | |
| MonitorProcessor | to_monitorprocessor () | |
| PeakMeter | to_peakmeter () | |
| PluginInsert | to_plugininsert () | |
| PolarityProcessor | to_polarityprocessor () | |
| Send | to_send () | |
| SideChain | to_sidechain () | |
| SurroundSend | to_surroundsend () | |
| UnknownProcessor | to_unknownprocessor () | |
Inherited from ARDOUR:SessionObjectPtr
| Methods | ||
|---|---|---|
| std::string | name () | |
| Cast | ||
| Stateful | to_stateful () | |
| StatefulDestructible | to_statefuldestructible () | |
∁ ARDOUR:AnyTime
C‡: ARDOUR::AnyTime
| Constructor | ||
|---|---|---|
| ℂ | ARDOUR.AnyTime (std::string) | |
| Methods | ||
| bool | not_zero () | |
| std::string | str () | |
↠ ARDOUR:AsyncMIDIPort
C‡: std::shared_ptr< ARDOUR::AsyncMIDIPort >, std::weak_ptr< ARDOUR::AsyncMIDIPort >
is-a: ARDOUR:MidiPort
| Methods | ||
|---|---|---|
| bool | isnil () | |
| int | write (unsigned char*, unsigned long, unsigned int) | |
Inherited from ARDOUR:MidiPort
| Methods | ||
|---|---|---|
| MidiBuffer | get_midi_buffer (unsigned int) | |
| bool | input_active () | |
| void | set_input_active (bool) | |
| Cast | ||
| AsyncMIDIPort | to_asyncmidiport () | |
Inherited from ARDOUR:Port
| Methods | ||
|---|---|---|
| int | connect (std::string) | |
| bool | connected () | |
Returns true if this port is connected to anything | ||
| bool | connected_to (std::string) | |
Returns true if this port is connected to o, otherwise false. | ||
| int | disconnect (std::string) | |
| int | disconnect_all () | |
| PortFlags | flags () | |
Returns flags | ||
| LuaTable(...) | get_connected_latency_range (LatencyRange&, bool) | |
| std::string | name () | |
Returns Port short name | ||
| bool | physically_connected () | |
| std::string | pretty_name (bool) | |
Returns Port human readable name | ||
| LatencyRange | private_latency_range (bool) | |
| LatencyRange | public_latency_range (bool) | |
| bool | receives_input () | |
Returns true if this Port receives input, otherwise false | ||
| bool | sends_output () | |
Returns true if this Port sends output, otherwise false | ||
| Cast | ||
| AsyncMIDIPort | to_asyncmidiport () | |
| AudioPort | to_audioport () | |
| MidiPort | to_midiport () | |
↠ ARDOUR:AudioBackend
C‡: std::shared_ptr< ARDOUR::AudioBackend >, std::weak_ptr< ARDOUR::AudioBackend >
AudioBackend is an high-level abstraction for interacting with the operating system's audio and midi I/O.
| Methods | ||
|---|---|---|
| unsigned int | buffer_size () | |
| std::string | device_name () | |
| std::string | driver_name () | |
override this if this implementation returns true from requires_driver_selection() | ||
| float | dsp_load () | |
return the fraction of the time represented by the current buffer size that is being used for each buffer process cycle, as a value from 0.0 to 1.0 E.g. if the buffer size represents 5msec and current processing takes 1msec, the returned value should be 0.2. Implementations can feel free to smooth the values returned over time (e.g. high pass filtering, or its equivalent). | ||
| DeviceStatusVector | enumerate_devices () | |
Returns a collection of DeviceStatuses identifying devices discovered by this backend since the start of the process. Any of the names in each DeviceStatus may be used to identify a device in other calls to the backend, though any of them may become invalid at any time. | ||
| StringVector | enumerate_drivers () | |
If the return value of requires_driver_selection() is true, then this function can return the list of known driver names. If the return value of requires_driver_selection() is false, then this function should not be called. If it is called its return value is an empty vector of strings. | ||
| DeviceStatusVector | enumerate_input_devices () | |
Returns a collection of DeviceStatuses identifying input devices discovered by this backend since the start of the process. Any of the names in each DeviceStatus may be used to identify a device in other calls to the backend, though any of them may become invalid at any time. | ||
| DeviceStatusVector | enumerate_output_devices () | |
Returns a collection of DeviceStatuses identifying output devices discovered by this backend since the start of the process. Any of the names in each DeviceStatus may be used to identify a device in other calls to the backend, though any of them may become invalid at any time. | ||
| AudioBackendInfo | info () | |
Return the AudioBackendInfo object from which this backend was constructed. | ||
| std::string | input_device_name () | |
| bool | isnil () | |
| std::string | output_device_name () | |
| unsigned int | period_size () | |
| float | sample_rate () | |
| int | set_buffer_size (unsigned int) | |
Set the buffer size to be used. The device is assumed to use a double buffering scheme, so that one buffer's worth of data can be processed by hardware while software works on the other buffer. All known suitable audio APIs support this model (though ALSA allows for alternate numbers of buffers, and CoreAudio doesn't directly expose the concept). | ||
| int | set_device_name (std::string) | |
Set the name of the device to be used | ||
| int | set_driver (std::string) | |
Returns zero if the backend can successfully use drivername as the driver, non-zero otherwise. Should not be used unless the backend returns true from requires_driver_selection() | ||
| int | set_input_device_name (std::string) | |
Set the name of the input device to be used if using separate input/output devices. use_separate_input_and_output_devices() | ||
| int | set_output_device_name (std::string) | |
Set the name of the output device to be used if using separate input/output devices. use_separate_input_and_output_devices() | ||
| int | set_peridod_size (unsigned int) | |
Set the period size to be used. must be called before starting the backend. | ||
| int | set_sample_rate (float) | |
Set the sample rate to be used | ||
| bool | use_separate_input_and_output_devices () | |
An optional alternate interface for backends to provide a facility to select separate input and output devices. If a backend returns true then enumerate_input_devices() and enumerate_output_devices() will be used instead of enumerate_devices() to enumerate devices. Similarly set_input/output_device_name() should be used to set devices instead of set_device_name(). | ||
∁ ARDOUR:AudioBackendInfo
C‡: ARDOUR::AudioBackendInfo
| Data Members | ||
|---|---|---|
| char* | name | |
∁ ARDOUR:AudioBuffer
C‡: ARDOUR::AudioBuffer
Buffer containing audio data.
| Methods | ||
|---|---|---|
| void | apply_gain (float, long) | |
Apply a fixed gain factor to the audio buffer
| ||
| bool | check_silence (unsigned int, unsigned int&) | |
Check buffer for silence
Returns true if all samples are zero | ||
| FloatArray | data (long) | |
| void | read_from (FloatArray, long, long, long) | |
| void | silence (long, long) | |
silence buffer
| ||
∁ ARDOUR:AudioEngine
C‡: ARDOUR::AudioEngine
is-a: ARDOUR:PortManager
| Methods | ||
|---|---|---|
| BackendVector | available_backends () | |
| std::string | current_backend_name () | |
| bool | freewheeling () | |
| float | get_dsp_load () | |
| std::string | get_last_backend_error () | |
| long | processed_samples () | |
| bool | running () | |
| AudioBackend | set_backend (std::string, std::string, std::string) | |
| int | set_buffer_size (unsigned int) | |
| int | set_device_name (std::string) | |
| int | set_sample_rate (float) | |
| bool | setup_required () | |
| int | start (bool) | |
| int | stop (bool) | |
Inherited from ARDOUR:PortManager
| Methods | ||
|---|---|---|
| int | connect (std::string, std::string) | |
| bool | connected (std::string) | |
| int | disconnect (std::string, std::string) | |
| int | disconnect_port (Port) | |
| LuaTable(int, ...) | get_backend_ports (std::string, DataType, PortFlags, StringVector&) | |
| LuaTable(int, ...) | get_connections (std::string, StringVector&, bool) | |
| void | get_physical_inputs (DataType, StringVector&, MidiPortFlags, MidiPortFlags) | |
| void | get_physical_outputs (DataType, StringVector&, MidiPortFlags, MidiPortFlags) | |
| Port | get_port_by_name (std::string) | |
Returns Corresponding Port or 0. | ||
| LuaTable(int, ...) | get_ports (DataType, PortList&) | |
| std::string | get_pretty_name_by_name (std::string) | |
| ChanCount | n_physical_inputs () | |
| ChanCount | n_physical_outputs () | |
| bool | physically_connected (std::string) | |
| PortEngine | port_engine () | |
| bool | port_is_physical (std::string) | |
| void | reset_input_meters () | |
↠ ARDOUR:AudioPlaylist
C‡: std::shared_ptr< ARDOUR::AudioPlaylist >, std::weak_ptr< ARDOUR::AudioPlaylist >
is-a: ARDOUR:Playlist
Base class for objects with saveable and undoable state
| Methods | ||
|---|---|---|
| bool | isnil () | |
| timecnt_t | read (FloatArray, FloatArray, FloatArray, timepos_t, timecnt_t, unsigned int) | |
Inherited from ARDOUR:Playlist
| Methods | ||
|---|---|---|
| void | add_region (Region, timepos_t, float, bool) | |
| Region | combine (RegionList, Track) | |
| unsigned int | count_regions_at (timepos_t) | |
| Playlist | cut (TimelineRangeList&) | |
| DataType | data_type () | |
| void | duplicate (Region, timepos_t&, timecnt_t, float) | |
| void | duplicate_range (TimelineRange&, float) | |
| void | duplicate_until (Region, timepos_t&, timecnt_t, timepos_t) | |
| bool | empty () | |
| Region | find_next_region (timepos_t, RegionPoint, int) | |
| timepos_t | find_next_region_boundary (timepos_t, int) | |
| long | find_next_transient (timepos_t, int) | |
| ID | get_orig_track_id () | |
| bool | hidden () | |
| void | lower_region (Region) | |
| void | lower_region_to_bottom (Region) | |
| unsigned int | n_regions () | |
| void | raise_region (Region) | |
| void | raise_region_to_top (Region) | |
| Region | region_by_id (ID) | |
| RegionListPtr | region_list () | |
| RegionListPtr | regions_at (timepos_t) | |
| RegionListPtr | regions_touched (timepos_t, timepos_t) | |
| RegionListPtr | regions_with_end_within (Range) | |
| RegionListPtr | regions_with_start_within (Range) | |
| void | remove_region (Region) | |
| bool | set_name (std::string) | |
| bool | shared () | |
| void | split_region (Region, timepos_t) | |
| Region | top_region_at (timepos_t) | |
| Region | top_unmuted_region_at (timepos_t) | |
| void | uncombine (Region) | |
| bool | used () | |
| Cast | ||
| AudioPlaylist | to_audioplaylist () | |
| MidiPlaylist | to_midiplaylist () | |
Inherited from ARDOUR:SessionObjectPtr
| Methods | ||
|---|---|---|
| std::string | name () | |
| Cast | ||
| Stateful | to_stateful () | |
| StatefulDestructible | to_statefuldestructible () | |
↠ ARDOUR:AudioPort
C‡: std::shared_ptr< ARDOUR::AudioPort >, std::weak_ptr< ARDOUR::AudioPort >
is-a: ARDOUR:Port
| Methods | ||
|---|---|---|
| bool | isnil () | |
Inherited from ARDOUR:Port
| Methods | ||
|---|---|---|
| int | connect (std::string) | |
| bool | connected () | |
Returns true if this port is connected to anything | ||
| bool | connected_to (std::string) | |
Returns true if this port is connected to o, otherwise false. | ||
| int | disconnect (std::string) | |
| int | disconnect_all () | |
| PortFlags | flags () | |
Returns flags | ||
| LuaTable(...) | get_connected_latency_range (LatencyRange&, bool) | |
| std::string | name () | |
Returns Port short name | ||
| bool | physically_connected () | |
| std::string | pretty_name (bool) | |
Returns Port human readable name | ||
| LatencyRange | private_latency_range (bool) | |
| LatencyRange | public_latency_range (bool) | |
| bool | receives_input () | |
Returns true if this Port receives input, otherwise false | ||
| bool | sends_output () | |
Returns true if this Port sends output, otherwise false | ||
| Cast | ||
| AsyncMIDIPort | to_asyncmidiport () | |
| AudioPort | to_audioport () | |
| MidiPort | to_midiport () | |
∁ ARDOUR:AudioPortMeters
C‡: std::map<std::string, ARDOUR::PortManager::DPM >
| Constructor | ||
|---|---|---|
| ℂ | ARDOUR.AudioPortMeters () | |
| Methods | ||
| LuaTable | add (std::string, ARDOUR::PortManager::DPM ) | |
| ... | at (--lua--) | |
| void | clear () | |
| unsigned long | count (std::string) | |
| bool | empty () | |
| LuaIter | iter () | |
| unsigned long | size () | |
| LuaTable | table () | |
↠ ARDOUR:AudioRegion
C‡: std::shared_ptr< ARDOUR::AudioRegion >, std::weak_ptr< ARDOUR::AudioRegion >
is-a: ARDOUR:Region
Base class for objects with saveable and undoable state
| Methods | ||
|---|---|---|
| AudioSource | audio_source (unsigned int) | |
| AutomationList | envelope () | |
| bool | envelope_active () | |
| bool | fade_before_fx () | |
| bool | fade_in_active () | |
| timepos_t | fade_in_length () | |
| bool | fade_out_active () | |
| timepos_t | fade_out_length () | |
| bool | isnil () | |
| double | maximum_amplitude (Progress) | |
Returns the maximum (linear) amplitude of the region, or a -ve number if the Progress object reports that the process was cancelled. | ||
| unsigned int | n_channels () | |
| double | rms (Progress) | |
Returns the maximum (rms) signal power of the region, or a -1 if the Progress object reports that the process was cancelled. | ||
| float | scale_amplitude () | |
| LuaTable(int, ...) | separate_by_channel (RegionVector&) | |
| void | set_envelope_active (bool) | |
| void | set_fade_before_fx (bool) | |
| void | set_fade_in_active (bool) | |
| void | set_fade_in_length (long) | |
| void | set_fade_in_shape (FadeShape) | |
| void | set_fade_out_active (bool) | |
| void | set_fade_out_length (long) | |
| void | set_fade_out_shape (FadeShape) | |
| void | set_scale_amplitude (float) | |
| Cast | ||
| Readable | to_readable () | |
Inherited from ARDOUR:Region
| Methods | ||
|---|---|---|
| bool | add_plugin (RegionFxPlugin, RegionFxPlugin) | |
| bool | at_natural_position () | |
| bool | automatic () | |
| bool | can_move () | |
| bool | captured () | |
| void | captured_xruns (XrunPositions&, bool) | |
| void | clear_sync_position () | |
| Control | control (Parameter, bool) | |
| bool | covers (timepos_t) | |
| void | cut_end (timepos_t) | |
| void | cut_front (timepos_t) | |
| DataType | data_type () | |
| bool | external () | |
| bool | has_transients () | |
| bool | hidden () | |
| bool | import () | |
| bool | is_compound () | |
| unsigned int | layer () | |
| timecnt_t | length () | |
| bool | load_plugin (PluginType, std::string) | |
| bool | locked () | |
| void | lower () | |
| void | lower_to_bottom () | |
| StringVector | master_source_names () | |
| SourceList | master_sources () | |
| void | move_start (timecnt_t) | |
| void | move_to_natural_position () | |
| bool | muted () | |
| RegionFxPlugin | nth_plugin (unsigned int) | |
| void | nudge_position (timecnt_t) | |
| bool | opaque () | |
| Playlist | playlist () | |
| timepos_t | position () | |
How the region parameters play together: POSITION: first sample of the region along the timeline START: first sample of the region within its source(s) LENGTH: number of samples the region represents | ||
| bool | position_locked () | |
| void | raise () | |
| void | raise_to_top () | |
| bool | remove_plugin (RegionFxPlugin, RegionFxPlugin) | |
| void | set_hidden (bool) | |
| void | set_initial_position (timepos_t) | |
| void | set_length (timecnt_t) | |
| void | set_locked (bool) | |
| void | set_muted (bool) | |
| bool | set_name (std::string) | |
Note: changing the name of a Region does not constitute an edit | ||
| void | set_opaque (bool) | |
| void | set_position (timepos_t) | |
| void | set_position_locked (bool) | |
| void | set_start (timepos_t) | |
| void | set_sync_position (timepos_t) | |
| void | set_video_locked (bool) | |
| float | shift () | |
| Source | source (unsigned int) | |
| timepos_t | start () | |
| float | stretch () | |
| bool | sync_marked () | |
| LuaTable(timecnt_t, ...) | sync_offset (int&) | |
| timepos_t | sync_position () | |
Returns Sync position in session time | ||
| Int64List | transients () | |
| void | trim_end (timepos_t) | |
| void | trim_front (timepos_t) | |
| void | trim_to (timepos_t, timecnt_t) | |
| bool | video_locked () | |
| bool | whole_file () | |
| Cast | ||
| AudioRegion | to_audioregion () | |
| MidiRegion | to_midiregion () | |
Inherited from ARDOUR:SessionObjectPtr
| Methods | ||
|---|---|---|
| std::string | name () | |
| Cast | ||
| Stateful | to_stateful () | |
| StatefulDestructible | to_statefuldestructible () | |
↠ ARDOUR:AudioRom
C‡: std::shared_ptr< ARDOUR::AudioRom >, std::weak_ptr< ARDOUR::AudioRom >
is-a: ARDOUR:Readable
| Methods | ||
|---|---|---|
| bool | isnil () | |
| AudioRom | new_rom (FloatArray, unsigned long) | |
Inherited from ARDOUR:Readable
| Methods | ||
|---|---|---|
| ReadableList | load (Session&, std::string) | |
| unsigned int | n_channels () | |
| long | read (FloatArray, long, long, int) | |
| long | readable_length () | |
↠ ARDOUR:AudioSource
C‡: std::shared_ptr< ARDOUR::AudioSource >, std::weak_ptr< ARDOUR::AudioSource >
is-a: ARDOUR:Source
Base class for objects with saveable and undoable state
| Methods | ||
|---|---|---|
| std::string | captured_for () | |
| bool | empty () | |
| bool | isnil () | |
| bool | isnil () | |
| timepos_t | length () | |
| unsigned int | n_channels () | |
| unsigned int | n_channels () | |
| long | read (FloatArray, long, long, int) | |
| long | readable_length () | |
| long | readable_length () | |
| float | sample_rate () | |
| Cast | ||
| Readable | to_readable () | |
Inherited from ARDOUR:Source
| Methods | ||
|---|---|---|
| std::string | ancestor_name () | |
| bool | can_be_analysed () | |
| XrunPositions | captured_xruns () | |
| bool | has_been_analysed () | |
| timepos_t | natural_position () | |
| timepos_t | timeline_position () | |
| long | timestamp () | |
| int | use_count () | |
| bool | used () | |
| bool | writable () | |
| Cast | ||
| AudioSource | to_audiosource () | |
| FileSource | to_filesource () | |
| MidiSource | to_midisource () | |
Inherited from ARDOUR:SessionObjectPtr
| Methods | ||
|---|---|---|
| std::string | name () | |
| Cast | ||
| Stateful | to_stateful () | |
| StatefulDestructible | to_statefuldestructible () | |
↠ ARDOUR:AudioTrack
C‡: std::shared_ptr< ARDOUR::AudioTrack >, std::weak_ptr< ARDOUR::AudioTrack >
is-a: ARDOUR:Track
Base class for objects with saveable and undoable state
| Methods | ||
|---|---|---|
| bool | isnil () | |
Inherited from ARDOUR:Track
| Constructor | ||
|---|---|---|
| ℵ | ARDOUR.Track () | |
| Methods | ||
| Region | bounce (InterThreadInfo&, std::string) | |
| Region | bounce_range (long, long, InterThreadInfo&, Processor, bool, std::string, bool) | |
| bool | bounceable (Processor, bool) | |
Test if the track can be bounced with the given settings. If sends/inserts/returns are present in the signal path or the given track has no audio outputs bouncing is not possible.
Returns true if the track can be bounced, or false otherwise. | ||
| bool | can_record () | |
| int | find_and_use_playlist (DataType, ID) | |
| Playlist | playlist () | |
| bool | set_name (std::string) | |
| int | use_copy_playlist () | |
| int | use_new_playlist (DataType) | |
| int | use_playlist (DataType, Playlist, bool) | |
| Cast | ||
| AudioTrack | to_audio_track () | |
| MidiTrack | to_midi_track () | |
Inherited from ARDOUR:Route
| Methods | ||
|---|---|---|
| bool | active () | |
| int | add_aux_send (Route, Processor) | |
Add an aux send to a route.
| ||
| int | add_foldback_send (Route, bool) | |
| int | add_processor_by_index (Processor, int, ProcessorStreams, bool) | |
| bool | add_sidechain (Processor) | |
| Amp | amp () | |
| void | clear_stripables () | |
| std::string | comment () | |
| bool | customize_plugin_insert (Processor, unsigned int, ChanCount, ChanCount) | |
| DataType | data_type () | |
| Stripable | first_selected_stripable () | |
| IO | input () | |
| Delivery | main_outs () | |
| MonitorControl | monitoring_control () | |
| MonitorState | monitoring_state () | |
| bool | muted () | |
| ChanCount | n_inputs () | |
| ChanCount | n_outputs () | |
| Processor | nth_plugin (unsigned int) | |
| Processor | nth_processor (unsigned int) | |
| Processor | nth_send (unsigned int) | |
| IO | output () | |
| PannerShell | panner_shell () | |
| PeakMeter | peak_meter () | |
| long | playback_latency (bool) | |
| int | remove_processor (Processor, ProcessorStreams, bool) | |
| int | remove_processors (ProcessorList, ProcessorStreams) | |
| bool | remove_sidechain (Processor) | |
| int | reorder_processors (ProcessorList, ProcessorStreams) | |
| int | replace_processor (Processor, Processor, ProcessorStreams) | |
| bool | reset_plugin_insert (Processor) | |
reset plugin-insert configuration to default, disable customizations. This is equivalent to calling customize_plugin_insert (proc, 0, unused)
Returns true if successful | ||
| int | save_as_template (std::string, std::string, std::string) | |
| void | select_next_stripable (bool, bool) | |
| void | select_prev_stripable (bool, bool) | |
| void | set_active (bool, void*) | |
| void | set_comment (std::string, void*) | |
| void | set_meter_point (MeterPoint) | |
| bool | set_strict_io (bool) | |
| long | signal_latency () | |
| bool | soloed () | |
| bool | strict_io () | |
| SurroundReturn | surround_return () | |
| SurroundSend | surround_send () | |
| Processor | the_instrument () | |
Return the first processor that accepts has at least one MIDI input and at least one audio output. In the vast majority of cases, this will be "the instrument". This does not preclude other MIDI->audio processors later in the processing chain, but that would be a special case not covered by this utility function. | ||
| Amp | trim () | |
| Cast | ||
| Track | to_track () | |
Inherited from ARDOUR:Stripable
| Methods | ||
|---|---|---|
| unsigned int | eq_band_cnt () | |
| std::string | eq_band_name (unsigned int) | |
| GainControl | gain_control () | |
| bool | is_auditioner () | |
| bool | is_hidden () | |
| bool | is_master () | |
| bool | is_monitor () | |
| bool | is_private_route () | |
| bool | is_selected () | |
| bool | is_surround_master () | |
| AutomationControl | mapped_control (WellKnownCtrl, unsigned int) | |
| ReadOnlyControl | mapped_output (WellKnownData) | |
| AutomationControl | master_send_enable_controllable () | |
| MonitorProcessor | monitor_control () | |
| MuteControl | mute_control () | |
| AutomationControl | pan_azimuth_control () | |
| AutomationControl | pan_elevation_control () | |
| AutomationControl | pan_frontback_control () | |
| AutomationControl | pan_lfe_control () | |
| AutomationControl | pan_width_control () | |
| PhaseControl | phase_control () | |
| PresentationInfo | presentation_info_ptr () | |
| AutomationControl | rec_enable_control () | |
| AutomationControl | rec_safe_control () | |
| AutomationControl | send_enable_controllable (unsigned int) | |
| AutomationControl | send_level_controllable (unsigned int, bool) | |
| std::string | send_name (unsigned int) | |
| AutomationControl | send_pan_azimuth_controllable (unsigned int) | |
| AutomationControl | send_pan_azimuth_enable_controllable (unsigned int) | |
| void | set_presentation_order (unsigned int) | |
| bool | slaved () | |
| bool | slaved_to (VCA) | |
| SoloControl | solo_control () | |
| SoloIsolateControl | solo_isolate_control () | |
| SoloSafeControl | solo_safe_control () | |
| GainControl | trim_control () | |
| Cast | ||
| Automatable | to_automatable () | |
| Route | to_route () | |
| Slavable | to_slavable () | |
| VCA | to_vca () | |
Inherited from ARDOUR:SessionObjectPtr
| Methods | ||
|---|---|---|
| std::string | name () | |
| Cast | ||
| Stateful | to_stateful () | |
| StatefulDestructible | to_statefuldestructible () | |
Inherited from PBD:Stateful
| Methods | ||
|---|---|---|
| void | clear_changes () | |
Forget about any changes to this object's properties | ||
| ID | id () | |
| OwnedPropertyList | properties () | |
∁ ARDOUR:AudioTrackList
C‡: std::list<std::shared_ptr<ARDOUR::AudioTrack> >
| Constructor | ||
|---|---|---|
| ℂ | ARDOUR.AudioTrackList () | |
| Methods | ||
| LuaTable | add (LuaTable {AudioTrack}) | |
| AudioTrack | back () | |
| void | clear () | |
| bool | empty () | |
| AudioTrack | front () | |
| LuaIter | iter () | |
| void | push_back (AudioTrack) | |
| void | reverse () | |
| unsigned long | size () | |
| LuaTable | table () | |
| void | unique () | |
↠ ARDOUR:Automatable
C‡: std::shared_ptr< ARDOUR::Automatable >, std::weak_ptr< ARDOUR::Automatable >
is-a: Evoral:ControlSet
| Methods | ||
|---|---|---|
| ParameterList | all_automatable_params () | |
API for Lua binding | ||
| AutomationControl | automation_control (Parameter, bool) | |
| bool | isnil () | |
| Cast | ||
| Slavable | to_slavable () | |
↠ ARDOUR:AutomatableSequence
C‡: std::shared_ptr< ARDOUR::AutomatableSequence<Temporal::Beats> >, std::weak_ptr< ARDOUR::AutomatableSequence<Temporal::Beats> >
is-a: ARDOUR:Automatable
| Methods | ||
|---|---|---|
| bool | isnil () | |
| Cast | ||
| Sequence | to_sequence () | |
Inherited from ARDOUR:Automatable
| Methods | ||
|---|---|---|
| ParameterList | all_automatable_params () | |
API for Lua binding | ||
| AutomationControl | automation_control (Parameter, bool) | |
| Cast | ||
| Slavable | to_slavable () | |
↠ ARDOUR:AutomationControl
C‡: std::shared_ptr< ARDOUR::AutomationControl >, std::weak_ptr< ARDOUR::AutomationControl >
is-a: PBD:Controllable
A PBD::Controllable with associated automation data (AutomationList)
| Methods | ||
|---|---|---|
| AutomationList | alist () | |
| AutoState | automation_state () | |
| ParameterDescriptor | desc () | |
| double | get_value () | |
Get `internal' value Returns raw value as used for the plugin/processor control port | ||
| bool | isnil () | |
| double | lower () | |
| double | normal () | |
| void | set_automation_state (AutoState) | |
| void | set_value (double, GroupControlDisposition) | |
Set `internal' value All derived classes must implement this. Basic derived classes will ignore group_override but more sophisticated children, notably those that proxy the value setting logic via an object that is aware of group relationships between this control and others, will find it useful.
| ||
| void | start_touch (timepos_t) | |
| void | stop_touch (timepos_t) | |
| bool | toggled () | |
| double | upper () | |
| bool | writable () | |
| Cast | ||
| Control | to_ctrl () | |
| SlavableAutomationControl | to_slavable () | |
Inherited from PBD:Controllable
| Methods | ||
|---|---|---|
| void | dump_registry () | |
| std::string | name () | |
| ControllableSet | registered_controllables () | |
| Cast | ||
| AutomationControl | to_automationcontrol () | |
| MPGainControl | to_mpgain () | |
| MPToggleControl | to_mptoggle () | |
Inherited from PBD:StatefulPtr
| Methods | ||
|---|---|---|
| void | clear_changes () | |
Forget about any changes to this object's properties | ||
| ID | id () | |
| OwnedPropertyList | properties () | |
↠ ARDOUR:AutomationList
C‡: std::shared_ptr< ARDOUR::AutomationList >, std::weak_ptr< ARDOUR::AutomationList >
is-a: Evoral:ControlList
| Methods | ||
|---|---|---|
| XMLNode | get_state () | |
| bool | isnil () | |
| Command | memento_command (XMLNode, XMLNode) | |
| bool | touch_enabled () | |
| bool | touching () | |
| bool | writing () | |
| Cast | ||
| ControlList | list () | |
| Stateful | to_stateful () | |
| StatefulDestructible | to_statefuldestructible () | |
Inherited from Evoral:ControlList
| Methods | ||
|---|---|---|
| void | add (timepos_t, double, bool, bool) | |
| void | clear (timepos_t, timepos_t) | |
| void | clear_list () | |
| bool | editor_add (timepos_t, double, bool) | |
| double | eval (timepos_t) | |
| EventList | events () | |
Returns the list of events | ||
| bool | in_write_pass () | |
Returns true if transport is running and this list is in write mode | ||
| InterpolationStyle | interpolation () | |
query interpolation style of the automation data Returns Interpolation Style | ||
| LuaTable(double, ...) | rt_safe_eval (timepos_t, bool&) | |
| bool | set_interpolation (InterpolationStyle) | |
| unsigned long | size () | |
| void | thin (double) | |
Thin the number of events in this list. The thinning factor corresponds to the area of a triangle computed between three points in the list (time-difference * value-difference). If the area is large, it indicates significant non-linearity between the points. Time is measured in samples, value is usually normalized to 0..1. During automation recording we thin the recorded points using this value. If a point is sufficiently co-linear with its neighbours (as defined by the area of the triangle formed by three of them), we will not include it in the list. The larger the value, the more points are excluded, so this effectively measures the amount of thinning to be done.
| ||
| void | truncate_end (timepos_t) | |
| void | truncate_start (timecnt_t) | |
| Cast | ||
| AutomationList | to_automationlist () | |
∁ ARDOUR:AutomationTypeSet
C‡: std::set<ARDOUR::AutomationType >
| Constructor | ||
|---|---|---|
| ℂ | ARDOUR.AutomationTypeSet () | |
| Methods | ||
| void | clear () | |
| bool | empty () | |
| LuaIter | iter () | |
| unsigned long | size () | |
| LuaTable | table () | |
∁ ARDOUR:BackendVector
C‡: std::vector<ARDOUR::AudioBackendInfo const* >
| Constructor | ||
|---|---|---|
| ℂ | ARDOUR.BackendVector () | |
| Methods | ||
| AudioBackendInfo | at (unsigned long) | |
| bool | empty () | |
| LuaIter | iter () | |
| unsigned long | size () | |
| LuaTable | table () | |
∁ ARDOUR:BufferSet
C‡: ARDOUR::BufferSet
A set of buffers of various types.
These are mainly accessed from Session and passed around as scratch buffers (eg as parameters to run() methods) to do in-place signal processing.
There are two types of counts associated with a BufferSet - available, and the 'use count'. Available is the actual number of allocated buffers (and so is the maximum acceptable value for the use counts).
The use counts are how things determine the form of their input and inform others the form of their output (eg what they did to the BufferSet). Setting the use counts is realtime safe.
| Methods | ||
|---|---|---|
| ChanCount | available () | |
| ChanCount | count () | |
| AudioBuffer | get_audio (unsigned long) | |
| MidiBuffer | get_midi (unsigned long) | |
↠ ARDOUR:Bundle
C‡: std::shared_ptr< ARDOUR::Bundle >, std::weak_ptr< ARDOUR::Bundle >
A set of `channels', each of which is associated with 0 or more ports. Each channel has a name which can be anything useful, and a data type. Intended for grouping things like, for example, a buss' outputs. `Channel' is a rather overloaded term but I can't think of a better one right now.
| Methods | ||
|---|---|---|
| std::string | channel_name (unsigned int) | |
Returns Channel name. | ||
| bool | isnil () | |
| unsigned int | n_total () | |
| std::string | name () | |
Returns Bundle name | ||
| ChanCount | nchannels () | |
Returns Number of channels that this Bundle has | ||
| bool | ports_are_inputs () | |
| bool | ports_are_outputs () | |
| Cast | ||
| UserBundle | to_userbundle () | |
∁ ARDOUR:BundleListPtr
C‡: std::shared_ptr<std::vector<std::shared_ptr<ARDOUR::Bundle> > >
| Constructor | ||
|---|---|---|
| ℂ | ARDOUR.BundleListPtr () | |
| Methods | ||
| LuaTable | add (LuaTable {Bundle}) | |
| Bundle | at (unsigned long) | |
| void | clear () | |
| bool | empty () | |
| LuaIter | iter () | |
| void | push_back (Bundle) | |
| unsigned long | size () | |
| LuaTable | table () | |
∁ ARDOUR:ChanCount
C‡: ARDOUR::ChanCount
A count of channels, possibly with many types.
Operators are defined so this may safely be used as if it were a simple (single-typed) integer count of channels.
| Constructor | ||
|---|---|---|
| ℂ | ARDOUR.ChanCount (DataType, unsigned int) | |
| Methods | ||
| unsigned int | get (DataType) | |
| unsigned int | n_audio () | |
query number of audio channels Returns number of audio channels | ||
| unsigned int | n_midi () | |
query number of midi channels Returns number of midi channels | ||
| unsigned int | n_total () | |
query total channel count of all data types Returns total channel count (audio + midi) | ||
| void | reset () | |
zero count of all data types | ||
| void | set (DataType, unsigned int) | |
| void | set_audio (unsigned int) | |
set number of audio channels
| ||
| void | set_midi (unsigned int) | |
set number of audio channels
| ||
∁ ARDOUR:ChanMapping
C‡: ARDOUR::ChanMapping
A mapping from one set of channels to another. The general form is 1 source (from), many sinks (to). numeric IDs are used to identify sources and sinks.
for plugins this is used to map "plugin-pin" to "audio-buffer"
| Constructor | ||
|---|---|---|
| ℂ | ARDOUR.ChanMapping () | |
| Methods | ||
| ChanCount | count () | |
| unsigned int | get (DataType, unsigned int) | |
| bool | is_monotonic () | |
Test if this mapping is monotonic (useful to see if inplace processing is feasible) Returns true if the map is a strict monotonic set | ||
| unsigned int | n_total () | |
| void | set (DataType, unsigned int, unsigned int) | |
∁ ARDOUR:ConstBundleListPtr
C‡: std::shared_ptr<std::vector<std::shared_ptr<ARDOUR::Bundle> > const>
| Constructor | ||
|---|---|---|
| ℂ | ARDOUR.ConstBundleListPtr () | |
| Methods | ||
| Bundle | at (unsigned long) | |
| bool | empty () | |
| LuaIter | iter () | |
| unsigned long | size () | |
| LuaTable | table () | |
∁ ARDOUR:ConstRouteListPtr
C‡: std::shared_ptr<std::list<std::shared_ptr<ARDOUR::Route> > const>
| Constructor | ||
|---|---|---|
| ℂ | ARDOUR.ConstRouteListPtr () | |
| Methods | ||
| bool | empty () | |
| LuaIter | iter () | |
| void | reverse () | |
| unsigned long | size () | |
| LuaTable | table () | |
∁ ARDOUR:ControlList
C‡: std::list<std::shared_ptr<ARDOUR::AutomationControl> >
| Constructor | ||
|---|---|---|
| ℂ | ARDOUR.ControlList () | |
| Methods | ||
| LuaTable | add (LuaTable {AutomationControl}) | |
| AutomationControl | back () | |
| void | clear () | |
| bool | empty () | |
| AutomationControl | front () | |
| LuaIter | iter () | |
| void | push_back (AutomationControl) | |
| void | reverse () | |
| unsigned long | size () | |
| LuaTable | table () | |
| void | unique () | |
∁ ARDOUR:ControlListPtr
C‡: std::shared_ptr<std::list<std::shared_ptr<ARDOUR::AutomationControl> > >
| Constructor | ||
|---|---|---|
| ℂ | ARDOUR.ControlListPtr () | |
| Methods | ||
| LuaTable | add (LuaTable {AutomationControl}) | |
| void | clear () | |
| bool | empty () | |
| LuaIter | iter () | |
| void | push_back (AutomationControl) | |
| void | reverse () | |
| unsigned long | size () | |
| LuaTable | table () | |
| void | unique () | |
∁ ARDOUR:ControlProtocolInfo
C‡: ARDOUR::ControlProtocolInfo
| Methods | ||
|---|---|---|
| bool | active () | |
| Data Members | ||
| std::string | name | |
∁ ARDOUR:ControlProtocolInfoList
C‡: std::list<ARDOUR::ControlProtocolInfo* >
| Constructor | ||
|---|---|---|
| ℂ | ARDOUR.ControlProtocolInfoList () | |
| Methods | ||
| ControlProtocolInfo | back () | |
| bool | empty () | |
| ControlProtocolInfo | front () | |
| LuaIter | iter () | |
| void | reverse () | |
| unsigned long | size () | |
| LuaTable | table () | |
∁ ARDOUR:ControlProtocolManager
C‡: ARDOUR::ControlProtocolManager
| Methods | ||
|---|---|---|
| int | activate (ControlProtocolInfo&) | |
| ControlProtocolInfoList | control_protocol_infos () | |
| int | deactivate (ControlProtocolInfo&) | |
| ControlProtocolManager | manager () | |
∁ ARDOUR:ControllableSet
C‡: std::set<std::shared_ptr<PBD::Controllable> > >
| Constructor | ||
|---|---|---|
| ℂ | ARDOUR.ControllableSet () | |
| Methods | ||
| void | clear () | |
| bool | empty () | |
| LuaIter | iter () | |
| unsigned long | size () | |
| LuaTable | table () | |
ℕ ARDOUR.DSP
| Methods | ||
|---|---|---|
| float | accurate_coefficient_to_dB (float) | |
| void | apply_gain_to_buffer (FloatArray, unsigned int, float) | |
| float | compute_peak (FloatArray, unsigned int, float) | |
| void | copy_vector (FloatArray, FloatArray, unsigned int) | |
| float | dB_to_coefficient (float) | |
| float | fast_coefficient_to_dB (float) | |
| void | find_peaks (FloatArray, unsigned int, FloatArray, FloatArray) | |
| float | log_meter (float) | |
non-linear power-scale meter deflection
Returns deflected value | ||
| float | log_meter_coeff (float) | |
non-linear power-scale meter deflection
Returns deflected value | ||
| void | memset (FloatArray, float, unsigned int) | |
lua wrapper to memset() | ||
| void | mix_buffers_no_gain (FloatArray, FloatArray, unsigned int) | |
| void | mix_buffers_with_gain (FloatArray, FloatArray, unsigned int, float) | |
| void | mmult (FloatArray, FloatArray, unsigned int) | |
matrix multiply multiply every sample of `data' with the corresponding sample at `mult'.
| ||
| LuaTable(...) | peaks (FloatArray, float&, float&, unsigned int) | |
| void | process_map (BufferSet, ChanCount, ChanMapping, ChanMapping, unsigned int, long) | |
∁ ARDOUR:DSP:Biquad
C‡: ARDOUR::DSP::Biquad
Biquad Filter
| Constructor | ||
|---|---|---|
| ℂ | ARDOUR.DSP.Biquad (double) | |
Instantiate Biquad Filter
| ||
| Methods | ||
| void | compute (Type, double, double, double) | |
| void | configure (Biquad) | |
| float | dB_at_freq (float) | |
filter transfer function (filter response for spectrum visualization)
Returns gain at given frequency in dB (clamped to -120..+120) | ||
| void | reset () | |
reset filter state | ||
| void | run (FloatArray, unsigned int) | |
process audio data
| ||
| void | set_coefficients (double, double, double, double, double) | |
∁ ARDOUR:DSP:Convolution
C‡: ARDOUR::DSP::Convolution
| Constructor | ||
|---|---|---|
| ℂ | ARDOUR.DSP.Convolution (Session&, unsigned int, unsigned int) | |
| Methods | ||
| bool | add_impdata (unsigned int, unsigned int, Readable, float, unsigned int, long, long, unsigned int) | |
| void | clear_impdata () | |
| unsigned int | latency () | |
| unsigned int | n_inputs () | |
| unsigned int | n_outputs () | |
| bool | ready () | |
| void | restart () | |
| void | run (BufferSet&, ChanMapping, ChanMapping, unsigned int, long) | |
| void | run_mono_buffered (FloatArray, unsigned int) | |
| void | run_mono_no_latency (FloatArray, unsigned int) | |
∁ ARDOUR:DSP:Convolver
C‡: ARDOUR::DSP::Convolver
is-a: ARDOUR:DSP:Convolution
| Constructor | ||
|---|---|---|
| ℂ | ARDOUR.DSP.Convolver (Session&, std::string, IRChannelConfig, IRSettings) | |
| Methods | ||
| void | run_stereo_buffered (FloatArray, FloatArray, unsigned int) | |
| void | run_stereo_no_latency (FloatArray, FloatArray, unsigned int) | |
Inherited from ARDOUR:DSP:Convolution
| Constructor | ||
|---|---|---|
| ℂ | ARDOUR.DSP.Convolution (Session&, unsigned int, unsigned int) | |
| Methods | ||
| bool | add_impdata (unsigned int, unsigned int, Readable, float, unsigned int, long, long, unsigned int) | |
| void | clear_impdata () | |
| unsigned int | latency () | |
| unsigned int | n_inputs () | |
| unsigned int | n_outputs () | |
| bool | ready () | |
| void | restart () | |
| void | run (BufferSet&, ChanMapping, ChanMapping, unsigned int, long) | |
| void | run_mono_buffered (FloatArray, unsigned int) | |
| void | run_mono_no_latency (FloatArray, unsigned int) | |
∁ ARDOUR:DSP:DspShm
C‡: ARDOUR::DSP::DspShm
C/C++ Shared Memory
A convenience class representing a C array of float[] or int32_t[] data values. This is useful for lua scripts to perform DSP operations directly using C/C++ with CPU Hardware acceleration.
Access to this memory area is always 4 byte aligned. The data is interpreted either as float or as int.
This memory area can also be shared between different instances or the same lua plugin (DSP, GUI).
Since memory allocation is not realtime safe it should be allocated during dsp_init() or dsp_configure(). The memory is free()ed automatically when the lua instance is destroyed.
| Constructor | ||
|---|---|---|
| ℂ | ARDOUR.DSP.DspShm (unsigned long) | |
| Methods | ||
| void | allocate (unsigned long) | |
[re] allocate memory in host's memory space
| ||
| int | atomic_get_int (unsigned long) | |
atomically read integer at offset This involves a memory barrier. This call is intended for buffers which are shared with another instance.
Returns value at offset | ||
| void | atomic_set_int (unsigned long, int) | |
atomically set integer at offset This involves a memory barrier. This call is intended for buffers which are shared with another instance.
| ||
| void | clear () | |
clear memory (set to zero) | ||
| FloatArray | to_float (unsigned long) | |
access memory as float array
Returns float[] | ||
| IntArray | to_int (unsigned long) | |
access memory as integer array
Returns int_32_t[] | ||
∁ ARDOUR:DSP:FFTSpectrum
C‡: ARDOUR::DSP::FFTSpectrum
| Constructor | ||
|---|---|---|
| ℂ | ARDOUR.DSP.FFTSpectrum (unsigned int, double) | |
| Methods | ||
| void | execute () | |
process current data in buffer | ||
| float | freq_at_bin (unsigned int) | |
| float | power_at_bin (unsigned int, float, bool) | |
query
Returns signal power at given bin (in dBFS) | ||
| void | set_data_hann (FloatArray, unsigned int, unsigned int) | |
∁ ARDOUR:DSP:Generator
C‡: ARDOUR::DSP::Generator
| Constructor | ||
|---|---|---|
| ℂ | ARDOUR.DSP.Generator () | |
| Methods | ||
| void | run (FloatArray, unsigned int) | |
| void | set_type (Type) | |
∁ ARDOUR:DSP:IRSettings
C‡: ARDOUR::DSP::Convolver::IRSettings
| Constructor | ||
|---|---|---|
| ℂ | ARDOUR.DSP.IRSettings () | |
| Methods | ||
| unsigned int | get_channel_delay (unsigned int) | |
| float | get_channel_gain (unsigned int) | |
| void | set_channel_delay (unsigned int, unsigned int) | |
| void | set_channel_gain (unsigned int, float) | |
| Data Members | ||
| float | gain | |
| unsigned int | pre_delay | |
∁ ARDOUR:DSP:LTCReader
C‡: ARDOUR::LTCReader
| Constructor | ||
|---|---|---|
| ℂ | ARDOUR.DSP.LTCReader (int, LTC_TV_STANDARD) | |
| Methods | ||
| LuaTable(long, ...) | read (unsigned int&, unsigned int&, unsigned int&, unsigned int&, long&) | |
| void | write (FloatArray, long, long) | |
∁ ARDOUR:DSP:LowPass
C‡: ARDOUR::DSP::LowPass
1st order Low Pass filter
| Constructor | ||
|---|---|---|
| ℂ | ARDOUR.DSP.LowPass (double, float) | |
instantiate a LPF
| ||
| Methods | ||
| void | ctrl (FloatArray, float, unsigned int) | |
filter control data This is useful for parameter smoothing.
| ||
| void | proc (FloatArray, unsigned int) | |
process audio data
| ||
| void | reset () | |
reset filter state | ||
| void | set_cutoff (float) | |
update filter cut-off frequency
| ||
∁ ARDOUR:DSP:StereoCorrelation
C‡: ARDOUR::DSP::StereoCorrelation
| Constructor | ||
|---|---|---|
| ℂ | ARDOUR.DSP.StereoCorrelation (float, float, float) | |
| Methods | ||
| void | process (FloatArray, FloatArray, unsigned int) | |
| float | read () | |
| void | reset () | |
∁ ARDOUR:DataType
C‡: ARDOUR::DataType
A type of Data Ardour is capable of processing.
The majority of this class is dedicated to conversion to and from various other type representations, simple comparison between then, etc. This code is deliberately 'ugly' so other code doesn't have to be.
| Constructor | ||
|---|---|---|
| ℂ | ARDOUR.DataType (std::string) | |
| Methods | ||
| DataType | audio () | |
convenience constructor for DataType::AUDIO with managed lifetime Returns DataType::AUDIO | ||
| DataType | midi () | |
convenience constructor for DataType::MIDI with managed lifetime Returns DataType::MIDI | ||
| DataType | null () | |
convenience constructor for DataType::NIL with managed lifetime Returns DataType::NIL | ||
| char* | to_string () | |
Inverse of the from-string constructor | ||
↠ ARDOUR:DelayLine
C‡: std::shared_ptr< ARDOUR::DelayLine >, std::weak_ptr< ARDOUR::DelayLine >
is-a: ARDOUR:Processor
| Methods | ||
|---|---|---|
| long | delay () | |
| bool | isnil () | |
Inherited from ARDOUR:Processor
| Methods | ||
|---|---|---|
| void | activate () | |
| bool | active () | |
| long | capture_offset () | |
| void | deactivate () | |
| std::string | display_name () | |
| bool | display_to_user () | |
| long | input_latency () | |
| ChanCount | input_streams () | |
| long | output_latency () | |
| ChanCount | output_streams () | |
| long | playback_offset () | |
| long | signal_latency () | |
| Cast | ||
| Amp | to_amp () | |
| Automatable | to_automatable () | |
| DelayLine | to_delayline () | |
| DiskIOProcessor | to_diskioprocessor () | |
| DiskReader | to_diskreader () | |
| DiskWriter | to_diskwriter () | |
| PluginInsert | to_insert () | |
| InternalSend | to_internalsend () | |
| IOProcessor | to_ioprocessor () | |
| Latent | to_latent () | |
| PeakMeter | to_meter () | |
| MonitorProcessor | to_monitorprocessor () | |
| PeakMeter | to_peakmeter () | |
| PluginInsert | to_plugininsert () | |
| PolarityProcessor | to_polarityprocessor () | |
| Send | to_send () | |
| SideChain | to_sidechain () | |
| SurroundSend | to_surroundsend () | |
| UnknownProcessor | to_unknownprocessor () | |
Inherited from ARDOUR:SessionObjectPtr
| Methods | ||
|---|---|---|
| std::string | name () | |
| Cast | ||
| Stateful | to_stateful () | |
| StatefulDestructible | to_statefuldestructible () | |
↠ ARDOUR:Delivery
C‡: std::shared_ptr< ARDOUR::Delivery >, std::weak_ptr< ARDOUR::Delivery >
is-a: ARDOUR:IOProcessor
Base class for objects with saveable and undoable state
| Methods | ||
|---|---|---|
| bool | isnil () | |
| PannerShell | panner_shell () | |
Inherited from ARDOUR:IOProcessor
| Methods | ||
|---|---|---|
| IO | input () | |
| ChanCount | natural_input_streams () | |
| ChanCount | natural_output_streams () | |
| IO | output () | |
Inherited from ARDOUR:Processor
| Methods | ||
|---|---|---|
| void | activate () | |
| bool | active () | |
| long | capture_offset () | |
| void | deactivate () | |
| std::string | display_name () | |
| bool | display_to_user () | |
| long | input_latency () | |
| ChanCount | input_streams () | |
| long | output_latency () | |
| ChanCount | output_streams () | |
| long | playback_offset () | |
| long | signal_latency () | |
| Cast | ||
| Amp | to_amp () | |
| Automatable | to_automatable () | |
| DelayLine | to_delayline () | |
| DiskIOProcessor | to_diskioprocessor () | |
| DiskReader | to_diskreader () | |
| DiskWriter | to_diskwriter () | |
| PluginInsert | to_insert () | |
| InternalSend | to_internalsend () | |
| IOProcessor | to_ioprocessor () | |
| Latent | to_latent () | |
| PeakMeter | to_meter () | |
| MonitorProcessor | to_monitorprocessor () | |
| PeakMeter | to_peakmeter () | |
| PluginInsert | to_plugininsert () | |
| PolarityProcessor | to_polarityprocessor () | |
| Send | to_send () | |
| SideChain | to_sidechain () | |
| SurroundSend | to_surroundsend () | |
| UnknownProcessor | to_unknownprocessor () | |
Inherited from ARDOUR:SessionObjectPtr
| Methods | ||
|---|---|---|
| std::string | name () | |
| Cast | ||
| Stateful | to_stateful () | |
| StatefulDestructible | to_statefuldestructible () | |
∁ ARDOUR:DeviceStatus
C‡: ARDOUR::AudioBackend::DeviceStatus
used to list device names along with whether or not they are currently available.
| Data Members | ||
|---|---|---|
| bool | available | |
| std::string | name | |
∁ ARDOUR:DeviceStatusVector
C‡: std::vector<ARDOUR::AudioBackend::DeviceStatus >
| Constructor | ||
|---|---|---|
| ℂ | ARDOUR.DeviceStatusVector () | |
| ℂ | ARDOUR.DeviceStatusVector () | |
| Methods | ||
| LuaTable | add (LuaTable {DeviceStatus}) | |
| DeviceStatus | at (unsigned long) | |
| void | clear () | |
| bool | empty () | |
| LuaIter | iter () | |
| void | push_back (DeviceStatus) | |
| void | reserve (unsigned long) | |
| unsigned long | size () | |
| LuaTable | table () | |
| ... | to_array (--lua--) | |
↠ ARDOUR:DiskIOProcessor
C‡: std::shared_ptr< ARDOUR::DiskIOProcessor >, std::weak_ptr< ARDOUR::DiskIOProcessor >
is-a: ARDOUR:Processor
| Methods | ||
|---|---|---|
| bool | isnil () | |
Inherited from ARDOUR:Processor
| Methods | ||
|---|---|---|
| void | activate () | |
| bool | active () | |
| long | capture_offset () | |
| void | deactivate () | |
| std::string | display_name () | |
| bool | display_to_user () | |
| long | input_latency () | |
| ChanCount | input_streams () | |
| long | output_latency () | |
| ChanCount | output_streams () | |
| long | playback_offset () | |
| long | signal_latency () | |
| Cast | ||
| Amp | to_amp () | |
| Automatable | to_automatable () | |
| DelayLine | to_delayline () | |
| DiskIOProcessor | to_diskioprocessor () | |
| DiskReader | to_diskreader () | |
| DiskWriter | to_diskwriter () | |
| PluginInsert | to_insert () | |
| InternalSend | to_internalsend () | |
| IOProcessor | to_ioprocessor () | |
| Latent | to_latent () | |
| PeakMeter | to_meter () | |
| MonitorProcessor | to_monitorprocessor () | |
| PeakMeter | to_peakmeter () | |
| PluginInsert | to_plugininsert () | |
| PolarityProcessor | to_polarityprocessor () | |
| Send | to_send () | |
| SideChain | to_sidechain () | |
| SurroundSend | to_surroundsend () | |
| UnknownProcessor | to_unknownprocessor () | |
Inherited from ARDOUR:SessionObjectPtr
| Methods | ||
|---|---|---|
| std::string | name () | |
| Cast | ||
| Stateful | to_stateful () | |
| StatefulDestructible | to_statefuldestructible () | |
↠ ARDOUR:DiskReader
C‡: std::shared_ptr< ARDOUR::DiskReader >, std::weak_ptr< ARDOUR::DiskReader >
is-a: ARDOUR:DiskIOProcessor
Base class for objects with saveable and undoable state
| Methods | ||
|---|---|---|
| bool | isnil () | |
Inherited from ARDOUR:Processor
| Methods | ||
|---|---|---|
| void | activate () | |
| bool | active () | |
| long | capture_offset () | |
| void | deactivate () | |
| std::string | display_name () | |
| bool | display_to_user () | |
| long | input_latency () | |
| ChanCount | input_streams () | |
| long | output_latency () | |
| ChanCount | output_streams () | |
| long | playback_offset () | |
| long | signal_latency () | |
| Cast | ||
| Amp | to_amp () | |
| Automatable | to_automatable () | |
| DelayLine | to_delayline () | |
| DiskIOProcessor | to_diskioprocessor () | |
| DiskReader | to_diskreader () | |
| DiskWriter | to_diskwriter () | |
| PluginInsert | to_insert () | |
| InternalSend | to_internalsend () | |
| IOProcessor | to_ioprocessor () | |
| Latent | to_latent () | |
| PeakMeter | to_meter () | |
| MonitorProcessor | to_monitorprocessor () | |
| PeakMeter | to_peakmeter () | |
| PluginInsert | to_plugininsert () | |
| PolarityProcessor | to_polarityprocessor () | |
| Send | to_send () | |
| SideChain | to_sidechain () | |
| SurroundSend | to_surroundsend () | |
| UnknownProcessor | to_unknownprocessor () | |
Inherited from ARDOUR:SessionObjectPtr
| Methods | ||
|---|---|---|
| std::string | name () | |
| Cast | ||
| Stateful | to_stateful () | |
| StatefulDestructible | to_statefuldestructible () | |
↠ ARDOUR:DiskWriter
C‡: std::shared_ptr< ARDOUR::DiskWriter >, std::weak_ptr< ARDOUR::DiskWriter >
is-a: ARDOUR:DiskIOProcessor
Base class for objects with saveable and undoable state
| Methods | ||
|---|---|---|
| bool | isnil () | |
Inherited from ARDOUR:Processor
| Methods | ||
|---|---|---|
| void | activate () | |
| bool | active () | |
| long | capture_offset () | |
| void | deactivate () | |
| std::string | display_name () | |
| bool | display_to_user () | |
| long | input_latency () | |
| ChanCount | input_streams () | |
| long | output_latency () | |
| ChanCount | output_streams () | |
| long | playback_offset () | |
| long | signal_latency () | |
| Cast | ||
| Amp | to_amp () | |
| Automatable | to_automatable () | |
| DelayLine | to_delayline () | |
| DiskIOProcessor | to_diskioprocessor () | |
| DiskReader | to_diskreader () | |
| DiskWriter | to_diskwriter () | |
| PluginInsert | to_insert () | |
| InternalSend | to_internalsend () | |
| IOProcessor | to_ioprocessor () | |
| Latent | to_latent () | |
| PeakMeter | to_meter () | |
| MonitorProcessor | to_monitorprocessor () | |
| PeakMeter | to_peakmeter () | |
| PluginInsert | to_plugininsert () | |
| PolarityProcessor | to_polarityprocessor () | |
| Send | to_send () | |
| SideChain | to_sidechain () | |
| SurroundSend | to_surroundsend () | |
| UnknownProcessor | to_unknownprocessor () | |
Inherited from ARDOUR:SessionObjectPtr
| Methods | ||
|---|---|---|
| std::string | name () | |
| Cast | ||
| Stateful | to_stateful () | |
| StatefulDestructible | to_statefuldestructible () | |
∁ ARDOUR:EventList
C‡: std::list<Evoral::ControlEvent* >
| Constructor | ||
|---|---|---|
| ℂ | ARDOUR.EventList () | |
| Methods | ||
| ControlEvent | back () | |
| bool | empty () | |
| ControlEvent | front () | |
| LuaIter | iter () | |
| void | reverse () | |
| unsigned long | size () | |
| LuaTable | table () | |
∁ ARDOUR:EventPtrList
C‡: std::list<std::shared_ptr<Evoral::Event<Temporal::Beats> > > >
| Constructor | ||
|---|---|---|
| ℂ | ARDOUR.EventPtrList () | |
| Methods | ||
| LuaTable | add (LuaTable {Beats}) | |
| EventPtr | back () | |
| void | clear () | |
| bool | empty () | |
| EventPtr | front () | |
| LuaIter | iter () | |
| void | push_back (EventPtr) | |
| void | reverse () | |
| unsigned long | size () | |
| LuaTable | table () | |
| void | unique () | |
↠ ARDOUR:FileSource
C‡: std::shared_ptr< ARDOUR::FileSource >, std::weak_ptr< ARDOUR::FileSource >
is-a: ARDOUR:Source
| Methods | ||
|---|---|---|
| unsigned short | channel () | |
| float | gain () | |
| bool | isnil () | |
| std::string | origin () | |
| std::string | path () | |
| std::string | take_id () | |
| bool | within_session () | |
Inherited from ARDOUR:Source
| Methods | ||
|---|---|---|
| std::string | ancestor_name () | |
| bool | can_be_analysed () | |
| XrunPositions | captured_xruns () | |
| bool | empty () | |
| bool | has_been_analysed () | |
| timepos_t | length () | |
| timepos_t | natural_position () | |
| timepos_t | timeline_position () | |
| long | timestamp () | |
| int | use_count () | |
| bool | used () | |
| bool | writable () | |
| Cast | ||
| AudioSource | to_audiosource () | |
| FileSource | to_filesource () | |
| MidiSource | to_midisource () | |
Inherited from ARDOUR:SessionObjectPtr
| Methods | ||
|---|---|---|
| std::string | name () | |
| Cast | ||
| Stateful | to_stateful () | |
| StatefulDestructible | to_statefuldestructible () | |
∁ ARDOUR:FluidSynth
C‡: ARDOUR::FluidSynth
| Constructor | ||
|---|---|---|
| ℂ | ARDOUR.FluidSynth (float, int) | |
instantiate a Synth
| ||
| Methods | ||
| bool | load_sf2 (std::string) | |
| bool | midi_event (unsigned char*, unsigned long) | |
| void | panic () | |
| unsigned int | program_count () | |
| std::string | program_name (unsigned int) | |
| bool | select_program (unsigned int, unsigned char) | |
| bool | synth (FloatArray, FloatArray, unsigned int) | |
↠ ARDOUR:GainControl
C‡: std::shared_ptr< ARDOUR::GainControl >, std::weak_ptr< ARDOUR::GainControl >
is-a: ARDOUR:SlavableAutomationControl
Base class for objects with saveable and undoable state
| Methods | ||
|---|---|---|
| bool | isnil () | |
Inherited from ARDOUR:SlavableAutomationControl
| Methods | ||
|---|---|---|
| void | add_master (AutomationControl) | |
| void | clear_masters () | |
| int | get_boolean_masters () | |
| double | get_masters_value () | |
| void | remove_master (AutomationControl) | |
| bool | slaved () | |
| bool | slaved_to (AutomationControl) | |
Inherited from ARDOUR:AutomationControl
| Methods | ||
|---|---|---|
| AutomationList | alist () | |
| AutoState | automation_state () | |
| ParameterDescriptor | desc () | |
| double | get_value () | |
Get `internal' value Returns raw value as used for the plugin/processor control port | ||
| double | lower () | |
| double | normal () | |
| void | set_automation_state (AutoState) | |
| void | set_value (double, GroupControlDisposition) | |
Set `internal' value All derived classes must implement this. Basic derived classes will ignore group_override but more sophisticated children, notably those that proxy the value setting logic via an object that is aware of group relationships between this control and others, will find it useful.
| ||
| void | start_touch (timepos_t) | |
| void | stop_touch (timepos_t) | |
| bool | toggled () | |
| double | upper () | |
| bool | writable () | |
| Cast | ||
| Control | to_ctrl () | |
| SlavableAutomationControl | to_slavable () | |
Inherited from PBD:Controllable
| Methods | ||
|---|---|---|
| void | dump_registry () | |
| std::string | name () | |
| ControllableSet | registered_controllables () | |
| Cast | ||
| AutomationControl | to_automationcontrol () | |
| MPGainControl | to_mpgain () | |
| MPToggleControl | to_mptoggle () | |
Inherited from PBD:StatefulPtr
| Methods | ||
|---|---|---|
| void | clear_changes () | |
Forget about any changes to this object's properties | ||
| ID | id () | |
| OwnedPropertyList | properties () | |
∁ ARDOUR:IDMap
C‡: std::map<PBD::ID, PBD::ID >
| Constructor | ||
|---|---|---|
| ℂ | ARDOUR.IDMap () | |
| Methods | ||
| LuaTable | add (PBD::ID, PBD::ID ) | |
| ... | at (--lua--) | |
| void | clear () | |
| unsigned long | count (ID) | |
| bool | empty () | |
| LuaIter | iter () | |
| unsigned long | size () | |
| LuaTable | table () | |
∁ ARDOUR:IDNameMap
C‡: std::map<PBD::ID, std::string >
| Constructor | ||
|---|---|---|
| ℂ | ARDOUR.IDNameMap () | |
| Methods | ||
| LuaTable | add (PBD::ID, std::string ) | |
| ... | at (--lua--) | |
| void | clear () | |
| unsigned long | count (ID) | |
| bool | empty () | |
| LuaIter | iter () | |
| unsigned long | size () | |
| LuaTable | table () | |
↠ ARDOUR:IO
C‡: std::shared_ptr< ARDOUR::IO >, std::weak_ptr< ARDOUR::IO >
is-a: ARDOUR:SessionObjectPtr
A collection of ports (all input or all output) with connections.
An IO can contain ports of varying types, making routes/inserts/etc with varied combinations of types (eg MIDI and audio) possible.
| Methods | ||
|---|---|---|
| bool | active () | |
| int | add_port (std::string, DataType) | |
| AudioPort | audio (unsigned int) | |
| int | connect (Port, std::string) | |
| int | disconnect (Port, std::string) | |
| int | disconnect_all () | |
| bool | has_port (Port) | |
| bool | isnil () | |
| long | latency () | |
| MidiPort | midi (unsigned int) | |
| ChanCount | n_ports () | |
| Port | nth (unsigned int) | |
| bool | physically_connected () | |
| Port | port_by_name (unsigned int) | |
| long | public_latency () | |
| int | remove_port (Port) | |
Inherited from ARDOUR:SessionObjectPtr
| Methods | ||
|---|---|---|
| std::string | name () | |
| Cast | ||
| Stateful | to_stateful () | |
| StatefulDestructible | to_statefuldestructible () | |
↠ ARDOUR:IOProcessor
C‡: std::shared_ptr< ARDOUR::IOProcessor >, std::weak_ptr< ARDOUR::IOProcessor >
is-a: ARDOUR:Processor
| Methods | ||
|---|---|---|
| IO | input () | |
| bool | isnil () | |
| ChanCount | natural_input_streams () | |
| ChanCount | natural_output_streams () | |
| IO | output () | |
Inherited from ARDOUR:Processor
| Methods | ||
|---|---|---|
| void | activate () | |
| bool | active () | |
| long | capture_offset () | |
| void | deactivate () | |
| std::string | display_name () | |
| bool | display_to_user () | |
| long | input_latency () | |
| ChanCount | input_streams () | |
| long | output_latency () | |
| ChanCount | output_streams () | |
| long | playback_offset () | |
| long | signal_latency () | |
| Cast | ||
| Amp | to_amp () | |
| Automatable | to_automatable () | |
| DelayLine | to_delayline () | |
| DiskIOProcessor | to_diskioprocessor () | |
| DiskReader | to_diskreader () | |
| DiskWriter | to_diskwriter () | |
| PluginInsert | to_insert () | |
| InternalSend | to_internalsend () | |
| IOProcessor | to_ioprocessor () | |
| Latent | to_latent () | |
| PeakMeter | to_meter () | |
| MonitorProcessor | to_monitorprocessor () | |
| PeakMeter | to_peakmeter () | |
| PluginInsert | to_plugininsert () | |
| PolarityProcessor | to_polarityprocessor () | |
| Send | to_send () | |
| SideChain | to_sidechain () | |
| SurroundSend | to_surroundsend () | |
| UnknownProcessor | to_unknownprocessor () | |
Inherited from ARDOUR:SessionObjectPtr
| Methods | ||
|---|---|---|
| std::string | name () | |
| Cast | ||
| Stateful | to_stateful () | |
| StatefulDestructible | to_statefuldestructible () | |
∁ ARDOUR:InterThreadInfo
C‡: ARDOUR::InterThreadInfo
| Constructor | ||
|---|---|---|
| ℂ | ARDOUR.InterThreadInfo () | |
| Data Members | ||
| bool | done | |
| float | progress | |
↠ ARDOUR:InternalReturn
C‡: std::shared_ptr< ARDOUR::InternalReturn >, std::weak_ptr< ARDOUR::InternalReturn >
is-a: ARDOUR:Return
Base class for objects with saveable and undoable state
| Methods | ||
|---|---|---|
| bool | isnil () | |
Inherited from ARDOUR:IOProcessor
| Methods | ||
|---|---|---|
| IO | input () | |
| ChanCount | natural_input_streams () | |
| ChanCount | natural_output_streams () | |
| IO | output () | |
Inherited from ARDOUR:Processor
| Methods | ||
|---|---|---|
| void | activate () | |
| bool | active () | |
| long | capture_offset () | |
| void | deactivate () | |
| std::string | display_name () | |
| bool | display_to_user () | |
| long | input_latency () | |
| ChanCount | input_streams () | |
| long | output_latency () | |
| ChanCount | output_streams () | |
| long | playback_offset () | |
| long | signal_latency () | |
| Cast | ||
| Amp | to_amp () | |
| Automatable | to_automatable () | |
| DelayLine | to_delayline () | |
| DiskIOProcessor | to_diskioprocessor () | |
| DiskReader | to_diskreader () | |
| DiskWriter | to_diskwriter () | |
| PluginInsert | to_insert () | |
| InternalSend | to_internalsend () | |
| IOProcessor | to_ioprocessor () | |
| Latent | to_latent () | |
| PeakMeter | to_meter () | |
| MonitorProcessor | to_monitorprocessor () | |
| PeakMeter | to_peakmeter () | |
| PluginInsert | to_plugininsert () | |
| PolarityProcessor | to_polarityprocessor () | |
| Send | to_send () | |
| SideChain | to_sidechain () | |
| SurroundSend | to_surroundsend () | |
| UnknownProcessor | to_unknownprocessor () | |
Inherited from ARDOUR:SessionObjectPtr
| Methods | ||
|---|---|---|
| std::string | name () | |
| Cast | ||
| Stateful | to_stateful () | |
| StatefulDestructible | to_statefuldestructible () | |
↠ ARDOUR:InternalSend
C‡: std::shared_ptr< ARDOUR::InternalSend >, std::weak_ptr< ARDOUR::InternalSend >
is-a: ARDOUR:Send
Base class for objects with saveable and undoable state
| Methods | ||
|---|---|---|
| bool | allow_feedback () | |
| std::string | display_name () | |
| bool | feeds (Route) | |
| bool | isnil () | |
| void | set_allow_feedback (bool) | |
| bool | set_name (std::string) | |
| Route | source_route () | |
| Route | target_route () | |
Inherited from ARDOUR:Send
| Methods | ||
|---|---|---|
| GainControl | gain_control () | |
| long | get_delay_in () | |
| long | get_delay_out () | |
| bool | is_foldback () | |
| void | set_remove_on_disconnect (bool) | |
| Cast | ||
| InternalSend | to_internalsend () | |
Inherited from ARDOUR:Delivery
| Methods | ||
|---|---|---|
| PannerShell | panner_shell () | |
Inherited from ARDOUR:IOProcessor
| Methods | ||
|---|---|---|
| IO | input () | |
| ChanCount | natural_input_streams () | |
| ChanCount | natural_output_streams () | |
| IO | output () | |
Inherited from ARDOUR:Processor
| Methods | ||
|---|---|---|
| void | activate () | |
| bool | active () | |
| long | capture_offset () | |
| void | deactivate () | |
| bool | display_to_user () | |
| long | input_latency () | |
| ChanCount | input_streams () | |
| long | output_latency () | |
| ChanCount | output_streams () | |
| long | playback_offset () | |
| long | signal_latency () | |
| Cast | ||
| Amp | to_amp () | |
| Automatable | to_automatable () | |
| DelayLine | to_delayline () | |
| DiskIOProcessor | to_diskioprocessor () | |
| DiskReader | to_diskreader () | |
| DiskWriter | to_diskwriter () | |
| PluginInsert | to_insert () | |
| InternalSend | to_internalsend () | |
| IOProcessor | to_ioprocessor () | |
| Latent | to_latent () | |
| PeakMeter | to_meter () | |
| MonitorProcessor | to_monitorprocessor () | |
| PeakMeter | to_peakmeter () | |
| PluginInsert | to_plugininsert () | |
| PolarityProcessor | to_polarityprocessor () | |
| Send | to_send () | |
| SideChain | to_sidechain () | |
| SurroundSend | to_surroundsend () | |
| UnknownProcessor | to_unknownprocessor () | |
Inherited from ARDOUR:SessionObjectPtr
| Methods | ||
|---|---|---|
| std::string | name () | |
| Cast | ||
| Stateful | to_stateful () | |
| StatefulDestructible | to_statefuldestructible () | |
∁ ARDOUR:LatencyRange
C‡: ARDOUR::LatencyRange
| Constructor | ||
|---|---|---|
| ℂ | ARDOUR.LatencyRange () | |
| Data Members | ||
| unsigned int | max | |
| unsigned int | min | |
↠ ARDOUR:Latent
C‡: std::shared_ptr< ARDOUR::Latent >, std::weak_ptr< ARDOUR::Latent >
| Methods | ||
|---|---|---|
| long | effective_latency () | |
| bool | isnil () | |
| void | set_user_latency (long) | |
| void | unset_user_latency () | |
| long | user_latency () | |
∁ ARDOUR:Location
C‡: ARDOUR::Location
is-a: PBD:StatefulDestructible
Location on Timeline - abstract representation for Markers, Loop/Punch Ranges, CD-Markers etc.
| Methods | ||
|---|---|---|
| timepos_t | _end () | |
| Flags | flags () | |
| bool | is_auto_loop () | |
| bool | is_auto_punch () | |
| bool | is_cd_marker () | |
| bool | is_clock_origin () | |
| bool | is_cue_marker () | |
| bool | is_hidden () | |
| bool | is_mark () | |
| bool | is_range_marker () | |
| bool | is_scene () | |
| bool | is_section () | |
| bool | is_session_range () | |
| bool | is_skip () | |
| bool | is_skipping () | |
| bool | is_xrun () | |
| timecnt_t | length () | |
| void | lock () | |
| bool | locked () | |
| bool | matches (Flags) | |
| int | move_to (timepos_t) | |
| std::string | name () | |
| int | set (timepos_t, timepos_t) | |
| int | set_end (timepos_t, bool) | |
| int | set_length (timepos_t, timepos_t) | |
| void | set_name (std::string) | |
Set location name | ||
| int | set_start (timepos_t, bool) | |
| timepos_t | start () | |
| void | unlock () | |
Inherited from PBD:Stateful
| Methods | ||
|---|---|---|
| void | clear_changes () | |
Forget about any changes to this object's properties | ||
| ID | id () | |
| OwnedPropertyList | properties () | |
∁ ARDOUR:LocationList
C‡: std::list<ARDOUR::Location* >
| Constructor | ||
|---|---|---|
| ℂ | ARDOUR.LocationList () | |
| Methods | ||
| Location | back () | |
| bool | empty () | |
| Location | front () | |
| LuaIter | iter () | |
| void | reverse () | |
| unsigned long | size () | |
| LuaTable | table () | |
∁ ARDOUR:Locations
C‡: ARDOUR::Locations
is-a: PBD:StatefulDestructible
| Methods | ||
|---|---|---|
| Location | add_range (timepos_t, timepos_t) | |
| Location | auto_loop_location () | |
| Location | auto_punch_location () | |
| LuaTable(...) | find_all_between (timepos_t, timepos_t, LocationList&, Flags) | |
| timepos_t | first_mark_after (timepos_t, bool) | |
| Location | first_mark_at (timepos_t, timecnt_t, Flags) | |
| timepos_t | first_mark_before (timepos_t, bool) | |
| LocationList | list () | |
| Location | mark_at (timepos_t, timecnt_t, Flags) | |
| LuaTable(...) | marks_either_side (timepos_t, timepos_t&, timepos_t&) | |
| LuaTable(Location, ...) | next_section (Location, timepos_t&, timepos_t&) | |
| Location | range_starts_at (timepos_t, timecnt_t, bool) | |
| void | remove (Location) | |
| Location | session_range_location () | |
Inherited from PBD:Stateful
| Methods | ||
|---|---|---|
| void | clear_changes () | |
Forget about any changes to this object's properties | ||
| ID | id () | |
| OwnedPropertyList | properties () | |
ℕ ARDOUR.LuaAPI
| Methods | ||
|---|---|---|
| std::string | ascii_dtostr (double) | |
| ... | build_filename (--lua--) | |
Creates a filename from a series of elements using the correct separator for filenames. No attempt is made to force the resulting filename to be an absolute path. If the first element is a relative path, the result will be a relative path. | ||
| ... | color_to_rgba (--lua--) | |
A convenience function to expand RGBA parameters from an integer convert a Canvas::Color (uint32_t 0xRRGGBBAA) into double RGBA values which can be passed as parameters to Cairo::Context::set_source_rgba Example: local r, g, b, a = ARDOUR.LuaAPI.color_to_rgba (0x88aa44ff) cairo_ctx:set_source_rgba (ARDOUR.LuaAPI.color_to_rgba (0x11336699) Returns 4 parameters: red, green, blue, alpha (in range 0..1) | ||
| ... | desc_scale_points (--lua--) | |
| std::string | dump_untagged_plugins () | |
Write a list of untagged plugins to a file, so we can bulk-tag them Returns path to XML file or empty string on error | ||
| StringVector | env () | |
| std::string | file_get_contents (std::string) | |
| bool | file_test (std::string, FileTest) | |
| LuaTable(float, ...) | get_plugin_insert_param (PluginInsert, unsigned int, bool&) | |
get a plugin control parameter value
Returns value | ||
| ... | get_plugin_insert_property (--lua--) | |
get a plugin property (LV2 plugins only)
Returns value, depending on datatype or nil if property is not found | ||
| LuaTable(float, ...) | get_processor_param (Processor, unsigned int, bool&) | |
get a plugin control parameter value
Returns value | ||
| ... | hsla_to_rgba (--lua--) | |
A convenience function for colorspace HSL to RGB conversion. All ranges are 0..1 Example: local r, g, b, a = ARDOUR.LuaAPI.hsla_to_rgba (hue, saturation, luminosity, alpha) Returns 4 parameters: red, green, blue, alpha (in range 0..1) | ||
| PluginInfoList | list_plugins () | |
| long | monotonic_time () | |
| Processor | new_luaproc (Session, std::string) | |
| Processor | new_luaproc_with_time_domain (Session, std::string, TimeDomain) | |
create a new Lua Processor (Plugin)
Returns Processor object (may be nil) | ||
| NotePtr | new_noteptr (unsigned char, Beats, Beats, unsigned char, unsigned char) | |
| Processor | new_plugin (Session, std::string, PluginType, std::string) | |
| PluginInfo | new_plugin_info (std::string, PluginType) | |
search a Plugin
Returns PluginInfo or nil if not found | ||
| Processor | new_plugin_with_time_domain (Session, std::string, PluginType, TimeDomain, std::string) | |
create a new Plugin Instance
Returns Processor or nil | ||
| Processor | new_send (Session, Route, Processor) | |
| Processor | nil_proc () | |
| NotePtrList | note_list (MidiModel) | |
| PatchChangePtrList | patch_change_list (MidiModel) | |
| std::string | path_get_basename (std::string) | |
| ... | plugin_automation (--lua--) | |
A convenience function to get a Automation Lists and ParameterDescriptor for a given plugin control. This is equivalent to the following lua code function (processor, param_id) local plugininsert = processor:to_insert () local plugin = plugininsert:plugin(0) local _, t = plugin:get_parameter_descriptor(param_id, ARDOUR.ParameterDescriptor ()) local ctrl = Evoral.Parameter (ARDOUR.AutomationType.PluginAutomation, 0, param_id) local ac = pi:automation_control (ctrl, false) local acl = ac:alist() return ac:alist(), ac:to_ctrl():list(), t[2] end Example usage: get the third input parameter of first plugin on the given route (Ardour starts counting at zero). local al, cl, pd = ARDOUR.LuaAPI.plugin_automation (route:nth_plugin (0), 3) Returns 3 parameters: AutomationList, ControlList, ParameterDescriptor | ||
| bool | reset_processor_to_default (Processor) | |
reset a processor to its default values (only works for plugins ) This is a wrapper which looks up the Processor by plugin-insert.
Returns true on success, false when the processor is not a plugin | ||
| ... | sample_to_timecode (--lua--) | |
Generic conversion from audio sample count to timecode. (TimecodeType, sample-rate, sample-pos) | ||
| void | segfault () | |
Crash Test Dummy | ||
| bool | set_automation_data (AutomationControl, Lua-Function, double) | |
| bool | set_plugin_insert_param (PluginInsert, unsigned int, float) | |
set a plugin control-input parameter value This is a wrapper around set_processor_param which looks up the Processor by plugin-insert.
Returns true on success, false on error or out-of-bounds value | ||
| bool | set_plugin_insert_property (PluginInsert, std::string, Lua-Function) | |
set a plugin property (LV2 plugins only)
Returns true on success, false if the given plugin has no property with the given URI | ||
| bool | set_processor_param (Processor, unsigned int, float) | |
set a plugin control-input parameter value
Returns true on success, false on error or out-of-bounds value | ||
| EventPtrList | sysex_list (MidiModel) | |
| ... | timecode_to_sample (--lua--) | |
Generic conversion from timecode to audio sample count. (TimecodeType, sample-rate, hh, mm, ss, ff) | ||
| void | usleep (unsigned long) | |
| bool | wait_for_process_callback (unsigned long, long) | |
Delay execution until next process cycle starts.
Returns true on success, false if timeout was reached or engine was not running | ||
∁ ARDOUR:LuaAPI:Rubberband
C‡: ARDOUR::LuaAPI::Rubberband
| Constructor | ||
|---|---|---|
| ℂ | ARDOUR.LuaAPI.Rubberband (AudioRegion, bool) | |
| Methods | ||
| unsigned int | n_channels () | |
| AudioRegion | process (Lua-Function) | |
| Readable | readable () | |
| long | readable_length () | |
| bool | set_mapping (Lua-Function) | |
| bool | set_strech_and_pitch (double, double) | |
∁ ARDOUR:LuaAPI:Vamp
C‡: ARDOUR::LuaAPI::Vamp
| Constructor | ||
|---|---|---|
| ℂ | ARDOUR.LuaAPI.Vamp (std::string, float) | |
| Methods | ||
| int | analyze (Readable, unsigned int, Lua-Function) | |
high-level abstraction to process a single channel of the given AudioReadable. If the plugin is not yet initialized, initialize() is called. if fn is not nil, it is called with the immediate Vamp::Plugin::Features on every process call.
Returns 0 on success | ||
| bool | initialize () | |
initialize the plugin for use with analyze(). This is equivalent to plugin():initialise (1, ssiz, bsiz) and prepares a plugin for analyze. (by preferred step and block sizes are used. if the plugin does not specify them or they're larger than 8K, both are set to 1024) Manual initialization is only required to set plugin-parameters which depend on prior initialization of the plugin. vamp:reset () vamp:initialize () vamp:plugin():setParameter (0, 1.5, nil) vamp:analyze (r, 0) | ||
| StringVector | list_plugins () | |
| Plugin | plugin () | |
| FeatureSet | process (FloatArrayVector, RealTime) | |
| void | reset () | |
call plugin():reset() and clear initialization flag | ||
∁ ARDOUR:LuaOSC:Address
C‡: ARDOUR::LuaOSC::Address
OSC transmitter
A Class to send OSC messages.
| Constructor | ||
|---|---|---|
| ℂ | ARDOUR.LuaOSC.Address (std::string) | |
Construct a new OSC transmitter object
| ||
| Methods | ||
| ... | send (--lua--) | |
Transmit an OSC message Path (string) and type (string) must always be given. The number of following args must match the type. Supported types are: 'i': integer (lua number) 'f': float (lua number) 'd': double (lua number) 'h': 64bit integer (lua number) 's': string (lua string) 'c': character (lua string) 'T': boolean (lua bool) -- this is not implicily True, a lua true/false must be given 'F': boolean (lua bool) -- this is not implicily False, a lua true/false must be given
Returns boolean true if successful, false on error. | ||
↠ ARDOUR:LuaProc
C‡: std::shared_ptr< ARDOUR::LuaProc >, std::weak_ptr< ARDOUR::LuaProc >
is-a: ARDOUR:Plugin
| Methods | ||
|---|---|---|
| bool | isnil () | |
| DspShm | shmem () | |
| LuaTableRef | table () | |
Inherited from ARDOUR:Plugin
| Methods | ||
|---|---|---|
| float | default_value (unsigned int) | |
| IOPortDescription | describe_io_port (DataType, bool, unsigned int) | |
| std::string | get_docs () | |
| PluginInfo | get_info () | |
| float | get_parameter (unsigned int) | |
| LuaTable(int, ...) | get_parameter_descriptor (unsigned int, ParameterDescriptor&) | |
| std::string | get_parameter_docs (unsigned int) | |
| char* | label () | |
| PresetRecord | last_preset () | |
Returns Last preset to be requested; the settings may have been changed since; find out with parameter_changed_since_last_preset. | ||
| bool | load_preset (PresetRecord) | |
| char* | maker () | |
| char* | name () | |
| LuaTable(unsigned int, ...) | nth_parameter (unsigned int, bool&) | |
| unsigned int | parameter_count () | |
| bool | parameter_is_audio (unsigned int) | |
| bool | parameter_is_control (unsigned int) | |
| bool | parameter_is_input (unsigned int) | |
| bool | parameter_is_output (unsigned int) | |
| std::string | parameter_label (unsigned int) | |
| PresetRecord | preset_by_label (std::string) | |
| PresetRecord | preset_by_uri (std::string) | |
| void | remove_preset (std::string) | |
| PresetRecord | save_preset (std::string) | |
Create a new plugin-preset from the current state
Returns PresetRecord with empty URI on failure | ||
| std::string | unique_id () | |
| Cast | ||
| LuaProc | to_luaproc () | |
Inherited from PBD:StatefulPtr
| Methods | ||
|---|---|---|
| void | clear_changes () | |
Forget about any changes to this object's properties | ||
| ID | id () | |
| OwnedPropertyList | properties () | |
∁ ARDOUR:LuaTableRef
C‡: ARDOUR::LuaTableRef
| Methods | ||
|---|---|---|
| ... | get (--lua--) | |
| ... | set (--lua--) | |
∁ ARDOUR:MIDIPortMeters
C‡: std::map<std::string, ARDOUR::PortManager::MPM >
| Constructor | ||
|---|---|---|
| ℂ | ARDOUR.MIDIPortMeters () | |
| Methods | ||
| LuaTable | add (std::string, ARDOUR::PortManager::MPM ) | |
| ... | at (--lua--) | |
| void | clear () | |
| unsigned long | count (std::string) | |
| bool | empty () | |
| LuaIter | iter () | |
| unsigned long | size () | |
| LuaTable | table () | |
↠ ARDOUR:MPGainControl
C‡: std::shared_ptr< ARDOUR::MPControl<float> >, std::weak_ptr< ARDOUR::MPControl<float> >
is-a: PBD:Controllable
| Methods | ||
|---|---|---|
| std::string | get_user_string () | |
| double | get_value () | |
| bool | isnil () | |
| double | lower () | |
| double | normal () | |
| void | set_value (double, GroupControlDisposition) | |
| double | upper () | |
Inherited from PBD:Controllable
| Methods | ||
|---|---|---|
| void | dump_registry () | |
| std::string | name () | |
| ControllableSet | registered_controllables () | |
| Cast | ||
| AutomationControl | to_automationcontrol () | |
| MPGainControl | to_mpgain () | |
| MPToggleControl | to_mptoggle () | |
Inherited from PBD:StatefulPtr
| Methods | ||
|---|---|---|
| void | clear_changes () | |
Forget about any changes to this object's properties | ||
| ID | id () | |
| OwnedPropertyList | properties () | |
↠ ARDOUR:MPToggleControl
C‡: std::shared_ptr< ARDOUR::MPControl<bool> >, std::weak_ptr< ARDOUR::MPControl<bool> >
is-a: PBD:Controllable
| Methods | ||
|---|---|---|
| std::string | get_user_string () | |
| double | get_value () | |
| bool | isnil () | |
| double | lower () | |
| double | normal () | |
| void | set_value (double, GroupControlDisposition) | |
| double | upper () | |
Inherited from PBD:Controllable
| Methods | ||
|---|---|---|
| void | dump_registry () | |
| std::string | name () | |
| ControllableSet | registered_controllables () | |
| Cast | ||
| AutomationControl | to_automationcontrol () | |
| MPGainControl | to_mpgain () | |
| MPToggleControl | to_mptoggle () | |
Inherited from PBD:StatefulPtr
| Methods | ||
|---|---|---|
| void | clear_changes () | |
Forget about any changes to this object's properties | ||
| ID | id () | |
| OwnedPropertyList | properties () | |
∁ ARDOUR:MidiBuffer
C‡: ARDOUR::MidiBuffer
Buffer containing 8-bit unsigned char (MIDI) data.
| Methods | ||
|---|---|---|
| void | copy (MidiBuffer) | |
| bool | empty () | |
| bool | push_back (long, EventType, unsigned long, unsigned char*) | |
| bool | push_event (Event) | |
| void | resize (unsigned long) | |
Reallocate the buffer used internally to handle at least size_t units of data. The buffer is not silent after this operation. the capacity argument passed to the constructor must have been non-zero. | ||
| void | silence (long, long) | |
Clear (eg zero, or empty) buffer | ||
| unsigned long | size () | |
| ... | table (--lua--) | |
↠ ARDOUR:MidiModel
C‡: std::shared_ptr< ARDOUR::MidiModel >, std::weak_ptr< ARDOUR::MidiModel >
is-a: ARDOUR:AutomatableSequence
| Methods | ||
|---|---|---|
| void | apply_command (HistoryOwner, Command) | |
| void | apply_diff_command_as_commit (HistoryOwner, Command) | |
| bool | isnil () | |
| NoteDiffCommand | new_note_diff_command (std::string) | |
Start a new NoteDiff command. This has no side-effects on the model or Session, the returned command can be held on to for as long as the caller wishes, or discarded without formality, until apply_diff_command_* is called and ownership is taken. | ||
| NoteDiffCommand | new_patch_change_diff_command (std::string) | |
Start a new PatchChangeDiff command | ||
| NoteDiffCommand | new_sysex_diff_command (std::string) | |
Start a new SysExDiff command | ||
Inherited from ARDOUR:AutomatableSequence
| Cast | ||
|---|---|---|
| Sequence | to_sequence () | |
Inherited from ARDOUR:Automatable
| Methods | ||
|---|---|---|
| ParameterList | all_automatable_params () | |
API for Lua binding | ||
| AutomationControl | automation_control (Parameter, bool) | |
| Cast | ||
| Slavable | to_slavable () | |
∅ ARDOUR:MidiModel:DiffCommand
C‡: ARDOUR::MidiModel::DiffCommand
is-a: PBD:Command
Base class for Undo/Redo commands and changesets
This class object is only used indirectly as return-value and function-parameter. It provides no methods by itself.
Inherited from PBD:Command
| Methods | ||
|---|---|---|
| std::string | name () | |
| void | set_name (std::string) | |
Inherited from PBD:Stateful
| Methods | ||
|---|---|---|
| void | clear_changes () | |
Forget about any changes to this object's properties | ||
| ID | id () | |
| OwnedPropertyList | properties () | |
∁ ARDOUR:MidiModel:NoteDiffCommand
C‡: ARDOUR::MidiModel::PatchChangeDiffCommand
is-a: ARDOUR:MidiModel:DiffCommand
| Methods | ||
|---|---|---|
| void | add (NotePtr) | |
| void | add (PatchChangePtr) | |
| void | change (EventPtr, Beats) | |
| void | remove (NotePtr) | |
| void | remove (EventPtr) | |
| void | remove (PatchChangePtr) | |
Inherited from PBD:Command
| Methods | ||
|---|---|---|
| std::string | name () | |
| void | set_name (std::string) | |
Inherited from PBD:Stateful
| Methods | ||
|---|---|---|
| void | clear_changes () | |
Forget about any changes to this object's properties | ||
| ID | id () | |
| OwnedPropertyList | properties () | |
↠ ARDOUR:MidiPlaylist
C‡: std::shared_ptr< ARDOUR::MidiPlaylist >, std::weak_ptr< ARDOUR::MidiPlaylist >
is-a: ARDOUR:Playlist
Base class for objects with saveable and undoable state
| Methods | ||
|---|---|---|
| bool | isnil () | |
| void | set_note_mode (NoteMode) | |
Inherited from ARDOUR:Playlist
| Methods | ||
|---|---|---|
| void | add_region (Region, timepos_t, float, bool) | |
| Region | combine (RegionList, Track) | |
| unsigned int | count_regions_at (timepos_t) | |
| Playlist | cut (TimelineRangeList&) | |
| DataType | data_type () | |
| void | duplicate (Region, timepos_t&, timecnt_t, float) | |
| void | duplicate_range (TimelineRange&, float) | |
| void | duplicate_until (Region, timepos_t&, timecnt_t, timepos_t) | |
| bool | empty () | |
| Region | find_next_region (timepos_t, RegionPoint, int) | |
| timepos_t | find_next_region_boundary (timepos_t, int) | |
| long | find_next_transient (timepos_t, int) | |
| ID | get_orig_track_id () | |
| bool | hidden () | |
| void | lower_region (Region) | |
| void | lower_region_to_bottom (Region) | |
| unsigned int | n_regions () | |
| void | raise_region (Region) | |
| void | raise_region_to_top (Region) | |
| Region | region_by_id (ID) | |
| RegionListPtr | region_list () | |
| RegionListPtr | regions_at (timepos_t) | |
| RegionListPtr | regions_touched (timepos_t, timepos_t) | |
| RegionListPtr | regions_with_end_within (Range) | |
| RegionListPtr | regions_with_start_within (Range) | |
| void | remove_region (Region) | |
| bool | set_name (std::string) | |
| bool | shared () | |
| void | split_region (Region, timepos_t) | |
| Region | top_region_at (timepos_t) | |
| Region | top_unmuted_region_at (timepos_t) | |
| void | uncombine (Region) | |
| bool | used () | |
| Cast | ||
| AudioPlaylist | to_audioplaylist () | |
| MidiPlaylist | to_midiplaylist () | |
Inherited from ARDOUR:SessionObjectPtr
| Methods | ||
|---|---|---|
| std::string | name () | |
| Cast | ||
| Stateful | to_stateful () | |
| StatefulDestructible | to_statefuldestructible () | |
↠ ARDOUR:MidiPort
C‡: std::shared_ptr< ARDOUR::MidiPort >, std::weak_ptr< ARDOUR::MidiPort >
is-a: ARDOUR:Port
| Methods | ||
|---|---|---|
| MidiBuffer | get_midi_buffer (unsigned int) | |
| bool | input_active () | |
| bool | isnil () | |
| void | set_input_active (bool) | |
| Cast | ||
| AsyncMIDIPort | to_asyncmidiport () | |
Inherited from ARDOUR:Port
| Methods | ||
|---|---|---|
| int | connect (std::string) | |
| bool | connected () | |
Returns true if this port is connected to anything | ||
| bool | connected_to (std::string) | |
Returns true if this port is connected to o, otherwise false. | ||
| int | disconnect (std::string) | |
| int | disconnect_all () | |
| PortFlags | flags () | |
Returns flags | ||
| LuaTable(...) | get_connected_latency_range (LatencyRange&, bool) | |
| std::string | name () | |
Returns Port short name | ||
| bool | physically_connected () | |
| std::string | pretty_name (bool) | |
Returns Port human readable name | ||
| LatencyRange | private_latency_range (bool) | |
| LatencyRange | public_latency_range (bool) | |
| bool | receives_input () | |
Returns true if this Port receives input, otherwise false | ||
| bool | sends_output () | |
Returns true if this Port sends output, otherwise false | ||
| Cast | ||
| AsyncMIDIPort | to_asyncmidiport () | |
| AudioPort | to_audioport () | |
| MidiPort | to_midiport () | |
↠ ARDOUR:MidiRegion
C‡: std::shared_ptr< ARDOUR::MidiRegion >, std::weak_ptr< ARDOUR::MidiRegion >
is-a: ARDOUR:Region
Base class for objects with saveable and undoable state
| Methods | ||
|---|---|---|
| bool | do_export (std::string) | |
Export the MIDI data of the MidiRegion to a new MIDI file (SMF). | ||
| bool | isnil () | |
| MidiSource | midi_source (unsigned int) | |
| MidiModel | model () | |
Inherited from ARDOUR:Region
| Methods | ||
|---|---|---|
| bool | add_plugin (RegionFxPlugin, RegionFxPlugin) | |
| bool | at_natural_position () | |
| bool | automatic () | |
| bool | can_move () | |
| bool | captured () | |
| void | captured_xruns (XrunPositions&, bool) | |
| void | clear_sync_position () | |
| Control | control (Parameter, bool) | |
| bool | covers (timepos_t) | |
| void | cut_end (timepos_t) | |
| void | cut_front (timepos_t) | |
| DataType | data_type () | |
| bool | external () | |
| bool | has_transients () | |
| bool | hidden () | |
| bool | import () | |
| bool | is_compound () | |
| unsigned int | layer () | |
| timecnt_t | length () | |
| bool | load_plugin (PluginType, std::string) | |
| bool | locked () | |
| void | lower () | |
| void | lower_to_bottom () | |
| StringVector | master_source_names () | |
| SourceList | master_sources () | |
| void | move_start (timecnt_t) | |
| void | move_to_natural_position () | |
| bool | muted () | |
| RegionFxPlugin | nth_plugin (unsigned int) | |
| void | nudge_position (timecnt_t) | |
| bool | opaque () | |
| Playlist | playlist () | |
| timepos_t | position () | |
How the region parameters play together: POSITION: first sample of the region along the timeline START: first sample of the region within its source(s) LENGTH: number of samples the region represents | ||
| bool | position_locked () | |
| void | raise () | |
| void | raise_to_top () | |
| bool | remove_plugin (RegionFxPlugin, RegionFxPlugin) | |
| void | set_hidden (bool) | |
| void | set_initial_position (timepos_t) | |
| void | set_length (timecnt_t) | |
| void | set_locked (bool) | |
| void | set_muted (bool) | |
| bool | set_name (std::string) | |
Note: changing the name of a Region does not constitute an edit | ||
| void | set_opaque (bool) | |
| void | set_position (timepos_t) | |
| void | set_position_locked (bool) | |
| void | set_start (timepos_t) | |
| void | set_sync_position (timepos_t) | |
| void | set_video_locked (bool) | |
| float | shift () | |
| Source | source (unsigned int) | |
| timepos_t | start () | |
| float | stretch () | |
| bool | sync_marked () | |
| LuaTable(timecnt_t, ...) | sync_offset (int&) | |
| timepos_t | sync_position () | |
Returns Sync position in session time | ||
| Int64List | transients () | |
| void | trim_end (timepos_t) | |
| void | trim_front (timepos_t) | |
| void | trim_to (timepos_t, timecnt_t) | |
| bool | video_locked () | |
| bool | whole_file () | |
| Cast | ||
| AudioRegion | to_audioregion () | |
| MidiRegion | to_midiregion () | |
Inherited from ARDOUR:SessionObjectPtr
| Methods | ||
|---|---|---|
| std::string | name () | |
| Cast | ||
| Stateful | to_stateful () | |
| StatefulDestructible | to_statefuldestructible () | |
↠ ARDOUR:MidiSource
C‡: std::shared_ptr< ARDOUR::MidiSource >, std::weak_ptr< ARDOUR::MidiSource >
is-a: ARDOUR:Source
| Methods | ||
|---|---|---|
| bool | empty () | |
| bool | isnil () | |
| timepos_t | length () | |
| MidiModel | model () | |
Inherited from ARDOUR:Source
| Methods | ||
|---|---|---|
| std::string | ancestor_name () | |
| bool | can_be_analysed () | |
| XrunPositions | captured_xruns () | |
| bool | has_been_analysed () | |
| timepos_t | natural_position () | |
| timepos_t | timeline_position () | |
| long | timestamp () | |
| int | use_count () | |
| bool | used () | |
| bool | writable () | |
| Cast | ||
| AudioSource | to_audiosource () | |
| FileSource | to_filesource () | |
| MidiSource | to_midisource () | |
Inherited from ARDOUR:SessionObjectPtr
| Methods | ||
|---|---|---|
| std::string | name () | |
| Cast | ||
| Stateful | to_stateful () | |
| StatefulDestructible | to_statefuldestructible () | |
↠ ARDOUR:MidiTrack
C‡: std::shared_ptr< ARDOUR::MidiTrack >, std::weak_ptr< ARDOUR::MidiTrack >
is-a: ARDOUR:Track
Base class for objects with saveable and undoable state
| Methods | ||
|---|---|---|
| unsigned short | get_capture_channel_mask () | |
| ChannelMode | get_capture_channel_mode () | |
| ChannelMode | get_playback_channel_mask () | |
| ChannelMode | get_playback_channel_mode () | |
| bool | input_active () | |
| bool | isnil () | |
| void | set_capture_channel_mask (unsigned short) | |
| void | set_capture_channel_mode (ChannelMode, unsigned short) | |
| void | set_input_active (bool) | |
| void | set_playback_channel_mask (unsigned short) | |
| void | set_playback_channel_mode (ChannelMode, unsigned short) | |
| bool | write_immediate_event (EventType, unsigned long, unsigned char*) | |
Inherited from ARDOUR:Track
| Constructor | ||
|---|---|---|
| ℵ | ARDOUR.Track () | |
| Methods | ||
| Region | bounce (InterThreadInfo&, std::string) | |
| Region | bounce_range (long, long, InterThreadInfo&, Processor, bool, std::string, bool) | |
| bool | bounceable (Processor, bool) | |
Test if the track can be bounced with the given settings. If sends/inserts/returns are present in the signal path or the given track has no audio outputs bouncing is not possible.
Returns true if the track can be bounced, or false otherwise. | ||
| bool | can_record () | |
| int | find_and_use_playlist (DataType, ID) | |
| Playlist | playlist () | |
| bool | set_name (std::string) | |
| int | use_copy_playlist () | |
| int | use_new_playlist (DataType) | |
| int | use_playlist (DataType, Playlist, bool) | |
| Cast | ||
| AudioTrack | to_audio_track () | |
| MidiTrack | to_midi_track () | |
Inherited from ARDOUR:Route
| Methods | ||
|---|---|---|
| bool | active () | |
| int | add_aux_send (Route, Processor) | |
Add an aux send to a route.
| ||
| int | add_foldback_send (Route, bool) | |
| int | add_processor_by_index (Processor, int, ProcessorStreams, bool) | |
| bool | add_sidechain (Processor) | |
| Amp | amp () | |
| void | clear_stripables () | |
| std::string | comment () | |
| bool | customize_plugin_insert (Processor, unsigned int, ChanCount, ChanCount) | |
| DataType | data_type () | |
| Stripable | first_selected_stripable () | |
| IO | input () | |
| Delivery | main_outs () | |
| MonitorControl | monitoring_control () | |
| MonitorState | monitoring_state () | |
| bool | muted () | |
| ChanCount | n_inputs () | |
| ChanCount | n_outputs () | |
| Processor | nth_plugin (unsigned int) | |
| Processor | nth_processor (unsigned int) | |
| Processor | nth_send (unsigned int) | |
| IO | output () | |
| PannerShell | panner_shell () | |
| PeakMeter | peak_meter () | |
| long | playback_latency (bool) | |
| int | remove_processor (Processor, ProcessorStreams, bool) | |
| int | remove_processors (ProcessorList, ProcessorStreams) | |
| bool | remove_sidechain (Processor) | |
| int | reorder_processors (ProcessorList, ProcessorStreams) | |
| int | replace_processor (Processor, Processor, ProcessorStreams) | |
| bool | reset_plugin_insert (Processor) | |
reset plugin-insert configuration to default, disable customizations. This is equivalent to calling customize_plugin_insert (proc, 0, unused)
Returns true if successful | ||
| int | save_as_template (std::string, std::string, std::string) | |
| void | select_next_stripable (bool, bool) | |
| void | select_prev_stripable (bool, bool) | |
| void | set_active (bool, void*) | |
| void | set_comment (std::string, void*) | |
| void | set_meter_point (MeterPoint) | |
| bool | set_strict_io (bool) | |
| long | signal_latency () | |
| bool | soloed () | |
| bool | strict_io () | |
| SurroundReturn | surround_return () | |
| SurroundSend | surround_send () | |
| Processor | the_instrument () | |
Return the first processor that accepts has at least one MIDI input and at least one audio output. In the vast majority of cases, this will be "the instrument". This does not preclude other MIDI->audio processors later in the processing chain, but that would be a special case not covered by this utility function. | ||
| Amp | trim () | |
| Cast | ||
| Track | to_track () | |
Inherited from ARDOUR:Stripable
| Methods | ||
|---|---|---|
| unsigned int | eq_band_cnt () | |
| std::string | eq_band_name (unsigned int) | |
| GainControl | gain_control () | |
| bool | is_auditioner () | |
| bool | is_hidden () | |
| bool | is_master () | |
| bool | is_monitor () | |
| bool | is_private_route () | |
| bool | is_selected () | |
| bool | is_surround_master () | |
| AutomationControl | mapped_control (WellKnownCtrl, unsigned int) | |
| ReadOnlyControl | mapped_output (WellKnownData) | |
| AutomationControl | master_send_enable_controllable () | |
| MonitorProcessor | monitor_control () | |
| MuteControl | mute_control () | |
| AutomationControl | pan_azimuth_control () | |
| AutomationControl | pan_elevation_control () | |
| AutomationControl | pan_frontback_control () | |
| AutomationControl | pan_lfe_control () | |
| AutomationControl | pan_width_control () | |
| PhaseControl | phase_control () | |
| PresentationInfo | presentation_info_ptr () | |
| AutomationControl | rec_enable_control () | |
| AutomationControl | rec_safe_control () | |
| AutomationControl | send_enable_controllable (unsigned int) | |
| AutomationControl | send_level_controllable (unsigned int, bool) | |
| std::string | send_name (unsigned int) | |
| AutomationControl | send_pan_azimuth_controllable (unsigned int) | |
| AutomationControl | send_pan_azimuth_enable_controllable (unsigned int) | |
| void | set_presentation_order (unsigned int) | |
| bool | slaved () | |
| bool | slaved_to (VCA) | |
| SoloControl | solo_control () | |
| SoloIsolateControl | solo_isolate_control () | |
| SoloSafeControl | solo_safe_control () | |
| GainControl | trim_control () | |
| Cast | ||
| Automatable | to_automatable () | |
| Route | to_route () | |
| Slavable | to_slavable () | |
| VCA | to_vca () | |
Inherited from ARDOUR:SessionObjectPtr
| Methods | ||
|---|---|---|
| std::string | name () | |
| Cast | ||
| Stateful | to_stateful () | |
| StatefulDestructible | to_statefuldestructible () | |
Inherited from PBD:Stateful
| Methods | ||
|---|---|---|
| void | clear_changes () | |
Forget about any changes to this object's properties | ||
| ID | id () | |
| OwnedPropertyList | properties () | |
∁ ARDOUR:MidiTrackList
C‡: std::list<std::shared_ptr<ARDOUR::MidiTrack> >
| Constructor | ||
|---|---|---|
| ℂ | ARDOUR.MidiTrackList () | |
| Methods | ||
| LuaTable | add (LuaTable {MidiTrack}) | |
| MidiTrack | back () | |
| void | clear () | |
| bool | empty () | |
| MidiTrack | front () | |
| LuaIter | iter () | |
| void | push_back (MidiTrack) | |
| void | reverse () | |
| unsigned long | size () | |
| LuaTable | table () | |
| void | unique () | |
↠ ARDOUR:MixerScene
C‡: std::shared_ptr< ARDOUR::MixerScene >, std::weak_ptr< ARDOUR::MixerScene >
Base class for objects with saveable and undoable state
| Methods | ||
|---|---|---|
| bool | apply () | |
| bool | apply_to (ControllableSet, AutomationTypeSet) | |
| void | clear () | |
| bool | empty () | |
| bool | isnil () | |
| std::string | name () | |
| bool | set_name (std::string) | |
| void | snapshot () | |
↠ ARDOUR:MonitorControl
C‡: std::shared_ptr< ARDOUR::MonitorControl >, std::weak_ptr< ARDOUR::MonitorControl >
is-a: ARDOUR:SlavableAutomationControl
Base class for objects with saveable and undoable state
| Methods | ||
|---|---|---|
| bool | isnil () | |
| MonitorChoice | monitoring_choice () | |
Inherited from ARDOUR:SlavableAutomationControl
| Methods | ||
|---|---|---|
| void | add_master (AutomationControl) | |
| void | clear_masters () | |
| int | get_boolean_masters () | |
| double | get_masters_value () | |
| void | remove_master (AutomationControl) | |
| bool | slaved () | |
| bool | slaved_to (AutomationControl) | |
Inherited from ARDOUR:AutomationControl
| Methods | ||
|---|---|---|
| AutomationList | alist () | |
| AutoState | automation_state () | |
| ParameterDescriptor | desc () | |
| double | get_value () | |
Get `internal' value Returns raw value as used for the plugin/processor control port | ||
| double | lower () | |
| double | normal () | |
| void | set_automation_state (AutoState) | |
| void | set_value (double, GroupControlDisposition) | |
Set `internal' value All derived classes must implement this. Basic derived classes will ignore group_override but more sophisticated children, notably those that proxy the value setting logic via an object that is aware of group relationships between this control and others, will find it useful.
| ||
| void | start_touch (timepos_t) | |
| void | stop_touch (timepos_t) | |
| bool | toggled () | |
| double | upper () | |
| bool | writable () | |
| Cast | ||
| Control | to_ctrl () | |
| SlavableAutomationControl | to_slavable () | |
Inherited from PBD:Controllable
| Methods | ||
|---|---|---|
| void | dump_registry () | |
| std::string | name () | |
| ControllableSet | registered_controllables () | |
| Cast | ||
| AutomationControl | to_automationcontrol () | |
| MPGainControl | to_mpgain () | |
| MPToggleControl | to_mptoggle () | |
Inherited from PBD:StatefulPtr
| Methods | ||
|---|---|---|
| void | clear_changes () | |
Forget about any changes to this object's properties | ||
| ID | id () | |
| OwnedPropertyList | properties () | |
↠ ARDOUR:MonitorProcessor
C‡: std::shared_ptr< ARDOUR::MonitorProcessor >, std::weak_ptr< ARDOUR::MonitorProcessor >
is-a: ARDOUR:Processor
Base class for objects with saveable and undoable state
| Methods | ||
|---|---|---|
| Controllable | channel_cut_control (unsigned int) | |
| Controllable | channel_dim_control (unsigned int) | |
| Controllable | channel_polarity_control (unsigned int) | |
| Controllable | channel_solo_control (unsigned int) | |
| bool | cut (unsigned int) | |
| bool | cut_all () | |
| Controllable | cut_control () | |
| bool | dim_all () | |
| Controllable | dim_control () | |
| float | dim_level () | |
| Controllable | dim_level_control () | |
| bool | dimmed (unsigned int) | |
| bool | inverted (unsigned int) | |
| bool | isnil () | |
| bool | monitor_active () | |
| bool | mono () | |
| Controllable | mono_control () | |
| void | set_cut (unsigned int, bool) | |
| void | set_cut_all (bool) | |
| void | set_dim (unsigned int, bool) | |
| void | set_dim_all (bool) | |
| void | set_mono (bool) | |
| void | set_polarity (unsigned int, bool) | |
| void | set_solo (unsigned int, bool) | |
| Controllable | solo_boost_control () | |
| float | solo_boost_level () | |
| bool | soloed (unsigned int) | |
Inherited from ARDOUR:Processor
| Methods | ||
|---|---|---|
| void | activate () | |
| bool | active () | |
| long | capture_offset () | |
| void | deactivate () | |
| std::string | display_name () | |
| bool | display_to_user () | |
| long | input_latency () | |
| ChanCount | input_streams () | |
| long | output_latency () | |
| ChanCount | output_streams () | |
| long | playback_offset () | |
| long | signal_latency () | |
| Cast | ||
| Amp | to_amp () | |
| Automatable | to_automatable () | |
| DelayLine | to_delayline () | |
| DiskIOProcessor | to_diskioprocessor () | |
| DiskReader | to_diskreader () | |
| DiskWriter | to_diskwriter () | |
| PluginInsert | to_insert () | |
| InternalSend | to_internalsend () | |
| IOProcessor | to_ioprocessor () | |
| Latent | to_latent () | |
| PeakMeter | to_meter () | |
| MonitorProcessor | to_monitorprocessor () | |
| PeakMeter | to_peakmeter () | |
| PluginInsert | to_plugininsert () | |
| PolarityProcessor | to_polarityprocessor () | |
| Send | to_send () | |
| SideChain | to_sidechain () | |
| SurroundSend | to_surroundsend () | |
| UnknownProcessor | to_unknownprocessor () | |
Inherited from ARDOUR:SessionObjectPtr
| Methods | ||
|---|---|---|
| std::string | name () | |
| Cast | ||
| Stateful | to_stateful () | |
| StatefulDestructible | to_statefuldestructible () | |
↠ ARDOUR:MuteControl
C‡: std::shared_ptr< ARDOUR::MuteControl >, std::weak_ptr< ARDOUR::MuteControl >
is-a: ARDOUR:SlavableAutomationControl
Base class for objects with saveable and undoable state
| Methods | ||
|---|---|---|
| bool | isnil () | |
| MutePoint | mute_points () | |
| bool | muted () | |
| bool | muted_by_self () | |
| void | set_mute_points (MutePoint) | |
Inherited from ARDOUR:SlavableAutomationControl
| Methods | ||
|---|---|---|
| void | add_master (AutomationControl) | |
| void | clear_masters () | |
| int | get_boolean_masters () | |
| double | get_masters_value () | |
| void | remove_master (AutomationControl) | |
| bool | slaved () | |
| bool | slaved_to (AutomationControl) | |
Inherited from ARDOUR:AutomationControl
| Methods | ||
|---|---|---|
| AutomationList | alist () | |
| AutoState | automation_state () | |
| ParameterDescriptor | desc () | |
| double | get_value () | |
Get `internal' value Returns raw value as used for the plugin/processor control port | ||
| double | lower () | |
| double | normal () | |
| void | set_automation_state (AutoState) | |
| void | set_value (double, GroupControlDisposition) | |
Set `internal' value All derived classes must implement this. Basic derived classes will ignore group_override but more sophisticated children, notably those that proxy the value setting logic via an object that is aware of group relationships between this control and others, will find it useful.
| ||
| void | start_touch (timepos_t) | |
| void | stop_touch (timepos_t) | |
| bool | toggled () | |
| double | upper () | |
| bool | writable () | |
| Cast | ||
| Control | to_ctrl () | |
| SlavableAutomationControl | to_slavable () | |
Inherited from PBD:Controllable
| Methods | ||
|---|---|---|
| void | dump_registry () | |
| std::string | name () | |
| ControllableSet | registered_controllables () | |
| Cast | ||
| AutomationControl | to_automationcontrol () | |
| MPGainControl | to_mpgain () | |
| MPToggleControl | to_mptoggle () | |
Inherited from PBD:StatefulPtr
| Methods | ||
|---|---|---|
| void | clear_changes () | |
Forget about any changes to this object's properties | ||
| ID | id () | |
| OwnedPropertyList | properties () | |
∁ ARDOUR:NotePtrList
C‡: std::list<std::shared_ptr<Evoral::Note<Temporal::Beats> > > >
| Constructor | ||
|---|---|---|
| ℂ | ARDOUR.NotePtrList () | |
| Methods | ||
| LuaTable | add (LuaTable {Beats}) | |
| NotePtr | back () | |
| void | clear () | |
| bool | empty () | |
| NotePtr | front () | |
| LuaIter | iter () | |
| void | push_back (NotePtr) | |
| void | reverse () | |
| unsigned long | size () | |
| LuaTable | table () | |
| void | unique () | |
∅ ARDOUR:OwnedPropertyList
C‡: PBD::OwnedPropertyList
is-a: ARDOUR:PropertyList
Persistent Property List
A variant of PropertyList that does not delete its property list in its destructor. Objects with their own Properties store them in an OwnedPropertyList to avoid having them deleted at the wrong time.
This class object is only used indirectly as return-value and function-parameter. It provides no methods by itself.
∁ ARDOUR:PDC
C‡: ARDOUR::Latent
| Methods | ||
|---|---|---|
| void | force_zero_latency (bool) | |
| bool | zero_latency () | |
↠ ARDOUR:PIControl
C‡: std::shared_ptr< ARDOUR::PluginInsert::PIControl >, std::weak_ptr< ARDOUR::PluginInsert::PIControl >
is-a: ARDOUR:PluginControl
A control that manipulates a plugin parameter (control port).
| Methods | ||
|---|---|---|
| bool | isnil () | |
Inherited from ARDOUR:AutomationControl
| Methods | ||
|---|---|---|
| AutomationList | alist () | |
| AutoState | automation_state () | |
| ParameterDescriptor | desc () | |
| double | get_value () | |
Get `internal' value Returns raw value as used for the plugin/processor control port | ||
| double | lower () | |
| double | normal () | |
| void | set_automation_state (AutoState) | |
| void | set_value (double, GroupControlDisposition) | |
Set `internal' value All derived classes must implement this. Basic derived classes will ignore group_override but more sophisticated children, notably those that proxy the value setting logic via an object that is aware of group relationships between this control and others, will find it useful.
| ||
| void | start_touch (timepos_t) | |
| void | stop_touch (timepos_t) | |
| bool | toggled () | |
| double | upper () | |
| bool | writable () | |
| Cast | ||
| Control | to_ctrl () | |
| SlavableAutomationControl | to_slavable () | |
Inherited from PBD:Controllable
| Methods | ||
|---|---|---|
| void | dump_registry () | |
| std::string | name () | |
| ControllableSet | registered_controllables () | |
| Cast | ||
| AutomationControl | to_automationcontrol () | |
| MPGainControl | to_mpgain () | |
| MPToggleControl | to_mptoggle () | |
Inherited from PBD:StatefulPtr
| Methods | ||
|---|---|---|
| void | clear_changes () | |
Forget about any changes to this object's properties | ||
| ID | id () | |
| OwnedPropertyList | properties () | |
↠ ARDOUR:PannerShell
C‡: std::shared_ptr< ARDOUR::PannerShell >, std::weak_ptr< ARDOUR::PannerShell >
is-a: ARDOUR:SessionObjectPtr
Class to manage panning by instantiating and controlling an appropriate Panner object for a given in/out configuration.
| Methods | ||
|---|---|---|
| bool | bypassed () | |
| bool | isnil () | |
| void | set_bypassed (bool) | |
Inherited from ARDOUR:SessionObjectPtr
| Methods | ||
|---|---|---|
| std::string | name () | |
| Cast | ||
| Stateful | to_stateful () | |
| StatefulDestructible | to_statefuldestructible () | |
∁ ARDOUR:ParameterDescriptor
C‡: ARDOUR::ParameterDescriptor
is-a: Evoral:ParameterDescriptor
Descriptor of a parameter or control.
Essentially a union of LADSPA, VST and LV2 info.
| Constructor | ||
|---|---|---|
| ℂ | ARDOUR.ParameterDescriptor () | |
| Methods | ||
| std::string | midi_note_name (unsigned char, bool, bool, bool) | |
| Data Members | ||
| unsigned int | display_priority | |
higher is more important http://lv2plug.in/ns/ext/port-props#displayPriority | ||
| bool | enumeration | |
| bool | inline_ctrl | |
| bool | integer_step | |
| std::string | label | |
| float | largestep | |
| std::string | print_fmt | |
format string for pretty printing | ||
| float | smallstep | |
| bool | sr_dependent | |
| float | step | |
Inherited from Evoral:ParameterDescriptor
| Constructor | ||
|---|---|---|
| ℂ | Evoral.ParameterDescriptor () | |
| Data Members | ||
| bool | logarithmic | |
True for log-scale parameters | ||
| float | lower | |
Minimum value (in Hz, for frequencies) | ||
| float | normal | |
Default value | ||
| unsigned int | rangesteps | |
number of steps, [min,max] (inclusive). <= 1 means continuous. == 2 only min, max. For integer controls this is usually (1 + max - min) | ||
| bool | toggled | |
True iff parameter is boolean | ||
| float | upper | |
Maximum value (in Hz, for frequencies) | ||
∁ ARDOUR:ParameterList
C‡: std::vector<Evoral::Parameter >
| Constructor | ||
|---|---|---|
| ℂ | ARDOUR.ParameterList () | |
| Methods | ||
| Parameter | at (unsigned long) | |
| bool | empty () | |
| LuaIter | iter () | |
| unsigned long | size () | |
| LuaTable | table () | |
∁ ARDOUR:PatchChangePtrList
C‡: std::list<std::shared_ptr<Evoral::PatchChange<Temporal::Beats> > > >
| Constructor | ||
|---|---|---|
| ℂ | ARDOUR.PatchChangePtrList () | |
| Methods | ||
| LuaTable | add (LuaTable {Beats}) | |
| PatchChangePtr | back () | |
| void | clear () | |
| bool | empty () | |
| PatchChangePtr | front () | |
| LuaIter | iter () | |
| void | push_back (PatchChangePtr) | |
| void | reverse () | |
| unsigned long | size () | |
| LuaTable | table () | |
| void | unique () | |
↠ ARDOUR:PeakMeter
C‡: std::shared_ptr< ARDOUR::PeakMeter >, std::weak_ptr< ARDOUR::PeakMeter >
is-a: ARDOUR:Processor
| Methods | ||
|---|---|---|
| bool | isnil () | |
| float | meter_level (unsigned int, MeterType) | |
| MeterType | meter_type () | |
| void | reset_max () | |
| void | set_meter_type (MeterType) | |
Inherited from ARDOUR:Processor
| Methods | ||
|---|---|---|
| void | activate () | |
| bool | active () | |
| long | capture_offset () | |
| void | deactivate () | |
| std::string | display_name () | |
| bool | display_to_user () | |
| long | input_latency () | |
| ChanCount | input_streams () | |
| long | output_latency () | |
| ChanCount | output_streams () | |
| long | playback_offset () | |
| long | signal_latency () | |
| Cast | ||
| Amp | to_amp () | |
| Automatable | to_automatable () | |
| DelayLine | to_delayline () | |
| DiskIOProcessor | to_diskioprocessor () | |
| DiskReader | to_diskreader () | |
| DiskWriter | to_diskwriter () | |
| PluginInsert | to_insert () | |
| InternalSend | to_internalsend () | |
| IOProcessor | to_ioprocessor () | |
| Latent | to_latent () | |
| PeakMeter | to_meter () | |
| MonitorProcessor | to_monitorprocessor () | |
| PeakMeter | to_peakmeter () | |
| PluginInsert | to_plugininsert () | |
| PolarityProcessor | to_polarityprocessor () | |
| Send | to_send () | |
| SideChain | to_sidechain () | |
| SurroundSend | to_surroundsend () | |
| UnknownProcessor | to_unknownprocessor () | |
Inherited from ARDOUR:SessionObjectPtr
| Methods | ||
|---|---|---|
| std::string | name () | |
| Cast | ||
| Stateful | to_stateful () | |
| StatefulDestructible | to_statefuldestructible () | |
↠ ARDOUR:PhaseControl
C‡: std::shared_ptr< ARDOUR::PhaseControl >, std::weak_ptr< ARDOUR::PhaseControl >
is-a: ARDOUR:AutomationControl
Base class for objects with saveable and undoable state
| Methods | ||
|---|---|---|
| bool | inverted (unsigned int) | |
| bool | isnil () | |
| void | set_phase_invert (unsigned int, bool) | |
| ||
Inherited from ARDOUR:AutomationControl
| Methods | ||
|---|---|---|
| AutomationList | alist () | |
| AutoState | automation_state () | |
| ParameterDescriptor | desc () | |
| double | get_value () | |
Get `internal' value Returns raw value as used for the plugin/processor control port | ||
| double | lower () | |
| double | normal () | |
| void | set_automation_state (AutoState) | |
| void | set_value (double, GroupControlDisposition) | |
Set `internal' value All derived classes must implement this. Basic derived classes will ignore group_override but more sophisticated children, notably those that proxy the value setting logic via an object that is aware of group relationships between this control and others, will find it useful.
| ||
| void | start_touch (timepos_t) | |
| void | stop_touch (timepos_t) | |
| bool | toggled () | |
| double | upper () | |
| bool | writable () | |
| Cast | ||
| Control | to_ctrl () | |
| SlavableAutomationControl | to_slavable () | |
Inherited from PBD:Controllable
| Methods | ||
|---|---|---|
| void | dump_registry () | |
| std::string | name () | |
| ControllableSet | registered_controllables () | |
| Cast | ||
| AutomationControl | to_automationcontrol () | |
| MPGainControl | to_mpgain () | |
| MPToggleControl | to_mptoggle () | |
Inherited from PBD:StatefulPtr
| Methods | ||
|---|---|---|
| void | clear_changes () | |
Forget about any changes to this object's properties | ||
| ID | id () | |
| OwnedPropertyList | properties () | |
↠ ARDOUR:Playlist
C‡: std::shared_ptr< ARDOUR::Playlist >, std::weak_ptr< ARDOUR::Playlist >
is-a: ARDOUR:SessionObjectPtr
A named object associated with a Session. Objects derived from this class are expected to be destroyed before the session calls drop_references().
| Methods | ||
|---|---|---|
| void | add_region (Region, timepos_t, float, bool) | |
| Region | combine (RegionList, Track) | |
| unsigned int | count_regions_at (timepos_t) | |
| Playlist | cut (TimelineRangeList&) | |
| DataType | data_type () | |
| void | duplicate (Region, timepos_t&, timecnt_t, float) | |
| void | duplicate_range (TimelineRange&, float) | |
| void | duplicate_until (Region, timepos_t&, timecnt_t, timepos_t) | |
| bool | empty () | |
| Region | find_next_region (timepos_t, RegionPoint, int) | |
| timepos_t | find_next_region_boundary (timepos_t, int) | |
| long | find_next_transient (timepos_t, int) | |
| ID | get_orig_track_id () | |
| bool | hidden () | |
| bool | isnil () | |
| void | lower_region (Region) | |
| void | lower_region_to_bottom (Region) | |
| unsigned int | n_regions () | |
| void | raise_region (Region) | |
| void | raise_region_to_top (Region) | |
| Region | region_by_id (ID) | |
| RegionListPtr | region_list () | |
| RegionListPtr | regions_at (timepos_t) | |
| RegionListPtr | regions_touched (timepos_t, timepos_t) | |
| RegionListPtr | regions_with_end_within (Range) | |
| RegionListPtr | regions_with_start_within (Range) | |
| void | remove_region (Region) | |
| bool | set_name (std::string) | |
| bool | shared () | |
| void | split_region (Region, timepos_t) | |
| Region | top_region_at (timepos_t) | |
| Region | top_unmuted_region_at (timepos_t) | |
| void | uncombine (Region) | |
| bool | used () | |
| Cast | ||
| AudioPlaylist | to_audioplaylist () | |
| MidiPlaylist | to_midiplaylist () | |
Inherited from ARDOUR:SessionObjectPtr
| Methods | ||
|---|---|---|
| std::string | name () | |
| Cast | ||
| Stateful | to_stateful () | |
| StatefulDestructible | to_statefuldestructible () | |
∁ ARDOUR:PlaylistList
C‡: std::vector<std::shared_ptr<ARDOUR::Playlist> >
| Constructor | ||
|---|---|---|
| ℂ | ARDOUR.PlaylistList () | |
| ℂ | ARDOUR.PlaylistList () | |
| Methods | ||
| LuaTable | add (LuaTable {Playlist}) | |
| Playlist | at (unsigned long) | |
| void | clear () | |
| bool | empty () | |
| LuaIter | iter () | |
| void | push_back (Playlist) | |
| void | reserve (unsigned long) | |
| unsigned long | size () | |
| LuaTable | table () | |
| ... | to_array (--lua--) | |
↠ ARDOUR:Plugin
C‡: std::shared_ptr< ARDOUR::Plugin >, std::weak_ptr< ARDOUR::Plugin >
is-a: PBD:StatefulDestructiblePtr
A plugin is an external module (usually 3rd party provided) loaded into Ardour for the purpose of digital signal processing.
This class provides an abstraction for methords provided by all supported plugin standards such as presets, name, parameters etc.
Plugins are not used directly in Ardour but always wrapped by a PluginInsert.
| Methods | ||
|---|---|---|
| float | default_value (unsigned int) | |
| IOPortDescription | describe_io_port (DataType, bool, unsigned int) | |
| std::string | get_docs () | |
| PluginInfo | get_info () | |
| float | get_parameter (unsigned int) | |
| LuaTable(int, ...) | get_parameter_descriptor (unsigned int, ParameterDescriptor&) | |
| std::string | get_parameter_docs (unsigned int) | |
| bool | isnil () | |
| char* | label () | |
| PresetRecord | last_preset () | |
Returns Last preset to be requested; the settings may have been changed since; find out with parameter_changed_since_last_preset. | ||
| bool | load_preset (PresetRecord) | |
| char* | maker () | |
| char* | name () | |
| LuaTable(unsigned int, ...) | nth_parameter (unsigned int, bool&) | |
| unsigned int | parameter_count () | |
| bool | parameter_is_audio (unsigned int) | |
| bool | parameter_is_control (unsigned int) | |
| bool | parameter_is_input (unsigned int) | |
| bool | parameter_is_output (unsigned int) | |
| std::string | parameter_label (unsigned int) | |
| PresetRecord | preset_by_label (std::string) | |
| PresetRecord | preset_by_uri (std::string) | |
| void | remove_preset (std::string) | |
| PresetRecord | save_preset (std::string) | |
Create a new plugin-preset from the current state
Returns PresetRecord with empty URI on failure | ||
| std::string | unique_id () | |
| Cast | ||
| LuaProc | to_luaproc () | |
Inherited from PBD:StatefulPtr
| Methods | ||
|---|---|---|
| void | clear_changes () | |
Forget about any changes to this object's properties | ||
| ID | id () | |
| OwnedPropertyList | properties () | |
∁ ARDOUR:Plugin:IOPortDescription
C‡: ARDOUR::Plugin::IOPortDescription
| Data Members | ||
|---|---|---|
| unsigned int | group_channel | |
| std::string | group_name | |
| bool | is_sidechain | |
| std::string | name | |
↠ ARDOUR:PluginControl
C‡: std::shared_ptr< ARDOUR::PlugInsertBase::PluginControl >, std::weak_ptr< ARDOUR::PlugInsertBase::PluginControl >
is-a: ARDOUR:AutomationControl
A control that manipulates a plugin parameter (control port).
| Methods | ||
|---|---|---|
| bool | isnil () | |
Inherited from ARDOUR:AutomationControl
| Methods | ||
|---|---|---|
| AutomationList | alist () | |
| AutoState | automation_state () | |
| ParameterDescriptor | desc () | |
| double | get_value () | |
Get `internal' value Returns raw value as used for the plugin/processor control port | ||
| double | lower () | |
| double | normal () | |
| void | set_automation_state (AutoState) | |
| void | set_value (double, GroupControlDisposition) | |
Set `internal' value All derived classes must implement this. Basic derived classes will ignore group_override but more sophisticated children, notably those that proxy the value setting logic via an object that is aware of group relationships between this control and others, will find it useful.
| ||
| void | start_touch (timepos_t) | |
| void | stop_touch (timepos_t) | |
| bool | toggled () | |
| double | upper () | |
| bool | writable () | |
| Cast | ||
| Control | to_ctrl () | |
| SlavableAutomationControl | to_slavable () | |
Inherited from PBD:Controllable
| Methods | ||
|---|---|---|
| void | dump_registry () | |
| std::string | name () | |
| ControllableSet | registered_controllables () | |
| Cast | ||
| AutomationControl | to_automationcontrol () | |
| MPGainControl | to_mpgain () | |
| MPToggleControl | to_mptoggle () | |
Inherited from PBD:StatefulPtr
| Methods | ||
|---|---|---|
| void | clear_changes () | |
Forget about any changes to this object's properties | ||
| ID | id () | |
| OwnedPropertyList | properties () | |
↠ ARDOUR:PluginInfo
C‡: std::shared_ptr< ARDOUR::PluginInfo >, std::weak_ptr< ARDOUR::PluginInfo >
| Constructor | ||
|---|---|---|
| ℵ | ARDOUR.PluginInfo () | |
| Methods | ||
| PresetVector | get_presets (bool) | |
| bool | is_instrument () | |
| bool | isnil () | |
| Data Members | ||
| std::string | category | |
| std::string | creator | |
| ARDOUR:ChanCount | n_inputs | |
| ARDOUR:ChanCount | n_outputs | |
| std::string | name | |
| std::string | path | |
| ARDOUR.PluginType | _type | |
| std::string | unique_id | |
∁ ARDOUR:PluginInfoList
C‡: std::list<std::shared_ptr<ARDOUR::PluginInfo> >
| Constructor | ||
|---|---|---|
| ℂ | ARDOUR.PluginInfoList () | |
| Methods | ||
| LuaTable | add (LuaTable {PluginInfo}) | |
| PluginInfo | back () | |
| void | clear () | |
| bool | empty () | |
| PluginInfo | front () | |
| LuaIter | iter () | |
| void | push_back (PluginInfo) | |
| void | reverse () | |
| unsigned long | size () | |
| LuaTable | table () | |
| void | unique () | |
↠ ARDOUR:PluginInsert
C‡: std::shared_ptr< ARDOUR::PluginInsert >, std::weak_ptr< ARDOUR::PluginInsert >
is-a: ARDOUR:Processor
| Methods | ||
|---|---|---|
| void | activate () | |
| void | clear_stats () | |
| ReadOnlyControl | control_output (unsigned int) | |
| void | deactivate () | |
| void | enable (bool) | |
| bool | enabled () | |
| unsigned int | get_count () | |
| LuaTable(bool, ...) | get_stats (long&, long&, double&, double&) | |
| bool | has_sidechain () | |
| ChanMapping | input_map (unsigned int) | |
| bool | is_channelstrip () | |
| bool | is_instrument () | |
| bool | isnil () | |
| ChanCount | natural_input_streams () | |
| ChanCount | natural_output_streams () | |
| ChanMapping | output_map (unsigned int) | |
| Plugin | plugin (unsigned int) | |
| bool | reset_parameters_to_default () | |
| void | set_input_map (unsigned int, ChanMapping) | |
| void | set_output_map (unsigned int, ChanMapping) | |
| void | set_thru_map (ChanMapping) | |
| IO | sidechain_input () | |
| long | signal_latency () | |
| bool | strict_io_configured () | |
| ChanMapping | thru_map () | |
| PluginType | _type () | |
| bool | write_immediate_event (EventType, unsigned long, unsigned char*) | |
Inherited from ARDOUR:Processor
| Methods | ||
|---|---|---|
| bool | active () | |
| long | capture_offset () | |
| std::string | display_name () | |
| bool | display_to_user () | |
| long | input_latency () | |
| ChanCount | input_streams () | |
| long | output_latency () | |
| ChanCount | output_streams () | |
| long | playback_offset () | |
| Cast | ||
| Amp | to_amp () | |
| Automatable | to_automatable () | |
| DelayLine | to_delayline () | |
| DiskIOProcessor | to_diskioprocessor () | |
| DiskReader | to_diskreader () | |
| DiskWriter | to_diskwriter () | |
| PluginInsert | to_insert () | |
| InternalSend | to_internalsend () | |
| IOProcessor | to_ioprocessor () | |
| Latent | to_latent () | |
| PeakMeter | to_meter () | |
| MonitorProcessor | to_monitorprocessor () | |
| PeakMeter | to_peakmeter () | |
| PluginInsert | to_plugininsert () | |
| PolarityProcessor | to_polarityprocessor () | |
| Send | to_send () | |
| SideChain | to_sidechain () | |
| SurroundSend | to_surroundsend () | |
| UnknownProcessor | to_unknownprocessor () | |
Inherited from ARDOUR:SessionObjectPtr
| Methods | ||
|---|---|---|
| std::string | name () | |
| Cast | ||
| Stateful | to_stateful () | |
| StatefulDestructible | to_statefuldestructible () | |
↠ ARDOUR:PluginPropertyControl
C‡: std::shared_ptr< ARDOUR::PlugInsertBase::PluginPropertyControl >, std::weak_ptr< ARDOUR::PlugInsertBase::PluginPropertyControl >
is-a: ARDOUR:AutomationControl
A control that manipulates a plugin property (message).
| Methods | ||
|---|---|---|
| bool | isnil () | |
Inherited from ARDOUR:AutomationControl
| Methods | ||
|---|---|---|
| AutomationList | alist () | |
| AutoState | automation_state () | |
| ParameterDescriptor | desc () | |
| double | get_value () | |
Get `internal' value Returns raw value as used for the plugin/processor control port | ||
| double | lower () | |
| double | normal () | |
| void | set_automation_state (AutoState) | |
| void | set_value (double, GroupControlDisposition) | |
Set `internal' value All derived classes must implement this. Basic derived classes will ignore group_override but more sophisticated children, notably those that proxy the value setting logic via an object that is aware of group relationships between this control and others, will find it useful.
| ||
| void | start_touch (timepos_t) | |
| void | stop_touch (timepos_t) | |
| bool | toggled () | |
| double | upper () | |
| bool | writable () | |
| Cast | ||
| Control | to_ctrl () | |
| SlavableAutomationControl | to_slavable () | |
Inherited from PBD:Controllable
| Methods | ||
|---|---|---|
| void | dump_registry () | |
| std::string | name () | |
| ControllableSet | registered_controllables () | |
| Cast | ||
| AutomationControl | to_automationcontrol () | |
| MPGainControl | to_mpgain () | |
| MPToggleControl | to_mptoggle () | |
Inherited from PBD:StatefulPtr
| Methods | ||
|---|---|---|
| void | clear_changes () | |
Forget about any changes to this object's properties | ||
| ID | id () | |
| OwnedPropertyList | properties () | |
ℕ ARDOUR.PluginType
| Methods | ||
|---|---|---|
| std::string | name (PluginType, bool) | |
↠ ARDOUR:PolarityProcessor
C‡: std::shared_ptr< ARDOUR::PolarityProcessor >, std::weak_ptr< ARDOUR::PolarityProcessor >
is-a: ARDOUR:Processor
Base class for objects with saveable and undoable state
| Methods | ||
|---|---|---|
| bool | isnil () | |
Inherited from ARDOUR:Processor
| Methods | ||
|---|---|---|
| void | activate () | |
| bool | active () | |
| long | capture_offset () | |
| void | deactivate () | |
| std::string | display_name () | |
| bool | display_to_user () | |
| long | input_latency () | |
| ChanCount | input_streams () | |
| long | output_latency () | |
| ChanCount | output_streams () | |
| long | playback_offset () | |
| long | signal_latency () | |
| Cast | ||
| Amp | to_amp () | |
| Automatable | to_automatable () | |
| DelayLine | to_delayline () | |
| DiskIOProcessor | to_diskioprocessor () | |
| DiskReader | to_diskreader () | |
| DiskWriter | to_diskwriter () | |
| PluginInsert | to_insert () | |
| InternalSend | to_internalsend () | |
| IOProcessor | to_ioprocessor () | |
| Latent | to_latent () | |
| PeakMeter | to_meter () | |
| MonitorProcessor | to_monitorprocessor () | |
| PeakMeter | to_peakmeter () | |
| PluginInsert | to_plugininsert () | |
| PolarityProcessor | to_polarityprocessor () | |
| Send | to_send () | |
| SideChain | to_sidechain () | |
| SurroundSend | to_surroundsend () | |
| UnknownProcessor | to_unknownprocessor () | |
Inherited from ARDOUR:SessionObjectPtr
| Methods | ||
|---|---|---|
| std::string | name () | |
| Cast | ||
| Stateful | to_stateful () | |
| StatefulDestructible | to_statefuldestructible () | |
↠ ARDOUR:Port
C‡: std::shared_ptr< ARDOUR::Port >, std::weak_ptr< ARDOUR::Port >
| Methods | ||
|---|---|---|
| int | connect (std::string) | |
| bool | connected () | |
Returns true if this port is connected to anything | ||
| bool | connected_to (std::string) | |
Returns true if this port is connected to o, otherwise false. | ||
| int | disconnect (std::string) | |
| int | disconnect_all () | |
| PortFlags | flags () | |
Returns flags | ||
| LuaTable(...) | get_connected_latency_range (LatencyRange&, bool) | |
| bool | isnil () | |
| std::string | name () | |
Returns Port short name | ||
| bool | physically_connected () | |
| std::string | pretty_name (bool) | |
Returns Port human readable name | ||
| LatencyRange | private_latency_range (bool) | |
| LatencyRange | public_latency_range (bool) | |
| bool | receives_input () | |
Returns true if this Port receives input, otherwise false | ||
| bool | sends_output () | |
Returns true if this Port sends output, otherwise false | ||
| Cast | ||
| AsyncMIDIPort | to_asyncmidiport () | |
| AudioPort | to_audioport () | |
| MidiPort | to_midiport () | |
∅ ARDOUR:PortEngine
C‡: ARDOUR::PortEngine
This class object is only used indirectly as return-value and function-parameter. It provides no methods by itself.
∁ ARDOUR:PortList
C‡: std::list<std::shared_ptr<ARDOUR::Port> >
| Constructor | ||
|---|---|---|
| ℂ | ARDOUR.PortList () | |
| Methods | ||
| Port | back () | |
| bool | empty () | |
| Port | front () | |
| LuaIter | iter () | |
| void | reverse () | |
| unsigned long | size () | |
| LuaTable | table () | |
∁ ARDOUR:PortManager
C‡: ARDOUR::PortManager
| Methods | ||
|---|---|---|
| int | connect (std::string, std::string) | |
| bool | connected (std::string) | |
| int | disconnect (std::string, std::string) | |
| int | disconnect_port (Port) | |
| LuaTable(int, ...) | get_backend_ports (std::string, DataType, PortFlags, StringVector&) | |
| LuaTable(int, ...) | get_connections (std::string, StringVector&, bool) | |
| void | get_physical_inputs (DataType, StringVector&, MidiPortFlags, MidiPortFlags) | |
| void | get_physical_outputs (DataType, StringVector&, MidiPortFlags, MidiPortFlags) | |
| Port | get_port_by_name (std::string) | |
Returns Corresponding Port or 0. | ||
| LuaTable(int, ...) | get_ports (DataType, PortList&) | |
| std::string | get_pretty_name_by_name (std::string) | |
| ChanCount | n_physical_inputs () | |
| ChanCount | n_physical_outputs () | |
| bool | physically_connected (std::string) | |
| PortEngine | port_engine () | |
| bool | port_is_physical (std::string) | |
| void | reset_input_meters () | |
↠ ARDOUR:PortSet
C‡: std::shared_ptr< ARDOUR::PortSet >, std::weak_ptr< ARDOUR::PortSet >
An ordered list of Ports, possibly of various types.
This allows access to all the ports as a list, ignoring type, or accessing the nth port of a given type. Note that port(n) and nth_audio_port(n) may NOT return the same port.
Each port is held twice; once in a per-type vector of vectors (_ports) and once in a vector of all port (_all_ports). This is to speed up the fairly common case of iterating over all ports.
| Methods | ||
|---|---|---|
| void | add (Port) | |
| void | clear () | |
Remove all ports from the PortSet. Ports are not deregistered with the engine, it's the caller's responsibility to not leak here! | ||
| bool | contains (Port) | |
| bool | empty () | |
| bool | isnil () | |
| unsigned long | num_ports (DataType) | |
| Port | port (DataType, unsigned long) | |
| bool | remove (Port) | |
∁ ARDOUR:PresentationInfo
C‡: ARDOUR::PresentationInfo
is-a: PBD:Stateful
Base class for objects with saveable and undoable state
| Methods | ||
|---|---|---|
| unsigned int | color () | |
| Flag | flags () | |
| unsigned int | order () | |
| void | set_color (unsigned int) | |
| bool | special (bool) | |
Inherited from PBD:Stateful
| Methods | ||
|---|---|---|
| void | clear_changes () | |
Forget about any changes to this object's properties | ||
| ID | id () | |
| OwnedPropertyList | properties () | |
∁ ARDOUR:PresetRecord
C‡: ARDOUR::Plugin::PresetRecord
| Constructor | ||
|---|---|---|
| ℂ | ARDOUR.PresetRecord () | |
| Data Members | ||
| std::string | label | |
| std::string | uri | |
| bool | user | |
| bool | valid | |
∁ ARDOUR:PresetVector
C‡: std::vector<ARDOUR::Plugin::PresetRecord >
| Constructor | ||
|---|---|---|
| ℂ | ARDOUR.PresetVector () | |
| ℂ | ARDOUR.PresetVector () | |
| Methods | ||
| LuaTable | add (LuaTable {PresetRecord}) | |
| PresetRecord | at (unsigned long) | |
| void | clear () | |
| bool | empty () | |
| LuaIter | iter () | |
| void | push_back (PresetRecord) | |
| void | reserve (unsigned long) | |
| unsigned long | size () | |
| LuaTable | table () | |
| ... | to_array (--lua--) | |
↠ ARDOUR:Processor
C‡: std::shared_ptr< ARDOUR::Processor >, std::weak_ptr< ARDOUR::Processor >
is-a: ARDOUR:SessionObjectPtr
| Methods | ||
|---|---|---|
| void | activate () | |
| bool | active () | |
| long | capture_offset () | |
| void | deactivate () | |
| std::string | display_name () | |
| bool | display_to_user () | |
| long | input_latency () | |
| ChanCount | input_streams () | |
| bool | isnil () | |
| long | output_latency () | |
| ChanCount | output_streams () | |
| long | playback_offset () | |
| long | signal_latency () | |
| Cast | ||
| Amp | to_amp () | |
| Automatable | to_automatable () | |
| DelayLine | to_delayline () | |
| DiskIOProcessor | to_diskioprocessor () | |
| DiskReader | to_diskreader () | |
| DiskWriter | to_diskwriter () | |
| PluginInsert | to_insert () | |
| InternalSend | to_internalsend () | |
| IOProcessor | to_ioprocessor () | |
| Latent | to_latent () | |
| PeakMeter | to_meter () | |
| MonitorProcessor | to_monitorprocessor () | |
| PeakMeter | to_peakmeter () | |
| PluginInsert | to_plugininsert () | |
| PolarityProcessor | to_polarityprocessor () | |
| Send | to_send () | |
| SideChain | to_sidechain () | |
| SurroundSend | to_surroundsend () | |
| UnknownProcessor | to_unknownprocessor () | |
Inherited from ARDOUR:SessionObjectPtr
| Methods | ||
|---|---|---|
| std::string | name () | |
| Cast | ||
| Stateful | to_stateful () | |
| StatefulDestructible | to_statefuldestructible () | |
∁ ARDOUR:ProcessorList
C‡: std::list<std::shared_ptr<ARDOUR::Processor> >
| Constructor | ||
|---|---|---|
| ℂ | ARDOUR.ProcessorList () | |
| Methods | ||
| LuaTable | add (LuaTable {Processor}) | |
| Processor | back () | |
| void | clear () | |
| bool | empty () | |
| Processor | front () | |
| LuaIter | iter () | |
| void | push_back (Processor) | |
| void | reverse () | |
| unsigned long | size () | |
| LuaTable | table () | |
| void | unique () | |
∁ ARDOUR:ProcessorVector
C‡: std::vector<std::shared_ptr<ARDOUR::Processor> >
| Constructor | ||
|---|---|---|
| ℂ | ARDOUR.ProcessorVector () | |
| ℂ | ARDOUR.ProcessorVector () | |
| Methods | ||
| LuaTable | add (LuaTable {Processor}) | |
| Processor | at (unsigned long) | |
| void | clear () | |
| bool | empty () | |
| LuaIter | iter () | |
| void | push_back (Processor) | |
| void | reserve (unsigned long) | |
| unsigned long | size () | |
| LuaTable | table () | |
| ... | to_array (--lua--) | |
∅ ARDOUR:Properties:BoolProperty
C‡: PBD::PropertyDescriptor<bool>
This class object is only used indirectly as return-value and function-parameter. It provides no methods by itself.
∅ ARDOUR:Properties:FloatProperty
C‡: PBD::PropertyDescriptor<float>
This class object is only used indirectly as return-value and function-parameter. It provides no methods by itself.
∅ ARDOUR:Properties:SamplePosProperty
C‡: PBD::PropertyDescriptor<long>
This class object is only used indirectly as return-value and function-parameter. It provides no methods by itself.
∅ ARDOUR:Properties:StringProperty
C‡: PBD::PropertyDescriptor<std::string >
This class object is only used indirectly as return-value and function-parameter. It provides no methods by itself.
∅ ARDOUR:Properties:TimeCntProperty
C‡: PBD::PropertyDescriptor<Temporal::timecnt_t>
This class object is only used indirectly as return-value and function-parameter. It provides no methods by itself.
∅ ARDOUR:Properties:TimePosProperty
C‡: PBD::PropertyDescriptor<Temporal::timepos_t>
This class object is only used indirectly as return-value and function-parameter. It provides no methods by itself.
∁ ARDOUR:PropertyChange
C‡: PBD::PropertyChange
A list of IDs of Properties that have changed in some situation or other
| Methods | ||
|---|---|---|
| bool | containsBool (BoolProperty) | |
| bool | containsFloat (FloatProperty) | |
| bool | containsSamplePos (SamplePosProperty) | |
| bool | containsString (StringProperty) | |
| bool | containsTimeCnt (TimeCntProperty) | |
| bool | containsTimePos (TimePosProperty) | |
∅ ARDOUR:PropertyList
C‡: PBD::PropertyList
A list of properties, mapped using their ID
This class object is only used indirectly as return-value and function-parameter. It provides no methods by itself.
∁ ARDOUR:RCConfiguration
C‡: ARDOUR::RCConfiguration
is-a: PBD:Configuration
Base class for objects with saveable and undoable state
| Methods | ||
|---|---|---|
| AFLPosition | get_afl_position () | |
| bool | get_all_safe () | |
| bool | get_allow_special_bus_removal () | |
| bool | get_ask_replace_instrument () | |
| bool | get_ask_setup_instrument () | |
| float | get_audio_capture_buffer_seconds () | |
| float | get_audio_playback_buffer_seconds () | |
| std::string | get_auditioner_output_left () | |
if true, we call Processor::flush() on all processors when the transport is stopped. Note that processors are still run when the transport is not moving. | ||
| std::string | get_auditioner_output_right () | |
if true, we call Processor::flush() on all processors when the transport is stopped. Note that processors are still run when the transport is not moving. | ||
| bool | get_auto_analyse_audio () | |
| bool | get_auto_connect_standard_busses () | |
*************************************************** DO NOT USE uint8_t or any other type that resolves to a single char, because the value will be stored incorrectly when serialized. Use int32_t instead and ensure that code correctly limits the value of the variable.*************************************************** | ||
| bool | get_auto_enable_surfaces () | |
| bool | get_auto_input_does_talkback () | |
| bool | get_auto_return_after_rewind_ffwd () | |
if true, we call Processor::flush() on all processors when the transport is stopped. Note that processors are still run when the transport is not moving. | ||
| AutoReturnTarget | get_auto_return_target_list () | |
if true, we call Processor::flush() on all processors when the transport is stopped. Note that processors are still run when the transport is not moving. | ||
| bool | get_automation_follows_regions () | |
| float | get_automation_interval_msecs () | |
if true, we call Processor::flush() on all processors when the transport is stopped. Note that processors are still run when the transport is not moving. | ||
| double | get_automation_thinning_factor () | |
| BufferingPreset | get_buffering_preset () | |
| std::string | get_click_emphasis_sound () | |
| float | get_click_gain () | |
| bool | get_click_record_only () | |
| std::string | get_click_sound () | |
| bool | get_clicking () | |
| std::string | get_clip_library_dir () | |
| bool | get_conceal_lv1_if_lv2_exists () | |
| bool | get_conceal_vst2_if_vst3_exists () | |
| int | get_cpu_dma_latency () | |
| bool | get_create_xrun_marker () | |
if true, we call Processor::flush() on all processors when the transport is stopped. Note that processors are still run when the transport is not moving. | ||
| TimeDomain | get_default_automation_time_domain () | |
| FadeShape | get_default_fade_shape () | |
| AnyTime | get_default_quantization () | |
| std::string | get_default_session_parent_dir () | |
| std::string | get_default_trigger_input_port () | |
| std::string | get_demo_session_index_url () | |
| DenormalModel | get_denormal_model () | |
| bool | get_denormal_protection () | |
| bool | get_disable_disarm_during_roll () | |
if true, we call Processor::flush() on all processors when the transport is stopped. Note that processors are still run when the transport is not moving. | ||
| bool | get_discover_plugins_on_start () | |
| unsigned int | get_disk_choice_space_threshold () | |
| std::string | get_donate_url () | |
| EditMode | get_edit_mode () | |
| bool | get_exclusive_solo () | |
| float | get_export_preroll () | |
| float | get_export_silence_threshold () | |
| unsigned int | get_feedback_interval_ms () | |
| bool | get_first_midi_bank_is_zero () | |
| bool | get_group_override_inverts () | |
if true, we call Processor::flush() on all processors when the transport is stopped. Note that processors are still run when the transport is not moving. | ||
| bool | get_hide_dummy_backend () | |
if true, we call Processor::flush() on all processors when the transport is stopped. Note that processors are still run when the transport is not moving. | ||
| bool | get_hiding_groups_deactivates_groups () | |
if true, we call Processor::flush() on all processors when the transport is stopped. Note that processors are still run when the transport is not moving. | ||
| int | get_history_depth () | |
if true, we call Processor::flush() on all processors when the transport is stopped. Note that processors are still run when the transport is not moving. | ||
| bool | get_implicit_selection_op_groups () | |
if true, we call Processor::flush() on all processors when the transport is stopped. Note that processors are still run when the transport is not moving. | ||
| int | get_initial_program_change () | |
| AutoConnectOption | get_input_auto_connect () | |
*************************************************** DO NOT USE uint8_t or any other type that resolves to a single char, because the value will be stored incorrectly when serialized. Use int32_t instead and ensure that code correctly limits the value of the variable.*************************************************** | ||
| int | get_inter_scene_gap_samples () | |
| bool | get_interview_editing () | |
| int | get_io_thread_count () | |
| int | get_io_thread_policy () | |
| bool | get_latched_record_enable () | |
| LayerModel | get_layer_model () | |
| unsigned int | get_limit_n_automatables () | |
| bool | get_link_send_and_route_panner () | |
| ListenPosition | get_listen_position () | |
| bool | get_locate_to_pgm_change () | |
| bool | get_locate_while_waiting_for_sync () | |
if true, we call Processor::flush() on all processors when the transport is stopped. Note that processors are still run when the transport is not moving. | ||
| LoopFadeChoice | get_loop_fade_choice () | |
if true, we call Processor::flush() on all processors when the transport is stopped. Note that processors are still run when the transport is not moving. | ||
| bool | get_loop_is_mode () | |
if true, we call Processor::flush() on all processors when the transport is stopped. Note that processors are still run when the transport is not moving. | ||
| std::string | get_ltc_output_port () | |
| float | get_ltc_output_volume () | |
| bool | get_ltc_send_continuously () | |
| bool | get_mark_at_pgm_change () | |
| MarkerLocatePriority | get_marker_locate_priority () | |
if true, we call Processor::flush() on all processors when the transport is stopped. Note that processors are still run when the transport is not moving. | ||
| float | get_max_audio_clip_duration () | |
| float | get_max_gain () | |
| float | get_max_midi_clip_size () | |
| unsigned int | get_max_recent_sessions () | |
| unsigned int | get_max_recent_templates () | |
| unsigned int | get_max_tail_samples () | |
| float | get_max_transport_speed () | |
| float | get_meter_falloff () | |
if true, we call Processor::flush() on all processors when the transport is stopped. Note that processors are still run when the transport is not moving. | ||
| MeterType | get_meter_type_bus () | |
if true, we call Processor::flush() on all processors when the transport is stopped. Note that processors are still run when the transport is not moving. | ||
| MeterType | get_meter_type_master () | |
if true, we call Processor::flush() on all processors when the transport is stopped. Note that processors are still run when the transport is not moving. | ||
| MeterType | get_meter_type_track () | |
if true, we call Processor::flush() on all processors when the transport is stopped. Note that processors are still run when the transport is not moving. | ||
| std::string | get_midi_audition_synth_uri () | |
| bool | get_midi_chase () | |
| double | get_midi_clock_resolution () | |
| bool | get_midi_clock_sets_tempo () | |
| bool | get_midi_feedback () | |
| bool | get_midi_input_follows_selection () | |
| bool | get_midi_panic_when_looping () | |
| float | get_midi_track_buffer_seconds () | |
| unsigned int | get_minimum_disk_read_bytes () | |
| unsigned int | get_minimum_disk_write_bytes () | |
| bool | get_mmc_control () | |
| FastWindOp | get_mmc_fast_wind_op () | |
if true, we call Processor::flush() on all processors when the transport is stopped. Note that processors are still run when the transport is not moving. | ||
| int | get_mmc_receive_device_id () | |
| int | get_mmc_send_device_id () | |
| std::string | get_monitor_bus_preferred_bundle () | |
| MonitorModel | get_monitoring_model () | |
| int | get_mtc_qf_speed_tolerance () | |
| bool | get_mute_affects_control_outs () | |
| bool | get_mute_affects_main_outs () | |
| bool | get_mute_affects_post_fader () | |
| bool | get_mute_affects_pre_fader () | |
| bool | get_mute_affects_surround_sends () | |
| bool | get_new_plugins_active () | |
| unsigned int | get_osc_port () | |
| AutoConnectOption | get_output_auto_connect () | |
*************************************************** DO NOT USE uint8_t or any other type that resolves to a single char, because the value will be stored incorrectly when serialized. Use int32_t instead and ensure that code correctly limits the value of the variable.*************************************************** | ||
| unsigned int | get_periodic_safety_backup_interval () | |
if true, we call Processor::flush() on all processors when the transport is stopped. Note that processors are still run when the transport is not moving. | ||
| bool | get_periodic_safety_backups () | |
if true, we call Processor::flush() on all processors when the transport is stopped. Note that processors are still run when the transport is not moving. | ||
| PFLPosition | get_pfl_position () | |
| std::string | get_pingback_url () | |
| unsigned int | get_plugin_cache_version () | |
| std::string | get_plugin_path_lxvst () | |
| std::string | get_plugin_path_vst () | |
| std::string | get_plugin_path_vst3 () | |
| unsigned int | get_plugin_scan_timeout () | |
| bool | get_plugins_stop_with_transport () | |
if true, we call Processor::flush() on all processors when the transport is stopped. Note that processors are still run when the transport is not moving. | ||
| unsigned int | get_port_resampler_quality () | |
*************************************************** DO NOT USE uint8_t or any other type that resolves to a single char, because the value will be stored incorrectly when serialized. Use int32_t instead and ensure that code correctly limits the value of the variable.*************************************************** | ||
| float | get_ppqn_factor_for_export () | |
| TimeDomain | get_preferred_time_domain () | |
*************************************************** DO NOT USE uint8_t or any other type that resolves to a single char, because the value will be stored incorrectly when serialized. Use int32_t instead and ensure that code correctly limits the value of the variable.*************************************************** | ||
| float | get_preroll_seconds () | |
if true, we call Processor::flush() on all processors when the transport is stopped. Note that processors are still run when the transport is not moving. | ||
| int | get_processor_usage () | |
| bool | get_quieten_at_speed () | |
| long | get_range_location_minimum () | |
| RangeSelectionAfterSplit | get_range_selection_after_split () | |
| bool | get_recording_resets_xrun_count () | |
if true, we call Processor::flush() on all processors when the transport is stopped. Note that processors are still run when the transport is not moving. | ||
| std::string | get_reference_manual_url () | |
| bool | get_region_boundaries_from_onscreen_tracks () | |
| bool | get_region_boundaries_from_selected_tracks () | |
| RegionEquivalence | get_region_equivalence () | |
if true, we call Processor::flush() on all processors when the transport is stopped. Note that processors are still run when the transport is not moving. | ||
| RegionSelectionAfterSplit | get_region_selection_after_split () | |
| bool | get_replicate_missing_region_channels () | |
if true, we call Processor::flush() on all processors when the transport is stopped. Note that processors are still run when the transport is not moving. | ||
| bool | get_reset_default_speed_on_stop () | |
if true, we call Processor::flush() on all processors when the transport is stopped. Note that processors are still run when the transport is not moving. | ||
| std::string | get_resource_index_url () | |
| bool | get_restore_hardware_connections () | |
*************************************************** DO NOT USE uint8_t or any other type that resolves to a single char, because the value will be stored incorrectly when serialized. Use int32_t instead and ensure that code correctly limits the value of the variable.*************************************************** | ||
| bool | get_rewind_ffwd_like_tape_decks () | |
if true, we call Processor::flush() on all processors when the transport is stopped. Note that processors are still run when the transport is not moving. | ||
| RippleMode | get_ripple_mode () | |
| bool | get_roll_will_loop () | |
if true, we call Processor::flush() on all processors when the transport is stopped. Note that processors are still run when the transport is not moving. | ||
| bool | get_run_all_transport_masters_always () | |
| std::string | get_sample_lib_path () | |
| bool | get_save_history () | |
if true, we call Processor::flush() on all processors when the transport is stopped. Note that processors are still run when the transport is not moving. | ||
| int | get_saved_history_depth () | |
if true, we call Processor::flush() on all processors when the transport is stopped. Note that processors are still run when the transport is not moving. | ||
| bool | get_send_ltc () | |
| bool | get_send_midi_clock () | |
| bool | get_send_mmc () | |
| bool | get_send_mtc () | |
| bool | get_setup_sidechain () | |
| bool | get_show_solo_mutes () | |
| bool | get_show_video_server_dialog () | |
| bool | get_show_vst3_micro_edit_inline () | |
| float | get_shuttle_max_speed () | |
if true, we call Processor::flush() on all processors when the transport is stopped. Note that processors are still run when the transport is not moving. | ||
| float | get_shuttle_speed_factor () | |
if true, we call Processor::flush() on all processors when the transport is stopped. Note that processors are still run when the transport is not moving. | ||
| float | get_shuttle_speed_threshold () | |
if true, we call Processor::flush() on all processors when the transport is stopped. Note that processors are still run when the transport is not moving. | ||
| ShuttleUnits | get_shuttle_units () | |
if true, we call Processor::flush() on all processors when the transport is stopped. Note that processors are still run when the transport is not moving. | ||
| bool | get_skip_playback () | |
if true, we call Processor::flush() on all processors when the transport is stopped. Note that processors are still run when the transport is not moving. | ||
| bool | get_solo_control_is_listen_control () | |
| float | get_solo_mute_gain () | |
| bool | get_solo_mute_override () | |
| bool | get_stop_at_session_end () | |
if true, we call Processor::flush() on all processors when the transport is stopped. Note that processors are still run when the transport is not moving. | ||
| bool | get_stop_on_grid () | |
if true, we call Processor::flush() on all processors when the transport is stopped. Note that processors are still run when the transport is not moving. | ||
| bool | get_stop_recording_on_xrun () | |
if true, we call Processor::flush() on all processors when the transport is stopped. Note that processors are still run when the transport is not moving. | ||
| bool | get_strict_io () | |
*************************************************** DO NOT USE uint8_t or any other type that resolves to a single char, because the value will be stored incorrectly when serialized. Use int32_t instead and ensure that code correctly limits the value of the variable.*************************************************** | ||
| float | get_tail_duration_sec () | |
| bool | get_timecode_sync_frame_rate () | |
| bool | get_trace_midi_input () | |
| bool | get_trace_midi_output () | |
| TracksAutoNamingRule | get_tracks_auto_naming () | |
| float | get_transient_sensitivity () | |
| bool | get_transport_masters_just_roll_when_sync_lost () | |
| bool | get_try_autostart_engine () | |
if true, we call Processor::flush() on all processors when the transport is stopped. Note that processors are still run when the transport is not moving. | ||
| std::string | get_tutorial_manual_url () | |
| std::string | get_updates_url () | |
| bool | get_use_audio_units () | |
| bool | get_use_click_emphasis () | |
| bool | get_use_lxvst () | |
| bool | get_use_macvst () | |
| bool | get_use_master_volume () | |
| bool | get_use_monitor_bus () | |
| bool | get_use_osc () | |
| bool | get_use_plugin_own_gui () | |
| bool | get_use_vst3 () | |
| bool | get_use_windows_vst () | |
| bool | get_verbose_plugin_scan () | |
| bool | get_verify_remove_last_capture () | |
if true, we call Processor::flush() on all processors when the transport is stopped. Note that processors are still run when the transport is not moving. | ||
| bool | get_video_advanced_setup () | |
| std::string | get_video_server_docroot () | |
| std::string | get_video_server_url () | |
| VST3KnobMode | get_vst3_knob_mode () | |
| bool | get_work_around_jack_no_copy_optimization () | |
| std::string | get_xjadeo_binary () | |
| bool | set_afl_position (AFLPosition) | |
| bool | set_all_safe (bool) | |
| bool | set_allow_special_bus_removal (bool) | |
| bool | set_ask_replace_instrument (bool) | |
| bool | set_ask_setup_instrument (bool) | |
| bool | set_audio_capture_buffer_seconds (float) | |
| bool | set_audio_playback_buffer_seconds (float) | |
| bool | set_auditioner_output_left (std::string) | |
if true, we call Processor::flush() on all processors when the transport is stopped. Note that processors are still run when the transport is not moving. | ||
| bool | set_auditioner_output_right (std::string) | |
if true, we call Processor::flush() on all processors when the transport is stopped. Note that processors are still run when the transport is not moving. | ||
| bool | set_auto_analyse_audio (bool) | |
| bool | set_auto_connect_standard_busses (bool) | |
*************************************************** DO NOT USE uint8_t or any other type that resolves to a single char, because the value will be stored incorrectly when serialized. Use int32_t instead and ensure that code correctly limits the value of the variable.*************************************************** | ||
| bool | set_auto_enable_surfaces (bool) | |
| bool | set_auto_input_does_talkback (bool) | |
| bool | set_auto_return_after_rewind_ffwd (bool) | |
if true, we call Processor::flush() on all processors when the transport is stopped. Note that processors are still run when the transport is not moving. | ||
| bool | set_auto_return_target_list (AutoReturnTarget) | |
| bool | set_automation_follows_regions (bool) | |
| bool | set_automation_interval_msecs (float) | |
if true, we call Processor::flush() on all processors when the transport is stopped. Note that processors are still run when the transport is not moving. | ||
| bool | set_automation_thinning_factor (double) | |
| bool | set_buffering_preset (BufferingPreset) | |
| bool | set_click_emphasis_sound (std::string) | |
| bool | set_click_gain (float) | |
| bool | set_click_record_only (bool) | |
| bool | set_click_sound (std::string) | |
| bool | set_clicking (bool) | |
| bool | set_clip_library_dir (std::string) | |
| bool | set_conceal_lv1_if_lv2_exists (bool) | |
| bool | set_conceal_vst2_if_vst3_exists (bool) | |
| bool | set_cpu_dma_latency (int) | |
| bool | set_create_xrun_marker (bool) | |
if true, we call Processor::flush() on all processors when the transport is stopped. Note that processors are still run when the transport is not moving. | ||
| bool | set_default_automation_time_domain (TimeDomain) | |
| bool | set_default_fade_shape (FadeShape) | |
| bool | set_default_quantization (AnyTime) | |
| bool | set_default_session_parent_dir (std::string) | |
| bool | set_default_trigger_input_port (std::string) | |
| bool | set_demo_session_index_url (std::string) | |
| bool | set_denormal_model (DenormalModel) | |
| bool | set_denormal_protection (bool) | |
| bool | set_disable_disarm_during_roll (bool) | |
if true, we call Processor::flush() on all processors when the transport is stopped. Note that processors are still run when the transport is not moving. | ||
| bool | set_discover_plugins_on_start (bool) | |
| bool | set_disk_choice_space_threshold (unsigned int) | |
| bool | set_donate_url (std::string) | |
| bool | set_edit_mode (EditMode) | |
| bool | set_exclusive_solo (bool) | |
| bool | set_export_preroll (float) | |
| bool | set_export_silence_threshold (float) | |
| bool | set_feedback_interval_ms (unsigned int) | |
| bool | set_first_midi_bank_is_zero (bool) | |
| bool | set_group_override_inverts (bool) | |
if true, we call Processor::flush() on all processors when the transport is stopped. Note that processors are still run when the transport is not moving. | ||
| bool | set_hide_dummy_backend (bool) | |
if true, we call Processor::flush() on all processors when the transport is stopped. Note that processors are still run when the transport is not moving. | ||
| bool | set_hiding_groups_deactivates_groups (bool) | |
if true, we call Processor::flush() on all processors when the transport is stopped. Note that processors are still run when the transport is not moving. | ||
| bool | set_history_depth (int) | |
if true, we call Processor::flush() on all processors when the transport is stopped. Note that processors are still run when the transport is not moving. | ||
| bool | set_implicit_selection_op_groups (bool) | |
if true, we call Processor::flush() on all processors when the transport is stopped. Note that processors are still run when the transport is not moving. | ||
| bool | set_initial_program_change (int) | |
| bool | set_input_auto_connect (AutoConnectOption) | |
| bool | set_inter_scene_gap_samples (int) | |
| bool | set_interview_editing (bool) | |
| bool | set_io_thread_count (int) | |
| bool | set_io_thread_policy (int) | |
| bool | set_latched_record_enable (bool) | |
| bool | set_layer_model (LayerModel) | |
| bool | set_limit_n_automatables (unsigned int) | |
| bool | set_link_send_and_route_panner (bool) | |
| bool | set_listen_position (ListenPosition) | |
| bool | set_locate_to_pgm_change (bool) | |
| bool | set_locate_while_waiting_for_sync (bool) | |
if true, we call Processor::flush() on all processors when the transport is stopped. Note that processors are still run when the transport is not moving. | ||
| bool | set_loop_fade_choice (LoopFadeChoice) | |
| bool | set_loop_is_mode (bool) | |
if true, we call Processor::flush() on all processors when the transport is stopped. Note that processors are still run when the transport is not moving. | ||
| bool | set_ltc_output_port (std::string) | |
| bool | set_ltc_output_volume (float) | |
| bool | set_ltc_send_continuously (bool) | |
| bool | set_mark_at_pgm_change (bool) | |
| bool | set_marker_locate_priority (MarkerLocatePriority) | |
| bool | set_max_audio_clip_duration (float) | |
| bool | set_max_gain (float) | |
| bool | set_max_midi_clip_size (float) | |
| bool | set_max_recent_sessions (unsigned int) | |
| bool | set_max_recent_templates (unsigned int) | |
| bool | set_max_tail_samples (unsigned int) | |
| bool | set_max_transport_speed (float) | |
| bool | set_meter_falloff (float) | |
if true, we call Processor::flush() on all processors when the transport is stopped. Note that processors are still run when the transport is not moving. | ||
| bool | set_meter_type_bus (MeterType) | |
| bool | set_meter_type_master (MeterType) | |
| bool | set_meter_type_track (MeterType) | |
| bool | set_midi_audition_synth_uri (std::string) | |
| bool | set_midi_chase (bool) | |
| bool | set_midi_clock_resolution (double) | |
| bool | set_midi_clock_sets_tempo (bool) | |
| bool | set_midi_feedback (bool) | |
| bool | set_midi_input_follows_selection (bool) | |
| bool | set_midi_panic_when_looping (bool) | |
| bool | set_midi_track_buffer_seconds (float) | |
| bool | set_minimum_disk_read_bytes (unsigned int) | |
| bool | set_minimum_disk_write_bytes (unsigned int) | |
| bool | set_mmc_control (bool) | |
| bool | set_mmc_fast_wind_op (FastWindOp) | |
| bool | set_mmc_receive_device_id (int) | |
| bool | set_mmc_send_device_id (int) | |
| bool | set_monitor_bus_preferred_bundle (std::string) | |
| bool | set_monitoring_model (MonitorModel) | |
| bool | set_mtc_qf_speed_tolerance (int) | |
| bool | set_mute_affects_control_outs (bool) | |
| bool | set_mute_affects_main_outs (bool) | |
| bool | set_mute_affects_post_fader (bool) | |
| bool | set_mute_affects_pre_fader (bool) | |
| bool | set_mute_affects_surround_sends (bool) | |
| bool | set_new_plugins_active (bool) | |
| bool | set_osc_port (unsigned int) | |
| bool | set_output_auto_connect (AutoConnectOption) | |
| bool | set_periodic_safety_backup_interval (unsigned int) | |
if true, we call Processor::flush() on all processors when the transport is stopped. Note that processors are still run when the transport is not moving. | ||
| bool | set_periodic_safety_backups (bool) | |
if true, we call Processor::flush() on all processors when the transport is stopped. Note that processors are still run when the transport is not moving. | ||
| bool | set_pfl_position (PFLPosition) | |
| bool | set_pingback_url (std::string) | |
| bool | set_plugin_cache_version (unsigned int) | |
| bool | set_plugin_path_lxvst (std::string) | |
| bool | set_plugin_path_vst (std::string) | |
| bool | set_plugin_path_vst3 (std::string) | |
| bool | set_plugin_scan_timeout (unsigned int) | |
| bool | set_plugins_stop_with_transport (bool) | |
if true, we call Processor::flush() on all processors when the transport is stopped. Note that processors are still run when the transport is not moving. | ||
| bool | set_port_resampler_quality (unsigned int) | |
*************************************************** DO NOT USE uint8_t or any other type that resolves to a single char, because the value will be stored incorrectly when serialized. Use int32_t instead and ensure that code correctly limits the value of the variable.*************************************************** | ||
| bool | set_ppqn_factor_for_export (float) | |
| bool | set_preferred_time_domain (TimeDomain) | |
*************************************************** DO NOT USE uint8_t or any other type that resolves to a single char, because the value will be stored incorrectly when serialized. Use int32_t instead and ensure that code correctly limits the value of the variable.*************************************************** | ||
| bool | set_preroll_seconds (float) | |
if true, we call Processor::flush() on all processors when the transport is stopped. Note that processors are still run when the transport is not moving. | ||
| bool | set_processor_usage (int) | |
| bool | set_quieten_at_speed (bool) | |
| bool | set_range_location_minimum (long) | |
| bool | set_range_selection_after_split (RangeSelectionAfterSplit) | |
| bool | set_recording_resets_xrun_count (bool) | |
if true, we call Processor::flush() on all processors when the transport is stopped. Note that processors are still run when the transport is not moving. | ||
| bool | set_reference_manual_url (std::string) | |
| bool | set_region_boundaries_from_onscreen_tracks (bool) | |
| bool | set_region_boundaries_from_selected_tracks (bool) | |
| bool | set_region_equivalence (RegionEquivalence) | |
| bool | set_region_selection_after_split (RegionSelectionAfterSplit) | |
| bool | set_replicate_missing_region_channels (bool) | |
if true, we call Processor::flush() on all processors when the transport is stopped. Note that processors are still run when the transport is not moving. | ||
| bool | set_reset_default_speed_on_stop (bool) | |
if true, we call Processor::flush() on all processors when the transport is stopped. Note that processors are still run when the transport is not moving. | ||
| bool | set_resource_index_url (std::string) | |
| bool | set_restore_hardware_connections (bool) | |
*************************************************** DO NOT USE uint8_t or any other type that resolves to a single char, because the value will be stored incorrectly when serialized. Use int32_t instead and ensure that code correctly limits the value of the variable.*************************************************** | ||
| bool | set_rewind_ffwd_like_tape_decks (bool) | |
if true, we call Processor::flush() on all processors when the transport is stopped. Note that processors are still run when the transport is not moving. | ||
| bool | set_ripple_mode (RippleMode) | |
| bool | set_roll_will_loop (bool) | |
if true, we call Processor::flush() on all processors when the transport is stopped. Note that processors are still run when the transport is not moving. | ||
| bool | set_run_all_transport_masters_always (bool) | |
| bool | set_sample_lib_path (std::string) | |
| bool | set_save_history (bool) | |
if true, we call Processor::flush() on all processors when the transport is stopped. Note that processors are still run when the transport is not moving. | ||
| bool | set_saved_history_depth (int) | |
if true, we call Processor::flush() on all processors when the transport is stopped. Note that processors are still run when the transport is not moving. | ||
| bool | set_send_ltc (bool) | |
| bool | set_send_midi_clock (bool) | |
| bool | set_send_mmc (bool) | |
| bool | set_send_mtc (bool) | |
| bool | set_setup_sidechain (bool) | |
| bool | set_show_solo_mutes (bool) | |
| bool | set_show_video_server_dialog (bool) | |
| bool | set_show_vst3_micro_edit_inline (bool) | |
| bool | set_shuttle_max_speed (float) | |
if true, we call Processor::flush() on all processors when the transport is stopped. Note that processors are still run when the transport is not moving. | ||
| bool | set_shuttle_speed_factor (float) | |
if true, we call Processor::flush() on all processors when the transport is stopped. Note that processors are still run when the transport is not moving. | ||
| bool | set_shuttle_speed_threshold (float) | |
if true, we call Processor::flush() on all processors when the transport is stopped. Note that processors are still run when the transport is not moving. | ||
| bool | set_shuttle_units (ShuttleUnits) | |
| bool | set_skip_playback (bool) | |
if true, we call Processor::flush() on all processors when the transport is stopped. Note that processors are still run when the transport is not moving. | ||
| bool | set_solo_control_is_listen_control (bool) | |
| bool | set_solo_mute_gain (float) | |
| bool | set_solo_mute_override (bool) | |
| bool | set_stop_at_session_end (bool) | |
if true, we call Processor::flush() on all processors when the transport is stopped. Note that processors are still run when the transport is not moving. | ||
| bool | set_stop_on_grid (bool) | |
if true, we call Processor::flush() on all processors when the transport is stopped. Note that processors are still run when the transport is not moving. | ||
| bool | set_stop_recording_on_xrun (bool) | |
if true, we call Processor::flush() on all processors when the transport is stopped. Note that processors are still run when the transport is not moving. | ||
| bool | set_strict_io (bool) | |
*************************************************** DO NOT USE uint8_t or any other type that resolves to a single char, because the value will be stored incorrectly when serialized. Use int32_t instead and ensure that code correctly limits the value of the variable.*************************************************** | ||
| bool | set_tail_duration_sec (float) | |
| bool | set_timecode_sync_frame_rate (bool) | |
| bool | set_trace_midi_input (bool) | |
| bool | set_trace_midi_output (bool) | |
| bool | set_tracks_auto_naming (TracksAutoNamingRule) | |
| bool | set_transient_sensitivity (float) | |
| bool | set_transport_masters_just_roll_when_sync_lost (bool) | |
| bool | set_try_autostart_engine (bool) | |
if true, we call Processor::flush() on all processors when the transport is stopped. Note that processors are still run when the transport is not moving. | ||
| bool | set_tutorial_manual_url (std::string) | |
| bool | set_updates_url (std::string) | |
| bool | set_use_audio_units (bool) | |
| bool | set_use_click_emphasis (bool) | |
| bool | set_use_lxvst (bool) | |
| bool | set_use_macvst (bool) | |
| bool | set_use_master_volume (bool) | |
| bool | set_use_monitor_bus (bool) | |
| bool | set_use_osc (bool) | |
| bool | set_use_plugin_own_gui (bool) | |
| bool | set_use_vst3 (bool) | |
| bool | set_use_windows_vst (bool) | |
| bool | set_verbose_plugin_scan (bool) | |
| bool | set_verify_remove_last_capture (bool) | |
if true, we call Processor::flush() on all processors when the transport is stopped. Note that processors are still run when the transport is not moving. | ||
| bool | set_video_advanced_setup (bool) | |
| bool | set_video_server_docroot (std::string) | |
| bool | set_video_server_url (std::string) | |
| bool | set_vst3_knob_mode (VST3KnobMode) | |
| bool | set_work_around_jack_no_copy_optimization (bool) | |
| bool | set_xjadeo_binary (std::string) | |
| Properties | ||
| ARDOUR.AFLPosition | afl_position | |
| bool | all_safe | |
| bool | allow_special_bus_removal | |
| bool | ask_replace_instrument | |
| bool | ask_setup_instrument | |
| float | audio_capture_buffer_seconds | |
| float | audio_playback_buffer_seconds | |
| std::string | auditioner_output_left | |
| std::string | auditioner_output_right | |
| bool | auto_analyse_audio | |
| bool | auto_connect_standard_busses | |
| bool | auto_enable_surfaces | |
| bool | auto_input_does_talkback | |
| bool | auto_return_after_rewind_ffwd | |
| ARDOUR.AutoReturnTarget | auto_return_target_list | |
| bool | automation_follows_regions | |
| float | automation_interval_msecs | |
| double | automation_thinning_factor | |
| ARDOUR.BufferingPreset | buffering_preset | |
| std::string | click_emphasis_sound | |
| float | click_gain | |
| bool | click_record_only | |
| std::string | click_sound | |
| bool | clicking | |
| std::string | clip_library_dir | |
| bool | conceal_lv1_if_lv2_exists | |
| bool | conceal_vst2_if_vst3_exists | |
| int | cpu_dma_latency | |
| bool | create_xrun_marker | |
| Temporal.TimeDomain | default_automation_time_domain | |
| ARDOUR.FadeShape | default_fade_shape | |
| ARDOUR:AnyTime | default_quantization | |
| std::string | default_session_parent_dir | |
| std::string | default_trigger_input_port | |
| std::string | demo_session_index_url | |
| ARDOUR.DenormalModel | denormal_model | |
| bool | denormal_protection | |
| bool | disable_disarm_during_roll | |
| bool | discover_plugins_on_start | |
| unsigned int | disk_choice_space_threshold | |
| std::string | donate_url | |
| ARDOUR.EditMode | edit_mode | |
| bool | exclusive_solo | |
| float | export_preroll | |
| float | export_silence_threshold | |
| unsigned int | feedback_interval_ms | |
| bool | first_midi_bank_is_zero | |
| bool | group_override_inverts | |
| bool | hide_dummy_backend | |
| bool | hiding_groups_deactivates_groups | |
| int | history_depth | |
| bool | implicit_selection_op_groups | |
| int | initial_program_change | |
| ARDOUR.AutoConnectOption | input_auto_connect | |
| int | inter_scene_gap_samples | |
| bool | interview_editing | |
| int | io_thread_count | |
| int | io_thread_policy | |
| bool | latched_record_enable | |
| ARDOUR.LayerModel | layer_model | |
| unsigned int | limit_n_automatables | |
| bool | link_send_and_route_panner | |
| ARDOUR.ListenPosition | listen_position | |
| bool | locate_to_pgm_change | |
| bool | locate_while_waiting_for_sync | |
| ARDOUR.LoopFadeChoice | loop_fade_choice | |
| bool | loop_is_mode | |
| std::string | ltc_output_port | |
| float | ltc_output_volume | |
| bool | ltc_send_continuously | |
| bool | mark_at_pgm_change | |
| ARDOUR.MarkerLocatePriority | marker_locate_priority | |
| float | max_audio_clip_duration | |
| float | max_gain | |
| float | max_midi_clip_size | |
| unsigned int | max_recent_sessions | |
| unsigned int | max_recent_templates | |
| unsigned int | max_tail_samples | |
| float | max_transport_speed | |
| float | meter_falloff | |
| ARDOUR.MeterType | meter_type_bus | |
| ARDOUR.MeterType | meter_type_master | |
| ARDOUR.MeterType | meter_type_track | |
| std::string | midi_audition_synth_uri | |
| bool | midi_chase | |
| double | midi_clock_resolution | |
| bool | midi_clock_sets_tempo | |
| bool | midi_feedback | |
| bool | midi_input_follows_selection | |
| bool | midi_panic_when_looping | |
| float | midi_track_buffer_seconds | |
| unsigned int | minimum_disk_read_bytes | |
| unsigned int | minimum_disk_write_bytes | |
| bool | mmc_control | |
| ARDOUR.FastWindOp | mmc_fast_wind_op | |
| int | mmc_receive_device_id | |
| int | mmc_send_device_id | |
| std::string | monitor_bus_preferred_bundle | |
| ARDOUR.MonitorModel | monitoring_model | |
| int | mtc_qf_speed_tolerance | |
| bool | mute_affects_control_outs | |
| bool | mute_affects_main_outs | |
| bool | mute_affects_post_fader | |
| bool | mute_affects_pre_fader | |
| bool | mute_affects_surround_sends | |
| bool | new_plugins_active | |
| unsigned int | osc_port | |
| ARDOUR.AutoConnectOption | output_auto_connect | |
| unsigned int | periodic_safety_backup_interval | |
| bool | periodic_safety_backups | |
| ARDOUR.PFLPosition | pfl_position | |
| std::string | pingback_url | |
| unsigned int | plugin_cache_version | |
| std::string | plugin_path_lxvst | |
| std::string | plugin_path_vst | |
| std::string | plugin_path_vst3 | |
| unsigned int | plugin_scan_timeout | |
| bool | plugins_stop_with_transport | |
| unsigned int | port_resampler_quality | |
| float | ppqn_factor_for_export | |
| Temporal.TimeDomain | preferred_time_domain | |
| float | preroll_seconds | |
| int | processor_usage | |
| bool | quieten_at_speed | |
| long | range_location_minimum | |
| ARDOUR.RangeSelectionAfterSplit | range_selection_after_split | |
| bool | recording_resets_xrun_count | |
| std::string | reference_manual_url | |
| bool | region_boundaries_from_onscreen_tracks | |
| bool | region_boundaries_from_selected_tracks | |
| ARDOUR.RegionEquivalence | region_equivalence | |
| ARDOUR.RegionSelectionAfterSplit | region_selection_after_split | |
| bool | replicate_missing_region_channels | |
| bool | reset_default_speed_on_stop | |
| std::string | resource_index_url | |
| bool | restore_hardware_connections | |
| bool | rewind_ffwd_like_tape_decks | |
| ARDOUR.RippleMode | ripple_mode | |
| bool | roll_will_loop | |
| bool | run_all_transport_masters_always | |
| std::string | sample_lib_path | |
| bool | save_history | |
| int | saved_history_depth | |
| bool | send_ltc | |
| bool | send_midi_clock | |
| bool | send_mmc | |
| bool | send_mtc | |
| bool | setup_sidechain | |
| bool | show_solo_mutes | |
| bool | show_video_server_dialog | |
| bool | show_vst3_micro_edit_inline | |
| float | shuttle_max_speed | |
| float | shuttle_speed_factor | |
| float | shuttle_speed_threshold | |
| ARDOUR.ShuttleUnits | shuttle_units | |
| bool | skip_playback | |
| bool | solo_control_is_listen_control | |
| float | solo_mute_gain | |
| bool | solo_mute_override | |
| bool | stop_at_session_end | |
| bool | stop_on_grid | |
| bool | stop_recording_on_xrun | |
| bool | strict_io | |
| float | tail_duration_sec | |
| bool | timecode_sync_frame_rate | |
| bool | trace_midi_input | |
| bool | trace_midi_output | |
| ARDOUR.TracksAutoNamingRule | tracks_auto_naming | |
| float | transient_sensitivity | |
| bool | transport_masters_just_roll_when_sync_lost | |
| bool | try_autostart_engine | |
| std::string | tutorial_manual_url | |
| std::string | updates_url | |
| bool | use_audio_units | |
| bool | use_click_emphasis | |
| bool | use_lxvst | |
| bool | use_macvst | |
| bool | use_master_volume | |
| bool | use_monitor_bus | |
| bool | use_osc | |
| bool | use_plugin_own_gui | |
| bool | use_vst3 | |
| bool | use_windows_vst | |
| bool | verbose_plugin_scan | |
| bool | verify_remove_last_capture | |
| bool | video_advanced_setup | |
| std::string | video_server_docroot | |
| std::string | video_server_url | |
| ARDOUR.VST3KnobMode | vst3_knob_mode | |
| bool | work_around_jack_no_copy_optimization | |
| std::string | xjadeo_binary | |
Inherited from PBD:Stateful
| Methods | ||
|---|---|---|
| void | clear_changes () | |
Forget about any changes to this object's properties | ||
| ID | id () | |
| OwnedPropertyList | properties () | |
∁ ARDOUR:RawMidiParser
C‡: ARDOUR::RawMidiParser
| Constructor | ||
|---|---|---|
| ℂ | ARDOUR.RawMidiParser () | |
| Methods | ||
| unsigned long | buffer_size () | |
| unsigned char* | midi_buffer () | |
| bool | process_byte (unsigned char) | |
| void | reset () | |
↠ ARDOUR:ReadOnlyControl
C‡: std::shared_ptr< ARDOUR::ReadOnlyControl >, std::weak_ptr< ARDOUR::ReadOnlyControl >
is-a: PBD:StatefulDestructiblePtr
| Methods | ||
|---|---|---|
| ParameterDescriptor | desc () | |
| std::string | describe_parameter () | |
| double | get_parameter () | |
| bool | isnil () | |
Inherited from PBD:StatefulPtr
| Methods | ||
|---|---|---|
| void | clear_changes () | |
Forget about any changes to this object's properties | ||
| ID | id () | |
| OwnedPropertyList | properties () | |
↠ ARDOUR:Readable
C‡: std::shared_ptr< ARDOUR::AudioReadable >, std::weak_ptr< ARDOUR::AudioReadable >
| Methods | ||
|---|---|---|
| bool | isnil () | |
| ReadableList | load (Session&, std::string) | |
| unsigned int | n_channels () | |
| long | read (FloatArray, long, long, int) | |
| long | readable_length () | |
∁ ARDOUR:ReadableList
C‡: std::vector<std::shared_ptr<ARDOUR::AudioReadable> >
| Constructor | ||
|---|---|---|
| ℂ | ARDOUR.ReadableList () | |
| ℂ | ARDOUR.ReadableList () | |
| Methods | ||
| LuaTable | add (LuaTable {Readable}) | |
| Readable | at (unsigned long) | |
| void | clear () | |
| bool | empty () | |
| LuaIter | iter () | |
| void | push_back (Readable) | |
| void | reserve (unsigned long) | |
| unsigned long | size () | |
| LuaTable | table () | |
| ... | to_array (--lua--) | |
↠ ARDOUR:Region
C‡: std::shared_ptr< ARDOUR::Region >, std::weak_ptr< ARDOUR::Region >
is-a: ARDOUR:SessionObjectPtr
A named object associated with a Session. Objects derived from this class are expected to be destroyed before the session calls drop_references().
| Methods | ||
|---|---|---|
| bool | add_plugin (RegionFxPlugin, RegionFxPlugin) | |
| bool | at_natural_position () | |
| bool | automatic () | |
| bool | can_move () | |
| bool | captured () | |
| void | captured_xruns (XrunPositions&, bool) | |
| void | clear_sync_position () | |
| Control | control (Parameter, bool) | |
| bool | covers (timepos_t) | |
| void | cut_end (timepos_t) | |
| void | cut_front (timepos_t) | |
| DataType | data_type () | |
| bool | external () | |
| bool | has_transients () | |
| bool | hidden () | |
| bool | import () | |
| bool | is_compound () | |
| bool | isnil () | |
| unsigned int | layer () | |
| timecnt_t | length () | |
| bool | load_plugin (PluginType, std::string) | |
| bool | locked () | |
| void | lower () | |
| void | lower_to_bottom () | |
| StringVector | master_source_names () | |
| SourceList | master_sources () | |
| void | move_start (timecnt_t) | |
| void | move_to_natural_position () | |
| bool | muted () | |
| RegionFxPlugin | nth_plugin (unsigned int) | |
| void | nudge_position (timecnt_t) | |
| bool | opaque () | |
| Playlist | playlist () | |
| timepos_t | position () | |
How the region parameters play together: POSITION: first sample of the region along the timeline START: first sample of the region within its source(s) LENGTH: number of samples the region represents | ||
| bool | position_locked () | |
| void | raise () | |
| void | raise_to_top () | |
| bool | remove_plugin (RegionFxPlugin, RegionFxPlugin) | |
| void | set_hidden (bool) | |
| void | set_initial_position (timepos_t) | |
| void | set_length (timecnt_t) | |
| void | set_locked (bool) | |
| void | set_muted (bool) | |
| bool | set_name (std::string) | |
Note: changing the name of a Region does not constitute an edit | ||
| void | set_opaque (bool) | |
| void | set_position (timepos_t) | |
| void | set_position_locked (bool) | |
| void | set_start (timepos_t) | |
| void | set_sync_position (timepos_t) | |
| void | set_video_locked (bool) | |
| float | shift () | |
| Source | source (unsigned int) | |
| timepos_t | start () | |
| float | stretch () | |
| bool | sync_marked () | |
| LuaTable(timecnt_t, ...) | sync_offset (int&) | |
| timepos_t | sync_position () | |
Returns Sync position in session time | ||
| Int64List | transients () | |
| void | trim_end (timepos_t) | |
| void | trim_front (timepos_t) | |
| void | trim_to (timepos_t, timecnt_t) | |
| bool | video_locked () | |
| bool | whole_file () | |
| Cast | ||
| AudioRegion | to_audioregion () | |
| MidiRegion | to_midiregion () | |
Inherited from ARDOUR:SessionObjectPtr
| Methods | ||
|---|---|---|
| std::string | name () | |
| Cast | ||
| Stateful | to_stateful () | |
| StatefulDestructible | to_statefuldestructible () | |
∁ ARDOUR:RegionFactory
C‡: ARDOUR::RegionFactory
| Methods | ||
|---|---|---|
| Region | clone_region (Region, bool, bool) | |
| Region | region_by_id (ID) | |
| RegionMap | regions () | |
↠ ARDOUR:RegionFxPlugin
C‡: std::shared_ptr< ARDOUR::RegionFxPlugin >, std::weak_ptr< ARDOUR::RegionFxPlugin >
is-a: ARDOUR:SessionObjectPtr
A named object associated with a Session. Objects derived from this class are expected to be destroyed before the session calls drop_references().
| Methods | ||
|---|---|---|
| unsigned int | get_count () | |
| bool | isnil () | |
| Plugin | plugin (unsigned int) | |
| bool | reset_parameters_to_default () | |
| long | signal_latency () | |
| PluginType | _type () | |
Inherited from ARDOUR:SessionObjectPtr
| Methods | ||
|---|---|---|
| std::string | name () | |
| Cast | ||
| Stateful | to_stateful () | |
| StatefulDestructible | to_statefuldestructible () | |
∁ ARDOUR:RegionList
C‡: std::list<std::shared_ptr<ARDOUR::Region> >
| Constructor | ||
|---|---|---|
| ℂ | ARDOUR.RegionList () | |
| Methods | ||
| Region | back () | |
| bool | empty () | |
| Region | front () | |
| LuaIter | iter () | |
| void | reverse () | |
| unsigned long | size () | |
| LuaTable | table () | |
∁ ARDOUR:RegionListPtr
C‡: std::shared_ptr<std::list<std::shared_ptr<ARDOUR::Region> > >
| Constructor | ||
|---|---|---|
| ℂ | ARDOUR.RegionListPtr () | |
| Methods | ||
| LuaTable | add (LuaTable {Region}) | |
| void | clear () | |
| bool | empty () | |
| ARDOUR.RegionListPtr | from_regionlist (RegionList) | |
| LuaIter | iter () | |
| void | push_back (Region) | |
| void | reverse () | |
| unsigned long | size () | |
| LuaTable | table () | |
| void | unique () | |
∁ ARDOUR:RegionMap
C‡: std::map<PBD::ID, std::shared_ptr<ARDOUR::Region> > >
| Constructor | ||
|---|---|---|
| ℂ | ARDOUR.RegionMap () | |
| Methods | ||
| LuaTable | add (LuaTable {Region}) | |
| ... | at (--lua--) | |
| void | clear () | |
| unsigned long | count (ID) | |
| bool | empty () | |
| LuaIter | iter () | |
| unsigned long | size () | |
| LuaTable | table () | |
∁ ARDOUR:RegionVector
C‡: std::vector<std::shared_ptr<ARDOUR::Region> >
| Constructor | ||
|---|---|---|
| ℂ | ARDOUR.RegionVector () | |
| ℂ | ARDOUR.RegionVector () | |
| Methods | ||
| LuaTable | add (LuaTable {Region}) | |
| Region | at (unsigned long) | |
| void | clear () | |
| bool | empty () | |
| LuaIter | iter () | |
| void | push_back (Region) | |
| void | reserve (unsigned long) | |
| unsigned long | size () | |
| LuaTable | table () | |
| ... | to_array (--lua--) | |
↠ ARDOUR:Return
C‡: std::shared_ptr< ARDOUR::Return >, std::weak_ptr< ARDOUR::Return >
is-a: ARDOUR:IOProcessor
Base class for objects with saveable and undoable state
| Methods | ||
|---|---|---|
| bool | isnil () | |
Inherited from ARDOUR:IOProcessor
| Methods | ||
|---|---|---|
| IO | input () | |
| ChanCount | natural_input_streams () | |
| ChanCount | natural_output_streams () | |
| IO | output () | |
Inherited from ARDOUR:Processor
| Methods | ||
|---|---|---|
| void | activate () | |
| bool | active () | |
| long | capture_offset () | |
| void | deactivate () | |
| std::string | display_name () | |
| bool | display_to_user () | |
| long | input_latency () | |
| ChanCount | input_streams () | |
| long | output_latency () | |
| ChanCount | output_streams () | |
| long | playback_offset () | |
| long | signal_latency () | |
| Cast | ||
| Amp | to_amp () | |
| Automatable | to_automatable () | |
| DelayLine | to_delayline () | |
| DiskIOProcessor | to_diskioprocessor () | |
| DiskReader | to_diskreader () | |
| DiskWriter | to_diskwriter () | |
| PluginInsert | to_insert () | |
| InternalSend | to_internalsend () | |
| IOProcessor | to_ioprocessor () | |
| Latent | to_latent () | |
| PeakMeter | to_meter () | |
| MonitorProcessor | to_monitorprocessor () | |
| PeakMeter | to_peakmeter () | |
| PluginInsert | to_plugininsert () | |
| PolarityProcessor | to_polarityprocessor () | |
| Send | to_send () | |
| SideChain | to_sidechain () | |
| SurroundSend | to_surroundsend () | |
| UnknownProcessor | to_unknownprocessor () | |
Inherited from ARDOUR:SessionObjectPtr
| Methods | ||
|---|---|---|
| std::string | name () | |
| Cast | ||
| Stateful | to_stateful () | |
| StatefulDestructible | to_statefuldestructible () | |
↠ ARDOUR:Route
C‡: std::shared_ptr< ARDOUR::Route >, std::weak_ptr< ARDOUR::Route >
is-a: ARDOUR:Stripable, PBD:Stateful
Base class for objects with saveable and undoable state
| Methods | ||
|---|---|---|
| bool | active () | |
| int | add_aux_send (Route, Processor) | |
Add an aux send to a route.
| ||
| int | add_foldback_send (Route, bool) | |
| int | add_processor_by_index (Processor, int, ProcessorStreams, bool) | |
| bool | add_sidechain (Processor) | |
| Amp | amp () | |
| void | clear_stripables () | |
| std::string | comment () | |
| bool | customize_plugin_insert (Processor, unsigned int, ChanCount, ChanCount) | |
| DataType | data_type () | |
| Stripable | first_selected_stripable () | |
| IO | input () | |
| bool | isnil () | |
| bool | isnil () | |
| Delivery | main_outs () | |
| MonitorControl | monitoring_control () | |
| MonitorState | monitoring_state () | |
| bool | muted () | |
| ChanCount | n_inputs () | |
| ChanCount | n_outputs () | |
| Processor | nth_plugin (unsigned int) | |
| Processor | nth_processor (unsigned int) | |
| Processor | nth_send (unsigned int) | |
| IO | output () | |
| PannerShell | panner_shell () | |
| PeakMeter | peak_meter () | |
| long | playback_latency (bool) | |
| int | remove_processor (Processor, ProcessorStreams, bool) | |
| int | remove_processors (ProcessorList, ProcessorStreams) | |
| bool | remove_sidechain (Processor) | |
| int | reorder_processors (ProcessorList, ProcessorStreams) | |
| int | replace_processor (Processor, Processor, ProcessorStreams) | |
| bool | reset_plugin_insert (Processor) | |
reset plugin-insert configuration to default, disable customizations. This is equivalent to calling customize_plugin_insert (proc, 0, unused)
Returns true if successful | ||
| int | save_as_template (std::string, std::string, std::string) | |
| void | select_next_stripable (bool, bool) | |
| void | select_prev_stripable (bool, bool) | |
| void | set_active (bool, void*) | |
| void | set_comment (std::string, void*) | |
| void | set_meter_point (MeterPoint) | |
| bool | set_name (std::string) | |
| bool | set_strict_io (bool) | |
| long | signal_latency () | |
| bool | soloed () | |
| bool | strict_io () | |
| SurroundReturn | surround_return () | |
| SurroundSend | surround_send () | |
| Processor | the_instrument () | |
Return the first processor that accepts has at least one MIDI input and at least one audio output. In the vast majority of cases, this will be "the instrument". This does not preclude other MIDI->audio processors later in the processing chain, but that would be a special case not covered by this utility function. | ||
| Amp | trim () | |
| Cast | ||
| Track | to_track () | |
Inherited from ARDOUR:Stripable
| Methods | ||
|---|---|---|
| unsigned int | eq_band_cnt () | |
| std::string | eq_band_name (unsigned int) | |
| GainControl | gain_control () | |
| bool | is_auditioner () | |
| bool | is_hidden () | |
| bool | is_master () | |
| bool | is_monitor () | |
| bool | is_private_route () | |
| bool | is_selected () | |
| bool | is_surround_master () | |
| AutomationControl | mapped_control (WellKnownCtrl, unsigned int) | |
| ReadOnlyControl | mapped_output (WellKnownData) | |
| AutomationControl | master_send_enable_controllable () | |
| MonitorProcessor | monitor_control () | |
| MuteControl | mute_control () | |
| AutomationControl | pan_azimuth_control () | |
| AutomationControl | pan_elevation_control () | |
| AutomationControl | pan_frontback_control () | |
| AutomationControl | pan_lfe_control () | |
| AutomationControl | pan_width_control () | |
| PhaseControl | phase_control () | |
| PresentationInfo | presentation_info_ptr () | |
| AutomationControl | rec_enable_control () | |
| AutomationControl | rec_safe_control () | |
| AutomationControl | send_enable_controllable (unsigned int) | |
| AutomationControl | send_level_controllable (unsigned int, bool) | |
| std::string | send_name (unsigned int) | |
| AutomationControl | send_pan_azimuth_controllable (unsigned int) | |
| AutomationControl | send_pan_azimuth_enable_controllable (unsigned int) | |
| void | set_presentation_order (unsigned int) | |
| bool | slaved () | |
| bool | slaved_to (VCA) | |
| SoloControl | solo_control () | |
| SoloIsolateControl | solo_isolate_control () | |
| SoloSafeControl | solo_safe_control () | |
| GainControl | trim_control () | |
| Cast | ||
| Automatable | to_automatable () | |
| Route | to_route () | |
| Slavable | to_slavable () | |
| VCA | to_vca () | |
Inherited from ARDOUR:SessionObjectPtr
| Methods | ||
|---|---|---|
| std::string | name () | |
| Cast | ||
| Stateful | to_stateful () | |
| StatefulDestructible | to_statefuldestructible () | |
Inherited from PBD:Stateful
| Methods | ||
|---|---|---|
| void | clear_changes () | |
Forget about any changes to this object's properties | ||
| ID | id () | |
| OwnedPropertyList | properties () | |
∁ ARDOUR:Route:ProcessorStreams
C‡: ARDOUR::Route::ProcessorStreams
A record of the stream configuration at some point in the processor list. Used to return where and why an processor list configuration request failed.
| Constructor | ||
|---|---|---|
| ℂ | ARDOUR.Route.ProcessorStreams () | |
↠ ARDOUR:RouteGroup
C‡: std::shared_ptr< ARDOUR::RouteGroup >, std::weak_ptr< ARDOUR::RouteGroup >
is-a: ARDOUR:SessionObjectPtr
A group identifier for routes.
RouteGroups permit to define properties which are shared among all Routes that use the given identifier.
A route can at most be in one group.
| Constructor | ||
|---|---|---|
| ℵ | ARDOUR.RouteGroup () | |
| Methods | ||
| int | add (Route) | |
Add a route to a group. Adding a route which is already in the group is allowed; nothing will happen.
| ||
| void | clear () | |
| void | destroy_subgroup () | |
| bool | empty () | |
| int | group_master_number () | |
| bool | has_subgroup () | |
| bool | is_active () | |
| bool | is_color () | |
| bool | is_gain () | |
| bool | is_hidden () | |
| bool | is_monitoring () | |
| bool | is_mute () | |
| bool | is_recenable () | |
| bool | is_relative () | |
| bool | is_route_active () | |
| bool | is_select () | |
| bool | is_solo () | |
| bool | isnil () | |
| void | make_subgroup (bool, Placement) | |
| int | remove (Route) | |
| unsigned int | rgba () | |
| RouteListPtr | route_list () | |
| void | set_active (bool, void*) | |
| void | set_color (bool) | |
| void | set_gain (bool) | |
| void | set_hidden (bool, void*) | |
| void | set_monitoring (bool) | |
| void | set_mute (bool) | |
| void | set_recenable (bool) | |
| void | set_relative (bool, void*) | |
| void | set_rgba (unsigned int) | |
set route-group color and notify UI about change | ||
| void | set_route_active (bool) | |
| void | set_select (bool) | |
| void | set_solo (bool) | |
| unsigned long | size () | |
Inherited from ARDOUR:SessionObjectPtr
| Methods | ||
|---|---|---|
| std::string | name () | |
| Cast | ||
| Stateful | to_stateful () | |
| StatefulDestructible | to_statefuldestructible () | |
∁ ARDOUR:RouteGroupList
C‡: std::list<std::shared_ptr<ARDOUR::RouteGroup> >
| Constructor | ||
|---|---|---|
| ℂ | ARDOUR.RouteGroupList () | |
| Methods | ||
| LuaTable | add (LuaTable {RouteGroup}) | |
| RouteGroup | back () | |
| void | clear () | |
| bool | empty () | |
| RouteGroup | front () | |
| LuaIter | iter () | |
| void | push_back (RouteGroup) | |
| void | reverse () | |
| unsigned long | size () | |
| LuaTable | table () | |
| void | unique () | |
∁ ARDOUR:RouteList
C‡: std::list<std::shared_ptr<ARDOUR::Route> >
| Constructor | ||
|---|---|---|
| ℂ | ARDOUR.RouteList () | |
| Methods | ||
| Route | back () | |
| bool | empty () | |
| Route | front () | |
| LuaIter | iter () | |
| void | reverse () | |
| unsigned long | size () | |
| LuaTable | table () | |
∁ ARDOUR:RouteListPtr
C‡: std::shared_ptr<std::list<std::shared_ptr<ARDOUR::Route> > >
| Constructor | ||
|---|---|---|
| ℂ | ARDOUR.RouteListPtr () | |
| Methods | ||
| LuaTable | add (LuaTable {Route}) | |
| void | clear () | |
| bool | empty () | |
| ARDOUR.RouteListPtr | from_routelist (RouteList) | |
| LuaIter | iter () | |
| void | push_back (Route) | |
| void | reverse () | |
| unsigned long | size () | |
| LuaTable | table () | |
| void | unique () | |
∁ ARDOUR:RouteStateMap
C‡: std::map<PBD::ID, ARDOUR::Session::RouteImportInfo >
| Constructor | ||
|---|---|---|
| ℂ | ARDOUR.RouteStateMap () | |
| Methods | ||
| LuaTable | add (PBD::ID, ARDOUR::Session::RouteImportInfo ) | |
| ... | at (--lua--) | |
| void | clear () | |
| unsigned long | count (ID) | |
| bool | empty () | |
| LuaIter | iter () | |
| unsigned long | size () | |
| LuaTable | table () | |
↠ ARDOUR:Send
C‡: std::shared_ptr< ARDOUR::Send >, std::weak_ptr< ARDOUR::Send >
is-a: ARDOUR:Delivery
Internal Abstraction for Sends (and MixbusSends)
| Methods | ||
|---|---|---|
| GainControl | gain_control () | |
| long | get_delay_in () | |
| long | get_delay_out () | |
| bool | is_foldback () | |
| bool | isnil () | |
| void | set_remove_on_disconnect (bool) | |
| Cast | ||
| InternalSend | to_internalsend () | |
Inherited from ARDOUR:Delivery
| Methods | ||
|---|---|---|
| PannerShell | panner_shell () | |
Inherited from ARDOUR:IOProcessor
| Methods | ||
|---|---|---|
| IO | input () | |
| ChanCount | natural_input_streams () | |
| ChanCount | natural_output_streams () | |
| IO | output () | |
Inherited from ARDOUR:Processor
| Methods | ||
|---|---|---|
| void | activate () | |
| bool | active () | |
| long | capture_offset () | |
| void | deactivate () | |
| std::string | display_name () | |
| bool | display_to_user () | |
| long | input_latency () | |
| ChanCount | input_streams () | |
| long | output_latency () | |
| ChanCount | output_streams () | |
| long | playback_offset () | |
| long | signal_latency () | |
| Cast | ||
| Amp | to_amp () | |
| Automatable | to_automatable () | |
| DelayLine | to_delayline () | |
| DiskIOProcessor | to_diskioprocessor () | |
| DiskReader | to_diskreader () | |
| DiskWriter | to_diskwriter () | |
| PluginInsert | to_insert () | |
| InternalSend | to_internalsend () | |
| IOProcessor | to_ioprocessor () | |
| Latent | to_latent () | |
| PeakMeter | to_meter () | |
| MonitorProcessor | to_monitorprocessor () | |
| PeakMeter | to_peakmeter () | |
| PluginInsert | to_plugininsert () | |
| PolarityProcessor | to_polarityprocessor () | |
| Send | to_send () | |
| SideChain | to_sidechain () | |
| SurroundSend | to_surroundsend () | |
| UnknownProcessor | to_unknownprocessor () | |
Inherited from ARDOUR:SessionObjectPtr
| Methods | ||
|---|---|---|
| std::string | name () | |
| Cast | ||
| Stateful | to_stateful () | |
| StatefulDestructible | to_statefuldestructible () | |
∁ ARDOUR:Session
C‡: ARDOUR::Session
is-a: PBD:HistoryOwner
| Methods | ||
|---|---|---|
| bool | actively_recording () | |
| double | actual_speed () | |
| void | add_internal_send (Route, Processor, Route) | |
| void | add_internal_sends (Route, Placement, RouteListPtr) | |
| int | add_master_bus (ChanCount) | |
| void | add_route_group (RouteGroup) | |
| bool | apply_nth_mixer_scene (unsigned long) | |
| bool | apply_nth_mixer_scene_to (unsigned long, RouteList) | |
| ConstBundleListPtr | bundles () | |
| void | cancel_all_solo () | |
| SessionConfiguration | cfg () | |
| void | clear_all_solo_state (ConstRouteListPtr) | |
| Controllable | controllable_by_id (ID) | |
| long | current_end_sample () | |
| long | current_start_sample () | |
| void | cut_copy_section (timepos_t, timepos_t, timepos_t, SectionOperation) | |
| void | disable_record (bool, bool) | |
| bool | empty () | |
| AudioEngine | engine () | |
| double | engine_speed () | |
| bool | export_route_state (RouteListPtr, std::string, bool) | |
| unsigned int | get_block_size () | |
| bool | get_play_loop () | |
| Route | get_remote_nth_route (unsigned int) | |
| Stripable | get_remote_nth_stripable (unsigned int, Flag) | |
| RouteList | get_routelist (bool, Flag) | |
| ConstRouteListPtr | get_routes () | |
| BufferSet | get_scratch_buffers (ChanCount, bool) | |
| BufferSet | get_silent_buffers (ChanCount) | |
| StripableList | get_stripables () | |
| RouteListPtr | get_tracks () | |
| unsigned int | get_xrun_count () | |
| void | goto_end () | |
| void | goto_start (bool) | |
| bool | have_external_connections_for_current_backend (bool) | |
| int | import_route_state (std::string, IDMap, RouteGroupImportMode, Progress) | |
| long | io_latency () | |
| long | last_transport_start () | |
| bool | listening () | |
| Locations | locations () | |
| Route | master_out () | |
| GainControl | master_volume () | |
| void | maybe_enable_record (bool) | |
| void | maybe_update_session_range (timepos_t, timepos_t) | |
| Route | monitor_out () | |
| std::string | name () | |
| unsigned int | naudiotracks () | |
| unsigned int | nbusses () | |
| RouteList | new_audio_route (int, int, RouteGroup, unsigned int, std::string, Flag, unsigned int) | |
| AudioTrackList | new_audio_track (int, int, RouteGroup, unsigned int, std::string, unsigned int, TrackMode, bool, bool) | |
| RouteList | new_midi_route (RouteGroup, unsigned int, std::string, bool, PluginInfo, PresetRecord, Flag, unsigned int) | |
| MidiTrackList | new_midi_track (ChanCount, ChanCount, bool, PluginInfo, PresetRecord, RouteGroup, unsigned int, std::string, unsigned int, TrackMode, bool, bool) | |
| RouteList | new_route_from_template (unsigned int, unsigned int, std::string, std::string, PlaylistDisposition) | |
| RouteGroup | new_route_group (std::string) | |
| long | nominal_sample_rate () | |
"native" sample rate of session, regardless of current audioengine rate, pullup/down etc | ||
| unsigned int | nroutes () | |
| MixerScene | nth_mixer_scene (unsigned long, bool) | |
| bool | nth_mixer_scene_valid (unsigned long) | |
| unsigned int | ntracks () | |
| RouteStateMap | parse_route_state (std::string, bool&) | |
| std::string | path () | |
| SessionPlaylists | playlists () | |
| bool | plot_process_graph (std::string) | |
| long | preroll_samples (long) | |
| Processor | processor_by_id (ID) | |
| RecordState | record_status () | |
| void | remove_route (Route) | |
| void | remove_route_group (RouteGroup) | |
| void | remove_routes (RouteListPtr) | |
| int | rename (std::string) | |
| void | request_bounded_roll (long, long) | |
| void | request_count_in_record () | |
| void | request_locate (long, bool, LocateTransportDisposition, TransportRequestSource) | |
| bool | request_locate_to_mark (std::string, LocateTransportDisposition, TransportRequestSource) | |
| void | request_play_loop (bool, bool) | |
| void | request_preroll_record_trim (long, long) | |
| void | request_roll (TransportRequestSource) | |
| void | request_stop (bool, bool, TransportRequestSource) | |
| void | request_transport_speed (double, TransportRequestSource) | |
| void | reset_xrun_count () | |
| Route | route_by_id (ID) | |
| Route | route_by_name (std::string) | |
| Route | route_by_selected_count (unsigned int) | |
| RouteGroupList | route_groups () | |
| long | sample_rate () | |
"actual" sample rate of session, set by current audioengine rate, pullup/down etc. | ||
| ... | sample_to_timecode_lua (--lua--) | |
| double | samples_per_timecode_frame () | |
| int | save_state (std::string, bool, bool, bool, bool, bool) | |
save session
Returns zero on success | ||
| void | scripts_changed () | |
| Route | selection () | |
| bool | session_range_is_free () | |
| void | set_control (AutomationControl, double, GroupControlDisposition) | |
| void | set_controls (ControlListPtr, double, GroupControlDisposition) | |
| void | set_dirty () | |
| void | set_exclusive_input_active (RouteListPtr, bool, bool) | |
| void | set_session_extents (timepos_t, timepos_t) | |
| void | set_session_range_is_free (bool) | |
| ... | simple_export (--lua--) | |
| std::string | snap_name () | |
| bool | solo_isolated () | |
| bool | soloing () | |
| Source | source_by_id (ID) | |
| void | store_nth_mixer_scene (unsigned long) | |
| Stripable | stripable_by_id (ID) | |
| Route | surround_master () | |
| bool | timecode_drop_frames () | |
| long | timecode_frames_per_hour () | |
| double | timecode_frames_per_second () | |
| ... | timecode_to_sample_lua (--lua--) | |
| bool | transport_rolling () | |
Returns true if the the transport is actively (audible) rolling. playback speed is not zero, and count-in as well as latency-preroll is complete, and _transport_sample changes every process cycle. | ||
| long | transport_sample () | |
| double | transport_speed (bool) | |
| bool | transport_state_rolling () | |
Returns true if the transport state (TFSM) is rolling. Note: the transport may not yet move if pre-roll or count-in in ongoing. | ||
| bool | transport_stopped () | |
Returns true if the transport state (TFSM) is stopped | ||
| bool | transport_stopped_or_stopping () | |
Returns true if the transport state (TFSM) is stopped or stopping | ||
| bool | transport_will_roll_forwards () | |
| StringList | unknown_processors () | |
| bool | unnamed () | |
| std::string | uuid () | |
| VCAManager | vca_manager () | |
| long | worst_input_latency () | |
| long | worst_latency_preroll () | |
| long | worst_latency_preroll_buffer_size_ceil () | |
| long | worst_output_latency () | |
| long | worst_route_latency () | |
| bool | writable () | |
Inherited from PBD:HistoryOwner
| Methods | ||
|---|---|---|
| bool | abort_empty_reversible_command () | |
Abort reversible command IFF no undo changes have been collected. Returns true if undo operation was aborted. | ||
| void | abort_reversible_command () | |
abort an open undo command This must only be called after begin_reversible_command () | ||
| void | add_command (Command) | |
| StatefulDiffCommand | add_stateful_diff_command (StatefulDestructiblePtr) | |
create an StatefulDiffCommand from the given object and add it to the stack. This function must only be called after begin_reversible_command. Failing to do so may lead to a crash.
Returns the allocated StatefulDiffCommand (already added via add_command) | ||
| void | begin_reversible_command (std::string) | |
begin collecting undo information This call must always be followed by either begin_reversible_command() or commit_reversible_command()
| ||
| bool | collected_undo_commands () | |
Test if any undo commands were added since the call to begin_reversible_command () This is useful to determine if an undoable action was performed before adding additional information (e.g. selection changes) to the undo transaction. Returns true if undo operation is valid but empty | ||
| void | commit_reversible_command (Command) | |
finalize an undo command and commit pending transactions This must only be called after begin_reversible_command ()
| ||
∁ ARDOUR:SessionConfiguration
C‡: ARDOUR::SessionConfiguration
is-a: PBD:Configuration
Base class for objects with saveable and undoable state
| Methods | ||
|---|---|---|
| std::string | get_audio_search_path () | |
*************************************************** DO NOT USE uint8_t or any other type that resolves to a single char, because the value will be stored incorrectly when serialized. Use int32_t instead and ensure that code correctly limits the value of the variable.*************************************************** | ||
| bool | get_auto_input () | |
*************************************************** DO NOT USE uint8_t or any other type that resolves to a single char, because the value will be stored incorrectly when serialized. Use int32_t instead and ensure that code correctly limits the value of the variable.*************************************************** | ||
| bool | get_auto_play () | |
*************************************************** DO NOT USE uint8_t or any other type that resolves to a single char, because the value will be stored incorrectly when serialized. Use int32_t instead and ensure that code correctly limits the value of the variable.*************************************************** | ||
| bool | get_auto_return () | |
*************************************************** DO NOT USE uint8_t or any other type that resolves to a single char, because the value will be stored incorrectly when serialized. Use int32_t instead and ensure that code correctly limits the value of the variable.*************************************************** | ||
| bool | get_count_in () | |
*************************************************** DO NOT USE uint8_t or any other type that resolves to a single char, because the value will be stored incorrectly when serialized. Use int32_t instead and ensure that code correctly limits the value of the variable.*************************************************** | ||
| CueBehavior | get_cue_behavior () | |
*************************************************** DO NOT USE uint8_t or any other type that resolves to a single char, because the value will be stored incorrectly when serialized. Use int32_t instead and ensure that code correctly limits the value of the variable.*************************************************** | ||
| TimeDomain | get_default_time_domain () | |
*************************************************** DO NOT USE uint8_t or any other type that resolves to a single char, because the value will be stored incorrectly when serialized. Use int32_t instead and ensure that code correctly limits the value of the variable.*************************************************** | ||
| bool | get_draw_opaque_midi_regions () | |
*************************************************** DO NOT USE uint8_t or any other type that resolves to a single char, because the value will be stored incorrectly when serialized. Use int32_t instead and ensure that code correctly limits the value of the variable.*************************************************** | ||
| bool | get_external_sync () | |
*************************************************** DO NOT USE uint8_t or any other type that resolves to a single char, because the value will be stored incorrectly when serialized. Use int32_t instead and ensure that code correctly limits the value of the variable.*************************************************** | ||
| InsertMergePolicy | get_insert_merge_policy () | |
*************************************************** DO NOT USE uint8_t or any other type that resolves to a single char, because the value will be stored incorrectly when serialized. Use int32_t instead and ensure that code correctly limits the value of the variable.*************************************************** | ||
| bool | get_jack_time_master () | |
*************************************************** DO NOT USE uint8_t or any other type that resolves to a single char, because the value will be stored incorrectly when serialized. Use int32_t instead and ensure that code correctly limits the value of the variable.*************************************************** | ||
| unsigned int | get_meterbridge_label_height () | |
*************************************************** DO NOT USE uint8_t or any other type that resolves to a single char, because the value will be stored incorrectly when serialized. Use int32_t instead and ensure that code correctly limits the value of the variable.*************************************************** | ||
| bool | get_midi_copy_is_fork () | |
*************************************************** DO NOT USE uint8_t or any other type that resolves to a single char, because the value will be stored incorrectly when serialized. Use int32_t instead and ensure that code correctly limits the value of the variable.*************************************************** | ||
| std::string | get_midi_search_path () | |
*************************************************** DO NOT USE uint8_t or any other type that resolves to a single char, because the value will be stored incorrectly when serialized. Use int32_t instead and ensure that code correctly limits the value of the variable.*************************************************** | ||
| long | get_minitimeline_span () | |
*************************************************** DO NOT USE uint8_t or any other type that resolves to a single char, because the value will be stored incorrectly when serialized. Use int32_t instead and ensure that code correctly limits the value of the variable.*************************************************** | ||
| SampleFormat | get_native_file_data_format () | |
*************************************************** DO NOT USE uint8_t or any other type that resolves to a single char, because the value will be stored incorrectly when serialized. Use int32_t instead and ensure that code correctly limits the value of the variable.*************************************************** | ||
| HeaderFormat | get_native_file_header_format () | |
*************************************************** DO NOT USE uint8_t or any other type that resolves to a single char, because the value will be stored incorrectly when serialized. Use int32_t instead and ensure that code correctly limits the value of the variable.*************************************************** | ||
| bool | get_punch_in () | |
*************************************************** DO NOT USE uint8_t or any other type that resolves to a single char, because the value will be stored incorrectly when serialized. Use int32_t instead and ensure that code correctly limits the value of the variable.*************************************************** | ||
| bool | get_punch_out () | |
*************************************************** DO NOT USE uint8_t or any other type that resolves to a single char, because the value will be stored incorrectly when serialized. Use int32_t instead and ensure that code correctly limits the value of the variable.*************************************************** | ||
| std::string | get_raid_path () | |
*************************************************** DO NOT USE uint8_t or any other type that resolves to a single char, because the value will be stored incorrectly when serialized. Use int32_t instead and ensure that code correctly limits the value of the variable.*************************************************** | ||
| bool | get_realtime_export () | |
*************************************************** DO NOT USE uint8_t or any other type that resolves to a single char, because the value will be stored incorrectly when serialized. Use int32_t instead and ensure that code correctly limits the value of the variable.*************************************************** | ||
| RecordMode | get_record_mode () | |
*************************************************** DO NOT USE uint8_t or any other type that resolves to a single char, because the value will be stored incorrectly when serialized. Use int32_t instead and ensure that code correctly limits the value of the variable.*************************************************** | ||
| MonitorChoice | get_session_monitoring () | |
*************************************************** DO NOT USE uint8_t or any other type that resolves to a single char, because the value will be stored incorrectly when serialized. Use int32_t instead and ensure that code correctly limits the value of the variable.*************************************************** | ||
| bool | get_show_busses_on_meterbridge () | |
*************************************************** DO NOT USE uint8_t or any other type that resolves to a single char, because the value will be stored incorrectly when serialized. Use int32_t instead and ensure that code correctly limits the value of the variable.*************************************************** | ||
| bool | get_show_fader_on_meterbridge () | |
*************************************************** DO NOT USE uint8_t or any other type that resolves to a single char, because the value will be stored incorrectly when serialized. Use int32_t instead and ensure that code correctly limits the value of the variable.*************************************************** | ||
| bool | get_show_group_tabs () | |
*************************************************** DO NOT USE uint8_t or any other type that resolves to a single char, because the value will be stored incorrectly when serialized. Use int32_t instead and ensure that code correctly limits the value of the variable.*************************************************** | ||
| bool | get_show_master_bus_comment_on_load () | |
*************************************************** DO NOT USE uint8_t or any other type that resolves to a single char, because the value will be stored incorrectly when serialized. Use int32_t instead and ensure that code correctly limits the value of the variable.*************************************************** | ||
| bool | get_show_master_on_meterbridge () | |
*************************************************** DO NOT USE uint8_t or any other type that resolves to a single char, because the value will be stored incorrectly when serialized. Use int32_t instead and ensure that code correctly limits the value of the variable.*************************************************** | ||
| bool | get_show_midi_on_meterbridge () | |
*************************************************** DO NOT USE uint8_t or any other type that resolves to a single char, because the value will be stored incorrectly when serialized. Use int32_t instead and ensure that code correctly limits the value of the variable.*************************************************** | ||
| bool | get_show_monitor_on_meterbridge () | |
*************************************************** DO NOT USE uint8_t or any other type that resolves to a single char, because the value will be stored incorrectly when serialized. Use int32_t instead and ensure that code correctly limits the value of the variable.*************************************************** | ||
| bool | get_show_mute_on_meterbridge () | |
*************************************************** DO NOT USE uint8_t or any other type that resolves to a single char, because the value will be stored incorrectly when serialized. Use int32_t instead and ensure that code correctly limits the value of the variable.*************************************************** | ||
| bool | get_show_name_on_meterbridge () | |
*************************************************** DO NOT USE uint8_t or any other type that resolves to a single char, because the value will be stored incorrectly when serialized. Use int32_t instead and ensure that code correctly limits the value of the variable.*************************************************** | ||
| bool | get_show_rec_on_meterbridge () | |
*************************************************** DO NOT USE uint8_t or any other type that resolves to a single char, because the value will be stored incorrectly when serialized. Use int32_t instead and ensure that code correctly limits the value of the variable.*************************************************** | ||
| bool | get_show_region_fades () | |
*************************************************** DO NOT USE uint8_t or any other type that resolves to a single char, because the value will be stored incorrectly when serialized. Use int32_t instead and ensure that code correctly limits the value of the variable.*************************************************** | ||
| bool | get_show_solo_on_meterbridge () | |
*************************************************** DO NOT USE uint8_t or any other type that resolves to a single char, because the value will be stored incorrectly when serialized. Use int32_t instead and ensure that code correctly limits the value of the variable.*************************************************** | ||
| bool | get_show_summary () | |
*************************************************** DO NOT USE uint8_t or any other type that resolves to a single char, because the value will be stored incorrectly when serialized. Use int32_t instead and ensure that code correctly limits the value of the variable.*************************************************** | ||
| std::string | get_slave_timecode_offset () | |
*************************************************** DO NOT USE uint8_t or any other type that resolves to a single char, because the value will be stored incorrectly when serialized. Use int32_t instead and ensure that code correctly limits the value of the variable.*************************************************** | ||
| unsigned int | get_subframes_per_frame () | |
*************************************************** DO NOT USE uint8_t or any other type that resolves to a single char, because the value will be stored incorrectly when serialized. Use int32_t instead and ensure that code correctly limits the value of the variable.*************************************************** | ||
| std::string | get_take_name () | |
*************************************************** DO NOT USE uint8_t or any other type that resolves to a single char, because the value will be stored incorrectly when serialized. Use int32_t instead and ensure that code correctly limits the value of the variable.*************************************************** | ||
| TimecodeFormat | get_timecode_format () | |
*************************************************** DO NOT USE uint8_t or any other type that resolves to a single char, because the value will be stored incorrectly when serialized. Use int32_t instead and ensure that code correctly limits the value of the variable.*************************************************** | ||
| std::string | get_timecode_generator_offset () | |
*************************************************** DO NOT USE uint8_t or any other type that resolves to a single char, because the value will be stored incorrectly when serialized. Use int32_t instead and ensure that code correctly limits the value of the variable.*************************************************** | ||
| long | get_timecode_offset () | |
*************************************************** DO NOT USE uint8_t or any other type that resolves to a single char, because the value will be stored incorrectly when serialized. Use int32_t instead and ensure that code correctly limits the value of the variable.*************************************************** | ||
| bool | get_timecode_offset_negative () | |
*************************************************** DO NOT USE uint8_t or any other type that resolves to a single char, because the value will be stored incorrectly when serialized. Use int32_t instead and ensure that code correctly limits the value of the variable.*************************************************** | ||
| bool | get_track_name_number () | |
*************************************************** DO NOT USE uint8_t or any other type that resolves to a single char, because the value will be stored incorrectly when serialized. Use int32_t instead and ensure that code correctly limits the value of the variable.*************************************************** | ||
| bool | get_track_name_take () | |
*************************************************** DO NOT USE uint8_t or any other type that resolves to a single char, because the value will be stored incorrectly when serialized. Use int32_t instead and ensure that code correctly limits the value of the variable.*************************************************** | ||
| bool | get_tracks_follow_session_time () | |
*************************************************** DO NOT USE uint8_t or any other type that resolves to a single char, because the value will be stored incorrectly when serialized. Use int32_t instead and ensure that code correctly limits the value of the variable.*************************************************** | ||
| bool | get_triggerbox_overrides_disk_monitoring () | |
*************************************************** DO NOT USE uint8_t or any other type that resolves to a single char, because the value will be stored incorrectly when serialized. Use int32_t instead and ensure that code correctly limits the value of the variable.*************************************************** | ||
| bool | get_use_monitor_fades () | |
*************************************************** DO NOT USE uint8_t or any other type that resolves to a single char, because the value will be stored incorrectly when serialized. Use int32_t instead and ensure that code correctly limits the value of the variable.*************************************************** | ||
| bool | get_use_region_fades () | |
*************************************************** DO NOT USE uint8_t or any other type that resolves to a single char, because the value will be stored incorrectly when serialized. Use int32_t instead and ensure that code correctly limits the value of the variable.*************************************************** | ||
| bool | get_use_surround_master () | |
*************************************************** DO NOT USE uint8_t or any other type that resolves to a single char, because the value will be stored incorrectly when serialized. Use int32_t instead and ensure that code correctly limits the value of the variable.*************************************************** | ||
| bool | get_use_transport_fades () | |
*************************************************** DO NOT USE uint8_t or any other type that resolves to a single char, because the value will be stored incorrectly when serialized. Use int32_t instead and ensure that code correctly limits the value of the variable.*************************************************** | ||
| bool | get_use_video_file_fps () | |
*************************************************** DO NOT USE uint8_t or any other type that resolves to a single char, because the value will be stored incorrectly when serialized. Use int32_t instead and ensure that code correctly limits the value of the variable.*************************************************** | ||
| bool | get_use_video_sync () | |
*************************************************** DO NOT USE uint8_t or any other type that resolves to a single char, because the value will be stored incorrectly when serialized. Use int32_t instead and ensure that code correctly limits the value of the variable.*************************************************** | ||
| float | get_video_pullup () | |
*************************************************** DO NOT USE uint8_t or any other type that resolves to a single char, because the value will be stored incorrectly when serialized. Use int32_t instead and ensure that code correctly limits the value of the variable.*************************************************** | ||
| bool | get_videotimeline_pullup () | |
*************************************************** DO NOT USE uint8_t or any other type that resolves to a single char, because the value will be stored incorrectly when serialized. Use int32_t instead and ensure that code correctly limits the value of the variable.*************************************************** | ||
| double | get_wave_amplitude_zoom () | |
*************************************************** DO NOT USE uint8_t or any other type that resolves to a single char, because the value will be stored incorrectly when serialized. Use int32_t instead and ensure that code correctly limits the value of the variable.*************************************************** | ||
| unsigned short | get_wave_zoom_factor () | |
*************************************************** DO NOT USE uint8_t or any other type that resolves to a single char, because the value will be stored incorrectly when serialized. Use int32_t instead and ensure that code correctly limits the value of the variable.*************************************************** | ||
| bool | set_audio_search_path (std::string) | |
*************************************************** DO NOT USE uint8_t or any other type that resolves to a single char, because the value will be stored incorrectly when serialized. Use int32_t instead and ensure that code correctly limits the value of the variable.*************************************************** | ||
| bool | set_auto_input (bool) | |
*************************************************** DO NOT USE uint8_t or any other type that resolves to a single char, because the value will be stored incorrectly when serialized. Use int32_t instead and ensure that code correctly limits the value of the variable.*************************************************** | ||
| bool | set_auto_play (bool) | |
*************************************************** DO NOT USE uint8_t or any other type that resolves to a single char, because the value will be stored incorrectly when serialized. Use int32_t instead and ensure that code correctly limits the value of the variable.*************************************************** | ||
| bool | set_auto_return (bool) | |
*************************************************** DO NOT USE uint8_t or any other type that resolves to a single char, because the value will be stored incorrectly when serialized. Use int32_t instead and ensure that code correctly limits the value of the variable.*************************************************** | ||
| bool | set_count_in (bool) | |
*************************************************** DO NOT USE uint8_t or any other type that resolves to a single char, because the value will be stored incorrectly when serialized. Use int32_t instead and ensure that code correctly limits the value of the variable.*************************************************** | ||
| bool | set_cue_behavior (CueBehavior) | |
| bool | set_default_time_domain (TimeDomain) | |
*************************************************** DO NOT USE uint8_t or any other type that resolves to a single char, because the value will be stored incorrectly when serialized. Use int32_t instead and ensure that code correctly limits the value of the variable.*************************************************** | ||
| bool | set_draw_opaque_midi_regions (bool) | |
*************************************************** DO NOT USE uint8_t or any other type that resolves to a single char, because the value will be stored incorrectly when serialized. Use int32_t instead and ensure that code correctly limits the value of the variable.*************************************************** | ||
| bool | set_external_sync (bool) | |
*************************************************** DO NOT USE uint8_t or any other type that resolves to a single char, because the value will be stored incorrectly when serialized. Use int32_t instead and ensure that code correctly limits the value of the variable.*************************************************** | ||
| bool | set_insert_merge_policy (InsertMergePolicy) | |
| bool | set_jack_time_master (bool) | |
*************************************************** DO NOT USE uint8_t or any other type that resolves to a single char, because the value will be stored incorrectly when serialized. Use int32_t instead and ensure that code correctly limits the value of the variable.*************************************************** | ||
| bool | set_meterbridge_label_height (unsigned int) | |
*************************************************** DO NOT USE uint8_t or any other type that resolves to a single char, because the value will be stored incorrectly when serialized. Use int32_t instead and ensure that code correctly limits the value of the variable.*************************************************** | ||
| bool | set_midi_copy_is_fork (bool) | |
*************************************************** DO NOT USE uint8_t or any other type that resolves to a single char, because the value will be stored incorrectly when serialized. Use int32_t instead and ensure that code correctly limits the value of the variable.*************************************************** | ||
| bool | set_midi_search_path (std::string) | |
*************************************************** DO NOT USE uint8_t or any other type that resolves to a single char, because the value will be stored incorrectly when serialized. Use int32_t instead and ensure that code correctly limits the value of the variable.*************************************************** | ||
| bool | set_minitimeline_span (long) | |
*************************************************** DO NOT USE uint8_t or any other type that resolves to a single char, because the value will be stored incorrectly when serialized. Use int32_t instead and ensure that code correctly limits the value of the variable.*************************************************** | ||
| bool | set_native_file_data_format (SampleFormat) | |
| bool | set_native_file_header_format (HeaderFormat) | |
| bool | set_punch_in (bool) | |
*************************************************** DO NOT USE uint8_t or any other type that resolves to a single char, because the value will be stored incorrectly when serialized. Use int32_t instead and ensure that code correctly limits the value of the variable.*************************************************** | ||
| bool | set_punch_out (bool) | |
*************************************************** DO NOT USE uint8_t or any other type that resolves to a single char, because the value will be stored incorrectly when serialized. Use int32_t instead and ensure that code correctly limits the value of the variable.*************************************************** | ||
| bool | set_raid_path (std::string) | |
*************************************************** DO NOT USE uint8_t or any other type that resolves to a single char, because the value will be stored incorrectly when serialized. Use int32_t instead and ensure that code correctly limits the value of the variable.*************************************************** | ||
| bool | set_realtime_export (bool) | |
*************************************************** DO NOT USE uint8_t or any other type that resolves to a single char, because the value will be stored incorrectly when serialized. Use int32_t instead and ensure that code correctly limits the value of the variable.*************************************************** | ||
| bool | set_record_mode (RecordMode) | |
| bool | set_session_monitoring (MonitorChoice) | |
| bool | set_show_busses_on_meterbridge (bool) | |
*************************************************** DO NOT USE uint8_t or any other type that resolves to a single char, because the value will be stored incorrectly when serialized. Use int32_t instead and ensure that code correctly limits the value of the variable.*************************************************** | ||
| bool | set_show_fader_on_meterbridge (bool) | |
*************************************************** DO NOT USE uint8_t or any other type that resolves to a single char, because the value will be stored incorrectly when serialized. Use int32_t instead and ensure that code correctly limits the value of the variable.*************************************************** | ||
| bool | set_show_group_tabs (bool) | |
*************************************************** DO NOT USE uint8_t or any other type that resolves to a single char, because the value will be stored incorrectly when serialized. Use int32_t instead and ensure that code correctly limits the value of the variable.*************************************************** | ||
| bool | set_show_master_bus_comment_on_load (bool) | |
*************************************************** DO NOT USE uint8_t or any other type that resolves to a single char, because the value will be stored incorrectly when serialized. Use int32_t instead and ensure that code correctly limits the value of the variable.*************************************************** | ||
| bool | set_show_master_on_meterbridge (bool) | |
*************************************************** DO NOT USE uint8_t or any other type that resolves to a single char, because the value will be stored incorrectly when serialized. Use int32_t instead and ensure that code correctly limits the value of the variable.*************************************************** | ||
| bool | set_show_midi_on_meterbridge (bool) | |
*************************************************** DO NOT USE uint8_t or any other type that resolves to a single char, because the value will be stored incorrectly when serialized. Use int32_t instead and ensure that code correctly limits the value of the variable.*************************************************** | ||
| bool | set_show_monitor_on_meterbridge (bool) | |
*************************************************** DO NOT USE uint8_t or any other type that resolves to a single char, because the value will be stored incorrectly when serialized. Use int32_t instead and ensure that code correctly limits the value of the variable.*************************************************** | ||
| bool | set_show_mute_on_meterbridge (bool) | |
*************************************************** DO NOT USE uint8_t or any other type that resolves to a single char, because the value will be stored incorrectly when serialized. Use int32_t instead and ensure that code correctly limits the value of the variable.*************************************************** | ||
| bool | set_show_name_on_meterbridge (bool) | |
*************************************************** DO NOT USE uint8_t or any other type that resolves to a single char, because the value will be stored incorrectly when serialized. Use int32_t instead and ensure that code correctly limits the value of the variable.*************************************************** | ||
| bool | set_show_rec_on_meterbridge (bool) | |
*************************************************** DO NOT USE uint8_t or any other type that resolves to a single char, because the value will be stored incorrectly when serialized. Use int32_t instead and ensure that code correctly limits the value of the variable.*************************************************** | ||
| bool | set_show_region_fades (bool) | |
*************************************************** DO NOT USE uint8_t or any other type that resolves to a single char, because the value will be stored incorrectly when serialized. Use int32_t instead and ensure that code correctly limits the value of the variable.*************************************************** | ||
| bool | set_show_solo_on_meterbridge (bool) | |
*************************************************** DO NOT USE uint8_t or any other type that resolves to a single char, because the value will be stored incorrectly when serialized. Use int32_t instead and ensure that code correctly limits the value of the variable.*************************************************** | ||
| bool | set_show_summary (bool) | |
*************************************************** DO NOT USE uint8_t or any other type that resolves to a single char, because the value will be stored incorrectly when serialized. Use int32_t instead and ensure that code correctly limits the value of the variable.*************************************************** | ||
| bool | set_slave_timecode_offset (std::string) | |
*************************************************** DO NOT USE uint8_t or any other type that resolves to a single char, because the value will be stored incorrectly when serialized. Use int32_t instead and ensure that code correctly limits the value of the variable.*************************************************** | ||
| bool | set_subframes_per_frame (unsigned int) | |
*************************************************** DO NOT USE uint8_t or any other type that resolves to a single char, because the value will be stored incorrectly when serialized. Use int32_t instead and ensure that code correctly limits the value of the variable.*************************************************** | ||
| bool | set_take_name (std::string) | |
*************************************************** DO NOT USE uint8_t or any other type that resolves to a single char, because the value will be stored incorrectly when serialized. Use int32_t instead and ensure that code correctly limits the value of the variable.*************************************************** | ||
| bool | set_timecode_format (TimecodeFormat) | |
*************************************************** DO NOT USE uint8_t or any other type that resolves to a single char, because the value will be stored incorrectly when serialized. Use int32_t instead and ensure that code correctly limits the value of the variable.*************************************************** | ||
| bool | set_timecode_generator_offset (std::string) | |
*************************************************** DO NOT USE uint8_t or any other type that resolves to a single char, because the value will be stored incorrectly when serialized. Use int32_t instead and ensure that code correctly limits the value of the variable.*************************************************** | ||
| bool | set_timecode_offset (long) | |
*************************************************** DO NOT USE uint8_t or any other type that resolves to a single char, because the value will be stored incorrectly when serialized. Use int32_t instead and ensure that code correctly limits the value of the variable.*************************************************** | ||
| bool | set_timecode_offset_negative (bool) | |
*************************************************** DO NOT USE uint8_t or any other type that resolves to a single char, because the value will be stored incorrectly when serialized. Use int32_t instead and ensure that code correctly limits the value of the variable.*************************************************** | ||
| bool | set_track_name_number (bool) | |
*************************************************** DO NOT USE uint8_t or any other type that resolves to a single char, because the value will be stored incorrectly when serialized. Use int32_t instead and ensure that code correctly limits the value of the variable.*************************************************** | ||
| bool | set_track_name_take (bool) | |
*************************************************** DO NOT USE uint8_t or any other type that resolves to a single char, because the value will be stored incorrectly when serialized. Use int32_t instead and ensure that code correctly limits the value of the variable.*************************************************** | ||
| bool | set_tracks_follow_session_time (bool) | |
*************************************************** DO NOT USE uint8_t or any other type that resolves to a single char, because the value will be stored incorrectly when serialized. Use int32_t instead and ensure that code correctly limits the value of the variable.*************************************************** | ||
| bool | set_triggerbox_overrides_disk_monitoring (bool) | |
*************************************************** DO NOT USE uint8_t or any other type that resolves to a single char, because the value will be stored incorrectly when serialized. Use int32_t instead and ensure that code correctly limits the value of the variable.*************************************************** | ||
| bool | set_use_monitor_fades (bool) | |
*************************************************** DO NOT USE uint8_t or any other type that resolves to a single char, because the value will be stored incorrectly when serialized. Use int32_t instead and ensure that code correctly limits the value of the variable.*************************************************** | ||
| bool | set_use_region_fades (bool) | |
*************************************************** DO NOT USE uint8_t or any other type that resolves to a single char, because the value will be stored incorrectly when serialized. Use int32_t instead and ensure that code correctly limits the value of the variable.*************************************************** | ||
| bool | set_use_surround_master (bool) | |
*************************************************** DO NOT USE uint8_t or any other type that resolves to a single char, because the value will be stored incorrectly when serialized. Use int32_t instead and ensure that code correctly limits the value of the variable.*************************************************** | ||
| bool | set_use_transport_fades (bool) | |
*************************************************** DO NOT USE uint8_t or any other type that resolves to a single char, because the value will be stored incorrectly when serialized. Use int32_t instead and ensure that code correctly limits the value of the variable.*************************************************** | ||
| bool | set_use_video_file_fps (bool) | |
*************************************************** DO NOT USE uint8_t or any other type that resolves to a single char, because the value will be stored incorrectly when serialized. Use int32_t instead and ensure that code correctly limits the value of the variable.*************************************************** | ||
| bool | set_use_video_sync (bool) | |
*************************************************** DO NOT USE uint8_t or any other type that resolves to a single char, because the value will be stored incorrectly when serialized. Use int32_t instead and ensure that code correctly limits the value of the variable.*************************************************** | ||
| bool | set_video_pullup (float) | |
*************************************************** DO NOT USE uint8_t or any other type that resolves to a single char, because the value will be stored incorrectly when serialized. Use int32_t instead and ensure that code correctly limits the value of the variable.*************************************************** | ||
| bool | set_videotimeline_pullup (bool) | |
*************************************************** DO NOT USE uint8_t or any other type that resolves to a single char, because the value will be stored incorrectly when serialized. Use int32_t instead and ensure that code correctly limits the value of the variable.*************************************************** | ||
| bool | set_wave_amplitude_zoom (double) | |
*************************************************** DO NOT USE uint8_t or any other type that resolves to a single char, because the value will be stored incorrectly when serialized. Use int32_t instead and ensure that code correctly limits the value of the variable.*************************************************** | ||
| bool | set_wave_zoom_factor (unsigned short) | |
| Properties | ||
| std::string | audio_search_path | |
| bool | auto_input | |
| bool | auto_play | |
| bool | auto_return | |
| bool | count_in | |
| ARDOUR.CueBehavior | cue_behavior | |
| Temporal.TimeDomain | default_time_domain | |
| bool | draw_opaque_midi_regions | |
| bool | external_sync | |
| ARDOUR.InsertMergePolicy | insert_merge_policy | |
| bool | jack_time_master | |
| unsigned int | meterbridge_label_height | |
| bool | midi_copy_is_fork | |
| std::string | midi_search_path | |
| long | minitimeline_span | |
| ARDOUR.SampleFormat | native_file_data_format | |
| ARDOUR.HeaderFormat | native_file_header_format | |
| bool | punch_in | |
| bool | punch_out | |
| std::string | raid_path | |
| bool | realtime_export | |
| ARDOUR.RecordMode | record_mode | |
| ARDOUR.MonitorChoice | session_monitoring | |
| bool | show_busses_on_meterbridge | |
| bool | show_fader_on_meterbridge | |
| bool | show_group_tabs | |
| bool | show_master_bus_comment_on_load | |
| bool | show_master_on_meterbridge | |
| bool | show_midi_on_meterbridge | |
| bool | show_monitor_on_meterbridge | |
| bool | show_mute_on_meterbridge | |
| bool | show_name_on_meterbridge | |
| bool | show_rec_on_meterbridge | |
| bool | show_region_fades | |
| bool | show_solo_on_meterbridge | |
| bool | show_summary | |
| std::string | slave_timecode_offset | |
| unsigned int | subframes_per_frame | |
| std::string | take_name | |
| Timecode.TimecodeFormat | timecode_format | |
| std::string | timecode_generator_offset | |
| long | timecode_offset | |
| bool | timecode_offset_negative | |
| bool | track_name_number | |
| bool | track_name_take | |
| bool | tracks_follow_session_time | |
| bool | triggerbox_overrides_disk_monitoring | |
| bool | use_monitor_fades | |
| bool | use_region_fades | |
| bool | use_surround_master | |
| bool | use_transport_fades | |
| bool | use_video_file_fps | |
| bool | use_video_sync | |
| float | video_pullup | |
| bool | videotimeline_pullup | |
| double | wave_amplitude_zoom | |
| unsigned short | wave_zoom_factor | |
Inherited from PBD:Stateful
| Methods | ||
|---|---|---|
| void | clear_changes () | |
Forget about any changes to this object's properties | ||
| ID | id () | |
| OwnedPropertyList | properties () | |
∁ ARDOUR:SessionObject
C‡: ARDOUR::SessionObject
A named object associated with a Session. Objects derived from this class are expected to be destroyed before the session calls drop_references().
| Methods | ||
|---|---|---|
| std::string | name () | |
| Cast | ||
| Stateful | to_stateful () | |
↠ ARDOUR:SessionObjectPtr
C‡: std::shared_ptr< ARDOUR::SessionObject >, std::weak_ptr< ARDOUR::SessionObject >
A named object associated with a Session. Objects derived from this class are expected to be destroyed before the session calls drop_references().
| Methods | ||
|---|---|---|
| bool | isnil () | |
| std::string | name () | |
| Cast | ||
| Stateful | to_stateful () | |
| StatefulDestructible | to_statefuldestructible () | |
↠ ARDOUR:SessionPlaylists
C‡: std::shared_ptr< ARDOUR::SessionPlaylists >, std::weak_ptr< ARDOUR::SessionPlaylists >
| Methods | ||
|---|---|---|
| Playlist | by_id (ID) | |
| Playlist | by_name (std::string) | |
| PlaylistList | get_unused () | |
| PlaylistList | get_used () | |
| bool | isnil () | |
| unsigned int | n_playlists () | |
| PlaylistList | playlists_for_track (Track) | |
| unsigned int | region_use_count (Region) | |
| unsigned int | source_use_count (Source) | |
↠ ARDOUR:SideChain
C‡: std::shared_ptr< ARDOUR::SideChain >, std::weak_ptr< ARDOUR::SideChain >
is-a: ARDOUR:IOProcessor
Base class for objects with saveable and undoable state
| Methods | ||
|---|---|---|
| bool | isnil () | |
Inherited from ARDOUR:IOProcessor
| Methods | ||
|---|---|---|
| IO | input () | |
| ChanCount | natural_input_streams () | |
| ChanCount | natural_output_streams () | |
| IO | output () | |
Inherited from ARDOUR:Processor
| Methods | ||
|---|---|---|
| void | activate () | |
| bool | active () | |
| long | capture_offset () | |
| void | deactivate () | |
| std::string | display_name () | |
| bool | display_to_user () | |
| long | input_latency () | |
| ChanCount | input_streams () | |
| long | output_latency () | |
| ChanCount | output_streams () | |
| long | playback_offset () | |
| long | signal_latency () | |
| Cast | ||
| Amp | to_amp () | |
| Automatable | to_automatable () | |
| DelayLine | to_delayline () | |
| DiskIOProcessor | to_diskioprocessor () | |
| DiskReader | to_diskreader () | |
| DiskWriter | to_diskwriter () | |
| PluginInsert | to_insert () | |
| InternalSend | to_internalsend () | |
| IOProcessor | to_ioprocessor () | |
| Latent | to_latent () | |
| PeakMeter | to_meter () | |
| MonitorProcessor | to_monitorprocessor () | |
| PeakMeter | to_peakmeter () | |
| PluginInsert | to_plugininsert () | |
| PolarityProcessor | to_polarityprocessor () | |
| Send | to_send () | |
| SideChain | to_sidechain () | |
| SurroundSend | to_surroundsend () | |
| UnknownProcessor | to_unknownprocessor () | |
Inherited from ARDOUR:SessionObjectPtr
| Methods | ||
|---|---|---|
| std::string | name () | |
| Cast | ||
| Stateful | to_stateful () | |
| StatefulDestructible | to_statefuldestructible () | |
∁ ARDOUR:SimpleExport
C‡: ARDOUR::SimpleExport
| Methods | ||
|---|---|---|
| bool | check_outputs () | |
| bool | run_export () | |
| void | set_folder (std::string) | |
| void | set_name (std::string) | |
| bool | set_preset (std::string) | |
| void | set_range (long, long) | |
↠ ARDOUR:Slavable
C‡: std::shared_ptr< ARDOUR::Slavable >, std::weak_ptr< ARDOUR::Slavable >
| Methods | ||
|---|---|---|
| void | assign (VCA) | |
| bool | assigned_to (VCAManager, VCA) | |
| bool | isnil () | |
| VCAVector | masters (VCAManager) | |
| void | unassign (VCA) | |
↠ ARDOUR:SlavableAutomationControl
C‡: std::shared_ptr< ARDOUR::SlavableAutomationControl >, std::weak_ptr< ARDOUR::SlavableAutomationControl >
is-a: ARDOUR:AutomationControl
Base class for objects with saveable and undoable state
| Methods | ||
|---|---|---|
| void | add_master (AutomationControl) | |
| void | clear_masters () | |
| int | get_boolean_masters () | |
| double | get_masters_value () | |
| bool | isnil () | |
| void | remove_master (AutomationControl) | |
| bool | slaved () | |
| bool | slaved_to (AutomationControl) | |
Inherited from ARDOUR:AutomationControl
| Methods | ||
|---|---|---|
| AutomationList | alist () | |
| AutoState | automation_state () | |
| ParameterDescriptor | desc () | |
| double | get_value () | |
Get `internal' value Returns raw value as used for the plugin/processor control port | ||
| double | lower () | |
| double | normal () | |
| void | set_automation_state (AutoState) | |
| void | set_value (double, GroupControlDisposition) | |
Set `internal' value All derived classes must implement this. Basic derived classes will ignore group_override but more sophisticated children, notably those that proxy the value setting logic via an object that is aware of group relationships between this control and others, will find it useful.
| ||
| void | start_touch (timepos_t) | |
| void | stop_touch (timepos_t) | |
| bool | toggled () | |
| double | upper () | |
| bool | writable () | |
| Cast | ||
| Control | to_ctrl () | |
| SlavableAutomationControl | to_slavable () | |
Inherited from PBD:Controllable
| Methods | ||
|---|---|---|
| void | dump_registry () | |
| std::string | name () | |
| ControllableSet | registered_controllables () | |
| Cast | ||
| AutomationControl | to_automationcontrol () | |
| MPGainControl | to_mpgain () | |
| MPToggleControl | to_mptoggle () | |
Inherited from PBD:StatefulPtr
| Methods | ||
|---|---|---|
| void | clear_changes () | |
Forget about any changes to this object's properties | ||
| ID | id () | |
| OwnedPropertyList | properties () | |
↠ ARDOUR:SoloControl
C‡: std::shared_ptr< ARDOUR::SoloControl >, std::weak_ptr< ARDOUR::SoloControl >
is-a: ARDOUR:SlavableAutomationControl
Base class for objects with saveable and undoable state
| Methods | ||
|---|---|---|
| bool | can_solo () | |
| bool | isnil () | |
| bool | self_soloed () | |
| bool | soloed () | |
Inherited from ARDOUR:SlavableAutomationControl
| Methods | ||
|---|---|---|
| void | add_master (AutomationControl) | |
| void | clear_masters () | |
| int | get_boolean_masters () | |
| double | get_masters_value () | |
| void | remove_master (AutomationControl) | |
| bool | slaved () | |
| bool | slaved_to (AutomationControl) | |
Inherited from ARDOUR:AutomationControl
| Methods | ||
|---|---|---|
| AutomationList | alist () | |
| AutoState | automation_state () | |
| ParameterDescriptor | desc () | |
| double | get_value () | |
Get `internal' value Returns raw value as used for the plugin/processor control port | ||
| double | lower () | |
| double | normal () | |
| void | set_automation_state (AutoState) | |
| void | set_value (double, GroupControlDisposition) | |
Set `internal' value All derived classes must implement this. Basic derived classes will ignore group_override but more sophisticated children, notably those that proxy the value setting logic via an object that is aware of group relationships between this control and others, will find it useful.
| ||
| void | start_touch (timepos_t) | |
| void | stop_touch (timepos_t) | |
| bool | toggled () | |
| double | upper () | |
| bool | writable () | |
| Cast | ||
| Control | to_ctrl () | |
| SlavableAutomationControl | to_slavable () | |
Inherited from PBD:Controllable
| Methods | ||
|---|---|---|
| void | dump_registry () | |
| std::string | name () | |
| ControllableSet | registered_controllables () | |
| Cast | ||
| AutomationControl | to_automationcontrol () | |
| MPGainControl | to_mpgain () | |
| MPToggleControl | to_mptoggle () | |
Inherited from PBD:StatefulPtr
| Methods | ||
|---|---|---|
| void | clear_changes () | |
Forget about any changes to this object's properties | ||
| ID | id () | |
| OwnedPropertyList | properties () | |
↠ ARDOUR:SoloIsolateControl
C‡: std::shared_ptr< ARDOUR::SoloIsolateControl >, std::weak_ptr< ARDOUR::SoloIsolateControl >
is-a: ARDOUR:SlavableAutomationControl
Base class for objects with saveable and undoable state
| Methods | ||
|---|---|---|
| bool | isnil () | |
| bool | self_solo_isolated () | |
| bool | solo_isolated () | |
Inherited from ARDOUR:SlavableAutomationControl
| Methods | ||
|---|---|---|
| void | add_master (AutomationControl) | |
| void | clear_masters () | |
| int | get_boolean_masters () | |
| double | get_masters_value () | |
| void | remove_master (AutomationControl) | |
| bool | slaved () | |
| bool | slaved_to (AutomationControl) | |
Inherited from ARDOUR:AutomationControl
| Methods | ||
|---|---|---|
| AutomationList | alist () | |
| AutoState | automation_state () | |
| ParameterDescriptor | desc () | |
| double | get_value () | |
Get `internal' value Returns raw value as used for the plugin/processor control port | ||
| double | lower () | |
| double | normal () | |
| void | set_automation_state (AutoState) | |
| void | set_value (double, GroupControlDisposition) | |
Set `internal' value All derived classes must implement this. Basic derived classes will ignore group_override but more sophisticated children, notably those that proxy the value setting logic via an object that is aware of group relationships between this control and others, will find it useful.
| ||
| void | start_touch (timepos_t) | |
| void | stop_touch (timepos_t) | |
| bool | toggled () | |
| double | upper () | |
| bool | writable () | |
| Cast | ||
| Control | to_ctrl () | |
| SlavableAutomationControl | to_slavable () | |
Inherited from PBD:Controllable
| Methods | ||
|---|---|---|
| void | dump_registry () | |
| std::string | name () | |
| ControllableSet | registered_controllables () | |
| Cast | ||
| AutomationControl | to_automationcontrol () | |
| MPGainControl | to_mpgain () | |
| MPToggleControl | to_mptoggle () | |
Inherited from PBD:StatefulPtr
| Methods | ||
|---|---|---|
| void | clear_changes () | |
Forget about any changes to this object's properties | ||
| ID | id () | |
| OwnedPropertyList | properties () | |
↠ ARDOUR:SoloSafeControl
C‡: std::shared_ptr< ARDOUR::SoloSafeControl >, std::weak_ptr< ARDOUR::SoloSafeControl >
is-a: ARDOUR:SlavableAutomationControl
Base class for objects with saveable and undoable state
| Methods | ||
|---|---|---|
| bool | isnil () | |
| bool | solo_safe () | |
Inherited from ARDOUR:SlavableAutomationControl
| Methods | ||
|---|---|---|
| void | add_master (AutomationControl) | |
| void | clear_masters () | |
| int | get_boolean_masters () | |
| double | get_masters_value () | |
| void | remove_master (AutomationControl) | |
| bool | slaved () | |
| bool | slaved_to (AutomationControl) | |
Inherited from ARDOUR:AutomationControl
| Methods | ||
|---|---|---|
| AutomationList | alist () | |
| AutoState | automation_state () | |
| ParameterDescriptor | desc () | |
| double | get_value () | |
Get `internal' value Returns raw value as used for the plugin/processor control port | ||
| double | lower () | |
| double | normal () | |
| void | set_automation_state (AutoState) | |
| void | set_value (double, GroupControlDisposition) | |
Set `internal' value All derived classes must implement this. Basic derived classes will ignore group_override but more sophisticated children, notably those that proxy the value setting logic via an object that is aware of group relationships between this control and others, will find it useful.
| ||
| void | start_touch (timepos_t) | |
| void | stop_touch (timepos_t) | |
| bool | toggled () | |
| double | upper () | |
| bool | writable () | |
| Cast | ||
| Control | to_ctrl () | |
| SlavableAutomationControl | to_slavable () | |
Inherited from PBD:Controllable
| Methods | ||
|---|---|---|
| void | dump_registry () | |
| std::string | name () | |
| ControllableSet | registered_controllables () | |
| Cast | ||
| AutomationControl | to_automationcontrol () | |
| MPGainControl | to_mpgain () | |
| MPToggleControl | to_mptoggle () | |
Inherited from PBD:StatefulPtr
| Methods | ||
|---|---|---|
| void | clear_changes () | |
Forget about any changes to this object's properties | ||
| ID | id () | |
| OwnedPropertyList | properties () | |
↠ ARDOUR:Source
C‡: std::shared_ptr< ARDOUR::Source >, std::weak_ptr< ARDOUR::Source >
is-a: ARDOUR:SessionObjectPtr
A named object associated with a Session. Objects derived from this class are expected to be destroyed before the session calls drop_references().
| Methods | ||
|---|---|---|
| std::string | ancestor_name () | |
| bool | can_be_analysed () | |
| XrunPositions | captured_xruns () | |
| bool | empty () | |
| bool | has_been_analysed () | |
| bool | isnil () | |
| timepos_t | length () | |
| timepos_t | natural_position () | |
| timepos_t | timeline_position () | |
| long | timestamp () | |
| int | use_count () | |
| bool | used () | |
| bool | writable () | |
| Cast | ||
| AudioSource | to_audiosource () | |
| FileSource | to_filesource () | |
| MidiSource | to_midisource () | |
Inherited from ARDOUR:SessionObjectPtr
| Methods | ||
|---|---|---|
| std::string | name () | |
| Cast | ||
| Stateful | to_stateful () | |
| StatefulDestructible | to_statefuldestructible () | |
∁ ARDOUR:SourceList
C‡: std::vector<std::shared_ptr<ARDOUR::Source> >
| Constructor | ||
|---|---|---|
| ℂ | ARDOUR.SourceList () | |
| ℂ | ARDOUR.SourceList () | |
| Methods | ||
| LuaTable | add (LuaTable {Source}) | |
| Source | at (unsigned long) | |
| void | clear () | |
| bool | empty () | |
| LuaIter | iter () | |
| void | push_back (Source) | |
| void | reserve (unsigned long) | |
| unsigned long | size () | |
| LuaTable | table () | |
| ... | to_array (--lua--) | |
↠ ARDOUR:Stripable
C‡: std::shared_ptr< ARDOUR::Stripable >, std::weak_ptr< ARDOUR::Stripable >
is-a: ARDOUR:SessionObjectPtr
A named object associated with a Session. Objects derived from this class are expected to be destroyed before the session calls drop_references().
| Methods | ||
|---|---|---|
| unsigned int | eq_band_cnt () | |
| std::string | eq_band_name (unsigned int) | |
| GainControl | gain_control () | |
| bool | is_auditioner () | |
| bool | is_hidden () | |
| bool | is_master () | |
| bool | is_monitor () | |
| bool | is_private_route () | |
| bool | is_selected () | |
| bool | is_surround_master () | |
| bool | isnil () | |
| AutomationControl | mapped_control (WellKnownCtrl, unsigned int) | |
| ReadOnlyControl | mapped_output (WellKnownData) | |
| AutomationControl | master_send_enable_controllable () | |
| MonitorProcessor | monitor_control () | |
| MuteControl | mute_control () | |
| AutomationControl | pan_azimuth_control () | |
| AutomationControl | pan_elevation_control () | |
| AutomationControl | pan_frontback_control () | |
| AutomationControl | pan_lfe_control () | |
| AutomationControl | pan_width_control () | |
| PhaseControl | phase_control () | |
| PresentationInfo | presentation_info_ptr () | |
| AutomationControl | rec_enable_control () | |
| AutomationControl | rec_safe_control () | |
| AutomationControl | send_enable_controllable (unsigned int) | |
| AutomationControl | send_level_controllable (unsigned int, bool) | |
| std::string | send_name (unsigned int) | |
| AutomationControl | send_pan_azimuth_controllable (unsigned int) | |
| AutomationControl | send_pan_azimuth_enable_controllable (unsigned int) | |
| void | set_presentation_order (unsigned int) | |
| bool | slaved () | |
| bool | slaved_to (VCA) | |
| SoloControl | solo_control () | |
| SoloIsolateControl | solo_isolate_control () | |
| SoloSafeControl | solo_safe_control () | |
| GainControl | trim_control () | |
| Cast | ||
| Automatable | to_automatable () | |
| Route | to_route () | |
| Slavable | to_slavable () | |
| VCA | to_vca () | |
Inherited from ARDOUR:SessionObjectPtr
| Methods | ||
|---|---|---|
| std::string | name () | |
| Cast | ||
| Stateful | to_stateful () | |
| StatefulDestructible | to_statefuldestructible () | |
∁ ARDOUR:StripableList
C‡: std::list<std::shared_ptr<ARDOUR::Stripable> >
| Constructor | ||
|---|---|---|
| ℂ | ARDOUR.StripableList () | |
| Methods | ||
| Stripable | back () | |
| bool | empty () | |
| Stripable | front () | |
| LuaIter | iter () | |
| void | reverse () | |
| unsigned long | size () | |
| LuaTable | table () | |
↠ ARDOUR:SurroundPannable
C‡: std::shared_ptr< ARDOUR::SurroundPannable >, std::weak_ptr< ARDOUR::SurroundPannable >
is-a: ARDOUR:Automatable
Base class for objects with saveable and undoable state
| Methods | ||
|---|---|---|
| bool | isnil () | |
| Data Members | ||
| ARDOUR:AutomationControl | binaural_render_mode | |
| ARDOUR:AutomationControl | pan_pos_x | |
| ARDOUR:AutomationControl | pan_pos_y | |
| ARDOUR:AutomationControl | pan_pos_z | |
| ARDOUR:AutomationControl | pan_size | |
| ARDOUR:AutomationControl | pan_snap | |
| ARDOUR:AutomationControl | sur_elevation_enable | |
| ARDOUR:AutomationControl | sur_ramp | |
| ARDOUR:AutomationControl | sur_zones | |
Inherited from ARDOUR:Automatable
| Methods | ||
|---|---|---|
| ParameterList | all_automatable_params () | |
API for Lua binding | ||
| AutomationControl | automation_control (Parameter, bool) | |
| Cast | ||
| Slavable | to_slavable () | |
↠ ARDOUR:SurroundReturn
C‡: std::shared_ptr< ARDOUR::SurroundReturn >, std::weak_ptr< ARDOUR::SurroundReturn >
is-a: ARDOUR:Processor
Base class for objects with saveable and undoable state
| Methods | ||
|---|---|---|
| bool | have_au_renderer () | |
| float | integrated_loudness () | |
| bool | isnil () | |
| bool | load_au_preset (unsigned long) | |
| float | max_dbtp () | |
| float | max_momentary () | |
| float | momentary () | |
| unsigned long | n_channels () | |
| Controllable | output_format_controllable () | |
| bool | set_au_param (unsigned long, float) | |
| void | set_bed_mix (bool, std::string, IntArray) | |
| void | set_ffoa (float) | |
| void | set_sync_and_align (bool) | |
| void | set_with_all_metadata (bool) | |
| unsigned long | total_n_channels (bool) | |
Inherited from ARDOUR:Processor
| Methods | ||
|---|---|---|
| void | activate () | |
| bool | active () | |
| long | capture_offset () | |
| void | deactivate () | |
| std::string | display_name () | |
| bool | display_to_user () | |
| long | input_latency () | |
| ChanCount | input_streams () | |
| long | output_latency () | |
| ChanCount | output_streams () | |
| long | playback_offset () | |
| long | signal_latency () | |
| Cast | ||
| Amp | to_amp () | |
| Automatable | to_automatable () | |
| DelayLine | to_delayline () | |
| DiskIOProcessor | to_diskioprocessor () | |
| DiskReader | to_diskreader () | |
| DiskWriter | to_diskwriter () | |
| PluginInsert | to_insert () | |
| InternalSend | to_internalsend () | |
| IOProcessor | to_ioprocessor () | |
| Latent | to_latent () | |
| PeakMeter | to_meter () | |
| MonitorProcessor | to_monitorprocessor () | |
| PeakMeter | to_peakmeter () | |
| PluginInsert | to_plugininsert () | |
| PolarityProcessor | to_polarityprocessor () | |
| Send | to_send () | |
| SideChain | to_sidechain () | |
| SurroundSend | to_surroundsend () | |
| UnknownProcessor | to_unknownprocessor () | |
Inherited from ARDOUR:SessionObjectPtr
| Methods | ||
|---|---|---|
| std::string | name () | |
| Cast | ||
| Stateful | to_stateful () | |
| StatefulDestructible | to_statefuldestructible () | |
↠ ARDOUR:SurroundSend
C‡: std::shared_ptr< ARDOUR::SurroundSend >, std::weak_ptr< ARDOUR::SurroundSend >
is-a: ARDOUR:Processor
Internal Abstraction for Sends (and MixbusSends)
| Methods | ||
|---|---|---|
| GainControl | gain_control () | |
| long | get_delay_in () | |
| long | get_delay_out () | |
| bool | isnil () | |
| unsigned int | n_pannables () | |
| SurroundPannable | pannable (unsigned long) | |
Inherited from ARDOUR:Processor
| Methods | ||
|---|---|---|
| void | activate () | |
| bool | active () | |
| long | capture_offset () | |
| void | deactivate () | |
| std::string | display_name () | |
| bool | display_to_user () | |
| long | input_latency () | |
| ChanCount | input_streams () | |
| long | output_latency () | |
| ChanCount | output_streams () | |
| long | playback_offset () | |
| long | signal_latency () | |
| Cast | ||
| Amp | to_amp () | |
| Automatable | to_automatable () | |
| DelayLine | to_delayline () | |
| DiskIOProcessor | to_diskioprocessor () | |
| DiskReader | to_diskreader () | |
| DiskWriter | to_diskwriter () | |
| PluginInsert | to_insert () | |
| InternalSend | to_internalsend () | |
| IOProcessor | to_ioprocessor () | |
| Latent | to_latent () | |
| PeakMeter | to_meter () | |
| MonitorProcessor | to_monitorprocessor () | |
| PeakMeter | to_peakmeter () | |
| PluginInsert | to_plugininsert () | |
| PolarityProcessor | to_polarityprocessor () | |
| Send | to_send () | |
| SideChain | to_sidechain () | |
| SurroundSend | to_surroundsend () | |
| UnknownProcessor | to_unknownprocessor () | |
Inherited from ARDOUR:SessionObjectPtr
| Methods | ||
|---|---|---|
| std::string | name () | |
| Cast | ||
| Stateful | to_stateful () | |
| StatefulDestructible | to_statefuldestructible () | |
∁ ARDOUR:TimelineRange
C‡: ARDOUR::TimelineRange
| Constructor | ||
|---|---|---|
| ℂ | ARDOUR.TimelineRange (timepos_t, timepos_t, unsigned int) | |
| Methods | ||
| timepos_t | _end () | |
| bool | equal (TimelineRange) | |
| timecnt_t | length () | |
| timepos_t | start () | |
| Data Members | ||
| unsigned int | id | |
∁ ARDOUR:TimelineRangeList
C‡: std::list<ARDOUR::TimelineRange >
| Constructor | ||
|---|---|---|
| ℂ | ARDOUR.TimelineRangeList () | |
| Methods | ||
| LuaTable | add (LuaTable {TimelineRange}) | |
| TimelineRange | back () | |
| void | clear () | |
| bool | empty () | |
| TimelineRange | front () | |
| LuaIter | iter () | |
| void | push_back (TimelineRange) | |
| void | reverse () | |
| unsigned long | size () | |
| LuaTable | table () | |
| void | unique () | |
↠ ARDOUR:Track
C‡: std::shared_ptr< ARDOUR::Track >, std::weak_ptr< ARDOUR::Track >
is-a: ARDOUR:Route
| Constructor | ||
|---|---|---|
| ℵ | ARDOUR.Track () | |
| Methods | ||
| Region | bounce (InterThreadInfo&, std::string) | |
| Region | bounce_range (long, long, InterThreadInfo&, Processor, bool, std::string, bool) | |
| bool | bounceable (Processor, bool) | |
Test if the track can be bounced with the given settings. If sends/inserts/returns are present in the signal path or the given track has no audio outputs bouncing is not possible.
Returns true if the track can be bounced, or false otherwise. | ||
| bool | can_record () | |
| int | find_and_use_playlist (DataType, ID) | |
| bool | isnil () | |
| Playlist | playlist () | |
| bool | set_name (std::string) | |
| int | use_copy_playlist () | |
| int | use_new_playlist (DataType) | |
| int | use_playlist (DataType, Playlist, bool) | |
| Cast | ||
| AudioTrack | to_audio_track () | |
| MidiTrack | to_midi_track () | |
Inherited from ARDOUR:Route
| Methods | ||
|---|---|---|
| bool | active () | |
| int | add_aux_send (Route, Processor) | |
Add an aux send to a route.
| ||
| int | add_foldback_send (Route, bool) | |
| int | add_processor_by_index (Processor, int, ProcessorStreams, bool) | |
| bool | add_sidechain (Processor) | |
| Amp | amp () | |
| void | clear_stripables () | |
| std::string | comment () | |
| bool | customize_plugin_insert (Processor, unsigned int, ChanCount, ChanCount) | |
| DataType | data_type () | |
| Stripable | first_selected_stripable () | |
| IO | input () | |
| Delivery | main_outs () | |
| MonitorControl | monitoring_control () | |
| MonitorState | monitoring_state () | |
| bool | muted () | |
| ChanCount | n_inputs () | |
| ChanCount | n_outputs () | |
| Processor | nth_plugin (unsigned int) | |
| Processor | nth_processor (unsigned int) | |
| Processor | nth_send (unsigned int) | |
| IO | output () | |
| PannerShell | panner_shell () | |
| PeakMeter | peak_meter () | |
| long | playback_latency (bool) | |
| int | remove_processor (Processor, ProcessorStreams, bool) | |
| int | remove_processors (ProcessorList, ProcessorStreams) | |
| bool | remove_sidechain (Processor) | |
| int | reorder_processors (ProcessorList, ProcessorStreams) | |
| int | replace_processor (Processor, Processor, ProcessorStreams) | |
| bool | reset_plugin_insert (Processor) | |
reset plugin-insert configuration to default, disable customizations. This is equivalent to calling customize_plugin_insert (proc, 0, unused)
Returns true if successful | ||
| int | save_as_template (std::string, std::string, std::string) | |
| void | select_next_stripable (bool, bool) | |
| void | select_prev_stripable (bool, bool) | |
| void | set_active (bool, void*) | |
| void | set_comment (std::string, void*) | |
| void | set_meter_point (MeterPoint) | |
| bool | set_strict_io (bool) | |
| long | signal_latency () | |
| bool | soloed () | |
| bool | strict_io () | |
| SurroundReturn | surround_return () | |
| SurroundSend | surround_send () | |
| Processor | the_instrument () | |
Return the first processor that accepts has at least one MIDI input and at least one audio output. In the vast majority of cases, this will be "the instrument". This does not preclude other MIDI->audio processors later in the processing chain, but that would be a special case not covered by this utility function. | ||
| Amp | trim () | |
| Cast | ||
| Track | to_track () | |
Inherited from ARDOUR:Stripable
| Methods | ||
|---|---|---|
| unsigned int | eq_band_cnt () | |
| std::string | eq_band_name (unsigned int) | |
| GainControl | gain_control () | |
| bool | is_auditioner () | |
| bool | is_hidden () | |
| bool | is_master () | |
| bool | is_monitor () | |
| bool | is_private_route () | |
| bool | is_selected () | |
| bool | is_surround_master () | |
| AutomationControl | mapped_control (WellKnownCtrl, unsigned int) | |
| ReadOnlyControl | mapped_output (WellKnownData) | |
| AutomationControl | master_send_enable_controllable () | |
| MonitorProcessor | monitor_control () | |
| MuteControl | mute_control () | |
| AutomationControl | pan_azimuth_control () | |
| AutomationControl | pan_elevation_control () | |
| AutomationControl | pan_frontback_control () | |
| AutomationControl | pan_lfe_control () | |
| AutomationControl | pan_width_control () | |
| PhaseControl | phase_control () | |
| PresentationInfo | presentation_info_ptr () | |
| AutomationControl | rec_enable_control () | |
| AutomationControl | rec_safe_control () | |
| AutomationControl | send_enable_controllable (unsigned int) | |
| AutomationControl | send_level_controllable (unsigned int, bool) | |
| std::string | send_name (unsigned int) | |
| AutomationControl | send_pan_azimuth_controllable (unsigned int) | |
| AutomationControl | send_pan_azimuth_enable_controllable (unsigned int) | |
| void | set_presentation_order (unsigned int) | |
| bool | slaved () | |
| bool | slaved_to (VCA) | |
| SoloControl | solo_control () | |
| SoloIsolateControl | solo_isolate_control () | |
| SoloSafeControl | solo_safe_control () | |
| GainControl | trim_control () | |
| Cast | ||
| Automatable | to_automatable () | |
| Route | to_route () | |
| Slavable | to_slavable () | |
| VCA | to_vca () | |
Inherited from ARDOUR:SessionObjectPtr
| Methods | ||
|---|---|---|
| std::string | name () | |
| Cast | ||
| Stateful | to_stateful () | |
| StatefulDestructible | to_statefuldestructible () | |
Inherited from PBD:Stateful
| Methods | ||
|---|---|---|
| void | clear_changes () | |
Forget about any changes to this object's properties | ||
| ID | id () | |
| OwnedPropertyList | properties () | |
↠ ARDOUR:UnknownProcessor
C‡: std::shared_ptr< ARDOUR::UnknownProcessor >, std::weak_ptr< ARDOUR::UnknownProcessor >
is-a: ARDOUR:Processor
| Methods | ||
|---|---|---|
| bool | isnil () | |
Inherited from ARDOUR:Processor
| Methods | ||
|---|---|---|
| void | activate () | |
| bool | active () | |
| long | capture_offset () | |
| void | deactivate () | |
| std::string | display_name () | |
| bool | display_to_user () | |
| long | input_latency () | |
| ChanCount | input_streams () | |
| long | output_latency () | |
| ChanCount | output_streams () | |
| long | playback_offset () | |
| long | signal_latency () | |
| Cast | ||
| Amp | to_amp () | |
| Automatable | to_automatable () | |
| DelayLine | to_delayline () | |
| DiskIOProcessor | to_diskioprocessor () | |
| DiskReader | to_diskreader () | |
| DiskWriter | to_diskwriter () | |
| PluginInsert | to_insert () | |
| InternalSend | to_internalsend () | |
| IOProcessor | to_ioprocessor () | |
| Latent | to_latent () | |
| PeakMeter | to_meter () | |
| MonitorProcessor | to_monitorprocessor () | |
| PeakMeter | to_peakmeter () | |
| PluginInsert | to_plugininsert () | |
| PolarityProcessor | to_polarityprocessor () | |
| Send | to_send () | |
| SideChain | to_sidechain () | |
| SurroundSend | to_surroundsend () | |
| UnknownProcessor | to_unknownprocessor () | |
Inherited from ARDOUR:SessionObjectPtr
| Methods | ||
|---|---|---|
| std::string | name () | |
| Cast | ||
| Stateful | to_stateful () | |
| StatefulDestructible | to_statefuldestructible () | |
↠ ARDOUR:UserBundle
C‡: std::shared_ptr< ARDOUR::UserBundle >, std::weak_ptr< ARDOUR::UserBundle >
is-a: ARDOUR:Bundle
A set of `channels', each of which is associated with 0 or more ports. Each channel has a name which can be anything useful, and a data type. Intended for grouping things like, for example, a buss' outputs. `Channel' is a rather overloaded term but I can't think of a better one right now.
| Methods | ||
|---|---|---|
| bool | isnil () | |
Inherited from ARDOUR:Bundle
| Methods | ||
|---|---|---|
| std::string | channel_name (unsigned int) | |
Returns Channel name. | ||
| unsigned int | n_total () | |
| std::string | name () | |
Returns Bundle name | ||
| ChanCount | nchannels () | |
Returns Number of channels that this Bundle has | ||
| bool | ports_are_inputs () | |
| bool | ports_are_outputs () | |
| Cast | ||
| UserBundle | to_userbundle () | |
↠ ARDOUR:VCA
C‡: std::shared_ptr< ARDOUR::VCA >, std::weak_ptr< ARDOUR::VCA >
is-a: ARDOUR:Stripable
Base class for objects with saveable and undoable state
| Methods | ||
|---|---|---|
| std::string | full_name () | |
| GainControl | gain_control () | |
| bool | isnil () | |
| MuteControl | mute_control () | |
| int | number () | |
| SoloControl | solo_control () | |
Inherited from ARDOUR:Stripable
| Methods | ||
|---|---|---|
| unsigned int | eq_band_cnt () | |
| std::string | eq_band_name (unsigned int) | |
| bool | is_auditioner () | |
| bool | is_hidden () | |
| bool | is_master () | |
| bool | is_monitor () | |
| bool | is_private_route () | |
| bool | is_selected () | |
| bool | is_surround_master () | |
| AutomationControl | mapped_control (WellKnownCtrl, unsigned int) | |
| ReadOnlyControl | mapped_output (WellKnownData) | |
| AutomationControl | master_send_enable_controllable () | |
| MonitorProcessor | monitor_control () | |
| AutomationControl | pan_azimuth_control () | |
| AutomationControl | pan_elevation_control () | |
| AutomationControl | pan_frontback_control () | |
| AutomationControl | pan_lfe_control () | |
| AutomationControl | pan_width_control () | |
| PhaseControl | phase_control () | |
| PresentationInfo | presentation_info_ptr () | |
| AutomationControl | rec_enable_control () | |
| AutomationControl | rec_safe_control () | |
| AutomationControl | send_enable_controllable (unsigned int) | |
| AutomationControl | send_level_controllable (unsigned int, bool) | |
| std::string | send_name (unsigned int) | |
| AutomationControl | send_pan_azimuth_controllable (unsigned int) | |
| AutomationControl | send_pan_azimuth_enable_controllable (unsigned int) | |
| void | set_presentation_order (unsigned int) | |
| bool | slaved () | |
| bool | slaved_to (VCA) | |
| SoloIsolateControl | solo_isolate_control () | |
| SoloSafeControl | solo_safe_control () | |
| GainControl | trim_control () | |
| Cast | ||
| Automatable | to_automatable () | |
| Route | to_route () | |
| Slavable | to_slavable () | |
| VCA | to_vca () | |
Inherited from ARDOUR:SessionObjectPtr
| Methods | ||
|---|---|---|
| std::string | name () | |
| Cast | ||
| Stateful | to_stateful () | |
| StatefulDestructible | to_statefuldestructible () | |
∁ ARDOUR:VCAList
C‡: std::list<std::shared_ptr<ARDOUR::VCA> >
| Constructor | ||
|---|---|---|
| ℂ | ARDOUR.VCAList () | |
| Methods | ||
| VCA | back () | |
| bool | empty () | |
| VCA | front () | |
| LuaIter | iter () | |
| void | reverse () | |
| unsigned long | size () | |
| LuaTable | table () | |
∁ ARDOUR:VCAManager
C‡: ARDOUR::VCAManager
is-a: PBD:StatefulDestructible
Base class for objects with saveable and undoable state with destruction notification
| Methods | ||
|---|---|---|
| VCAList | create_vca (unsigned int, std::string) | |
| unsigned long | n_vcas () | |
| void | remove_vca (VCA) | |
| VCA | vca_by_name (std::string) | |
| VCA | vca_by_number (int) | |
| VCAList | vcas () | |
Inherited from PBD:Stateful
| Methods | ||
|---|---|---|
| void | clear_changes () | |
Forget about any changes to this object's properties | ||
| ID | id () | |
| OwnedPropertyList | properties () | |
∁ ARDOUR:VCAVector
C‡: std::vector<std::shared_ptr<ARDOUR::VCA> >
| Constructor | ||
|---|---|---|
| ℂ | ARDOUR.VCAVector () | |
| Methods | ||
| VCA | at (unsigned long) | |
| bool | empty () | |
| LuaIter | iter () | |
| unsigned long | size () | |
| LuaTable | table () | |
∁ ARDOUR:WeakAudioSourceList
C‡: std::list<std::weak_ptr<ARDOUR::AudioSource> >
| Constructor | ||
|---|---|---|
| ℂ | ARDOUR.WeakAudioSourceList () | |
| Methods | ||
| AudioSource | back () | |
| bool | empty () | |
| AudioSource | front () | |
| LuaIter | iter () | |
| void | reverse () | |
| unsigned long | size () | |
| LuaTable | table () | |
∁ ARDOUR:WeakRouteList
C‡: std::list<std::weak_ptr<ARDOUR::Route> >
| Constructor | ||
|---|---|---|
| ℂ | ARDOUR.WeakRouteList () | |
| Methods | ||
| Route | back () | |
| bool | empty () | |
| Route | front () | |
| LuaIter | iter () | |
| void | reverse () | |
| unsigned long | size () | |
| LuaTable | table () | |
∁ ARDOUR:WeakSourceList
C‡: std::list<std::weak_ptr<ARDOUR::Source> >
| Constructor | ||
|---|---|---|
| ℂ | ARDOUR.WeakSourceList () | |
| Methods | ||
| Source | back () | |
| bool | empty () | |
| Source | front () | |
| LuaIter | iter () | |
| void | reverse () | |
| unsigned long | size () | |
| LuaTable | table () | |
∁ ARDOUR:XrunPositions
C‡: std::vector<long >
| Constructor | ||
|---|---|---|
| ℂ | ARDOUR.XrunPositions () | |
| ℂ | ARDOUR.XrunPositions () | |
| Methods | ||
| LuaTable | add (LuaTable {long}) | |
| long | at (unsigned long) | |
| void | clear () | |
| bool | empty () | |
| LuaIter | iter () | |
| void | push_back (long) | |
| void | reserve (unsigned long) | |
| unsigned long | size () | |
| LuaTable | table () | |
| ... | to_array (--lua--) | |
ℕ ArdourUI
| Methods | ||
|---|---|---|
| LuaTable | actionlist () | |
| UIConfiguration | config () | |
| std::string | http_get (std::string) | |
| void | mixer_screenshot (std::string) | |
| ProcessorVector | processor_selection () | |
| unsigned int | translate_order (InsertAt) | |
∁ ArdourUI:ARDOUR::AutomationListList
C‡: std::list<std::shared_ptr<ARDOUR::AutomationList> >
| Constructor | ||
|---|---|---|
| ℂ | ArdourUI.ARDOUR..AutomationListList () | |
| Methods | ||
| LuaTable | add (LuaTable {AutomationList}) | |
| AutomationList | back () | |
| void | clear () | |
| bool | empty () | |
| AutomationList | front () | |
| LuaIter | iter () | |
| void | push_back (AutomationList) | |
| void | reverse () | |
| unsigned long | size () | |
| LuaTable | table () | |
| void | unique () | |
∁ ArdourUI:ArdourMarker
C‡: ArdourMarker
Location Marker
Editor ruler representation of a location marker or range on the timeline.
| Methods | ||
|---|---|---|
| std::string | name () | |
| timepos_t | position () | |
| Type | _type () | |
∁ ArdourUI:ArdourMarkerList
C‡: std::list<ArdourMarker* >
| Constructor | ||
|---|---|---|
| ℂ | ArdourUI.ArdourMarkerList () | |
| Methods | ||
| ArdourMarker | back () | |
| void | clear () | |
| bool | empty () | |
| ArdourMarker | front () | |
| LuaIter | iter () | |
| ... | push_back (--lua--) | |
| void | reverse () | |
| unsigned long | size () | |
| LuaTable | table () | |
| void | unique () | |
∅ ArdourUI:AutomationSelection
C‡: AutomationSelection
is-a: ArdourUI:ARDOUR::AutomationListList
This class object is only used indirectly as return-value and function-parameter. It provides no methods by itself.
Inherited from ArdourUI:ARDOUR::AutomationListList
| Constructor | ||
|---|---|---|
| ℂ | ArdourUI.ARDOUR..AutomationListList () | |
| Methods | ||
| LuaTable | add (LuaTable {AutomationList}) | |
| AutomationList | back () | |
| void | clear () | |
| bool | empty () | |
| AutomationList | front () | |
| LuaIter | iter () | |
| void | push_back (AutomationList) | |
| void | reverse () | |
| unsigned long | size () | |
| LuaTable | table () | |
| void | unique () | |
∅ ArdourUI:AxisView
C‡: AxisView
This class object is only used indirectly as return-value and function-parameter. It provides no methods by itself.
∅ ArdourUI:ControlPoint
C‡: ControlPoint
is-a: ArdourUI:Selectable
Base class for objects with auto-disconnection. trackable must be inherited when objects shall automatically invalidate slots referring to them on destruction. A slot built from a member function of a trackable derived type installs a callback that is invoked when the trackable object is destroyed or overwritten.
add_destroy_notify_callback() and remove_destroy_notify_callback() can be used to manually install and remove callbacks when notification of the object dying is needed.
notify_callbacks() invokes and removes all previously installed callbacks and can therefore be used to disconnect from all signals.
Note that there is no virtual destructor. Don't use trackable* as pointer type for managing your data or the destructors of your derived types won't be called when deleting your objects.
signal
This class object is only used indirectly as return-value and function-parameter. It provides no methods by itself.
∁ ArdourUI:ControlPointList
C‡: std::list<ControlPoint* >
| Constructor | ||
|---|---|---|
| ℂ | ArdourUI.ControlPointList () | |
| Methods | ||
| ControlPoint | back () | |
| void | clear () | |
| bool | empty () | |
| ControlPoint | front () | |
| LuaIter | iter () | |
| ... | push_back (--lua--) | |
| void | reverse () | |
| unsigned long | size () | |
| LuaTable | table () | |
| void | unique () | |
∁ ArdourUI:EditingContext
C‡: EditingContext
Base class for objects with auto-disconnection. trackable must be inherited when objects shall automatically invalidate slots referring to them on destruction. A slot built from a member function of a trackable derived type installs a callback that is invoked when the trackable object is destroyed or overwritten.
add_destroy_notify_callback() and remove_destroy_notify_callback() can be used to manually install and remove callbacks when notification of the object dying is needed.
notify_callbacks() invokes and removes all previously installed callbacks and can therefore be used to disconnect from all signals.
Note that there is no virtual destructor. Don't use trackable* as pointer type for managing your data or the destructors of your derived types won't be called when deleting your objects.
signal
| Methods | ||
|---|---|---|
| TrackViewList | axis_views_from_routes (RouteListPtr) | |
| MouseMode | current_mouse_mode () | |
Returns The current mouse mode (gain, object, range, timefx etc.) (defined in editing_syms.inc.h) | ||
| LuaTable(Location, ...) | find_location_from_marker (ArdourMarker, bool&) | |
| ArdourMarker | find_marker_from_location_id (ID, bool) | |
| long | get_current_zoom () | |
| Selection | get_cut_buffer () | |
| LuaTable(Beats, ...) | get_draw_length_as_beats (bool&, timepos_t) | |
| int | get_grid_beat_divisions (GridType) | |
| LuaTable(Beats, ...) | get_grid_type_as_beats (bool&, timepos_t) | |
| LuaTable(timecnt_t, ...) | get_nudge_distance (timepos_t, timecnt_t&) | |
| Selection | get_selection () | |
| StripableTimeAxisView | get_stripable_time_axis_by_id (ID) | |
| double | get_y_origin () | |
| GridType | grid_type () | |
| long | pixel_to_sample (double) | |
| void | redo (unsigned int) | |
Redo some transactions.
| ||
| void | reset_x_origin (long) | |
Queue up a change to the Editor viewport x origin.
| ||
| void | reset_y_origin (double) | |
| void | reset_zoom (long) | |
| double | sample_to_pixel (long) | |
| void | set_mouse_mode (MouseMode, bool) | |
Set the mouse mode (gain, object, range, timefx etc.)
| ||
| void | set_snap_mode (SnapMode) | |
| void | set_zoom_focus (ZoomFocus) | |
| SnapMode | snap_mode () | |
| void | undo (unsigned int) | |
Undo some transactions.
| ||
| ZoomFocus | zoom_focus () | |
∁ ArdourUI:Editor
C‡: PublicEditor
is-a: ArdourUI:EditingContext
| Methods | ||
|---|---|---|
| void | access_action (std::string, std::string) | |
| void | add_location_from_playhead_cursor () | |
| void | add_location_mark (timepos_t, Flags, int) | |
| void | center_screen (long) | |
| void | clear_grouped_playlists (RouteUI) | |
| void | clear_playlist (Playlist) | |
| void | consider_auditioning (Region) | |
Possibly start the audition of a region. If r is 0, or not an AudioRegion any current audition is cancelled. If we are currently auditioning r , the audition will be cancelled. Otherwise an audition of r will start.
| ||
| Route | current_mixer_stripable () | |
| long | current_page_samples () | |
| void | deselect_all () | |
| LuaTable(...) | do_embed (StringVector, ImportDisposition, ImportMode, timepos_t&, PluginInfo, Track) | |
| LuaTable(...) | do_import (StringVector, ImportDisposition, ImportMode, SrcQuality, MidiTrackNameSource, MidiTempoMapDisposition, timepos_t&, PluginInfo, Track, bool) | |
| bool | dragging_playhead () | |
| MouseMode | effective_mouse_mode () | |
| void | export_audio () | |
Open main export dialog | ||
| void | export_range () | |
Open export dialog with current range preselected | ||
| void | export_selection () | |
Open export dialog with current selection preselected | ||
| void | fit_selection () | |
| bool | follow_playhead () | |
Returns true if the editor is following the playhead | ||
| timecnt_t | get_paste_offset (timepos_t, unsigned int, timecnt_t) | |
| LuaTable(...) | get_pointer_position (double&, double&) | |
| LuaTable(bool, ...) | get_selection_extents (timepos_t&, timepos_t&) | |
| bool | get_smart_mode () | |
| TrackViewList | get_track_views () | |
| int | get_videotl_bar_height () | |
| void | goto_nth_marker (int) | |
| void | hide_track_in_display (TimeAxisView, bool) | |
| long | leftmost_sample () | |
Returns true if the playhead is currently being dragged, otherwise false | ||
| void | maximise_editing_space () | |
| void | maybe_locate_with_edit_preroll (long) | |
| void | mouse_add_new_marker (timepos_t, Flags, int) | |
| void | new_playlists_for_all_tracks (bool) | |
| void | new_playlists_for_armed_tracks (bool) | |
| void | new_playlists_for_grouped_tracks (RouteUI, bool) | |
| void | new_playlists_for_selected_tracks (bool) | |
| void | new_region_from_selection () | |
| void | override_visible_track_count () | |
| void | play_selection () | |
| void | play_with_preroll () | |
| void | quick_export () | |
Open Simple Export Dialog | ||
| RegionView | regionview_from_region (Region) | |
| void | remove_last_capture () | |
| void | remove_location_at_playhead_cursor () | |
| void | remove_tracks () | |
| void | restore_editing_space () | |
| RouteTimeAxisView | rtav_from_route (Route) | |
| bool | scroll_down_one_track (bool) | |
| void | scroll_tracks_down_line () | |
| void | scroll_tracks_up_line () | |
| bool | scroll_up_one_track (bool) | |
| void | select_all_tracks () | |
| void | select_all_visible_lanes () | |
| void | separate_region_from_selection () | |
| void | set_follow_playhead (bool, bool) | |
Set whether the editor should follow the playhead.
| ||
| void | set_loop_range (timepos_t, timepos_t, std::string) | |
| void | set_punch_range (timepos_t, timepos_t, std::string) | |
| void | set_selection (SelectionList, SelectionOperation) | |
| void | set_stationary_playhead (bool) | |
| void | set_toggleaction (std::string, std::string, bool) | |
| void | set_video_timeline_height (int, bool) | |
| void | set_visible_track_count (int) | |
| void | show_track_in_display (TimeAxisView, bool) | |
| bool | stationary_playhead () | |
| void | stem_export () | |
Open stem export dialog | ||
| void | temporal_zoom_step (bool) | |
| void | toggle_meter_updating () | |
| void | toggle_ruler_video (bool) | |
| void | toggle_xjadeo_proc (int) | |
| void | update_grid () | |
| double | visible_canvas_height () | |
Inherited from ArdourUI:EditingContext
| Methods | ||
|---|---|---|
| TrackViewList | axis_views_from_routes (RouteListPtr) | |
| MouseMode | current_mouse_mode () | |
Returns The current mouse mode (gain, object, range, timefx etc.) (defined in editing_syms.inc.h) | ||
| LuaTable(Location, ...) | find_location_from_marker (ArdourMarker, bool&) | |
| ArdourMarker | find_marker_from_location_id (ID, bool) | |
| long | get_current_zoom () | |
| Selection | get_cut_buffer () | |
| LuaTable(Beats, ...) | get_draw_length_as_beats (bool&, timepos_t) | |
| int | get_grid_beat_divisions (GridType) | |
| LuaTable(Beats, ...) | get_grid_type_as_beats (bool&, timepos_t) | |
| LuaTable(timecnt_t, ...) | get_nudge_distance (timepos_t, timecnt_t&) | |
| Selection | get_selection () | |
| StripableTimeAxisView | get_stripable_time_axis_by_id (ID) | |
| double | get_y_origin () | |
| GridType | grid_type () | |
| long | pixel_to_sample (double) | |
| void | redo (unsigned int) | |
Redo some transactions.
| ||
| void | reset_x_origin (long) | |
Queue up a change to the Editor viewport x origin.
| ||
| void | reset_y_origin (double) | |
| void | reset_zoom (long) | |
| double | sample_to_pixel (long) | |
| void | set_mouse_mode (MouseMode, bool) | |
Set the mouse mode (gain, object, range, timefx etc.)
| ||
| void | set_snap_mode (SnapMode) | |
| void | set_zoom_focus (ZoomFocus) | |
| SnapMode | snap_mode () | |
| void | undo (unsigned int) | |
Undo some transactions.
| ||
| ZoomFocus | zoom_focus () | |
∅ ArdourUI:MarkerSelection
C‡: MarkerSelection
is-a: ArdourUI:ArdourMarkerList
This class object is only used indirectly as return-value and function-parameter. It provides no methods by itself.
Inherited from ArdourUI:ArdourMarkerList
| Constructor | ||
|---|---|---|
| ℂ | ArdourUI.ArdourMarkerList () | |
| Methods | ||
| ArdourMarker | back () | |
| void | clear () | |
| bool | empty () | |
| ArdourMarker | front () | |
| LuaIter | iter () | |
| ... | push_back (--lua--) | |
| void | reverse () | |
| unsigned long | size () | |
| LuaTable | table () | |
| void | unique () | |
∁ ArdourUI:MidiTimeAxisView
C‡: MidiTimeAxisView
is-a: ArdourUI:TimeAxisView
Base class for objects with auto-disconnection. trackable must be inherited when objects shall automatically invalidate slots referring to them on destruction. A slot built from a member function of a trackable derived type installs a callback that is invoked when the trackable object is destroyed or overwritten.
add_destroy_notify_callback() and remove_destroy_notify_callback() can be used to manually install and remove callbacks when notification of the object dying is needed.
notify_callbacks() invokes and removes all previously installed callbacks and can therefore be used to disconnect from all signals.
Note that there is no virtual destructor. Don't use trackable* as pointer type for managing your data or the destructors of your derived types won't be called when deleting your objects.
signal
| Methods | ||
|---|---|---|
| MidiRegion | add_region (timepos_t, timecnt_t, bool) | |
Inherited from ArdourUI:TimeAxisView
| Methods | ||
|---|---|---|
| unsigned int | current_height () | |
| unsigned int | effective_height () | |
Returns effective height (taking children into account) in canvas units, or 0 if this TimeAxisView has not yet been shown | ||
| int | order () | |
Returns index of this TimeAxisView within its parent | ||
| void | set_height (unsigned int, TrackHeightMode, bool) | |
| int | y_position () | |
Returns y position, or -1 if hidden | ||
| Cast | ||
| MidiTimeAxisView | to_midi_time_axis_view () | |
∅ ArdourUI:PointSelection
C‡: PointSelection
is-a: ArdourUI:ControlPointList
This class object is only used indirectly as return-value and function-parameter. It provides no methods by itself.
Inherited from ArdourUI:ControlPointList
| Constructor | ||
|---|---|---|
| ℂ | ArdourUI.ControlPointList () | |
| Methods | ||
| ControlPoint | back () | |
| void | clear () | |
| bool | empty () | |
| ControlPoint | front () | |
| LuaIter | iter () | |
| ... | push_back (--lua--) | |
| void | reverse () | |
| unsigned long | size () | |
| LuaTable | table () | |
| void | unique () | |
∁ ArdourUI:RegionSelection
C‡: RegionSelection
Class to represent list of selected regions.
| Methods | ||
|---|---|---|
| timepos_t | end_time () | |
| unsigned long | n_midi_regions () | |
| RegionList | regionlist () | |
| timepos_t | start_time () | |
∁ ArdourUI:RegionView
C‡: AudioRegionView
is-a: ArdourUI:TimeAxisViewItem
Base class for objects with auto-disconnection. trackable must be inherited when objects shall automatically invalidate slots referring to them on destruction. A slot built from a member function of a trackable derived type installs a callback that is invoked when the trackable object is destroyed or overwritten.
add_destroy_notify_callback() and remove_destroy_notify_callback() can be used to manually install and remove callbacks when notification of the object dying is needed.
notify_callbacks() invokes and removes all previously installed callbacks and can therefore be used to disconnect from all signals.
Note that there is no virtual destructor. Don't use trackable* as pointer type for managing your data or the destructors of your derived types won't be called when deleting your objects.
signal
| Methods | ||
|---|---|---|
| void | hide_region_editor () | |
| bool | set_region_fx_line (unsigned int, unsigned int) | |
| void | set_region_gain_line () | |
| void | show_region_editor () | |
| Cast | ||
| RegionView | to_audioregionview () | |
Inherited from ArdourUI:TimeAxisViewItem
| Methods | ||
|---|---|---|
| TimeAxisView | get_time_axis_view () | |
Returns the TimeAxisView that this item is on | ||
∁ ArdourUI:RouteTimeAxisView
C‡: RouteTimeAxisView
is-a: ArdourUI:RouteUI
Base class for objects with auto-disconnection. trackable must be inherited when objects shall automatically invalidate slots referring to them on destruction. A slot built from a member function of a trackable derived type installs a callback that is invoked when the trackable object is destroyed or overwritten.
add_destroy_notify_callback() and remove_destroy_notify_callback() can be used to manually install and remove callbacks when notification of the object dying is needed.
notify_callbacks() invokes and removes all previously installed callbacks and can therefore be used to disconnect from all signals.
Note that there is no virtual destructor. Don't use trackable* as pointer type for managing your data or the destructors of your derived types won't be called when deleting your objects.
signal
| Cast | ||
|---|---|---|
| StripableTimeAxisView | to_stripabletimeaxisview () | |
| TimeAxisView | to_timeaxisview () | |
∅ ArdourUI:RouteUI
C‡: RouteUI
is-a: ArdourUI:Selectable
Base class for objects with auto-disconnection. trackable must be inherited when objects shall automatically invalidate slots referring to them on destruction. A slot built from a member function of a trackable derived type installs a callback that is invoked when the trackable object is destroyed or overwritten.
add_destroy_notify_callback() and remove_destroy_notify_callback() can be used to manually install and remove callbacks when notification of the object dying is needed.
notify_callbacks() invokes and removes all previously installed callbacks and can therefore be used to disconnect from all signals.
Note that there is no virtual destructor. Don't use trackable* as pointer type for managing your data or the destructors of your derived types won't be called when deleting your objects.
signal
This class object is only used indirectly as return-value and function-parameter. It provides no methods by itself.
∅ ArdourUI:Selectable
C‡: Selectable
Base class for objects with auto-disconnection. trackable must be inherited when objects shall automatically invalidate slots referring to them on destruction. A slot built from a member function of a trackable derived type installs a callback that is invoked when the trackable object is destroyed or overwritten.
add_destroy_notify_callback() and remove_destroy_notify_callback() can be used to manually install and remove callbacks when notification of the object dying is needed.
notify_callbacks() invokes and removes all previously installed callbacks and can therefore be used to disconnect from all signals.
Note that there is no virtual destructor. Don't use trackable* as pointer type for managing your data or the destructors of your derived types won't be called when deleting your objects.
signal
This class object is only used indirectly as return-value and function-parameter. It provides no methods by itself.
∁ ArdourUI:Selection
C‡: Selection
| Methods | ||
|---|---|---|
| void | clear () | |
Clear everything from the Selection | ||
| void | clear_all () | |
| bool | empty (bool) | |
check if all selections are empty
Returns true if nothing is selected. | ||
| Data Members | ||
| ArdourUI:AutomationSelection | lines | |
| ArdourUI:MarkerSelection | markers | |
| ArdourUI:PointSelection | points | |
| ArdourUI:RegionSelection | regions | |
| ArdourUI:TimeSelection | time | |
| ArdourUI:TrackSelection | tracks | |
∁ ArdourUI:SelectionList
C‡: std::list<Selectable* >
| Constructor | ||
|---|---|---|
| ℂ | ArdourUI.SelectionList () | |
| Methods | ||
| Selectable | back () | |
| void | clear () | |
| bool | empty () | |
| Selectable | front () | |
| LuaIter | iter () | |
| ... | push_back (--lua--) | |
| void | reverse () | |
| unsigned long | size () | |
| LuaTable | table () | |
| void | unique () | |
∅ ArdourUI:StripableTimeAxisView
C‡: StripableTimeAxisView
is-a: ArdourUI:TimeAxisView
Base class for objects with auto-disconnection. trackable must be inherited when objects shall automatically invalidate slots referring to them on destruction. A slot built from a member function of a trackable derived type installs a callback that is invoked when the trackable object is destroyed or overwritten.
add_destroy_notify_callback() and remove_destroy_notify_callback() can be used to manually install and remove callbacks when notification of the object dying is needed.
notify_callbacks() invokes and removes all previously installed callbacks and can therefore be used to disconnect from all signals.
Note that there is no virtual destructor. Don't use trackable* as pointer type for managing your data or the destructors of your derived types won't be called when deleting your objects.
signal
This class object is only used indirectly as return-value and function-parameter. It provides no methods by itself.
Inherited from ArdourUI:TimeAxisView
| Methods | ||
|---|---|---|
| unsigned int | current_height () | |
| unsigned int | effective_height () | |
Returns effective height (taking children into account) in canvas units, or 0 if this TimeAxisView has not yet been shown | ||
| int | order () | |
Returns index of this TimeAxisView within its parent | ||
| void | set_height (unsigned int, TrackHeightMode, bool) | |
| int | y_position () | |
Returns y position, or -1 if hidden | ||
| Cast | ||
| MidiTimeAxisView | to_midi_time_axis_view () | |
∁ ArdourUI:TimeAxisView
C‡: TimeAxisView
is-a: ArdourUI:AxisView
| Methods | ||
|---|---|---|
| unsigned int | current_height () | |
| unsigned int | effective_height () | |
Returns effective height (taking children into account) in canvas units, or 0 if this TimeAxisView has not yet been shown | ||
| int | order () | |
Returns index of this TimeAxisView within its parent | ||
| void | set_height (unsigned int, TrackHeightMode, bool) | |
| int | y_position () | |
Returns y position, or -1 if hidden | ||
| Cast | ||
| MidiTimeAxisView | to_midi_time_axis_view () | |
∁ ArdourUI:TimeAxisViewItem
C‡: TimeAxisViewItem
is-a: ArdourUI:Selectable
| Methods | ||
|---|---|---|
| TimeAxisView | get_time_axis_view () | |
Returns the TimeAxisView that this item is on | ||
∁ ArdourUI:TimeSelection
C‡: TimeSelection
is-a: ARDOUR:TimelineRangeList
| Methods | ||
|---|---|---|
| long | end_sample () | |
| timepos_t | end_time () | |
| timecnt_t | length () | |
| long | start_sample () | |
| timepos_t | start_time () | |
Inherited from ARDOUR:TimelineRangeList
| Constructor | ||
|---|---|---|
| ℂ | ARDOUR.TimelineRangeList () | |
| Methods | ||
| LuaTable | add (LuaTable {TimelineRange}) | |
| TimelineRange | back () | |
| void | clear () | |
| bool | empty () | |
| TimelineRange | front () | |
| LuaIter | iter () | |
| void | push_back (TimelineRange) | |
| void | reverse () | |
| unsigned long | size () | |
| LuaTable | table () | |
| void | unique () | |
∅ ArdourUI:TrackSelection
C‡: TrackSelection
is-a: ArdourUI:TrackViewList
This class object is only used indirectly as return-value and function-parameter. It provides no methods by itself.
Inherited from ArdourUI:TrackViewList
| Methods | ||
|---|---|---|
| bool | contains (TimeAxisView) | |
| RouteList | routelist () | |
| Cast | ||
| TrackViewStdList | to_tav_list () | |
∁ ArdourUI:TrackViewList
C‡: TrackViewList
| Methods | ||
|---|---|---|
| bool | contains (TimeAxisView) | |
| RouteList | routelist () | |
| Cast | ||
| TrackViewStdList | to_tav_list () | |
∁ ArdourUI:TrackViewStdList
C‡: std::list<TimeAxisView* >
| Constructor | ||
|---|---|---|
| ℂ | ArdourUI.TrackViewStdList () | |
| Methods | ||
| TimeAxisView | back () | |
| bool | empty () | |
| TimeAxisView | front () | |
| LuaIter | iter () | |
| void | reverse () | |
| unsigned long | size () | |
| LuaTable | table () | |
∁ ArdourUI:UIConfiguration
C‡: UIConfiguration
| Methods | ||
|---|---|---|
| unsigned int | get_action_table_columns () | |
| TimeSelectionAfterSectionPaste | get_after_section_op () | |
| bool | get_all_floating_windows_are_dialogs () | |
| bool | get_allow_non_quarter_pulse () | |
| bool | get_allow_to_resize_init_dialog () | |
| bool | get_ask_before_closing_last_window () | |
| bool | get_ask_cut_copy_section_tempo_map () | |
| bool | get_automation_edit_cancels_auto_hide () | |
| bool | get_autoplay_clips () | |
| bool | get_autoplay_files () | |
| bool | get_autoscroll_editor () | |
| bool | get_blink_alert_indicators () | |
| bool | get_blink_rec_arm () | |
| bool | get_boxy_buttons () | |
| bool | get_buggy_gradients () | |
| bool | get_cairo_image_surface () | |
| bool | get_check_announcements () | |
| long | get_clock_display_limit () | |
| std::string | get_color_file () | |
| bool | get_color_regions_using_track_color () | |
| std::string | get_default_bindings () | |
| int | get_default_lower_midi_note () | |
| --MISSING (ARDOUR::ColorMode)-- | get_default_midi_note_color_mode () | |
| bool | get_default_narrow_ms () | |
| int | get_default_upper_midi_note () | |
| WindowPosition | get_default_window_position () | |
| int | get_drag_sensitivity () | |
| float | get_draggable_playhead_speed () | |
| bool | get_editor_stereo_only_meters () | |
| bool | get_exclusive_solo_selects_route () | |
| float | get_extra_ui_extents_time () | |
| bool | get_flat_buttons () | |
| bool | get_floating_monitor_section () | |
| bool | get_follow_edits () | |
| int | get_font_scale () | |
| std::string | get_freesound_dir () | |
| bool | get_grid_follows_internal () | |
| bool | get_hide_splash_screen () | |
| bool | get_highlight_auditioned_clips () | |
| std::string | get_icon_set () | |
| InputMeterLayout | get_input_meter_layout () | |
| bool | get_input_meter_scopes () | |
| unsigned int | get_insert_at_position () | |
| std::string | get_keyboard_layout () | |
| std::string | get_keyboard_layout_name () | |
| bool | get_link_region_and_track_selection () | |
| unsigned int | get_lock_gui_after_seconds () | |
| unsigned int | get_max_active_rta () | |
| unsigned int | get_max_inline_controls () | |
| int | get_max_note_height () | |
| int | get_max_plugin_chart () | |
| int | get_max_plugin_recent () | |
| float | get_meter_hold () | |
| MeterLineUp | get_meter_line_up_din () | |
| MeterLineUp | get_meter_line_up_level () | |
| float | get_meter_peak () | |
| bool | get_meter_style_led () | |
| VUMeterStandard | get_meter_vu_standard () | |
| std::string | get_mixer_strip_visibility () | |
| bool | get_name_new_markers () | |
| bool | get_never_display_periodic_midi () | |
| bool | get_new_automation_points_on_lane () | |
| bool | get_no_strobe () | |
| NoteNameDisplay | get_note_name_display () | |
| AppleNSGLViewMode | get_nsgl_view_mode () | |
| bool | get_one_plugin_window_only () | |
| bool | get_only_copy_imported_files () | |
| bool | get_open_gui_after_adding_plugin () | |
| bool | get_open_gui_after_creating_instrument_track () | |
| PluginGUIBehavior | get_plugin_gui_behavior () | |
| bool | get_prefer_inline_over_gui () | |
| bool | get_prefer_tap_tempo () | |
| bool | get_preview_video_frame_on_drag () | |
| ClockDeltaMode | get_primary_clock_delta_mode () | |
| int | get_recent_session_sort () | |
| RegionEditDisposition | get_region_edit_disposition () | |
| bool | get_render_plus_hints () | |
| bool | get_rubberbanding_snaps_to_grid () | |
| unsigned int | get_ruler_granularity () | |
| bool | get_rulers_follow_grid () | |
| bool | get_sandbox_all_lua_scripts () | |
| bool | get_save_export_analysis_image () | |
| bool | get_save_export_mixer_screenshot () | |
| ScreenSaverMode | get_screen_saver_mode () | |
| bool | get_scroll_velocity_editing () | |
| ClockDeltaMode | get_secondary_clock_delta_mode () | |
| bool | get_select_last_drawn_note_only () | |
| bool | get_sensitize_playhead () | |
| bool | get_show_editor_meter () | |
| bool | get_show_grids_ruler () | |
| bool | get_show_inline_display_by_default () | |
| bool | get_show_manager_if_plugins_are_missing () | |
| bool | get_show_mini_timeline () | |
| bool | get_show_name_highlight () | |
| bool | get_show_on_cue_page () | |
| bool | get_show_plugin_scan_window () | |
| bool | get_show_region_cue_markers () | |
| bool | get_show_region_gain () | |
| bool | get_show_region_name () | |
| bool | get_show_region_xrun_markers () | |
| bool | get_show_secondary_clock () | |
| bool | get_show_selection_marker () | |
| bool | get_show_snapped_cursor () | |
| bool | get_show_toolbar_cuectrl () | |
| bool | get_show_toolbar_latency () | |
| bool | get_show_toolbar_monitor_info () | |
| bool | get_show_toolbar_monitoring () | |
| bool | get_show_toolbar_recpunch () | |
| bool | get_show_toolbar_selclock () | |
| bool | get_show_track_meters () | |
| bool | get_show_waveform_clipping () | |
| bool | get_show_waveforms () | |
| bool | get_show_waveforms_while_recording () | |
| bool | get_show_zoom_tools () | |
| SnapTarget | get_snap_target () | |
| unsigned int | get_snap_threshold () | |
| bool | get_snap_to_marks () | |
| bool | get_snap_to_playhead () | |
| bool | get_snap_to_region_end () | |
| bool | get_snap_to_region_start () | |
| bool | get_snap_to_region_sync () | |
| bool | get_sound_midi_notes () | |
| std::string | get_stripable_color_palette () | |
| bool | get_super_rapid_clock_update () | |
| int | get_time_axis_name_ellipsize_mode () | |
| float | get_timeline_item_gradient_depth () | |
| bool | get_transients_follow_front () | |
| std::string | get_ui_font_family () | |
| std::string | get_ui_rc_file () | |
| bool | get_update_action_scripts () | |
| bool | get_update_editor_during_summary_drag () | |
| bool | get_use_cocoa_invalidation () | |
| bool | get_use_double_click_to_zoom_to_selection () | |
| bool | get_use_mouse_position_as_zoom_focus_on_scroll () | |
| bool | get_use_note_bars_for_velocity () | |
| bool | get_use_palette_for_new_bus () | |
| bool | get_use_palette_for_new_track () | |
| bool | get_use_palette_for_new_vca () | |
| bool | get_use_route_color_widely () | |
| bool | get_use_time_rulers_to_zoom_with_vertical_drag () | |
| bool | get_use_tooltips () | |
| bool | get_use_wm_visibility () | |
| unsigned int | get_vertical_region_gap () | |
| std::string | get_vkeybd_layout () | |
| unsigned long | get_waveform_cache_size () | |
| double | get_waveform_clip_level () | |
| float | get_waveform_gradient_depth () | |
| WaveformScale | get_waveform_scale () | |
| WaveformShape | get_waveform_shape () | |
| bool | get_widget_prelight () | |
| bool | set_action_table_columns (unsigned int) | |
| bool | set_after_section_op (TimeSelectionAfterSectionPaste) | |
| bool | set_all_floating_windows_are_dialogs (bool) | |
| bool | set_allow_non_quarter_pulse (bool) | |
| bool | set_allow_to_resize_init_dialog (bool) | |
| bool | set_ask_before_closing_last_window (bool) | |
| bool | set_ask_cut_copy_section_tempo_map (bool) | |
| bool | set_automation_edit_cancels_auto_hide (bool) | |
| bool | set_autoplay_clips (bool) | |
| bool | set_autoplay_files (bool) | |
| bool | set_autoscroll_editor (bool) | |
| bool | set_blink_alert_indicators (bool) | |
| bool | set_blink_rec_arm (bool) | |
| bool | set_boxy_buttons (bool) | |
| bool | set_buggy_gradients (bool) | |
| bool | set_cairo_image_surface (bool) | |
| bool | set_check_announcements (bool) | |
| bool | set_clock_display_limit (long) | |
| bool | set_color_file (std::string) | |
| bool | set_color_regions_using_track_color (bool) | |
| bool | set_default_bindings (std::string) | |
| bool | set_default_lower_midi_note (int) | |
| bool | set_default_midi_note_color_mode (--MISSING (ARDOUR::ColorMode)--) | |
| bool | set_default_narrow_ms (bool) | |
| bool | set_default_upper_midi_note (int) | |
| bool | set_default_window_position (WindowPosition) | |
| bool | set_drag_sensitivity (int) | |
| bool | set_draggable_playhead_speed (float) | |
| bool | set_editor_stereo_only_meters (bool) | |
| bool | set_exclusive_solo_selects_route (bool) | |
| bool | set_extra_ui_extents_time (float) | |
| bool | set_flat_buttons (bool) | |
| bool | set_floating_monitor_section (bool) | |
| bool | set_follow_edits (bool) | |
| bool | set_font_scale (int) | |
| bool | set_freesound_dir (std::string) | |
| bool | set_grid_follows_internal (bool) | |
| bool | set_hide_splash_screen (bool) | |
| bool | set_highlight_auditioned_clips (bool) | |
| bool | set_icon_set (std::string) | |
| bool | set_input_meter_layout (InputMeterLayout) | |
| bool | set_input_meter_scopes (bool) | |
| bool | set_insert_at_position (unsigned int) | |
| bool | set_keyboard_layout (std::string) | |
| bool | set_keyboard_layout_name (std::string) | |
| bool | set_link_region_and_track_selection (bool) | |
| bool | set_lock_gui_after_seconds (unsigned int) | |
| bool | set_max_active_rta (unsigned int) | |
| bool | set_max_inline_controls (unsigned int) | |
| bool | set_max_note_height (int) | |
| bool | set_max_plugin_chart (int) | |
| bool | set_max_plugin_recent (int) | |
| bool | set_meter_hold (float) | |
| bool | set_meter_line_up_din (MeterLineUp) | |
| bool | set_meter_line_up_level (MeterLineUp) | |
| bool | set_meter_peak (float) | |
| bool | set_meter_style_led (bool) | |
| bool | set_meter_vu_standard (VUMeterStandard) | |
| bool | set_mixer_strip_visibility (std::string) | |
| void | set_modifier (std::string, std::string) | |
| bool | set_name_new_markers (bool) | |
| bool | set_never_display_periodic_midi (bool) | |
| bool | set_new_automation_points_on_lane (bool) | |
| bool | set_no_strobe (bool) | |
| bool | set_note_name_display (NoteNameDisplay) | |
| bool | set_nsgl_view_mode (AppleNSGLViewMode) | |
| bool | set_one_plugin_window_only (bool) | |
| bool | set_only_copy_imported_files (bool) | |
| bool | set_open_gui_after_adding_plugin (bool) | |
| bool | set_open_gui_after_creating_instrument_track (bool) | |
| bool | set_plugin_gui_behavior (PluginGUIBehavior) | |
| bool | set_prefer_inline_over_gui (bool) | |
| bool | set_prefer_tap_tempo (bool) | |
| bool | set_preview_video_frame_on_drag (bool) | |
| bool | set_primary_clock_delta_mode (ClockDeltaMode) | |
| bool | set_recent_session_sort (int) | |
| bool | set_region_edit_disposition (RegionEditDisposition) | |
| bool | set_render_plus_hints (bool) | |
| bool | set_rubberbanding_snaps_to_grid (bool) | |
| bool | set_ruler_granularity (unsigned int) | |
| bool | set_rulers_follow_grid (bool) | |
| bool | set_sandbox_all_lua_scripts (bool) | |
| bool | set_save_export_analysis_image (bool) | |
| bool | set_save_export_mixer_screenshot (bool) | |
| bool | set_screen_saver_mode (ScreenSaverMode) | |
| bool | set_scroll_velocity_editing (bool) | |
| bool | set_secondary_clock_delta_mode (ClockDeltaMode) | |
| bool | set_select_last_drawn_note_only (bool) | |
| bool | set_sensitize_playhead (bool) | |
| bool | set_show_editor_meter (bool) | |
| bool | set_show_grids_ruler (bool) | |
| bool | set_show_inline_display_by_default (bool) | |
| bool | set_show_manager_if_plugins_are_missing (bool) | |
| bool | set_show_mini_timeline (bool) | |
| bool | set_show_name_highlight (bool) | |
| bool | set_show_on_cue_page (bool) | |
| bool | set_show_plugin_scan_window (bool) | |
| bool | set_show_region_cue_markers (bool) | |
| bool | set_show_region_gain (bool) | |
| bool | set_show_region_name (bool) | |
| bool | set_show_region_xrun_markers (bool) | |
| bool | set_show_secondary_clock (bool) | |
| bool | set_show_selection_marker (bool) | |
| bool | set_show_snapped_cursor (bool) | |
| bool | set_show_toolbar_cuectrl (bool) | |
| bool | set_show_toolbar_latency (bool) | |
| bool | set_show_toolbar_monitor_info (bool) | |
| bool | set_show_toolbar_monitoring (bool) | |
| bool | set_show_toolbar_recpunch (bool) | |
| bool | set_show_toolbar_selclock (bool) | |
| bool | set_show_track_meters (bool) | |
| bool | set_show_waveform_clipping (bool) | |
| bool | set_show_waveforms (bool) | |
| bool | set_show_waveforms_while_recording (bool) | |
| bool | set_show_zoom_tools (bool) | |
| bool | set_snap_target (SnapTarget) | |
| bool | set_snap_threshold (unsigned int) | |
| bool | set_snap_to_marks (bool) | |
| bool | set_snap_to_playhead (bool) | |
| bool | set_snap_to_region_end (bool) | |
| bool | set_snap_to_region_start (bool) | |
| bool | set_snap_to_region_sync (bool) | |
| bool | set_sound_midi_notes (bool) | |
| bool | set_stripable_color_palette (std::string) | |
| bool | set_super_rapid_clock_update (bool) | |
| bool | set_time_axis_name_ellipsize_mode (int) | |
| bool | set_timeline_item_gradient_depth (float) | |
| bool | set_transients_follow_front (bool) | |
| bool | set_ui_font_family (std::string) | |
| bool | set_ui_rc_file (std::string) | |
| bool | set_update_action_scripts (bool) | |
| bool | set_update_editor_during_summary_drag (bool) | |
| bool | set_use_cocoa_invalidation (bool) | |
| bool | set_use_double_click_to_zoom_to_selection (bool) | |
| bool | set_use_mouse_position_as_zoom_focus_on_scroll (bool) | |
| bool | set_use_note_bars_for_velocity (bool) | |
| bool | set_use_palette_for_new_bus (bool) | |
| bool | set_use_palette_for_new_track (bool) | |
| bool | set_use_palette_for_new_vca (bool) | |
| bool | set_use_route_color_widely (bool) | |
| bool | set_use_time_rulers_to_zoom_with_vertical_drag (bool) | |
| bool | set_use_tooltips (bool) | |
| bool | set_use_wm_visibility (bool) | |
| bool | set_vertical_region_gap (unsigned int) | |
| bool | set_vkeybd_layout (std::string) | |
| bool | set_waveform_cache_size (unsigned long) | |
| bool | set_waveform_clip_level (double) | |
| bool | set_waveform_gradient_depth (float) | |
| bool | set_waveform_scale (WaveformScale) | |
| bool | set_waveform_shape (WaveformShape) | |
| bool | set_widget_prelight (bool) | |
| Properties | ||
| unsigned int | action_table_columns | |
| ARDOUR.TimeSelectionAfterSectionPaste | after_section_op | |
| bool | all_floating_windows_are_dialogs | |
| bool | allow_non_quarter_pulse | |
| bool | allow_to_resize_init_dialog | |
| bool | ask_before_closing_last_window | |
| bool | ask_cut_copy_section_tempo_map | |
| bool | automation_edit_cancels_auto_hide | |
| bool | autoplay_clips | |
| bool | autoplay_files | |
| bool | autoscroll_editor | |
| bool | blink_alert_indicators | |
| bool | blink_rec_arm | |
| bool | boxy_buttons | |
| bool | buggy_gradients | |
| bool | cairo_image_surface | |
| bool | check_announcements | |
| long | clock_display_limit | |
| std::string | color_file | |
| bool | color_regions_using_track_color | |
| std::string | default_bindings | |
| int | default_lower_midi_note | |
| --MISSING (ARDOUR::ColorMode)-- | default_midi_note_color_mode | |
| bool | default_narrow_ms | |
| int | default_upper_midi_note | |
| Gtk.WindowPosition | default_window_position | |
| int | drag_sensitivity | |
| float | draggable_playhead_speed | |
| bool | editor_stereo_only_meters | |
| bool | exclusive_solo_selects_route | |
| float | extra_ui_extents_time | |
| bool | flat_buttons | |
| bool | floating_monitor_section | |
| bool | follow_edits | |
| int | font_scale | |
| std::string | freesound_dir | |
| bool | grid_follows_internal | |
| bool | hide_splash_screen | |
| bool | highlight_auditioned_clips | |
| std::string | icon_set | |
| ARDOUR.InputMeterLayout | input_meter_layout | |
| bool | input_meter_scopes | |
| unsigned int | insert_at_position | |
| std::string | keyboard_layout | |
| std::string | keyboard_layout_name | |
| bool | link_region_and_track_selection | |
| unsigned int | lock_gui_after_seconds | |
| unsigned int | max_active_rta | |
| unsigned int | max_inline_controls | |
| int | max_note_height | |
| int | max_plugin_chart | |
| int | max_plugin_recent | |
| float | meter_hold | |
| ARDOUR.MeterLineUp | meter_line_up_din | |
| ARDOUR.MeterLineUp | meter_line_up_level | |
| float | meter_peak | |
| bool | meter_style_led | |
| ARDOUR.VUMeterStandard | meter_vu_standard | |
| std::string | mixer_strip_visibility | |
| bool | name_new_markers | |
| bool | never_display_periodic_midi | |
| bool | new_automation_points_on_lane | |
| bool | no_strobe | |
| Editing.NoteNameDisplay | note_name_display | |
| ARDOUR.AppleNSGLViewMode | nsgl_view_mode | |
| bool | one_plugin_window_only | |
| bool | only_copy_imported_files | |
| bool | open_gui_after_adding_plugin | |
| bool | open_gui_after_creating_instrument_track | |
| ARDOUR.PluginGUIBehavior | plugin_gui_behavior | |
| bool | prefer_inline_over_gui | |
| bool | prefer_tap_tempo | |
| bool | preview_video_frame_on_drag | |
| ARDOUR.ClockDeltaMode | primary_clock_delta_mode | |
| int | recent_session_sort | |
| Editing.RegionEditDisposition | region_edit_disposition | |
| bool | render_plus_hints | |
| bool | rubberbanding_snaps_to_grid | |
| unsigned int | ruler_granularity | |
| bool | rulers_follow_grid | |
| bool | sandbox_all_lua_scripts | |
| bool | save_export_analysis_image | |
| bool | save_export_mixer_screenshot | |
| ARDOUR.ScreenSaverMode | screen_saver_mode | |
| bool | scroll_velocity_editing | |
| ARDOUR.ClockDeltaMode | secondary_clock_delta_mode | |
| bool | select_last_drawn_note_only | |
| bool | sensitize_playhead | |
| bool | show_editor_meter | |
| bool | show_grids_ruler | |
| bool | show_inline_display_by_default | |
| bool | show_manager_if_plugins_are_missing | |
| bool | show_mini_timeline | |
| bool | show_name_highlight | |
| bool | show_on_cue_page | |
| bool | show_plugin_scan_window | |
| bool | show_region_cue_markers | |
| bool | show_region_gain | |
| bool | show_region_name | |
| bool | show_region_xrun_markers | |
| bool | show_secondary_clock | |
| bool | show_selection_marker | |
| bool | show_snapped_cursor | |
| bool | show_toolbar_cuectrl | |
| bool | show_toolbar_latency | |
| bool | show_toolbar_monitor_info | |
| bool | show_toolbar_monitoring | |
| bool | show_toolbar_recpunch | |
| bool | show_toolbar_selclock | |
| bool | show_track_meters | |
| bool | show_waveform_clipping | |
| bool | show_waveforms | |
| bool | show_waveforms_while_recording | |
| bool | show_zoom_tools | |
| ARDOUR.SnapTarget | snap_target | |
| unsigned int | snap_threshold | |
| bool | snap_to_marks | |
| bool | snap_to_playhead | |
| bool | snap_to_region_end | |
| bool | snap_to_region_start | |
| bool | snap_to_region_sync | |
| bool | sound_midi_notes | |
| std::string | stripable_color_palette | |
| bool | super_rapid_clock_update | |
| int | time_axis_name_ellipsize_mode | |
| float | timeline_item_gradient_depth | |
| bool | transients_follow_front | |
| std::string | ui_font_family | |
| std::string | ui_rc_file | |
| bool | update_action_scripts | |
| bool | update_editor_during_summary_drag | |
| bool | use_cocoa_invalidation | |
| bool | use_double_click_to_zoom_to_selection | |
| bool | use_mouse_position_as_zoom_focus_on_scroll | |
| bool | use_note_bars_for_velocity | |
| bool | use_palette_for_new_bus | |
| bool | use_palette_for_new_track | |
| bool | use_palette_for_new_vca | |
| bool | use_route_color_widely | |
| bool | use_time_rulers_to_zoom_with_vertical_drag | |
| bool | use_tooltips | |
| bool | use_wm_visibility | |
| unsigned int | vertical_region_gap | |
| std::string | vkeybd_layout | |
| unsigned long | waveform_cache_size | |
| double | waveform_clip_level | |
| float | waveform_gradient_depth | |
| ARDOUR.WaveformScale | waveform_scale | |
| ARDOUR.WaveformShape | waveform_shape | |
| bool | widget_prelight | |
⋯ C:ByteArray
C‡: unsigned char*
| Methods | ||
|---|---|---|
| LuaMetaTable | array () | |
| LuaTable | get_table () | |
| unsigned char* | offset (unsigned int) | |
| void | set_table (LuaTable {unsigned char}) | |
∁ C:ByteVector
C‡: std::vector<unsigned char >
| Constructor | ||
|---|---|---|
| ℂ | C.ByteVector () | |
| ℂ | C.ByteVector () | |
| Methods | ||
| LuaTable | add (LuaTable {unsigned char}) | |
| unsigned char | at (unsigned long) | |
| void | clear () | |
| bool | empty () | |
| LuaIter | iter () | |
| void | push_back (unsigned char) | |
| void | reserve (unsigned long) | |
| unsigned long | size () | |
| LuaTable | table () | |
| ... | to_array (--lua--) | |
⋯ C:DoubleArray
C‡: double*
| Methods | ||
|---|---|---|
| LuaMetaTable | array () | |
| LuaTable | get_table () | |
| DoubleArray | offset (unsigned int) | |
| void | set_table (LuaTable {double}) | |
∁ C:DoubleVector
C‡: std::vector<double >
| Constructor | ||
|---|---|---|
| ℂ | C.DoubleVector () | |
| ℂ | C.DoubleVector () | |
| Methods | ||
| LuaTable | add (LuaTable {double}) | |
| double | at (unsigned long) | |
| void | clear () | |
| bool | empty () | |
| LuaIter | iter () | |
| void | push_back (double) | |
| void | reserve (unsigned long) | |
| unsigned long | size () | |
| LuaTable | table () | |
| ... | to_array (--lua--) | |
⋯ C:FloatArray
C‡: float*
| Methods | ||
|---|---|---|
| LuaMetaTable | array () | |
| LuaTable | get_table () | |
| FloatArray | offset (unsigned int) | |
| void | set_table (LuaTable {float}) | |
∁ C:FloatArrayVector
C‡: std::vector<float* >
| Constructor | ||
|---|---|---|
| ℂ | C.FloatArrayVector () | |
| ℂ | C.FloatArrayVector () | |
| Methods | ||
| LuaTable | add (LuaTable {FloatArray}) | |
| FloatArray | at (unsigned long) | |
| void | clear () | |
| bool | empty () | |
| LuaIter | iter () | |
| void | push_back (FloatArray) | |
| void | reserve (unsigned long) | |
| unsigned long | size () | |
| LuaTable | table () | |
| ... | to_array (--lua--) | |
∁ C:FloatVector
C‡: std::vector<float >
| Constructor | ||
|---|---|---|
| ℂ | C.FloatVector () | |
| ℂ | C.FloatVector () | |
| Methods | ||
| LuaTable | add (LuaTable {float}) | |
| float | at (unsigned long) | |
| void | clear () | |
| bool | empty () | |
| LuaIter | iter () | |
| void | push_back (float) | |
| void | reserve (unsigned long) | |
| unsigned long | size () | |
| LuaTable | table () | |
| ... | to_array (--lua--) | |
∁ C:Int64List
C‡: std::list<long >
| Constructor | ||
|---|---|---|
| ℂ | C.Int64List () | |
| Methods | ||
| LuaTable | add (LuaTable {long}) | |
| long | back () | |
| void | clear () | |
| bool | empty () | |
| long | front () | |
| LuaIter | iter () | |
| void | push_back (long) | |
| void | reverse () | |
| unsigned long | size () | |
| LuaTable | table () | |
| void | unique () | |
⋯ C:IntArray
C‡: int*
| Methods | ||
|---|---|---|
| LuaMetaTable | array () | |
| LuaTable | get_table () | |
| IntArray | offset (unsigned int) | |
| void | set_table (LuaTable {int}) | |
∁ C:IntVector
C‡: std::vector<int >
| Constructor | ||
|---|---|---|
| ℂ | C.IntVector () | |
| ℂ | C.IntVector () | |
| Methods | ||
| LuaTable | add (LuaTable {int}) | |
| int | at (unsigned long) | |
| void | clear () | |
| bool | empty () | |
| LuaIter | iter () | |
| void | push_back (int) | |
| void | reserve (unsigned long) | |
| unsigned long | size () | |
| LuaTable | table () | |
| ... | to_array (--lua--) | |
∁ C:StringList
C‡: std::list<std::string >
| Constructor | ||
|---|---|---|
| ℂ | C.StringList () | |
| Methods | ||
| LuaTable | add (LuaTable {std::string}) | |
| std::string | back () | |
| void | clear () | |
| bool | empty () | |
| std::string | front () | |
| LuaIter | iter () | |
| void | push_back (std::string) | |
| void | reverse () | |
| unsigned long | size () | |
| LuaTable | table () | |
| void | unique () | |
∁ C:StringVector
C‡: std::vector<std::string >
| Constructor | ||
|---|---|---|
| ℂ | C.StringVector () | |
| ℂ | C.StringVector () | |
| Methods | ||
| LuaTable | add (LuaTable {std::string}) | |
| std::string | at (unsigned long) | |
| void | clear () | |
| bool | empty () | |
| LuaIter | iter () | |
| void | push_back (std::string) | |
| void | reserve (unsigned long) | |
| unsigned long | size () | |
| LuaTable | table () | |
| ... | to_array (--lua--) | |
∁ Cairo:Context
C‡: Cairo::Context
Context is the main class used to draw in cairomm. It contains the current state of the rendering device, including coordinates of yet to be drawn shapes.
In the simplest case, create a Context with its target Surface, set its drawing options (line width, color, etc), create shapes with methods like move_to() and line_to(), and then draw the shapes to the Surface using methods such as stroke() or fill().
Context is a reference-counted object that should be used via Cairo::RefPtr.
| Methods | ||
|---|---|---|
| void | arc (double, double, double, double, double) | |
Adds a circular arc of the given radius to the current path. The arc is centered at (xc, yc), begins at angle1 and proceeds in the direction of increasing angles to end at angle2. If angle2 is less than angle1 it will be progressively increased by 2*M_PI until it is greater than angle1. If there is a current point, an initial line segment will be added to the path to connect the current point to the beginning of the arc. If this initial line is undesired, it can be avoided by calling begin_new_sub_path() before calling arc(). Angles are measured in radians. An angle of 0 is in the direction of the positive X axis (in user-space). An angle of M_PI/2.0 radians (90 degrees) is in the direction of the positive Y axis (in user-space). Angles increase in the direction from the positive X axis toward the positive Y axis. So with the default transformation matrix, angles increase in a clockwise direction. ( To convert from degrees to radians, use degrees * (M_PI / 180.0). ) This function gives the arc in the direction of increasing angles; see arc_negative() to get the arc in the direction of decreasing angles. The arc is circular in user-space. To achieve an elliptical arc, you can scale the current transformation matrix by different amounts in the X and Y directions. For example, to draw an ellipse in the box given by x, y, width, height: context->save(); context->translate(x, y); context->scale(width / 2.0, height / 2.0); context->arc(0.0, 0.0, 1.0, 0.0, 2 * M_PI); context->restore();
| ||
| void | arc_negative (double, double, double, double, double) | |
Adds a circular arc of the given radius to the current path. The arc is centered at (xc, yc), begins at angle1 and proceeds in the direction of decreasing angles to end at angle2. If angle2 is greater than angle1 it will be progressively decreased by 2*M_PI until it is greater than angle1. See arc() for more details. This function differs only in the direction of the arc between the two angles.
| ||
| void | begin_new_path () | |
Clears the current path. After this call there will be no current point. | ||
| void | begin_new_sub_path () | |
Begin a new subpath. Note that the existing path is not affected. After this call there will be no current point. In many cases, this call is not needed since new subpaths are frequently started with move_to(). A call to begin_new_sub_path() is particularly useful when beginning a new subpath with one of the arc() calls. This makes things easier as it is no longer necessary to manually compute the arc's initial coordinates for a call to move_to(). 1.2 | ||
| void | clip () | |
Establishes a new clip region by intersecting the current clip region with the current Path as it would be filled by fill() and according to the current fill rule. After clip(), the current path will be cleared from the cairo Context. The current clip region affects all drawing operations by effectively masking out any changes to the surface that are outside the current clip region. Calling clip() can only make the clip region smaller, never larger. But the current clip is part of the graphics state, so a temporary restriction of the clip region can be achieved by calling clip() within a save()/restore() pair. The only other means of increasing the size of the clip region is reset_clip(). set_fill_rule() | ||
| void | clip_preserve () | |
Establishes a new clip region by intersecting the current clip region with the current path as it would be filled by fill() and according to the current fill rule. Unlike clip(), clip_preserve preserves the path within the cairo Context. clip() set_fill_rule() | ||
| void | close_path () | |
Adds a line segment to the path from the current point to the beginning of the current subpath, (the most recent point passed to move_to()), and closes this subpath. After this call the current point will be at the joined endpoint of the sub-path. The behavior of close_path() is distinct from simply calling line_to() with the equivalent coordinate in the case of stroking. When a closed subpath is stroked, there are no caps on the ends of the subpath. Instead, there is a line join connecting the final and initial segments of the subpath. If there is no current point before the call to close_path(), this function will have no effect. | ||
| void | curve_to (double, double, double, double, double, double) | |
Adds a cubic Bezier spline to the path from the current point to position (x3, y3) in user-space coordinates, using (x1, y1) and (x2, y2) as the control points. After this call the current point will be (x3, y3). If there is no current point before the call to curve_to() this function will behave as if preceded by a call to move_to(x1, y1).
| ||
| void | fill () | |
A drawing operator that fills the current path according to the current fill rule, (each sub-path is implicitly closed before being filled). After fill(), the current path will be cleared from the cairo context. set_fill_rule() fill_preserve() | ||
| void | fill_preserve () | |
A drawing operator that fills the current path according to the current fill rule, (each sub-path is implicitly closed before being filled). Unlike fill(), fill_preserve() preserves the path within the cairo Context. set_fill_rule() fill(). | ||
| void | line_to (double, double) | |
Adds a line to the path from the current point to position (x, y) in user-space coordinates. After this call the current point will be (x, y). If there is no current point before the call to line_to() this function will behave as move_to(x, y).
| ||
| void | move_to (double, double) | |
If the current subpath is not empty, begin a new subpath. After this call the current point will be (x, y).
| ||
| void | paint () | |
A drawing operator that paints the current source everywhere within the current clip region. | ||
| void | paint_with_alpha (double) | |
A drawing operator that paints the current source everywhere within the current clip region using a mask of constant alpha value alpha. The effect is similar to paint(), but the drawing is faded out using the alpha value.
| ||
| void | rectangle (double, double, double, double) | |
Adds a closed-subpath rectangle of the given size to the current path at position (x, y) in user-space coordinates. This function is logically equivalent to: context->move_to(x, y); context->rel_line_to(width, 0); context->rel_line_to(0, height); context->rel_line_to(-width, 0); context->close_path();
| ||
| void | rel_curve_to (double, double, double, double, double, double) | |
Relative-coordinate version of curve_to(). All offsets are relative to the current point. Adds a cubic Bezier spline to the path from the current point to a point offset from the current point by (dx3, dy3), using points offset by (dx1, dy1) and (dx2, dy2) as the control points. After this call the current point will be offset by (dx3, dy3). Given a current point of (x, y), rel_curve_to(dx1, dy1, dx2, dy2, dx3, dy3) is logically equivalent to curve_to(x + dx1, y + dy1, x + dx2, y + dy2, x + dx3, y + dy3). It is an error to call this function with no current point. Doing so will cause this to shutdown with a status of CAIRO_STATUS_NO_CURRENT_POINT. Cairomm will then throw an exception.
| ||
| void | rel_line_to (double, double) | |
Relative-coordinate version of line_to(). Adds a line to the path from the current point to a point that is offset from the current point by (dx, dy) in user space. After this call the current point will be offset by (dx, dy). Given a current point of (x, y), rel_line_to(dx, dy) is logically equivalent to line_to(x + dx, y + dy). It is an error to call this function with no current point. Doing so will cause this to shutdown with a status of CAIRO_STATUS_NO_CURRENT_POINT. Cairomm will then throw an exception.
| ||
| void | rel_move_to (double, double) | |
If the current subpath is not empty, begin a new subpath. After this call the current point will offset by (x, y). Given a current point of (x, y), rel_move_to(dx, dy) is logically equivalent to move_to(x + dx, y + dy) It is an error to call this function with no current point. Doing so will cause this to shutdown with a status of CAIRO_STATUS_NO_CURRENT_POINT. Cairomm will then throw an exception.
| ||
| void | reset_clip () | |
Reset the current clip region to its original, unrestricted state. That is, set the clip region to an infinitely large shape containing the target surface. Equivalently, if infinity is too hard to grasp, one can imagine the clip region being reset to the exact bounds of the target surface. Note that code meant to be reusable should not call reset_clip() as it will cause results unexpected by higher-level code which calls clip(). Consider using save() and restore() around clip() as a more robust means of temporarily restricting the clip region. | ||
| void | restore () | |
Restores cr to the state saved by a preceding call to save() and removes that state from the stack of saved states. save() | ||
| void | rotate (double) | |
Modifies the current transformation matrix (CTM) by rotating the user-space axes by angle radians. The rotation of the axes takes places after any existing transformation of user space. The rotation direction for positive angles is from the positive X axis toward the positive Y axis.
| ||
| void | save () | |
Makes a copy of the current state of the Context and saves it on an internal stack of saved states. When restore() is called, it will be restored to the saved state. Multiple calls to save() and restore() can be nested; each call to restore() restores the state from the matching paired save(). It isn't necessary to clear all saved states before a cairo_t is freed. Any saved states will be freed when the Context is destroyed. restore() | ||
| void | scale (double, double) | |
Modifies the current transformation matrix (CTM) by scaling the X and Y user-space axes by sx and sy respectively. The scaling of the axes takes place after any existing transformation of user space.
| ||
| void | set_dash (DoubleVector, double) | |
Sets the dash pattern to be used by stroke(). A dash pattern is specified by dashes, an array of positive values. Each value provides the user-space length of altenate "on" and "off" portions of the stroke. The offset specifies an offset into the pattern at which the stroke begins. Each "on" segment will have caps applied as if the segment were a separate sub-path. In particular, it is valid to use an "on" length of 0.0 with Cairo::LINE_CAP_ROUND or Cairo::LINE_CAP_SQUARE in order to distributed dots or squares along a path. Note: The length values are in user-space units as evaluated at the time of stroking. This is not necessarily the same as the user space at the time of set_dash(). If dashes is empty dashing is disabled. If the size of dashes is 1, a symmetric pattern is assumed with alternating on and off portions of the size specified by the single value in dashes. It is invalid for any value in dashes to be negative, or for all values to be 0. If this is the case, an exception will be thrown
| ||
| void | set_font_size (double) | |
Sets the current font matrix to a scale by a factor of size, replacing any font matrix previously set with set_font_size() or set_font_matrix(). This results in a font size of size user space units. (More precisely, this matrix will result in the font's em-square being a by size square in user space.) If text is drawn without a call to set_font_size(), (nor set_font_matrix() nor set_scaled_font()), the default font size is 10.0.
| ||
| void | set_line_cap (LineCap) | |
Sets the current line cap style within the cairo Context. See LineCap for details about how the available line cap styles are drawn. As with the other stroke parameters, the current line cap style is examined by stroke(), stroke_extents(), and stroke_to_path(), but does not have any effect during path construction. The default line cap style is Cairo::LINE_CAP_BUTT.
| ||
| void | set_line_join (LineJoin) | |
Sets the current line join style within the cairo Context. See LineJoin for details about how the available line join styles are drawn. As with the other stroke parameters, the current line join style is examined by stroke(), stroke_extents(), and stroke_to_path(), but does not have any effect during path construction. The default line join style is Cairo::LINE_JOIN_MITER.
| ||
| void | set_line_width (double) | |
Sets the current line width within the cairo Context. The line width specifies the diameter of a pen that is circular in user-space, (though device-space pen may be an ellipse in general due to scaling/shear/rotation of the CTM). Note: When the description above refers to user space and CTM it refers to the user space and CTM in effect at the time of the stroking operation, not the user space and CTM in effect at the time of the call to set_line_width(). The simplest usage makes both of these spaces identical. That is, if there is no change to the CTM between a call to set_line_width() and the stroking operation, then one can just pass user-space values to set_line_width() and ignore this note. As with the other stroke parameters, the current line cap style is examined by stroke(), stroke_extents(), and stroke_to_path(), but does not have any effect during path construction. The default line width value is 2.0.
| ||
| void | set_operator (Operator) | |
Sets the compositing operator to be used for all drawing operations. See Operator for details on the semantics of each available compositing operator.
| ||
| void | set_source_rgb (double, double, double) | |
Sets the source pattern within the Context to an opaque color. This opaque color will then be used for any subsequent drawing operation until a new source pattern is set. The color components are floating point numbers in the range 0 to 1. If the values passed in are outside that range, they will be clamped. set_source_rgba() set_source()
| ||
| void | set_source_rgba (double, double, double, double) | |
Sets the source pattern within the Context to a translucent color. This color will then be used for any subsequent drawing operation until a new source pattern is set. The color and alpha components are floating point numbers in the range 0 to 1. If the values passed in are outside that range, they will be clamped. set_source_rgb() set_source()
| ||
| void | show_text (std::string) | |
A drawing operator that generates the shape from a string of UTF-8 characters, rendered according to the current font_face, font_size (font_matrix), and font_options. This function first computes a set of glyphs for the string of text. The first glyph is placed so that its origin is at the current point. The origin of each subsequent glyph is offset from that of the previous glyph by the advance values of the previous glyph. After this call the current point is moved to the origin of where the next glyph would be placed in this same progression. That is, the current point will be at the origin of the final glyph offset by its advance values. This allows for easy display of a single logical string with multiple calls to show_text(). Note: The show_text() function call is part of what the cairo designers call the "toy" text API. It is convenient for short demos and simple programs, but it is not expected to be adequate for serious text-using applications. See show_glyphs() for the "real" text display API in cairo.
| ||
| void | stroke () | |
A drawing operator that strokes the current Path according to the current line width, line join, line cap, and dash settings. After stroke(), the current Path will be cleared from the cairo Context. set_line_width() set_line_join() set_line_cap() set_dash() stroke_preserve(). Note: Degenerate segments and sub-paths are treated specially and provide a useful result. These can result in two different situations: 1. Zero-length "on" segments set in set_dash(). If the cap style is Cairo::LINE_CAP_ROUND or Cairo::LINE_CAP_SQUARE then these segments will be drawn as circular dots or squares respectively. In the case of Cairo::LINE_CAP_SQUARE, the orientation of the squares is determined by the direction of the underlying path. 2. A sub-path created by move_to() followed by either a close_path() or one or more calls to line_to() to the same coordinate as the move_to(). If the cap style is Cairo::LINE_CAP_ROUND then these sub-paths will be drawn as circular dots. Note that in the case of Cairo::LINE_CAP_SQUARE a degenerate sub-path will not be drawn at all, (since the correct orientation is indeterminate). In no case will a cap style of Cairo::LINE_CAP_BUTT cause anything to be drawn in the case of either degenerate segments or sub-paths. | ||
| void | stroke_preserve () | |
A drawing operator that strokes the current Path according to the current line width, line join, line cap, and dash settings. Unlike stroke(), stroke_preserve() preserves the Path within the cairo Context. set_line_width() set_line_join() set_line_cap() set_dash() stroke_preserve(). | ||
| void | translate (double, double) | |
Modifies the current transformation matrix (CTM) by translating the user-space origin by (tx, ty). This offset is interpreted as a user-space coordinate according to the CTM in place before the new call to translate. In other words, the translation of the user-space origin takes place after any existing transformation.
| ||
| void | unset_dash () | |
This function disables a dash pattern that was set with set_dash() | ||
∁ Cairo:ImageSurface
C‡: LuaCairo::ImageSurface
| Constructor | ||
|---|---|---|
| ℂ | Cairo.ImageSurface (Format, int, int) | |
| Methods | ||
| Context | context () | |
Returns a context object to perform operations on the surface | ||
| int | get_height () | |
Gets the height of the ImageSurface in pixels | ||
| int | get_stride () | |
Returns the stride of the image surface in bytes (or 0 if surface is not an image surface). The stride is the distance in bytes from the beginning of one row of the image data to the beginning of the next row. | ||
| int | get_width () | |
Gets the width of the ImageSurface in pixels | ||
| void | set_as_source (Context, int, int) | |
Set this surface as source for another context. This allows to draw this surface | ||
∁ Cairo:PangoLayout
C‡: LuaCairo::PangoLayout
| Constructor | ||
|---|---|---|
| ℂ | Cairo.PangoLayout (Context, std::string) | |
| Methods | ||
| Alignment | get_alignment () | |
Gets the alignment for the layout: how partial lines are positioned within the horizontal space available. Returns The alignment. | ||
| EllipsizeMode | get_ellipsize () | |
Gets the type of ellipsization being performed for layout. See set_ellipsize() Use is_ellipsized() to query whether any paragraphs were actually ellipsized. Returns The current ellipsization mode for layout. | ||
| ... | get_pixel_size (--lua--) | |
Determines the logical width and height of a Pango::Layout in device units. | ||
| std::string | get_text () | |
Gets the text in the layout. The returned text should not be freed or modified. Returns The text in the layout. | ||
| WrapMode | get_wrap () | |
Gets the wrap mode for the layout. Use is_wrapped() to query whether any paragraphs were actually wrapped. Returns Active wrap mode. | ||
| bool | is_ellipsized () | |
Queries whether the layout had to ellipsize any paragraphs. This returns true if the ellipsization mode for layout is not Pango::ELLIPSIZE_NONE, a positive width is set on layout, and there are paragraphs exceeding that width that have to be ellipsized. Returns true if any paragraphs had to be ellipsized, false otherwise. | ||
| bool | is_wrapped () | |
Queries whether the layout had to wrap any paragraphs. This returns true if a positive width is set on layout, ellipsization mode of layout is set to Pango::ELLIPSIZE_NONE, and there are paragraphs exceeding the layout width that have to be wrapped. Returns true if any paragraphs had to be wrapped, false otherwise. | ||
| void | layout_cairo_path (Context) | |
| void | set_alignment (Alignment) | |
Sets the alignment for the layout: how partial lines are positioned within the horizontal space available.
| ||
| void | set_ellipsize (EllipsizeMode) | |
Sets the type of ellipsization being performed for layout. Depending on the ellipsization mode ellipsize text is removed from the start, middle, or end of text so they fit within the width and height of layout set with set_width() and set_height(). If the layout contains characters such as newlines that force it to be layed out in multiple paragraphs, then whether each paragraph is ellipsized separately or the entire layout is ellipsized as a whole depends on the set height of the layout. See set_height() for details.
| ||
| void | set_markup (std::string) | |
Sets the layout text and attribute list from marked-up text (see markup format). Replaces the current text and attribute list.
| ||
| void | set_text (std::string) | |
Set the text of the layout.
| ||
| void | set_width (float) | |
Sets the width to which the lines of the Pango::Layout should wrap or ellipsized. The default value is -1: no width set.
| ||
| void | set_wrap (WrapMode) | |
Sets the wrap mode; the wrap mode only has effect if a width is set on the layout with set_width(). To turn off wrapping, set the width to -1.
| ||
| void | show_in_cairo_context (Context) | |
Draws a Layout in the specified Cairo context. The top-left corner of the Layout will be drawn at the current point of the cairo context.
| ||
↠ Evoral:Control
C‡: std::shared_ptr< Evoral::Control >, std::weak_ptr< Evoral::Control >
Base class representing some kind of (automatable) control; a fader's gain, for example, or a compressor plugin's threshold.
The class knows the Evoral::Parameter that it is controlling, and has a list of values for automation.
| Methods | ||
|---|---|---|
| bool | isnil () | |
| ControlList | list () | |
∁ Evoral:ControlEvent
C‡: Evoral::ControlEvent
A single event (time-stamped value) for a control
| Data Members | ||
|---|---|---|
| double | value | |
| Temporal:timepos_t | when | |
↠ Evoral:ControlList
C‡: std::shared_ptr< Evoral::ControlList >, std::weak_ptr< Evoral::ControlList >
| Methods | ||
|---|---|---|
| void | add (timepos_t, double, bool, bool) | |
| void | clear (timepos_t, timepos_t) | |
| void | clear_list () | |
| bool | editor_add (timepos_t, double, bool) | |
| double | eval (timepos_t) | |
| EventList | events () | |
Returns the list of events | ||
| bool | in_write_pass () | |
Returns true if transport is running and this list is in write mode | ||
| InterpolationStyle | interpolation () | |
query interpolation style of the automation data Returns Interpolation Style | ||
| bool | isnil () | |
| LuaTable(double, ...) | rt_safe_eval (timepos_t, bool&) | |
| bool | set_interpolation (InterpolationStyle) | |
| unsigned long | size () | |
| void | thin (double) | |
Thin the number of events in this list. The thinning factor corresponds to the area of a triangle computed between three points in the list (time-difference * value-difference). If the area is large, it indicates significant non-linearity between the points. Time is measured in samples, value is usually normalized to 0..1. During automation recording we thin the recorded points using this value. If a point is sufficiently co-linear with its neighbours (as defined by the area of the triangle formed by three of them), we will not include it in the list. The larger the value, the more points are excluded, so this effectively measures the amount of thinning to be done.
| ||
| void | truncate_end (timepos_t) | |
| void | truncate_start (timecnt_t) | |
| Cast | ||
| AutomationList | to_automationlist () | |
↠ Evoral:ControlSet
C‡: std::shared_ptr< Evoral::ControlSet >, std::weak_ptr< Evoral::ControlSet >
| Methods | ||
|---|---|---|
| bool | isnil () | |
∁ Evoral:Event
C‡: Evoral::Event<long>
| Methods | ||
|---|---|---|
| unsigned char* | buffer () | |
| unsigned char | channel () | |
| void | clear () | |
| void | set_buffer (unsigned int, unsigned char*, bool) | |
| void | set_channel (unsigned char) | |
| void | set_type (unsigned char) | |
| unsigned int | size () | |
| long | time () | |
| unsigned char | _type () | |
↠ Evoral:EventPtr
C‡: std::shared_ptr< Evoral::Event<Temporal::Beats> >, std::weak_ptr< Evoral::Event<Temporal::Beats> >
| Methods | ||
|---|---|---|
| bool | isnil () | |
| unsigned int | size () | |
| Beats | time () | |
↠ Evoral:NotePtr
C‡: std::shared_ptr< Evoral::Note<Temporal::Beats> >, std::weak_ptr< Evoral::Note<Temporal::Beats> >
| Methods | ||
|---|---|---|
| unsigned char | channel () | |
| bool | isnil () | |
| Beats | length () | |
| unsigned char | note () | |
| unsigned char | off_velocity () | |
| Beats | time () | |
| unsigned char | velocity () | |
∁ Evoral:Parameter
C‡: Evoral::Parameter
ID of a [play|record|automate]able parameter.
A parameter is defined by (type, id, channel). Type is an integer which can be used in any way by the application (e.g. cast to a custom enum, map to/from a URI, etc). ID is type specific (e.g. MIDI controller #).
This class defines a < operator which is a strict weak ordering, so Parameter may be stored in a std::set, used as a std::map key, etc.
| Constructor | ||
|---|---|---|
| ℂ | Evoral.Parameter (unsigned int, unsigned char, unsigned int) | |
| Methods | ||
| unsigned char | channel () | |
| unsigned int | id () | |
| unsigned int | _type () | |
∁ Evoral:ParameterDescriptor
C‡: Evoral::ParameterDescriptor
Description of the value range of a parameter or control.
| Constructor | ||
|---|---|---|
| ℂ | Evoral.ParameterDescriptor () | |
| Data Members | ||
| bool | logarithmic | |
True for log-scale parameters | ||
| float | lower | |
Minimum value (in Hz, for frequencies) | ||
| float | normal | |
Default value | ||
| unsigned int | rangesteps | |
number of steps, [min,max] (inclusive). <= 1 means continuous. == 2 only min, max. For integer controls this is usually (1 + max - min) | ||
| bool | toggled | |
True iff parameter is boolean | ||
| float | upper | |
Maximum value (in Hz, for frequencies) | ||
↠ Evoral:PatchChangePtr
C‡: std::shared_ptr< Evoral::PatchChange<Temporal::Beats> >, std::weak_ptr< Evoral::PatchChange<Temporal::Beats> >
| Methods | ||
|---|---|---|
| int | bank () | |
| bool | isnil () | |
| unsigned char | program () | |
| Beats | time () | |
∁ Evoral:Range
C‡: Temporal::Range
| Constructor | ||
|---|---|---|
| ℂ | Evoral.Range (timepos_t, timepos_t) | |
| Methods | ||
| timepos_t | _end () | |
| timepos_t | start () | |
↠ Evoral:Sequence
C‡: std::shared_ptr< Evoral::Sequence<Temporal::Beats> >, std::weak_ptr< Evoral::Sequence<Temporal::Beats> >
is-a: Evoral:ControlSet
| Methods | ||
|---|---|---|
| bool | isnil () | |
ℕ Keyboard
| Data Members | ||
|---|---|---|
| unsigned int | CopyModifier | |
| unsigned int | GainExtraFineScaleModifier | |
| unsigned int | GainFineScaleModifier | |
| unsigned int | RangeSelectModifier | |
| unsigned int | ScrollHorizontalModifier | |
| unsigned int | ScrollZoomHorizontalModifier | |
| unsigned int | ScrollZoomVerticalModifier | |
∁ LuaDialog:Dialog
C‡: LuaDialog::Dialog
| Constructor | ||
|---|---|---|
| ℂ | LuaDialog.Dialog (std::string, Lua-Function) | |
| Methods | ||
| ... | run (--lua--) | |
∁ LuaDialog:Message
C‡: LuaDialog::Message
| Constructor | ||
|---|---|---|
| ℂ | LuaDialog.Message (std::string, std::string, MessageType, ButtonType) | |
| Methods | ||
| int | run () | |
∁ LuaDialog:ProgressWindow
C‡: LuaDialog::ProgressWindow
| Constructor | ||
|---|---|---|
| ℂ | LuaDialog.ProgressWindow (std::string, bool) | |
| Methods | ||
| bool | canceled () | |
| void | done () | |
Close and hide the dialog. This is required to be at the end, since the dialog is modal and prevents other UI operations while visible. | ||
| bool | progress (float, std::string) | |
Report progress and update GUI.
Returns true if cancel was clicked, false otherwise | ||
∁ LuaSignal:Set
C‡: std::bitset<50ul>
| Constructor | ||
|---|---|---|
| ℂ | LuaSignal.Set () | |
| Methods | ||
| LuaTable | add (50ul) | |
| bool | any () | |
| unsigned long | count () | |
| bool | none () | |
| Set | reset () | |
| Set | set (unsigned long, bool) | |
| unsigned long | size () | |
| LuaTable | table () | |
| bool | test (unsigned long) | |
ℕ PBD
| Methods | ||
|---|---|---|
| unsigned int | hardware_concurrency () | |
| int | max_mmcss_threads_per_process () | |
| bool | open_uri (std::string) | |
| bool | open_uri (std::string) | |
∁ PBD:Command
C‡: PBD::Command
is-a: PBD:StatefulDestructible
Base class for Undo/Redo commands and changesets
| Methods | ||
|---|---|---|
| std::string | name () | |
| void | set_name (std::string) | |
Inherited from PBD:Stateful
| Methods | ||
|---|---|---|
| void | clear_changes () | |
Forget about any changes to this object's properties | ||
| ID | id () | |
| OwnedPropertyList | properties () | |
∅ PBD:Configuration
C‡: PBD::Configuration
is-a: PBD:Stateful
Base class for objects with saveable and undoable state
This class object is only used indirectly as return-value and function-parameter. It provides no methods by itself.
Inherited from PBD:Stateful
| Methods | ||
|---|---|---|
| void | clear_changes () | |
Forget about any changes to this object's properties | ||
| ID | id () | |
| OwnedPropertyList | properties () | |
↠ PBD:Controllable
C‡: std::shared_ptr< PBD::Controllable >, std::weak_ptr< PBD::Controllable >
is-a: PBD:StatefulDestructiblePtr
This is a pure virtual class to represent a scalar control.
Note that it contains no storage/state for the controllable thing that it represents. Derived classes must provide set_value()/get_value() methods, which will involve (somehow) an actual location to store the value.
In essence, this is an interface, not a class.
Without overriding upper() and lower(), a derived class will function as a control whose value can range between 0 and 1.0.
We express Controllable values in one of three ways: 1. `user' --- as presented to the user (e.g. dB, Hz, etc.) 2. `interface' --- as used in some cases for the UI representation (in order to make controls behave logarithmically). 3. `internal' --- as passed to a processor, track, plugin, or whatever.
Note that in some cases user and internal may be the same (and interface different) e.g. frequency, which is presented to the user and passed to the processor in linear terms, but which needs log scaling in the interface.
In other cases, user and interface may be the same (and internal different) e.g. gain, which is presented to the user in log terms (dB) but passed to the processor as a linear quantity.
| Methods | ||
|---|---|---|
| void | dump_registry () | |
| double | get_value () | |
Get `internal' value Returns raw value as used for the plugin/processor control port | ||
| bool | isnil () | |
| std::string | name () | |
| ControllableSet | registered_controllables () | |
| Cast | ||
| AutomationControl | to_automationcontrol () | |
| MPGainControl | to_mpgain () | |
| MPToggleControl | to_mptoggle () | |
Inherited from PBD:StatefulPtr
| Methods | ||
|---|---|---|
| void | clear_changes () | |
Forget about any changes to this object's properties | ||
| ID | id () | |
| OwnedPropertyList | properties () | |
∁ PBD:HistoryOwner
C‡: PBD::HistoryOwner
| Methods | ||
|---|---|---|
| bool | abort_empty_reversible_command () | |
Abort reversible command IFF no undo changes have been collected. Returns true if undo operation was aborted. | ||
| void | abort_reversible_command () | |
abort an open undo command This must only be called after begin_reversible_command () | ||
| void | add_command (Command) | |
| StatefulDiffCommand | add_stateful_diff_command (StatefulDestructiblePtr) | |
create an StatefulDiffCommand from the given object and add it to the stack. This function must only be called after begin_reversible_command. Failing to do so may lead to a crash.
Returns the allocated StatefulDiffCommand (already added via add_command) | ||
| void | begin_reversible_command (std::string) | |
begin collecting undo information This call must always be followed by either begin_reversible_command() or commit_reversible_command()
| ||
| bool | collected_undo_commands () | |
Test if any undo commands were added since the call to begin_reversible_command () This is useful to determine if an undoable action was performed before adding additional information (e.g. selection changes) to the undo transaction. Returns true if undo operation is valid but empty | ||
| void | commit_reversible_command (Command) | |
finalize an undo command and commit pending transactions This must only be called after begin_reversible_command ()
| ||
∁ PBD:ID
C‡: PBD::ID
a unique ID to identify objects numerically
| Constructor | ||
|---|---|---|
| ℂ | PBD.ID (std::string) | |
| Methods | ||
| std::string | to_s () | |
∁ PBD:IdVector
C‡: std::vector<PBD::ID >
| Constructor | ||
|---|---|---|
| ℂ | PBD.IdVector () | |
| ℂ | PBD.IdVector () | |
| Methods | ||
| LuaTable | add (LuaTable {ID}) | |
| ID | at (unsigned long) | |
| void | clear () | |
| bool | empty () | |
| LuaIter | iter () | |
| void | push_back (ID) | |
| void | reserve (unsigned long) | |
| unsigned long | size () | |
| LuaTable | table () | |
| ... | to_array (--lua--) | |
∅ PBD:Progress
C‡: PBD::Progress
A class to handle reporting of progress of something
This class object is only used indirectly as return-value and function-parameter. It provides no methods by itself.
∁ PBD:RingBuffer8
C‡: PBD::RingBufferNPT<unsigned char>
| Constructor | ||
|---|---|---|
| ℂ | PBD.RingBuffer8 (unsigned long) | |
| Methods | ||
| void | increment_read_ptr (unsigned long) | |
| void | increment_write_ptr (unsigned long) | |
| unsigned long | read (unsigned char*, unsigned long) | |
| unsigned long | read_space () | |
| void | reset () | |
| unsigned long | write (unsigned char*, unsigned long) | |
| unsigned long | write_one (unsigned char) | |
| unsigned long | write_space () | |
∁ PBD:RingBufferF
C‡: PBD::RingBufferNPT<float>
| Constructor | ||
|---|---|---|
| ℂ | PBD.RingBufferF (unsigned long) | |
| Methods | ||
| void | increment_read_ptr (unsigned long) | |
| void | increment_write_ptr (unsigned long) | |
| unsigned long | read (FloatArray, unsigned long) | |
| unsigned long | read_space () | |
| void | reset () | |
| unsigned long | write (FloatArray, unsigned long) | |
| unsigned long | write_one (float) | |
| unsigned long | write_space () | |
∁ PBD:RingBufferI
C‡: PBD::RingBufferNPT<int>
| Constructor | ||
|---|---|---|
| ℂ | PBD.RingBufferI (unsigned long) | |
| Methods | ||
| void | increment_read_ptr (unsigned long) | |
| void | increment_write_ptr (unsigned long) | |
| unsigned long | read (IntArray, unsigned long) | |
| unsigned long | read_space () | |
| void | reset () | |
| unsigned long | write (IntArray, unsigned long) | |
| unsigned long | write_one (int) | |
| unsigned long | write_space () | |
∁ PBD:Stateful
C‡: PBD::Stateful
Base class for objects with saveable and undoable state
| Methods | ||
|---|---|---|
| void | clear_changes () | |
Forget about any changes to this object's properties | ||
| ID | id () | |
| OwnedPropertyList | properties () | |
∅ PBD:StatefulDestructible
C‡: PBD::StatefulDestructible
is-a: PBD:Stateful
Base class for objects with saveable and undoable state with destruction notification
This class object is only used indirectly as return-value and function-parameter. It provides no methods by itself.
Inherited from PBD:Stateful
| Methods | ||
|---|---|---|
| void | clear_changes () | |
Forget about any changes to this object's properties | ||
| ID | id () | |
| OwnedPropertyList | properties () | |
↠ PBD:StatefulDestructiblePtr
C‡: std::shared_ptr< PBD::StatefulDestructible >, std::weak_ptr< PBD::StatefulDestructible >
is-a: PBD:StatefulPtr
Base class for objects with saveable and undoable state with destruction notification
| Methods | ||
|---|---|---|
| bool | isnil () | |
Inherited from PBD:StatefulPtr
| Methods | ||
|---|---|---|
| void | clear_changes () | |
Forget about any changes to this object's properties | ||
| ID | id () | |
| OwnedPropertyList | properties () | |
∁ PBD:StatefulDiffCommand
C‡: PBD::StatefulDiffCommand
is-a: PBD:Command
A Command which stores its action as the differences between the before and after state of a Stateful object.
| Methods | ||
|---|---|---|
| bool | empty () | |
| void | undo () | |
Inherited from PBD:Command
| Methods | ||
|---|---|---|
| std::string | name () | |
| void | set_name (std::string) | |
Inherited from PBD:Stateful
| Methods | ||
|---|---|---|
| void | clear_changes () | |
Forget about any changes to this object's properties | ||
| ID | id () | |
| OwnedPropertyList | properties () | |
↠ PBD:StatefulPtr
C‡: std::shared_ptr< PBD::Stateful >, std::weak_ptr< PBD::Stateful >
Base class for objects with saveable and undoable state
| Methods | ||
|---|---|---|
| void | clear_changes () | |
Forget about any changes to this object's properties | ||
| ID | id () | |
| bool | isnil () | |
| OwnedPropertyList | properties () | |
∁ PBD:XMLNode
C‡: XMLNode
| Methods | ||
|---|---|---|
| std::string | name () | |
ℕ Temporal
| Methods | ||
|---|---|---|
| long | superclock_ticks_per_second () | |
∁ Temporal:BBT_Argument
C‡: Temporal::BBT_Argument
is-a: Temporal:BBT_TIME
Bar, Beat, Tick Time (i.e. Tempo-Based Time)
| Constructor | ||
|---|---|---|
| ℂ | Temporal.BBT_Argument (int, int, int) | |
Inherited from Temporal:BBT_TIME
| Constructor | ||
|---|---|---|
| ℂ | Temporal.BBT_TIME (int, int, int) | |
| Methods | ||
| std::string | str () | |
| Data Members | ||
| int | bars | |
| int | beats | |
| int | ticks | |
∁ Temporal:BBT_Offset
C‡: Temporal::BBT_Offset
| Constructor | ||
|---|---|---|
| ℂ | Temporal.BBT_Offset (unsigned int, unsigned int, unsigned int) | |
| Methods | ||
| std::string | str () | |
| Data Members | ||
| int | bars | |
| int | beats | |
| int | ticks | |
∁ Temporal:BBT_TIME
C‡: Temporal::BBT_Time
Bar, Beat, Tick Time (i.e. Tempo-Based Time)
| Constructor | ||
|---|---|---|
| ℂ | Temporal.BBT_TIME (int, int, int) | |
| Methods | ||
| std::string | str () | |
| Data Members | ||
| int | bars | |
| int | beats | |
| int | ticks | |
∁ Temporal:Beats
C‡: Temporal::Beats
Musical time in beats.
| Constructor | ||
|---|---|---|
| ℂ | Temporal.Beats (int, int) | |
| Methods | ||
| Beats | beats (long) | |
| Beats | diff (Beats) | |
| Beats | from_double (double) | |
| long | get_beats () | |
| int | get_ticks () | |
| Beats | next_beat () | |
| Beats | prev_beat () | |
| Beats | round_down_to_beat () | |
| Beats | round_to_beat () | |
| Beats | round_up_to_beat () | |
| std::string | str () | |
| Beats | ticks (long) | |
| long | to_ticks () | |
∁ Temporal:Meter
C‡: Temporal::Meter
Meter, or time signature (subdivisions per bar, and which note type is a single subdivision).
| Constructor | ||
|---|---|---|
| ℂ | Temporal.Meter (double, double) | |
| Methods | ||
| int | divisions_per_bar () | |
| int | note_value () | |
∁ Temporal:MeterPoint
C‡: Temporal::MeterPoint
is-a: Temporal:Meter
Meter, or time signature (subdivisions per bar, and which note type is a single subdivision).
| Cast | ||
|---|---|---|
| Point | to_point () | |
Inherited from Temporal:Meter
| Constructor | ||
|---|---|---|
| ℂ | Temporal.Meter (double, double) | |
| Methods | ||
| int | divisions_per_bar () | |
| int | note_value () | |
∁ Temporal:Point
C‡: Temporal::Point
| Methods | ||
|---|---|---|
| BBT_TIME | bbt () | |
| Beats | beats () | |
| long | sample (int) | |
| long | sclock () | |
| timepos_t | time () | |
∁ Temporal:Tempo
C‡: Temporal::Tempo
Tempo, the speed at which musical time progresses (BPM).
| Constructor | ||
|---|---|---|
| ℂ | Temporal.Tempo (double, double, int) | |
| Methods | ||
| int | note_type () | |
| double | note_types_per_minute () | |
| double | quarter_notes_per_minute () | |
| double | samples_per_note_type (int) | |
| double | samples_per_quarter_note (int) | |
| long | superclocks_per_note_type () | |
↠ Temporal:TempoMap
C‡: std::shared_ptr< Temporal::TempoMap >, std::weak_ptr< Temporal::TempoMap >
Base class for objects with saveable and undoable state with destruction notification
| Methods | ||
|---|---|---|
| void | abort_update () | |
| BBT_Argument | bbt_at (timepos_t) | |
| BBT_Argument | bbt_at_beats (Beats) | |
| timecnt_t | bbt_duration_at (timepos_t, BBT_Offset) | |
| BBT_Argument | bbt_walk (BBT_Argument, BBT_Offset) | |
| Beats | bbtwalk_to_quarters (Beats, BBT_Offset) | |
| Beats | bbtwalk_to_quarters_bbt (BBT_Argument, BBT_Offset) | |
| timecnt_t | convert_duration (timecnt_t, timepos_t, TimeDomain) | |
| LuaTable(...) | grid (TempoMapPoints&, long, long, unsigned int, unsigned int) | |
| bool | isnil () | |
| MeterPoint | meter_at (timepos_t) | |
| MeterPoint | meter_at_bbt (BBT_Argument) | |
| MeterPoint | meter_at_beats (Beats) | |
| MeterPoint | meter_at_sc (long) | |
| LuaTable(...) | midi_clock_beat_at_or_after (long, long&, unsigned int&) | |
| Beats | quarters_at (timepos_t) | |
| Beats | quarters_at_bbt (BBT_Argument) | |
| Beats | quarters_at_sample (long) | |
| double | quarters_per_minute_at (timepos_t) | |
| TempoMap | read () | |
| BBT_Argument | round_to_bar (BBT_Argument) | |
| long | sample_at (timepos_t) | |
| long | sample_at_bbt (Beats) | |
| long | sample_at_beats (Beats) | |
| bool | set_continuing (TempoPoint&, bool) | |
| MeterPoint | set_meter (Meter, timepos_t) | |
| bool | set_ramped (TempoPoint&, bool) | |
| TempoPoint | set_tempo (Tempo, timepos_t) | |
| long | superclock_at (timepos_t) | |
| long | superclock_at_bbt (BBT_Argument) | |
| long | superclock_at_beats (Beats) | |
| TempoPoint | tempo_at (timepos_t) | |
| TempoPoint | tempo_at_bbt (BBT_Argument) | |
| TempoPoint | tempo_at_beats (Beats) | |
| TempoPoint | tempo_at_sc (long) | |
| int | update (TempoMap) | |
| TempoMap | write_copy () | |
∁ Temporal:TempoMapPoint
C‡: Temporal::TempoMapPoint
is-a: Temporal:Point
Tempo Map - mapping of timecode to musical time. convert audio-samples, sample-rate to Bar/Beat/Tick, Meter/Tempo
| Methods | ||
|---|---|---|
| timepos_t | time () | |
| Cast | ||
| TempoMetric | to_tempometric () | |
Inherited from Temporal:Point
| Methods | ||
|---|---|---|
| BBT_TIME | bbt () | |
| Beats | beats () | |
| long | sample (int) | |
| long | sclock () | |
∁ Temporal:TempoMapPoints
C‡: std::vector<Temporal::TempoMapPoint >
| Constructor | ||
|---|---|---|
| ℂ | Temporal.TempoMapPoints () | |
| ℂ | Temporal.TempoMapPoints () | |
| Methods | ||
| LuaTable | add (LuaTable {TempoMapPoint}) | |
| TempoMapPoint | at (unsigned long) | |
| void | clear () | |
| bool | empty () | |
| LuaIter | iter () | |
| void | push_back (TempoMapPoint) | |
| void | reserve (unsigned long) | |
| unsigned long | size () | |
| LuaTable | table () | |
| ... | to_array (--lua--) | |
∁ Temporal:TempoMetric
C‡: Temporal::TempoMetric
Helper class to perform computations that require both Tempo and Meter at a given point in time.
It may seem nicer to make this IS-A TempoPoint and IS-A MeterPoint. Doing so runs into multiple inheritance of Point, plus the major semantic issue that pairing a tempo and a meter does in fact allow for two positions, not one. That means we have to provide accessors to the TempoPoint and MeterPoint and thus it may as well be HAS-A rather than IS-A.
This object should always be short lived. It holds references to a TempoPoint and a MeterPoint that are not lifetime-managed. It's just a convenience object, in essence, to avoid having to replicate the computation code that requires both tempo and meter information every place it is used.
| Methods | ||
|---|---|---|
| int | divisions_per_bar () | |
| MeterPoint | meter () | |
| int | note_type () | |
| int | note_value () | |
| Beats | quarters_at (BBT_TIME) | |
| long | sample_at (Beats) | |
| TempoPoint | tempo () | |
∁ Temporal:TempoPoint
C‡: Temporal::TempoPoint
is-a: Temporal:Tempo
Tempo, the speed at which musical time progresses (BPM).
| Methods | ||
|---|---|---|
| Beats | quarters_at_sample (long) | |
| timepos_t | time () | |
| Cast | ||
| Point | to_point () | |
| Tempo | to_tempo () | |
Inherited from Temporal:Tempo
| Constructor | ||
|---|---|---|
| ℂ | Temporal.Tempo (double, double, int) | |
| Methods | ||
| int | note_type () | |
| double | note_types_per_minute () | |
| double | quarter_notes_per_minute () | |
| double | samples_per_note_type (int) | |
| double | samples_per_quarter_note (int) | |
| long | superclocks_per_note_type () | |
∁ Temporal:ratio
C‡: Temporal::_ratio_t<long>
| Constructor | ||
|---|---|---|
| ℂ | Temporal.ratio (long, long) | |
| Methods | ||
| bool | is_unity () | |
| bool | is_zero () | |
∁ Temporal:timecnt_t
C‡: Temporal::timecnt_t
| Constructor | ||
|---|---|---|
| ℂ | Temporal.timecnt_t (long) | |
| Methods | ||
| timecnt_t | abs () | |
| Beats | beats () | |
| timecnt_t | decrement () | |
| timecnt_t | from_samples (long) | |
| timecnt_t | from_superclock (long) | |
| timecnt_t | from_ticks (long) | |
| bool | is_negative () | |
| bool | is_positive () | |
| bool | is_zero () | |
| long | magnitude () | |
| timecnt_t | max () | |
| timepos_t | position () | |
| long | samples () | |
| timecnt_t | scale (ratio) | |
| timecnt_t | scale (ratio) | |
| void | set_position (timepos_t) | |
| void | set_time_domain (TimeDomain) | |
| std::string | str () | |
| long | superclocks () | |
| long | ticks () | |
| TimeDomain | time_domain () | |
| timecnt_t | zero (TimeDomain) | |
∁ Temporal:timepos_t
C‡: Temporal::timepos_t
| Constructor | ||
|---|---|---|
| ℂ | Temporal.timepos_t (long) | |
| Methods | ||
| Beats | beats () | |
| timepos_t | decrement () | |
| timecnt_t | distance (timepos_t) | |
| timepos_t | from_superclock (long) | |
| timepos_t | from_ticks (long) | |
| timepos_t | increment () | |
| bool | is_beats () | |
| bool | is_negative () | |
| bool | is_positive () | |
| bool | is_superclock () | |
| bool | is_zero () | |
| timepos_t | max (TimeDomain) | |
| long | samples () | |
| timepos_t | scale (ratio) | |
| timepos_t | smallest_step (TimeDomain) | |
| std::string | str () | |
| long | superclocks () | |
| long | ticks () | |
| TimeDomain | time_domain () | |
| timepos_t | zero (bool) | |
∁ Timecode:Time
C‡: Timecode::Time
| Constructor | ||
|---|---|---|
| ℂ | Timecode.Time (double) | |
| Data Members | ||
| bool | drop | |
Whether this Time uses dropframe Timecode | ||
| unsigned int | frames | |
Timecode frames (not audio frames) | ||
| unsigned int | hours | |
| unsigned int | minutes | |
| bool | negative | |
| double | rate | |
Frame rate of this Time | ||
| unsigned int | seconds | |
| unsigned int | subframes | |
Typically unused | ||
∁ Vamp:Plugin
C‡: Vamp::Plugin
is-a: Vamp:PluginBase
Vamp::Plugin is a base class for plugin instance classes that provide feature extraction from audio or related data.
In most cases, the input will be audio and the output will be a stream of derived data at a lower sampling resolution than the input.
Note that this class inherits several abstract methods from PluginBase. These must be implemented by the subclass.
PLUGIN LIFECYCLE
Feature extraction plugins are managed differently from real-time plugins (such as VST effects). The main difference is that the parameters for a feature extraction plugin are configured before the plugin is used, and do not change during use.
1. Host constructs the plugin, passing it the input sample rate. The plugin may do basic initialisation, but should not do anything computationally expensive at this point. You must make sure your plugin is cheap to construct, otherwise you'll seriously affect the startup performance of almost all hosts. If you have serious initialisation to do, the proper place is in initialise() (step 5).
2. Host may query the plugin's available outputs.
3. Host queries programs and parameter descriptors, and may set some or all of them. Parameters that are not explicitly set should take their default values as specified in the parameter descriptor. When a program is set, the parameter values may change and the host will re-query them to check.
4. Host queries the preferred step size, block size and number of channels. These may all vary depending on the parameter values. (Note however that you cannot make the number of distinct outputs dependent on parameter values.)
5. Plugin is properly initialised with a call to initialise. This fixes the step size, block size, and number of channels, as well as all of the parameter and program settings. If the values passed in to initialise do not match the plugin's advertised preferred values from step 4, the plugin may refuse to initialise and return false (although if possible it should accept the new values). Any computationally expensive setup code should take place here.
6. Host finally checks the number of values, resolution, extents etc per output (which may vary depending on the number of channels, step size and block size as well as the parameter values).
7. Host will repeatedly call the process method to pass in blocks of input data. This method may return features extracted from that data (if the plugin is causal).
8. Host will call getRemainingFeatures exactly once, after all the input data has been processed. This may return any non-causal or leftover features.
9. At any point after initialise was called, the host may optionally call the reset method and restart processing. (This does not mean it can change the parameters, which are fixed from initialise until destruction.)
A plugin does not need to handle the case where setParameter or selectProgram is called after initialise has been called. It's the host's responsibility not to do that. Similarly, the plugin may safely assume that initialise is called no more than once.
| Methods | ||
|---|---|---|
| InputDomain | getInputDomain () | |
Get the plugin's required input domain. If this is TimeDomain, the samples provided to the process() function (below) will be in the time domain, as for a traditional audio processing plugin. If this is FrequencyDomain, the host will carry out a windowed FFT of size equal to the negotiated block size on the data before passing the frequency bin data in to process(). The input data for the FFT will be rotated so as to place the origin in the centre of the block. The plugin does not get to choose the window type -- the host will either let the user do so, or will use a Hanning window. | ||
| unsigned long | getMaxChannelCount () | |
Get the maximum supported number of input channels. | ||
| unsigned long | getMinChannelCount () | |
Get the minimum supported number of input channels. | ||
| OutputList | getOutputDescriptors () | |
Get the outputs of this plugin. An output's index in this list is used as its numeric index when looking it up in the FeatureSet returned from the process() call. | ||
| unsigned long | getPreferredBlockSize () | |
Get the preferred block size (window size -- the number of sample frames passed in each block to the process() function). This should be called before initialise(). A plugin that can handle any block size may return 0. The final block size will be set in the initialise() call. | ||
| unsigned long | getPreferredStepSize () | |
Get the preferred step size (window increment -- the distance in sample frames between the start frames of consecutive blocks passed to the process() function) for the plugin. This should be called before initialise(). A plugin may return 0 if it has no particular interest in the step size. In this case, the host should make the step size equal to the block size if the plugin is accepting input in the time domain. If the plugin is accepting input in the frequency domain, the host may use any step size. The final step size will be set in the initialise() call. | ||
| FeatureSet | getRemainingFeatures () | |
After all blocks have been processed, calculate and return any remaining features derived from the complete input. | ||
| std::string | getType () | |
Used to distinguish between Vamp::Plugin and other potential sibling subclasses of PluginBase. Do not reimplement this function in your subclass. | ||
| bool | initialise (unsigned long, unsigned long, unsigned long) | |
Initialise a plugin to prepare it for use with the given number of input channels, step size (window increment, in sample frames) and block size (window size, in sample frames). The input sample rate should have been already specified at construction time. Return true for successful initialisation, false if the number of input channels, step size and/or block size cannot be supported. | ||
| void | reset () | |
Reset the plugin after use, to prepare it for another clean run. Not called for the first initialisation (i.e. initialise must also do a reset). | ||
Inherited from Vamp:PluginBase
| Methods | ||
|---|---|---|
| std::string | getCopyright () | |
Get the copyright statement or licensing summary for the plugin. This can be an informative text, without the same presentation constraints as mentioned for getMaker above. | ||
| std::string | getCurrentProgram () | |
Get the current program. | ||
| std::string | getDescription () | |
Get a human-readable description for the plugin, typically a line of text that may optionally be displayed in addition to the plugin's "name". May be empty if the name has said it all already. Example: "Detect and count zero crossing points" | ||
| std::string | getIdentifier () | |
Get the computer-usable name of the plugin. This should be reasonably short and contain no whitespace or punctuation characters. It may only contain the characters [a-zA-Z0-9_-]. This is the authoritative way for a program to identify a plugin within a given library. This text may be visible to the user, but it should not be the main text used to identify a plugin to the user (that will be the name, below). Example: "zero_crossings" | ||
| std::string | getMaker () | |
Get the name of the author or vendor of the plugin in human-readable form. This should be a short identifying text, as it may be used to label plugins from the same source in a menu or similar. | ||
| std::string | getName () | |
Get a human-readable name or title of the plugin. This should be brief and self-contained, as it may be used to identify the plugin to the user in isolation (i.e. without also showing the plugin's "identifier"). Example: "Zero Crossings" | ||
| float | getParameter (std::string) | |
Get the value of a named parameter. The argument is the identifier field from that parameter's descriptor. | ||
| ParameterList | getParameterDescriptors () | |
Get the controllable parameters of this plugin. | ||
| int | getPluginVersion () | |
Get the version number of the plugin. | ||
| StringVector | getPrograms () | |
Get the program settings available in this plugin. A program is a named shorthand for a set of parameter values; changing the program may cause the plugin to alter the values of its published parameters (and/or non-public internal processing parameters). The host should re-read the plugin's parameter values after setting a new program. The programs must have unique names. | ||
| void | selectProgram (std::string) | |
Select a program. (If the given program name is not one of the available programs, do nothing.) | ||
| void | setParameter (std::string, float) | |
Set a named parameter. The first argument is the identifier field from that parameter's descriptor. | ||
∁ Vamp:Plugin:Feature
C‡: Vamp::Plugin::Feature
| Data Members | ||
|---|---|---|
| Vamp:RealTime | duration | |
Duration of the output feature. This is mandatory if the output has VariableSampleRate or FixedSampleRate and hasDuration is true, and unused otherwise. | ||
| bool | hasDuration | |
True if an output feature has a specified duration. This is optional if the output has VariableSampleRate or FixedSampleRate, and and unused if the output has OneSamplePerStep. | ||
| bool | hasTimestamp | |
True if an output feature has its own timestamp. This is mandatory if the output has VariableSampleRate, optional if the output has FixedSampleRate, and unused if the output has OneSamplePerStep. | ||
| std::string | label | |
Label for the sample of this feature. | ||
| Vamp:RealTime | timestamp | |
Timestamp of the output feature. This is mandatory if the output has VariableSampleRate or if the output has FixedSampleRate and hasTimestamp is true, and unused otherwise. | ||
| C:FloatVector | values | |
Results for a single sample of this feature. If the output hasFixedBinCount, there must be the same number of values as the output's binCount count. | ||
∁ Vamp:Plugin:FeatureList
C‡: std::vector<Vamp::Plugin::Feature >
| Constructor | ||
|---|---|---|
| ℂ | Vamp.Plugin.FeatureList () | |
| ℂ | Vamp.Plugin.FeatureList () | |
| Methods | ||
| LuaTable | add (LuaTable {Feature}) | |
| Feature | at (unsigned long) | |
| void | clear () | |
| bool | empty () | |
| LuaIter | iter () | |
| void | push_back (Feature) | |
| void | reserve (unsigned long) | |
| unsigned long | size () | |
| LuaTable | table () | |
| ... | to_array (--lua--) | |
∁ Vamp:Plugin:FeatureSet
C‡: std::map<int, std::vector<Vamp::Plugin::Feature > > > >
| Constructor | ||
|---|---|---|
| ℂ | Vamp.Plugin.FeatureSet () | |
| Methods | ||
| LuaTable | add (LuaTable {Feature}) | |
| ... | at (--lua--) | |
| void | clear () | |
| unsigned long | count (int) | |
| bool | empty () | |
| LuaIter | iter () | |
| unsigned long | size () | |
| LuaTable | table () | |
∁ Vamp:Plugin:OutputDescriptor
C‡: Vamp::Plugin::OutputDescriptor
| Data Members | ||
|---|---|---|
| unsigned long | binCount | |
The number of values per result of the output. Undefined if hasFixedBinCount is false. If this is zero, the output is point data (i.e. only the time of each output is of interest, the value list will be empty). | ||
| C:StringVector | binNames | |
The (human-readable) names of each of the bins, if appropriate. This is always optional. | ||
| std::string | description | |
A human-readable short text describing the output. May be empty if the name has said it all already. Example: "The number of zero crossing points per processing block" | ||
| bool | hasDuration | |
True if the returned results for this output are known to have a duration field. | ||
| bool | hasFixedBinCount | |
True if the output has the same number of values per sample for every output sample. Outputs for which this is false are unlikely to be very useful in a general-purpose host. | ||
| bool | hasKnownExtents | |
True if the results in each output bin fall within a fixed numeric range (minimum and maximum values). Undefined if binCount is zero. | ||
| std::string | identifier | |
The name of the output, in computer-usable form. Should be reasonably short and without whitespace or punctuation, using the characters [a-zA-Z0-9_-] only. Example: "zero_crossing_count" | ||
| bool | isQuantized | |
True if the output values are quantized to a particular resolution. Undefined if binCount is zero. | ||
| float | maxValue | |
Maximum value of the results in the output. Undefined if hasKnownExtents is false or binCount is zero. | ||
| float | minValue | |
Minimum value of the results in the output. Undefined if hasKnownExtents is false or binCount is zero. | ||
| float | quantizeStep | |
Quantization resolution of the output values (e.g. 1.0 if they are all integers). Undefined if isQuantized is false or binCount is zero. | ||
| float | sampleRate | |
Sample rate of the output results, as samples per second. Undefined if sampleType is OneSamplePerStep. If sampleType is VariableSampleRate and this value is non-zero, then it may be used to calculate a resolution for the output (i.e. the "duration" of each sample, in time, will be 1/sampleRate seconds). It's recommended to set this to zero if that behaviour is not desired. | ||
| Vamp.Plugin.OutputDescriptor.SampleType | sampleType | |
Positioning in time of the output results. | ||
| std::string | unit | |
The unit of the output, in human-readable form. | ||
∁ Vamp:Plugin:OutputList
C‡: std::vector<Vamp::Plugin::OutputDescriptor >
| Constructor | ||
|---|---|---|
| ℂ | Vamp.Plugin.OutputList () | |
| ℂ | Vamp.Plugin.OutputList () | |
| Methods | ||
| LuaTable | add (LuaTable {OutputDescriptor}) | |
| OutputDescriptor | at (unsigned long) | |
| void | clear () | |
| bool | empty () | |
| LuaIter | iter () | |
| void | push_back (OutputDescriptor) | |
| void | reserve (unsigned long) | |
| unsigned long | size () | |
| LuaTable | table () | |
| ... | to_array (--lua--) | |
∁ Vamp:PluginBase
C‡: Vamp::PluginBase
A base class for plugins with optional configurable parameters, programs, etc. The Vamp::Plugin is derived from this, and individual Vamp plugins should derive from that.
This class does not provide the necessary interfaces to instantiate or run a plugin. It only specifies an interface for retrieving those controls that the host may wish to show to the user for editing. It could meaningfully be subclassed by real-time plugins or other sorts of plugin as well as Vamp plugins.
| Methods | ||
|---|---|---|
| std::string | getCopyright () | |
Get the copyright statement or licensing summary for the plugin. This can be an informative text, without the same presentation constraints as mentioned for getMaker above. | ||
| std::string | getCurrentProgram () | |
Get the current program. | ||
| std::string | getDescription () | |
Get a human-readable description for the plugin, typically a line of text that may optionally be displayed in addition to the plugin's "name". May be empty if the name has said it all already. Example: "Detect and count zero crossing points" | ||
| std::string | getIdentifier () | |
Get the computer-usable name of the plugin. This should be reasonably short and contain no whitespace or punctuation characters. It may only contain the characters [a-zA-Z0-9_-]. This is the authoritative way for a program to identify a plugin within a given library. This text may be visible to the user, but it should not be the main text used to identify a plugin to the user (that will be the name, below). Example: "zero_crossings" | ||
| std::string | getMaker () | |
Get the name of the author or vendor of the plugin in human-readable form. This should be a short identifying text, as it may be used to label plugins from the same source in a menu or similar. | ||
| std::string | getName () | |
Get a human-readable name or title of the plugin. This should be brief and self-contained, as it may be used to identify the plugin to the user in isolation (i.e. without also showing the plugin's "identifier"). Example: "Zero Crossings" | ||
| float | getParameter (std::string) | |
Get the value of a named parameter. The argument is the identifier field from that parameter's descriptor. | ||
| ParameterList | getParameterDescriptors () | |
Get the controllable parameters of this plugin. | ||
| int | getPluginVersion () | |
Get the version number of the plugin. | ||
| StringVector | getPrograms () | |
Get the program settings available in this plugin. A program is a named shorthand for a set of parameter values; changing the program may cause the plugin to alter the values of its published parameters (and/or non-public internal processing parameters). The host should re-read the plugin's parameter values after setting a new program. The programs must have unique names. | ||
| std::string | getType () | |
Get the type of plugin. This is to be implemented by the immediate subclass, not by actual plugins. Do not attempt to implement this in plugin code. | ||
| void | selectProgram (std::string) | |
Select a program. (If the given program name is not one of the available programs, do nothing.) | ||
| void | setParameter (std::string, float) | |
Set a named parameter. The first argument is the identifier field from that parameter's descriptor. | ||
∁ Vamp:PluginBase:ParameterDescriptor
C‡: Vamp::PluginBase::ParameterDescriptor
| Data Members | ||
|---|---|---|
| float | defaultValue | |
The default value of the parameter. The plugin should ensure that parameters have this value on initialisation (i.e. the host is not required to explicitly set parameters if it wants to use their default values). | ||
| std::string | description | |
A human-readable short text describing the parameter. May be empty if the name has said it all already. | ||
| std::string | identifier | |
The name of the parameter, in computer-usable form. Should be reasonably short, and may only contain the characters [a-zA-Z0-9_-]. | ||
| bool | isQuantized | |
True if the parameter values are quantized to a particular resolution. | ||
| float | maxValue | |
The maximum value of the parameter. | ||
| float | minValue | |
The minimum value of the parameter. | ||
| std::string | name | |
The human-readable name of the parameter. | ||
| float | quantizeStep | |
Quantization resolution of the parameter values (e.g. 1.0 if they are all integers). Undefined if isQuantized is false. | ||
| std::string | unit | |
The unit of the parameter, in human-readable form. | ||
| C:StringVector | valueNames | |
Names for the quantized values. If isQuantized is true, this may either be empty or contain one string for each of the quantize steps from minValue up to maxValue inclusive. Undefined if isQuantized is false. If these names are provided, they should be shown to the user in preference to the values themselves. The user may never see the actual numeric values unless they are also encoded in the names. | ||
∁ Vamp:PluginBase:ParameterList
C‡: std::vector<Vamp::PluginBase::ParameterDescriptor >
| Constructor | ||
|---|---|---|
| ℂ | Vamp.PluginBase.ParameterList () | |
| ℂ | Vamp.PluginBase.ParameterList () | |
| Methods | ||
| LuaTable | add (LuaTable {ParameterDescriptor}) | |
| ParameterDescriptor | at (unsigned long) | |
| void | clear () | |
| bool | empty () | |
| LuaIter | iter () | |
| void | push_back (ParameterDescriptor) | |
| void | reserve (unsigned long) | |
| unsigned long | size () | |
| LuaTable | table () | |
| ... | to_array (--lua--) | |
∁ Vamp:RealTime
C‡: Vamp::RealTime
RealTime represents time values to nanosecond precision with accurate arithmetic and frame-rate conversion functions.
| Constructor | ||
|---|---|---|
| ℂ | Vamp.RealTime (int, int) | |
| Methods | ||
| RealTime | frame2RealTime (long, unsigned int) | |
| int | msec () | |
| long | realTime2Frame (RealTime, unsigned int) | |
| std::string | toString () | |
Return a human-readable debug-type string to full precision (probably not a format to show to a user directly) | ||
| int | usec () | |
| Data Members | ||
| int | nsec | |
| int | sec | |
ℕ os
| Methods | ||
|---|---|---|
| int | execute (std::string) | |
| LuaTable | forkexec () | |
Enum/Constants
∈ PBD.Controllable.GroupControlDisposition
- PBD.GroupControlDisposition.InverseGroup
- PBD.GroupControlDisposition.NoGroup
- PBD.GroupControlDisposition.UseGroup
∈ Timecode.TimecodeFormat
- Timecode.TimecodeFormat.TC23976
- Timecode.TimecodeFormat.TC24
- Timecode.TimecodeFormat.TC24976
- Timecode.TimecodeFormat.TC25
- Timecode.TimecodeFormat.TC2997
- Timecode.TimecodeFormat.TC2997DF
- Timecode.TimecodeFormat.TC2997000
- Timecode.TimecodeFormat.TC2997000DF
- Timecode.TimecodeFormat.TC30
- Timecode.TimecodeFormat.TC5994
- Timecode.TimecodeFormat.TC60
∈ Temporal
- Temporal.ticks_per_beat
∈ Temporal.TimeDomain
- Temporal.TimeDomain.AudioTime
- Temporal.TimeDomain.BeatTime
∈ Temporal.Tempo.Type
- Temporal.Tempo.Type.Ramp
- Temporal.Tempo.Type.Constant
∈ Evoral.ControlList.InterpolationStyle
- Evoral.InterpolationStyle.Discrete
- Evoral.InterpolationStyle.Linear
- Evoral.InterpolationStyle.Curved
- Evoral.InterpolationStyle.Logarithmic
- Evoral.InterpolationStyle.Exponential
∈ Evoral.EventType
- Evoral.EventType.NO_EVENT
- Evoral.EventType.MIDI_EVENT
- Evoral.EventType.LIVE_MIDI_EVENT
∈ Vamp.Plugin.InputDomain
- Vamp.Plugin.InputDomain.TimeDomain
- Vamp.Plugin.InputDomain.FrequencyDomain
∈ Vamp.Plugin.OutputDescriptor.SampleType
- Vamp.Plugin.OutputDescriptor.SampleType.OneSamplePerStep
- Vamp.Plugin.OutputDescriptor.SampleType.FixedSampleRate
- Vamp.Plugin.OutputDescriptor.SampleType.VariableSampleRate
∈ ARDOUR
- ARDOUR.revision
∈ ARDOUR.ChanMapping
- ARDOUR.ChanMapping.Invalid
∈ PBD.PropertyDescriptor<Temporal.timepos_t>*
- ARDOUR.Properties.Start
∈ PBD.PropertyDescriptor<Temporal.timecnt_t>*
- ARDOUR.Properties.Length
∈ PBD.PropertyDescriptor<unsigned int>*
- ARDOUR.Properties.Layer
∈ PBD.PropertyDescriptor<bool>*
- ARDOUR.Properties.Muted
- ARDOUR.Properties.Opaque
∈ ARDOUR.PresentationInfo
- ARDOUR.PresentationInfo.max_order
∈ ARDOUR.PluginType
- ARDOUR.PluginType.AudioUnit
- ARDOUR.PluginType.LADSPA
- ARDOUR.PluginType.LV2
- ARDOUR.PluginType.Windows_VST
- ARDOUR.PluginType.LXVST
- ARDOUR.PluginType.MacVST
- ARDOUR.PluginType.Lua
- ARDOUR.PluginType.VST3
∈ ARDOUR.PresentationInfo.Flag
- ARDOUR.PresentationInfo.Flag.AudioTrack
- ARDOUR.PresentationInfo.Flag.MidiTrack
- ARDOUR.PresentationInfo.Flag.AudioBus
- ARDOUR.PresentationInfo.Flag.MidiBus
- ARDOUR.PresentationInfo.Flag.VCA
- ARDOUR.PresentationInfo.Flag.MasterOut
- ARDOUR.PresentationInfo.Flag.MonitorOut
- ARDOUR.PresentationInfo.Flag.Auditioner
- ARDOUR.PresentationInfo.Flag.Hidden
- ARDOUR.PresentationInfo.Flag.GroupOrderSet
- ARDOUR.PresentationInfo.Flag.TriggerTrack
- ARDOUR.PresentationInfo.Flag.StatusMask
- ARDOUR.PresentationInfo.Flag.TypeMask
∈ ARDOUR.AutoState
- ARDOUR.AutoState.Off
- ARDOUR.AutoState.Write
- ARDOUR.AutoState.Touch
- ARDOUR.AutoState.Play
- ARDOUR.AutoState.Latch
∈ ARDOUR.AutomationType
- ARDOUR.AutomationType.GainAutomation
- ARDOUR.AutomationType.BusSendLevel
- ARDOUR.AutomationType.SurroundSendLevel
- ARDOUR.AutomationType.InsertReturnLevel
- ARDOUR.AutomationType.PluginAutomation
- ARDOUR.AutomationType.SoloAutomation
- ARDOUR.AutomationType.SoloIsolateAutomation
- ARDOUR.AutomationType.SoloSafeAutomation
- ARDOUR.AutomationType.MuteAutomation
- ARDOUR.AutomationType.RecEnableAutomation
- ARDOUR.AutomationType.RecSafeAutomation
- ARDOUR.AutomationType.TrimAutomation
- ARDOUR.AutomationType.PhaseAutomation
- ARDOUR.AutomationType.MidiCCAutomation
- ARDOUR.AutomationType.MidiPgmChangeAutomation
- ARDOUR.AutomationType.MidiPitchBenderAutomation
- ARDOUR.AutomationType.MidiChannelPressureAutomation
- ARDOUR.AutomationType.MidiNotePressureAutomation
- ARDOUR.AutomationType.MidiSystemExclusiveAutomation
∈ ARDOUR.SrcQuality
- ARDOUR.SrcQuality.SrcBest
∈ ARDOUR.SectionOperation
- ARDOUR.SectionOperation.CopyPaste
- ARDOUR.SectionOperation.CutPaste
- ARDOUR.SectionOperation.Insert
- ARDOUR.SectionOperation.Delete
∈ ARDOUR.MeterType
- ARDOUR.MeterType.MeterMaxSignal
- ARDOUR.MeterType.MeterMaxPeak
- ARDOUR.MeterType.MeterPeak
- ARDOUR.MeterType.MeterKrms
- ARDOUR.MeterType.MeterK20
- ARDOUR.MeterType.MeterK14
- ARDOUR.MeterType.MeterIEC1DIN
- ARDOUR.MeterType.MeterIEC1NOR
- ARDOUR.MeterType.MeterIEC2BBC
- ARDOUR.MeterType.MeterIEC2EBU
- ARDOUR.MeterType.MeterVU
- ARDOUR.MeterType.MeterK12
- ARDOUR.MeterType.MeterPeak0dB
- ARDOUR.MeterType.MeterMCP
∈ ARDOUR.MeterPoint
- ARDOUR.MeterPoint.MeterInput
- ARDOUR.MeterPoint.MeterPreFader
- ARDOUR.MeterPoint.MeterPostFader
- ARDOUR.MeterPoint.MeterOutput
- ARDOUR.MeterPoint.MeterCustom
∈ ARDOUR.Placement
- ARDOUR.Placement.PreFader
- ARDOUR.Placement.PostFader
∈ ARDOUR.MonitorChoice
- ARDOUR.MonitorChoice.MonitorAuto
- ARDOUR.MonitorChoice.MonitorInput
- ARDOUR.MonitorChoice.MonitorDisk
- ARDOUR.MonitorChoice.MonitorCue
∈ ARDOUR.MonitorState
- ARDOUR.MonitorState.MonitoringSilence
- ARDOUR.MonitorState.MonitoringInput
- ARDOUR.MonitorState.MonitoringDisk
- ARDOUR.MonitorState.MonitoringCue
∈ ARDOUR.FastWindOp
- ARDOUR.FastWindOp.FastWindOff
- ARDOUR.FastWindOp.FastWindVarispeed
- ARDOUR.FastWindOp.FastWindLocate
∈ ARDOUR.MuteMaster.MutePoint
- ARDOUR.MutePoint.PreFader
- ARDOUR.MutePoint.PostFader
- ARDOUR.MutePoint.Listen
- ARDOUR.MutePoint.Main
∈ ARDOUR.NoteMode
- ARDOUR.NoteMode.Sustained
- ARDOUR.NoteMode.Percussive
∈ ARDOUR.ChannelMode
- ARDOUR.ChannelMode.AllChannels
- ARDOUR.ChannelMode.FilterChannels
- ARDOUR.ChannelMode.ForceChannel
∈ ARDOUR.PortFlags
- ARDOUR.PortFlags.IsInput
- ARDOUR.PortFlags.IsOutput
- ARDOUR.PortFlags.IsPhysical
- ARDOUR.PortFlags.CanMonitor
- ARDOUR.PortFlags.IsTerminal
∈ ARDOUR.MidiPortFlags
- ARDOUR.MidiPortFlags.MidiPortMusic
- ARDOUR.MidiPortFlags.MidiPortControl
- ARDOUR.MidiPortFlags.MidiPortSelection
- ARDOUR.MidiPortFlags.MidiPortVirtual
∈ ARDOUR.PlaylistDisposition
- ARDOUR.PlaylistDisposition.CopyPlaylist
- ARDOUR.PlaylistDisposition.NewPlaylist
- ARDOUR.PlaylistDisposition.SharePlaylist
∈ ARDOUR.MidiTrackNameSource
- ARDOUR.MidiTrackNameSource.SMFTrackNumber
- ARDOUR.MidiTrackNameSource.SMFTrackName
- ARDOUR.MidiTrackNameSource.SMFFileAndTrackName
- ARDOUR.MidiTrackNameSource.SMFInstrumentName
∈ ARDOUR.MidiTempoMapDisposition
- ARDOUR.MidiTempoMapDisposition.SMFTempoIgnore
- ARDOUR.MidiTempoMapDisposition.SMFTempoUse
∈ ARDOUR.RegionEquivalence
- ARDOUR.RegionEquivalence.Exact
- ARDOUR.RegionEquivalence.Enclosed
- ARDOUR.RegionEquivalence.Overlap
- ARDOUR.RegionEquivalence.LayerTime
∈ ARDOUR.RegionPoint
- ARDOUR.RegionPoint.Start
- ARDOUR.RegionPoint.End
- ARDOUR.RegionPoint.SyncPoint
∈ ARDOUR.TrackMode
- ARDOUR.TrackMode.Normal
- ARDOUR.TrackMode.NonLayered
∈ ARDOUR.RecordMode
- ARDOUR.RecordMode.RecLayered
- ARDOUR.RecordMode.RecNonLayered
- ARDOUR.RecordMode.RecSoundOnSound
∈ ARDOUR.TransportRequestSource
- ARDOUR.TransportRequestSource.TRS_Engine
- ARDOUR.TransportRequestSource.TRS_UI
∈ ARDOUR.LocateTransportDisposition
- ARDOUR.LocateTransportDisposition.MustRoll
- ARDOUR.LocateTransportDisposition.MustStop
- ARDOUR.LocateTransportDisposition.RollIfAppropriate
∈ ARDOUR.CueBehavior
- ARDOUR.CueBehavior.FollowCues
- ARDOUR.CueBehavior.ImplicitlyIgnoreCues
∈ ARDOUR.Session.RouteGroupImportMode
- ARDOUR.RouteGroupImportMode.IgnoreRouteGroup
- ARDOUR.RouteGroupImportMode.UseRouteGroup
- ARDOUR.RouteGroupImportMode.CreateRouteGroup
∈ ARDOUR.WellKnownCtrl
- ARDOUR.WellKnownCtrl.EQ_Enable
- ARDOUR.WellKnownCtrl.EQ_Mode
- ARDOUR.WellKnownCtrl.EQ_BandGain
- ARDOUR.WellKnownCtrl.EQ_BandFreq
- ARDOUR.WellKnownCtrl.EQ_BandQ
- ARDOUR.WellKnownCtrl.EQ_BandShape
- ARDOUR.WellKnownCtrl.HPF_Enable
- ARDOUR.WellKnownCtrl.HPF_Freq
- ARDOUR.WellKnownCtrl.HPF_Slope
- ARDOUR.WellKnownCtrl.LPF_Enable
- ARDOUR.WellKnownCtrl.LPF_Freq
- ARDOUR.WellKnownCtrl.LPF_Slope
- ARDOUR.WellKnownCtrl.TapeDrive_Drive
- ARDOUR.WellKnownCtrl.TapeDrive_Mode
- ARDOUR.WellKnownCtrl.Comp_Enable
- ARDOUR.WellKnownCtrl.Comp_Mode
- ARDOUR.WellKnownCtrl.Comp_Threshold
- ARDOUR.WellKnownCtrl.Comp_Makeup
- ARDOUR.WellKnownCtrl.Comp_Ratio
- ARDOUR.WellKnownCtrl.Comp_Attack
- ARDOUR.WellKnownCtrl.Comp_Release
- ARDOUR.WellKnownCtrl.Comp_KeyFilterFreq
- ARDOUR.WellKnownCtrl.Comp_Lookahead
- ARDOUR.WellKnownCtrl.Comp_FastAttack
- ARDOUR.WellKnownCtrl.Comp_Mix
- ARDOUR.WellKnownCtrl.Comp_RMSPeak
- ARDOUR.WellKnownCtrl.Gate_Enable
- ARDOUR.WellKnownCtrl.Gate_Mode
- ARDOUR.WellKnownCtrl.Gate_Threshold
- ARDOUR.WellKnownCtrl.Gate_Ratio
- ARDOUR.WellKnownCtrl.Gate_Knee
- ARDOUR.WellKnownCtrl.Gate_Depth
- ARDOUR.WellKnownCtrl.Gate_Hysteresis
- ARDOUR.WellKnownCtrl.Gate_Hold
- ARDOUR.WellKnownCtrl.Gate_Attack
- ARDOUR.WellKnownCtrl.Gate_Release
- ARDOUR.WellKnownCtrl.Gate_KeyListen
- ARDOUR.WellKnownCtrl.Gate_KeyFilterEnable
- ARDOUR.WellKnownCtrl.Gate_KeyFilterFreq
- ARDOUR.WellKnownCtrl.Gate_Lookahead
- ARDOUR.WellKnownCtrl.Gate_FastAttack
- ARDOUR.WellKnownCtrl.DeEss_Enable
- ARDOUR.WellKnownCtrl.DeEss_HiShelf
- ARDOUR.WellKnownCtrl.DeEss_Threshold
- ARDOUR.WellKnownCtrl.DeEss_Attack
- ARDOUR.WellKnownCtrl.DeEss_EssDepth
- ARDOUR.WellKnownCtrl.DeEss_EssFreq
- ARDOUR.WellKnownCtrl.DeEss_EssSolo
- ARDOUR.WellKnownCtrl.DeEss_HiDepth
- ARDOUR.WellKnownCtrl.DeEss_HiFreq
- ARDOUR.WellKnownCtrl.DeEss_HiSolo
- ARDOUR.WellKnownCtrl.Denoise_Enable
- ARDOUR.WellKnownCtrl.Denoise_Threshold
- ARDOUR.WellKnownCtrl.Denoise_DepthLow
- ARDOUR.WellKnownCtrl.Denoise_DepthHigh
- ARDOUR.WellKnownCtrl.Master_Limiter_Enable
∈ ARDOUR.WellKnownData
- ARDOUR.WellKnownData.TapeDrive_Saturation
- ARDOUR.WellKnownData.Master_PhaseCorrelationMin
- ARDOUR.WellKnownData.Master_PhaseCorrelationMax
- ARDOUR.WellKnownData.Master_KMeter
- ARDOUR.WellKnownData.Master_LimiterRedux
- ARDOUR.WellKnownData.Comp_Meter
- ARDOUR.WellKnownData.Comp_Redux
- ARDOUR.WellKnownData.Gate_Meter
- ARDOUR.WellKnownData.Gate_Redux
- ARDOUR.WellKnownData.DeEss_Meter
- ARDOUR.WellKnownData.DeEss_EssRedux
- ARDOUR.WellKnownData.DeEss_HiRedux
- ARDOUR.WellKnownData.Denoise_Meter
- ARDOUR.WellKnownData.Denoise_ReduxLo
- ARDOUR.WellKnownData.Denoise_ReduxHi
∈ ARDOUR.SampleFormat
- ARDOUR.SampleFormat.Float
- ARDOUR.SampleFormat.Int24
- ARDOUR.SampleFormat.Int16
∈ ARDOUR.HeaderFormat
- ARDOUR.HeaderFormat.BWF
- ARDOUR.HeaderFormat.WAVE
- ARDOUR.HeaderFormat.WAVE64
- ARDOUR.HeaderFormat.CAF
- ARDOUR.HeaderFormat.AIFF
- ARDOUR.HeaderFormat.iXML
- ARDOUR.HeaderFormat.RF64
- ARDOUR.HeaderFormat.RF64_WAV
- ARDOUR.HeaderFormat.MBWF
- ARDOUR.HeaderFormat.FLAC
∈ ARDOUR.InsertMergePolicy
- ARDOUR.InsertMergePolicy.Reject
- ARDOUR.InsertMergePolicy.Relax
- ARDOUR.InsertMergePolicy.Replace
- ARDOUR.InsertMergePolicy.TruncateExisting
- ARDOUR.InsertMergePolicy.TruncateAddition
- ARDOUR.InsertMergePolicy.Extend
∈ ARDOUR.AFLPosition
- ARDOUR.AFLPosition.AFLFromBeforeProcessors
- ARDOUR.AFLPosition.AFLFromAfterProcessors
∈ ARDOUR.PFLPosition
- ARDOUR.PFLPosition.PFLFromBeforeProcessors
- ARDOUR.PFLPosition.PFLFromAfterProcessors
∈ ARDOUR.AutoReturnTarget
- ARDOUR.AutoReturnTarget.LastLocate
- ARDOUR.AutoReturnTarget.RangeSelectionStart
- ARDOUR.AutoReturnTarget.Loop
- ARDOUR.AutoReturnTarget.RegionSelectionStart
∈ ARDOUR.FadeShape
- ARDOUR.FadeShape.FadeLinear
- ARDOUR.FadeShape.FadeFast
- ARDOUR.FadeShape.FadeSlow
- ARDOUR.FadeShape.FadeConstantPower
- ARDOUR.FadeShape.FadeSymmetric
∈ ARDOUR.MarkerLocatePriority
- ARDOUR.MarkerLocatePriority.FirstMarker
- ARDOUR.MarkerLocatePriority.LastMarker
- ARDOUR.MarkerLocatePriority.NextMarker
∈ ARDOUR.LoopFadeChoice
- ARDOUR.LoopFadeChoice.NoLoopFade
- ARDOUR.LoopFadeChoice.EndLoopFade
- ARDOUR.LoopFadeChoice.BothLoopFade
- ARDOUR.LoopFadeChoice.XFadeLoop
∈ ARDOUR.DenormalModel
- ARDOUR.DenormalModel.DenormalNone
- ARDOUR.DenormalModel.DenormalFTZ
- ARDOUR.DenormalModel.DenormalDAZ
- ARDOUR.DenormalModel.DenormalFTZDAZ
∈ ARDOUR.BufferingPreset
- ARDOUR.BufferingPreset.Small
- ARDOUR.BufferingPreset.Medium
- ARDOUR.BufferingPreset.Large
- ARDOUR.BufferingPreset.Custom
∈ ARDOUR.EditMode
- ARDOUR.EditMode.Slide
- ARDOUR.EditMode.Ripple
- ARDOUR.EditMode.Lock
∈ ARDOUR.RippleMode
- ARDOUR.RippleMode.RippleSelected
- ARDOUR.RippleMode.RippleAll
- ARDOUR.RippleMode.RippleInterview
∈ ARDOUR.AutoConnectOption
- ARDOUR.AutoConnectOption.ManualConnect
- ARDOUR.AutoConnectOption.AutoConnectPhysical
- ARDOUR.AutoConnectOption.AutoConnectMaster
∈ ARDOUR.LayerModel
- ARDOUR.LayerModel.LaterHigher
- ARDOUR.LayerModel.Manual
∈ ARDOUR.ListenPosition
- ARDOUR.ListenPosition.AfterFaderListen
- ARDOUR.ListenPosition.PreFaderListen
∈ ARDOUR.MonitorModel
- ARDOUR.MonitorModel.HardwareMonitoring
- ARDOUR.MonitorModel.SoftwareMonitoring
- ARDOUR.MonitorModel.ExternalMonitoring
∈ ARDOUR.SnapTarget
- ARDOUR.SnapTarget.SnapTargetGrid
- ARDOUR.SnapTarget.SnapTargetOther
- ARDOUR.SnapTarget.SnapTargetBoth
∈ ARDOUR.RegionSelectionAfterSplit
- ARDOUR.SnapTarget.RegionSelectionAfterSplit.None
- ARDOUR.SnapTarget.RegionSelectionAfterSplit.NewlyCreatedLeft
- ARDOUR.SnapTarget.RegionSelectionAfterSplit.NewlyCreatedRight
- ARDOUR.SnapTarget.RegionSelectionAfterSplit.NewlyCreatedBoth
- ARDOUR.SnapTarget.RegionSelectionAfterSplit.Existing
- ARDOUR.SnapTarget.RegionSelectionAfterSplit.ExistingNewlyCreatedLeft
- ARDOUR.SnapTarget.RegionSelectionAfterSplit.ExistingNewlyCreatedRight
- ARDOUR.SnapTarget.RegionSelectionAfterSplit.ExistingNewlyCreatedBoth
∈ ARDOUR.RangeSelectionAfterSplit
- ARDOUR.SnapTarget.RangeSelectionAfterSplit.ClearSel
- ARDOUR.SnapTarget.RangeSelectionAfterSplit.PreserveSel
- ARDOUR.SnapTarget.RangeSelectionAfterSplit.ForceSel
∈ ARDOUR.TimeSelectionAfterSectionPaste
- ARDOUR.SnapTarget.TimeSelectionAfterSectionPaste.SectionSelectNoop
- ARDOUR.SnapTarget.TimeSelectionAfterSectionPaste.SectionSelectClear
- ARDOUR.SnapTarget.TimeSelectionAfterSectionPaste.SectionSelectRetain
- ARDOUR.SnapTarget.TimeSelectionAfterSectionPaste.SectionSelectRetainAndMovePlayhead
∈ ARDOUR.ScreenSaverMode
- ARDOUR.SnapTarget.ScreenSaverMode.InhibitNever
- ARDOUR.SnapTarget.ScreenSaverMode.InhibitWhileRecording
- ARDOUR.SnapTarget.ScreenSaverMode.InhibitAlways
∈ ARDOUR.AppleNSGLViewMode
- ARDOUR.SnapTarget.AppleNSGLViewMode.NSGLHiRes
- ARDOUR.SnapTarget.AppleNSGLViewMode.NSGLLoRes
- ARDOUR.SnapTarget.AppleNSGLViewMode.NSGLDisable
∈ ARDOUR.PluginGUIBehavior
- ARDOUR.SnapTarget.PluginGUIBehavior.PluginGUIHide
- ARDOUR.SnapTarget.PluginGUIBehavior.PluginGUIDestroyAny
- ARDOUR.SnapTarget.PluginGUIBehavior.PluginGUIDestroyVST
∈ ARDOUR.ClockDeltaMode
- ARDOUR.SnapTarget.ClockDeltaMode.NoDelta
- ARDOUR.SnapTarget.ClockDeltaMode.DeltaEditPoint
- ARDOUR.SnapTarget.ClockDeltaMode.DeltaOriginMarker
∈ ARDOUR.WaveformScale
- ARDOUR.SnapTarget.WaveformScale.Linear
- ARDOUR.SnapTarget.WaveformScale.Logarithmic
∈ ARDOUR.WaveformShape
- ARDOUR.SnapTarget.WaveformShape.Traditional
- ARDOUR.SnapTarget.WaveformShape.Rectified
∈ ARDOUR.MeterLineUp
- ARDOUR.SnapTarget.MeterLineUp.MeteringLineUp24
- ARDOUR.SnapTarget.MeterLineUp.MeteringLineUp20
- ARDOUR.SnapTarget.MeterLineUp.MeteringLineUp18
- ARDOUR.SnapTarget.MeterLineUp.MeteringLineUp15
- ARDOUR.SnapTarget.InputMeterLayout.MeteringLineUp15
∈ ARDOUR.InputMeterLayout
- ARDOUR.SnapTarget.InputMeterLayout.LayoutVertical
- ARDOUR.SnapTarget.InputMeterLayout.LayoutHorizontal
- ARDOUR.SnapTarget.InputMeterLayout.LayoutAutomatic
∈ ARDOUR.VUMeterStandard
- ARDOUR.SnapTarget.VUMeterStandard.MeteringVUfrench
- ARDOUR.SnapTarget.VUMeterStandard.MeteringVUamerican
- ARDOUR.SnapTarget.VUMeterStandard.MeteringVUstandard
- ARDOUR.SnapTarget.VUMeterStandard.MeteringVUeight
∈ ARDOUR.ShuttleUnits
- ARDOUR.SnapTarget.ShuttleUnits.Percentage
- ARDOUR.SnapTarget.ShuttleUnits.Semitones
∈ ARDOUR.SyncSource
- ARDOUR.SnapTarget.SyncSource.Engine
- ARDOUR.SnapTarget.SyncSource.MTC
- ARDOUR.SnapTarget.SyncSource.MIDIClock
- ARDOUR.SnapTarget.SyncSource.LTC
∈ ARDOUR.TracksAutoNamingRule
- ARDOUR.SnapTarget.TracksAutoNamingRule.UseDefaultNames
- ARDOUR.SnapTarget.TracksAutoNamingRule.NameAfterDriver
∈ ARDOUR.VST3KnobMode
- ARDOUR.SnapTarget.VST3KnobMode.VST3KnobPluginDefault
- ARDOUR.SnapTarget.VST3KnobMode.VST3KnobCircularMode
- ARDOUR.SnapTarget.VST3KnobMode.VST3KnobRelativCircularMode
- ARDOUR.SnapTarget.VST3KnobMode.VST3KnobLinearMode
∈ ARDOUR.RecordState
- ARDOUR.Session.RecordState.Disabled
- ARDOUR.Session.RecordState.Enabled
- ARDOUR.Session.RecordState.Recording
∈ ARDOUR.Location.Flags
- ARDOUR.LocationFlags.IsMark
- ARDOUR.LocationFlags.IsAutoPunch
- ARDOUR.LocationFlags.IsAutoLoop
- ARDOUR.LocationFlags.IsHidden
- ARDOUR.LocationFlags.IsCDMarker
- ARDOUR.LocationFlags.IsRangeMarker
- ARDOUR.LocationFlags.IsSessionRange
- ARDOUR.LocationFlags.IsSkip
- ARDOUR.LocationFlags.IsSkipping
- ARDOUR.LocationFlags.IsClockOrigin
- ARDOUR.LocationFlags.IsXrun
- ARDOUR.LocationFlags.IsCueMarker
- ARDOUR.LocationFlags.IsSection
- ARDOUR.LocationFlags.IsScene
∈ Glib.FileTest
- ARDOUR.LuaAPI.FileTest.IsRegular
- ARDOUR.LuaAPI.FileTest.IsSymlink
- ARDOUR.LuaAPI.FileTest.IsDir
- ARDOUR.LuaAPI.FileTest.IsExecutable
- ARDOUR.LuaAPI.FileTest.Exists
∈ ARDOUR.DSP.Biquad.Type
- ARDOUR.DSP.BiquadType.LowPass
- ARDOUR.DSP.BiquadType.HighPass
- ARDOUR.DSP.BiquadType.BandPassSkirt
- ARDOUR.DSP.BiquadType.BandPass0dB
- ARDOUR.DSP.BiquadType.Notch
- ARDOUR.DSP.BiquadType.AllPass
- ARDOUR.DSP.BiquadType.Peaking
- ARDOUR.DSP.BiquadType.LowShelf
- ARDOUR.DSP.BiquadType.HighShelf
- ARDOUR.DSP.BiquadType.MatchedLowPass
- ARDOUR.DSP.BiquadType.MatchedHighPass
- ARDOUR.DSP.BiquadType.MatchedBandPass0dB
- ARDOUR.DSP.BiquadType.MatchedPeaking
∈ ARDOUR.DSP.Generator.Type
- ARDOUR.DSP.NoiseType.UniformWhiteNoise
- ARDOUR.DSP.NoiseType.GaussianWhiteNoise
- ARDOUR.DSP.NoiseType.PinkNoise
∈ ARDOUR.DSP.LTC_TV_STANDARD
- ARDOUR.DSP.LTC_TV_STANDARD.LTC_TV_525_60
- ARDOUR.DSP.LTC_TV_STANDARD.LTC_TV_625_50
- ARDOUR.DSP.LTC_TV_STANDARD.LTC_TV_1125_60
- ARDOUR.DSP.LTC_TV_STANDARD.LTC_TV_FILM_24
∈ ARDOUR.DSP.Convolver.IRChannelConfig
- ARDOUR.DSP.IRChannelConfig.Mono
- ARDOUR.DSP.IRChannelConfig.MonoToStereo
- ARDOUR.DSP.IRChannelConfig.Stereo
∈ Cairo.LineCap
- Cairo.LineCap.Butt
- Cairo.LineCap.Round
- Cairo.LineCap.Square
∈ Cairo.LineJoin
- Cairo.LineJoin.Miter
- Cairo.LineJoin.Round
- Cairo.LineJoin.Bevel
∈ Cairo.Operator
- Cairo.Operator.Clear
- Cairo.Operator.Source
- Cairo.Operator.Over
- Cairo.Operator.Add
∈ Cairo.Format
- Cairo.Format.ARGB32
- Cairo.Format.RGB24
∈ Pango.EllipsizeMode
- Cairo.EllipsizeMode.None
- Cairo.EllipsizeMode.Start
- Cairo.EllipsizeMode.Middle
- Cairo.EllipsizeMode.End
∈ Pango.Alignment
- Cairo.Alignment.Left
- Cairo.Alignment.Center
- Cairo.Alignment.Right
∈ Pango.WrapMode
- Cairo.WrapMode.Word
- Cairo.WrapMode.Char
- Cairo.WrapMode.WordChar
∈ LuaDialog.Message.MessageType
- LuaDialog.MessageType.Info
- LuaDialog.MessageType.Warning
- LuaDialog.MessageType.Question
- LuaDialog.MessageType.Error
∈ LuaDialog.Message.ButtonType
- LuaDialog.ButtonType.OK
- LuaDialog.ButtonType.Close
- LuaDialog.ButtonType.Cancel
- LuaDialog.ButtonType.Yes_No
- LuaDialog.ButtonType.OK_Cancel
∈ LuaDialog.Response
- LuaDialog.Response.OK
- LuaDialog.Response.Cancel
- LuaDialog.Response.Close
- LuaDialog.Response.Yes
- LuaDialog.Response.No
- LuaDialog.Response.None
∈ Keyboard
- Keyboard.PrimaryModifier
- Keyboard.SecondaryModifier
- Keyboard.TertiaryModifier
- Keyboard.Level4Modifier
- Keyboard.CapsLockModifier
∈ RouteDialogs.InsertAt
- ArdourUI.InsertAt.BeforeSelection
- ArdourUI.InsertAt.AfterSelection
- ArdourUI.InsertAt.First
- ArdourUI.InsertAt.Last
∈ ArdourMarker.Type
- ArdourUI.MarkerType.Mark
- ArdourUI.MarkerType.Tempo
- ArdourUI.MarkerType.Meter
- ArdourUI.MarkerType.SessionStart
- ArdourUI.MarkerType.SessionEnd
- ArdourUI.MarkerType.RangeStart
- ArdourUI.MarkerType.RangeEnd
- ArdourUI.MarkerType.LoopStart
- ArdourUI.MarkerType.LoopEnd
- ArdourUI.MarkerType.PunchIn
- ArdourUI.MarkerType.PunchOut
∈ ARDOUR.SelectionOperation
- ArdourUI.SelectionOp.Toggle
- ArdourUI.SelectionOp.Set
- ArdourUI.SelectionOp.Extend
- ArdourUI.SelectionOp.Add
∈ TimeAxisView.TrackHeightMode
- ArdourUI.TrackHeightMode.OnlySelf
- ArdourUI.TrackHeightMode.TotalHeight
- ArdourUI.TrackHeightMode.HeightPerLane,
∈ Gtk.WindowPosition
- ArdourUI.Gtk.WindowPosition.None
- ArdourUI.Gtk.WindowPosition.Center
- ArdourUI.Gtk.WindowPosition.Mouse
- ArdourUI.Gtk.WindowPosition.CenterAlways
- ArdourUI.Gtk.WindowPosition.CenterOnParent
∈ Editing.GridType
- Editing.GridTypeNone
- Editing.GridTypeBar
- Editing.GridTypeBeat
- Editing.GridTypeBeatDiv2
- Editing.GridTypeBeatDiv4
- Editing.GridTypeBeatDiv8
- Editing.GridTypeBeatDiv16
- Editing.GridTypeBeatDiv32
- Editing.GridTypeBeatDiv3
- Editing.GridTypeBeatDiv6
- Editing.GridTypeBeatDiv12
- Editing.GridTypeBeatDiv24
- Editing.GridTypeBeatDiv5
- Editing.GridTypeBeatDiv10
- Editing.GridTypeBeatDiv20
- Editing.GridTypeBeatDiv7
- Editing.GridTypeBeatDiv14
- Editing.GridTypeBeatDiv28
- Editing.GridTypeTimecode
- Editing.GridTypeMinSec
- Editing.GridTypeCDFrame
∈ Editing.SnapMode
- Editing.SnapOff
- Editing.SnapNormal
- Editing.SnapMagnetic
∈ Editing.MouseMode
- Editing.MouseObject
- Editing.MouseRange
- Editing.MouseCut
- Editing.MouseTimeFX
- Editing.MouseGrid
- Editing.MouseDraw
- Editing.MouseContent
∈ Editing.ZoomFocus
- Editing.ZoomFocusLeft
- Editing.ZoomFocusRight
- Editing.ZoomFocusCenter
- Editing.ZoomFocusPlayhead
- Editing.ZoomFocusMouse
- Editing.ZoomFocusEdit
∈ Editing.DisplayControl
- Editing.FollowPlayhead
- Editing.ShowMeasures
- Editing.ShowWaveforms
- Editing.ShowWaveformsRecording
∈ Editing.ImportMode
- Editing.ImportAsRegion
- Editing.ImportToTrack
- Editing.ImportAsTrack
- Editing.ImportAsTrigger
∈ Editing.ImportPosition
- Editing.ImportAtTimestamp
- Editing.ImportAtEditPoint
- Editing.ImportAtPlayhead
- Editing.ImportAtStart
∈ Editing.ImportDisposition
- Editing.ImportDistinctFiles
- Editing.ImportMergeFiles
- Editing.ImportSerializeFiles
- Editing.ImportDistinctChannels
∈ Editing.NoteNameDisplay
- Editing.Always
- Editing.WithMIDNAM
- Editing.Never
∈ Editing.RegionEditDisposition
- Editing.BottomPaneOnly
- Editing.OpenBottomPane
- Editing.PreferBottomPane
- Editing.NeverBottomPane
∈ LuaSignal.LuaSignal
- LuaSignal.ConfigChanged
- LuaSignal.EngineRunning
- LuaSignal.EngineStopped
- LuaSignal.EngineHalted
- LuaSignal.EngineDeviceListChanged
- LuaSignal.BufferSizeChanged
- LuaSignal.SampleRateChanged
- LuaSignal.FeedbackDetected
- LuaSignal.SuccessfulGraphSort
- LuaSignal.StartTimeChanged
- LuaSignal.EndTimeChanged
- LuaSignal.Exported
- LuaSignal.Change
- LuaSignal.SessionConfigChanged
- LuaSignal.TransportStateChange
- LuaSignal.DirtyChanged
- LuaSignal.StateSaved
- LuaSignal.Xrun
- LuaSignal.TransportLooped
- LuaSignal.SoloActive
- LuaSignal.SoloChanged
- LuaSignal.IsolatedChanged
- LuaSignal.MonitorChanged
- LuaSignal.RecordStateChanged
- LuaSignal.RecordArmStateChanged
- LuaSignal.AudioLoopLocationChanged
- LuaSignal.AudioPunchLocationChanged
- LuaSignal.LocationsModified
- LuaSignal.AuditionActive
- LuaSignal.BundleAddedOrRemoved
- LuaSignal.PositionChanged
- LuaSignal.Located
- LuaSignal.RoutesReconnected
- LuaSignal.RouteAdded
- LuaSignal.RouteGroupPropertyChanged
- LuaSignal.RouteAddedToRouteGroup
- LuaSignal.RouteRemovedFromRouteGroup
- LuaSignal.StepEditStatusChange
- LuaSignal.RouteGroupAdded
- LuaSignal.RouteGroupRemoved
- LuaSignal.RouteGroupsReordered
- LuaSignal.PluginListChanged
- LuaSignal.PluginStatusChanged
- LuaSignal.DiskOverrun
- LuaSignal.DiskUnderrun
- LuaSignal.RegionsPropertyChanged
- LuaSignal.LuaTimerS
- LuaSignal.LuaTimerDS
- LuaSignal.SetSession
- LuaSignal.SelectionChanged
Class Index
- ARDOUR
- ARDOUR:Amp
- ARDOUR:AnyTime
- ARDOUR:AsyncMIDIPort
- ARDOUR:AudioBackend
- ARDOUR:AudioBackendInfo
- ARDOUR:AudioBuffer
- ARDOUR:AudioEngine
- ARDOUR:AudioPlaylist
- ARDOUR:AudioPort
- ARDOUR:AudioPortMeters
- ARDOUR:AudioRegion
- ARDOUR:AudioRom
- ARDOUR:AudioSource
- ARDOUR:AudioTrack
- ARDOUR:AudioTrackList
- ARDOUR:Automatable
- ARDOUR:AutomatableSequence
- ARDOUR:AutomationControl
- ARDOUR:AutomationList
- ARDOUR:AutomationTypeSet
- ARDOUR:BackendVector
- ARDOUR:BufferSet
- ARDOUR:Bundle
- ARDOUR:BundleListPtr
- ARDOUR:ChanCount
- ARDOUR:ChanMapping
- ARDOUR:ConstBundleListPtr
- ARDOUR:ConstRouteListPtr
- ARDOUR:ControlList
- ARDOUR:ControlListPtr
- ARDOUR:ControlProtocolInfo
- ARDOUR:ControlProtocolInfoList
- ARDOUR:ControlProtocolManager
- ARDOUR:ControllableSet
- ARDOUR.DSP
- ARDOUR:DSP:Biquad
- ARDOUR:DSP:Convolution
- ARDOUR:DSP:Convolver
- ARDOUR:DSP:DspShm
- ARDOUR:DSP:FFTSpectrum
- ARDOUR:DSP:Generator
- ARDOUR:DSP:IRSettings
- ARDOUR:DSP:LTCReader
- ARDOUR:DSP:LowPass
- ARDOUR:DSP:StereoCorrelation
- ARDOUR:DataType
- ARDOUR:DelayLine
- ARDOUR:Delivery
- ARDOUR:DeviceStatus
- ARDOUR:DeviceStatusVector
- ARDOUR:DiskIOProcessor
- ARDOUR:DiskReader
- ARDOUR:DiskWriter
- ARDOUR:EventList
- ARDOUR:EventPtrList
- ARDOUR:FileSource
- ARDOUR:FluidSynth
- ARDOUR:GainControl
- ARDOUR:IDMap
- ARDOUR:IDNameMap
- ARDOUR:IO
- ARDOUR:IOProcessor
- ARDOUR:InterThreadInfo
- ARDOUR:InternalReturn
- ARDOUR:InternalSend
- ARDOUR:LatencyRange
- ARDOUR:Latent
- ARDOUR:Location
- ARDOUR:LocationList
- ARDOUR:Locations
- ARDOUR.LuaAPI
- ARDOUR:LuaAPI:Rubberband
- ARDOUR:LuaAPI:Vamp
- ARDOUR:LuaOSC:Address
- ARDOUR:LuaProc
- ARDOUR:LuaTableRef
- ARDOUR:MIDIPortMeters
- ARDOUR:MPGainControl
- ARDOUR:MPToggleControl
- ARDOUR:MidiBuffer
- ARDOUR:MidiModel
- ARDOUR:MidiModel:DiffCommand
- ARDOUR:MidiModel:NoteDiffCommand
- ARDOUR:MidiPlaylist
- ARDOUR:MidiPort
- ARDOUR:MidiRegion
- ARDOUR:MidiSource
- ARDOUR:MidiTrack
- ARDOUR:MidiTrackList
- ARDOUR:MixerScene
- ARDOUR:MonitorControl
- ARDOUR:MonitorProcessor
- ARDOUR:MuteControl
- ARDOUR:NotePtrList
- ARDOUR:OwnedPropertyList
- ARDOUR:PDC
- ARDOUR:PIControl
- ARDOUR:PannerShell
- ARDOUR:ParameterDescriptor
- ARDOUR:ParameterList
- ARDOUR:PatchChangePtrList
- ARDOUR:PeakMeter
- ARDOUR:PhaseControl
- ARDOUR:Playlist
- ARDOUR:PlaylistList
- ARDOUR:Plugin
- ARDOUR:Plugin:IOPortDescription
- ARDOUR:PluginControl
- ARDOUR:PluginInfo
- ARDOUR:PluginInfoList
- ARDOUR:PluginInsert
- ARDOUR:PluginPropertyControl
- ARDOUR.PluginType
- ARDOUR:PolarityProcessor
- ARDOUR:Port
- ARDOUR:PortEngine
- ARDOUR:PortList
- ARDOUR:PortManager
- ARDOUR:PortSet
- ARDOUR:PresentationInfo
- ARDOUR:PresetRecord
- ARDOUR:PresetVector
- ARDOUR:Processor
- ARDOUR:ProcessorList
- ARDOUR:ProcessorVector
- ARDOUR:Properties:BoolProperty
- ARDOUR:Properties:FloatProperty
- ARDOUR:Properties:SamplePosProperty
- ARDOUR:Properties:StringProperty
- ARDOUR:Properties:TimeCntProperty
- ARDOUR:Properties:TimePosProperty
- ARDOUR:PropertyChange
- ARDOUR:PropertyList
- ARDOUR:RCConfiguration
- ARDOUR:RawMidiParser
- ARDOUR:ReadOnlyControl
- ARDOUR:Readable
- ARDOUR:ReadableList
- ARDOUR:Region
- ARDOUR:RegionFactory
- ARDOUR:RegionFxPlugin
- ARDOUR:RegionList
- ARDOUR:RegionListPtr
- ARDOUR:RegionMap
- ARDOUR:RegionVector
- ARDOUR:Return
- ARDOUR:Route
- ARDOUR:Route:ProcessorStreams
- ARDOUR:RouteGroup
- ARDOUR:RouteGroupList
- ARDOUR:RouteList
- ARDOUR:RouteListPtr
- ARDOUR:RouteStateMap
- ARDOUR:Send
- ARDOUR:Session
- ARDOUR:SessionConfiguration
- ARDOUR:SessionObject
- ARDOUR:SessionObjectPtr
- ARDOUR:SessionPlaylists
- ARDOUR:SideChain
- ARDOUR:SimpleExport
- ARDOUR:Slavable
- ARDOUR:SlavableAutomationControl
- ARDOUR:SoloControl
- ARDOUR:SoloIsolateControl
- ARDOUR:SoloSafeControl
- ARDOUR:Source
- ARDOUR:SourceList
- ARDOUR:Stripable
- ARDOUR:StripableList
- ARDOUR:SurroundPannable
- ARDOUR:SurroundReturn
- ARDOUR:SurroundSend
- ARDOUR:TimelineRange
- ARDOUR:TimelineRangeList
- ARDOUR:Track
- ARDOUR:UnknownProcessor
- ARDOUR:UserBundle
- ARDOUR:VCA
- ARDOUR:VCAList
- ARDOUR:VCAManager
- ARDOUR:VCAVector
- ARDOUR:WeakAudioSourceList
- ARDOUR:WeakRouteList
- ARDOUR:WeakSourceList
- ARDOUR:XrunPositions
- ArdourUI
- ArdourUI:ARDOUR::AutomationListList
- ArdourUI:ArdourMarker
- ArdourUI:ArdourMarkerList
- ArdourUI:AutomationSelection
- ArdourUI:AxisView
- ArdourUI:ControlPoint
- ArdourUI:ControlPointList
- ArdourUI:EditingContext
- ArdourUI:Editor
- ArdourUI:MarkerSelection
- ArdourUI:MidiTimeAxisView
- ArdourUI:PointSelection
- ArdourUI:RegionSelection
- ArdourUI:RegionView
- ArdourUI:RouteTimeAxisView
- ArdourUI:RouteUI
- ArdourUI:Selectable
- ArdourUI:Selection
- ArdourUI:SelectionList
- ArdourUI:StripableTimeAxisView
- ArdourUI:TimeAxisView
- ArdourUI:TimeAxisViewItem
- ArdourUI:TimeSelection
- ArdourUI:TrackSelection
- ArdourUI:TrackViewList
- ArdourUI:TrackViewStdList
- ArdourUI:UIConfiguration
- C:ByteArray
- C:ByteVector
- C:DoubleArray
- C:DoubleVector
- C:FloatArray
- C:FloatArrayVector
- C:FloatVector
- C:Int64List
- C:IntArray
- C:IntVector
- C:StringList
- C:StringVector
- Cairo:Context
- Cairo:ImageSurface
- Cairo:PangoLayout
- Evoral:Control
- Evoral:ControlEvent
- Evoral:ControlList
- Evoral:ControlSet
- Evoral:Event
- Evoral:EventPtr
- Evoral:NotePtr
- Evoral:Parameter
- Evoral:ParameterDescriptor
- Evoral:PatchChangePtr
- Evoral:Range
- Evoral:Sequence
- Keyboard
- LuaDialog:Dialog
- LuaDialog:Message
- LuaDialog:ProgressWindow
- LuaSignal:Set
- PBD
- PBD:Command
- PBD:Configuration
- PBD:Controllable
- PBD:HistoryOwner
- PBD:ID
- PBD:IdVector
- PBD:Progress
- PBD:RingBuffer8
- PBD:RingBufferF
- PBD:RingBufferI
- PBD:Stateful
- PBD:StatefulDestructible
- PBD:StatefulDestructiblePtr
- PBD:StatefulDiffCommand
- PBD:StatefulPtr
- PBD:XMLNode
- Temporal
- Temporal:BBT_Argument
- Temporal:BBT_Offset
- Temporal:BBT_TIME
- Temporal:Beats
- Temporal:Meter
- Temporal:MeterPoint
- Temporal:Point
- Temporal:Tempo
- Temporal:TempoMap
- Temporal:TempoMapPoint
- Temporal:TempoMapPoints
- Temporal:TempoMetric
- Temporal:TempoPoint
- Temporal:ratio
- Temporal:timecnt_t
- Temporal:timepos_t
- Timecode:Time
- Vamp:Plugin
- Vamp:Plugin:Feature
- Vamp:Plugin:FeatureList
- Vamp:Plugin:FeatureSet
- Vamp:Plugin:OutputDescriptor
- Vamp:Plugin:OutputList
- Vamp:PluginBase
- Vamp:PluginBase:ParameterDescriptor
- Vamp:PluginBase:ParameterList
- Vamp:RealTime
- os
Appendix
List of Menu Actions
Menu actions
Every single menu item in Ardour's GUI is accessible by control surfaces or scripts.
The list below shows all available values of action-name as of Ardour 7.1. You can get the current list at any time by running Ardour with the -A flag.
| Action Name | Menu Name |
|---|---|
| Common/Hide | Hide |
| Common/NewMIDITracer | MIDI Tracer |
| Common/Quit | Quit |
| Common/Save | Save |
| Common/ToggleMaximalEditor | Maximise Editor Space |
| Common/ToggleMaximalMixer | Maximise Mixer Space |
| Common/ToggleRecordEnableTrack1 | Toggle Record Enable Track 1 |
| Common/ToggleRecordEnableTrack10 | Toggle Record Enable Track 10 |
| Common/ToggleRecordEnableTrack11 | Toggle Record Enable Track 11 |
| Common/ToggleRecordEnableTrack12 | Toggle Record Enable Track 12 |
| Common/ToggleRecordEnableTrack13 | Toggle Record Enable Track 13 |
| Common/ToggleRecordEnableTrack14 | Toggle Record Enable Track 14 |
| Common/ToggleRecordEnableTrack15 | Toggle Record Enable Track 15 |
| Common/ToggleRecordEnableTrack16 | Toggle Record Enable Track 16 |
| Common/ToggleRecordEnableTrack17 | Toggle Record Enable Track 17 |
| Common/ToggleRecordEnableTrack18 | Toggle Record Enable Track 18 |
| Common/ToggleRecordEnableTrack19 | Toggle Record Enable Track 19 |
| Common/ToggleRecordEnableTrack2 | Toggle Record Enable Track 2 |
| Common/ToggleRecordEnableTrack20 | Toggle Record Enable Track 20 |
| Common/ToggleRecordEnableTrack21 | Toggle Record Enable Track 21 |
| Common/ToggleRecordEnableTrack22 | Toggle Record Enable Track 22 |
| Common/ToggleRecordEnableTrack23 | Toggle Record Enable Track 23 |
| Common/ToggleRecordEnableTrack24 | Toggle Record Enable Track 24 |
| Common/ToggleRecordEnableTrack25 | Toggle Record Enable Track 25 |
| Common/ToggleRecordEnableTrack26 | Toggle Record Enable Track 26 |
| Common/ToggleRecordEnableTrack27 | Toggle Record Enable Track 27 |
| Common/ToggleRecordEnableTrack28 | Toggle Record Enable Track 28 |
| Common/ToggleRecordEnableTrack29 | Toggle Record Enable Track 29 |
| Common/ToggleRecordEnableTrack3 | Toggle Record Enable Track 3 |
| Common/ToggleRecordEnableTrack30 | Toggle Record Enable Track 30 |
| Common/ToggleRecordEnableTrack31 | Toggle Record Enable Track 31 |
| Common/ToggleRecordEnableTrack32 | Toggle Record Enable Track 32 |
| Common/ToggleRecordEnableTrack4 | Toggle Record Enable Track 4 |
| Common/ToggleRecordEnableTrack5 | Toggle Record Enable Track 5 |
| Common/ToggleRecordEnableTrack6 | Toggle Record Enable Track 6 |
| Common/ToggleRecordEnableTrack7 | Toggle Record Enable Track 7 |
| Common/ToggleRecordEnableTrack8 | Toggle Record Enable Track 8 |
| Common/ToggleRecordEnableTrack9 | Toggle Record Enable Track 9 |
| Common/add-location-from-playhead | Add Mark from Playhead |
| Common/addExistingAudioFiles | Import |
| Common/alt-finish-range | Finish Range |
| Common/alt-start-range | Start Range |
| Common/alternate-add-location-from-playhead | Add Mark from Playhead |
| Common/alternate-jump-backward-to-mark | Jump to Previous Mark |
| Common/alternate-jump-forward-to-mark | Jump to Next Mark |
| Common/alternate-remove-location-from-playhead | Remove Mark at Playhead |
| Common/attach-editor | Attach |
| Common/attach-mixer | Attach |
| Common/attach-preferences | Attach |
| Common/attach-recorder | Attach |
| Common/attach-trigger | Attach |
| Common/change-editor-visibility | Change |
| Common/change-mixer-visibility | Change |
| Common/change-preferences-visibility | Change |
| Common/change-recorder-visibility | Change |
| Common/change-trigger-visibility | Change |
| Common/chat | Chat |
| Common/deselect-all | Deselect All |
| Common/detach-editor | Detach |
| Common/detach-mixer | Detach |
| Common/detach-preferences | Detach |
| Common/detach-recorder | Detach |
| Common/detach-trigger | Detach |
| Common/finish-loop-range | Finish Loop Range |
| Common/finish-punch-range | Finish Punch Range |
| Common/finish-range | Finish Range |
| Common/finish-range-from-playhead | Finish Range from Playhead |
| Common/forums | User Forums |
| Common/hide-editor | Hide |
| Common/hide-mixer | Hide |
| Common/hide-preferences | Hide |
| Common/hide-recorder | Hide |
| Common/hide-trigger | Hide |
| Common/howto-report | How to Report a Bug |
| Common/invert-selection | Invert Selection |
| Common/jump-backward-to-mark | Jump to Previous Mark |
| Common/jump-forward-to-mark | Jump to Next Mark |
| Common/jump-to-loop-end | Jump to Loop End |
| Common/jump-to-loop-start | Jump to Loop Start |
| Common/key-change-editor-visibility | Change |
| Common/key-change-mixer-visibility | Change |
| Common/key-change-preferences-visibility | Change |
| Common/key-change-recorder-visibility | Change |
| Common/key-change-trigger-visibility | Change |
| Common/menu-show-preferences | Preferences |
| Common/next-tab | Next Tab |
| Common/nudge-next-backward | Nudge Next Earlier |
| Common/nudge-next-forward | Nudge Next Later |
| Common/nudge-playhead-backward | Nudge Playhead Backward |
| Common/nudge-playhead-forward | Nudge Playhead Forward |
| Common/playhead-backward-to-grid | Playhead to Previous Grid |
| Common/playhead-forward-to-grid | Playhead to Next Grid |
| Common/previous-tab | Previous Tab |
| Common/reference | Reference |
| Common/remove-location-from-playhead | Remove Mark at Playhead |
| Common/select-all-tracks | Select All Tracks |
| Common/select-all-visible-lanes | Select All Visible Lanes |
| Common/set-session-end-from-playhead | Set Session End from Playhead |
| Common/set-session-start-from-playhead | Set Session Start from Playhead |
| Common/show-editor | Show Editor |
| Common/show-mixer | Show Mixer |
| Common/show-preferences | Show |
| Common/show-recorder | Show Recorder |
| Common/show-trigger | Show Cues |
| Common/start-loop-range | Start Loop Range |
| Common/start-punch-range | Start Punch Range |
| Common/start-range | Start Range |
| Common/start-range-from-playhead | Start Range from Playhead |
| Common/toggle-editor-and-mixer | Toggle Editor & Mixer |
| Common/toggle-location-at-playhead | Toggle Mark at Playhead |
| Common/toggle-meterbridge | Meterbridge |
| Common/tracker | Report a Bug |
| Common/tutorial | Tutorial |
| Common/website | Website |
| Common/website-dev | Development |
| Cues/trigger-cue-0 | Trigger Cue A |
| Cues/trigger-cue-1 | Trigger Cue B |
| Cues/trigger-cue-10 | Trigger Cue K |
| Cues/trigger-cue-11 | Trigger Cue L |
| Cues/trigger-cue-12 | Trigger Cue M |
| Cues/trigger-cue-13 | Trigger Cue N |
| Cues/trigger-cue-14 | Trigger Cue O |
| Cues/trigger-cue-15 | Trigger Cue P |
| Cues/trigger-cue-2 | Trigger Cue C |
| Cues/trigger-cue-3 | Trigger Cue D |
| Cues/trigger-cue-4 | Trigger Cue E |
| Cues/trigger-cue-5 | Trigger Cue F |
| Cues/trigger-cue-6 | Trigger Cue G |
| Cues/trigger-cue-7 | Trigger Cue H |
| Cues/trigger-cue-8 | Trigger Cue I |
| Cues/trigger-cue-9 | Trigger Cue J |
| DrawChannel/draw-channel-1 | 1 |
| DrawChannel/draw-channel-10 | 10 |
| DrawChannel/draw-channel-11 | 11 |
| DrawChannel/draw-channel-12 | 12 |
| DrawChannel/draw-channel-13 | 13 |
| DrawChannel/draw-channel-14 | 14 |
| DrawChannel/draw-channel-15 | 15 |
| DrawChannel/draw-channel-16 | 16 |
| DrawChannel/draw-channel-2 | 2 |
| DrawChannel/draw-channel-3 | 3 |
| DrawChannel/draw-channel-4 | 4 |
| DrawChannel/draw-channel-5 | 5 |
| DrawChannel/draw-channel-6 | 6 |
| DrawChannel/draw-channel-7 | 7 |
| DrawChannel/draw-channel-8 | 8 |
| DrawChannel/draw-channel-9 | 9 |
| DrawChannel/draw-channel-auto | Auto |
| DrawLength/draw-length-asixteenthbeat | 1/64 Note |
| DrawLength/draw-length-auto | Auto |
| DrawLength/draw-length-bar | Bar |
| DrawLength/draw-length-beat | 1/4 Note |
| DrawLength/draw-length-eighths | 1/32 Note |
| DrawLength/draw-length-fifths | 1/5 (8th quintuplet) |
| DrawLength/draw-length-fourteenths | 1/14 (16th septuplet) |
| DrawLength/draw-length-halves | 1/8 Note |
| DrawLength/draw-length-quarters | 1/16 Note |
| DrawLength/draw-length-sevenths | 1/7 (8th septuplet) |
| DrawLength/draw-length-sixths | 1/6 (16th triplet) |
| DrawLength/draw-length-tenths | 1/10 (16th quintuplet) |
| DrawLength/draw-length-thirds | 1/3 (8th triplet) |
| DrawLength/draw-length-thirtyseconds | 1/128 Note |
| DrawLength/draw-length-twelfths | 1/12 (32nd triplet) |
| DrawLength/draw-length-twentieths | 1/20 (32nd quintuplet) |
| DrawLength/draw-length-twentyeighths | 1/28 (32nd septuplet) |
| DrawLength/draw-length-twentyfourths | 1/24 (64th triplet) |
| DrawVelocity/draw-velocity-1 | 1 |
| DrawVelocity/draw-velocity-10 | 10 |
| DrawVelocity/draw-velocity-100 | 100 |
| DrawVelocity/draw-velocity-101 | 101 |
| DrawVelocity/draw-velocity-102 | 102 |
| DrawVelocity/draw-velocity-103 | 103 |
| DrawVelocity/draw-velocity-104 | 104 |
| DrawVelocity/draw-velocity-105 | 105 |
| DrawVelocity/draw-velocity-106 | 106 |
| DrawVelocity/draw-velocity-107 | 107 |
| DrawVelocity/draw-velocity-108 | 108 |
| DrawVelocity/draw-velocity-109 | 109 |
| DrawVelocity/draw-velocity-11 | 11 |
| DrawVelocity/draw-velocity-110 | 110 |
| DrawVelocity/draw-velocity-111 | 111 |
| DrawVelocity/draw-velocity-112 | 112 |
| DrawVelocity/draw-velocity-113 | 113 |
| DrawVelocity/draw-velocity-114 | 114 |
| DrawVelocity/draw-velocity-115 | 115 |
| DrawVelocity/draw-velocity-116 | 116 |
| DrawVelocity/draw-velocity-117 | 117 |
| DrawVelocity/draw-velocity-118 | 118 |
| DrawVelocity/draw-velocity-119 | 119 |
| DrawVelocity/draw-velocity-12 | 12 |
| DrawVelocity/draw-velocity-120 | 120 |
| DrawVelocity/draw-velocity-121 | 121 |
| DrawVelocity/draw-velocity-122 | 122 |
| DrawVelocity/draw-velocity-123 | 123 |
| DrawVelocity/draw-velocity-124 | 124 |
| DrawVelocity/draw-velocity-125 | 125 |
| DrawVelocity/draw-velocity-126 | 126 |
| DrawVelocity/draw-velocity-127 | 127 |
| DrawVelocity/draw-velocity-13 | 13 |
| DrawVelocity/draw-velocity-14 | 14 |
| DrawVelocity/draw-velocity-15 | 15 |
| DrawVelocity/draw-velocity-16 | 16 |
| DrawVelocity/draw-velocity-17 | 17 |
| DrawVelocity/draw-velocity-18 | 18 |
| DrawVelocity/draw-velocity-19 | 19 |
| DrawVelocity/draw-velocity-2 | 2 |
| DrawVelocity/draw-velocity-20 | 20 |
| DrawVelocity/draw-velocity-21 | 21 |
| DrawVelocity/draw-velocity-22 | 22 |
| DrawVelocity/draw-velocity-23 | 23 |
| DrawVelocity/draw-velocity-24 | 24 |
| DrawVelocity/draw-velocity-25 | 25 |
| DrawVelocity/draw-velocity-26 | 26 |
| DrawVelocity/draw-velocity-27 | 27 |
| DrawVelocity/draw-velocity-28 | 28 |
| DrawVelocity/draw-velocity-29 | 29 |
| DrawVelocity/draw-velocity-3 | 3 |
| DrawVelocity/draw-velocity-30 | 30 |
| DrawVelocity/draw-velocity-31 | 31 |
| DrawVelocity/draw-velocity-32 | 32 |
| DrawVelocity/draw-velocity-33 | 33 |
| DrawVelocity/draw-velocity-34 | 34 |
| DrawVelocity/draw-velocity-35 | 35 |
| DrawVelocity/draw-velocity-36 | 36 |
| DrawVelocity/draw-velocity-37 | 37 |
| DrawVelocity/draw-velocity-38 | 38 |
| DrawVelocity/draw-velocity-39 | 39 |
| DrawVelocity/draw-velocity-4 | 4 |
| DrawVelocity/draw-velocity-40 | 40 |
| DrawVelocity/draw-velocity-41 | 41 |
| DrawVelocity/draw-velocity-42 | 42 |
| DrawVelocity/draw-velocity-43 | 43 |
| DrawVelocity/draw-velocity-44 | 44 |
| DrawVelocity/draw-velocity-45 | 45 |
| DrawVelocity/draw-velocity-46 | 46 |
| DrawVelocity/draw-velocity-47 | 47 |
| DrawVelocity/draw-velocity-48 | 48 |
| DrawVelocity/draw-velocity-49 | 49 |
| DrawVelocity/draw-velocity-5 | 5 |
| DrawVelocity/draw-velocity-50 | 50 |
| DrawVelocity/draw-velocity-51 | 51 |
| DrawVelocity/draw-velocity-52 | 52 |
| DrawVelocity/draw-velocity-53 | 53 |
| DrawVelocity/draw-velocity-54 | 54 |
| DrawVelocity/draw-velocity-55 | 55 |
| DrawVelocity/draw-velocity-56 | 56 |
| DrawVelocity/draw-velocity-57 | 57 |
| DrawVelocity/draw-velocity-58 | 58 |
| DrawVelocity/draw-velocity-59 | 59 |
| DrawVelocity/draw-velocity-6 | 6 |
| DrawVelocity/draw-velocity-60 | 60 |
| DrawVelocity/draw-velocity-61 | 61 |
| DrawVelocity/draw-velocity-62 | 62 |
| DrawVelocity/draw-velocity-63 | 63 |
| DrawVelocity/draw-velocity-64 | 64 |
| DrawVelocity/draw-velocity-65 | 65 |
| DrawVelocity/draw-velocity-66 | 66 |
| DrawVelocity/draw-velocity-67 | 67 |
| DrawVelocity/draw-velocity-68 | 68 |
| DrawVelocity/draw-velocity-69 | 69 |
| DrawVelocity/draw-velocity-7 | 7 |
| DrawVelocity/draw-velocity-70 | 70 |
| DrawVelocity/draw-velocity-71 | 71 |
| DrawVelocity/draw-velocity-72 | 72 |
| DrawVelocity/draw-velocity-73 | 73 |
| DrawVelocity/draw-velocity-74 | 74 |
| DrawVelocity/draw-velocity-75 | 75 |
| DrawVelocity/draw-velocity-76 | 76 |
| DrawVelocity/draw-velocity-77 | 77 |
| DrawVelocity/draw-velocity-78 | 78 |
| DrawVelocity/draw-velocity-79 | 79 |
| DrawVelocity/draw-velocity-8 | 8 |
| DrawVelocity/draw-velocity-80 | 80 |
| DrawVelocity/draw-velocity-81 | 81 |
| DrawVelocity/draw-velocity-82 | 82 |
| DrawVelocity/draw-velocity-83 | 83 |
| DrawVelocity/draw-velocity-84 | 84 |
| DrawVelocity/draw-velocity-85 | 85 |
| DrawVelocity/draw-velocity-86 | 86 |
| DrawVelocity/draw-velocity-87 | 87 |
| DrawVelocity/draw-velocity-88 | 88 |
| DrawVelocity/draw-velocity-89 | 89 |
| DrawVelocity/draw-velocity-9 | 9 |
| DrawVelocity/draw-velocity-90 | 90 |
| DrawVelocity/draw-velocity-91 | 91 |
| DrawVelocity/draw-velocity-92 | 92 |
| DrawVelocity/draw-velocity-93 | 93 |
| DrawVelocity/draw-velocity-94 | 94 |
| DrawVelocity/draw-velocity-95 | 95 |
| DrawVelocity/draw-velocity-96 | 96 |
| DrawVelocity/draw-velocity-97 | 97 |
| DrawVelocity/draw-velocity-98 | 98 |
| DrawVelocity/draw-velocity-99 | 99 |
| DrawVelocity/draw-velocity-auto | Auto |
| Editor/GridChoice | Snap & Grid |
| Editor/LoudnessAssistant | Loudness Assistant... |
| Editor/ToggleGroupTabs | Show Group Tabs |
| Editor/ToggleJadeo | Video Monitor |
| Editor/ToggleSummary | Show Summary |
| Editor/addExistingPTFiles | Import PT session |
| Editor/addExternalAudioToRegionList | Import to Source List... |
| Editor/alternate-alternate-redo | Redo |
| Editor/alternate-editor-delete | Delete |
| Editor/alternate-nudge-backward | Nudge Earlier |
| Editor/alternate-nudge-forward | Nudge Later |
| Editor/alternate-redo | Redo |
| Editor/alternate-select-all-after-edit-cursor | Select All After Edit Point |
| Editor/alternate-select-all-before-edit-cursor | Select All Before Edit Point |
| Editor/alternate-tab-to-transient-backwards | Move to Previous Transient |
| Editor/alternate-tab-to-transient-forwards | Move to Next Transient |
| Editor/bring-into-session | Bring all media into session folder |
| Editor/center-edit-cursor | Center Edit Point |
| Editor/center-playhead | Center Playhead |
| Editor/copy-playlists-for-all-tracks | Copy Playlist For All Tracks |
| Editor/copy-playlists-for-armed-tracks | Copy Playlist For Rec-Armed Tracks |
| Editor/copy-playlists-for-selected-tracks | Copy Playlist For Selected Tracks |
| Editor/crop | Crop |
| Editor/cycle-edit-mode | Cycle Edit Mode |
| Editor/cycle-edit-point | Change Edit Point |
| Editor/cycle-edit-point-with-marker | Change Edit Point Including Marker |
| Editor/cycle-snap-mode | Toggle Snap |
| Editor/cycle-zoom-focus | Next Zoom Focus |
| Editor/duplicate | Duplicate |
| Editor/edit-at-mouse | Mouse |
| Editor/edit-at-playhead | Playhead |
| Editor/edit-at-selected-marker | Marker |
| Editor/edit-current-meter | Edit Current Time Signature |
| Editor/edit-current-tempo | Edit Current Tempo |
| Editor/edit-cursor-to-next-region-end | To Next Region End |
| Editor/edit-cursor-to-next-region-start | To Next Region Start |
| Editor/edit-cursor-to-next-region-sync | To Next Region Sync |
| Editor/edit-cursor-to-previous-region-end | To Previous Region End |
| Editor/edit-cursor-to-previous-region-start | To Previous Region Start |
| Editor/edit-cursor-to-previous-region-sync | To Previous Region Sync |
| Editor/edit-cursor-to-range-end | To Range End |
| Editor/edit-cursor-to-range-start | To Range Start |
| Editor/edit-to-playhead | Active Mark to Playhead |
| Editor/editor-analyze-loudness | Loudness Analysis |
| Editor/editor-analyze-spectrum | Spectral Analysis |
| Editor/editor-consolidate | Consolidate Range |
| Editor/editor-consolidate-with-processing | Consolidate Range (with processing) |
| Editor/editor-copy | Copy |
| Editor/editor-crop | Crop |
| Editor/editor-cut | Cut |
| Editor/editor-delete | Delete |
| Editor/editor-fade-range | Fade Range Selection |
| Editor/editor-loudness-assistant | Loudness Assistant |
| Editor/editor-paste | Paste |
| Editor/editor-separate | Separate |
| Editor/expand-tracks | Expand Track Height |
| Editor/export-audio | Export Audio |
| Editor/export-range | Export Range |
| Editor/fit-selection | Fit Selection (Vertical) |
| Editor/fit_16_tracks | Fit 16 Tracks |
| Editor/fit_1_track | Fit 1 Track |
| Editor/fit_2_tracks | Fit 2 Tracks |
| Editor/fit_32_tracks | Fit 32 Tracks |
| Editor/fit_4_tracks | Fit 4 Tracks |
| Editor/fit_8_tracks | Fit 8 Tracks |
| Editor/fit_all_tracks | Fit All Tracks |
| Editor/goto-visual-state-1 | Go to View 1 |
| Editor/goto-visual-state-10 | Go to View 10 |
| Editor/goto-visual-state-11 | Go to View 11 |
| Editor/goto-visual-state-12 | Go to View 12 |
| Editor/goto-visual-state-2 | Go to View 2 |
| Editor/goto-visual-state-3 | Go to View 3 |
| Editor/goto-visual-state-4 | Go to View 4 |
| Editor/goto-visual-state-5 | Go to View 5 |
| Editor/goto-visual-state-6 | Go to View 6 |
| Editor/goto-visual-state-7 | Go to View 7 |
| Editor/goto-visual-state-8 | Go to View 8 |
| Editor/goto-visual-state-9 | Go to View 9 |
| Editor/importFromSession | Import from Session |
| Editor/insert-time | Insert Time |
| Editor/layer-display-overlaid | Overlaid layer display |
| Editor/layer-display-stacked | Stacked layer display |
| Editor/lock | Lock |
| Editor/main-menu-play-selected-regions | Play Selected Regions |
| Editor/main-menu-tag-selected-regions | Tag Selected Regions |
| Editor/move-range-end-to-next-region-boundary | Move Range End to Next Region Boundary |
| Editor/move-range-end-to-previous-region-boundary | Move Range End to Previous Region Boundary |
| Editor/move-range-start-to-next-region-boundary | Move Range Start to Next Region Boundary |
| Editor/move-range-start-to-previous-region-boundary | Move Range Start to Previous Region Boundary |
| Editor/move-selected-tracks-down | Move Selected Tracks Down |
| Editor/move-selected-tracks-up | Move Selected Tracks Up |
| Editor/multi-duplicate | Multi-Duplicate... |
| Editor/new-playlists-for-all-tracks | New Playlist For All Tracks |
| Editor/new-playlists-for-armed-tracks | New Playlist For Rec-Armed Tracks |
| Editor/new-playlists-for-selected-tracks | New Playlist For Selected Tracks |
| Editor/next-grid-choice | Next Quantize Grid Choice |
| Editor/nudge-backward | Nudge Earlier |
| Editor/nudge-forward | Nudge Later |
| Editor/play-edit-range | Play Edit Range |
| Editor/play-from-edit-point | Play from Edit Point |
| Editor/play-from-edit-point-and-return | Play from Edit Point and Return |
| Editor/playhead-to-edit | Playhead to Active Mark |
| Editor/playhead-to-next-region-boundary | Playhead to Next Region Boundary |
| Editor/playhead-to-next-region-boundary-noselection | Playhead to Next Region Boundary (No Track Selection) |
| Editor/playhead-to-next-region-end | Playhead to Next Region End |
| Editor/playhead-to-next-region-start | Playhead to Next Region Start |
| Editor/playhead-to-next-region-sync | Playhead to Next Region Sync |
| Editor/playhead-to-previous-region-boundary | Playhead to Previous Region Boundary |
| Editor/playhead-to-previous-region-boundary-noselection | Playhead to Previous Region Boundary (No Track Selection) |
| Editor/playhead-to-previous-region-end | Playhead to Previous Region End |
| Editor/playhead-to-previous-region-start | Playhead to Previous Region Start |
| Editor/playhead-to-previous-region-sync | Playhead to Previous Region Sync |
| Editor/playhead-to-range-end | Playhead to Range End |
| Editor/playhead-to-range-start | Playhead to Range Start |
| Editor/prev-grid-choice | Previous Quantize Grid Choice |
| Editor/quantize | Quantize |
| Editor/redo | Redo |
| Editor/redo-last-selection-op | Redo Selection Change |
| Editor/remove-gaps | Remove Gaps |
| Editor/remove-last-capture | Remove Last Capture |
| Editor/remove-time | Remove Time |
| Editor/remove-track | Remove |
| Editor/save-visual-state-1 | Save View 1 |
| Editor/save-visual-state-10 | Save View 10 |
| Editor/save-visual-state-11 | Save View 11 |
| Editor/save-visual-state-12 | Save View 12 |
| Editor/save-visual-state-2 | Save View 2 |
| Editor/save-visual-state-3 | Save View 3 |
| Editor/save-visual-state-4 | Save View 4 |
| Editor/save-visual-state-5 | Save View 5 |
| Editor/save-visual-state-6 | Save View 6 |
| Editor/save-visual-state-7 | Save View 7 |
| Editor/save-visual-state-8 | Save View 8 |
| Editor/save-visual-state-9 | Save View 9 |
| Editor/scroll-backward | Scroll Backward |
| Editor/scroll-forward | Scroll Forward |
| Editor/scroll-playhead-backward | Playhead Backward |
| Editor/scroll-playhead-forward | Playhead Forward |
| Editor/scroll-tracks-down | Scroll Tracks Down |
| Editor/scroll-tracks-up | Scroll Tracks Up |
| Editor/select-all-after-edit-cursor | Select All After Edit Point |
| Editor/select-all-before-edit-cursor | Select All Before Edit Point |
| Editor/select-all-between-cursors | Select All Overlapping Edit Range |
| Editor/select-all-in-loop-range | Select All in Loop Range |
| Editor/select-all-in-punch-range | Select All in Punch Range |
| Editor/select-all-objects | Select All Objects |
| Editor/select-all-within-cursors | Select All Inside Edit Range |
| Editor/select-from-regions | Set Range to Selected Regions |
| Editor/select-loop-range | Set Range to Loop Range |
| Editor/select-next-route | Select Next Track or Bus |
| Editor/select-next-stripable | Select Next Strip |
| Editor/select-prev-route | Select Previous Track or Bus |
| Editor/select-prev-stripable | Select Previous Strip |
| Editor/select-punch-range | Set Range to Punch Range |
| Editor/select-range-between-cursors | Select Edit Range |
| Editor/select-topmost | Select Topmost Track |
| Editor/selected-marker-to-next-region-boundary | To Next Region Boundary |
| Editor/selected-marker-to-next-region-boundary-noselection | To Next Region Boundary (No Track Selection) |
| Editor/selected-marker-to-previous-region-boundary | To Previous Region Boundary |
| Editor/selected-marker-to-previous-region-boundary-noselection | To Previous Region Boundary (No Track Selection) |
| Editor/separate-from-loop | Separate Using Loop Range |
| Editor/separate-from-punch | Separate Using Punch Range |
| Editor/set-auto-punch-range | Set Auto Punch In/Out from Playhead |
| Editor/set-edit-lock | Lock |
| Editor/set-edit-point | Active Marker to Mouse |
| Editor/set-edit-ripple | Ripple |
| Editor/set-edit-slide | Slide |
| Editor/set-loop-from-edit-range | Set Loop from Selection |
| Editor/set-playhead | Playhead to Mouse |
| Editor/set-punch-from-edit-range | Set Punch from Selection |
| Editor/set-ripple-all | All |
| Editor/set-ripple-interview | Interview |
| Editor/set-ripple-selected | Selected |
| Editor/set-session-from-edit-range | Set Session Start/End from Selection |
| Editor/set-tempo-from-edit-range | Set Tempo from Edit Range = Bar |
| Editor/show-editor-list | Show Editor List |
| Editor/show-editor-mixer | Show Editor Mixer |
| Editor/show-marker-lines | Show Marker Lines |
| Editor/show-plist-selector | Show Playlist Selector |
| Editor/show-touched-automation | Show Automation Lane on Touch |
| Editor/shrink-tracks | Shrink Track Height |
| Editor/snap-magnetic | Magnetic |
| Editor/snap-normal | Grid |
| Editor/snap-off | No Grid |
| Editor/sound-midi-notes | Sound Selected MIDI Notes |
| Editor/split-region | Split/Separate |
| Editor/step-mouse-mode | Step Mouse Mode |
| Editor/step-tracks-down | Step Tracks Down |
| Editor/step-tracks-up | Step Tracks Up |
| Editor/tab-to-transient-backwards | Move to Previous Transient |
| Editor/tab-to-transient-forwards | Move to Next Transient |
| Editor/tag-last-capture | Tag Last Capture |
| Editor/temporal-zoom-in | Zoom In |
| Editor/temporal-zoom-out | Zoom Out |
| Editor/toggle-all-existing-automation | Toggle All Existing Automation |
| Editor/toggle-follow-playhead | Follow Playhead |
| Editor/toggle-layer-display | Toggle Layer Display |
| Editor/toggle-log-window | Log |
| Editor/toggle-midi-input-active | Toggle MIDI Input Active for Editor-Selected Tracks/Busses |
| Editor/toggle-skip-playback | Use Skip Ranges |
| Editor/toggle-stationary-playhead | Stationary Playhead |
| Editor/toggle-track-active | Toggle Active |
| Editor/toggle-vmon-frame | Frame number |
| Editor/toggle-vmon-fullscreen | Fullscreen |
| Editor/toggle-vmon-letterbox | Letterbox |
| Editor/toggle-vmon-ontop | Always on Top |
| Editor/toggle-vmon-osdbg | Timecode Background |
| Editor/toggle-vmon-timecode | Timecode |
| Editor/toggle-zoom | Toggle Zoom State |
| Editor/track-height-large | Large |
| Editor/track-height-larger | Larger |
| Editor/track-height-largest | Largest |
| Editor/track-height-normal | Normal |
| Editor/track-height-small | Small |
| Editor/track-mute-toggle | Toggle Mute |
| Editor/track-record-enable-toggle | Toggle Record Enable |
| Editor/track-solo-isolate-toggle | Toggle Solo Isolate |
| Editor/track-solo-toggle | Toggle Solo |
| Editor/undo | Undo |
| Editor/undo-last-selection-op | Undo Selection Change |
| Editor/zoom-to-extents | Zoom to Extents |
| Editor/zoom-to-selection | Zoom to Selection |
| Editor/zoom-to-selection-horiz | Zoom to Selection (Horizontal) |
| Editor/zoom-to-session | Zoom to Session |
| Editor/zoom-vmon-100 | Original Size |
| Editor/zoom_100_ms | Zoom to 100 ms |
| Editor/zoom_10_min | Zoom to 10 min |
| Editor/zoom_10_ms | Zoom to 10 ms |
| Editor/zoom_10_sec | Zoom to 10 sec |
| Editor/zoom_1_min | Zoom to 1 min |
| Editor/zoom_1_sec | Zoom to 1 sec |
| Editor/zoom_5_min | Zoom to 5 min |
| EditorMenu/AlignMenu | Align |
| EditorMenu/AnalyzeMenu | Analyze |
| EditorMenu/Autoconnect | Autoconnect |
| EditorMenu/AutomationMenu | Automation |
| EditorMenu/ConsolidateMenu | Consolidate |
| EditorMenu/Crossfades | Crossfades |
| EditorMenu/CueMenu | Cues |
| EditorMenu/Edit | Edit |
| EditorMenu/EditCursorMovementOptions | Move Selected Marker |
| EditorMenu/EditPointMenu | Edit Point |
| EditorMenu/EditSelectRangeOptions | Select Range Operations |
| EditorMenu/EditSelectRegionOptions | Select Regions |
| EditorMenu/FadeMenu | Fade |
| EditorMenu/GridChoiceQuintuplets | Quintuplets |
| EditorMenu/GridChoiceSeptuplets | Septuplets |
| EditorMenu/GridChoiceTriplets | Triplets |
| EditorMenu/LatchMenu | Latch |
| EditorMenu/LayerDisplay | Region Layers |
| EditorMenu/Link | Link |
| EditorMenu/LocateToMarker | Locate to Markers |
| EditorMenu/LuaScripts | Lua Scripts |
| EditorMenu/MIDI | MIDI Options |
| EditorMenu/MarkerMenu | Markers |
| EditorMenu/MeterFalloff | Meter falloff |
| EditorMenu/MeterHold | Meter hold |
| EditorMenu/MiscOptions | Misc Options |
| EditorMenu/Monitoring | Monitoring |
| EditorMenu/MoveActiveMarkMenu | Active Mark |
| EditorMenu/MovePlayHeadMenu | Playhead |
| EditorMenu/PlayMenu | Play |
| EditorMenu/PrimaryClockMenu | Primary Clock |
| EditorMenu/Pullup | Pullup / Pulldown |
| EditorMenu/RegionEditOps | Region operations |
| EditorMenu/RegionGainMenu | Gain |
| EditorMenu/RegionMenu | Region |
| EditorMenu/RegionMenuDuplicate | Duplicate |
| EditorMenu/RegionMenuEdit | Edit |
| EditorMenu/RegionMenuFades | Fades |
| EditorMenu/RegionMenuGain | Gain |
| EditorMenu/RegionMenuLayering | Layering |
| EditorMenu/RegionMenuMIDI | MIDI |
| EditorMenu/RegionMenuMarkers | Markers |
| EditorMenu/RegionMenuPosition | Position |
| EditorMenu/RegionMenuRanges | Ranges |
| EditorMenu/RegionMenuTrim | Trim |
| EditorMenu/RulerMenu | Rulers |
| EditorMenu/SavedViewMenu | Editor Views |
| EditorMenu/ScrollMenu | Scroll |
| EditorMenu/SecondaryClockMenu | Secondary Clock |
| EditorMenu/Select | Select |
| EditorMenu/SelectMenu | Select |
| EditorMenu/SeparateMenu | Separate |
| EditorMenu/SetLoopMenu | Loop |
| EditorMenu/SetPunchMenu | Punch |
| EditorMenu/Solo | Solo |
| EditorMenu/Subframes | Subframes |
| EditorMenu/SyncMenu | Sync |
| EditorMenu/TempoMenu | Tempo |
| EditorMenu/Timecode | Timecode fps |
| EditorMenu/Tools | Tools |
| EditorMenu/TrackHeightMenu | Height |
| EditorMenu/TrackMenu | Track |
| EditorMenu/TrackPlaylistMenu | Playlists |
| EditorMenu/VideoMonitorMenu | Video Monitor |
| EditorMenu/View | View |
| EditorMenu/ZoomFocus | Zoom Focus |
| EditorMenu/ZoomFocusMenu | Zoom Focus |
| EditorMenu/ZoomMenu | Zoom |
| LuaAction/script-1 | Unset #1 |
| LuaAction/script-10 | Unset #10 |
| LuaAction/script-11 | Unset #11 |
| LuaAction/script-12 | Unset #12 |
| LuaAction/script-13 | Unset #13 |
| LuaAction/script-14 | Unset #14 |
| LuaAction/script-15 | Unset #15 |
| LuaAction/script-16 | Unset #16 |
| LuaAction/script-17 | Unset #17 |
| LuaAction/script-18 | Unset #18 |
| LuaAction/script-19 | Unset #19 |
| LuaAction/script-2 | Unset #2 |
| LuaAction/script-20 | Unset #20 |
| LuaAction/script-21 | Unset #21 |
| LuaAction/script-22 | Unset #22 |
| LuaAction/script-23 | Unset #23 |
| LuaAction/script-24 | Unset #24 |
| LuaAction/script-25 | Unset #25 |
| LuaAction/script-26 | Unset #26 |
| LuaAction/script-27 | Unset #27 |
| LuaAction/script-28 | Unset #28 |
| LuaAction/script-29 | Unset #29 |
| LuaAction/script-3 | Unset #3 |
| LuaAction/script-30 | Unset #30 |
| LuaAction/script-31 | Unset #31 |
| LuaAction/script-32 | Unset #32 |
| LuaAction/script-4 | Unset #4 |
| LuaAction/script-5 | Unset #5 |
| LuaAction/script-6 | Unset #6 |
| LuaAction/script-7 | Unset #7 |
| LuaAction/script-8 | Unset #8 |
| LuaAction/script-9 | Unset #9 |
| MIDI/panic | Panic (Send MIDI all-notes-off) |
| Main Menu/AudioFileFormat | Audio File Format |
| Main Menu/AudioFileFormatData | Sample Format |
| Main Menu/AudioFileFormatHeader | File Type |
| Main Menu/Cleanup | Clean-up |
| Main Menu/ControlSurfaces | Control Surfaces |
| Main Menu/Denormals | Denormal Handling |
| Main Menu/DetachMenu | Detach |
| Main Menu/EditorMenu | Editor |
| Main Menu/Help | Help |
| Main Menu/KeyMouseActions | Misc. Shortcuts |
| Main Menu/Metering | Metering |
| Main Menu/MeteringFallOffRate | Fall Off Rate |
| Main Menu/MeteringHoldTime | Hold Time |
| Main Menu/MixerMenu | Mixer |
| Main Menu/Plugins | Plugins |
| Main Menu/PrefsMenu | Preferences |
| Main Menu/RecorderMenu | Recorder |
| Main Menu/Session | Session |
| Main Menu/Sync | Sync |
| Main Menu/TransportOptions | Options |
| Main Menu/TriggerMenu | Cue Grid |
| Main Menu/WindowMenu | Window |
| Main/AddTrackBus | Add Track, Bus or VCA... |
| Main/Archive | Archive... |
| Main/CleanupPeakFiles | Rebuild Peak Files |
| Main/CleanupUnusedRegions | Clean-up Unused Regions... |
| Main/CleanupUnusedSources | Clean-up Unused Sources... |
| Main/Close | Close |
| Main/CloseVideo | Remove Video |
| Main/EditMetadata | Edit Metadata... |
| Main/Escape | Escape (deselect all) |
| Main/Export | Export |
| Main/ExportAudio | Export to Audio File(s)... |
| Main/ExportVideo | Export to Video File... |
| Main/FlushWastebasket | Flush Wastebasket |
| Main/ImportMetadata | Import Metadata... |
| Main/ManageTemplates | Templates |
| Main/Metadata | Metadata |
| Main/MonitorMenu | Monitor Section |
| Main/New | New... |
| Main/Open | Open... |
| Main/OpenVideo | Open Video... |
| Main/QuickExport | Quick Audio Export... |
| Main/QuickSnapshotStay | Quick Snapshot (& keep working on current version) ... |
| Main/QuickSnapshotSwitch | Quick Snapshot (& switch to new version) ... |
| Main/Recent | Recent... |
| Main/Rename | Rename... |
| Main/SaveAs | Save As... |
| Main/SaveTemplate | Save Template... |
| Main/Scripting | Scripting |
| Main/SnapshotStay | Snapshot (& keep working on current version) ... |
| Main/SnapshotSwitch | Snapshot (& switch to new version) ... |
| Main/StemExport | Stem export... |
| Main/ToggleLatencyCompensation | Disable Latency Compensation |
| Main/cancel-solo | Cancel Solo |
| Main/close-current-dialog | Close Current Dialog |
| Main/duplicate-routes | Duplicate Tracks/Busses... |
| Mixer/ToggleFoldbackStrip | Mixer: Show Foldback Strip |
| Mixer/ToggleMixerList | Mixer: Show Mixer List |
| Mixer/ToggleMonitorSection | Mixer: Show Monitor Section |
| Mixer/ToggleVCAPane | Mixer: Show VCAs |
| Mixer/ab-plugins | Toggle Selected Plugins |
| Mixer/clear-mixer-scene-1 | Clear Mixer Scene #1 |
| Mixer/clear-mixer-scene-10 | Clear Mixer Scene #10 |
| Mixer/clear-mixer-scene-11 | Clear Mixer Scene #11 |
| Mixer/clear-mixer-scene-12 | Clear Mixer Scene #12 |
| Mixer/clear-mixer-scene-2 | Clear Mixer Scene #2 |
| Mixer/clear-mixer-scene-3 | Clear Mixer Scene #3 |
| Mixer/clear-mixer-scene-4 | Clear Mixer Scene #4 |
| Mixer/clear-mixer-scene-5 | Clear Mixer Scene #5 |
| Mixer/clear-mixer-scene-6 | Clear Mixer Scene #6 |
| Mixer/clear-mixer-scene-7 | Clear Mixer Scene #7 |
| Mixer/clear-mixer-scene-8 | Clear Mixer Scene #8 |
| Mixer/clear-mixer-scene-9 | Clear Mixer Scene #9 |
| Mixer/copy-processors | Copy Selected Processors |
| Mixer/cut-processors | Cut Selected Processors |
| Mixer/decrement-gain | Increase Gain on Mixer-Selected Tracks/Busses |
| Mixer/delete-processors | Delete Selected Processors |
| Mixer/increment-gain | Decrease Gain on Mixer-Selected Tracks/Busses |
| Mixer/mute | Toggle Mute on Mixer-Selected Tracks/Busses |
| Mixer/paste-processors | Paste Selected Processors |
| Mixer/recall-mixer-scene-1 | Recall Mixer Scene #1 |
| Mixer/recall-mixer-scene-10 | Recall Mixer Scene #10 |
| Mixer/recall-mixer-scene-11 | Recall Mixer Scene #11 |
| Mixer/recall-mixer-scene-12 | Recall Mixer Scene #12 |
| Mixer/recall-mixer-scene-2 | Recall Mixer Scene #2 |
| Mixer/recall-mixer-scene-3 | Recall Mixer Scene #3 |
| Mixer/recall-mixer-scene-4 | Recall Mixer Scene #4 |
| Mixer/recall-mixer-scene-5 | Recall Mixer Scene #5 |
| Mixer/recall-mixer-scene-6 | Recall Mixer Scene #6 |
| Mixer/recall-mixer-scene-7 | Recall Mixer Scene #7 |
| Mixer/recall-mixer-scene-8 | Recall Mixer Scene #8 |
| Mixer/recall-mixer-scene-9 | Recall Mixer Scene #9 |
| Mixer/recenable | Toggle Rec-enable on Mixer-Selected Tracks/Busses |
| Mixer/scroll-left | Scroll Mixer Window to the left |
| Mixer/scroll-right | Scroll Mixer Window to the right |
| Mixer/select-all-processors | Select All (visible) Processors |
| Mixer/select-next-stripable | Select Next Mixer Strip |
| Mixer/select-none | Deselect all strips and processors |
| Mixer/select-prev-stripable | Select Previous Mixer Strip |
| Mixer/solo | Toggle Solo on Mixer-Selected Tracks/Busses |
| Mixer/store-mixer-scene-1 | Store Mixer Scene #1 |
| Mixer/store-mixer-scene-10 | Store Mixer Scene #10 |
| Mixer/store-mixer-scene-11 | Store Mixer Scene #11 |
| Mixer/store-mixer-scene-12 | Store Mixer Scene #12 |
| Mixer/store-mixer-scene-2 | Store Mixer Scene #2 |
| Mixer/store-mixer-scene-3 | Store Mixer Scene #3 |
| Mixer/store-mixer-scene-4 | Store Mixer Scene #4 |
| Mixer/store-mixer-scene-5 | Store Mixer Scene #5 |
| Mixer/store-mixer-scene-6 | Store Mixer Scene #6 |
| Mixer/store-mixer-scene-7 | Store Mixer Scene #7 |
| Mixer/store-mixer-scene-8 | Store Mixer Scene #8 |
| Mixer/store-mixer-scene-9 | Store Mixer Scene #9 |
| Mixer/toggle-disk-monitor | Toggle Disk Monitoring |
| Mixer/toggle-input-monitor | Toggle Input Monitoring |
| Mixer/toggle-midi-input-active | Toggle MIDI Input Active for Mixer-Selected Tracks/Busses |
| Mixer/toggle-processors | Toggle Selected Processors |
| Mixer/unity-gain | Set Gain to 0dB on Mixer-Selected Tracks/Busses |
| Monitor Section/monitor-cut-all | Mute |
| Monitor Section/monitor-dim-all | Dim |
| Monitor Section/monitor-mono | Mono |
| Monitor/UseMonitorSection | Use Monitor Section |
| Monitor/monitor-cut-0 | Cut monitor channel 0 |
| Monitor/monitor-cut-1 | Cut monitor channel 1 |
| Monitor/monitor-cut-10 | Cut monitor channel 10 |
| Monitor/monitor-cut-11 | Cut monitor channel 11 |
| Monitor/monitor-cut-12 | Cut monitor channel 12 |
| Monitor/monitor-cut-13 | Cut monitor channel 13 |
| Monitor/monitor-cut-14 | Cut monitor channel 14 |
| Monitor/monitor-cut-15 | Cut monitor channel 15 |
| Monitor/monitor-cut-2 | Cut monitor channel 2 |
| Monitor/monitor-cut-3 | Cut monitor channel 3 |
| Monitor/monitor-cut-4 | Cut monitor channel 4 |
| Monitor/monitor-cut-5 | Cut monitor channel 5 |
| Monitor/monitor-cut-6 | Cut monitor channel 6 |
| Monitor/monitor-cut-7 | Cut monitor channel 7 |
| Monitor/monitor-cut-8 | Cut monitor channel 8 |
| Monitor/monitor-cut-9 | Cut monitor channel 9 |
| Monitor/monitor-dim-0 | Dim monitor channel 0 |
| Monitor/monitor-dim-1 | Dim monitor channel 1 |
| Monitor/monitor-dim-10 | Dim monitor channel 10 |
| Monitor/monitor-dim-11 | Dim monitor channel 11 |
| Monitor/monitor-dim-12 | Dim monitor channel 12 |
| Monitor/monitor-dim-13 | Dim monitor channel 13 |
| Monitor/monitor-dim-14 | Dim monitor channel 14 |
| Monitor/monitor-dim-15 | Dim monitor channel 15 |
| Monitor/monitor-dim-2 | Dim monitor channel 2 |
| Monitor/monitor-dim-3 | Dim monitor channel 3 |
| Monitor/monitor-dim-4 | Dim monitor channel 4 |
| Monitor/monitor-dim-5 | Dim monitor channel 5 |
| Monitor/monitor-dim-6 | Dim monitor channel 6 |
| Monitor/monitor-dim-7 | Dim monitor channel 7 |
| Monitor/monitor-dim-8 | Dim monitor channel 8 |
| Monitor/monitor-dim-9 | Dim monitor channel 9 |
| Monitor/monitor-invert-0 | Invert monitor channel 0 |
| Monitor/monitor-invert-1 | Invert monitor channel 1 |
| Monitor/monitor-invert-10 | Invert monitor channel 10 |
| Monitor/monitor-invert-11 | Invert monitor channel 11 |
| Monitor/monitor-invert-12 | Invert monitor channel 12 |
| Monitor/monitor-invert-13 | Invert monitor channel 13 |
| Monitor/monitor-invert-14 | Invert monitor channel 14 |
| Monitor/monitor-invert-15 | Invert monitor channel 15 |
| Monitor/monitor-invert-2 | Invert monitor channel 2 |
| Monitor/monitor-invert-3 | Invert monitor channel 3 |
| Monitor/monitor-invert-4 | Invert monitor channel 4 |
| Monitor/monitor-invert-5 | Invert monitor channel 5 |
| Monitor/monitor-invert-6 | Invert monitor channel 6 |
| Monitor/monitor-invert-7 | Invert monitor channel 7 |
| Monitor/monitor-invert-8 | Invert monitor channel 8 |
| Monitor/monitor-invert-9 | Invert monitor channel 9 |
| Monitor/monitor-solo-0 | Solo monitor channel 0 |
| Monitor/monitor-solo-1 | Solo monitor channel 1 |
| Monitor/monitor-solo-10 | Solo monitor channel 10 |
| Monitor/monitor-solo-11 | Solo monitor channel 11 |
| Monitor/monitor-solo-12 | Solo monitor channel 12 |
| Monitor/monitor-solo-13 | Solo monitor channel 13 |
| Monitor/monitor-solo-14 | Solo monitor channel 14 |
| Monitor/monitor-solo-15 | Solo monitor channel 15 |
| Monitor/monitor-solo-2 | Solo monitor channel 2 |
| Monitor/monitor-solo-3 | Solo monitor channel 3 |
| Monitor/monitor-solo-4 | Solo monitor channel 4 |
| Monitor/monitor-solo-5 | Solo monitor channel 5 |
| Monitor/monitor-solo-6 | Solo monitor channel 6 |
| Monitor/monitor-solo-7 | Solo monitor channel 7 |
| Monitor/monitor-solo-8 | Solo monitor channel 8 |
| Monitor/monitor-solo-9 | Solo monitor channel 9 |
| Monitor/toggle-monitor-processor-box | Toggle Monitor Section Processor Box |
| MouseMode/set-mouse-mode-audition | Audition Tool |
| MouseMode/set-mouse-mode-content | Content Tool |
| MouseMode/set-mouse-mode-cut | Cut Tool |
| MouseMode/set-mouse-mode-draw | Note Drawing Tool |
| MouseMode/set-mouse-mode-object | Object Tool |
| MouseMode/set-mouse-mode-object-range | Smart Mode |
| MouseMode/set-mouse-mode-range | Range Tool |
| MouseMode/set-mouse-mode-timefx | Time FX Tool |
| Notes/add-select-next | Add Next to Selection |
| Notes/add-select-previous | Add Previous to Selection |
| Notes/alt-add-select-next | Add Next to Selection (alternate) |
| Notes/alt-add-select-previous | Add Previous to Selection (alternate) |
| Notes/alt-delete | Delete Selection (alternate) |
| Notes/alt-select-next | Select Next (alternate) |
| Notes/alt-select-previous | Select Previous (alternate) |
| Notes/clear-selection | Clear Note Selection |
| Notes/decrease-velocity | Decrease Velocity |
| Notes/decrease-velocity-fine | Decrease Velocity (fine) |
| Notes/decrease-velocity-fine-smush | Decrease Velocity (fine, allow mush) |
| Notes/decrease-velocity-fine-smush-together | Decrease Velocity (fine, allow mush, non-relative) |
| Notes/decrease-velocity-fine-together | Decrease Velocity (fine, non-relative) |
| Notes/decrease-velocity-smush | Decrease Velocity (allow mush) |
| Notes/decrease-velocity-smush-together | Decrease Velocity (maintain ratios, allow mush) |
| Notes/decrease-velocity-together | Decrease Velocity (non-relative) |
| Notes/delete | Delete Selection |
| Notes/duplicate-selection | Duplicate Note Selection |
| Notes/edit-channels | Edit Note Channels |
| Notes/edit-velocities | Edit Note Velocities |
| Notes/extend-selection | Extend Note Selection |
| Notes/increase-velocity | Increase Velocity |
| Notes/increase-velocity-fine | Increase Velocity (fine) |
| Notes/increase-velocity-fine-smush | Increase Velocity (fine, allow mush) |
| Notes/increase-velocity-fine-smush-together | Increase Velocity (fine, allow mush, non-relative) |
| Notes/increase-velocity-fine-together | Increase Velocity (fine, non-relative) |
| Notes/increase-velocity-smush | Increase Velocity (allow mush) |
| Notes/increase-velocity-smush-together | Increase Velocity (maintain ratios, allow mush) |
| Notes/increase-velocity-together | Increase Velocity (non-relative) |
| Notes/invert-selection | Invert Note Selection |
| Notes/move-ends-earlier | Move Note Ends Earlier |
| Notes/move-ends-earlier-fine | Move Note Ends Earlier (fine) |
| Notes/move-ends-later | Move Note Ends Later |
| Notes/move-ends-later-fine | Move Note Ends Later (fine) |
| Notes/move-starts-earlier | Move Note Start Earlier |
| Notes/move-starts-earlier-fine | Move Note Start Earlier (fine) |
| Notes/move-starts-later | Move Note Start Later |
| Notes/move-starts-later-fine | Move Note Start Later (fine) |
| Notes/nudge-earlier | Nudge Notes Earlier (grid) |
| Notes/nudge-earlier-fine | Nudge Notes Earlier (1/4 grid) |
| Notes/nudge-later | Nudge Notes Later (grid) |
| Notes/nudge-later-fine | Nudge Notes Later (1/4 grid) |
| Notes/quantize-selected-notes | Quantize Selected Notes |
| Notes/select-next | Select Next |
| Notes/select-previous | Select Previous |
| Notes/transpose-down-octave | Transpose Down (octave) |
| Notes/transpose-down-octave-smush | Transpose Down (octave, allow mush) |
| Notes/transpose-down-semitone | Transpose Down (semitone) |
| Notes/transpose-down-semitone-smush | Transpose Down (semitone, allow mush) |
| Notes/transpose-up-octave | Transpose Up (octave) |
| Notes/transpose-up-octave-smush | Transpose Up (octave, allow mush) |
| Notes/transpose-up-semitone | Transpose Up (semitone) |
| Notes/transpose-up-semitone-smush | Transpose Up (semitone, allow mush) |
| Options/SendMMC | Send MMC |
| Options/SendMTC | Send MTC |
| Options/SendMidiClock | Send MIDI Clock |
| Options/UseMMC | Use MMC |
| ProcessorMenu/ab_plugins | A/B Plugins |
| ProcessorMenu/activate_all | Activate All |
| ProcessorMenu/backspace | Delete |
| ProcessorMenu/clear | Clear (all) |
| ProcessorMenu/clear_post | Clear (post-fader) |
| ProcessorMenu/clear_pre | Clear (pre-fader) |
| ProcessorMenu/controls | Controls |
| ProcessorMenu/copy | Copy |
| ProcessorMenu/custom-volume-pos | Custom LAN Amp Position |
| ProcessorMenu/cut | Cut |
| ProcessorMenu/deactivate_all | Deactivate All |
| ProcessorMenu/delete | Delete |
| ProcessorMenu/deselectall | Deselect All |
| ProcessorMenu/disk-io-custom | Custom |
| ProcessorMenu/disk-io-menu | Disk I/O ... |
| ProcessorMenu/disk-io-postfader | Post-Fader |
| ProcessorMenu/disk-io-prefader | Pre-Fader |
| ProcessorMenu/edit | Edit... |
| ProcessorMenu/edit-generic | Edit with generic controls... |
| ProcessorMenu/manage-pins | Pin Connections... |
| ProcessorMenu/newaux | New Aux Send ... |
| ProcessorMenu/newinsert | New Insert |
| ProcessorMenu/newlisten | New Foldback Send ... |
| ProcessorMenu/newplugin | New Plugin |
| ProcessorMenu/newsend | New External Send ... |
| ProcessorMenu/paste | Paste |
| ProcessorMenu/presets | Presets |
| ProcessorMenu/removelisten | Remove Foldback Send ... |
| ProcessorMenu/rename | Rename |
| ProcessorMenu/selectall | Select All |
| ProcessorMenu/send_options | Send Options |
| Recorder/arm-all | Record Arm All Tracks |
| Recorder/arm-none | Disable Record Arm of All Tracks |
| Recorder/reset-input-peak-hold | Reset Input Peak Hold |
| Region/add-range-marker-from-region | Add Single Range Marker |
| Region/add-range-markers-from-region | Add Range Marker Per Region |
| Region/add-region-cue-marker | Add Region Cue Marker |
| Region/align-regions-end | Align End |
| Region/align-regions-end-relative | Align End Relative |
| Region/align-regions-start | Align Start |
| Region/align-regions-start-relative | Align Start Relative |
| Region/align-regions-sync | Align Sync |
| Region/align-regions-sync-relative | Align Sync Relative |
| Region/alternate-nudge-backward | Nudge Earlier |
| Region/alternate-nudge-forward | Nudge Later |
| Region/alternate-set-fade-in-length | Set Fade In Length |
| Region/alternate-set-fade-out-length | Set Fade Out Length |
| Region/boost-region-gain | Boost Gain |
| Region/bounce-regions-processed | Bounce (with processing) |
| Region/bounce-regions-unprocessed | Bounce (without processing) |
| Region/choose-top-region | Choose Top... |
| Region/choose-top-region-context-menu | Choose Top... |
| Region/clear-region-cue-markers | Clear Region Cue Markers |
| Region/close-region-gaps | Close Gaps |
| Region/combine-regions | Combine |
| Region/cut-region-gain | Cut Gain |
| Region/deinterlace-midi | Deinterlace Into Layers |
| Region/duplicate-region | Duplicate |
| Region/export-region | Export... |
| Region/fork-region | Unlink all selected regions |
| Region/fork-regions-from-unselected | Unlink from unselected |
| Region/insert-patch-change | Insert Patch Change... |
| Region/insert-patch-change-context | Insert Patch Change... |
| Region/insert-region-from-source-list | Insert Region from Source List |
| Region/legatize-region | Legatize |
| Region/loop-region | Loop |
| Region/loudness-analyze-region | Loudness Analysis... |
| Region/lower-region | Lower |
| Region/lower-region-to-bottom | Lower to Bottom |
| Region/make-region-markers-cd | Convert Region Cue Markers to CD Markers |
| Region/make-region-markers-global | Convert Region Cue Markers to Location Markers |
| Region/multi-duplicate-region | Multi-Duplicate... |
| Region/naturalize-region | Move to Original Position |
| Region/normalize-region | Normalize... |
| Region/nudge-backward | Nudge Earlier |
| Region/nudge-backward-by-capture-offset | Nudge Earlier by Capture Offset |
| Region/nudge-forward | Nudge Later |
| Region/nudge-forward-by-capture-offset | Nudge Later by Capture Offset |
| Region/pitch-shift-region | Pitch Shift... |
| Region/place-transient | Place Transient |
| Region/play-selected-regions | Play Selected Regions |
| Region/quantize-region | Quantize... |
| Region/raise-region | Raise |
| Region/raise-region-to-top | Raise to Top |
| Region/region-fill-track | Fill Track |
| Region/remove-overlap | Remove Overlap |
| Region/remove-region | Remove |
| Region/remove-region-sync | Remove Sync |
| Region/rename-region | Rename... |
| Region/reset-region-gain | Reset Gain |
| Region/reset-region-gain-envelopes | Reset Envelope |
| Region/reverse-region | Reverse |
| Region/separate-under-region | Separate Under |
| Region/sequence-regions | Sequence Regions |
| Region/set-fade-in-length | Set Fade In Length |
| Region/set-fade-out-length | Set Fade Out Length |
| Region/set-loop-from-region | Set Loop Range |
| Region/set-punch-from-region | Set Punch |
| Region/set-region-sync-position | Set Sync Position |
| Region/set-selection-from-region | Set Range Selection |
| Region/set-tempo-from-region | Set Tempo from Region = Bar |
| Region/show-region-list-editor | List Editor... |
| Region/show-region-properties | Properties... |
| Region/show-rhythm-ferret | Rhythm Ferret... |
| Region/snap-regions-to-grid | Snap Position to Grid |
| Region/spectral-analyze-region | Spectral Analysis... |
| Region/split-multichannel-region | Make Mono Regions |
| Region/split-region-at-transients | Split at Percussion Onsets |
| Region/strip-region-silence | Strip Silence... |
| Region/tag-selected-regions | Tag Selected Regions |
| Region/toggle-opaque-region | Opaque |
| Region/toggle-region-fade-in | Fade In |
| Region/toggle-region-fade-out | Fade Out |
| Region/toggle-region-fades | Fades |
| Region/toggle-region-polarity | Invert Polarity |
| Region/toggle-region-gain-envelope-active | Envelope Active |
| Region/toggle-region-lock | Lock |
| Region/toggle-region-mute | Mute |
| Region/toggle-region-video-lock | Lock to Video |
| Region/transform-region | Transform... |
| Region/transpose-region | Transpose... |
| Region/trim-back | Trim End at Edit Point |
| Region/trim-front | Trim Start at Edit Point |
| Region/trim-region-to-loop | Trim to Loop |
| Region/trim-region-to-punch | Trim to Punch |
| Region/trim-to-next-region | Trim to Next |
| Region/trim-to-previous-region | Trim to Previous |
| Region/uncombine-regions | Uncombine |
| RegionList/removeUnusedRegions | Remove Unused |
| RegionList/rlAudition | Audition |
| Rulers/toggle-bbt-ruler | Bars:Beats |
| Rulers/toggle-cd-marker-ruler | CD Markers |
| Rulers/toggle-cue-marker-ruler | Cue Markers |
| Rulers/toggle-loop-punch-ruler | Loop/Punch Ranges |
| Rulers/toggle-marker-ruler | Location Markers |
| Rulers/toggle-meter-ruler | Time Signature |
| Rulers/toggle-minsec-ruler | Mins:Secs |
| Rulers/toggle-range-ruler | Range Markers |
| Rulers/toggle-samples-ruler | Samples |
| Rulers/toggle-tempo-ruler | Tempo |
| Rulers/toggle-timecode-ruler | Timecode |
| Rulers/toggle-video-ruler | Video Timeline |
| Snap/grid-type-asixteenthbeat | 1/64 Note |
| Snap/grid-type-bar | Bar |
| Snap/grid-type-beat | 1/4 Note |
| Snap/grid-type-cdframe | CD Frames |
| Snap/grid-type-eighths | 1/32 Note |
| Snap/grid-type-fifths | 1/5 (8th quintuplet) |
| Snap/grid-type-fourteenths | 1/14 (16th septuplet) |
| Snap/grid-type-halves | 1/8 Note |
| Snap/grid-type-minsec | MinSec |
| Snap/grid-type-none | No Grid |
| Snap/grid-type-quarters | 1/16 Note |
| Snap/grid-type-sevenths | 1/7 (8th septuplet) |
| Snap/grid-type-sixths | 1/6 (16th triplet) |
| Snap/grid-type-tenths | 1/10 (16th quintuplet) |
| Snap/grid-type-thirds | 1/3 (8th triplet) |
| Snap/grid-type-thirtyseconds | 1/128 Note |
| Snap/grid-type-timecode | Timecode |
| Snap/grid-type-twelfths | 1/12 (32nd triplet) |
| Snap/grid-type-twentieths | 1/20 (32nd quintuplet) |
| Snap/grid-type-twentyeighths | 1/28 (32nd septuplet) |
| Snap/grid-type-twentyfourths | 1/24 (64th triplet) |
| Solo/solo-use-afl | After Fade Listen (AFL) solo |
| Solo/solo-use-in-place | In-place solo |
| Solo/solo-use-pfl | Pre Fade Listen (PFL) solo |
| Solo/toggle-exclusive-solo | Toggle exclusive solo mode |
| Solo/toggle-mute-overrides-solo | Toggle mute overrides solo mode |
| StepEditing/back | Move Insert Position Back by Note Length |
| StepEditing/dec-note-length | Decrease Note Length |
| StepEditing/dec-note-velocity | Decrease Note Velocity |
| StepEditing/inc-note-length | Increase Note Length |
| StepEditing/inc-note-velocity | Increase Note Velocity |
| StepEditing/insert-a | Insert Note A |
| StepEditing/insert-asharp | Insert Note A-sharp |
| StepEditing/insert-b | Insert Note B |
| StepEditing/insert-c | Insert Note C |
| StepEditing/insert-csharp | Insert Note C-sharp |
| StepEditing/insert-d | Insert Note D |
| StepEditing/insert-dsharp | Insert Note D-sharp |
| StepEditing/insert-e | Insert Note E |
| StepEditing/insert-f | Insert Note F |
| StepEditing/insert-fsharp | Insert Note F-sharp |
| StepEditing/insert-g | Insert Note G |
| StepEditing/insert-gsharp | Insert Note G-sharp |
| StepEditing/insert-rest | Insert a Note-length Rest |
| StepEditing/insert-snap-rest | Insert a Snap-length Rest |
| StepEditing/next-note-length | Move to Next Note Length |
| StepEditing/next-note-velocity | Move to Next Note Velocity |
| StepEditing/next-octave | Move to next octave |
| StepEditing/no-dotted | No Dotted Notes |
| StepEditing/note-length-eighth | Set Note Length to 1/8 |
| StepEditing/note-length-half | Set Note Length to 1/2 |
| StepEditing/note-length-quarter | Set Note Length to 1/4 |
| StepEditing/note-length-sixteenth | Set Note Length to 1/16 |
| StepEditing/note-length-sixtyfourth | Set Note Length to 1/64 |
| StepEditing/note-length-third | Set Note Length to 1/3 |
| StepEditing/note-length-thirtysecond | Set Note Length to 1/32 |
| StepEditing/note-length-whole | Set Note Length to Whole |
| StepEditing/note-velocity-f | Set Note Velocity to Forte |
| StepEditing/note-velocity-ff | Set Note Velocity to Fortississimo |
| StepEditing/note-velocity-fff | Set Note Velocity to Fortississimo |
| StepEditing/note-velocity-mf | Set Note Velocity to Mezzo-Forte |
| StepEditing/note-velocity-mp | Set Note Velocity to Mezzo-Piano |
| StepEditing/note-velocity-p | Set Note Velocity to Piano |
| StepEditing/note-velocity-pp | Set Note Velocity to Pianissimo |
| StepEditing/note-velocity-ppp | Set Note Velocity to Pianississimo |
| StepEditing/octave-0 | Switch to the 1st octave |
| StepEditing/octave-1 | Switch to the 2nd octave |
| StepEditing/octave-10 | Switch to the 11th octave |
| StepEditing/octave-2 | Switch to the 3rd octave |
| StepEditing/octave-3 | Switch to the 4th octave |
| StepEditing/octave-4 | Switch to the 5th octave |
| StepEditing/octave-5 | Switch to the 6th octave |
| StepEditing/octave-6 | Switch to the 7th octave |
| StepEditing/octave-7 | Switch to the 8th octave |
| StepEditing/octave-8 | Switch to the 9th octave |
| StepEditing/octave-9 | Switch to the 10th octave |
| StepEditing/prev-note-length | Move to Previous Note Length |
| StepEditing/prev-note-velocity | Move to Previous Note Velocity |
| StepEditing/prev-octave | Move to next octave |
| StepEditing/sustain | Sustain Selected Notes by Note Length |
| StepEditing/sync-to-edit-point | Move Insert Position to Edit Point |
| StepEditing/toggle-chord | Toggle Chord Entry |
| StepEditing/toggle-dotted | Toggled Dotted Notes |
| StepEditing/toggle-double-dotted | Toggled Double-Dotted Notes |
| StepEditing/toggle-triple-dotted | Toggled Triple-Dotted Notes |
| StepEditing/toggle-triplet | Toggle Triple Notes |
| Transport/Forward | Forward |
| Transport/ForwardFast | Forward (Fast) |
| Transport/ForwardSlow | Forward (Slow) |
| Transport/GotoEnd | Go to End |
| Transport/GotoStart | Go to Start |
| Transport/GotoWallClock | Go to Wall Clock |
| Transport/GotoZero | Go to Zero |
| Transport/Loop | Play Loop Range |
| Transport/PlayPreroll | Play w/Preroll |
| Transport/PlaySelection | Play Selection |
| Transport/Record | Enable Record |
| Transport/RecordCountIn | Record w/Count-In |
| Transport/RecordPreroll | Record w/Preroll |
| Transport/Rewind | Rewind |
| Transport/RewindFast | Rewind (Fast) |
| Transport/RewindSlow | Rewind (Slow) |
| Transport/Roll | Roll |
| Transport/SessionMonitorDisk | All Disk |
| Transport/SessionMonitorIn | All Input |
| Transport/Stop | Stop |
| Transport/ToggleAutoInput | Auto Input |
| Transport/ToggleAutoPlay | Auto Play |
| Transport/ToggleAutoReturn | Auto Return |
| Transport/ToggleClick | Click |
| Transport/ToggleExternalSync | Use External Positional Sync Source |
| Transport/ToggleFollowEdits | Follow Range |
| Transport/TogglePunch | Punch In/Out |
| Transport/TogglePunchIn | Punch In |
| Transport/TogglePunchOut | Punch Out |
| Transport/ToggleRoll | Start/Stop |
| Transport/ToggleRollForgetCapture | Stop and Forget Capture |
| Transport/ToggleRollMaybe | Start/Continue/Stop |
| Transport/ToggleTimeMaster | Time Master |
| Transport/ToggleVideoSync | Sync Startup to Video |
| Transport/TransitionToReverse | Transition to Reverse |
| Transport/TransitionToRoll | Transition to Roll |
| Transport/Transport | Transport |
| Transport/alternate-GotoStart | Go to Start |
| Transport/alternate-ToggleRoll | Start/Stop |
| Transport/alternate-numpad-decimal | Numpad Decimal |
| Transport/alternate-record-roll | Start Recording |
| Transport/focus-on-clock | Focus On Clock |
| Transport/goto-mark-1 | Locate to Mark 1 |
| Transport/goto-mark-2 | Locate to Mark 2 |
| Transport/goto-mark-3 | Locate to Mark 3 |
| Transport/goto-mark-4 | Locate to Mark 4 |
| Transport/goto-mark-5 | Locate to Mark 5 |
| Transport/goto-mark-6 | Locate to Mark 6 |
| Transport/goto-mark-7 | Locate to Mark 7 |
| Transport/goto-mark-8 | Locate to Mark 8 |
| Transport/goto-mark-9 | Locate to Mark 9 |
| Transport/numpad-0 | Numpad 0 |
| Transport/numpad-1 | Numpad 1 |
| Transport/numpad-2 | Numpad 2 |
| Transport/numpad-3 | Numpad 3 |
| Transport/numpad-4 | Numpad 4 |
| Transport/numpad-5 | Numpad 5 |
| Transport/numpad-6 | Numpad 6 |
| Transport/numpad-7 | Numpad 7 |
| Transport/numpad-8 | Numpad 8 |
| Transport/numpad-9 | Numpad 9 |
| Transport/numpad-decimal | Numpad Decimal |
| Transport/primary-clock-bbt | Bars & Beats |
| Transport/primary-clock-minsec | Minutes & Seconds |
| Transport/primary-clock-samples | Samples |
| Transport/primary-clock-seconds | Seconds |
| Transport/primary-clock-timecode | Timecode |
| Transport/record-roll | Start Recording |
| Transport/secondary-clock-bbt | Bars & Beats |
| Transport/secondary-clock-minsec | Minutes & Seconds |
| Transport/secondary-clock-samples | Samples |
| Transport/secondary-clock-seconds | Seconds |
| Transport/secondary-clock-timecode | Timecode |
| Transport/solo-selection | Solo Selection |
| Window/toggle-about | About |
| Window/toggle-add-routes | Add Tracks/Busses |
| Window/toggle-add-video | Add Video |
| Window/toggle-audio-connection-manager | Audio Connections |
| Window/toggle-audio-midi-setup | Audio/MIDI Setup |
| Window/toggle-big-clock | Big Clock |
| Window/toggle-big-transport | Transport Controls |
| Window/toggle-bundle-manager | Bundle Manager |
| Window/toggle-dsp-statistics | Performance Meters |
| Window/toggle-idle-o-meter | Idle'o'Meter |
| Window/toggle-inspector | Tracks and Busses |
| Window/toggle-io-plugins | I/O Plugins |
| Window/toggle-key-editor | Keyboard Shortcuts |
| Window/toggle-library-downloader | Library Downloader |
| Window/toggle-locations | Locations |
| Window/toggle-luawindow | Scripting |
| Window/toggle-midi-connection-manager | MIDI Connections |
| Window/toggle-plugin-dsp-load | Plugin DSP Load |
| Window/toggle-plugin-manager | Plugin Manager |
| Window/toggle-script-manager | Script Manager |
| Window/toggle-session-options-editor | Properties |
| Window/toggle-speaker-config | Speaker Configuration |
| Window/toggle-transport-masters | Transport Masters |
| Window/toggle-video-export | Video Export Dialog |
| Window/toggle-virtual-keyboard | Virtual Keyboard |
| Zoom/zoom-focus-center | Zoom Focus Center |
| Zoom/zoom-focus-edit | Zoom Focus Edit Point |
| Zoom/zoom-focus-left | Zoom Focus Left |
| Zoom/zoom-focus-mouse | Zoom Focus Mouse |
| Zoom/zoom-focus-playhead | Zoom Focus Playhead |
| Zoom/zoom-focus-right | Zoom Focus Right |
Default Keyboard Shortcuts
Window: Editor
| Aligning with the Edit Point | |
|---|---|
| x | Align Sync Relative |
| a | Align Sync |
| a | Align Start Relative |
| a | Align End |
| a | Align Start |
| Basic Editing | |
| / | Fade Range Selection |
| h | Play Selected Regions |
| p | Playhead to Mouse |
| BackSpace | Delete |
| Delete | Delete |
| " | New Playlist For Selected Tracks |
| : | Copy Playlist For Selected Tracks |
| question | Show Playlist Selector |
| f | Stationary Playhead |
| l | Show Editor List |
| s | Show Summary |
| { | Overlaid layer display |
| bar | Raise to Top |
| } | Stacked layer display |
| c | Copy |
| d | Duplicate |
| f | Follow Playhead |
| r | Redo |
| v | Paste |
| x | Cut |
| y | Redo |
| z | Undo (capture) |
| space | Play from Edit Point and Return |
| " | New Playlist For All Tracks |
| : | Copy Playlist For All Tracks |
| c | Crop |
| r | Set Range to Selected Regions |
| z | Redo |
| d | Multi-Duplicate... |
| v | Video Monitor |
| c | Consolidate Range |
| " | New Playlist For Rec-Armed Tracks |
| : | Copy Playlist For Rec-Armed Tracks |
| Changing What's Visible | |
| - | Zoom Out |
| = | Zoom In |
| f | Fit Selection (Vertical) |
| Up | Step Tracks Up |
| Down | Step Tracks Down |
| Page_Up | Scroll Tracks Up |
| Page_Down | Scroll Tracks Down |
| + | Expand Track Height |
| e | Show Editor Mixer |
| z | Toggle Zoom State |
| Up | Move Selected Tracks Up |
| Down | Move Selected Tracks Down |
| + | Shrink Track Height |
| underscore | Zoom to Session |
| Defining Loop, Punch Range and Tempo Changes | |
| 0 | Set Tempo from Edit Range = Bar |
| 9 | Set Tempo from Region = Bar |
| [ | Set Punch from Selection |
| ] | Set Loop from Selection |
| Editing with Edit Point | |
| ' | To Previous Region Sync |
| 1 | Cycle Edit Mode |
| 2 | Change Edit Point |
| ; | To Next Region Sync |
| i | Insert Region from Source List |
| j | Trim Start at Edit Point |
| k | Trim End at Edit Point |
| 2 | Change Edit Point Including Marker |
| Editor Views | |
| F1 | Go to View 1 |
| F2 | Go to View 2 |
| F3 | Go to View 3 |
| F4 | Go to View 4 |
| F5 | Go to View 5 |
| F6 | Go to View 6 |
| F7 | Go to View 7 |
| F8 | Go to View 8 |
| F9 | Go to View 9 |
| F10 | Go to View 10 |
| F11 | Go to View 11 |
| F12 | Go to View 12 |
| F1 | Save View 1 |
| F2 | Save View 2 |
| F3 | Save View 3 |
| F4 | Save View 4 |
| F5 | Save View 5 |
| F6 | Save View 6 |
| F7 | Save View 7 |
| F8 | Save View 8 |
| F9 | Save View 9 |
| F10 | Save View 10 |
| F11 | Save View 11 |
| F12 | Save View 12 |
| Grid Settings + Editor Modes | |
| 4 | Toggle Snap |
| 5 | Previous Quantize Grid Choice |
| 6 | Next Quantize Grid Choice |
| Markers & Locations | |
| Left | To Previous Region Boundary |
| Right | To Next Region Boundary |
| Mouse Modes | |
| 3 | Smart Mode |
| c | Cut Tool |
| d | Note Drawing Tool |
| e | Content Tool |
| g | Object Tool |
| r | Range Tool |
| t | Time FX Tool |
| z | Zoom to Selection |
| Moving the Playhead in the Editor | |
| Left | Move to Previous Transient |
| Right | Move to Next Transient |
| Left | Playhead to Previous Region Boundary |
| Right | Playhead to Next Region Boundary |
| Left | Playhead to Previous Region Sync |
| Right | Playhead to Next Region Sync |
| Region Operations | |
| m | Add Region Cue Marker |
| s | Split/Separate |
| v | Set Sync Position |
| u | Unlink from unselected |
| / | Set Fade In Length |
| \ | Set Fade Out Length |
| j | Trim to Previous |
| k | Trim to Next |
| 0 | Opaque |
| 1 | Mute |
| 2 | Move to Original Position |
| 3 | Normalize... |
| 4 | Reverse |
| 5 | Quantize... |
| 6 | Boost Gain |
| 7 | Cut Gain |
| 8 | Pitch Shift... |
| 9 | Rename... |
| f | Rhythm Ferret... |
| r | Add Single Range Marker |
| e | Export... |
| Selecting | |
| u | Select All Inside Edit Range |
| Numpad + | Nudge Later |
| Numpad - | Nudge Earlier |
| d | Select All in Punch Range |
| a | Select All Objects |
| l | Select All in Loop Range |
| u | Select All Overlapping Edit Range |
| e | Select All After Edit Point |
| Up | Select Previous Track or Bus |
| Down | Select Next Track or Bus |
| Up | Select Previous Strip |
| Down | Select Next Strip |
| Track Actions from the Editor | |
| b | Toggle Record Enable |
| i | Toggle MIDI Input Active for Editor-Selected Tracks/Busses |
| s | Toggle Solo |
Window: Global
| Global Editing Operations | |
|---|---|
| , | Start Range |
| . | Finish Range |
| Escape | Escape (deselect all) |
| , | Start Punch Range |
| . | Finish Punch Range |
| Numpad Up | Finish Range |
| Numpad Down | Start Range |
| , | Start Loop Range |
| . | Finish Loop Range |
| Global MIDI commands | |
| ` | Panic (Send MIDI all-notes-off) |
| Global Marker Operations | |
| q | Jump to Previous Mark |
| w | Jump to Next Mark |
| Tab | Add Mark from Playhead |
| Numpad Enter | Add Mark from Playhead |
| Tab | Remove Mark at Playhead |
| Numpad Enter | Remove Mark at Playhead |
| Numpad Left | Jump to Previous Mark |
| Numpad Right | Jump to Next Mark |
| Global Monitor Operations | |
| m | Mute |
| m | Dim |
| m | Mono |
| Global NumPad Transport Functions | |
| Numpad - | Numpad Decimal |
| Numpad . | Numpad Decimal |
| Numpad 0 | Numpad 0 |
| Numpad 1 | Numpad 1 |
| Numpad 2 | Numpad 2 |
| Numpad 3 | Numpad 3 |
| Numpad 4 | Numpad 4 |
| Numpad 5 | Numpad 5 |
| Numpad 6 | Numpad 6 |
| Numpad 7 | Numpad 7 |
| Numpad 8 | Numpad 8 |
| Numpad 9 | Numpad 9 |
| Global Playhead Operations | |
| Return | Go to Start |
| Home | Go to Start |
| Left | Playhead to Previous Grid |
| Right | Playhead to Next Grid |
| End | Go to End |
| Left | Nudge Playhead Backward |
| Right | Nudge Playhead Forward |
| Global Session & File Handling | |
| e | Quick Audio Export... |
| i | Import |
| n | New... |
| o | Open... |
| q | Quit |
| s | Save |
| n | Add Track, Bus or VCA... |
| o | Recent... |
| s | Snapshot (& keep working on current version) ... |
| e | Export to Audio File(s)... |
| e | Stem export... |
| Global Transport & Recording Control | |
| space | Start/Stop |
| a | Solo Selection |
| l | Play Loop Range |
| space | Start Recording |
| less | Record w/Preroll |
| greater | Record w/Count-In |
| r | Enable Record |
| Left | Rewind |
| Up | Transition to Roll |
| Right | Forward |
| Down | Transition to Reverse |
| space | Stop and Forget Capture |
| Numpad + | Nudge Next Later |
| Numpad - | Nudge Next Earlier |
| space | Play Selection |
| ` | Use External Positional Sync Source |
| space | Start/Continue/Stop |
| Global Transport Modes | |
| 7 | Auto Return |
| 8 | Punch In/Out |
| ` | Click |
| 3 | Follow Range |
| 7 | Auto Play |
| Global Window Visibility | |
| Numpad / | Focus On Clock |
| Page_Up | Previous Tab |
| Page_Down | Next Tab |
| f | Maximise Mixer Space |
| b | Meterbridge |
| c | Show Cues |
| k | Virtual Keyboard |
| l | Locations |
| m | Show Mixer |
| o | Properties |
| r | Show Recorder |
| a | Audio Connections |
| m | MIDI Connections |
| f | Maximise Editor Space |
| Selecting | |
| t | Select All Visible Lanes |
| i | Invert Selection |
Window: MIDI
| Note Editing | |
|---|---|
| , | Move Note Start Earlier |
| . | Move Note Ends Later |
| c | Edit Note Channels |
| q | Quantize Selected Notes |
| v | Edit Note Velocities |
| Tab | Select Next |
| Left | Nudge Notes Earlier (grid) |
| Up | Transpose Up (semitone) |
| Right | Nudge Notes Later (grid) |
| Down | Transpose Down (semitone) |
| Delete | Delete Selection (alternate) |
| ISO_Left_Tab | Add Next to Selection (alternate) |
| Tab | Add Next to Selection |
| Up | Transpose Up (octave, allow mush) |
| Down | Transpose Down (octave, allow mush) |
| , | Move Note Start Later |
| . | Move Note Ends Earlier |
| d | Duplicate Note Selection |
| e | Extend Note Selection |
| i | Invert Note Selection |
| Tab | Select Previous |
| Up | Increase Velocity |
| Down | Decrease Velocity |
| ISO_Left_Tab | Add Previous to Selection (alternate) |
| Tab | Add Previous to Selection |
| Up | Increase Velocity (allow mush) |
| Down | Decrease Velocity (allow mush) |
| , | Move Note Start Earlier (fine) |
| . | Move Note Ends Later (fine) |
| Left | Nudge Notes Earlier (1/4 grid) |
| Up | Transpose Up (octave) |
| Right | Nudge Notes Later (1/4 grid) |
| Down | Transpose Down (octave) |
| Up | Transpose Up (semitone, allow mush) |
| Down | Transpose Down (semitone, allow mush) |
| , | Move Note Start Later (fine) |
| . | Move Note Ends Earlier (fine) |
| Up | Increase Velocity (fine) |
| Down | Decrease Velocity (fine) |
| Up | Increase Velocity (fine, allow mush) |
| Down | Decrease Velocity (fine, allow mush) |
Window: Recorder
| Recorder Page | |
|---|---|
| r | Record Arm All Tracks |
| r | Disable Record Arm of All Tracks |
Window: Mixer
| Mixer Scenes | |
|---|---|
| F1 | Recall Mixer Scene #1 |
| F2 | Recall Mixer Scene #2 |
| F3 | Recall Mixer Scene #3 |
| F4 | Recall Mixer Scene #4 |
| F5 | Recall Mixer Scene #5 |
| F6 | Recall Mixer Scene #6 |
| F7 | Recall Mixer Scene #7 |
| F8 | Recall Mixer Scene #8 |
| F9 | Recall Mixer Scene #9 |
| F10 | Recall Mixer Scene #10 |
| F11 | Recall Mixer Scene #11 |
| F12 | Recall Mixer Scene #12 |
| F1 | Store Mixer Scene #1 |
| F2 | Store Mixer Scene #2 |
| F3 | Store Mixer Scene #3 |
| F4 | Store Mixer Scene #4 |
| F5 | Store Mixer Scene #5 |
| F6 | Store Mixer Scene #6 |
| F7 | Store Mixer Scene #7 |
| F8 | Store Mixer Scene #8 |
| F9 | Store Mixer Scene #9 |
| F10 | Store Mixer Scene #10 |
| F11 | Store Mixer Scene #11 |
| F12 | Store Mixer Scene #12 |
| Navigation operations | |
| Left | Scroll Mixer Window to the left |
| Right | Scroll Mixer Window to the right |
| Operations on the selected strip(s) | |
| 0 | Set Gain to 0dB on Mixer-Selected Tracks/Busses |
| d | Toggle Disk Monitoring |
| i | Toggle Input Monitoring |
| m | Toggle Mute on Mixer-Selected Tracks/Busses |
| r | Toggle Rec-enable on Mixer-Selected Tracks/Busses |
| Up | Increase Gain on Mixer-Selected Tracks/Busses |
| Down | Decrease Gain on Mixer-Selected Tracks/Busses |
| i | Toggle MIDI Input Active for Mixer-Selected Tracks/Busses |
| Playhead to Start Marker | |
| Return | Go to Start |
| Processor operations on the selected strip(s) | |
| / | Toggle Selected Plugins |
| Delete | Delete Selected Processors |
| a | Select All (visible) Processors |
| c | Copy Selected Processors |
| v | Paste Selected Processors |
| x | Cut Selected Processors |
| Window Visibility | |
| l | Mixer: Show Mixer List |
| m | Mixer: Show Monitor Section |
| v | Mixer: Show VCAs |
| m | Show Editor |
| Up | Select Previous Mixer Strip |
| Down | Select Next Mixer Strip |
Window: Step Editing
| Uncategorized | |
|---|---|
| ' | Toggle Triple Notes |
| , | Set Note Velocity to Fortississimo |
| . | Toggled Dotted Notes |
| 0 | Switch to the 11th octave |
| 1 | Switch to the 2nd octave |
| 2 | Switch to the 3rd octave |
| 3 | Switch to the 4th octave |
| 4 | Switch to the 5th octave |
| 5 | Switch to the 6th octave |
| 6 | Switch to the 7th octave |
| 7 | Switch to the 8th octave |
| 8 | Switch to the 9th octave |
| 9 | Switch to the 10th octave |
| ` | Switch to the 1st octave |
| a | Insert Note C |
| b | Set Note Velocity to Mezzo-Forte |
| c | Set Note Velocity to Piano |
| d | Insert Note E |
| e | Insert Note D-sharp |
| f | Insert Note F |
| g | Insert Note G |
| h | Insert Note A |
| j | Insert Note B |
| m | Set Note Velocity to Fortississimo |
| n | Set Note Velocity to Forte |
| s | Insert Note D |
| t | Insert Note F-sharp |
| u | Insert Note A-sharp |
| v | Set Note Velocity to Mezzo-Piano |
| w | Insert Note C-sharp |
| x | Set Note Velocity to Pianissimo |
| y | Insert Note G-sharp |
| z | Set Note Velocity to Pianississimo |
| BackSpace | Move Insert Position Back by Note Length |
| Tab | Insert a Note-length Rest |
| Up | Move to Next Note Velocity |
| Down | Move to Previous Note Velocity |
| F1 | Set Note Length to Whole |
| F2 | Set Note Length to 1/2 |
| F3 | Set Note Length to 1/3 |
| F4 | Set Note Length to 1/4 |
| F5 | Set Note Length to 1/8 |
| F6 | Set Note Length to 1/16 |
| F7 | Set Note Length to 1/32 |
| F8 | Set Note Length to 1/64 |
| bar | Toggle Chord Entry |
| . | No Dotted Notes |
| Tab | Insert a Snap-length Rest |
| Up | Move to Next Note Length |
| Down | Move to Previous Note Length |
Window: Monitor Section
| Uncategorized | |
|---|---|
| a | After Fade Listen (AFL) solo |
| b | Toggle Monitor Section Processor Box |
| e | Toggle exclusive solo mode |
| i | In-place solo |
| l | Cut monitor channel 0 |
| o | Toggle mute overrides solo mode |
| p | Pre Fade Listen (PFL) solo |
| r | Cut monitor channel 1 |
| l | Invert monitor channel 0 |
| r | Invert monitor channel 1 |
| l | Solo monitor channel 0 |
| r | Solo monitor channel 1 |
| l | Dim monitor channel 0 |
| r | Dim monitor channel 1 |
Window: Processor Box
| Uncategorized | |
|---|---|
| BackSpace | Delete |
| Delete | Delete |
Window: Cues
| Uncategorized | ||||||||
|---|---|---|---|---|---|---|---|---|
| F1 | Trigger Cue A | |||||||
| F2 | Trigger Cue B | |||||||
| F3 | Trigger Cue C | |||||||
| F4 | Trigger Cue D | |||||||
| F5 | Trigger Cue E | |||||||
| F6 | Trigger Cue F | |||||||
| F7 | Trigger Cue G | |||||||
| F8 | Trigger Cue H | |||||||
| Ref | Monitoring Mode (Audio/MIDI Setup) | Auto Input does 'talkback'(System Prefs) | Track Rec Enable | Master Rec Enable | Transport | Auto Input (Session Props) | Meter (What you see) | Monitor (What you hear) |
|---|---|---|---|---|---|---|---|---|
| 1 | Ardour | On | Off | Off | ◼ | On | Input | Input |
| 2 | Ardour | On | Off | Off | ◼ | Off | Disk (Silence) | Disk (Silence) |
| 3 | Ardour | On | Off | Off | ▶ | On | Disk (Audio) | Disk (Audio) |
| 4 | Ardour | On | Off | Off | ▶ | Off | Disk (Audio) | Disk (Audio) |
| 5 | Ardour | On | Off | On | ◼ | On | Input | Input |
| 6 | Ardour | On | Off | On | ◼ | Off | Disk (Silence) | Disk (Silence) |
| 7 | Ardour | On | Off | On | ▶ | On | Disk (Audio) | Disk (Audio) |
| 8 | Ardour | On | Off | On | ▶ | Off | Disk (Audio) | Disk (Audio) |
| 9 | Ardour | On | On | Off | ◼ | On | Input | Input |
| 10 | Ardour | On | On | Off | ◼ | Off | Input | Input |
| 11 | Ardour | On | On | Off | ▶ | On | Disk (Audio)† | Disk (Audio) |
| 12 | Ardour | On | On | Off | ▶ | Off | Input | Input |
| 13 | Ardour | On | On | On | ◼ | On | Input | Input |
| 14 | Ardour | On | On | On | ◼ | Off | Input | Input |
| 15 | Ardour | On | On | On | ▶ | On | Input | Input |
| 16 | Ardour | On | On | On | ▶ | Off | Input | Input |
| 17 | Ardour | Off | Off | Off | ◼ | On | Disk (Silence) | Disk (Silence) |
| 18 | Ardour | Off | Off | Off | ◼ | Off | Disk (Silence) | Disk (Silence) |
| 19 | Ardour | Off | Off | Off | ▶ | On | Disk (Audio) | Disk (Audio) |
| 20 | Ardour | Off | Off | Off | ▶ | Off | Disk (Audio) | Disk (Audio) |
| 21 | Ardour | Off | Off | On | ◼ | On | Disk (Silence) | Disk (Silence) |
| 22 | Ardour | Off | Off | On | ◼ | Off | Disk (Silence) | Disk (Silence) |
| 23 | Ardour | Off | Off | On | ▶ | On | Disk (Audio) | Disk (Audio) |
| 24 | Ardour | Off | Off | On | ▶ | Off | Disk (Audio) | Disk (Audio) |
| 25 | Ardour | Off | On | Off | ◼ | On | Input | Input |
| 26 | Ardour | Off | On | Off | ◼ | Off | Input | Input |
| 27 | Ardour | Off | On | Off | ▶ | On | Disk (Audio)† | Disk (Audio) |
| 28 | Ardour | Off | On | Off | ▶ | Off | Input | Input |
| 29 | Ardour | Off | On | On | ◼ | On | Input | Input |
| 30 | Ardour | Off | On | On | ◼ | Off | Input | Input |
| 31 | Ardour | Off | On | On | ▶ | On | Input | Input |
| 32 | Ardour | Off | On | On | ▶ | Off | Input | Input |
| 33 | Audio Hardware | On | Off | Off | ◼ | On | Input | Silence |
| 34 | Audio Hardware | On | Off | Off | ◼ | Off | Disk (Silence) | Disk (Silence) |
| 35 | Audio Hardware | On | Off | Off | ▶ | On | Disk (Audio) | Disk (Audio) |
| 36 | Audio Hardware | On | Off | Off | ▶ | Off | Disk (Audio) | Disk (Audio) |
| 37 | Audio Hardware | On | Off | On | ◼ | On | Input | Silence |
| 38 | Audio Hardware | On | Off | On | ◼ | Off | Disk (Silence) | Disk (Silence) |
| 39 | Audio Hardware | On | Off | On | ▶ | On | Disk (Audio) | Disk (Audio) |
| 40 | Audio Hardware | On | Off | On | ▶ | Off | Disk (Audio) | Disk (Audio) |
| 41 | Audio Hardware | On | On | Off | ◼ | On | Input | HW Pass Through |
| 42 | Audio Hardware | On | On | Off | ◼ | Off | Input | HW Pass Through |
| 43 | Audio Hardware | On | On | Off | ▶ | On | Disk (Audio)† | Disk (Audio) |
| 44 | Audio Hardware | On | On | Off | ▶ | Off | Input | HW Pass Through |
| 45 | Audio Hardware | On | On | On | ◼ | On | Input | HW Pass Through |
| 46 | Audio Hardware | On | On | On | ◼ | Off | Input | HW Pass Through |
| 47 | Audio Hardware | On | On | On | ▶ | On | Input | HW Pass Through |
| 48 | Audio Hardware | On | On | On | ▶ | Off | Input | HW Pass Through |
| 49 | Audio Hardware | Off | Off | Off | ◼ | On | Disk (Silence) | Disk (Silence) |
| 50 | Audio Hardware | Off | Off | Off | ◼ | Off | Disk (Silence) | Disk (Silence) |
| 51 | Audio Hardware | Off | Off | Off | ▶ | On | Disk (Audio) | Disk (Audio) |
| 52 | Audio Hardware | Off | Off | Off | ▶ | Off | Disk (Audio) | Disk (Audio) |
| 53 | Audio Hardware | Off | Off | On | ◼ | On | Disk (Silence) | Disk (Silence) |
| 54 | Audio Hardware | Off | Off | On | ◼ | Off | Disk (Silence) | Disk (Silence) |
| 55 | Audio Hardware | Off | Off | On | ▶ | On | Disk (Audio) | Disk (Audio) |
| 56 | Audio Hardware | Off | Off | On | ▶ | Off | Disk (Audio) | Disk (Audio) |
| 57 | Audio Hardware | Off | On | Off | ◼ | On | Input | HW Pass Through |
| 58 | Audio Hardware | Off | On | Off | ◼ | Off | Input | HW Pass Through |
| 59 | Audio Hardware | Off | On | Off | ▶ | On | Disk (Audio)† | Disk (Audio) |
| 60 | Audio Hardware | Off | On | Off | ▶ | Off | Input | HW Pass Through |
| 61 | Audio Hardware | Off | On | On | ◼ | On | Input | HW Pass Through |
| 62 | Audio Hardware | Off | On | On | ◼ | Off | Input | HW Pass Through |
| 63 | Audio Hardware | Off | On | On | ▶ | On | Input | HW Pass Through |
| 64 | Audio Hardware | Off | On | On | ▶ | Off | Input | HW Pass Through |
† Until Ardour 8.6.388 the meter was set to display Input.
Files and Directories Ardour Knows About
Configuration Directory
Ardour stores configuration files in two places. The system configuration directory and the user configuration directory. The system configuration directory is used for stock configuration files at install time. The user configuration directory is used by Ardour to store configuration changes made in the GUI as well as being a place the user can add control surface device files, scripts etc.
Ardour tries to use standard places for these directories for the platform it is running on.
Linux
The user configuration directory will be somewhere inside the user's
home directory. The home directory on a linux system is normally
/home/$USER/, but should also be returned by $HOME
or ~.
A normal place to find this is $HOME/.config/ardour*/ where
* is the major version. However this can be set by the system with the
$XDG_CONFIG_HOME environment variable to something else. If you cannot
find $HOME/.config/ on your system try echo ${XDG_CONFIG_HOME}
to see if your distro is using something else. In any case Ardour
appends the ardour*
directory to the result where * is the major version number.
For example, ardour5 where the Ardour version is 5.6.
In Linux, all path names are lowercase and case-sensitive.
macOS
The user configuration directory on macOS is
$HOME/Library/Preferences/Ardour*/ where *
is the major version number.
For example, Ardour5 where the Ardour version is 5.6.
Windows
Windows users are not expected to hand edit configuration files at all. It is expected configuration options are changed with some sort of GUI tool. For the most part all of Ardour's configuration is taken care of by the GUI in preferences. However, there are devices that may need a custom file and that would be in the users configuration directory.
Ardour asks the system for this directory and then appends
Ardour*
to the path where * is the major version number.
For example, Ardour5 where the Ardour version is 5.6.
The official path would look like:
%localappdata%\Ardour5\ Windows expands
%localappdata% to
a real path.
An example of a configuration path in Window 10 would be:
C:\<User>\AppData\Local\Ardour5\
The user in the path would be the user's account name.
The above is only an example and may not even be true for all installations of Windows 10.
Plugins
Plugins will be installed in various places, some by standard and some by developer whim. Some are installed incorrectly by distro policy.
Linux
On Linux, there are 4 kinds of plugins Ardour can use: LADSPA, LV2 (LADSPA version 2), VST2, and VST3.
LADSPA
LADSPA plugins should be found in /usr/lib/ladspa/,
/usr/local/lib/ladspa/
or in a directory mentioned in your LADSPA_PATH environment variable.
The most common mistake made by distro packagers, is to use a path
like /usr/lib/$ARCH/ladspa/ and find that Ardour will not find that by
default. The user can either add a link from this actual directory to
the standard directory or add this path to LADSPA_PATH.
LV2
LV2 plugins should be found in /usr/lib/lv2/,
/usr/local/lib/lv2/
or in a directory mentioned in your LV2_PATH environment variable.
The most common mistake made by distro packagers, is to use a path
like /usr/lib/$ARCH/lv2/, /usr/lib64/lv2
or /usr/local/lib64/lv2 and find that Ardour will not find
that by default. The user can either add a link from this actual directory
to the standard directory or add this path to LV2_PATH.
Linux VST or lxvst
They are typically installed in /usr/lib/lxvst,
/usr/local/lib/lxvst or
a directory mentioned in your LXVST_PATH environment variable. However,
this is not a standard and the VST plugin developer may install the plugin
just about anywhere. Therefore Ardour allows the user to set extra VST
paths in the preferences GUI under Plugins>VST.
macOS
On the Mac, plugins are expected to be installed correctly Ardour uses
the system tool to scan for AU style plugins and LV2s should be in the right
place. LV2 should be in $HOME/Library/Audio/Plug-Ins/LV2/
/Library/Audio/Plug-Ins/LV2/
/usr/local/lib/lv2/
/usr/lib/lv2/
If an AU or LV2 plugin does not show up on a Mac it is probably
a development fault with the plugin and the plugin will not work with anything.
Ardour in Ardour 5.6 has support for native VST plugins. That is VST
plugins built for OSX. I am not sure if these have a standard place to
be, but as with other VSTs the search path can be edited at Plugins>VST.
Windows
The most common plugins on Windows are VSTs. However, LADSPA and LV2 plugins are available for windows as well. In fact Ardour's built in plugins are LV2s. The biggest advantage of LV2 plugins is that they are the most likely to be cross platform and therefore allow the same Ardour project to be worked on in Windows, OSX and Linux.
VST
As with other platforms, VSTs on Windows do not have a standard place to reside. Ardour Preferences>Plugins>VST allows setting the VST path from the GUI.
LV2
The LV2 standard for Windows is %APPDATA%/LV2/ or
%COMMONPROGRAMFILES%/LV2/ (On Windows 10: C:\<User>\AppData\Roaming\LV2\ or C:\Program Files\Common Files\LV2\).
Project Directory
Ardour places a project directory where the user tells it to. This directory is chosen when creating a project. In most cases the user does not need to know about the files inside of the project directory. However there are a few sub-directories worth noting.
export
This is the sub-directory where exported files end up.
MIDI Notes Reference
The table below lists the MIDI notes, numbers and frequency. Ardour uses the middle C = C4 (note 60) convention, meaning that the first (lowest) octave is −1.
Frequency calculations are based on A4 = 440 Hz.
| MIDI number | MIDI (english) Note Name | German Note Name | Neo-Latin Note Name | Octave | Frequency (Hz) Rounded at 10-3 |
| 0 | C | C | Do | -1 | 8.176 |
| 1 | C#/D♭ | C#/D♭ | Do#/Re♭ | -1 | 8.662 |
| 2 | D | D | Re | -1 | 9.177 |
| 3 | D#/E♭ | D#/E♭ | Re#/Mi♭ | -1 | 9.723 |
| 4 | E | E | Mi | -1 | 10.301 |
| 5 | F | F | Fa | -1 | 10.913 |
| 6 | F#/G♭ | F#/G♭ | Fa#/Sol♭ | -1 | 11.562 |
| 7 | G | G | Sol | -1 | 12.250 |
| 8 | G#/A♭ | G#/A♭ | Sol#/La♭ | -1 | 12.978 |
| 9 | A | A | La | -1 | 13.750 |
| 10 | A#/B♭ | A#/B | La#/Si♭ | -1 | 14.568 |
| 11 | B | H | Si | -1 | 15.434 |
| 12 | C | C | Do | 0 | 16.352 |
| 13 | C#/D♭ | C#/D♭ | Do#/Re♭ | 0 | 17.324 |
| 14 | D | D | Re | 0 | 18.354 |
| 15 | D#/E♭ | D#/E♭ | Re#/Mi♭ | 0 | 19.445 |
| 16 | E | E | Mi | 0 | 20.602 |
| 17 | F | F | Fa | 0 | 21.827 |
| 18 | F#/G♭ | F#/G♭ | Fa#/Sol♭ | 0 | 23.125 |
| 19 | G | G | Sol | 0 | 24.500 |
| 20 | G#/A♭ | G#/A♭ | Sol#/La♭ | 0 | 25.957 |
| 21 | A | A | La | 0 | 27.500 |
| 22 | A#/B♭ | A#/B | La#/Si♭ | 0 | 29.135 |
| 23 | B | H | Si | 0 | 30.868 |
| 24 | C | C | Do | 1 | 32.703 |
| 25 | C#/D♭ | C#/D♭ | Do#/Re♭ | 1 | 34.648 |
| 26 | D | D | Re | 1 | 36.708 |
| 27 | D#/E♭ | D#/E♭ | Re#/Mi♭ | 1 | 38.891 |
| 28 | E | E | Mi | 1 | 41.203 |
| 29 | F | F | Fa | 1 | 43.654 |
| 30 | F#/G♭ | F#/G♭ | Fa#/Sol♭ | 1 | 46.249 |
| 31 | G | G | Sol | 1 | 48.999 |
| 32 | G#/A♭ | G#/A♭ | Sol#/La♭ | 1 | 51.913 |
| 33 | A | A | La | 1 | 55.000 |
| 34 | A#/B♭ | A#/B | La#/Si♭ | 1 | 58.270 |
| 35 | B | H | Si | 1 | 61.735 |
| 36 | C | C | Do | 2 | 65.406 |
| 37 | C#/D♭ | C#/D♭ | Do#/Re♭ | 2 | 69.296 |
| 38 | D | D | Re | 2 | 73.416 |
| 39 | D#/E♭ | D#/E♭ | Re#/Mi♭ | 2 | 77.782 |
| 40 | E | E | Mi | 2 | 82.407 |
| 41 | F | F | Fa | 2 | 87.307 |
| 42 | F#/G♭ | F#/G♭ | Fa#/Sol♭ | 2 | 92.499 |
| 43 | G | G | Sol | 2 | 97.999 |
| 44 | G#/A♭ | G#/A♭ | Sol#/La♭ | 2 | 103.826 |
| 45 | A | A | La | 2 | 110.000 |
| 46 | A#/B♭ | A#/B | La#/Si♭ | 2 | 116.541 |
| 47 | B | H | Si | 2 | 123.471 |
| 48 | C | C | Do | 3 | 130.813 |
| 49 | C#/D♭ | C#/D♭ | Do#/Re♭ | 3 | 138.591 |
| 50 | D | D | Re | 3 | 146.832 |
| 51 | D#/E♭ | D#/E♭ | Re#/Mi♭ | 3 | 155.563 |
| 52 | E | E | Mi | 3 | 164.814 |
| 53 | F | F | Fa | 3 | 174.614 |
| 54 | F#/G♭ | F#/G♭ | Fa#/Sol♭ | 3 | 184.997 |
| 55 | G | G | Sol | 3 | 195.998 |
| 56 | G#/A♭ | G#/A♭ | Sol#/La♭ | 3 | 207.652 |
| 57 | A | A | La | 3 | 220.000 |
| 58 | A#/B♭ | A#/B | La#/Si♭ | 3 | 233.082 |
| 59 | B | H | Si | 3 | 246.942 |
| 60 | C | C | Do | 4 | 261.626 |
| 61 | C#/D♭ | C#/D♭ | Do#/Re♭ | 4 | 277.183 |
| 62 | D | D | Re | 4 | 293.665 |
| 63 | D#/E♭ | D#/E♭ | Re#/Mi♭ | 4 | 311.127 |
| 64 | E | E | Mi | 4 | 329.628 |
| 65 | F | F | Fa | 4 | 349.228 |
| 66 | F#/G♭ | F#/G♭ | Fa#/Sol♭ | 4 | 369.994 |
| 67 | G | G | Sol | 4 | 391.995 |
| 68 | G#/A♭ | G#/A♭ | Sol#/La♭ | 4 | 415.305 |
| 69 | A | A | La | 4 | 440.000 |
| 70 | A#/B♭ | A#/B | La#/Si♭ | 4 | 466.164 |
| 71 | B | H | Si | 4 | 493.883 |
| 72 | C | C | Do | 5 | 523.251 |
| 73 | C#/D♭ | C#/D♭ | Do#/Re♭ | 5 | 554.365 |
| 74 | D | D | Re | 5 | 587.330 |
| 75 | D#/E♭ | D#/E♭ | Re#/Mi♭ | 5 | 622.254 |
| 76 | E | E | Mi | 5 | 659.255 |
| 77 | F | F | Fa | 5 | 698.456 |
| 78 | F#/G♭ | F#/G♭ | Fa#/Sol♭ | 5 | 739.989 |
| 79 | G | G | Sol | 5 | 783.991 |
| 80 | G#/A♭ | G#/A♭ | Sol#/La♭ | 5 | 830.609 |
| 81 | A | A | La | 5 | 880.000 |
| 82 | A#/B♭ | A#/B | La#/Si♭ | 5 | 932.328 |
| 83 | B | H | Si | 5 | 987.767 |
| 84 | C | C | Do | 6 | 1 046.502 |
| 85 | C#/D♭ | C#/D♭ | Do#/Re♭ | 6 | 1 108.731 |
| 86 | D | D | Re | 6 | 1 174.659 |
| 87 | D#/E♭ | D#/E♭ | Re#/Mi♭ | 6 | 1 244.508 |
| 88 | E | E | Mi | 6 | 1 318.510 |
| 89 | F | F | Fa | 6 | 1 396.913 |
| 90 | F#/G♭ | F#/G♭ | Fa#/Sol♭ | 6 | 1 479.978 |
| 91 | G | G | Sol | 6 | 1 567.982 |
| 92 | G#/A♭ | G#/A♭ | Sol#/La♭ | 6 | 1 661.219 |
| 93 | A | A | La | 6 | 1 760.000 |
| 94 | A#/B♭ | A#/B | La#/Si♭ | 6 | 1 864.655 |
| 95 | B | H | Si | 6 | 1 975.533 |
| 96 | C | C | Do | 7 | 2 093.005 |
| 97 | C#/D♭ | C#/D♭ | Do#/Re♭ | 7 | 2 217.461 |
| 98 | D | D | Re | 7 | 2 349.318 |
| 99 | D#/E♭ | D#/E♭ | Re#/Mi♭ | 7 | 2 489.016 |
| 100 | E | E | Mi | 7 | 2 637.020 |
| 101 | F | F | Fa | 7 | 2 793.826 |
| 102 | F#/G♭ | F#/G♭ | Fa#/Sol♭ | 7 | 2 959.955 |
| 103 | G | G | Sol | 7 | 3 135.963 |
| 104 | G#/A♭ | G#/A♭ | Sol#/La♭ | 7 | 3 322.438 |
| 105 | A | A | La | 7 | 3 520.000 |
| 106 | A#/B♭ | A#/B | La#/Si♭ | 7 | 3 729.310 |
| 107 | B | H | Si | 7 | 3 951.066 |
| 108 | C | C | Do | 8 | 4 186.009 |
| 109 | C#/D♭ | C#/D♭ | Do#/Re♭ | 8 | 4 434.922 |
| 110 | D | D | Re | 8 | 4 698.636 |
| 111 | D#/E♭ | D#/E♭ | Re#/Mi♭ | 8 | 4 978.032 |
| 112 | E | E | Mi | 8 | 5 274.041 |
| 113 | F | F | Fa | 8 | 5 587.652 |
| 114 | F#/G♭ | F#/G♭ | Fa#/Sol♭ | 8 | 5 919.911 |
| 115 | G | G | Sol | 8 | 6 271.927 |
| 116 | G#/A♭ | G#/A♭ | Sol#/La♭ | 8 | 6 644.875 |
| 117 | A | A | La | 8 | 7 040.000 |
| 118 | A#/B♭ | A#/B | La#/Si♭ | 8 | 7 458.620 |
| 119 | B | H | Si | 8 | 7 902.133 |
| 120 | C | C | Do | 9 | 8 372.018 |
| 121 | C#/D♭ | C#/D♭ | Do#/Re♭ | 9 | 8 869.844 |
| 122 | D | D | Re | 9 | 9 397.273 |
| 123 | D#/E♭ | D#/E♭ | Re#/Mi♭ | 9 | 9 956.063 |
| 124 | E | E | Mi | 9 | 10 548.082 |
| 125 | F | F | Fa | 9 | 11 175.303 |
| 126 | F#/G♭ | F#/G♭ | Fa#/Sol♭ | 9 | 11 839.822 |
| 127 | G | G | Sol | 9 | 12 543.854 |
MIDNAM Reference
Add information of how these files are defined instead of telling the user to go modify an existing file, also, remove the “you” language!
Adding a custom MIDNAM file
MIDNAM files are XML, and can be edited using any text editor. When doing so, please ensure to change the "Model" of the device, as Ardour will only load each model once (i.e. it will skip files, if there are clashes).
After you have done modifications to a file, it is a good idea to validate it. This can be done using the tool xmllint as shown below:
$ xmllint --valid --noout myfile.midnam
$ wget https://raw.githubusercontent.com/Ardour/ardour/refs/heads/master/share/patchfiles/MIDINameDocument10.dtd
$ xmllint --dtdvalid MIDINameDocument10.dtd myfile.midnam
Once you are satisfied with your file, you have to put it at a location where Ardour picks it up. The best place would be the (hidden) directory Ardour configuration directory subdirectory patchfiles. in your home-folder. Should the sub-directory patchfiles not exist yet, just create it. The path and file-names are case-sensitive. The file should end with ".midnam".
After restarting Ardour, hit the small Log-button in the upper right corner of the main window. It should say something like (this is Linux, MacOS or Windows will be different):
[INFO]: Loading 3 MIDI patches from /home/username/.config/ardour6/patchfiles
The added device should now show up in the dropdown mentioned in the previous paragraph.
Should the MIDNAM-file be useful for the general public, it would be nice to share it: Fork the Ardour-project on gitHub by hitting the "Fork"-Button. Go to the patchfiles-directory (and read the README).
You can upload the file using the Web-Interface. Be sure to select "Create a new branch for this commit and start a pull request".
Getting More Plugins
The following list shows a few plugin packages. In some cases, a package contains just one or two plugins; in other cases, dozens.
This list does not aim at being exhaustive.
Plugins by Standard:
LV2
- SWH http://plugin.org.uk/lv2/ [GNU GPLv3]
- ll-plugins http://ll-plugins.nongnu.org/ [GNU GPLv3]
- ZynAddSubFX http://zynaddsubfx.sourceforge.net/ [GNU GPLv2+]
- OvertoneDSP https://www.overtonedsp.co.uk/ [Proprietary]
- Invada Studio https://launchpad.net/invada-studio/ [GNU GPLv2]
- Pianoteq https://www.pianoteq.com/ [Proprietary]
LADSPA
- Kokkini Zita http://kokkinizita.linuxaudio.org/linuxaudio/ [GNU GPL/GNU GPLv3]
- Blepvco http://www.smbolton.com/linux.html [GNU GPLv2+]
- Blop http://blop.sourceforge.net/ [GNU GPLv2]
- CAPS http://quitte.de/dsp/caps.html [GNU GPLv3]
- CMT http://www.ladspa.org/cmt/overview.html [GNU GPLv2]
- FOO https://github.com/sampov2/foo-plugins [GNU GPLv2]
- NJL https://github.com/tialaramex/njl-plugins [GNU GPLv2]
- Omins http://www.nongnu.org/om-synth/omins.html [GNU GPLv3]
- SWH http://plugin.org.uk/ [GNU GPLv3]
- TAP http://tap-plugins.sourceforge.net/ [GNU GPLv2]
- VCF http://www.suse.de/~mana/ladspa.html [GNU LGPL]
- VLevel http://vlevel.sourceforge.net/ [GNU GPLv2]
- Vocoder http://www.sirlab.de/linux/download_vocoder.html [GNU GPLv2+]
- WASP http://linux01.gwdg.de/~nlissne/wasp/index.html [GNU GPLv3]
- Nova http://chuck.stanford.edu/planetccrma/mirror/fedora/linux/planetccrma/10/i386/repoview/ladspa-nova-plugins.html [GNU GPLv2+]
- Socal’s LEET Plugins http://code.google.com/p/leetplugins/ [GNU GPLv2]
Linux VST (LXVST)
- Loomer http://www.loomer.co.uk/ [Proprietary]
- Distrho http://distrho.sourceforge.net/ports.php [GNU GPLv3]
- Argotlunar http://mourednik.github.io/argotlunar/ [GNU GPLv2]
- U-he https://u-he.com/ [Proprietary]
How to install plugins?
Linux
Installation will vary a little depending on how the plugins have been obtained. If a particular plugin package appears in the local repository, installing it using is done by using the normal software package management tool for the system. Most Linux distributions that are good for audio work will have most of the LADSPA and LV2 plugins mentioned above available in ready-to-use form.
Finding them will typically require searching the distribution's repository to find the name of the package. The tools for doing this vary from distribution to distribution. A good place to start searching is with the name of the package (e.g. "caps" or "cmt"). There are no fixed rules about what different Linux distributions call their packages for a given set of plugins.
If the package isn't available, then the plugins can be built from source (plugins are generally fairly easy to compile and well-documented).
LADSPA plugins are shared library files. They need to be installed in either /usr/lib/ladspa, /usr/local/lib/ladspa or in a directory mentioned in the local LADSPA_PATH environment variable.
LV2 plugins are folders/directories. They need to be installed in either /usr/lib/lv2, /usr/local/lib/lv2 or a directory mentioned in the local LV2_PATH environment variable.
Linux VST (LXVST) plugins are distributed as shared library files. They are typically installed in /usr/lib/lxvst, /usr/local/lib/lxvst or a directory mentioned in the local LXVST_PATH environment variable.
OS X
Except for the particularly technical computer user, building and installing plugins in the LV2 (or LADSPA) format is probably not something worth planning on.
Most of the plugins likely to be used on OS X will be in Apple's AudioUnit format. These have their own installation process that tends to just work.