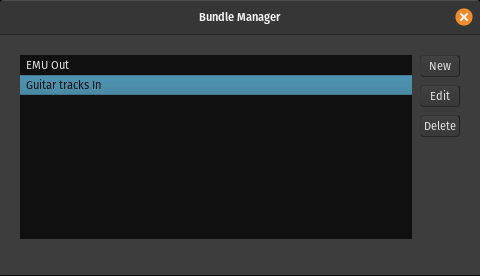
Bundle Manager
The Bundle Manager simplifies connecting I/O channels in cases where similarly purposed instruments/mics are scattered across a multi-channel audio interface. A common scenario is recording a drumkit with 6 mics. If you need to re-route the mics in the session, instead of connecting each and every one of them separately, you can create a bundle and connect just the bundle.
Bundles can be created for both sources (e.g. mic inputs) and destinations (e.g. studio monitors). You can create as many bundles as you like.
Creating a bundle
Click New button to create a new bundle. In the newly opened dialog, give it a name, choose whether you want this to be a bundle of source or destination channels, then connect the ports that you want to collect to the bundle port.
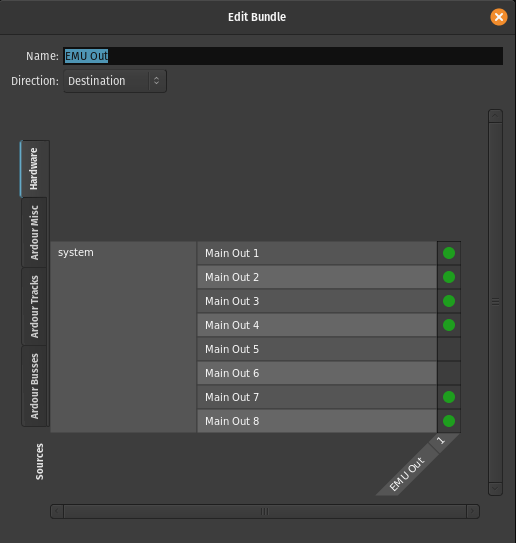
Close the dialog to apply changes.
Connecting a bundle
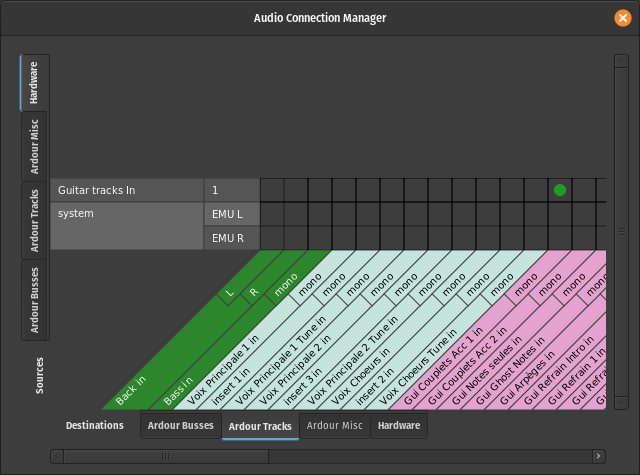
When connecting a bundle to a port, it works as a convenience proxy for the physical ports. Clicking to connect a bundle (here, "Guitar tracks in") to an input automatically connects all the actuel ports in the bundle at once.
Editing and deleting bundles
At any time you can re-open the Bundle Manager window, select a bundle, click Edit and change connection of physical ports to the bundle. Close the window to apply changes.
You can easily delete an existing bundle. Open the Bundle Manager window, select a bundle, click Delete.
Reusing bundles
As bundles are part of a session rather than a global setting, you can save them as part of a template for further reuse. Simply create a new session, create and connect tracks, busses, and bundles, then save your session as a template. Choose this template when creating a new session.